
|
Re: Our 1932 901
|
||||
|---|---|---|---|---|
|
Home away from home

|
Dave & Tim
I would prefer a sealed throwout bearing. I've been debating as to what I want to do about it and the transmission. As you probably remember, I took over this restoration from another person. He had rebuilt the trans and did not plug up the opening for the Bijur leaving the original Bijur fitting installed. He also did not install four (1 at the top & 3 at the bottom) of the studs that go in the bell housing. When I tried to screw them in it appeared e things did not align properly. Since I'm a one man operation, not in possession of a transmission jack and not wanting to buy one; I'm not sure that I want to tackle removing the transmission to replace the bearing. If I can't get the studs installed, then I'll tackle the issue, but I may just decide to do anyway if for no other reason than the bearing. I think I remember seeing a post of Dave's where you mentioned a Napa P/N. Since the linkage was done as part the conversion from up to down draft. I kinda decided to make them myself as I like doing those sorts of things as opposed to trying to chase them down. As long as I have the lathe set up to do 32 threads per inch I may just re-make the choke one so it is in a S shape. Dave thanks for you nice comments and Tim on your thoughts on sealing the line. I really appreciate all the assists I get from PackardInfo.com. I spend enough time on this project undoing what I've done so I can install something else that should have gone in before.
Posted on: 2016/2/1 17:21
|
|||
|
||||
|
Re: Our 1932 901
|
||||
|---|---|---|---|---|
|
Forum Ambassador

|
If it's of any use, Hollander's identifies the original throwout bearing for all 1932 thru 1935 (except 120) as A477 which I believe is a CJB Ahlberg number. The bearing I removed from my '34 was marked BCA 2E, that is an open bearing requiring the Bijur to be functional. Sorry to say I never made a note of the # of the sealed bearing I replaced it with.
Attach file:  (61.51 KB) (61.51 KB)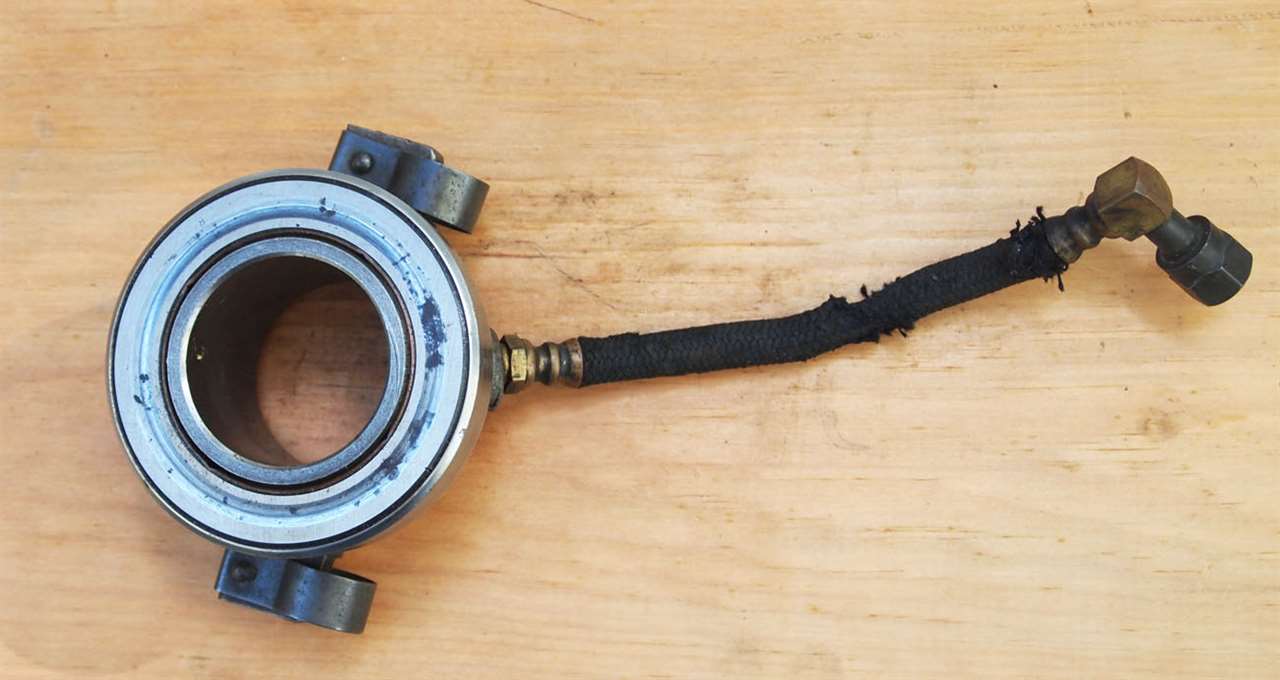
Posted on: 2016/2/2 12:31
|
|||
|
||||
|
Re: Our 1932 901
|
||||
|---|---|---|---|---|
|
Home away from home
|
Dave,
Thanks for the info & picture on the bearing. I pulled the inspection cover off of the transmission. The picture was invaluable in me determining that the car has a sealed throughout bearing. So I'm going plug the opening on the transmission and seal the Bijur line. I was also able to get all, except for one of the studs installed. So that should finish off that part of the restoration. Again thanks.
Posted on: 2016/2/3 20:37
|
|||
|
||||
|
Re: Our 1932 901
|
||||
|---|---|---|---|---|
|
Home away from home
|
The rear section of drive shaft that I got from Dave looked pretty sound, but I could not find anyone in the Los Angeles/Ventura area that could weld and balance it. This was because they did not have anything that would match up with the 6 bolt Packard flange without out making an adapter. I did find a shop that would do it for "$500 or so". Therefore, I decided to go with a completely new DS which is going to be made by Driveshaft Specialist in San Antonio for $625. It should be done in a week or so.
I finished most of the work on the dash. The instrument clustered was installed and some of the bright work that I had already had plated. The map light is now out for plating. I was unable to locate all of the correct push/pull switches for the dash and have ordered new ones. Although they are different, they'll be behind the dash and out of sight. I'll make knobs for them so they look correct. All of the floor boards have been installed and fitted. The bottom of the front seat was cleaned up and painted with a semi-flat black paint. I'll be sending the metal frame for the driver's seat, the back of the front seat and other pieces out for media blasting the remove the rust on them. I've ordered additional cloth wire so I can finish off the electrical under the dash, the rear seat cigar lighters, and the dome light. I've tried to find the left rear tail light stanchion as the top on mine that holds the license plate had broken off. Therefore, I made an attempt to repair mine by: 1. Forming a new top out of brass 2. 2. Attaching a threaded .25" rod to the base to strengthen the brass piece by drilling and tapping the base & brazing the rod to the brass top piece 3. Welding the threaded rod and brass to the base with Muggy Weld's Super Alloy 1. I'll be sending it out for plating. I don't think the fix will be as strong as the original so I'll keep my fingers crossed that it does not come apart at the plater's. Attach file: (107.53 KB)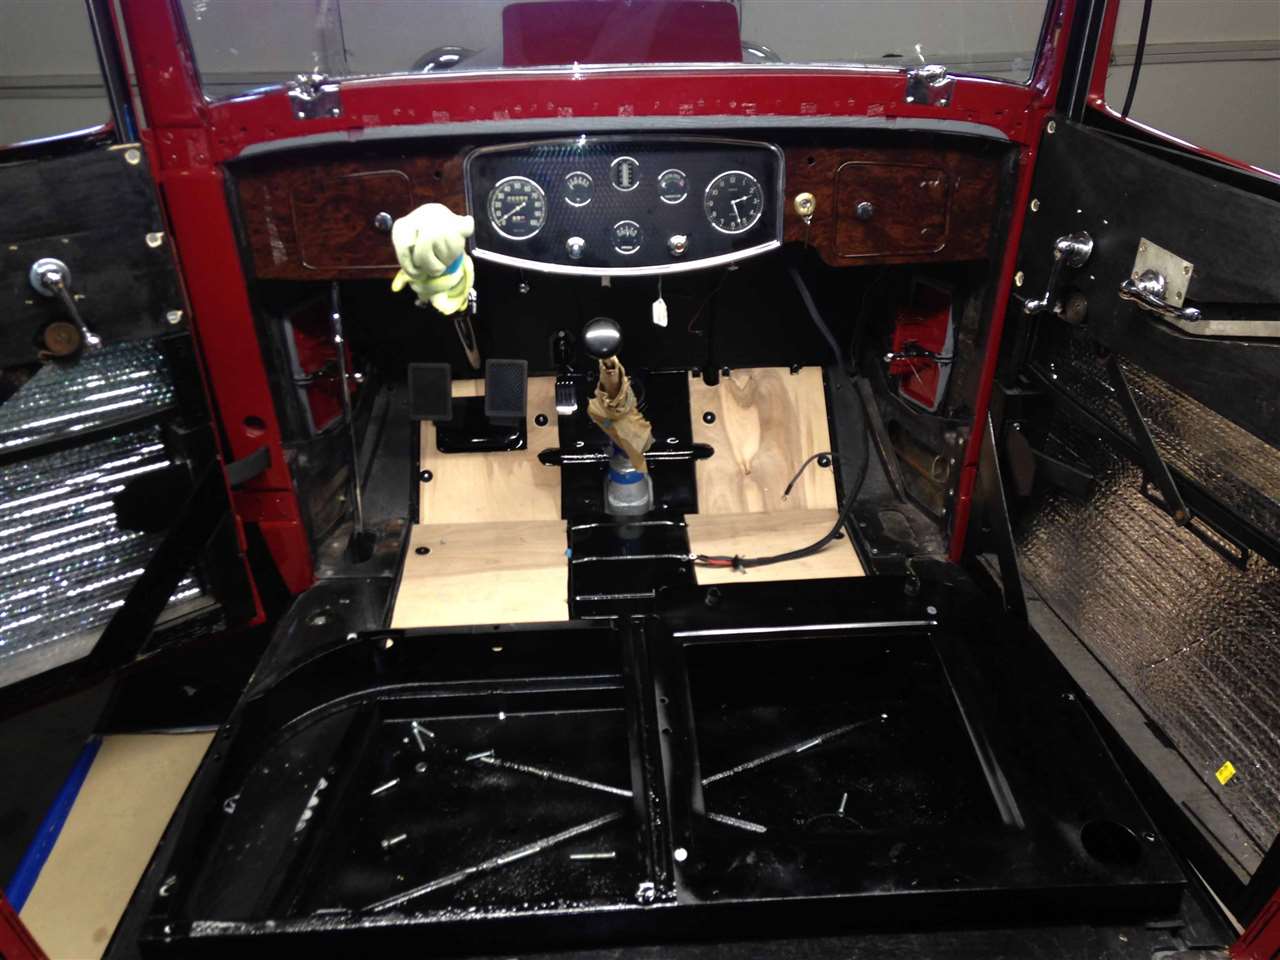 (76.27 KB) (76.27 KB)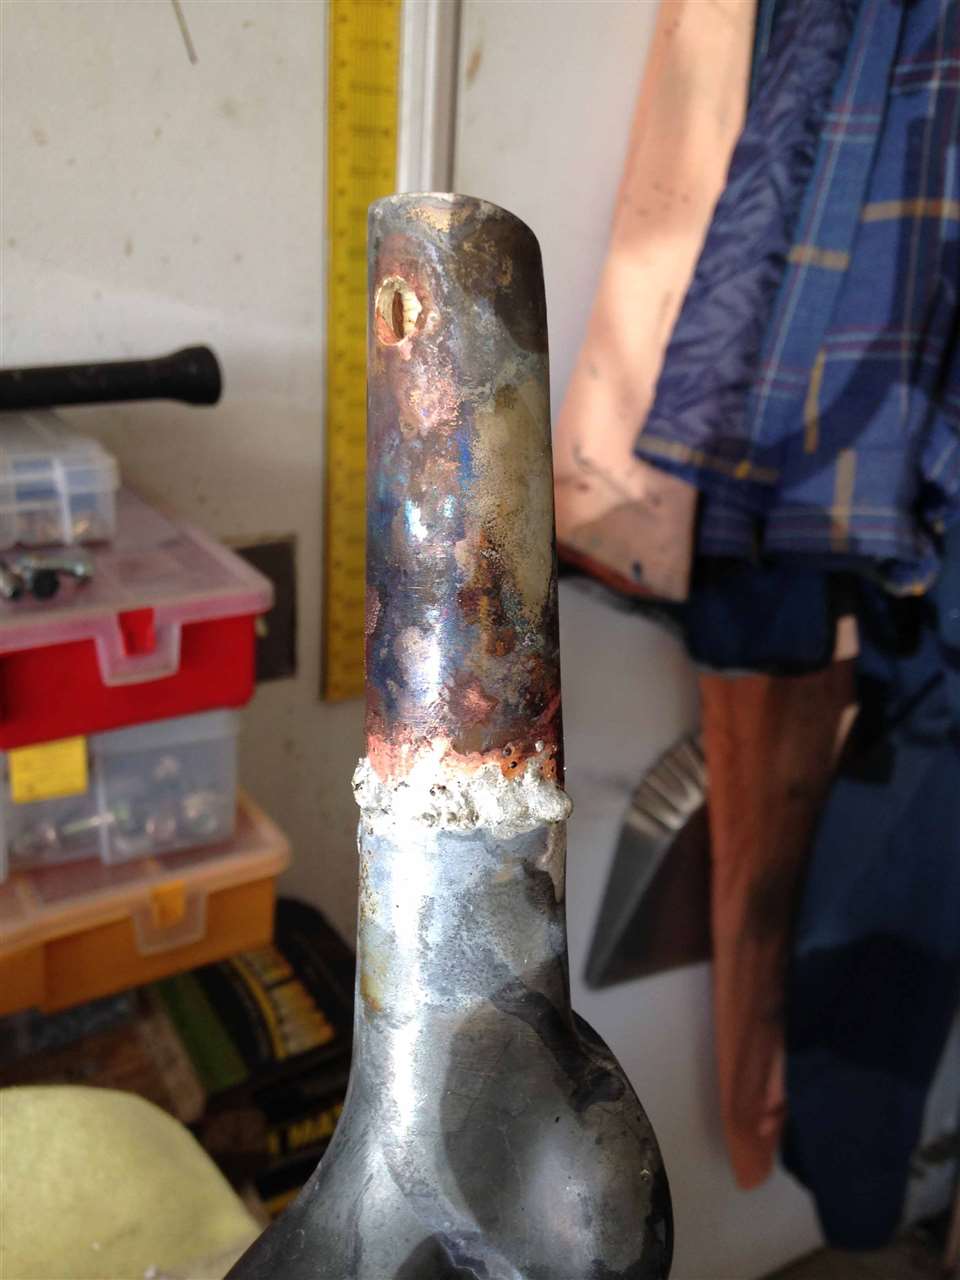 (79.95 KB) (79.95 KB)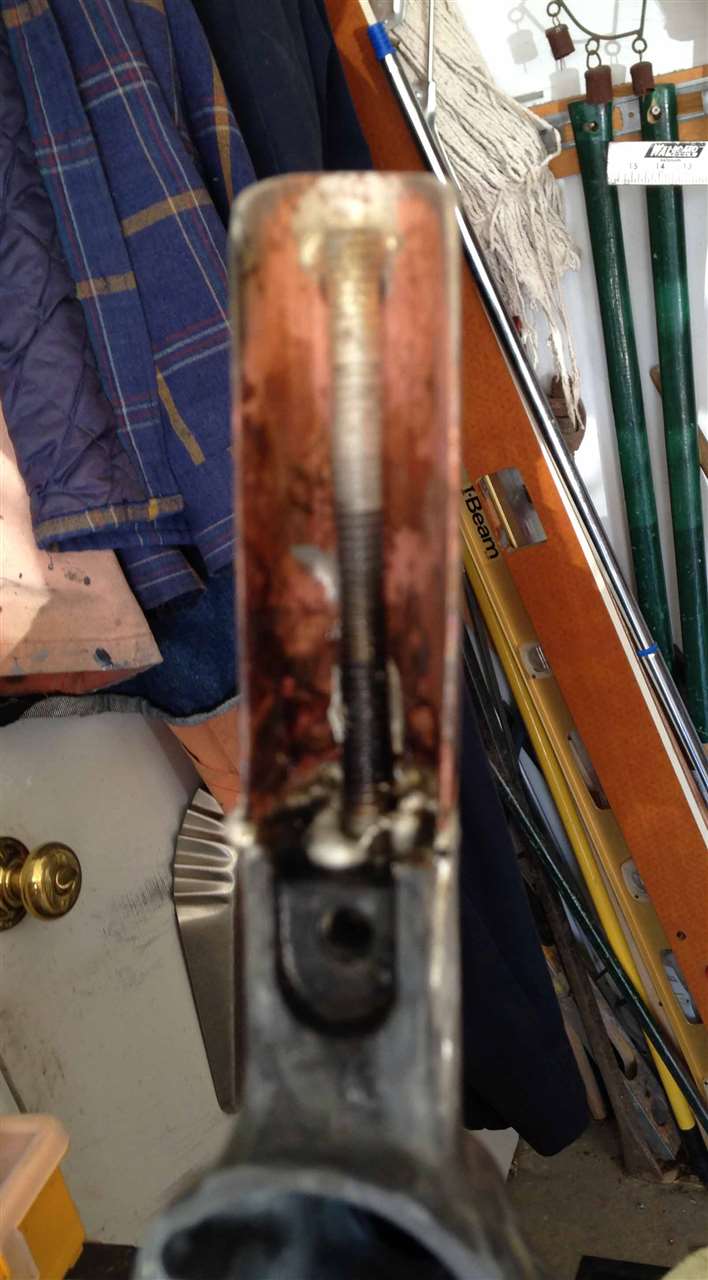 (139.29 KB) (139.29 KB)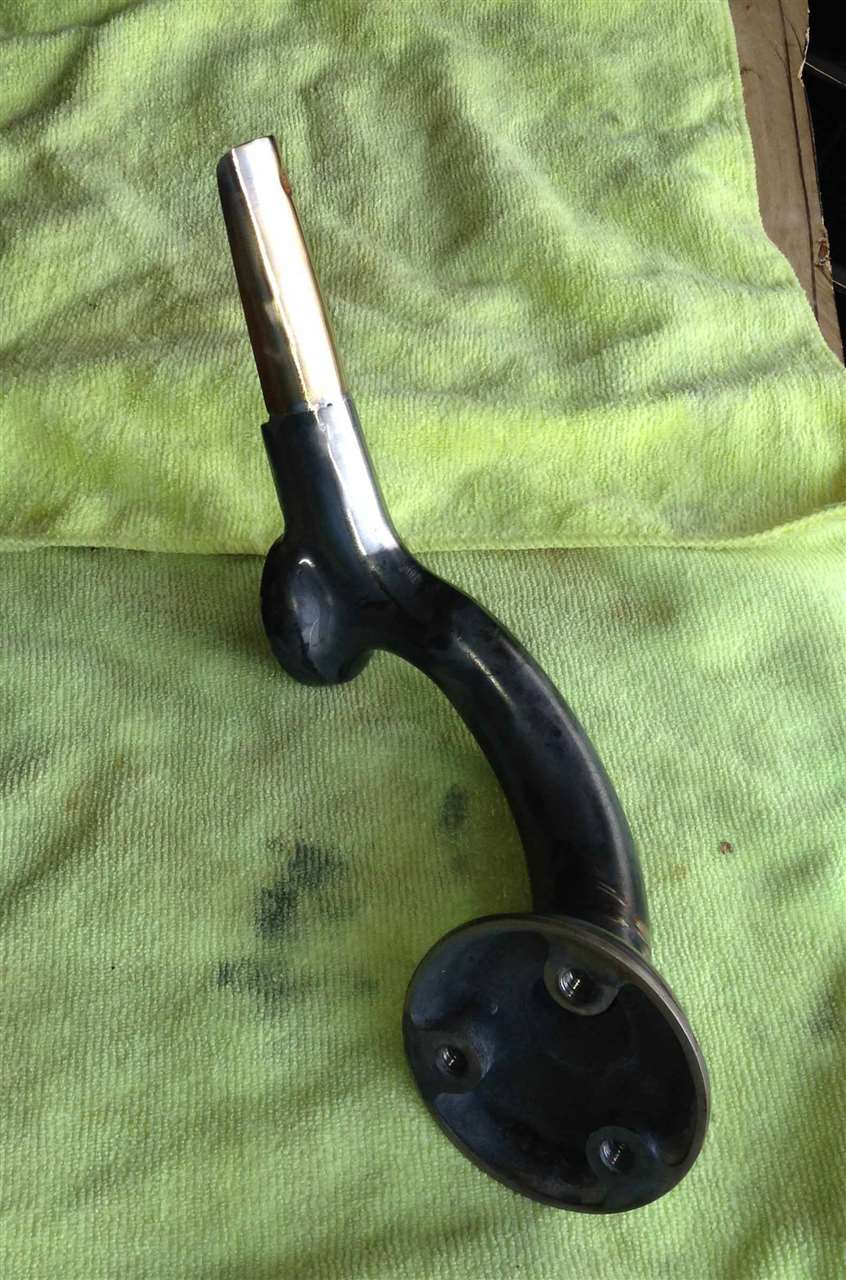
Posted on: 2016/3/3 11:21
|
|||
|
||||
|
Re: Our 1932 901
|
||||
|---|---|---|---|---|
|
Forum Ambassador
|
Someone does (or has in the past) reproduced those stanchions though for the life of me I can't recall who just now. The one on my '34 which is also part of the gas tank filler neck and tail light was also broken (like so many were) and I very luckily managed recently to get one of the bronze reproductions done by Art Brummer back in the 60s or 70s. Many of those Art Brummer molds and patterns ended up with (son-in-law ?) Chris Charleton up in Paris, ME and I believe he still produces parts from some of them.
Posted on: 2016/3/3 13:16
|
|||
|
||||
|
Re: Our 1932 901
|
||||
|---|---|---|---|---|
|
Home away from home
|
Dave,
I talked to Chris last week. He turned me on to several sources - they either did not had one or did not respond. I'll go with the repaired one and keep my eyes open for another one. While we are discussing my Packard challenges I got ready to connect the small line from the gas tank to the gas gauge and ran into a problem. The compression nut that came with the kit has 5/16" with 24 threads per inch while the gauge appears to be 27 threads per inch. Any ideas on what gives?
Posted on: 2016/3/3 18:58
|
|||
|
||||
|
Re: Our 1932 901
|
||||
|---|---|---|---|---|
|
Forum Ambassador
|
Sorry can't help with the gas gauge tubing, the 34 has an electric sending unit.
Posted on: 2016/3/3 19:22
|
|||
|
||||
|
Re: Our 1932 901
|
||||
|---|---|---|---|---|
|
Home away from home
|
Classic & exotic have many parts for the King Seeley gas gauges. Good luck making it work permanently!
http://www.classicandexotic.com/store/c-85-king-seeley-hobson-fuel-gauge.aspx
Posted on: 2016/3/4 15:40
|
|||
|
||||
|
Re: Our 1932 901
|
||||
|---|---|---|---|---|
|
Home away from home
|
David,
Thanks for the heads up I see that Classic & Exotic have a nut. The nut I have has 28 threads per inch (TPI) and the gauge is 27 TPI. I think the 27 TPI is a 1/16" NPT. For the $38.75 plus shipping that C&E is asking for their nut, I think I'll make one as I'm guessing it should take less than a 1/2 an hour. ?
Posted on: 2016/3/12 15:50
|
|||
|
||||


