|
Re: Wade's Workshop
|
||||
|---|---|---|---|---|
|
Forum Ambassador

|
Tuesday 28th June 2011
Wade is away for a couple of days so yesterday, before leaving the workshop, I suggested coming down today to complete the unfinished manifold studs. Good idea, I thought, should only take an hour or so. Took slightly longer, being in the vicinity of 4 & 1/2 hours before I'd finished the 13 studs required. Yesterday I'd just hacksawed off the heads of the bolts being used as "stock" for the studs required. But before leaving yesterday had Wade figure out how long the stud and new threaded length needed to be. Turned out by my cutting off the head of the bolt for the "stock" each was about 1/8" too long. So another series of hacksaw cuts were required this morning to trim the 13 down to the right length. Next was cutting the new thread. First one started off well, threads cutting easily until I realised that what I thought was easy cutting was the "stock" turning in the vice. One stud ruined. Second one clamped much more firmly in the vice and cutting well until I realised the thread was cutting at an angle to the axis of the "stock". Second stud ruined. Third one clamped in the vice, and this time it was a combination of the woes of both one and two, with the thread not cutting straight and the "stock" turning in the vice! Third stud ruined. Time to take stock.  Determined if I ground a champher on the end of the "stock", so the die could start on a slight taper, I'd have a better chance of cutting a thread parallel to the "stock's" axis. And not to be too gentle in tightening the handle of the vice! And what do you know? It worked! Felt very pleased with the first one, only needed another 12. Fortunately I learned from my mistakes and didn't butcher another "stock" in the process. Did have to cut 3 new "stocks" from bolts to replace the "stocks" ruined but did so with one hacksaw cut each, so I learned there too. With one of the lessons of life being to learn from your mistakes, today was certainly a day I learned a lot! The studs are longer than the studs they'll replace and will probably require some trimming before or after they're fitted. But that's a story for another day, and as they used to say at the end of whatever serial was playing at the Saturday arvo flicks "don't miss the next thrill packed episode"! Quote: Joe Santana wrote:.....perhaps those plates you have were rubber stamped, and the ink wore off over years of wiping off the cowl. Maybe. Maybe.....it's certainly possible in light of your experience, but I'm not sure that was the case here in Oz! Attach file:  (42.56 KB) (42.56 KB) (27.15 KB) (27.15 KB)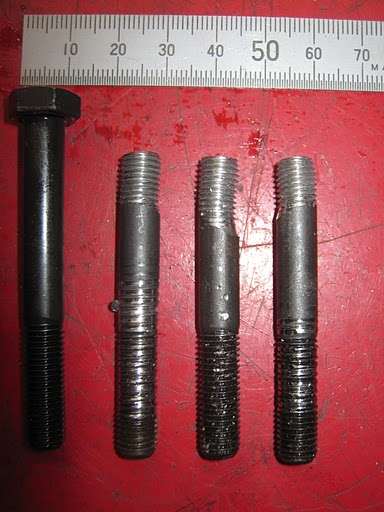 (27.56 KB) (27.56 KB)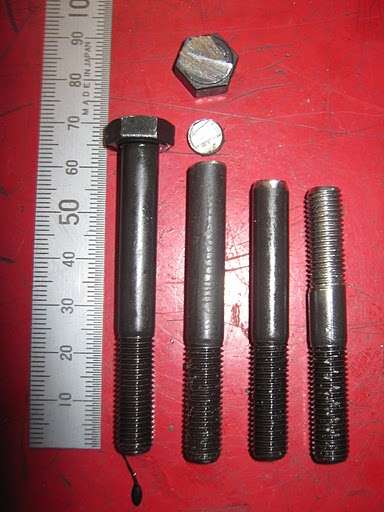 (27.66 KB) (27.66 KB)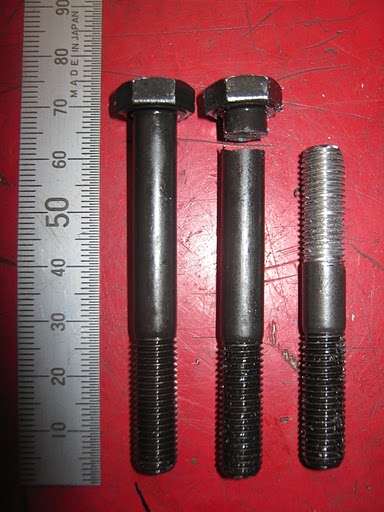 (49.04 KB) (49.04 KB)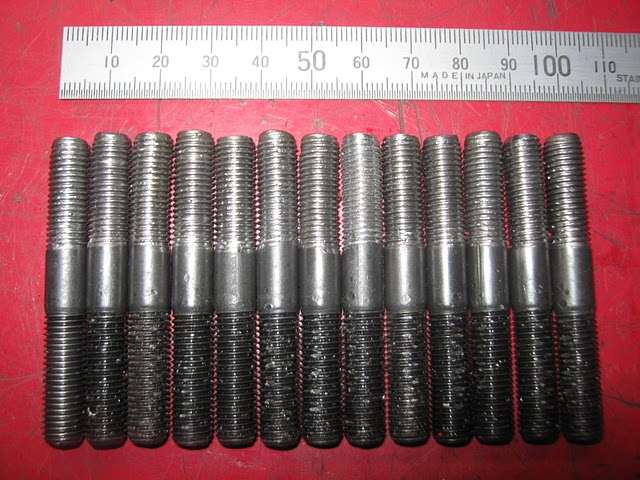
Posted on: 2011/6/28 2:58
|
|||
|
Mal
/o[]o\ ====  Bowral, Southern Highlands of NSW, Australia "Out of chaos comes order" - Nietzsche. 1938 Eight Touring Sedan - SOLD 1941 One-Twenty Club Coupe - SOLD 1948 Super Eight Limo, chassis RHD - SOLD 1950 Eight Touring Sedan - SOLD What's this?  Put your Packard in the Packard Vehicle Registry! Here's how! Any questions - PM or email me at ozstatman@gmail.com |
||||
|
||||
|
Re: Wade's Workshop
|
||||
|---|---|---|---|---|
|
Home away from home

|
Quote:
...Not a cheap option but Owen_Dyneto posted a picture of the Packard fonts some time back... Joe, this way please. 
Posted on: 2011/6/28 7:06
|
|||
|
The story of ZIS-110, ZIS-115, ZIL-111 & Chaika GAZ-13 on www.guscha.de
|
||||
|
||||
|
Re: Wade's Workshop
|
||||
|---|---|---|---|---|
|
Forum Ambassador
|
Sunday 3rd July 2011
Oh, woe is Noel! Some pic's from todays PACA run to The Australiana Pioneer Village at Wilberforce. About 5 minutes after Noel left, I received a phone call advising the OD on his '39 120 had locked up. The remaining PACA members drove to offer assistance and/or advice but it was apparent nothing could be done to fix it on the spot. Suffice to say the '39 suffered the indignity of being trucked back to the workshop on a Tilt Tray Tow Truck. More tomorrow, it's been a long day. Attach file: (18.56 KB)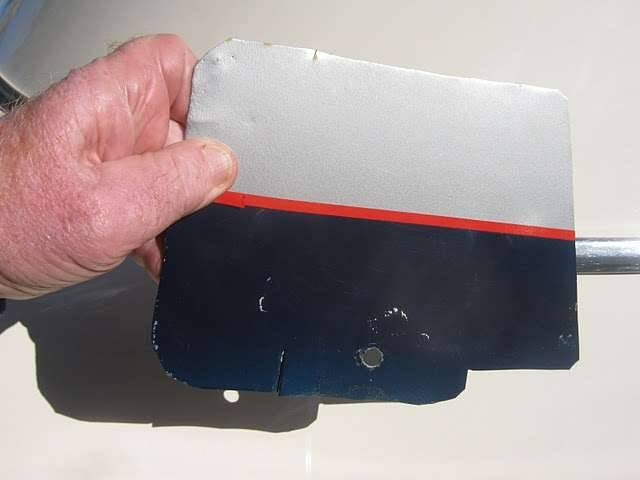 (44.00 KB) (44.00 KB)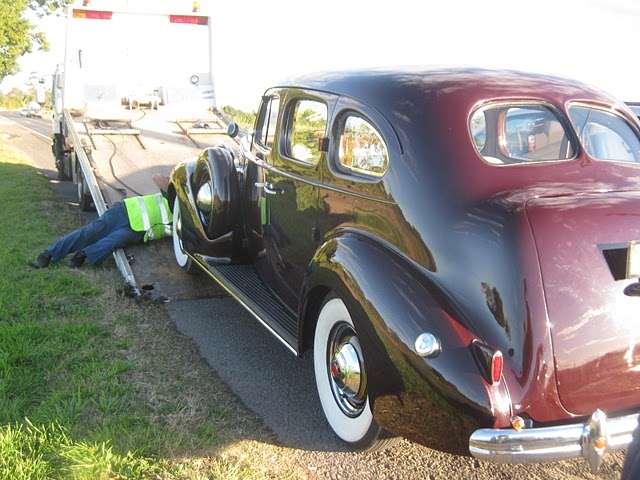 (39.33 KB) (39.33 KB)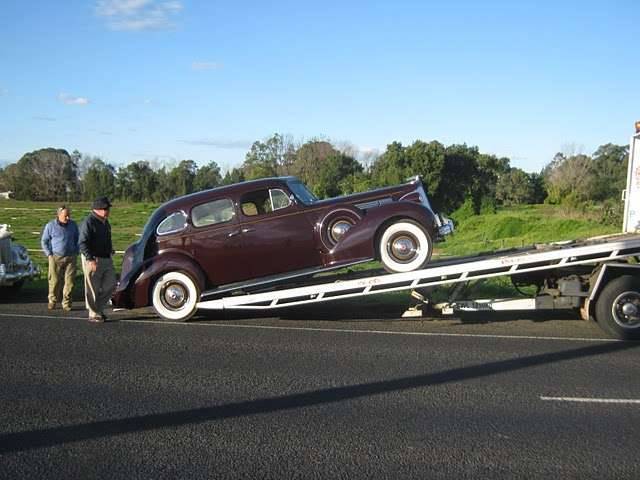 (37.57 KB) (37.57 KB)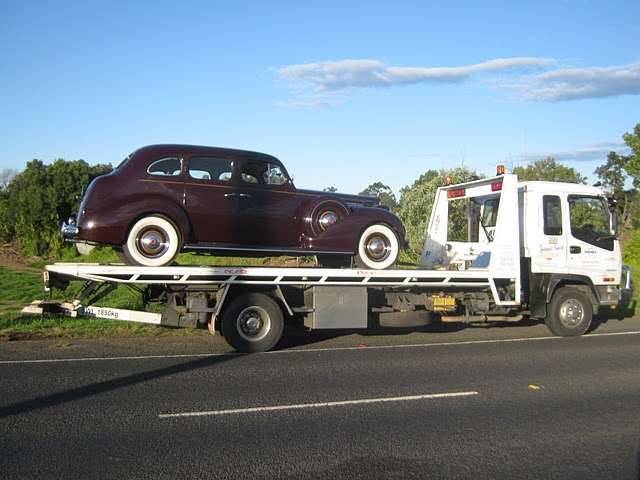 (30.73 KB) (30.73 KB)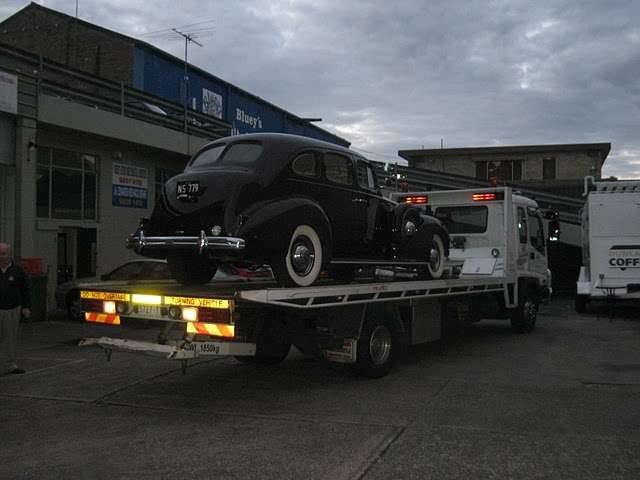 (18.26 KB) (18.26 KB) (29.55 KB) (29.55 KB)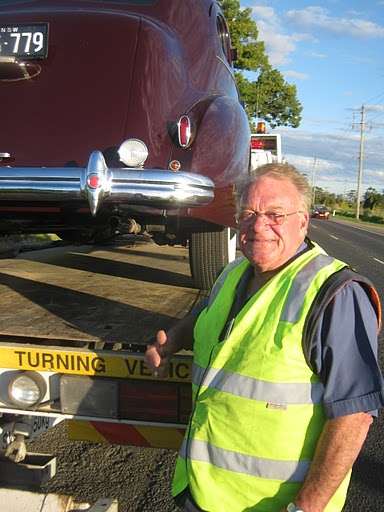
Posted on: 2011/7/3 6:33
|
|||
|
Mal
/o[]o\ ==== Bowral, Southern Highlands of NSW, Australia "Out of chaos comes order" - Nietzsche. 1938 Eight Touring Sedan - SOLD 1941 One-Twenty Club Coupe - SOLD 1948 Super Eight Limo, chassis RHD - SOLD 1950 Eight Touring Sedan - SOLD What's this? Put your Packard in the Packard Vehicle Registry! Here's how! Any questions - PM or email me at ozstatman@gmail.com |
||||
|
||||
|
Re: Wade's Workshop
|
||||
|---|---|---|---|---|
|
Forum Ambassador

|
Poor car. This isn't the first time it's suffered such an indignity because of the OD is it. Maybe it's time to get firm and threaten to gut, consign parts to the scrap pile, or even replace the OD unless it gets its act together. Too nice a car to be laid up by one recalcitrant assembly.
Posted on: 2011/7/3 9:17
|
|||
|
Howard
|
||||
|
||||
|
Re: Wade's Workshop
|
||||
|---|---|---|---|---|
|
Not too shy to talk

|
What is it with this guy's car? I think I saw it on www.imamistake.com.au/Noel...
Posted on: 2011/7/3 10:44
|
|||
|
||||
|
Re: Wade's Workshop
|
||||
|---|---|---|---|---|
|
Forum Ambassador
|
Howard,
Yes, has happened before so Noel isn't very happy. It wasn't just stern words said to it yesterday, also some very colourful language. Hooberitz,  to PackardInfo but the link doesn't work for me. And if you own a Packard, I invite you to include it in the Packard Owners Registry here on PackardInfo. to PackardInfo but the link doesn't work for me. And if you own a Packard, I invite you to include it in the Packard Owners Registry here on PackardInfo.
Posted on: 2011/7/3 15:51
|
|||
|
Mal
/o[]o\ ==== Bowral, Southern Highlands of NSW, Australia "Out of chaos comes order" - Nietzsche. 1938 Eight Touring Sedan - SOLD 1941 One-Twenty Club Coupe - SOLD 1948 Super Eight Limo, chassis RHD - SOLD 1950 Eight Touring Sedan - SOLD What's this? Put your Packard in the Packard Vehicle Registry! Here's how! Any questions - PM or email me at ozstatman@gmail.com |
||||
|
||||
|
Re: Wade's Workshop
|
||||
|---|---|---|---|---|
|
Forum Ambassador
|
Monday 4th July 2011
Just to backtrack to yesterday and Noel's misfortune. Noel has done a number PACA runs in the '39 without incident in the last few months and, because of that, thought his troubles were behind him. Not to be. Apparently on the way to Wilberforce yesterday a grinding noise started to come from the OD when in OD so Noel locked it out and no noise! However after leaving Wilberforce Noel tried engaging OD again, and I don't know if everything locked up immediately or sometime after engaging the OD. I do know that when it did lockup Noel was fortunate to be able to just pull off the sealed road surface as it skidded to a stop. Then came the phonecall and the cavalry, such as it was. Noel demonstrated his predicament and it was obvious he wasn't going anywhere. Chris, starliner, part of the Packard posse together with Jeff, Margaret and myself, suggested we jack up the rear end to check if it was the diff, but it wasn't. Still stuck. About this time a young guy in a Ute, Michael, pulled up and offered assistance. Michael is a Mercedes-Benz mechanic but, when the problem was explained, realised his experience didn't translate too well to trouble shooting and fixing Packards. However, with his workshop only about 200 metres back down the road, he returned there and obtained names and phone numbers of local tow truck operators. Back with the Packards the first "towie" he tried was busy, but the second wasn't and he was only "just up the road". Michael left us to await the "towies" arrival. Must mention that Michael made a terrific impression on all of us with his more than helpful and friendly manner. I'm pleased to be able to provide this link to Rivers Edge Turf where Michael works, it's the least I can do. So, any Aussies in the Sydney area, I can think of no better way of repaying Michael for his help and assistance then by using Rivers Edge Turf for any turf supplies required in your landscaping projects! Back to the tow truck. Don't really know what "just up the road" means sometimes? In outback Australia it can well mean the next property hundreds of miles away but, nearer to Sydney, I'd think it would be a whole lot closer. It was probably about a 1/2 hour wait before Jim and his Missus arrived to retrieve the recalcitrant '39. Jim is a bit of a character and as Chris said reminds him of Harvey both in physical and personality characteristics. Straight away, after the introductions, when Noel asked him about the cost of the tow he got me! Started by quoting a round-a-bout and reverse direction route. I thought maybe because a bridge we'd crossed might have had a heavy vehicle weight limit. No, he was just having some fun at our expense. That sorted out, and my heart rate returning to something approaching normal, Jim then proceeded to haul the '39 on board the tow truck. Like most tow trucks now, it is a tilt tray tow truck, or as those on the other side of the Pacific will say a roll back! The technique employed is interesting, well to me at least, because I haven't seen this done before. No, I lie, when the guy picked up a large container from out front of the workshop the same, or similar, technique was employed. At the time didn't realise it would also be employed to move disabled vehicles. Jim started by tilting the tray and sliding(rolling?) it back to intersect where the front of the front tyres contact the road. Then the tray keeps sliding back until the front wheels are aboard. This continues until the front of the rear tyres intersect with the edge of the tray. At this point, or maybe it was earlier, the winch cable is attached. Then the non turning rear tyres are forcibly dragged onto the tray, left a "skid" mark of sorts on the tray. Hard part done the '39 was then snugged down, Noel and I proceeded in the '41, playing leapfrog for a while with the truck, on the way to the workshop. We'd spoken earlier with Wade about the situation and he advised have the '39 towed in and he would open the workshop for it's arrival. We stopped on the way for, 1) Noel to be in a position to pay Jim for the tow and 2) to change cars from the '41 to my daily driver so I could drive Noel home as night was fast approaching. Jim beat us to the workshop, although we were ahead when we first stopped, and waited in the street for us to arrive. Wade was already there and had opened up and moved a couple of cars so the '39 had clear access to Packard Corner. Although it had been comparatively easy to get the '39 on board the truck the reverse applied for the unloading. Started well with gravity playing it's part but soon required assistance with Wade and I pushing the front while Noel poured water under the rear tyres to try and provide some slip. Managed to get the rear near to the edge of the tray then, using a floor jack under the centre of the diff housing, Jim moved the tray forward sufficiently that the rear tyres could be lowered to the floor. Jim then finished moving the tray forward until clear of the front tyres. Jack then went back under the centre of the diff housing and with Wade pulling and steering the jack, Noel and I provided the propulsive muscle for the '39 to take up a forlorn residence between The Fossil and Big Red. Took Noel home, through all the traffic one could muster on a Sunday evening so it seemed, with the return run a dffferent way a lot faster. Noel, I told you we should have gone the way I said! That done all that remained was to publish the mishap on PackardInfo! The previous occasions where incidents have been hushed up or talked around to avoid Noel's threats of physical violence were not going to be repeated this time. Especially seeing I was intimately involved. So Noel, there you have it, the grubby laundry aired to the world! Well, the Packard world, at least. Now, that didn't hurt too much, did it? That brings us to today, which was tame in comparison to yesterdays events. Arrived late morning to find that Wade had jacked up the '39 and it was now as high as it could be on jack stands, front and rear. If the OD has to come out, all the room possible under the car is required to provide manoeuvering space. Wade undertook some basic diagnostics and confirms the OD is definitely the culprit here. He'd also heard some "creaking" noises coming from the front end when turning and straightening the wheels, this also will be looked into. Another thing Wade noted, and you were right Noel, I was wrong  , the rear axle seals are leaking too! And to add to the list, I noticed when looking under the '39 when by the side of the road that one of the rear shock links is loose. , the rear axle seals are leaking too! And to add to the list, I noticed when looking under the '39 when by the side of the road that one of the rear shock links is loose. Enough of the '39 though, for now it was Big Red's turn for attention. Wade had been cleaning out the exhaust manifold stud holes in the block in preparation for installing the NOS manifold. I was set to work shortening both ends of the MBM studs employing a hacksaw yet again. And though I'm getting lots of practice with the hacksaw I still can't cut straight. What saved me here was that the part of the stud being cut off was being held in the jaws of the vice lined up with paint marks on the vice. With the cut starting flush against the end of the jaws I should get a straight cut, right? Right, I did, well at least straight enough for the job at hand. Studs shortened to final working length, ends ground off to remove any burrs, they were now ready for installation. Installation was the old fashioned way, using two nuts tightened against each other to provide a fixed head to use the spanner(wrench) on. Studs had also been graded for length, MBM doesn't guarantee precision engineering in every instance. Although the length differences were minor, Wade utilised the "longer" ones basically at either end of the block, although one of the "shorter" ones was also deployed there where Wade had determined one of the stud holes was a shorty. Basically after each 2 studs were tightened to the block a "trial" fit of the manifold was undertaken. At first it rattled around, some of the holes in the manifold flanges being quite large, but it still fitted without effort although more snuggley by the time the final stud was in place. While I was trimming studs Wade had turned to the bane of his life, no not Noel's '39, but oil leaks! Hates them! There's one the left side of Big Red's engine. The oil filter had been removed last week, today it was the turn of the fuel and vacuum pump. After a clean up, it looks like there's a leak from the bottom of the boss the pump mounts on. And that's where I left Wade, because I had to have some dental treatment. Last week, when I went down to finish the studs, there was a pizza surprize lunch. Well it was a surprize for me, because afterwards I swear there was a hole in a tooth approaching the size of the grand canyon! Turned out to be a little smaller than that, just a bit of tooth chipped off! Anyway, it's now all fixed. Attach file: (33.65 KB)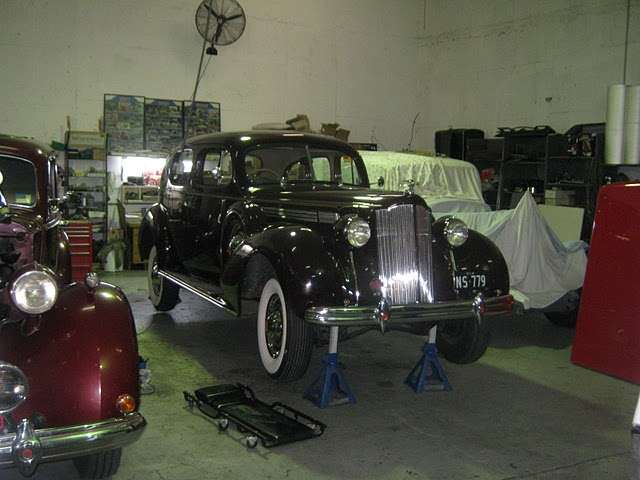 (45.59 KB) (45.59 KB)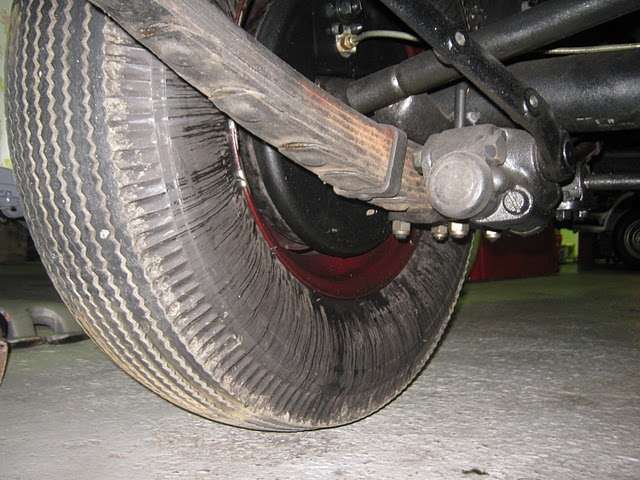 (47.08 KB) (47.08 KB) (23.58 KB) (23.58 KB)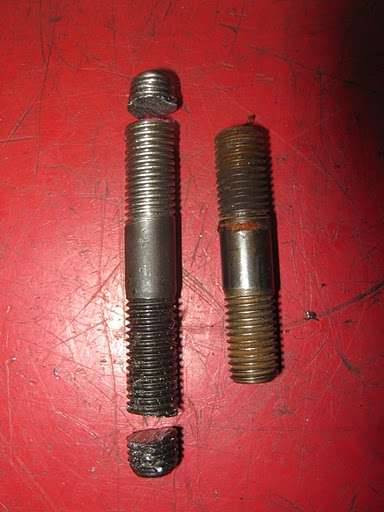 (43.29 KB) (43.29 KB)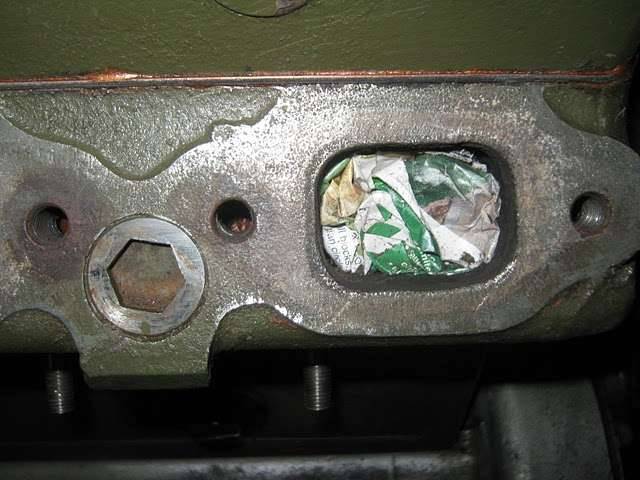 (34.83 KB) (34.83 KB)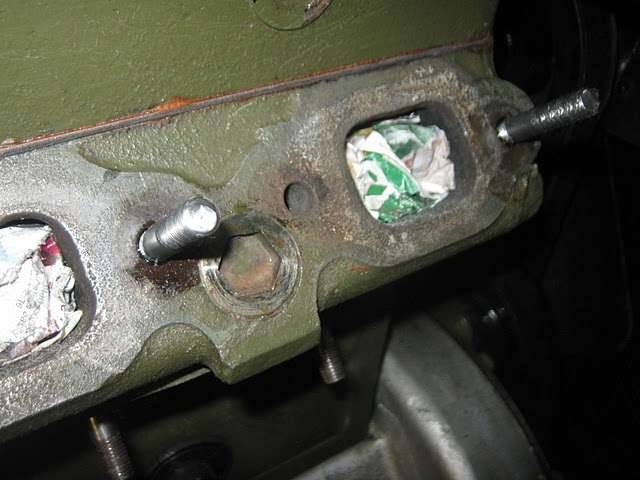 (38.90 KB) (38.90 KB)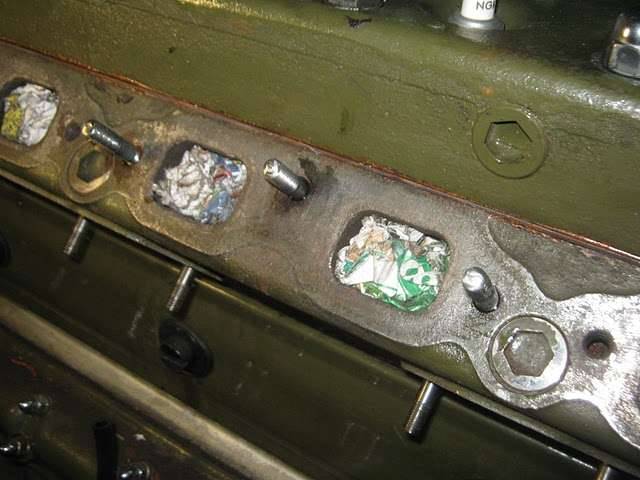 (37.44 KB) (37.44 KB) (39.71 KB) (39.71 KB)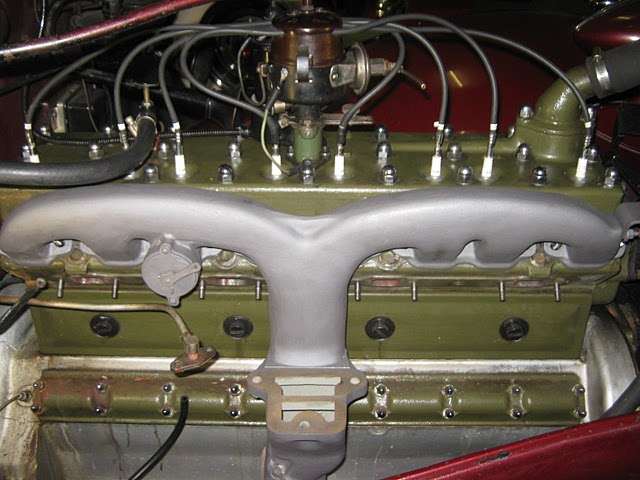
Posted on: 2011/7/4 5:16
|
|||
|
Mal
/o[]o\ ==== Bowral, Southern Highlands of NSW, Australia "Out of chaos comes order" - Nietzsche. 1938 Eight Touring Sedan - SOLD 1941 One-Twenty Club Coupe - SOLD 1948 Super Eight Limo, chassis RHD - SOLD 1950 Eight Touring Sedan - SOLD What's this? Put your Packard in the Packard Vehicle Registry! Here's how! Any questions - PM or email me at ozstatman@gmail.com |
||||
|
||||
|
Re: Wade's Workshop
|
||||
|---|---|---|---|---|
|
Home away from home
|
So I wonder who it might be that is Noels 'jinx'. I am sure it will all be sorted out soon though - can't imagine Wade giving up that easily - if at all!
By the way Mal, next time you are cutting a thread, run an expendable nut onto it first so the nut sits on the thread that is to remain. You can then use the side of the nut as a cutting guide and after you finish cutting you wind the nut off and it helps to clean the thread up. It also protects the good part of the thread from slips with the hacksaw blade or grinder. You probably already knew this, but forgot to mention it - so you can tell me to go suck eggs if that's the case! LOL
Posted on: 2011/7/4 7:23
|
|||
|
If at First You Don't Succeed - Skydiving is Not For You...
|
||||
|
||||
|
Re: Wade's Workshop
|
||||
|---|---|---|---|---|
|
Forum Ambassador
|
Tuesday 5th July 2011
Started by removing the rear wheels and brake drums from Noel's '39. While I was doing that Wade was involved in some remedial work on Big Red's fuel/vacuum pump. This because he suspected oil could be leaking from the ends of the pump pivot pin, it's pressed in at one end and crimped, if that's the right term, at the other end to retain it. Back to that shortly after the '39 is dealt with, but in case you're getting excited Noel, don't! With the '39 up in the air, appropriately used the air gun to undo the lug bolts. But this I can tell you Noel, in order to get to the lug bolts the hub caps had to be removed and they took a bit to remove. But that just went to show our double sided tape hubcap retention system works! Hubcaps and lug bolts off next was the brake drums and for these Harvey's very handy brake drum puller came in very handy again. Hardest part, because of it's weight and the arrangement of arms and such, is getting it set up properly on the brake drum with the centre screw centered. Takes time to do it right and aligned properly but that pays off when the drums pop-off relatively easily. The right being easier than the left. Once off, the drums and the backing plates, shoes and cylinders, except for a coating of brake dust, were all dry, so no leaks. Wade now thinks the grease on the inside of the rear tyres might be because the rear wheel bearings were very well packed when replaced a little while back. With the excess being shed through the drain hole at the bottom of the retainer as it's designed to. Will know more another day because that's where things were left on the '39 to move on to Big Red. Filled Big Red's cooling system with water for a static leak test, especially at any exhaust manifold studs which intrude into the water jacket, and left it for time to take its toll. By this time Wade had fashioned a new retaining system for the fuel/vacuum pump pivot pin. As mentioned, the free end of the pin is crimped or maybe that's punched to retain it in the body of the pump. Because the pin that came out had obvious wear marks, Wade wanted to replace it, but the spare pin he had didn't have an end left to crimp or punch! Solution was to drill and tap the end of the pin for a screw, lock washer, washer, o-ring(to seal against oil leaks) combination. The other end of the pin is knurled and is a press fit into the pump body. All went together with liberal, for the size of the pin, quantities of sealer for an oil tight fit. That done, MBM gaskets were then required for the fuel/vacuum pump and for the oil filter canister to oil pipe joints. Usually Wade uses a traditional type gasket sealer but for the fuel/vacuum pump mounting gaskets he went modern and used John's Silicon sealer instead. Applied the sealer to one gasket on the bench which was then "stuck" to the insulating block and to which another gasket was "stuck" to the other side of the insulating block. Finally the outside of one of the gaskets on either side of the insulating block was Siliconed and slipped into place on the pump boss. But.......didn't I say yesterday oil leaks are the bane of Wade's Packard life? Should have included water leaks as well! Because in installing the gasket/insulating block combo he saw a water leak! A lot, a whole lot, of time and effort has been put into trying to eliminate water leaks. Each time appears successful only for another leak to make it's watery appearance! Seems like one leak is fixed only for another leak to surface, there can't be much more that needs attention, can there? After the Fuel/vacuum pump was mounted, the source of the leak was traced to the 2nd and 3rd lower mounting bolts of the water jacket side plate. All of these bolts are new and most of the bolt holes had been heli-coiled because of corrosion resulting from the holes being through to the water jacket. 2nd bolt looked perfect when taken out but the 3rd was obviously the culprit this time round. Of course we'd had to drain the water again after re-filling it only an hour or so earlier. But to clear the area of the 3rd bolt of water because of pooling in the water jacket in that area required a somewhat different approach. Water kept coming from the bolt hole long after the drain cock had stopped flowing. Wade attempted to blow it out using compressed air but that didn't work, still water. I suggested attacking it with air from the other end and Wade tried down the radiator neck with limited success. So I then suggested we blow through the heater hose with a rubber sleeve making up the difference in diameters between heater hose and air gun. Now, with the Cormorant/Pelican/Swan/Duck/?????? cap on and Mal with a thumb over the now open heater inlet pipe, a successful blow out of water was achieved. Then the bolts were re-installed. 2nd from front, no problems. 3rd from front, problem! The thread in the block was stripped! So out with the heli-coil set, tapped through the side plate into block and heli-coil inserted followed by the bolt along with liberal amounts of sealer. But, rather than refill with water straight away, it's going to be left at least overnight before being filled. By removing the heater hose and then after fixing the side plate bolts another problem was discovered. In fact removing the heater hose suited Wade who was going to do that anyway because of another leak in that vicinity. Wade thought the seal between the heater cut-off valve to the head mount was leaking. But, after taking the valve off the brass nut, the brass nut was found to be cracked! Wade was quite pleaded to be able to rustle up another brass nut from "stock" because it was the type of item he didn't think he'd have. From there the heater valve together with the new nut were installed on Big Red and the heater hose re-connected. As Wade often says, one step forward two steps back! Quote: Snapey wrote:....next time you are cutting a thread, run an expendable nut onto it first so the nut sits on the thread that is to remain. You can then use the side of the nut as a cutting guide and after you finish cutting you wind the nut off and it helps to clean the thread up. It also protects the good part of the thread from slips with the hacksaw blade or grinder. You probably already knew this, but forgot to mention it - so you can tell me to go suck eggs if that's the case! LOL I knew that, it was a long loong looong time ago, but had forgotten.  for the reminder and it'll also help others in those situations. for the reminder and it'll also help others in those situations. I'd never tell you how to suck eggs, especially with the work you're doing and documenting in your Racing Biposto Blog. Attach file: (44.12 KB)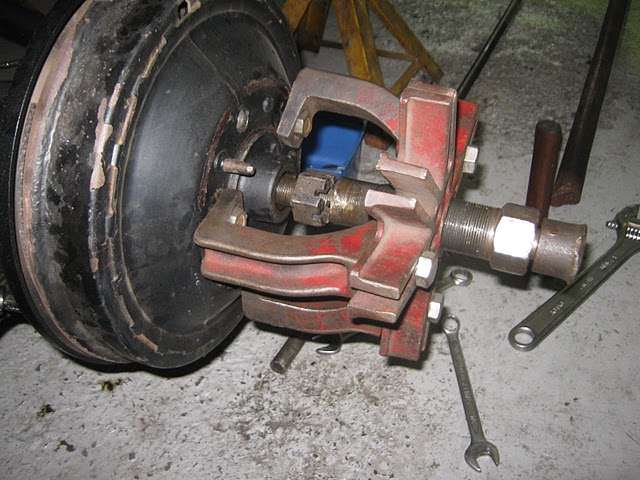 (42.49 KB) (42.49 KB) (40.06 KB) (40.06 KB)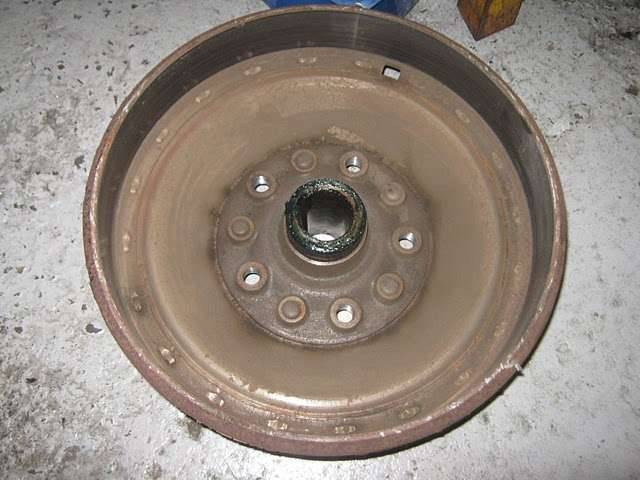 (43.16 KB) (43.16 KB)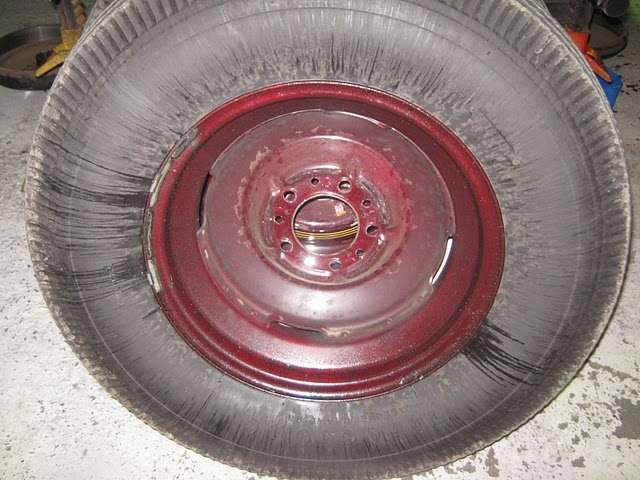 (30.33 KB) (30.33 KB) (34.67 KB) (34.67 KB)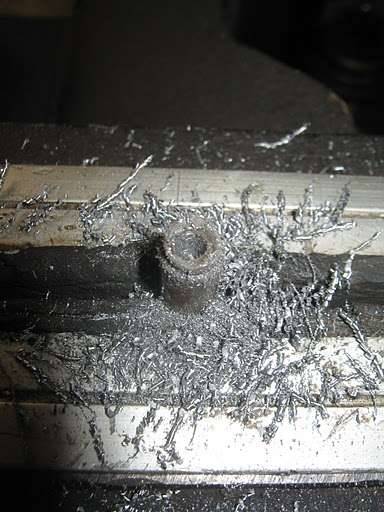 (33.51 KB) (33.51 KB)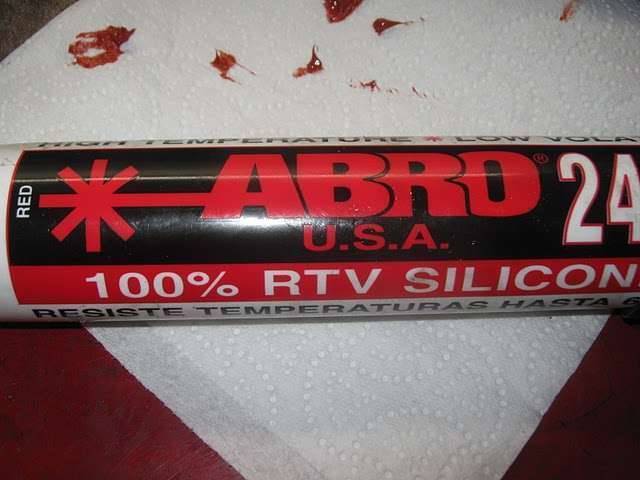 (27.95 KB) (27.95 KB)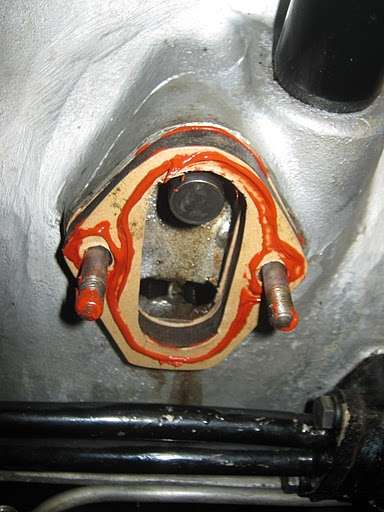 (31.13 KB) (31.13 KB) (24.92 KB) (24.92 KB) (19.14 KB) (19.14 KB)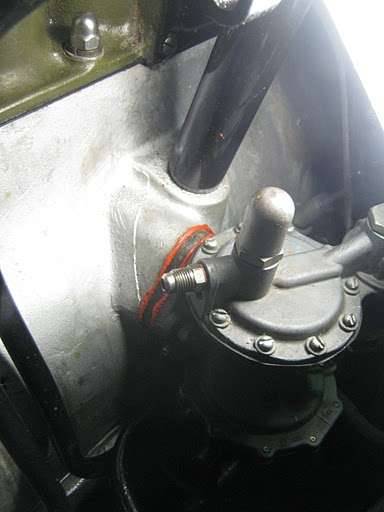 (35.93 KB) (35.93 KB)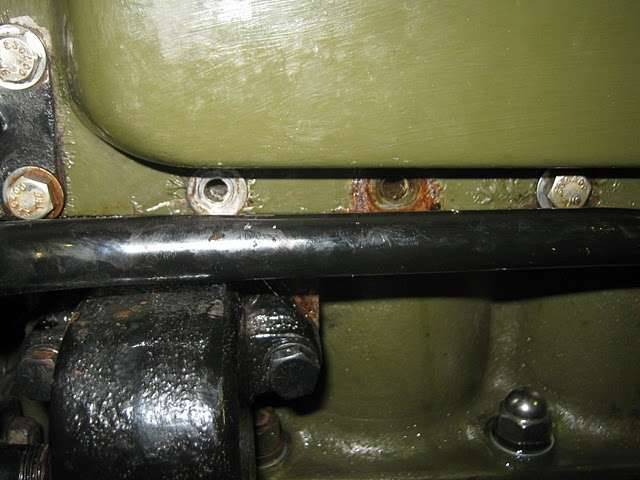 (35.71 KB) (35.71 KB)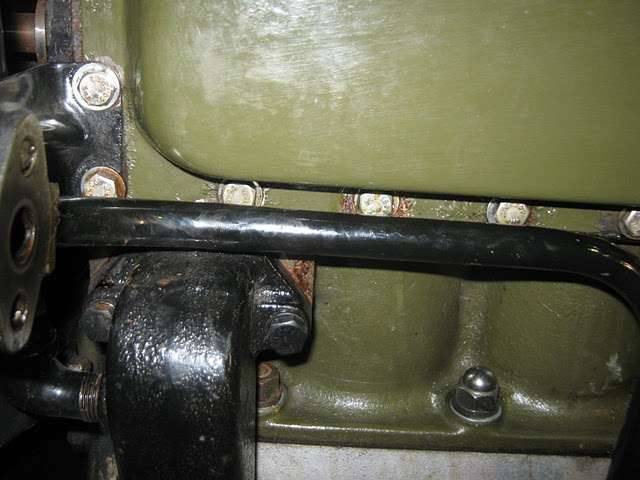 (23.01 KB) (23.01 KB)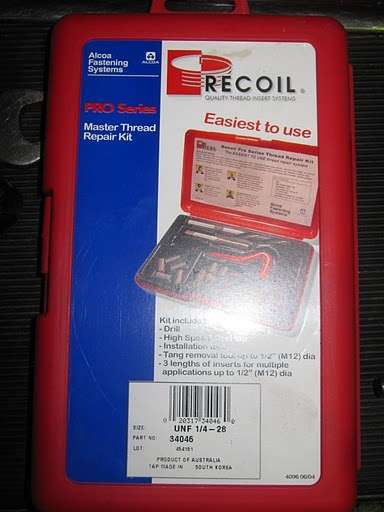 (26.27 KB) (26.27 KB)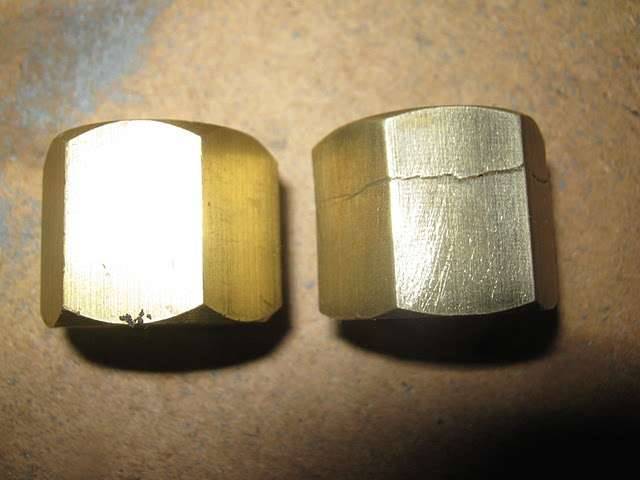 (33.99 KB) (33.99 KB) (22.49 KB) (22.49 KB)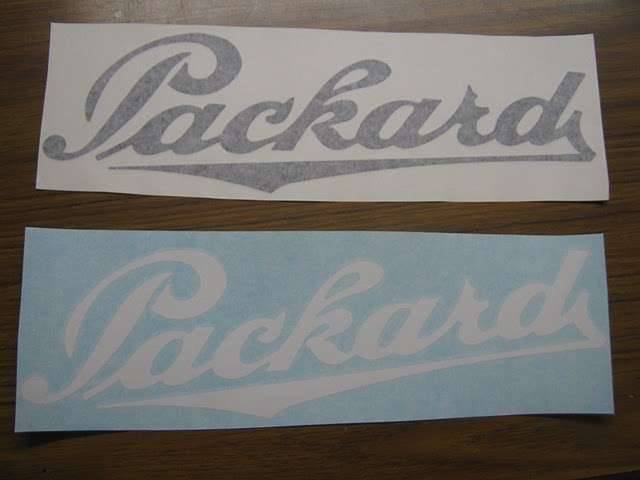
Posted on: 2011/7/5 3:55
|
|||
|
Mal
/o[]o\ ==== Bowral, Southern Highlands of NSW, Australia "Out of chaos comes order" - Nietzsche. 1938 Eight Touring Sedan - SOLD 1941 One-Twenty Club Coupe - SOLD 1948 Super Eight Limo, chassis RHD - SOLD 1950 Eight Touring Sedan - SOLD What's this? Put your Packard in the Packard Vehicle Registry! Here's how! Any questions - PM or email me at ozstatman@gmail.com |
||||
|
||||
Register To PostTopic is Locked


