|
Re: BigKev's 1954 Packard Clipper Deluxe Sedan
|
||||
|---|---|---|---|---|
|
Webmaster

|
Just did a few quick things tonight in the garage. First order of business was getting the trunk lid aligned. When I put it back on the car after priming it I just bolted it in place to get it back on the car and up off the floor. So I needed to get all the gaps lined up and it firmly locked in place.
With that done, I then reinstalled the trunk lock emblem, bezel, lock cylinder, and latch mechanism. I was fortunate to have even the foam diamond shaped spacer/gasket that goes between the back of the emblem and the trunk lid, and also the very thin small gasket between the lock cylinder and the trunk lid. Eventually I need to find a nicer bezel. But it will do fine for now. There is alway the moment of worry when you first lock the trunk what you will have something misaligned, and it wont reopen. But luckily it aligned perfectly on the first try! I am lucky to have the original "Packard" stamped keys for the car. These were hidden up in the front fender somewhere and fell out when I took the front driver side render off. They just needed to be cleaned up a bit. Attach file:  (64.61 KB) (64.61 KB)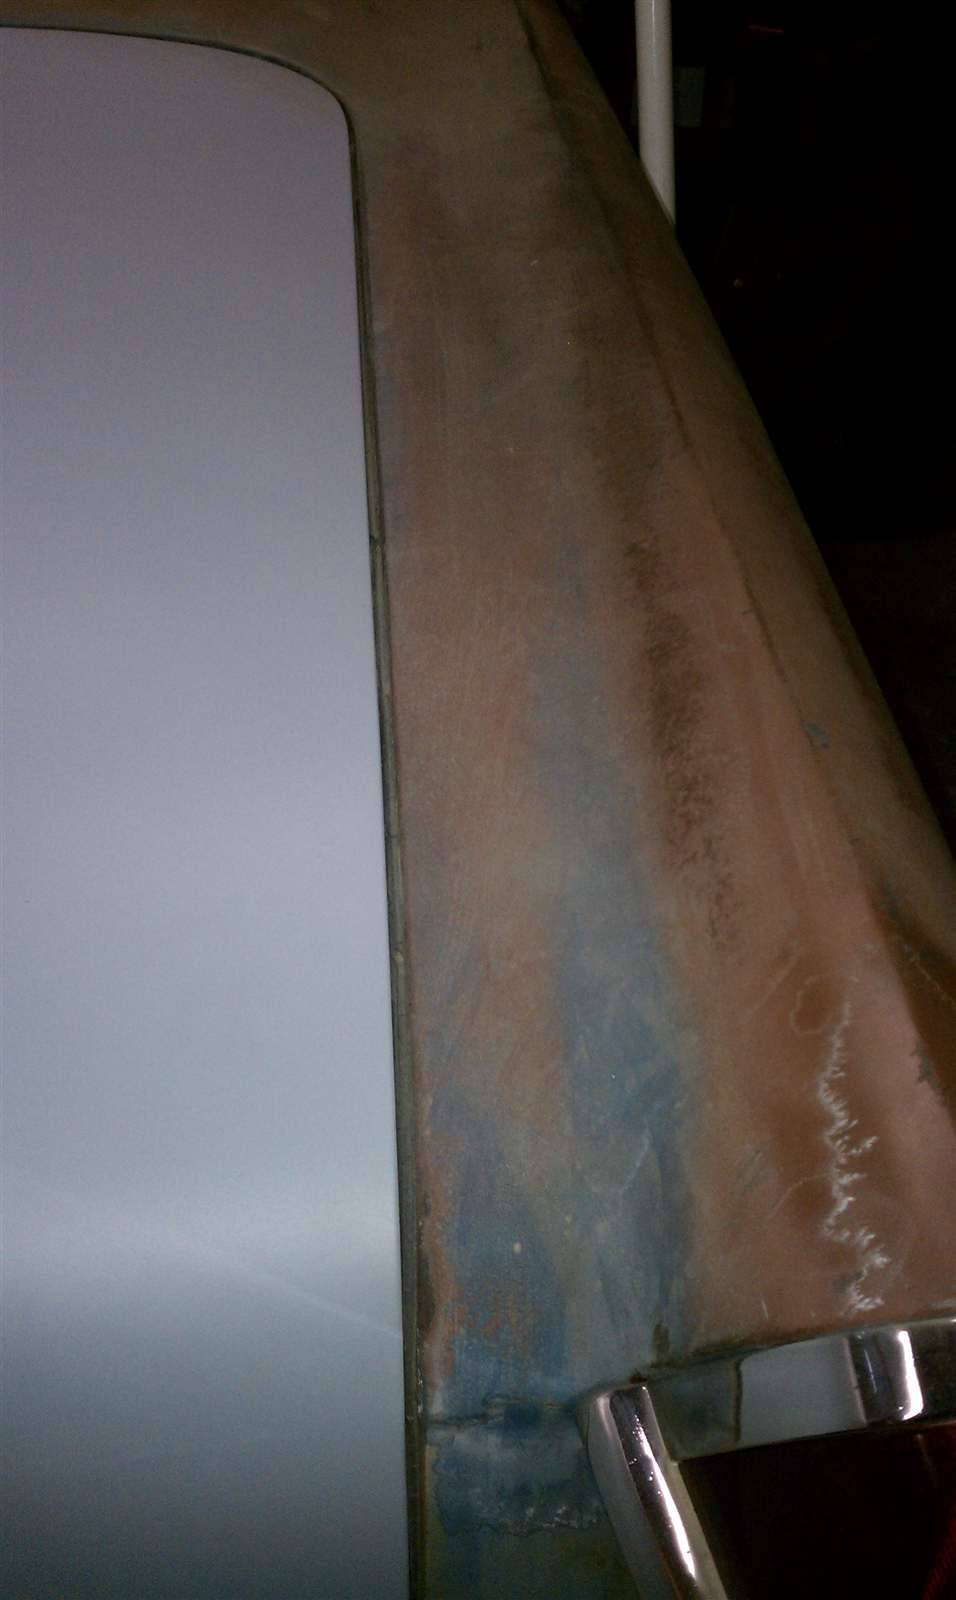 (89.68 KB) (89.68 KB)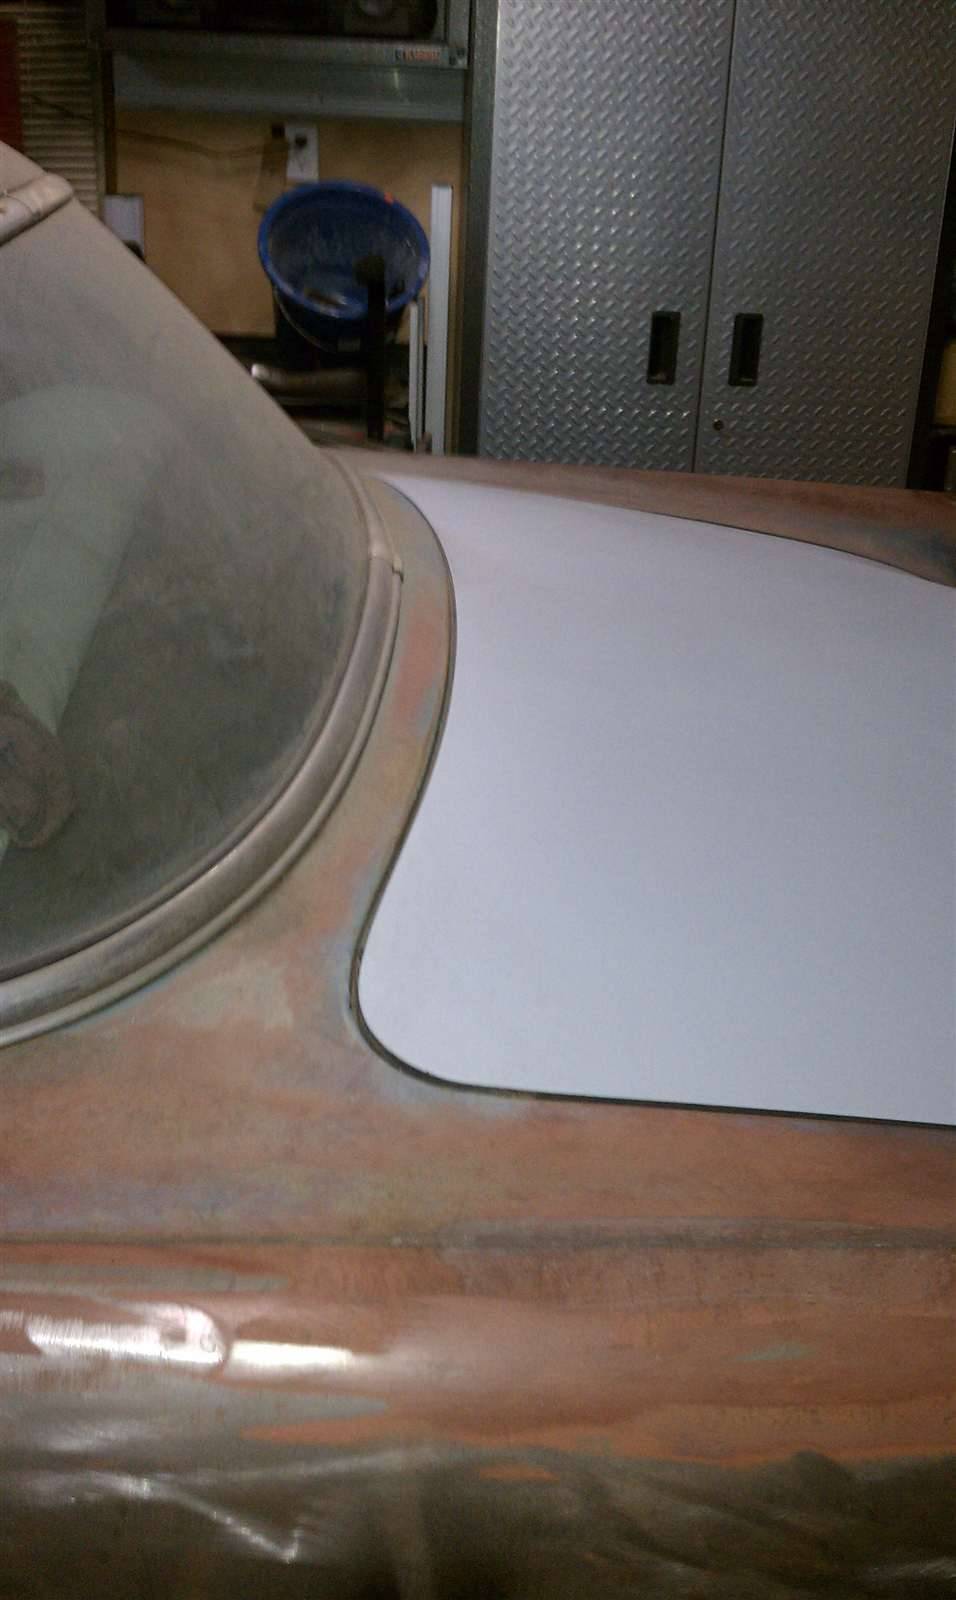 (96.42 KB) (96.42 KB)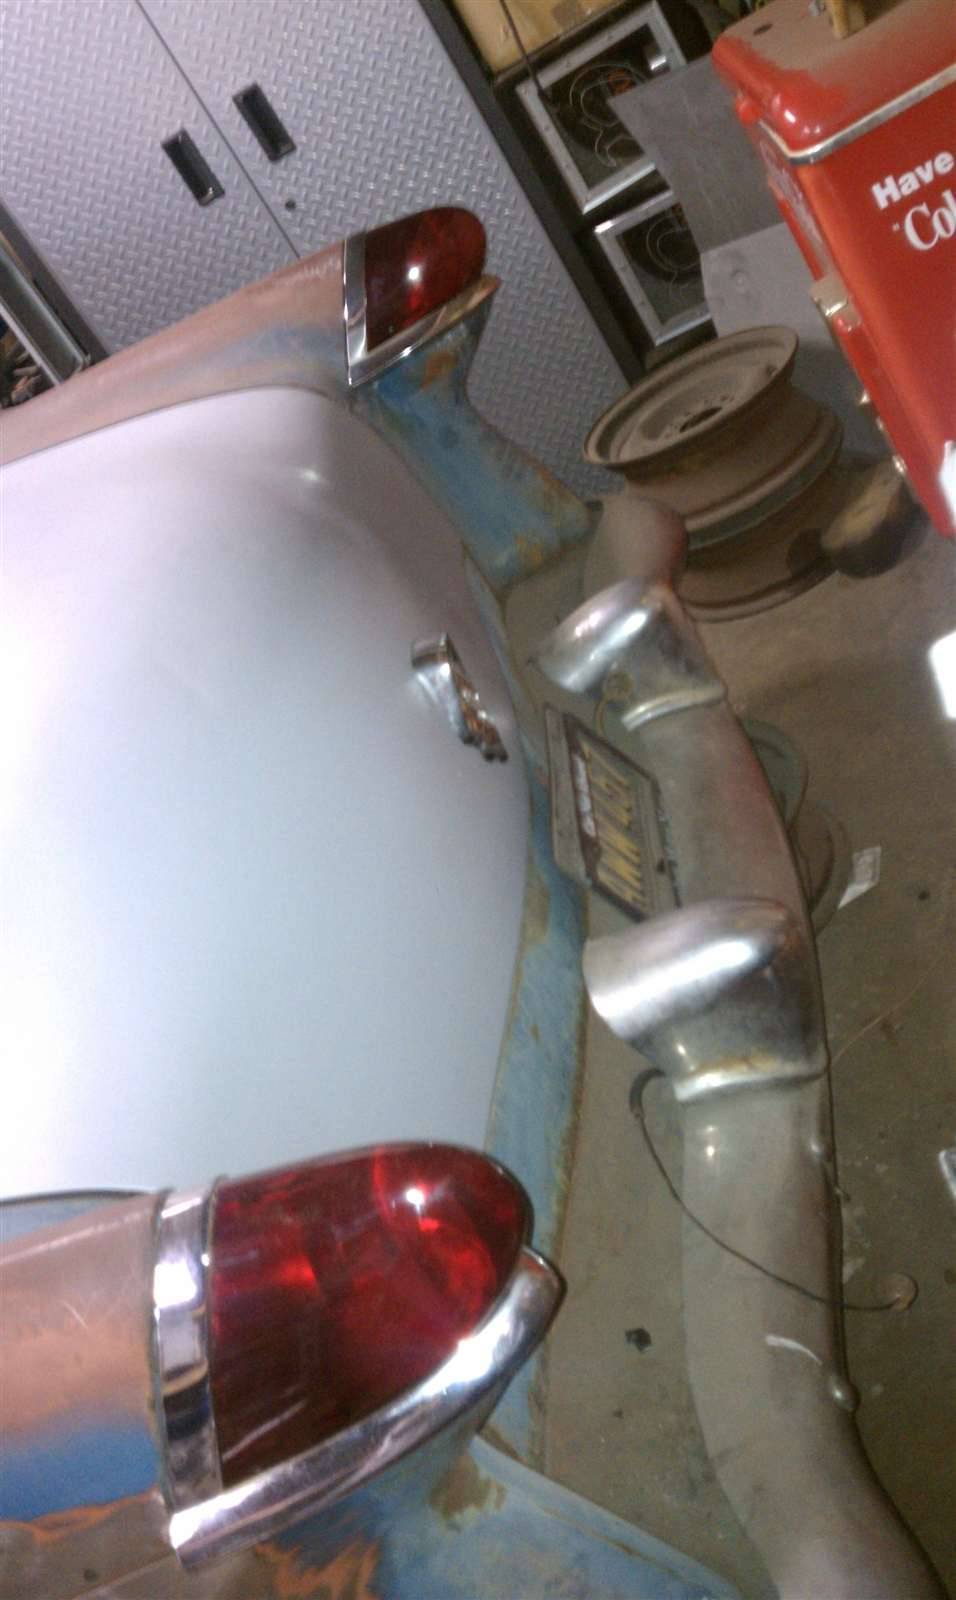 (78.65 KB) (78.65 KB)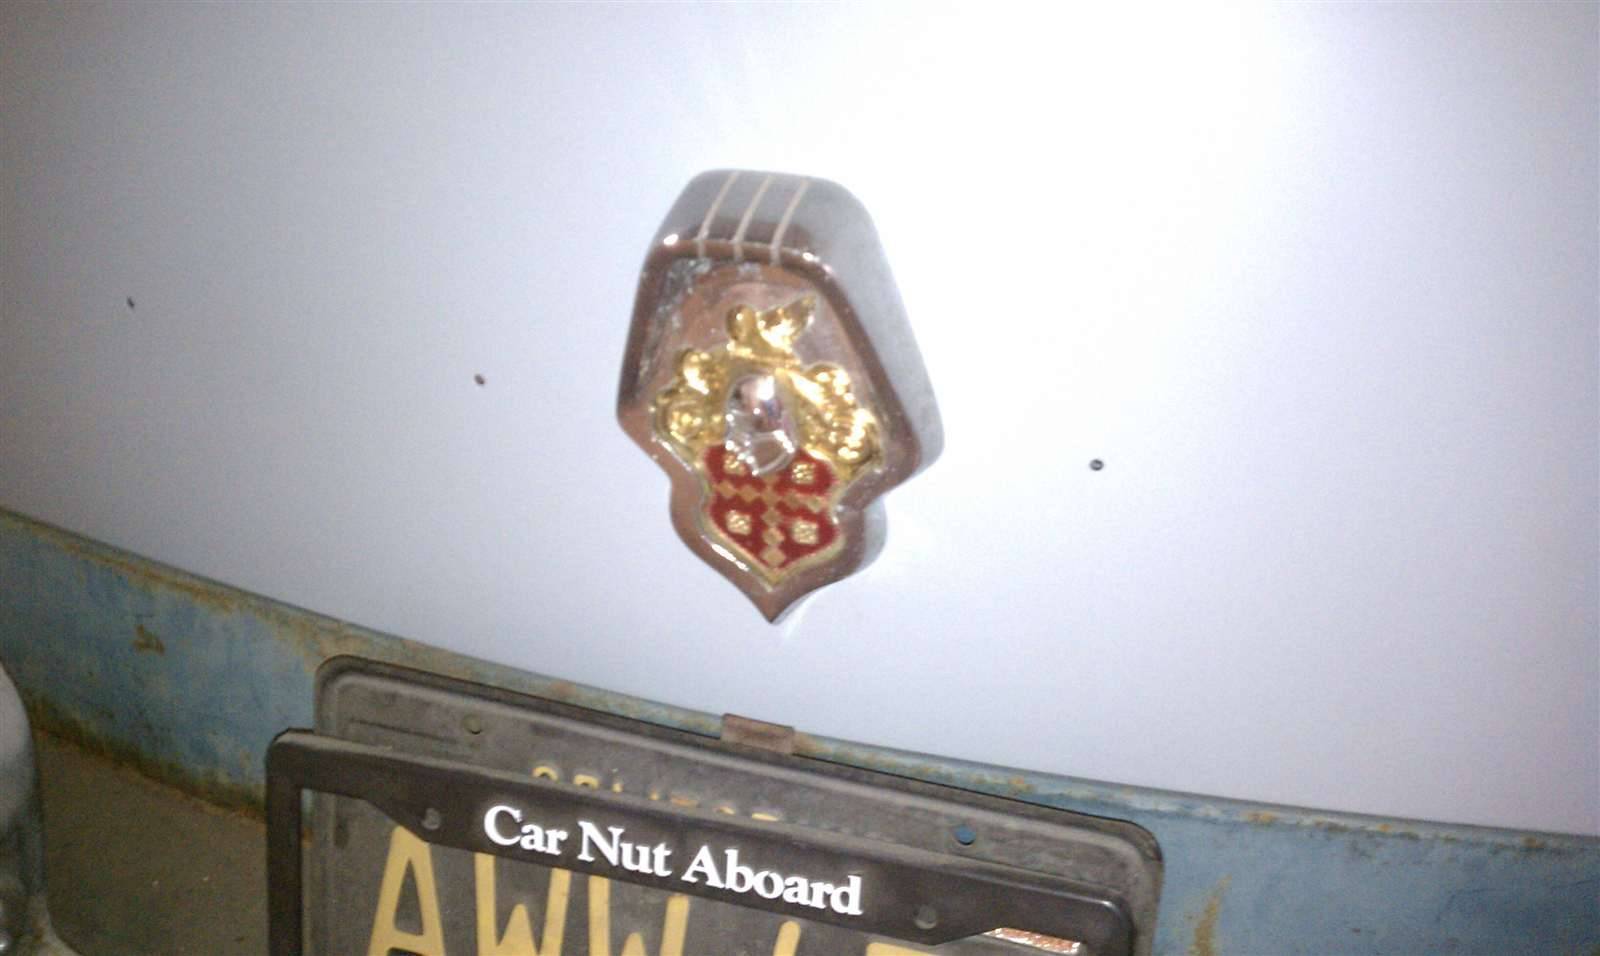 (183.22 KB) (183.22 KB)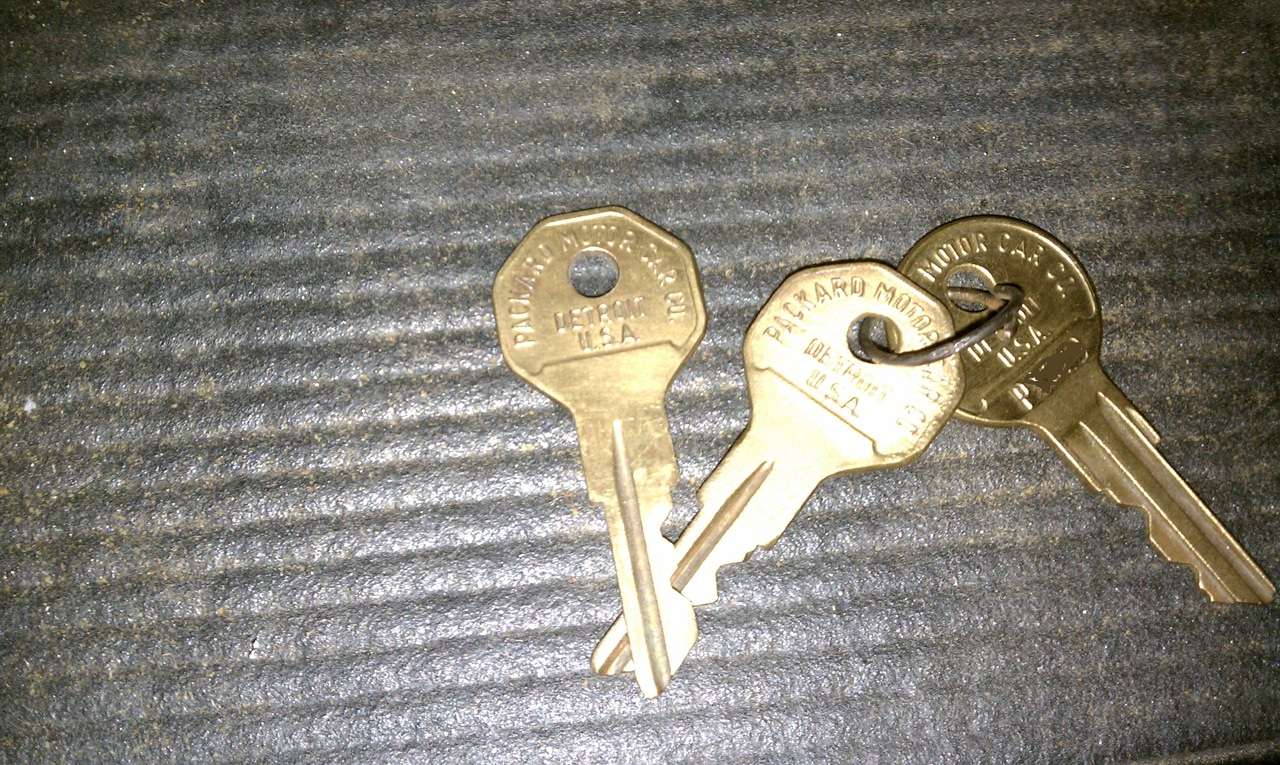
Posted on: 2010/9/9 22:55
|
|||
|
-BigKev
1954 Packard Clipper Deluxe Touring Sedan -> Registry | Project Blog 1937 Packard 115-C Convertible Coupe -> Registry | Project Blog |
||||
|
||||
|
Re: BigKev's 1954 Packard Clipper Deluxe Sedan
|
||||
|---|---|---|---|---|
|
Webmaster
|
With the basic trunk stuff done (except for the license plate and backup lights), I moved back inside the car to finish building up the under dash harnesses.
A couple of changes and additions I had to make to the aftermarket harness. First the alternator exciter wire is fed from a switched 12v source to the alternator in the default harness setup. I cut this wire and grouped both halves of it with the dash cluster group. The two halves will connect to the "Gen" light. I also had to add a wire that runs from the headlight switch grouping to the dash cluster grouping for the dash lights. Also spliced off that same dash light wire to run a wire with the column group for the shift quadrant light, and another wire with the ignition wire grouping for the ignition switch light. I ran an addition wire as I am sure I am missing another dash light somewhere, so I have the wire ready to go. I also had to add a wire for all the Courtesy light grounds. This extends back to the dome light in the rear, the "B" pillar manual switch, and of course the front door pillar switches. It also connects to the ground on the headlight switch and the courtesy light under the dash. So if this wire ground anywhere along those points, it completes the circuit and turns on the dome light and under dash courtesy light. I also had to splice into the power feed for the Dome light and feed it over to the under dash Courtesy light. That power wire will also extend over to the glove box light, which operates on it's own unrelated ground switch. I also checked the black wire that feed up with the column group. It indeed does connect to the quadrant dash light. It appears you have to basically take the column apart to change the bulb as it is inaccessible by removing the quadrant cover. The light bulb is wrapped in a blueish-green plastic and it makes the only the pointer glow green. This is even visible during the day when turned on. I fed it with 12v to test it, and it glowed steady. So I going to leave the old bulb in there for now. When I take apart the column to replace the shift and turn signal arm I will change it out at that time. Only wire I am unsure what to with at this time is the Hazard wire. I may just tape it off for now until I figure out the best way to incorporate it. I guess I need to look at a GM diagram to see how that is wired up. It is supposed to the Hazard power pin on the dash connector on a GM car. Obviously the Packard column doesn't have this. I wonder if it triggers off of a ground or power signal.
Posted on: 2010/9/10 22:16
|
|||
|
-BigKev
1954 Packard Clipper Deluxe Touring Sedan -> Registry | Project Blog 1937 Packard 115-C Convertible Coupe -> Registry | Project Blog |
||||
|
||||
|
Re: BigKev's 1954 Packard Clipper Deluxe Sedan
|
||||
|---|---|---|---|---|
|
Webmaster
|
No garage time this morning as I am off to LA to the Fabric district to see if I can locate some cheap upholstery material for the interior. Actually the wife was going there to look for some material that she can't find locally and figured I would tag along as you never know what you might find in block after block of fabric dealers.
I don't think I will find the exact Blue Stripped broad cloth I am looking for, but if I find something close then that may work. If I cant even find something similar, then I am going to do the interior in '54 Supper Clipper style, which was two-tone solid broad cloth. I cut swatches out of my old interior fabric and washed them to bring along with me. Off to the hunt!
Posted on: 2010/9/11 11:44
|
|||
|
-BigKev
1954 Packard Clipper Deluxe Touring Sedan -> Registry | Project Blog 1937 Packard 115-C Convertible Coupe -> Registry | Project Blog |
||||
|
||||
|
Re: BigKev's 1954 Packard Clipper Deluxe Sedan
|
||||
|---|---|---|---|---|
|
Webmaster
|
Thanks Guy!
Posted on: 2010/9/12 1:34
|
|||
|
-BigKev
1954 Packard Clipper Deluxe Touring Sedan -> Registry | Project Blog 1937 Packard 115-C Convertible Coupe -> Registry | Project Blog |
||||
|
||||
|
Re: BigKev's 1954 Packard Clipper Deluxe Sedan
|
||||
|---|---|---|---|---|
|
Webmaster
|
No fabric was found for the car. Come to find out the block after block of fabric stores in the Fabric District in LA do not deal in anything related to Automotive Fabrics. Oh well. Win some, lose some.
After I got back home I was back out in the garage and working more on the dash electrical. All the sub harnesses are built and fully tape wrapped. Just need to get the actual dash back in so I can finish. With every complete for right now inside the car, it was time to prep all the switches. So I went through all the switches (ignition, headlight, antenna, etc). All the switches were media blasted to clean them up and remove all the corrosion from the terminals. The headlight switch needed two rounds of media blasting as I had to rotate the dimmer on the switch to get all of the rheostat cleaned. I then went over each switch a multimeter to make sure everything worked and nothing had abnormal resistance. I had to take apart and clean out the corrosion from one of my door switches to get it working again. Also I noticed there is a condenser attached the the ACC terminal on the ignition switch. This is not on the wire diagram. Was this installed to reduce ignition noise because of the radio? I also prepped the back side of the dash cluster, and replaced all the 6 volt bulbs with the 12v equivalent. Tomorrow I will need to address all the rust that is covering the back side of the dash. Then once that is all cleaned up, the dash can go back into the car. Attach file: (89.35 KB)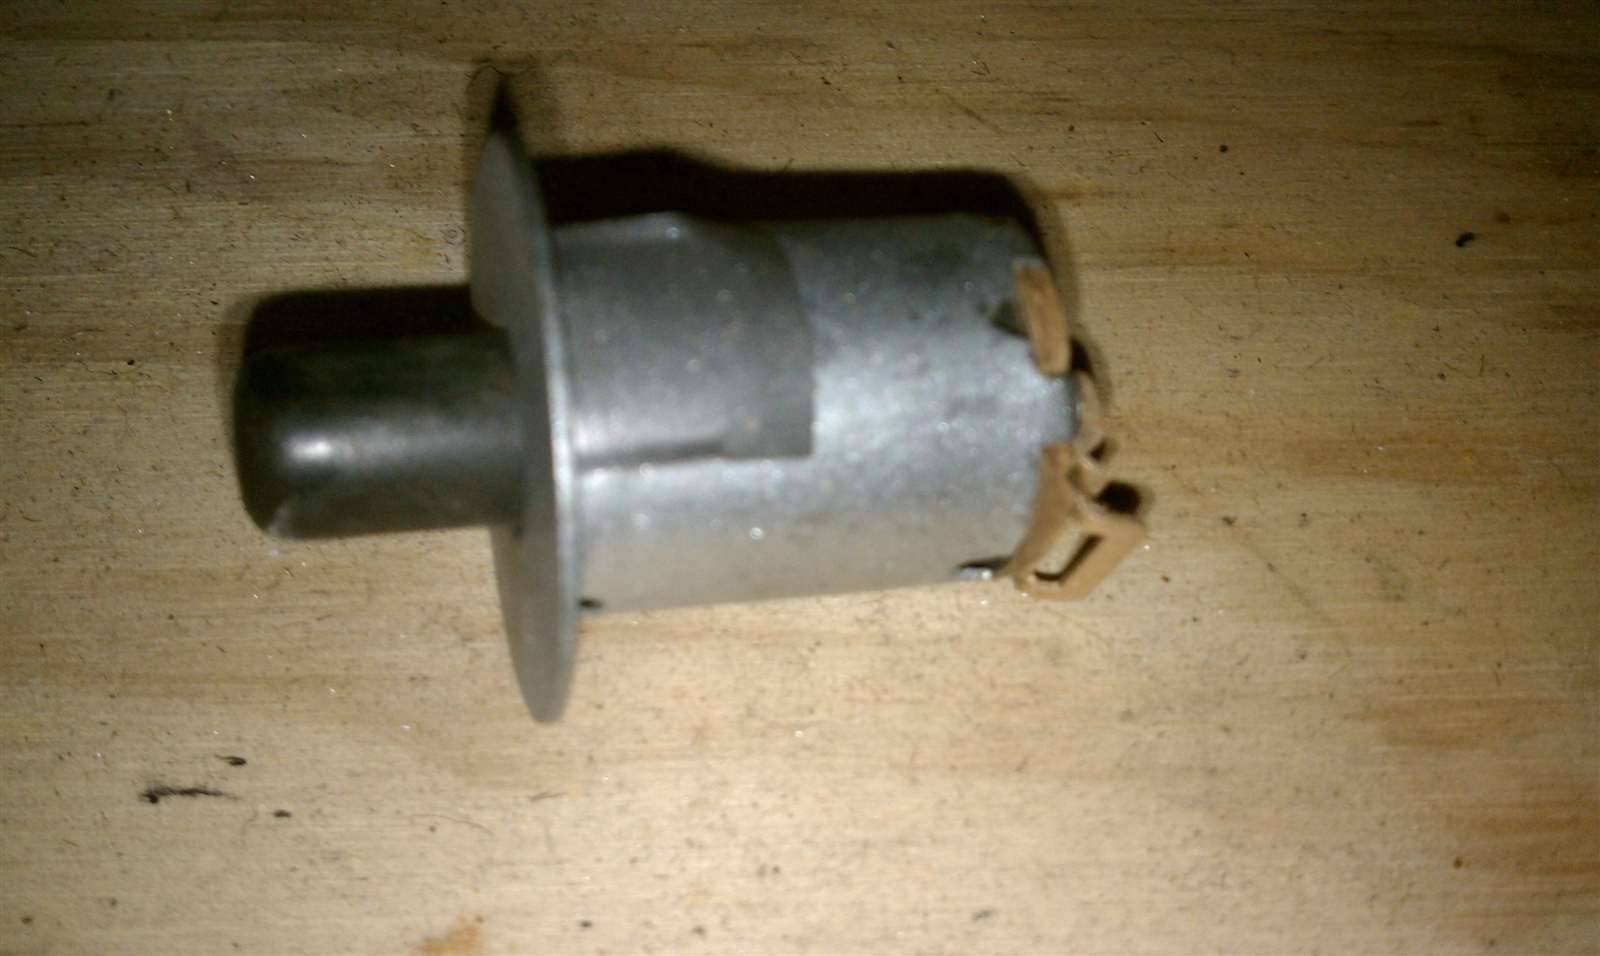 (97.49 KB) (97.49 KB)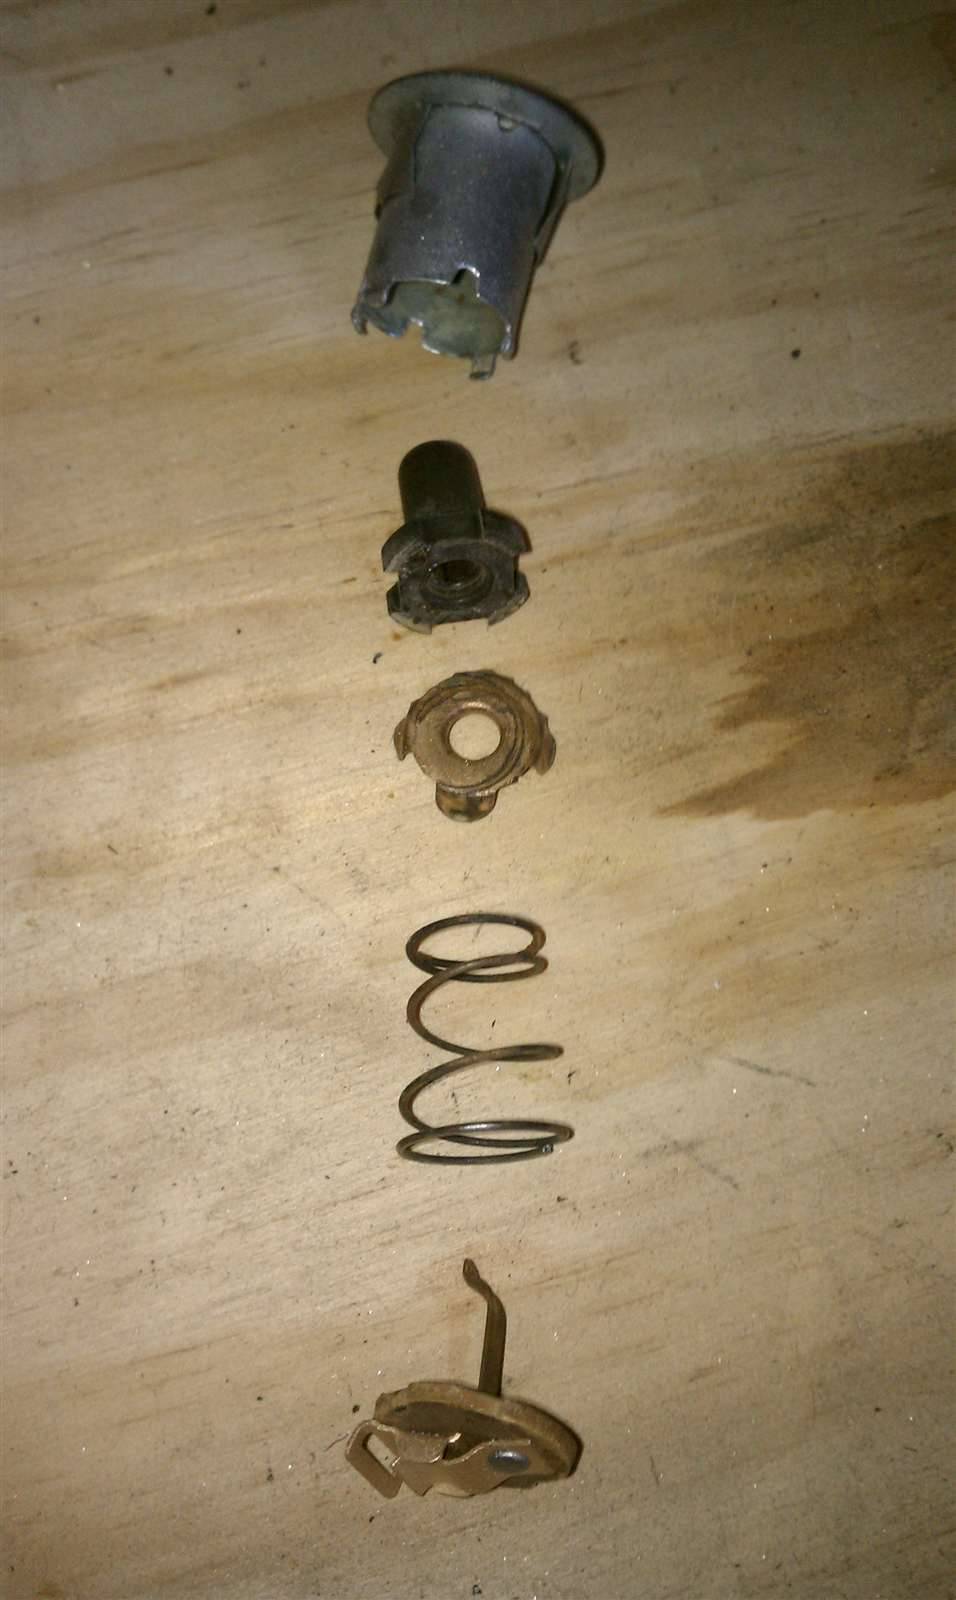 (99.22 KB) (99.22 KB)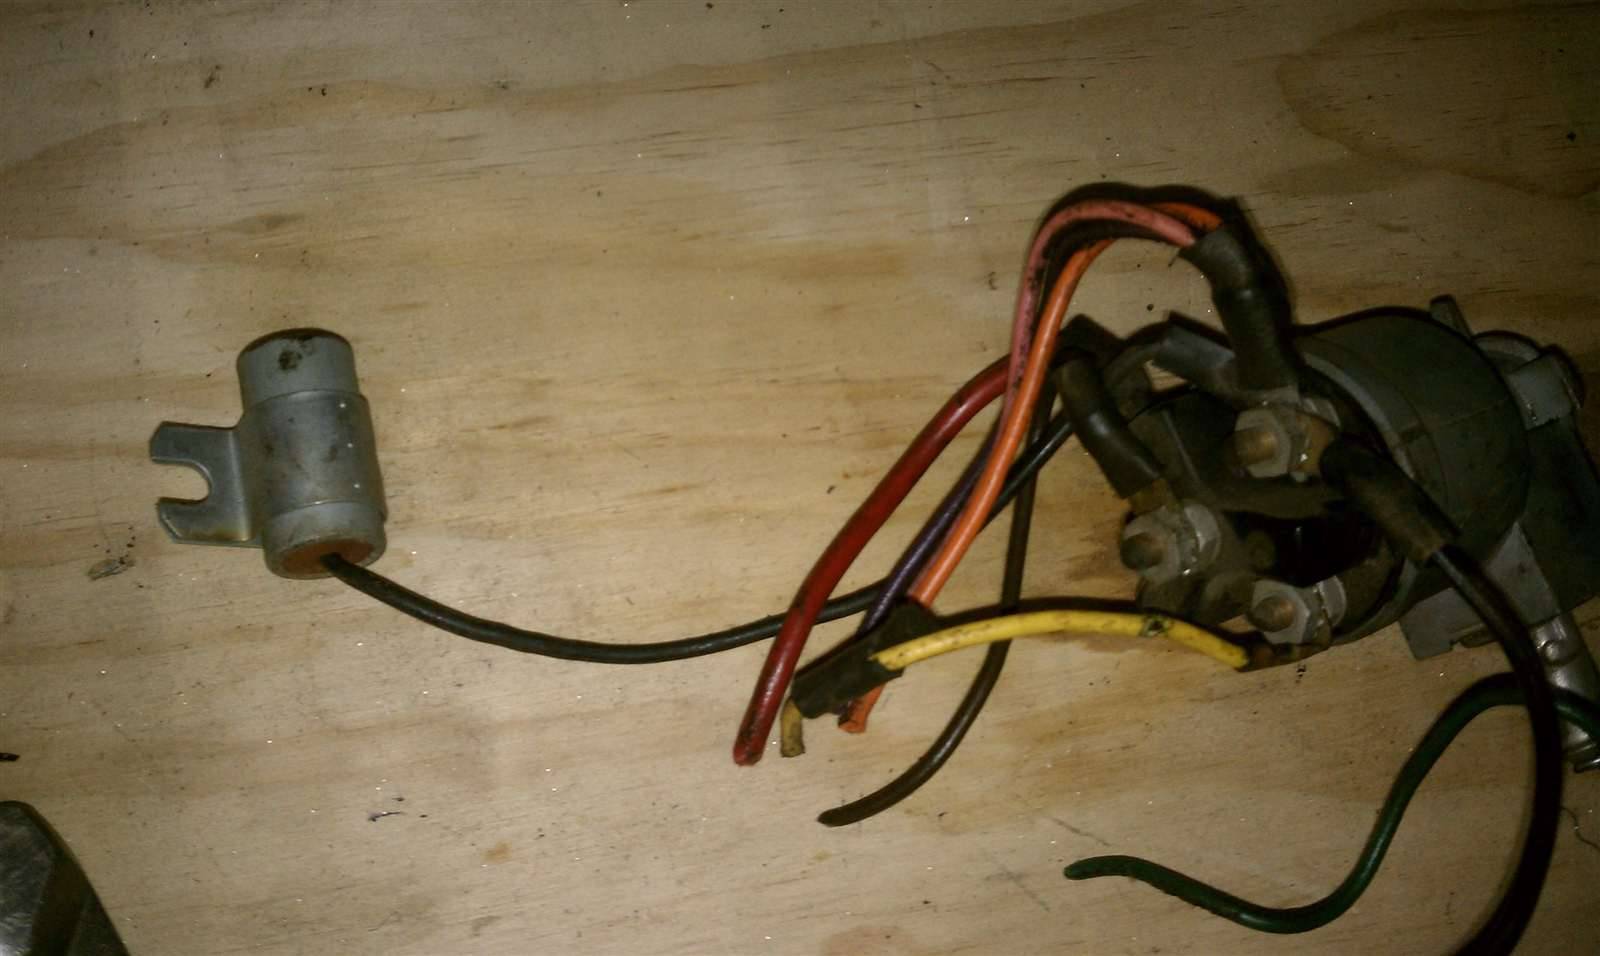 (70.35 KB) (70.35 KB)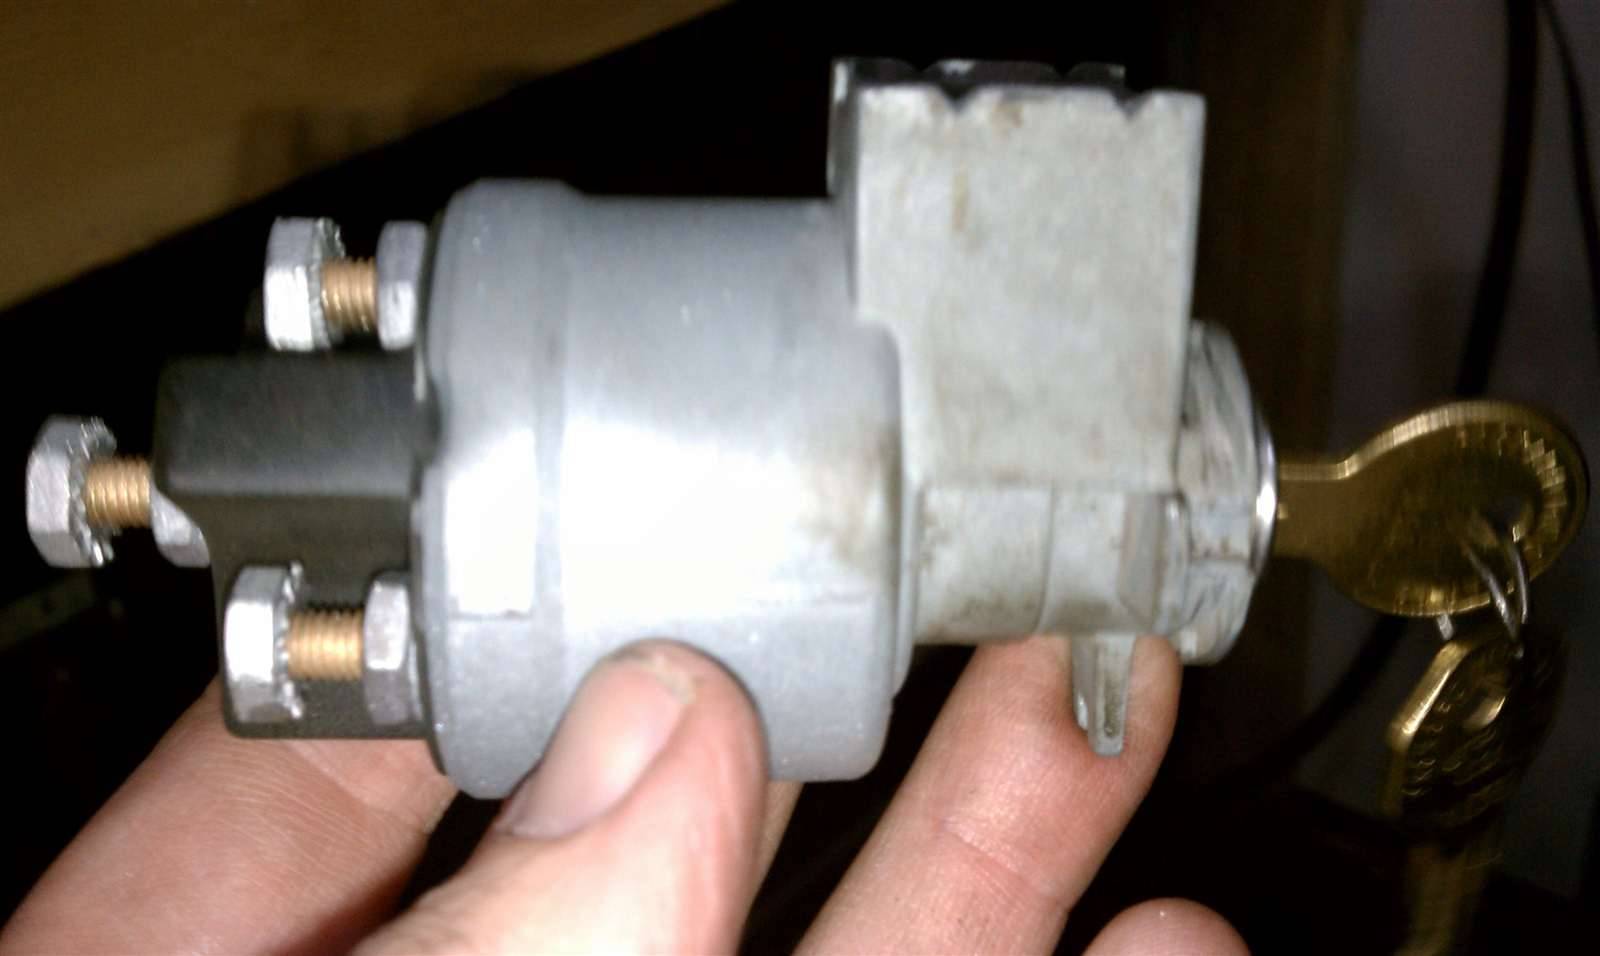 (134.96 KB) (134.96 KB)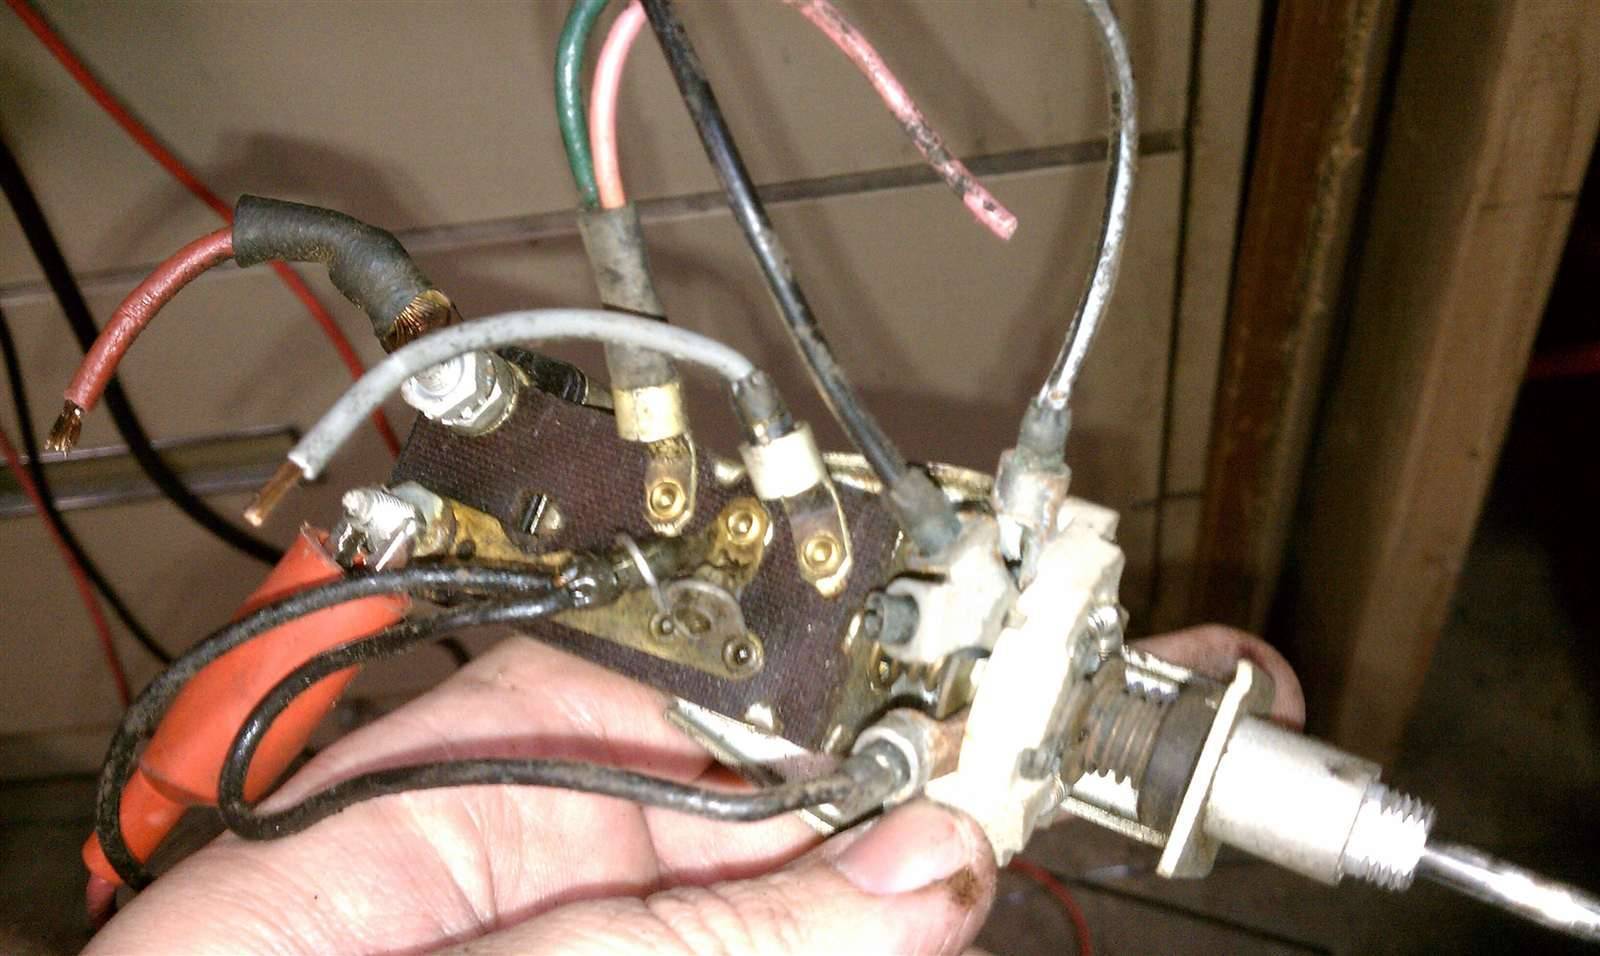 (143.40 KB) (143.40 KB)
Posted on: 2010/9/12 1:51
|
|||
|
-BigKev
1954 Packard Clipper Deluxe Touring Sedan -> Registry | Project Blog 1937 Packard 115-C Convertible Coupe -> Registry | Project Blog |
||||
|
||||
|
Re: BigKev's 1954 Packard Clipper Deluxe Sedan
|
||||
|---|---|---|---|---|
|
Forum Ambassador

|
Very nice job on the loom. When you (or anyone else with switch out) checked the headlight switch, do you remember the condition of the connection at this terminal. I have some switches where the dash lights would work for awhile then go out--or not work at all.
On those switches, that feed terminal and rivet have loosened slightly. I suspect instead of pushing the wire straight down, because of location it was pushed in at an angle and with the leverage, rivet end was stretched. A little resistance, a little heat and eventually a little oxidation and no connection since the contact area is so small. On the good switches I have, that rivet is tight and no terminal movement is possible. On the others, the terminal will wiggle sideways to the extent the location tab at terminal end will allow. I have not found a foolproof way to tighten things up again. Thorough cleaning is a problem which may be contributing to the difficulty. Tightening the rivet is difficult and too much pressure cracks the ceramic yet not enough and no lasting improvement. Electrical rosin core solder I tried did not seem to flow or stick well. Maybe a much bigger iron as it's a big heat sink. Attach file: (48.15 KB)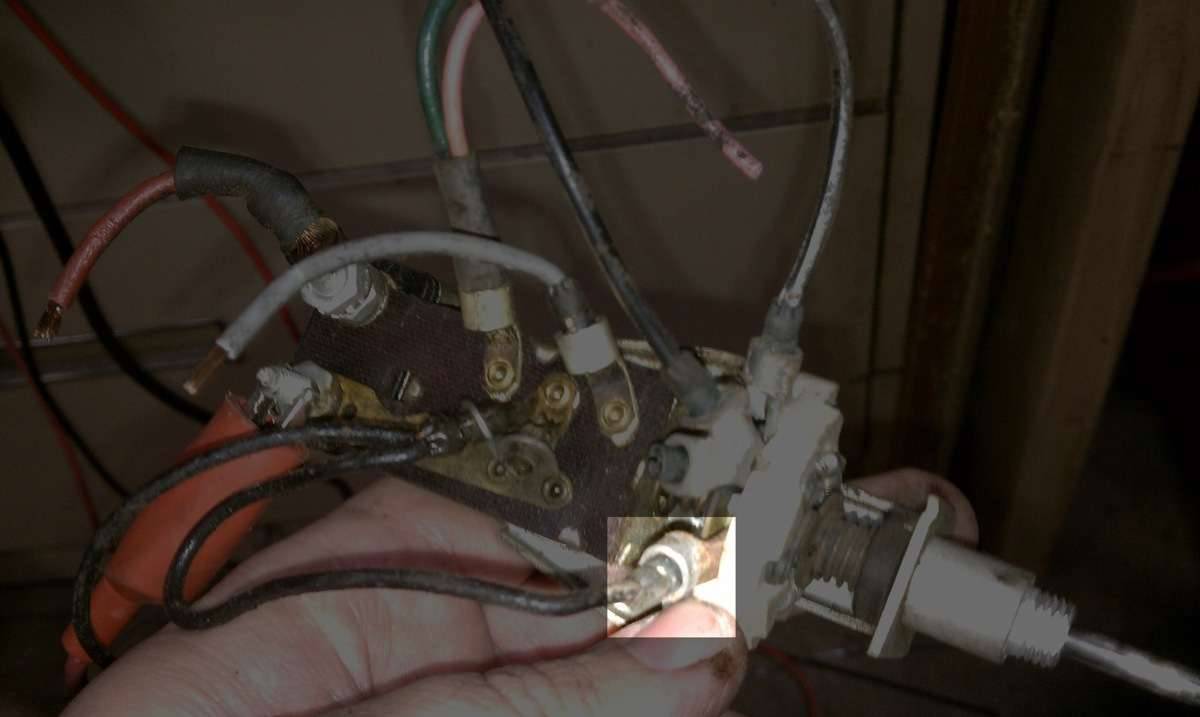
Posted on: 2010/9/12 9:45
|
|||
|
||||
|
Re: BigKev's 1954 Packard Clipper Deluxe Sedan
|
||||
|---|---|---|---|---|
|
Webmaster
|
Howard,
That terminal on my switch was pretty tight. There was really no deflection at that point. Perhaps a small brass nut/bolt with a filed down head would work instead of that rivet? It would allow you tighten it down enough to hold it in place, but not so tight that you crack the insulator. A small drop of loctite would keep it from loosening back up. The worst spot on my switch was on the back side where the dome light grounds when the knob is turned all the way counter-clockwise. There was a lot of corrosion on it so it wasn't making a good contact there.
Posted on: 2010/9/12 11:26
|
|||
|
-BigKev
1954 Packard Clipper Deluxe Touring Sedan -> Registry | Project Blog 1937 Packard 115-C Convertible Coupe -> Registry | Project Blog |
||||
|
||||
|
Re: BigKev's 1954 Packard Clipper Deluxe Sedan
|
||||
|---|---|---|---|---|
|
Home away from home

|
Two little offerings that might be helpful:
I always paint the backs of my dashboard white. Makes any future work easy to see. My favorite method to clean up those rheostats and all the little contact discs down around the center of the shaft is to daub them with valve lapping compound then work them back and forth for a while. Afterwards blast everything clean with brake cleaner and then lube with a touch of white lube. Works really well. Did you ever find a pattern for the cardboard divider behind the back seat? Just took one intact out of a 53.
Posted on: 2010/9/12 11:57
|
|||
|
||||
|
Re: BigKev's 1954 Packard Clipper Deluxe Sedan
|
||||
|---|---|---|---|---|
|
Webmaster
|
Ross,
I still haven't had a chance get a pattern for the trunk divider. I was going to make a new divider out of black fiberboard (door panel board) but just haven't got around to climbing in the trunk with some thin cardboard to try to make a pattern. If I can ask you to make me a tracing of the pattern that would be most helpful. I appreciate it!
Posted on: 2010/9/12 12:17
|
|||
|
-BigKev
1954 Packard Clipper Deluxe Touring Sedan -> Registry | Project Blog 1937 Packard 115-C Convertible Coupe -> Registry | Project Blog |
||||
|
||||


