|
Re: KPack's 1954 Panama
|
||||
|---|---|---|---|---|
|
Forum Ambassador

|
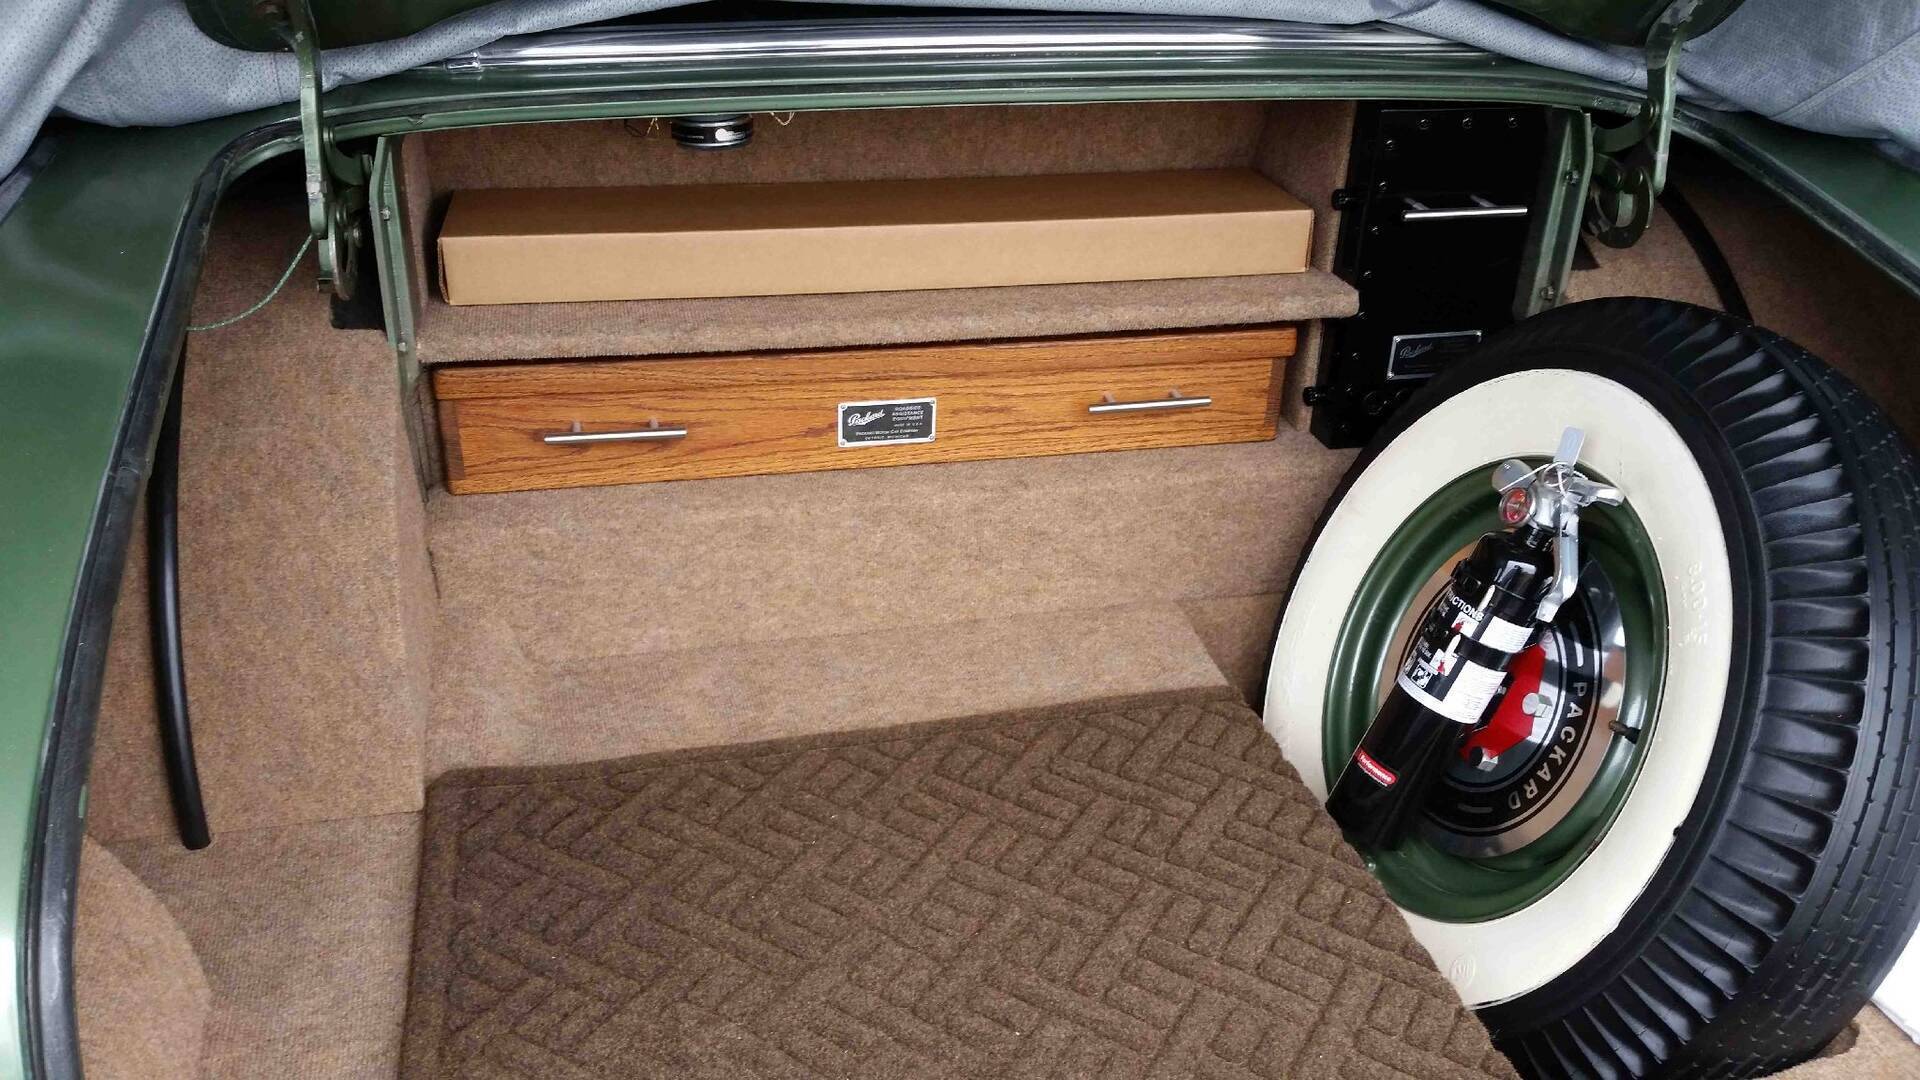
Very nice trunk. What is the round black item over the L wheel well?
Posted on: 2020/12/2 19:41
|
|||
|
Howard
|
||||
|
||||
|
Re: KPack's 1954 Panama
|
||||
|---|---|---|---|---|
|
Home away from home

|
Very nice trunk.
What did you make the fire extinguisher holder out of? What do the metal plates say?
Posted on: 2020/12/2 19:46
|
|||
|
||||
|
Re: KPack's 1954 Panama
|
||||
|---|---|---|---|---|
|
Home away from home

|
HH56 - The black item is a piece of irrigation tubing split along its length, actually a sliver of material the width of the pinch weld was removed from the plastic tubing. It's decorative only and hides the pinch weld. ACE was having a sale on a lot of paint samples around 2-4 oz each. While the carpet looks one color it is actually a blend of many, I think I have enough to make the tubing the same color(s) as the carpet. If you look behind the spare I'll be able to see the right pinch weld cover.
Let the ride decide - That is a piece of 0.100 inch thick 6016-T6 cut into a 12 inch diameter circle. I printed some decals that mimic the typical Packard hub cap. The extinguisher bracket hides the decal split line quite well (I'm limited to 8.5 X 11 decals, so it must be 2 pieces). Since my last name is Packard I took the liberty to print some plates that mimic the type of plates that you might find say on the trunk mounted AC unit. The tag on the tool box reads: Packard Emergency Roadside Equipment, and then Packard Motor Car Company Detroit, Michigan. Again the plate is 6061-T6 with a decal . . . actually when I'm trying to get a jet black background I have to use 2 decals, one on top of the other. The reflectivity of the aluminum plate coupled with the amount of ink deposited during printing results in a gray color if only one decal is used . . . same is true for the pseudo hub cap . . . both the red and the black needed two layers. The extinguisher is the modern version of Halon, rated excellent for electrical and liquids . . . not so much for wood. The claim is zero clean-up after discharge, that's what I wanted. The black box on the right holds 2 Optima six volt batteries for the 12 volt negative ground electrical system that 'floats' inside the car. That's for a modern radio, GPS, and various USB power outlets. It's a constant loss system, but at the power demand of modern radios results in days on continuous use. The batteries are recharged after each use of the car . . . no more than 2-3 hours of use. In a pinch either of those batteries could be used under the hood. The box is yet another 6061 wonder that bolts to the right hinge reinforcement. The upper shelf is attached to another plate attached to the left hinge reinforcement. This shelf is another piece of 6061 rigidly attached to the vertical plates . . . quite rigid to 'racking' . . . there is a piece of plywood, with bull nose, to hold the upholstery and increase the stiffness to vertical loads. The message to Kevin was the easy in which the 'hump' could be made into a shelf, and once there's a shelf the craziness may begin. I should stop here because I think high jacking Kevin's thread distracts from his progress on his '54 project. I can't believe the pace! dp
Posted on: 2020/12/3 0:32
|
|||
|
||||
|
Re: KPack's 1954 Panama
|
||||
|---|---|---|---|---|
|
Home away from home

|
JW - so you used the spray adhesive to attach the carpet directly to the metal? I'm almost sad to cover it all up because I worked so hard at stripping it to bare metal, repairing rust, priming, seam sealing and painting. But a finished trunk will be more functional and aesthetically pleasing. Love the way your trunk turned out!
David - You're not hijacking at all, I'm happy to see different ideas. I never would've thought to put a shelf back there. And the metal plates and decals are awesome! The extinguisher bracket is especially creative. I will likely just end up covering everything up as is, but I like what you've done on yours. And the tan looks really nice. I didn't go with that because the rest of the car is blue and I figured gray would go better with that, but that tan color is sharp. -Kevin
Posted on: 2020/12/3 1:13
|
|||
|
||||
|
Re: KPack's 1954 Panama
|
||||
|---|---|---|---|---|
|
Home away from home

|
Kevin, I believe that is correct. Spray and trim adhesive. I may have left the flooring carpet loose, but can't recall for sure. Unlike David's trunk, I was able to make the carpeting fit over the fenders pinch seams. Here are some more photos.
Attach file:  (54.98 KB) (54.98 KB)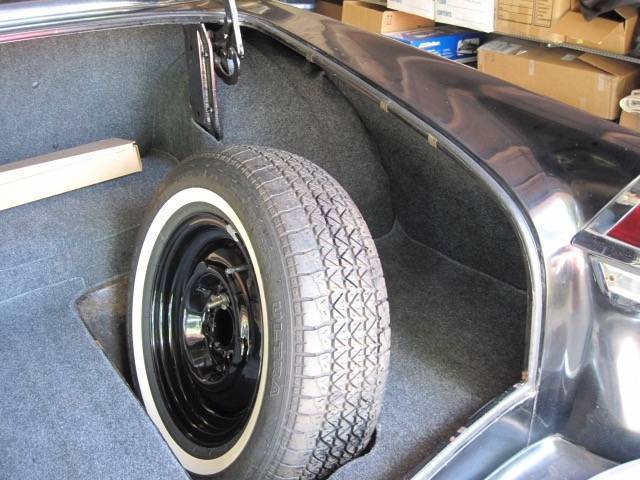 (55.69 KB) (55.69 KB)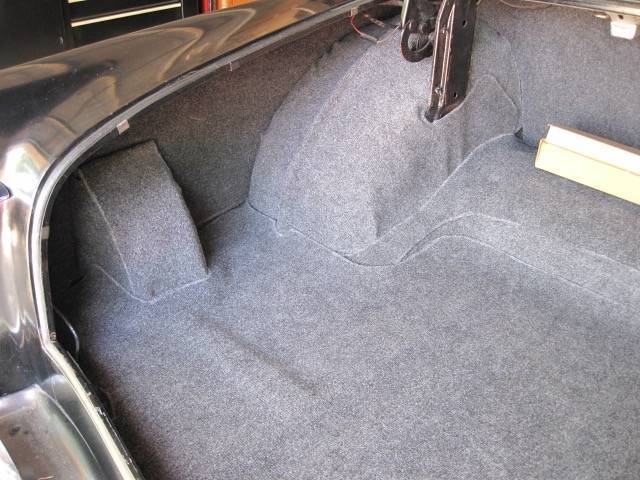 (33.80 KB) (33.80 KB)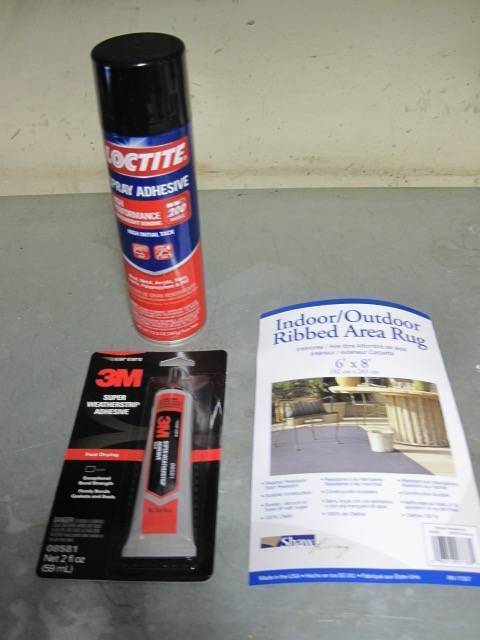
Posted on: 2020/12/4 13:42
|
|||
|
We move toward
And make happen What occupies our mind... (W. Scherer) |
||||
|
||||
|
Re: KPack's 1954 Panama
|
||||
|---|---|---|---|---|
|
Home away from home
|
Slow progress, but progress nonetheless. I did more work on the trunk, following JW's example on his. For now I did the whole floor sections, but not the wheel wells or sides. Not sure if I'm going to do those or not, but at least I have a semi-finished trunk. It does look a lot better than what it did when I got it.
My carb rebuild parts came in from Mike's Carburetor Parts, so I got to work on rebuilding my carb. I am totally clueless when it comes to how carbs work, but I took lots of pictures of everything while I was disassembling. The Motors manual is also very helpful. Good diagrams of all the parts for each system. The float bowl was completely empty when I opened it. Bone dry. And there was a fairly thick layer of grime and junk in it. I bought a gallon of carb cleaner and soaked all the parts and cleaned them up as best I could. Lots of scrubbing and quite the mess. I scrubbed everything with soap and water afterwards, and blew it all out until it was completely dry. Things cleaned up fairly nicely I think. I painted the lower black because after cleaning it up it appeared to be bare iron and I don't want it to rust. The kit I got from Mike's seems like it's pretty well put together. All the gaskets match. Parts seem well made. Not sure what this pin is, but the one in the kit was twice as long so I put the old one back in. The accelerator pump is longer on the original as well. Is there a way to change the length on the new one? Lastly, the gas in the filter bowl is yellow. The gas in the tank is new ethanol free (10 gallons). Why in the world would my gas be this color? Fuel pump issues? Also, then trying to start the car last no fuel was going into the bowl....could this be caused by air getting into the lines at the connections? -Kevin Attach file:  (108.32 KB) (108.32 KB)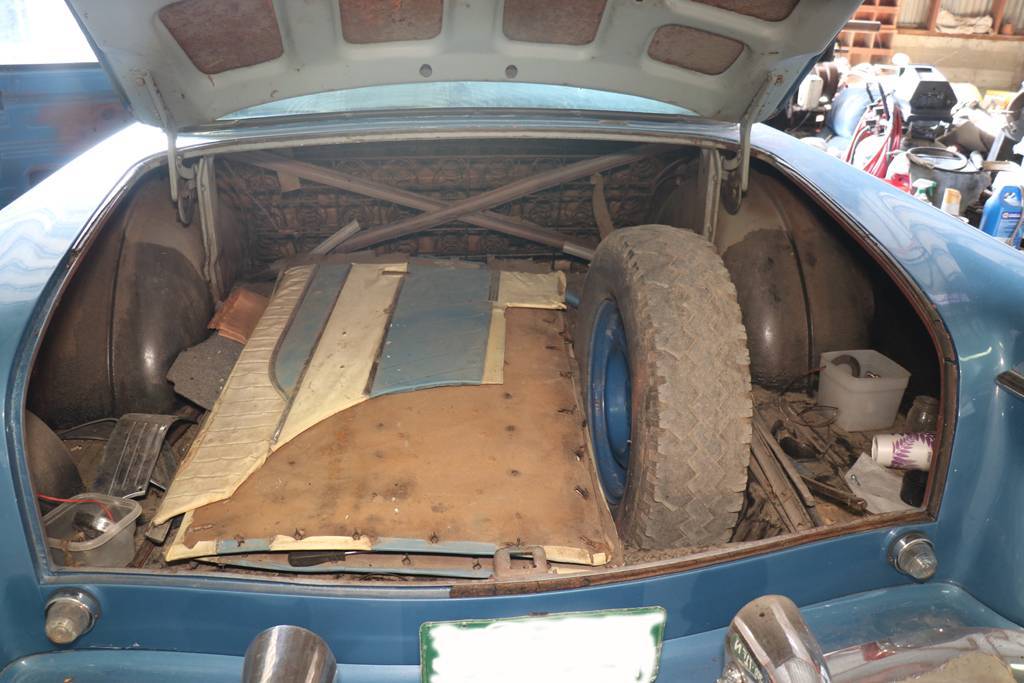 (104.46 KB) (104.46 KB)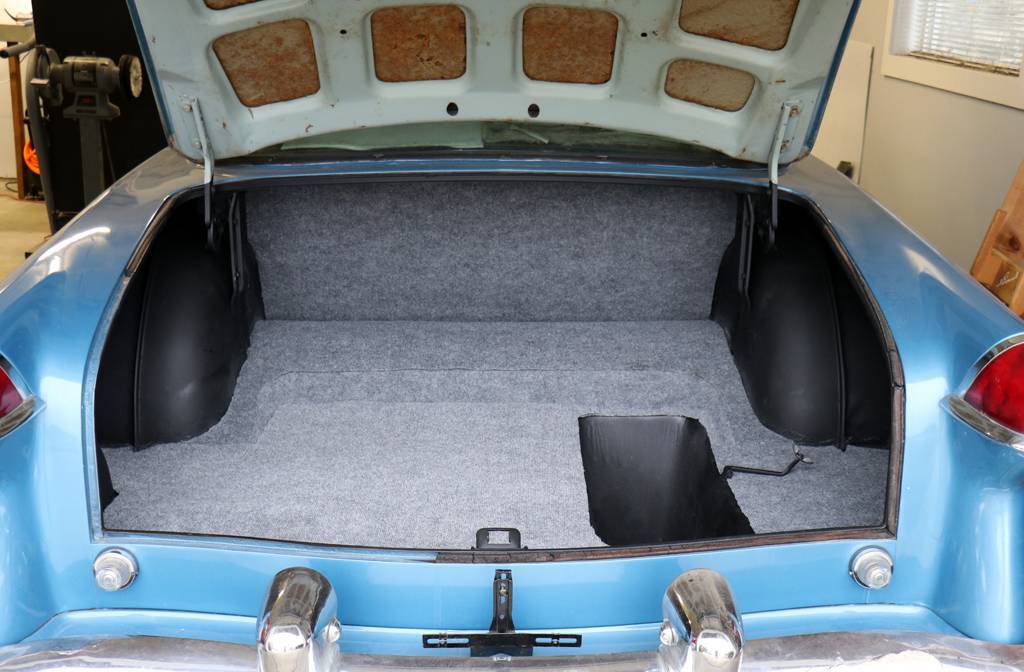 (113.03 KB) (113.03 KB) (127.98 KB) (127.98 KB) (118.16 KB) (118.16 KB)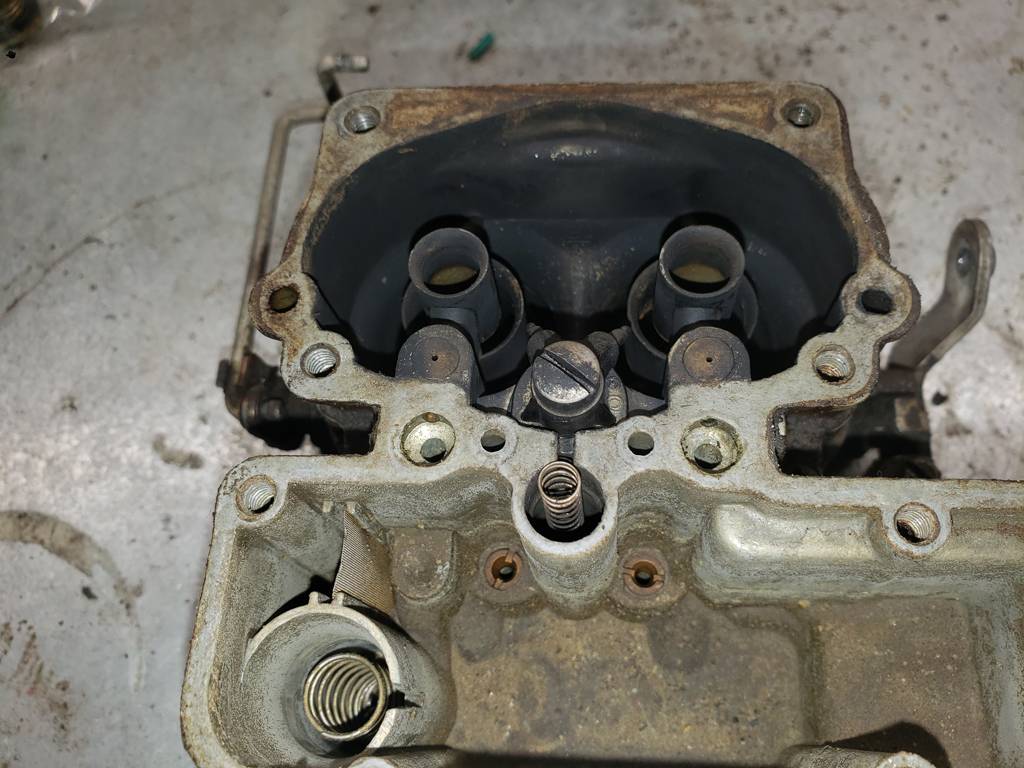 (109.37 KB) (109.37 KB) (88.73 KB) (88.73 KB)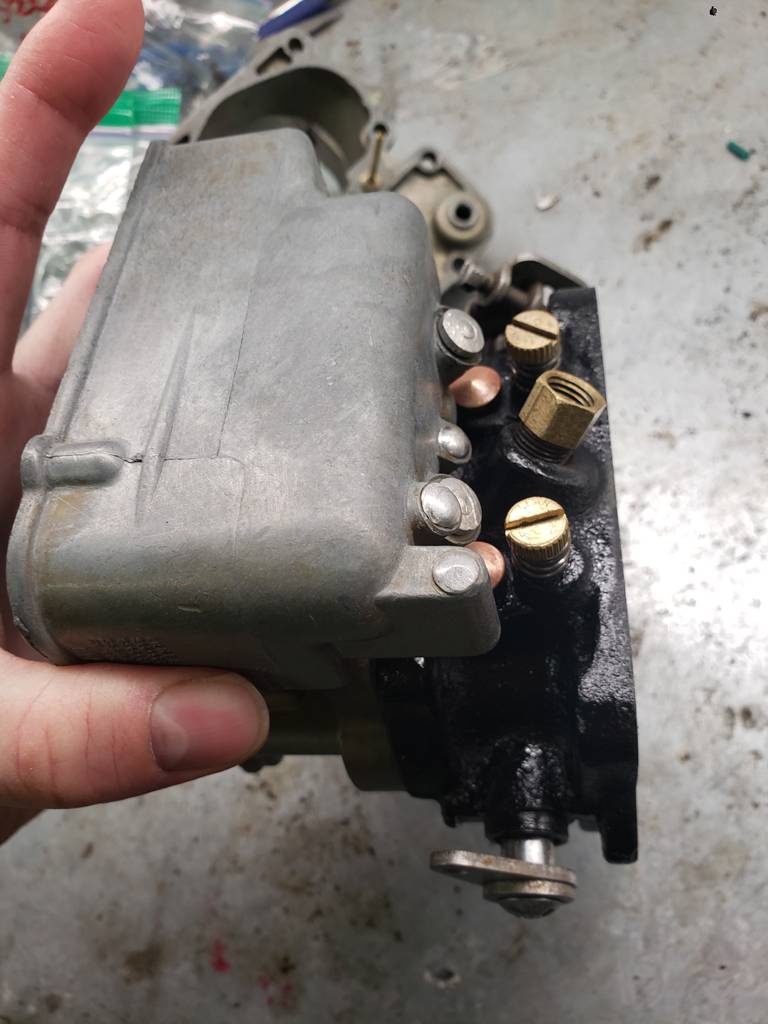 (145.65 KB) (145.65 KB)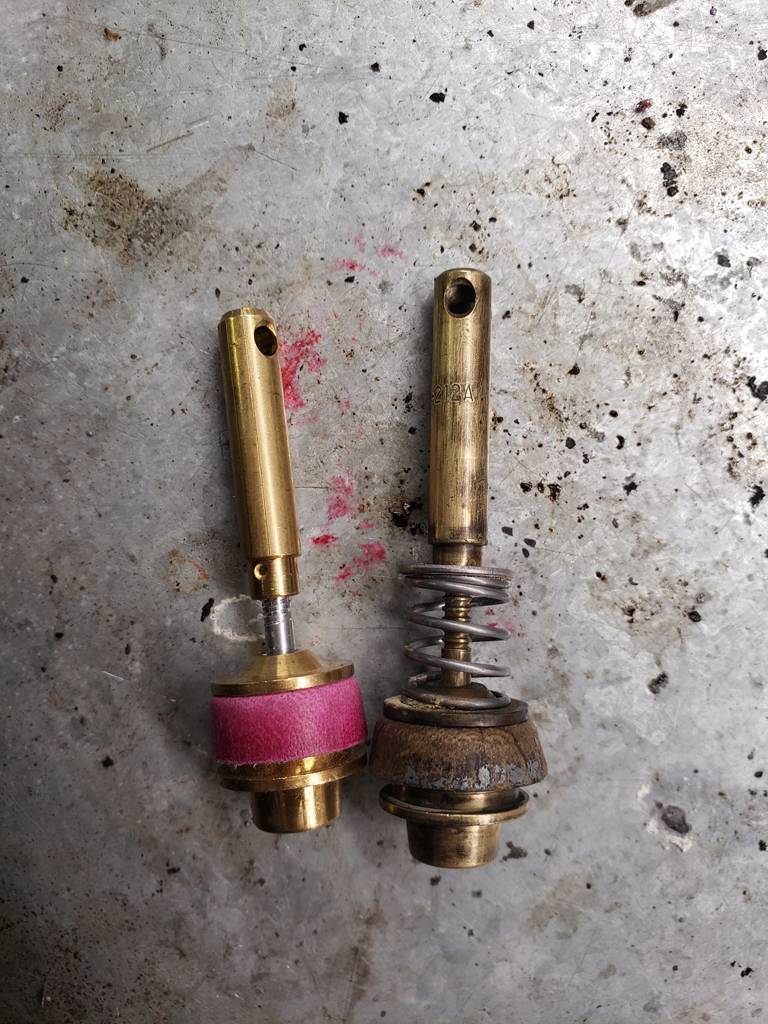 (118.58 KB) (118.58 KB) (83.79 KB) (83.79 KB)
Posted on: 2020/12/7 21:15
|
|||
|
||||
|
Re: KPack's 1954 Panama
|
||||
|---|---|---|---|---|
|
Home away from home

|
The "pin" is the needle valve and must be replaced as a set with the seat. The one with the kit was designed to use with the seat from the kit.
Your old accelerator pump appears to have had an adjustable length and is extended but the new shorter one should not be a problem. Did you take all the pressed-in plugs out too? As bad as the condition seems, it wouldn't be a bad idea, especially if the kit came with replacements.
Posted on: 2020/12/7 21:31
|
|||
|
||||
|
Re: KPack's 1954 Panama
|
||||
|---|---|---|---|---|
|
Just can't stay away
|
Love the progress Kevin, great work on cleaning the carb, they can be thick with gas and ethanol residue (yuck).
Looks like the accelerator pump has a thread where the new one can be extended or shortened. The pin is the jet I believe? I'll let someone with more knowledge on this carb answer that one definitively.
Posted on: 2020/12/7 21:34
|
|||
|
- Anthony
1955 Packard Clipper Custom 1951 Kaiser Deluxe |
||||
|
||||
|
Re: KPack's 1954 Panama
|
||||
|---|---|---|---|---|
|
Home away from home
|
As for the yellow fuel in the filter, it's little picking up rust and dirt from inside the lines and will probably clear up in time. Should also invest in not only a vacuum gauge and one that can also test fuel pressure to test the pump.
Also, be sure to soak the new accelerator pump's leather in oil and be very careful when installing it so as to not nick the edge.
Posted on: 2020/12/7 21:50
|
|||
|
||||


