|
Re: Air Conditioning Again.....
|
||||
|---|---|---|---|---|
|
Forum Ambassador

|
I know it's not quite apples to apples with the vintage unit but maybe of interest showing some routing that's available and what I did on my custom made unit in trying to duplicate the factory in dash setup. The blower is not installed yet but that's the only major thing remaining.
Your bracket and plumbing will probably all be on the passenger side and be all hoses rather than partial metal tubing--but the basics and most openings are the same--just a mirror image. Attach file:  (37.55 KB) (37.55 KB)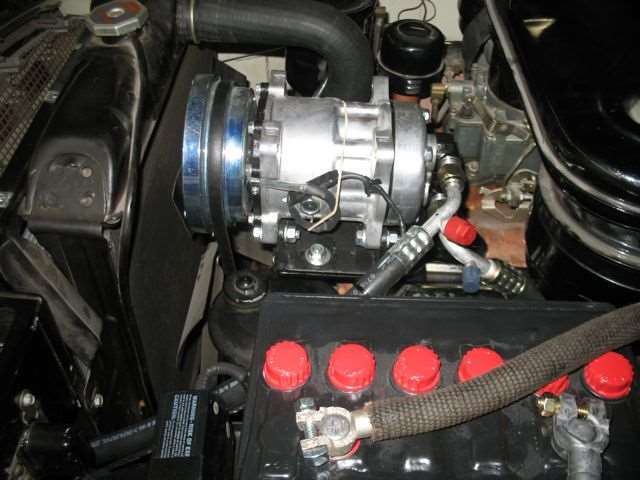 (41.05 KB) (41.05 KB)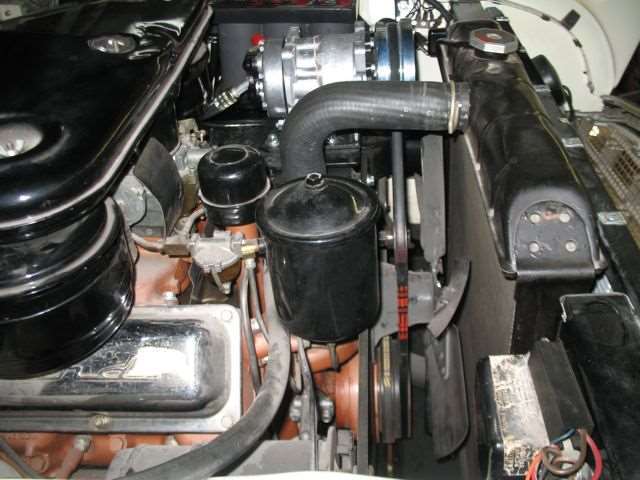 (39.60 KB) (39.60 KB)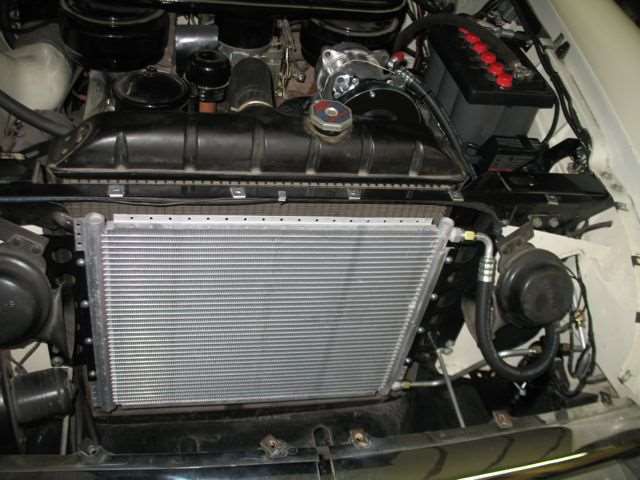 (37.80 KB) (37.80 KB)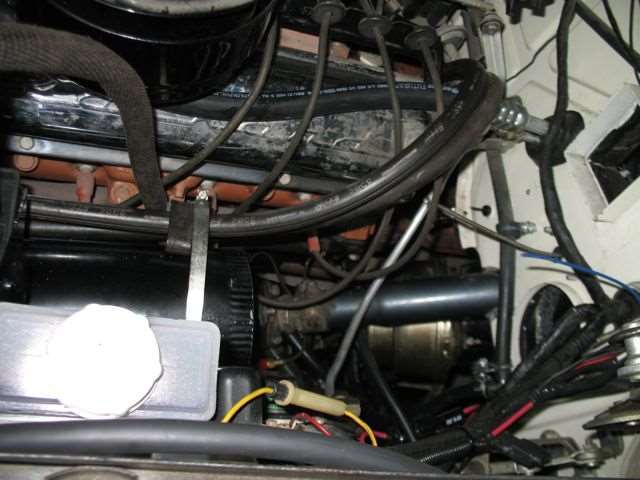 (29.13 KB) (29.13 KB)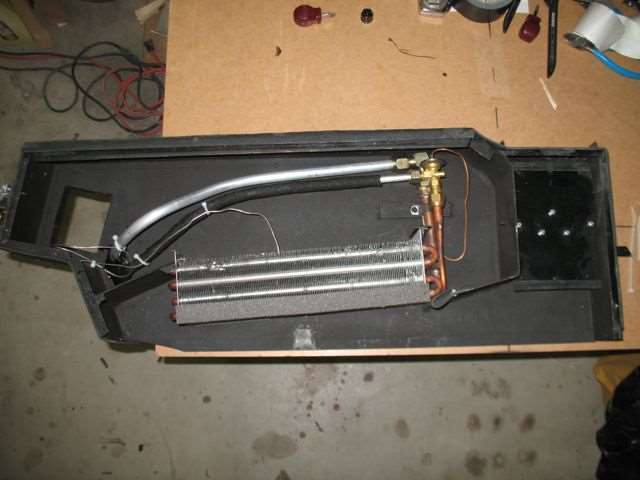
Posted on: 2012/1/9 13:48
|
|||
|
Howard
|
||||
|
||||
|
Re: Air Conditioning Again.....
|
||||
|---|---|---|---|---|
|
Home away from home
|
Nifty evap/orifice/box setup!
Posted on: 2012/1/9 14:37
|
|||
|
||||
|
Re: Air Conditioning Again.....
|
||||
|---|---|---|---|---|
|
Home away from home

|
G'day Men,
As somebody once said, you show me yours and I'll show you mine. It's been awhile coming but from downunder, here is my contribution to this topic. The job is almost finished and she's booked in for a final check of my work and a regas tomorrow, so hopefully we'll have cool air on tap after then. It's 95 F here today so it's time! The rabbits ears or rams horns mount has been fitted and the compressor mounted and pulleys lined up - no mean feat let me tell you. Nothing fitted just right first go and a fair bit of re-engineering and a lot of swearing finally got it all together. I wouldn't advocate anyone else go down this compressor mount track as although the unit seems very strongly made (cast iron), the mounting points are not symmetrical. The only way I could get it lined up was to have a full length bolt at the pivot point and a 3/8" bolt one side and a 5/16" bolt on the other side of the adjustment points. Adjustment is itself an interesting feature as there isn't a lot anyway but to tighten the belt, the compressor is moved inwards. That is, moving it outwards like you would think actually reduces the distance to the bottom pulley and thus slackens the belt. It took me three buy and return belt deals to finally get the right size which allowed sufficient tension, but even then the idler pulley had to partially unbolted to do it as it didn't allow much adjustment either. Still, all good now. I guess the purists among us aren't going to approve of this but I have mounted an electric fan in front of the condenser via my home made mount. It's wired up to work immediately the air con is switched on (ie, it always runs with the air con on). I have also fitted an under dash switch which allows me to switch the condenser fan on independently of the air con (ie, when the air con is off) for emergency engine cooling if needed. You can see the two relays on the inner guard just above the hose fittings, one for the fan and one for the compressor. You won't be able to see them with the lid back on. By the way, I eventually opted for new hoses and fittings, new TX valve and had the condenser and evaporator coil flushed. All dismantling and reassembly was done by myself which is why it's taken so long to get this stage. The big advantage to me of this is that the impact to my hip pocket shouldn't be so bad. I haven't got final costings as yet as the hose maker is also the fellow who will be doing the gas recharge, and he hasn't billed me yet. If anybody would like some more pic's just let me know. Regards, John Attach file: (125.37 KB)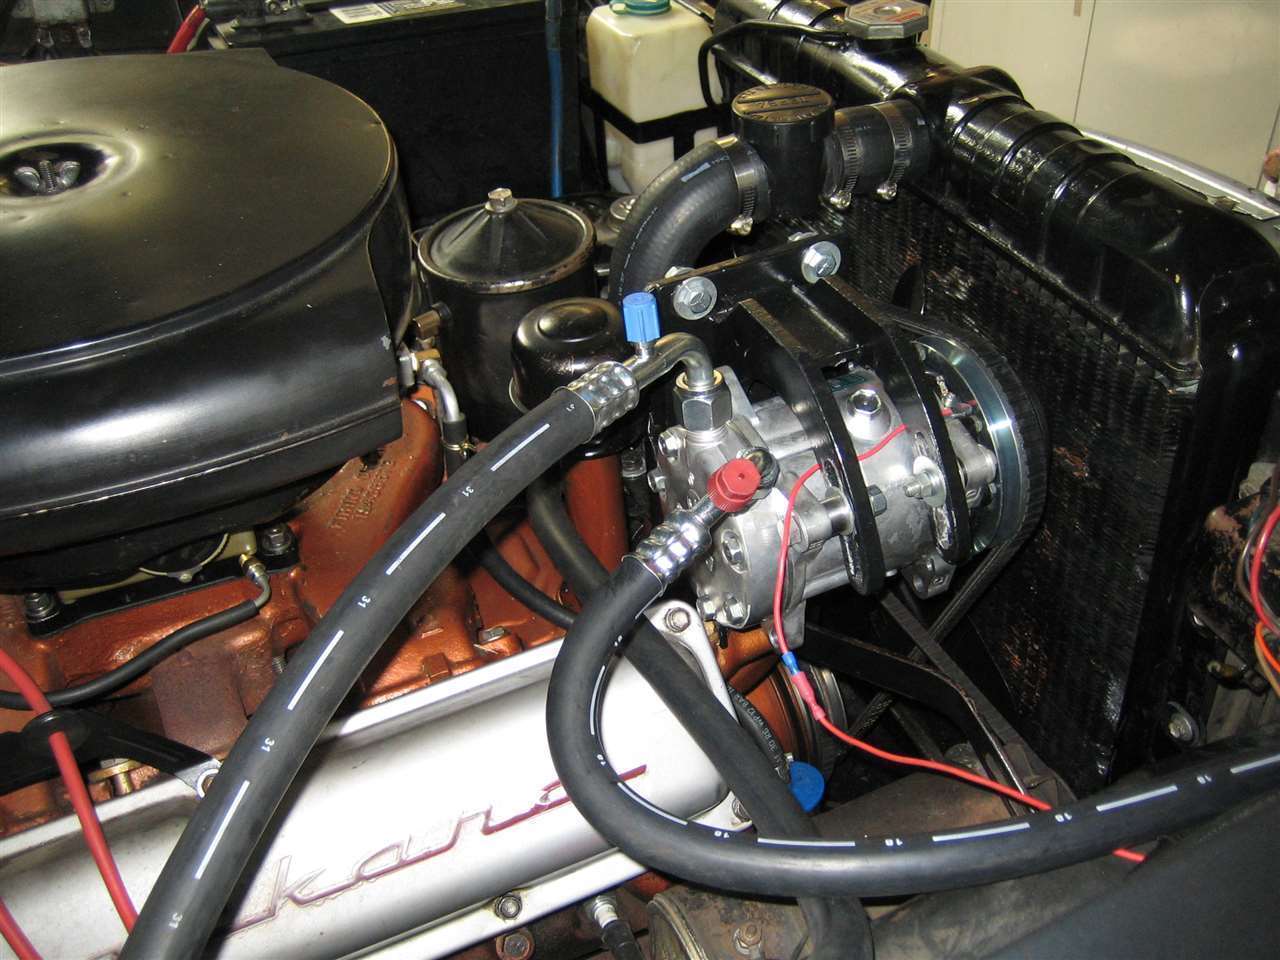 (151.05 KB) (151.05 KB)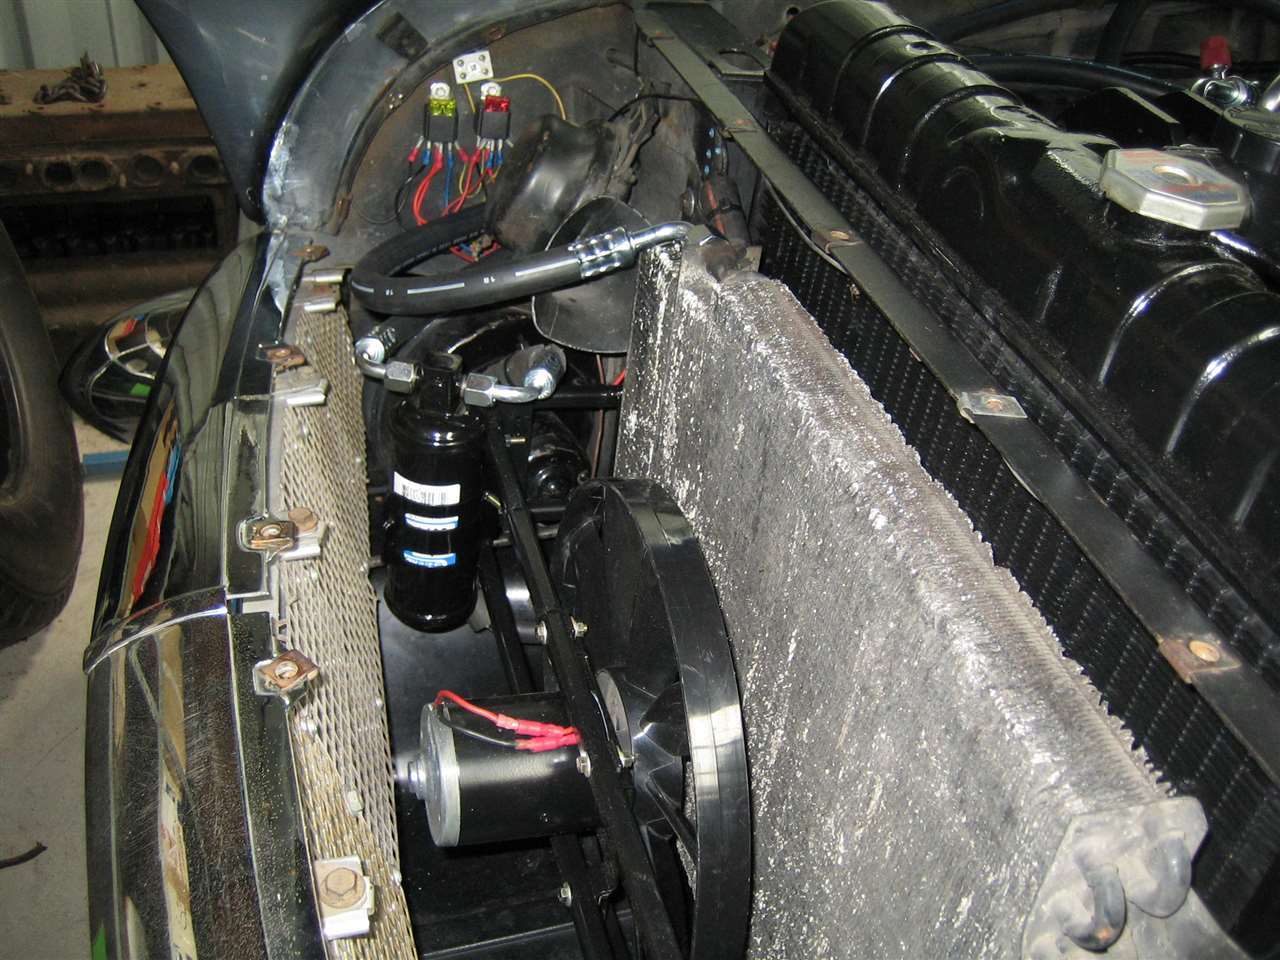
Posted on: 2012/1/16 23:52
|
|||
|
||||
|
Re: Air Conditioning Again.....
|
||||
|---|---|---|---|---|
|
Home away from home
|
G'day Men,
One thing I forgot to do in my last post was to comment on the issue of underdash evaporators and glove box lids. If you look at the attached pic you can see how my bits sit. It looks as if the glove box lid is sitting on the evaporator casing but this is actually not the case. The bottom of the glove box lid, which when opened curls under somewhat, is actually resting on the two evaporator to dash brackets which prevents the lid from opening any further. I thought about redesigning these brackets but that still won't allow the lid to fully open as it will then rest on the evaporator, a gain of about 1/4". I got the air con system regassed today and she's working well with nice cool air flowing around (I actually had to turn it down when it got too cold). Not counting my time or the shortened lifespan the extra stress caused by this exercise, the all up cost in round figures was AUD$850, which I thought was pretty good. This included everything except the condenser and evaporator, although their flush was, and the condenser fan which I had laying around in the shed. Regards, John Attach file: (117.19 KB)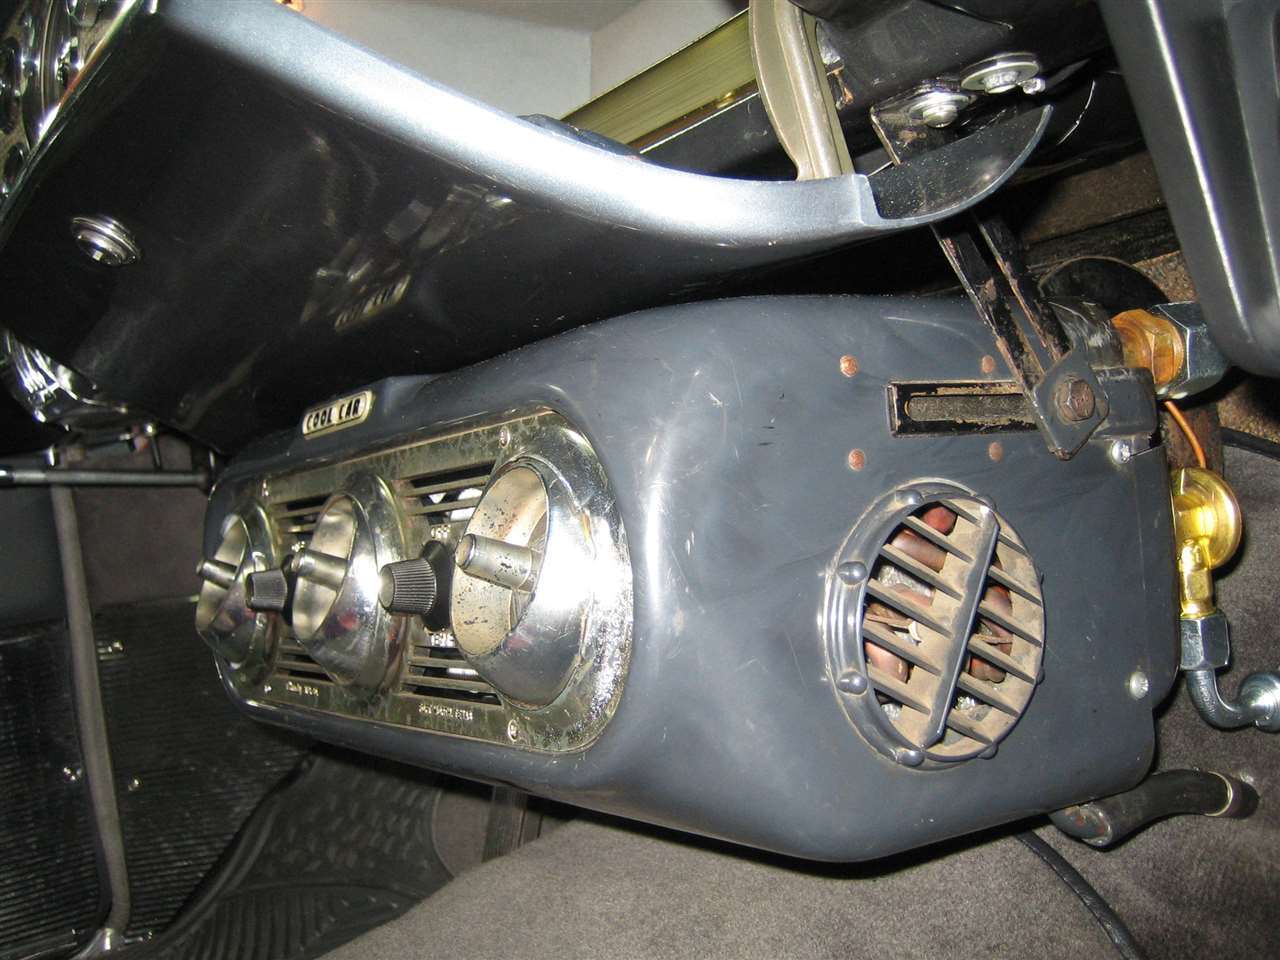
Posted on: 2012/1/17 23:34
|
|||
|
||||
|
Re: Air Conditioning Again.....
|
||||
|---|---|---|---|---|
|
Forum Ambassador

|
Cool, John, cool!
Posted on: 2012/1/18 0:22
|
|||
|
Mal
/o[]o\ ====  Bowral, Southern Highlands of NSW, Australia "Out of chaos comes order" - Nietzsche. 1938 Eight Touring Sedan - SOLD 1941 One-Twenty Club Coupe - SOLD 1948 Super Eight Limo, chassis RHD - SOLD 1950 Eight Touring Sedan - SOLD What's this?  Put your Packard in the Packard Vehicle Registry! Here's how! Any questions - PM or email me at ozstatman@gmail.com |
||||
|
||||
|
Re: Air Conditioning Again.....
|
||||
|---|---|---|---|---|
|
Home away from home
|
Sure is Mal, now that's out of the way it's time to move onto a new project. I've been thinking about Peter Packard's alternator project, which involved fitting a combined alternator and vac pump, but not for the same reason. My power brakes are a little on the "heavy" side and I've been wondering whether an auxilliary source of vacuum might improve things. Providing I can get the alternator in and lined up OK, the vac part should only need a simple "T" piece to splice it into the vac line. I'll give Pete a call to find out more.
Cheers, John
Posted on: 2012/1/18 17:56
|
|||
|
||||


