|
Re: Wade's Workshop
|
||||
|---|---|---|---|---|
|
Forum Ambassador

|
Tuesday 21st February 2012
Arrived back at 2:00am this morning from our sojourn north, but didn't have any opportunity to catch up with Packards or their owners, such is life. After some catch up sleep dropped in briefly about Noon at the workshop. Found Wade putting the last of the rod bearing caps on Juniors bottom end. Engine assembly hasn't been plain sailing with Wade finding the compression rings were too big but was able to source some replacement rings locally and carried on. At the moment there is about a short block assembled. Left Wade to carry on and hope to be there tomorrow to assist if I can. Wade had installed the rebuilt accelerator cross shaft linkage and in doing so had to redrill and repin the crank arm to the new shaft. Also tidied up some of the firewall wiring which will probably be further refined when a different pair of horns are fitted in lieu of the single trumpet horn presently used. Attach file:  (43.10 KB) (43.10 KB)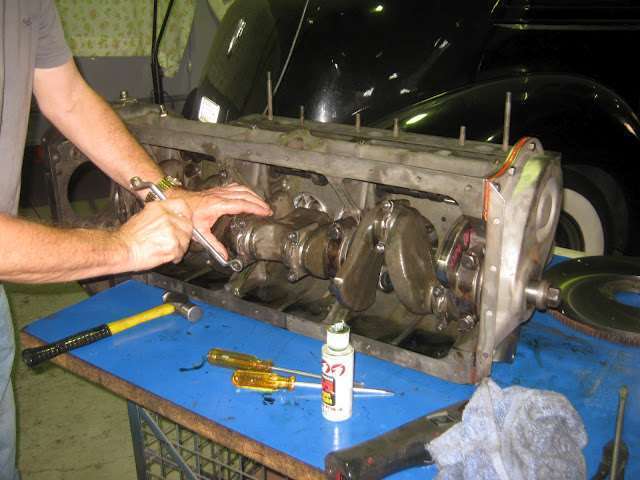 (38.60 KB) (38.60 KB)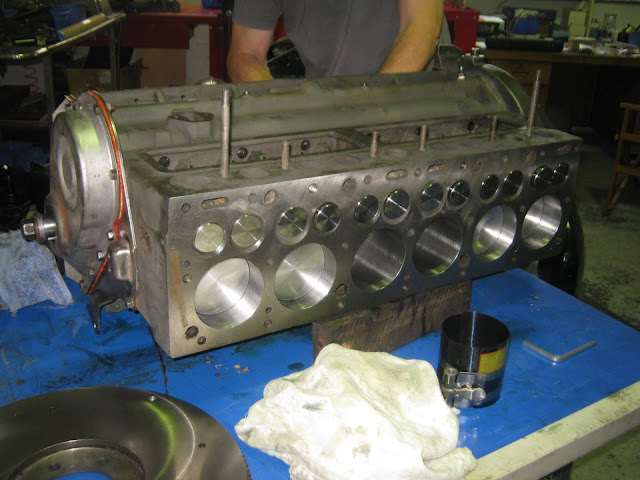 (34.43 KB) (34.43 KB)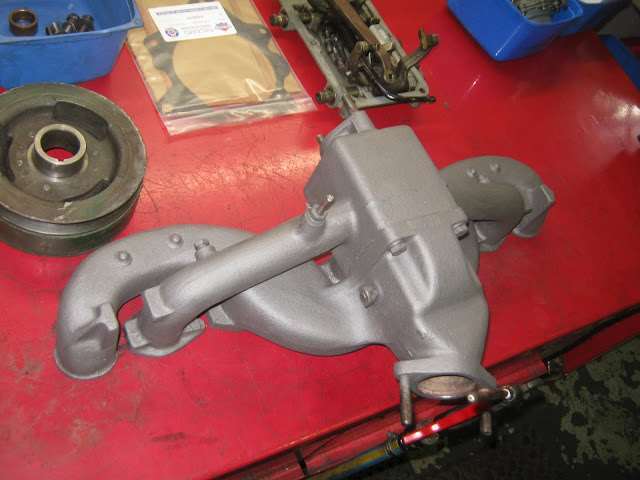 (14.86 KB) (14.86 KB)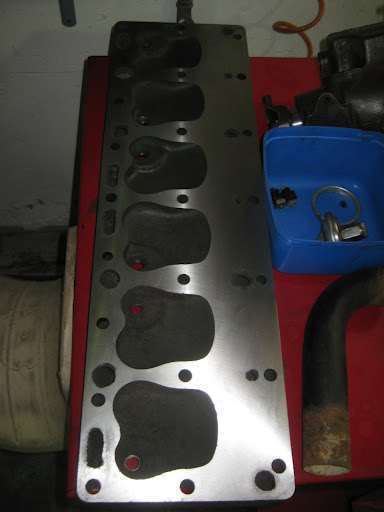 (47.48 KB) (47.48 KB)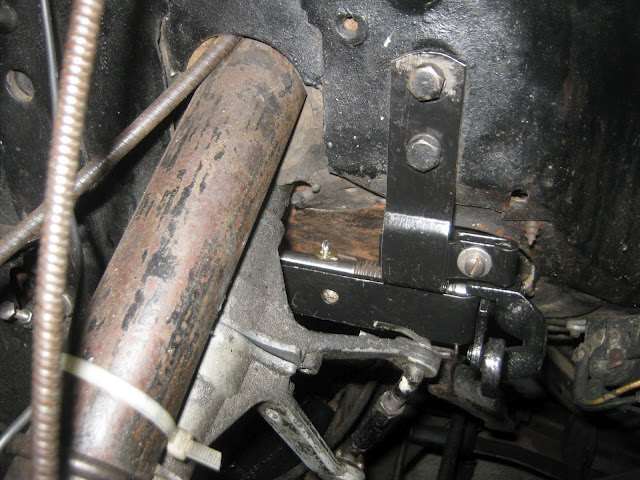 (28.92 KB) (28.92 KB) (45.29 KB) (45.29 KB)
Posted on: 2012/2/20 23:14
|
|||
|
Mal
/o[]o\ ====  Bowral, Southern Highlands of NSW, Australia "Out of chaos comes order" - Nietzsche. 1938 Eight Touring Sedan - SOLD 1941 One-Twenty Club Coupe - SOLD 1948 Super Eight Limo, chassis RHD - SOLD 1950 Eight Touring Sedan - SOLD What's this?  Put your Packard in the Packard Vehicle Registry! Here's how! Any questions - PM or email me at ozstatman@gmail.com |
||||
|
||||

|
Re: Wade's Workshop
|
||||
|---|---|---|---|---|
|
Forum Ambassador
|
Thursday 23rd February 2012
On arrival at the workshop found Wade cleaning up head nuts for Junior on the wire wheel. They hadn't been cleaned earlier and with the head close to going on needed to be ready. Wade had also changed out some of the nuts because they weren't 3/4", makes it much easier when putting it back together. Took over the wire wheeling while Wade moved onto chasing through all the threads in the head nuts. Had just about finished that when Noel arrived. Noel was taking Fleurette away to Ralph Moore's and then home. But she'll be back, radio head still needs to be fitted. After Noel left, Wade also made an exit to the Gearbox Factory to pick up Juniors trans and part of the OD they had to make a new bushing for because Wade had found much too much play in some of the OD components. While Wade was out picking up the trans and OD parts I cleaned up and POR-15'd some parts for Junior. On Wade's return the plan was to bolt the rest of the OD to the trans and hang the completed trans/OD unit on Juniors bellhousing and engine ready for painting. Prior to leaving, Wade had put Juniors head in the "washing machine" for a hot wash to remove the protective lanolin coating, the head needed to go on the engine too. So much for planning! Bolted the OD housing to the trans after first preparing a new non-MBM gasket and the putting the rollers for the OD in place, using grease followed by a rubber band is the easy way to go. Fine so far, but....everything had bound up! Wade wasn't happy. At many a turn in this saga things had gone wrong or not worked out as they should, here was another one. So started the dis-assembly of the OD, I think Wade could just about do this in the dark now that he's so practiced at it. As each component was removed it was given a visual inspection for fit or for signs of interference. Nothing was readily apparent so turned to the spare OD, much of which is now unusable anyway but it's all we've got. Then a process of replacement, ended up replacing one part only. Then parts fitments, in the order they go together, at each discernible step observing and "feeling" the effect on the trans/OD. By this process was able to determine that a spacer, in the form of a washer was required, in tightening the nut holding the roller cage to the mainshaft. There were a number of assemble/dis-assemble repetitions before finding this and Wade was very glad to be able to find the reason for the problem and the simple solution to fix it. Only trouble was all this took the best part of half a day and painting of the engine/trans/OD unit wasn't going to happen today. Still, with Grahams help, was able to bolt the trans/OD unit to the engine and when the head goes on tomorrow Wade can commence painting. Earlier I said Wade wasn't happy, he's also not happy with his US parts supplier specifically the rebuilt planetary gear unit for the OD as well as an OD thrust washer. That's where the Gearbox Factory came in very handy with their expertise and accessibility. Stephen, if Wade doesn't see your post and respond, I'll try to remember to follow it up with him on Monday. I dare not respond myself because the closest I get to things electrical is turning a light switch on or off! Edit - One thing I will say is that in installing the magnetic ring there was also a plastic "spacer" but in using that the rotor didn't sit properly so the spacer wasn't used. Can't remember if the pic I took of the magnetic ring included the spacer or not. Have also added a few more pic's of the coil and wire setup, best I can do for now. Attach file: (40.24 KB) (25.72 KB) (25.72 KB) (36.88 KB) (36.88 KB) (41.92 KB) (41.92 KB)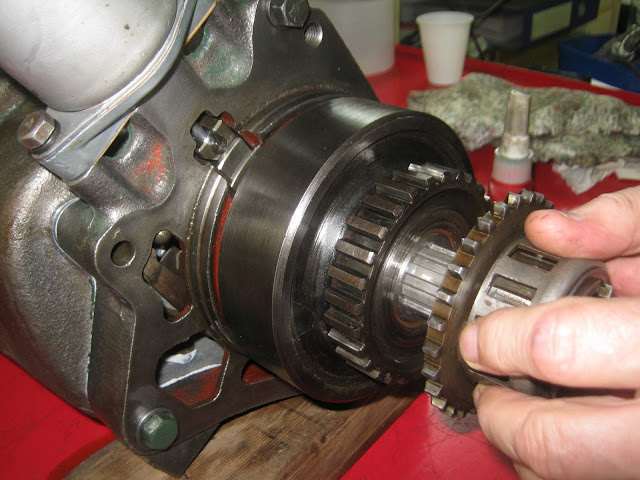 (43.73 KB) (43.73 KB)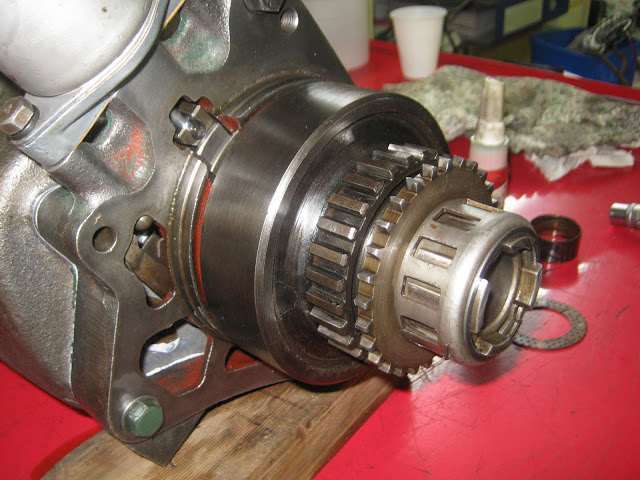 (40.49 KB) (40.49 KB)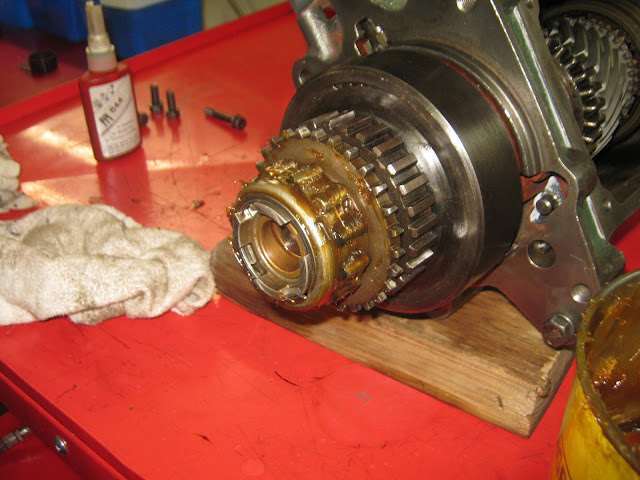 (44.28 KB) (44.28 KB)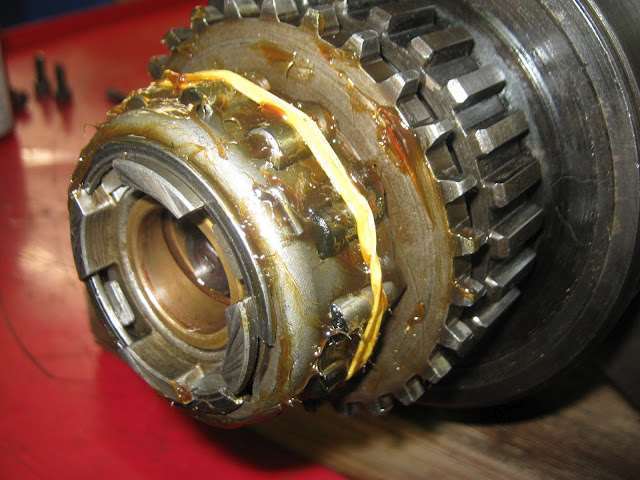 (44.25 KB) (44.25 KB)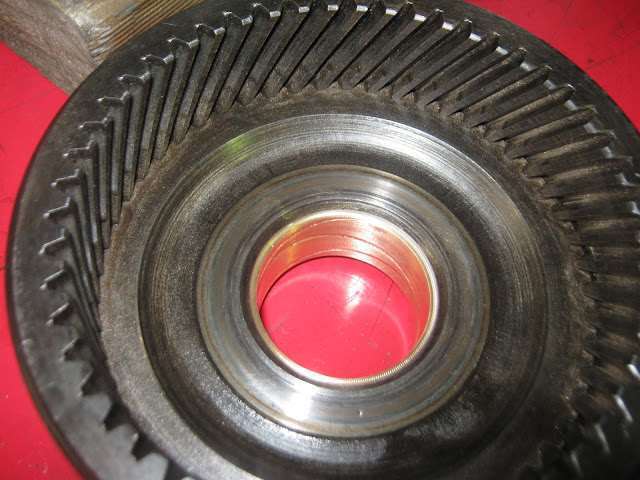 (39.91 KB) (39.91 KB)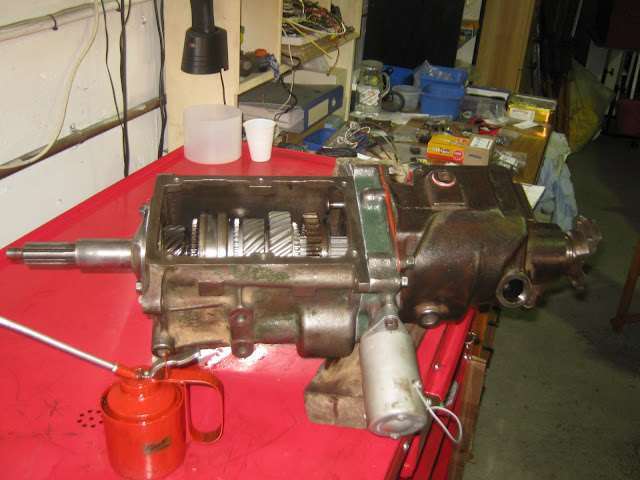 (42.38 KB) (42.38 KB) (23.12 KB) (23.12 KB)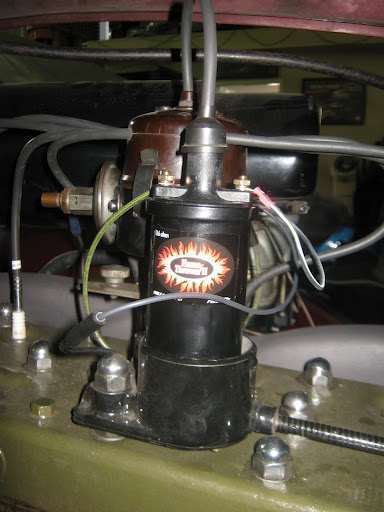 (24.95 KB) (24.95 KB) (23.05 KB) (23.05 KB)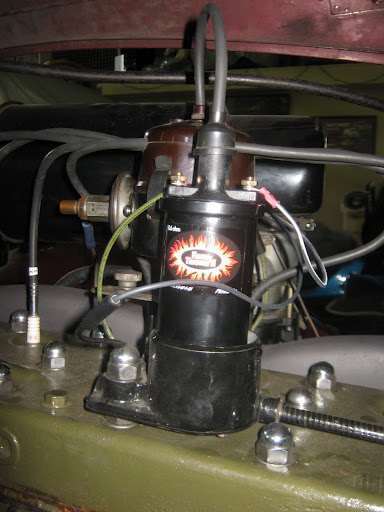
Posted on: 2012/2/23 2:43
|
|||
|
Mal
/o[]o\ ==== Bowral, Southern Highlands of NSW, Australia "Out of chaos comes order" - Nietzsche. 1938 Eight Touring Sedan - SOLD 1941 One-Twenty Club Coupe - SOLD 1948 Super Eight Limo, chassis RHD - SOLD 1950 Eight Touring Sedan - SOLD What's this? Put your Packard in the Packard Vehicle Registry! Here's how! Any questions - PM or email me at ozstatman@gmail.com |
||||
|
||||
|
Re: Wade's Workshop
|
||||
|---|---|---|---|---|
|
Home away from home
|
G'day all, I am always amazed how much longer an R9 Solenoid is compared to an R6. I have never fitted an R9/R11 to a 35-38 Packard chassis as the two components require so much more mutilation of the cross member to fit the items. Fitting a Packard overdrive to a pre 1939 is very much comparative to a modest boob job.....If you have all the body except..you know ....well, then, if counselling for the status quo fails .... a voluntary lot of considerable pain and it may be worth it to you in the end, so long as you maintain it. In other words,T##,s upgrade = Packard Overdrive retrofit. P.S. Both cost about the same in the long run but the overdrive can be left in the garage. Best regards Peter
Posted on: 2012/2/23 4:13
|
|||
|
I like people, Packards and old motorbikes
|
||||
|
||||
|
Re: Wade's Workshop
|
||||
|---|---|---|---|---|
|
Forum Ambassador
|
Friday 25th February 2012
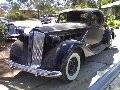
Didn't expect to get to the workshop today until Noel rang. He was on a train to go and pick up his daily driver from the workshop which had remained there when he left in Fleurette yesterday. Original plan was to return later yesterday to pick up the daily driver but, as often happens, the time to do so slipped away. The other side to the call was I too was on a train, no, not the same one, after donating blood plasma in the city. Anyway, arranged that Noel would continue his journey by four stops then I'd drive him to the workshop. There we found the Picasso of Packards, the Michaelangelo of motors, but more commonly referred to as Wade painting Juniors engine/trans/OD, head and other pieces. Head is still separate from the engine, to facilitate using the head studs as pick up points for the engine lift, and will go on once the engine is reunited with Junior. Concerning all these parts being painted Packard Engine Green, like the streakers defence, it seemed like a good idea at the time! Ray Stevens - The Streak - Ex YouTube And Noel, a few pic's of one of the Bonnet(Hood) catches on my Coupe. Attach file: (37.55 KB) (39.74 KB) (39.74 KB)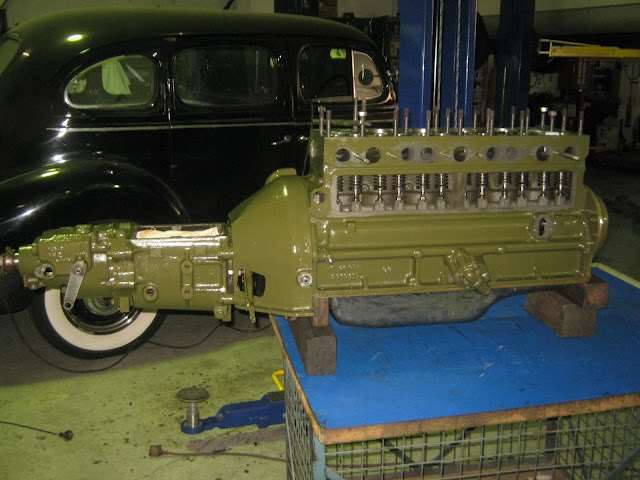 (38.92 KB) (38.92 KB) (22.26 KB) (22.26 KB)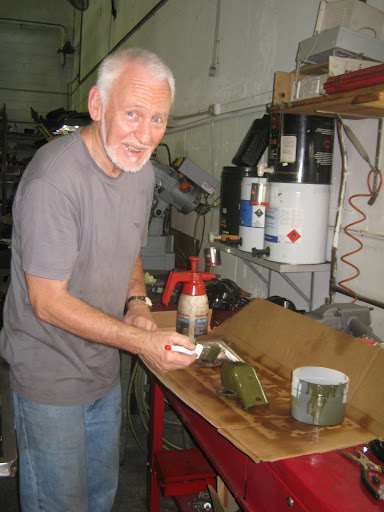 (23.01 KB) (23.01 KB) (28.51 KB) (28.51 KB)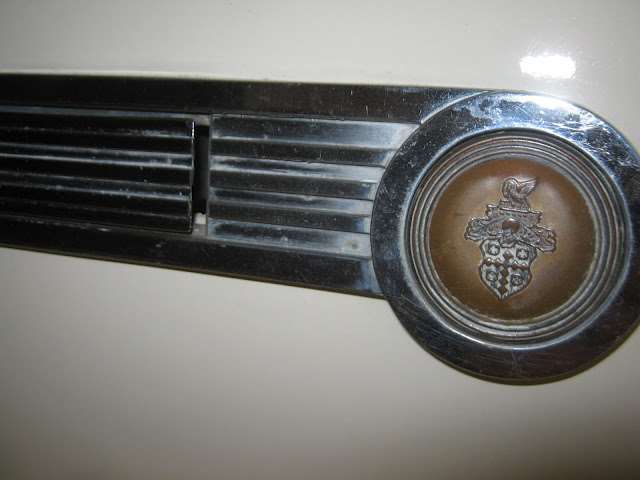 (31.56 KB) (31.56 KB)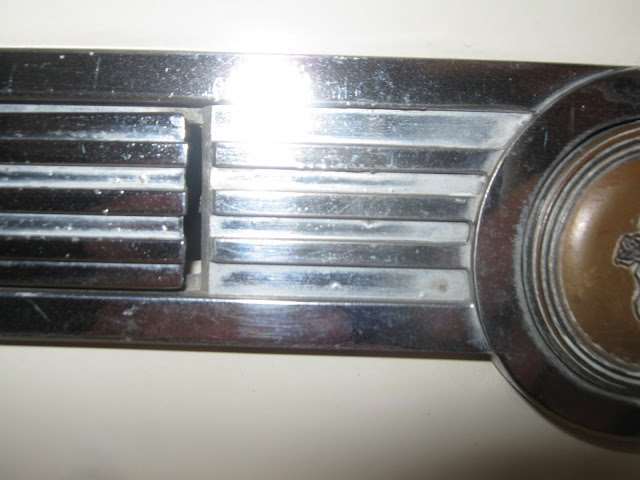 (34.65 KB) (34.65 KB)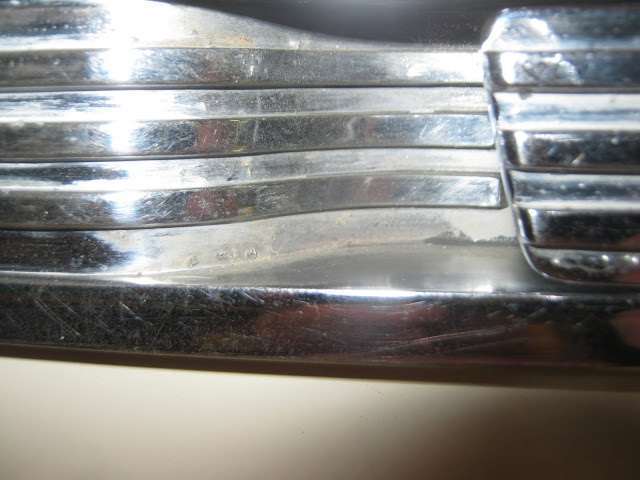
Posted on: 2012/2/23 22:37
|
|||
|
Mal
/o[]o\ ==== Bowral, Southern Highlands of NSW, Australia "Out of chaos comes order" - Nietzsche. 1938 Eight Touring Sedan - SOLD 1941 One-Twenty Club Coupe - SOLD 1948 Super Eight Limo, chassis RHD - SOLD 1950 Eight Touring Sedan - SOLD What's this? Put your Packard in the Packard Vehicle Registry! Here's how! Any questions - PM or email me at ozstatman@gmail.com |
||||
|
||||
|
Re: Wade's Workshop
|
||||
|---|---|---|---|---|
|
Forum Ambassador
|
Monday 27th February 2012
Surprise! Surprise! Arrived at the workshop to find Wade had put in a big day on Saturday installing the engine/trans/OD into Junior. Also bolted on starter, generator, fuel pump and installed oil fill tube. So this morning, while Wade was sorting out gear linkages under Junior, I installed the tailshaft. It also turned out that on Friday Wade had painted the sump(pan) on Juniors engine. He'd hoisted the engine/trans/OD setup on the engine crane to gain the underneath access required. Then, after installing the tailshaft, installed the OD mount, engine snubber bracket to the frame and bolted in the OD mount. Thought was not to re-install the engine snubber because one end is loose but ended up doing so by turning the snubber around, so if it drops it will trail and not pole vault. Then assisted Wade with the linkages. The bell crank mounted between the master cylinder and the frame had to come off to accommodate fitment of one of the linkage rods. The other had been taken off during dis-assembly and was much easier to refit as a result. The trans top then went back on followed by the shifting arms on the top of the trans. Supposedly this was the easy way to do it but one proved otherwise but did go on eventually. During the course of all this Juniors Mum and Dad, Annet and John, arrived to see the progress their offspring had made. Were pleased to see things going together and this time I ended up in a pic, courtesy of Annet, see below. Following their departure more wrestling with linkages and suchforth. Also installed the solenoid and governor to the OD and replaced the spade connectors in the OD harness in doing so. Also filled the trans, OD and engine with fresh oil. Don't know how many times Junior went up and down on the hoist, but it was like a Stephen, steve-52/200, will be taking up your questions with Wade tomoorow. Attach file: (33.02 KB)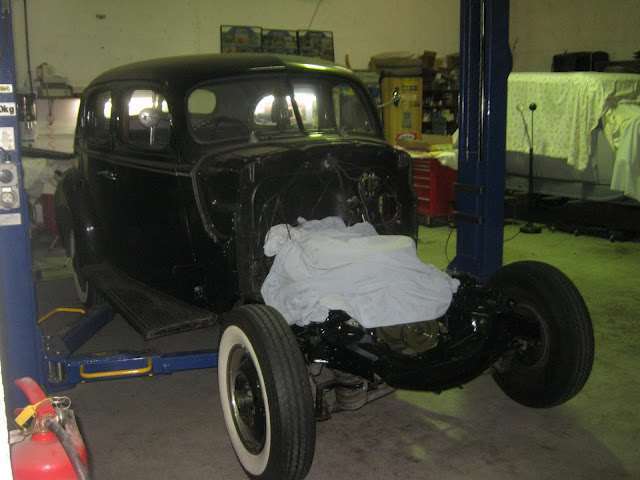 (34.40 KB) (34.40 KB)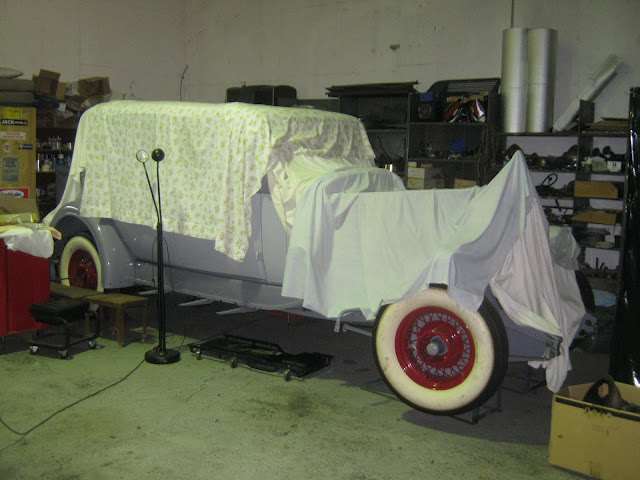 (36.08 KB) (36.08 KB)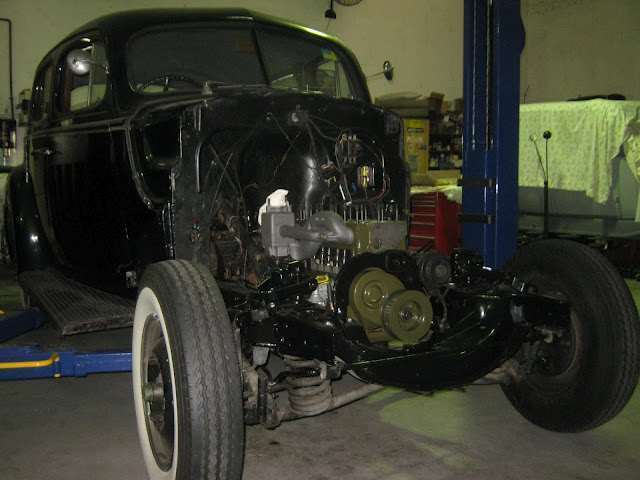 (45.90 KB) (45.90 KB)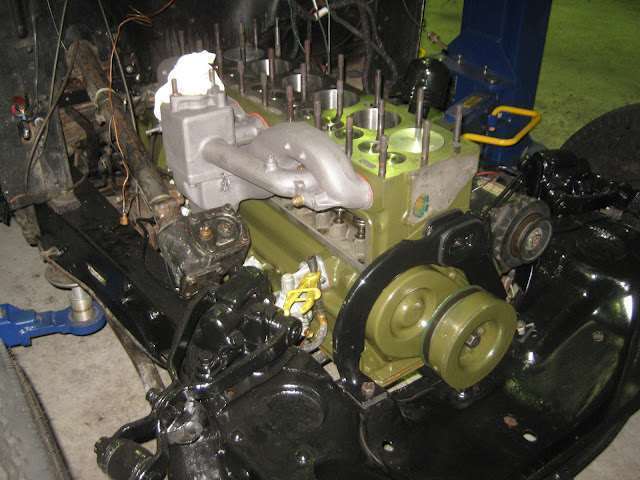 (29.91 KB) (29.91 KB)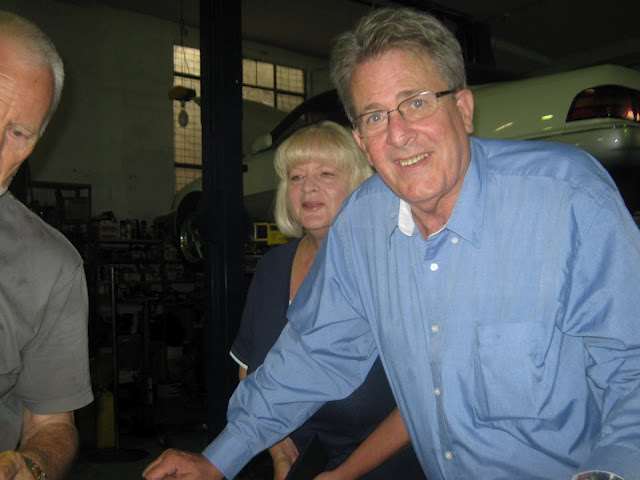 (38.50 KB) (38.50 KB)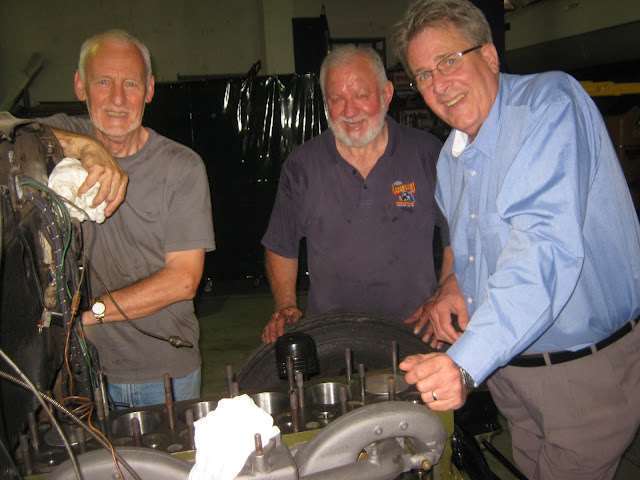
Posted on: 2012/2/27 3:05
|
|||
|
Mal
/o[]o\ ==== Bowral, Southern Highlands of NSW, Australia "Out of chaos comes order" - Nietzsche. 1938 Eight Touring Sedan - SOLD 1941 One-Twenty Club Coupe - SOLD 1948 Super Eight Limo, chassis RHD - SOLD 1950 Eight Touring Sedan - SOLD What's this? Put your Packard in the Packard Vehicle Registry! Here's how! Any questions - PM or email me at ozstatman@gmail.com |
||||
|
||||
|
Re: Wade's Workshop
|
||||
|---|---|---|---|---|
|
Forum Ambassador
|
Tuesday 28th February 2012
A long morning with Junior again yo-yoing up and down on the hoist in trying to locate and fix the shift linkage problem. Had finished up yesterday thinking a longer linkage rod, for 2nd/top gears between the steering column arm and the fore/aft rod, was required to fix the linkage alignment issue. Another linkage rod, sourced from the part shelf, was cut down in length and reshaped as per the rod that was too short. This morning cut a thread on the new longer rod and installed same. Trouble was, it worked with reverse, 1st and 2nd gear but not with top. Determined that the bell crank for 2nd/top that transfers motion from the steering column link to the fore/aft rod was hitting the bracket which holds it and the master cylinder. Much scratching of heads, much inspection and introspection before finally biting the bullet and taking off the trans top shift levers and pulling the trans top off. Wade hadn't wanted to do that because the trans top that came off Juniors trans wasn't as good as the one that replaced it. But with the fore/aft rod for 2nd/top pushing the bellcrank against it's bracket without being connected to the column change something just wasn't right. Wade actually explained this too me a couple of times before the penny dropped because I thought the problem was tied up in the new longer linkage rod. It wasn't. What it turned out to be is that the 2nd/top splined shaft in Juniors original trans top has the wide positioning splines in a slightly different place from the positioning of the same splines in the replacement top. Not much mind you but that fraction of an inch on the spline translates to somewhere in the vicinity of 2" to 3" by the time the various length levers and consequent mechanical advantage come into play. So, sorry John and Annet, although you now will be able to change gears you won't have the benefit of new seals on the splined shafts! One of my tasks today was using a very small triangular file on the internal splines on the trans top shifting levers before the levers would slide on to the shafts with relative ease. But while I was doing that Wade reconnected the oil pressure gauge line and the road draft tube. Speaking of the oil pressure gauge line hook up, at one stage yesterday Wade changed out the straight into the block fitting he'd previously fitted(probably a 120 fitting) for the right angle fitting that came on Juniors engine. In all the fiddling yesterday with gear linkages Wade had noticed that one of the linkages would have hit the oil pressure gauge line if left as is. Just goes to show that although things look like they will work they often don't. After all Packard's engineers did do things for a reason. A welcome break came with lunch of home made pizza and your beverage of choice to wash it down. Returning to Junior it was time to tidy up a few more thing before the head went back on. First of these was making and installing a pointer for the harmonic balancer. While Junior does have the flywheel pointer to the timing marks there, this isn't as user friendly as a pointer and marks on the harmonic balancer. However to install the harmonic balancer pointer had to remove the front engine mount yoke which entailed postioning and then slightly elevating a transmission jack and block of wood under the sump(pan) before undoing the retaining bolts to the engine and mounting bolts to the frame. With the engine mount yoke off measured up the width and length required before sourcing and cutting and grinding a piece of aluminium to fit then drilling a mounting hole and bending to shape. A few more passes on the grinding wheel to put a point on the pointer and......it fell apart in my hands. Bending the aluminium had weakened it and the final grinding was enough to cause failure. But better it happened now rather than later in Junior, because once everything was bolted back on it wouldn't be coming off a second time. For the next attempt, sourced some steel and following the same cutting, grinding, drilling and bending processes it's fine. Well it's still in one piece. Left things to Wade at this juncture, the pointer will probably be on Junior by the time I get there tomorrow! Attach file: (24.64 KB)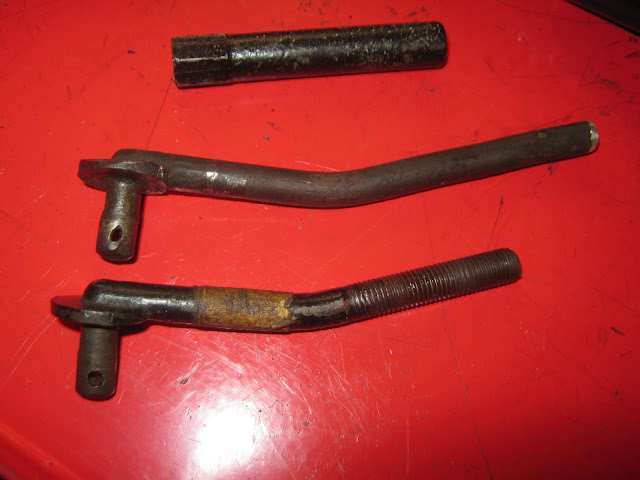 (26.49 KB) (26.49 KB)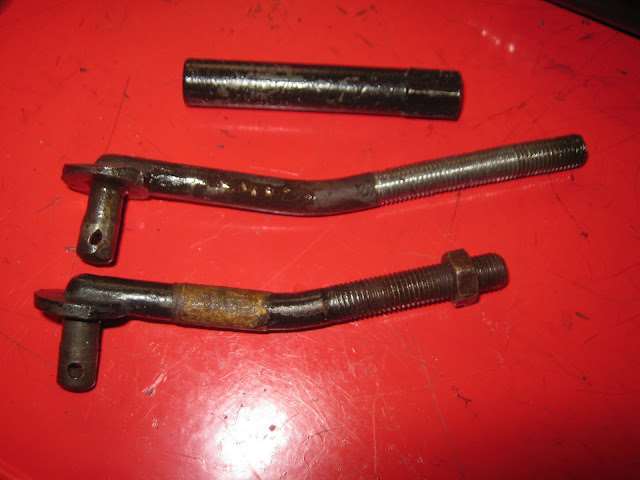 (24.40 KB) (24.40 KB) (24.54 KB) (24.54 KB)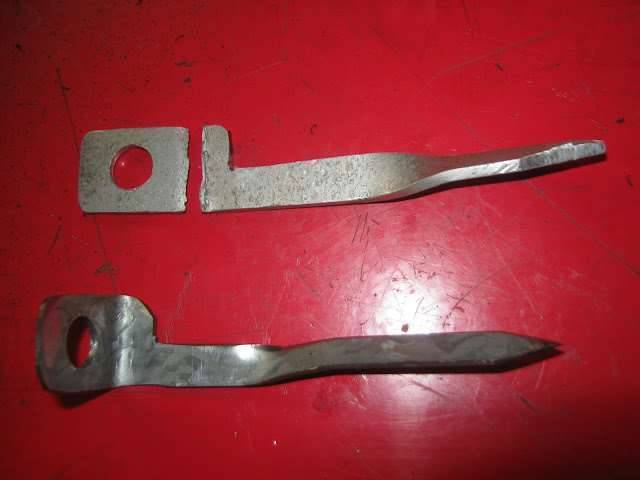 (27.23 KB) (27.23 KB)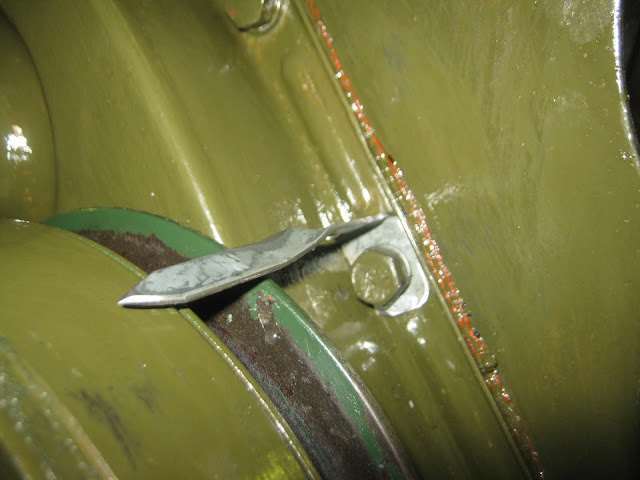
Posted on: 2012/2/28 2:20
|
|||
|
Mal
/o[]o\ ==== Bowral, Southern Highlands of NSW, Australia "Out of chaos comes order" - Nietzsche. 1938 Eight Touring Sedan - SOLD 1941 One-Twenty Club Coupe - SOLD 1948 Super Eight Limo, chassis RHD - SOLD 1950 Eight Touring Sedan - SOLD What's this? Put your Packard in the Packard Vehicle Registry! Here's how! Any questions - PM or email me at ozstatman@gmail.com |
||||
|
||||
|
Re: Wade's Workshop
|
||||
|---|---|---|---|---|
|
Home away from home
|
Don't hit me but I have two of those shift thingies. One is for a floor shift and the possible one has 52509 on it.
Number on inside is 395386 which I can't seem to match in any parts book.
Posted on: 2012/2/28 2:43
|
|||
|
Carpe Diem!!
 Registry Registry
|
||||
|
||||
|
Re: Wade's Workshop
|
||||
|---|---|---|---|---|
|
Forum Ambassador
|
Wednesday 29th February 2012
Arrived to find the front motor mount yoke back on together with the new timing mark pointer. Then onto a more substantial matter, installing Juniors head. Block and head surfaces both cleaned, a good squirt of oil into each cylinder to aid in initial lubrication and to help establish compression on first start up, clean up of the new gasket, a good copper spray to each side of the gasket, on with gasket followed by the head. Followed by the washers and head nuts torqued down in increments to 63 ft/lbs, except for one! One of the new studs had stripped in the block! Wade didn't have a heli-coil of the right size but a call by John to Col of Brookers Brakes soon found one. Then, a very delicate operation, tapping the old stud hole to accept the heli-coil without removing the head which was successfully done. Did this by using grease on the end of the tap and carefully and slowly tapped the block, changing the grease a number of times and then carefully cleaning out the stud hole. Fitted the oil filter bracket, housing and connected the inlet and outlet lines, with a short visit by Noel revealing the filter is a genuine Packard one by the script on the canister top! With oil in the engine, slightly overfull, plus more added to the filter canister before the canister lid was tightened down Wade wanted to check there was oil pressure. So, using a booster pack, 12V was used to spin the sparkplug less and carbeuretor less engine. After an initial spin cycle I adjourned to the front seat and observed that the second cycle moved the oil pressure gauge up slightly, so Houston, we have oil pressure. Then on to fitting a set of NGK plugs while Wade cleaned up the distributor cap and installed it. In order to mount the bracket for the sparkplug wires, the head nut to mount the bracket was cracked loose. But when re-torquing the head nut slippage occurred. Fortunately it was just the head nut stripping on the new stud so wasn't as big a drama as the one experienced earlier, a replacement nut proving all that was needed. Also mounted the coil and connected the ignition wires. Next was the carb and it's associated linkage. The carb itself is fine, although it's a non standard carb, but the linkage was something else. The firewall cross shaft accelerator pedal linkage has been rebuilt and now operated fully without any slop. The linkage setup, as it was, hadn't permitted full movement of the carb butterfly. But now, with the rebuilt cross shaft linkage, the rod between the bell crank on the manifold and the cross shaft was too long. So needed to shorten up the linkage rod except it was as short as it could get. Some time ago I'd brought down to the workshop a container of rod ends and linkage arms, I'd collected about 45 years ago. Finally, I thought, they may come in useful. By swapping out one end of the original linkage rod, combined with shortening and re-tapping the brass body of one of my linkage rods to 10/32 NC thread a rod of the requisite length was available. Except, it didn't work! Although one end of the rod had been bent to reduce the offset between the accelerator cross shaft arm and the bell crank it bound up about half way through the length of travel required. Solution here was to fabricate a length of steel strapping so that the accelerator cross shaft arm pushed directly in a fore & aft movement with the strap extending the cross reach of the bell crank. AND, another linkage rod, the previously fabricated rod not working at all in this new environment. Fortunately Mal's box of bits provided a small rose joint(heim joint) and a rod which together appeared perfect for this new situation. Appears to be working but Wade still isn't happy so will be further reviewed once Wade returns from Gil-bloody-gandra on Monday. At this stage would have attempted a short test start of Junior irrespective but, being out of gas, that too will happen on Monday. Attach file: (20.29 KB)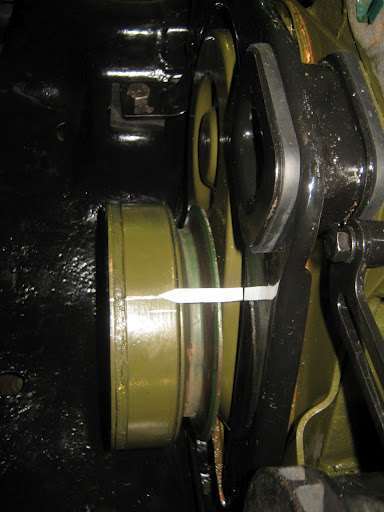 (46.29 KB) (46.29 KB)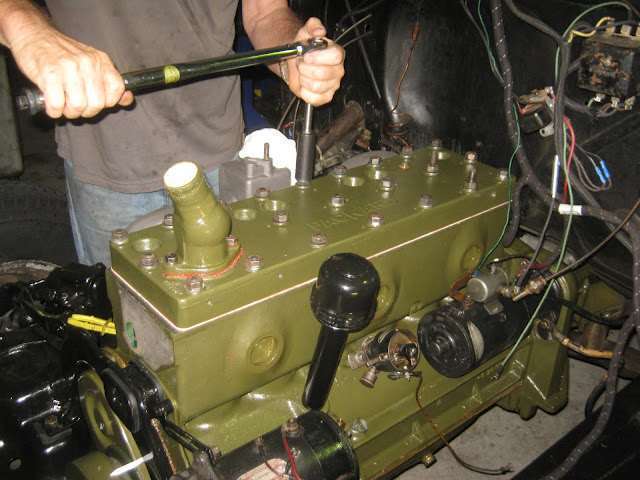 (36.00 KB) (36.00 KB)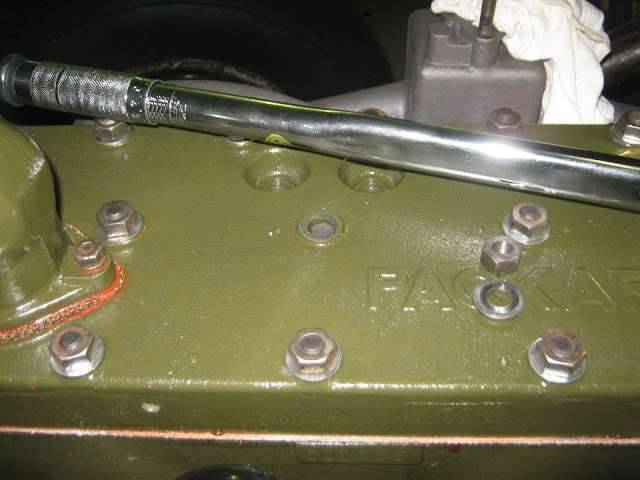 (32.84 KB) (32.84 KB)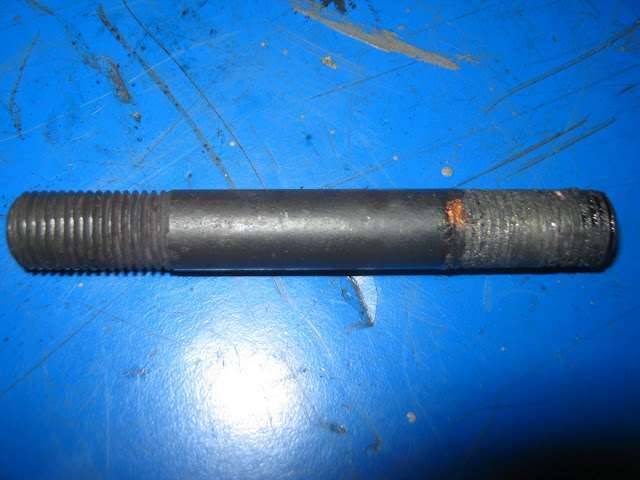 (22.50 KB) (22.50 KB)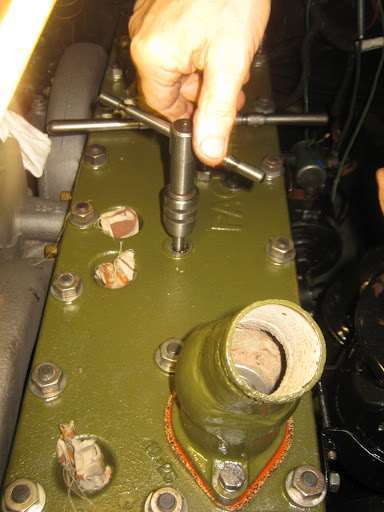 (52.23 KB) (52.23 KB)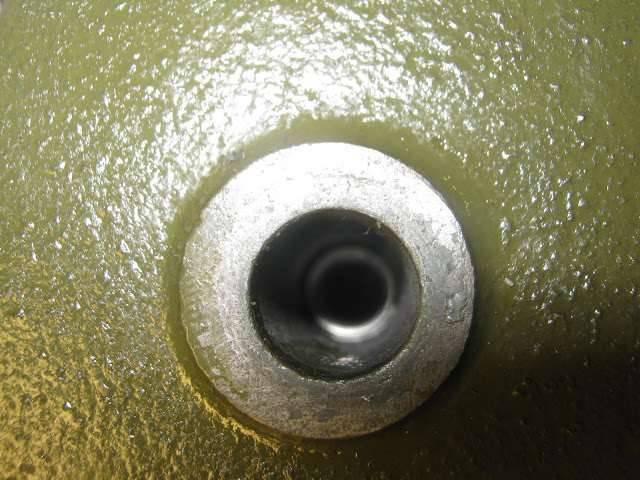 (30.69 KB) (30.69 KB)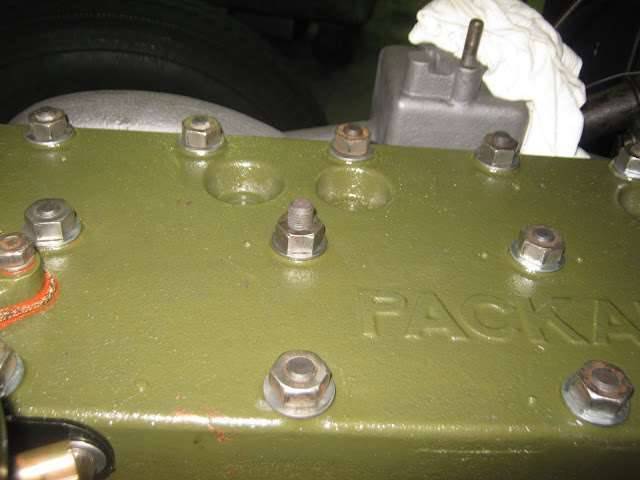 (15.61 KB) (15.61 KB)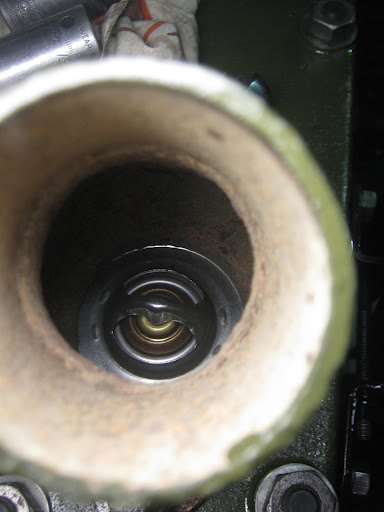 (45.76 KB) (45.76 KB)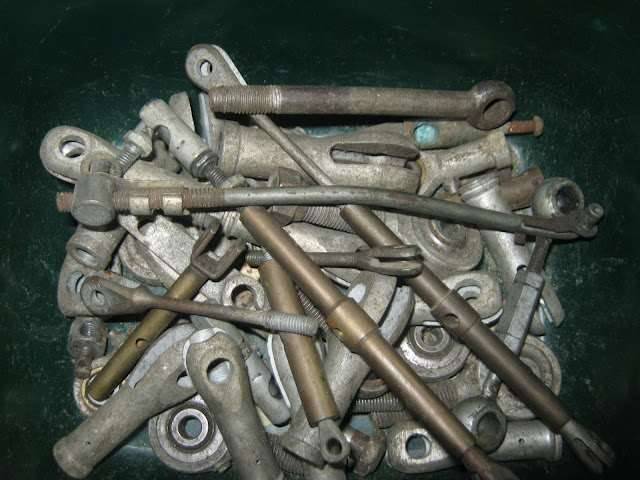 (22.38 KB) (22.38 KB)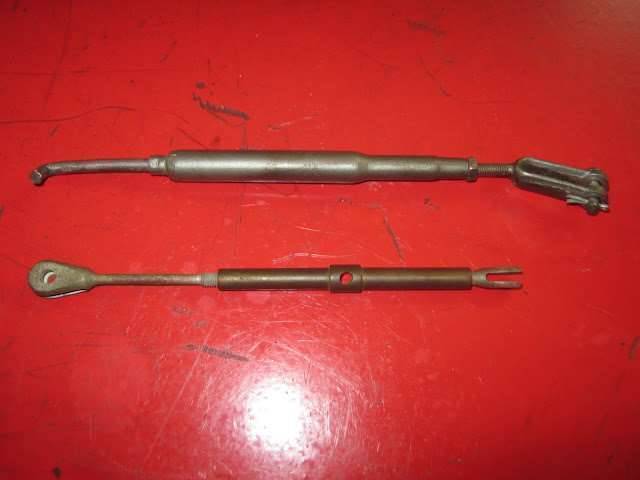 (23.27 KB) (23.27 KB)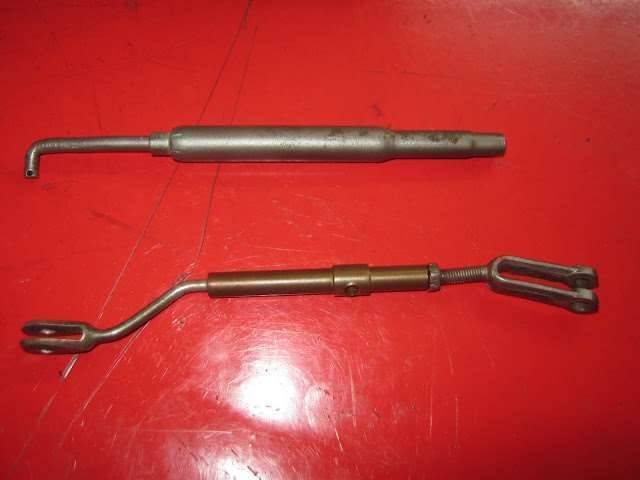 (20.89 KB) (20.89 KB)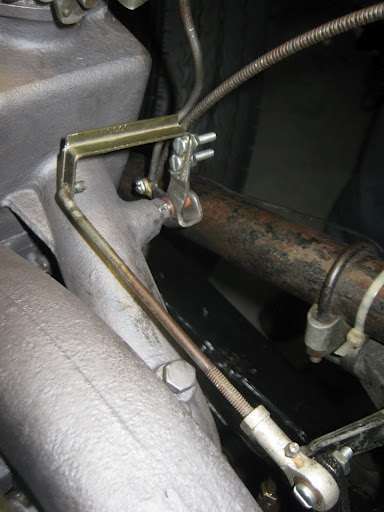 (38.85 KB) (38.85 KB) (49.98 KB) (49.98 KB)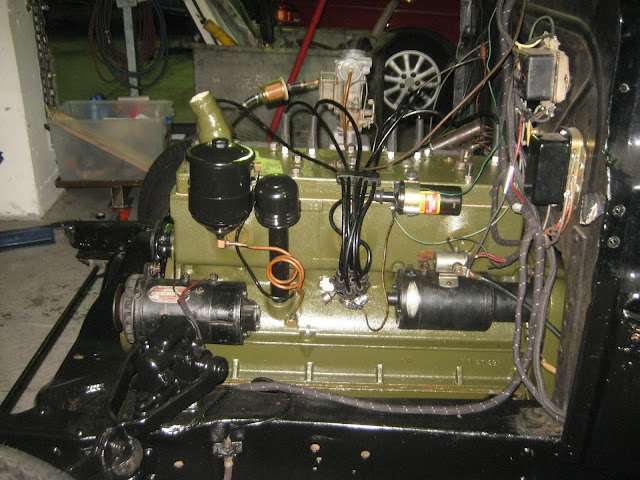
Posted on: 2012/2/29 2:35
|
|||
|
Mal
/o[]o\ ==== Bowral, Southern Highlands of NSW, Australia "Out of chaos comes order" - Nietzsche. 1938 Eight Touring Sedan - SOLD 1941 One-Twenty Club Coupe - SOLD 1948 Super Eight Limo, chassis RHD - SOLD 1950 Eight Touring Sedan - SOLD What's this? Put your Packard in the Packard Vehicle Registry! Here's how! Any questions - PM or email me at ozstatman@gmail.com |
||||
|
||||
|
Re: Wade's Workshop
|
||||
|---|---|---|---|---|
|
Forum Ambassador
|
Monday 5th March 2012
Noel oftentimes uses the term "Dr Wade" and I too must admit to using it from time to time. I was reminded of that, in arriving at the workshop, to find laid out on the bench the parts about to be bolted back onto Juniors engine today. Seemed to be like the instruments laid out prior to an operation. Besides the water pump, the one Wade rebuilt not the new "Chinese" one which Wade has some reservations about, there were the tappet covers together with new gaskets for all. But I didn't get to hang round for long, being sent on an errand to pick up 20 litres of fuel to partly replenish Junior's empty tank. Returned to find Wade had fitted the backing plate to the water pump and was in the midst of applying silicon sealer to mount the pump and new gasket to the engine. With the water pump, fan, pulley and fan belt mounted, emptied the fresh fuel into Junior and turned the engine over using a booster pack to get fuel through to the fuel filter and carb. Except no fuel came through. Instead of pulling fuel through Wade pushed some through using compressed air and a rag to effect a seal between the compressed air line and the fuel filler neck. Didn't take long to get fuel through to the carb using this method, but there was a problem. The right angled fuel line fitting going into the carb was leaking. Pulled it off and discovered, besides the crack in it, it was the wrong fitting. The correct fitting has a ferrule inside against which the fuel line flared end seals against, this one didn't have a ferrule! Not to worry, Dr Wade just picks a correct fitting off the shelf and fits it, no leak now! With fuel up it was time to see if Junior would start, he wouldn't! Timing wasn't right, so back to basics. Set #1 @ TDC, easy to do now with the pointer and marks on the harmonic balancer assisted by being able to observe the valves without the tappet covers in place. Pulled the distributor to free up the bolt and screw at the base that allows for incremental adjustment then ensured the rotor was facing #1 spark plug lead. Was a little off so tweaked into position and the distributor tightened down. Time to give Junior a real test and because we'd been joined by Junior's Dad John, during the course of these proceedings, there now was a proud parent in attendance. After a few false starts Junior came to life, but didn't run for long. Without any coolant ran just long enough to ensure oil pressure and no rattles, noises or very importantly leaks. With vital signs checked Dr Wade left the patient to convalesce while going on to mount the tappet covers. The rear tappet cover was a real b@$t@rd to manouvere and hold in position then get the bolts in place. Installing the front tappet cover was somewhat easier, helped by raising Junior on the hoist to be at a better working height. The rear tappet cover might have been a bit easier to install at a more comfortable working level but old habits can be hard to break. Here's a YouTube video compilation of the little videos I took of the various start attempts, culminating in Junior coming to life for John. After John's departure, buoyed no doubt by seeing Junior's first cries after months of silence, I re-installed the transmission inspection plate and the front floor carpet. While I was doing that Wade was fiddling, sorry Dr Wade was testing and diagnosing Juniors needs in regard to the carburetor linkage problem. That done we left Junior and the workshop to visit JohnM. Earlier John had called me, because he couldn't make contact with Wade. However I passed the call onto Dr Wade who arranged to make of all things, a Packard housecall on JohnM's '39 Six TJ Richards bodied Sedan! On the weekend John couldn't get the '39 started, changed coil and condensor, but it still wouldn't go. Arriving at John's, and following a few basic checks with the meter, which indicated the battery was a little low, the '39 sprang into life. Maybe it was the bedside manner? More likely it had just been flooded yesterday following an hour or so of repeated start attempts and now with a head clear, so to speak, was ready to roar. Or does Dr Wade have mystical Packard powers which normal men cannae ken? While there also took the opportunity to inspect the throttle linkage on the '39 and, because John's son Paul had made up a new linkage system, persuaded John to contribute his old linkage to the cause of getting Juniors linkage system working which he was happy to do. Back at the workshop there was more discussion, fabrication and fiddling all in the cause of Juniors throttle linkages. Ended up making a new linkage rod between the firewall accelerator linkage lever and the bell crank arm. But not before a number of other plans had been mooted, mocked up and discarded. Also turned to a pic I'd taken about a month back when in the process of cleaning up the intake/exhaust manifolds prior to cleaning it up for painting. That one pic showed the bellcrank mounted on the manifold. But most interesting was the bellcrank was 180 degrees around from the way we were now mounting it. Although it "didn't look right" decided to pursue that avenue because around the other way it wasn't working anyway. Well, turned out just what was needed. That and fabricating a new linkage shaft out of a piece of scrap round, two rod end bearing(aka heim or rose joints) together with offsetting the linkage rod from the lever arms with spacers so it operated in one plane only. So now we have a throttle linkage, although not Packard, but importantly it works! Attach file: (31.67 KB)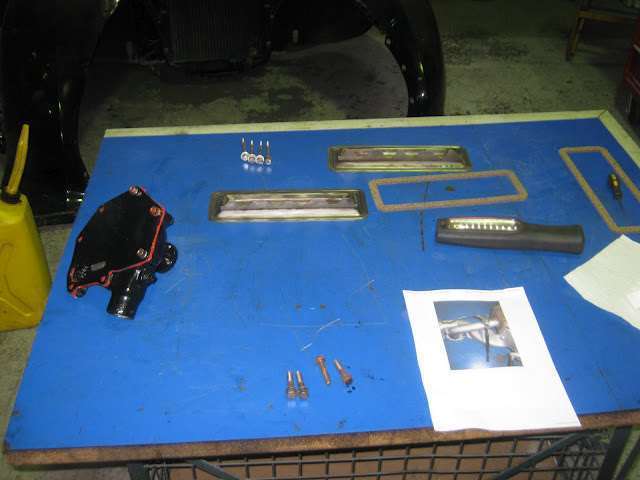 (25.16 KB) (25.16 KB)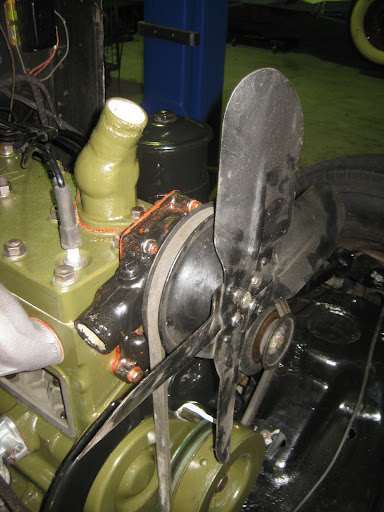 (17.44 KB) (17.44 KB)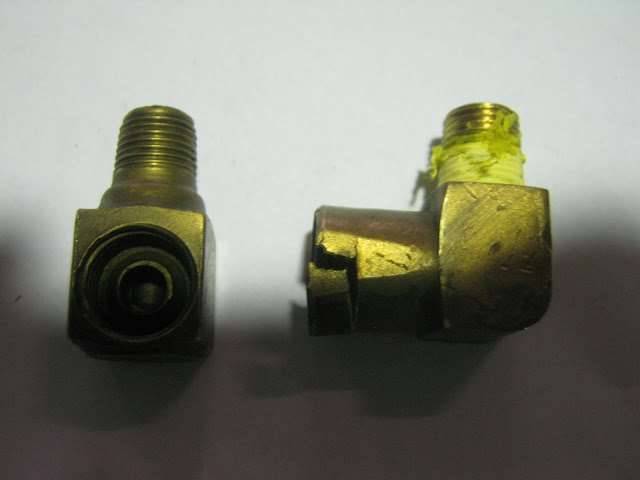 (24.27 KB) (24.27 KB)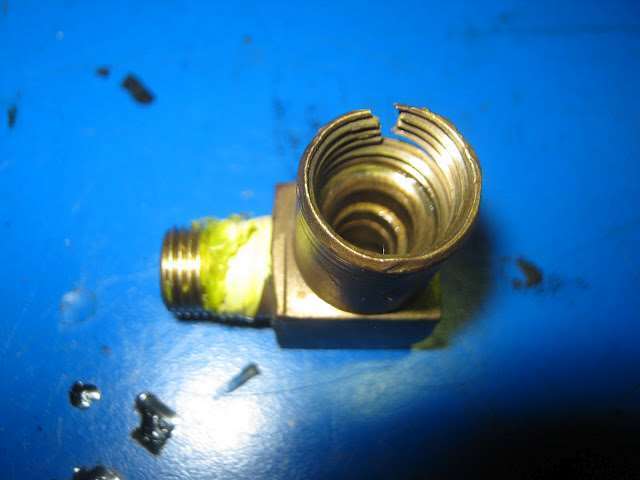 (31.04 KB) (31.04 KB) (35.69 KB) (35.69 KB)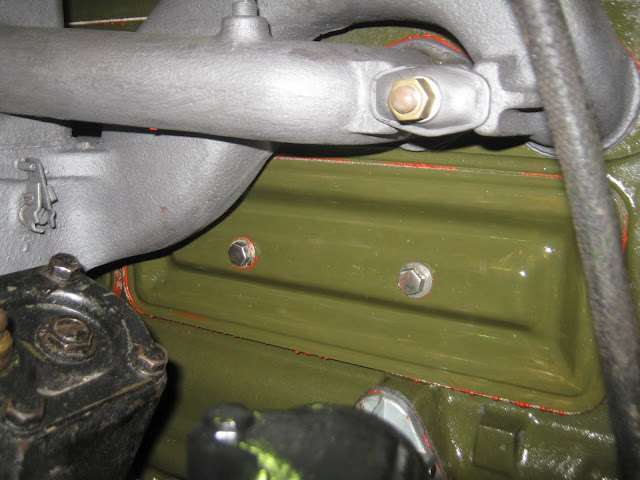 (45.04 KB) (45.04 KB)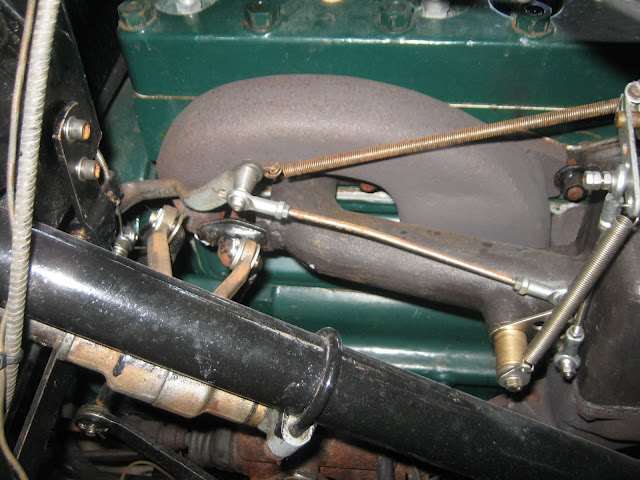 (25.24 KB) (25.24 KB)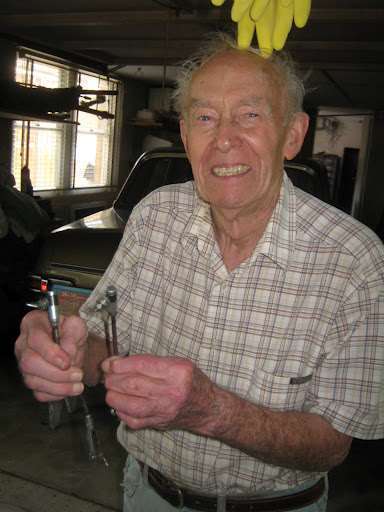 (42.91 KB) (42.91 KB)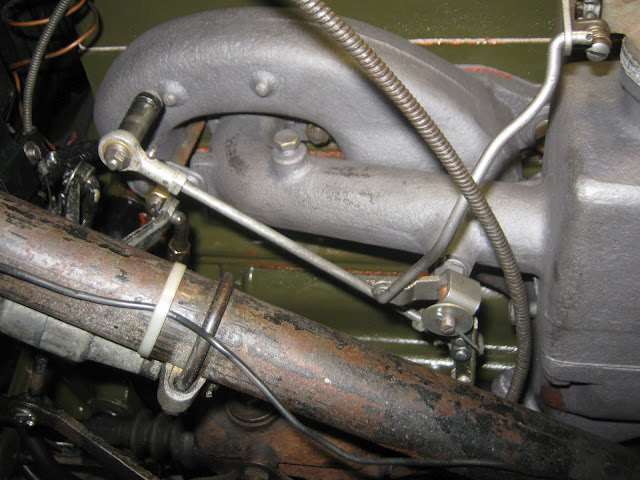 (23.23 KB) (23.23 KB)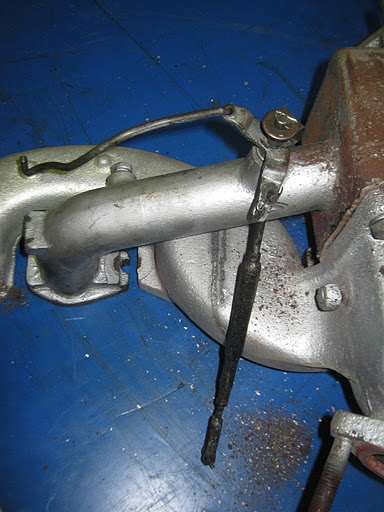
Posted on: 2012/3/5 8:03
|
|||
|
Mal
/o[]o\ ==== Bowral, Southern Highlands of NSW, Australia "Out of chaos comes order" - Nietzsche. 1938 Eight Touring Sedan - SOLD 1941 One-Twenty Club Coupe - SOLD 1948 Super Eight Limo, chassis RHD - SOLD 1950 Eight Touring Sedan - SOLD What's this? Put your Packard in the Packard Vehicle Registry! Here's how! Any questions - PM or email me at ozstatman@gmail.com |
||||
|
||||
Register To PostTopic is Locked


