|
Re: Larry's 1951 Club Sedan Project
|
||||
|---|---|---|---|---|
|
Home away from home
|
Nice Suzuki 8 - impressive but not heavy enough!
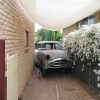
How about a transverse Packard straight8! Across the frame would be a real engineering challenge.
Posted on: 2013/9/5 8:07
|
|||
|
1951 Packard Club Sedan | [url=ht
|
||||
|
||||
|
Re: Larry's 1951 Club Sedan Project
|
||||
|---|---|---|---|---|
|
Home away from home

|
Engine started
It's now Christmas and (just like everyone else I talk to) I wonder where the year has gone! Good progress on the car over recent times, the most significant event being the starting of the engine a few weeks ago. Like other milestones, I got a real buzz from hearing the engine running. According to the chap who sold me the car (- in pieces -) the engine has not run since around mid 1970's. So after taking many weeks to do a full rebuild it was very nice to have it start and run without any problems. Here's a short video . . . . . Engine Running (Let me know if you have any problem viewing the video) Leading up to starting the engine . . . . I had to get a lot done after fitting it into the car and amongst other tasks to do before I could contemplate starting it was waiting for a 6volt coil to arrive from Kanter. So I decided to test one of the (probably 60-year old) original coils I had. Very pleased when it produced a decent spark. Also to be finalized was the filling of the Ultramatic with ATF and connection of the tailshaft and gearshift levers. (The car is on blocks so as to be able to check the Ultramatic operation). Of course that meant fitting the steering shaft complete with steering box . . . which had to be reconditioned and brought back to 'as new' condition. Very few of my '51 parts are in good condition. Generally parts need a lot of work and TLC to restore them. So the short of it was that I needed to do many weeks of work restoring parts and fitting them before I could contemplate an engine start. I ordered a set of gauges (- oil/ temp/ amps) so as to be immediately aware of oil pressure when the engine was first run (- and these will be fitted to the cockpit eventually). A battery cutout and leads were fitted and various other bits and pieces reconditioned and fitted as well. It was pleasing to find I had an original battery isolation switch I could use - still on a rusty old wreck I have stored away out of town. Starter was reconditioned, tested and fitted, as was the generator. Then fan and fan belt and other necessary parts. Hundreds of hours in total. The Ultra oil cooler had a water leak, which had to be silver soldered. The original fittings and pipe ends were corroded so new ones were made. A temporary short rubber hose from pump into a glass jar would provide the petrol as the petrol tank is yet to be placed in the car. Couldn't find the original transmission shift lever so I made another from 5/16" rod and a piece of hex bar, the rods threaded at each end and the hex bar threaded internally to suit. Couple of lock nuts added as well. This works well, with plenty of adjustment available. I filled the Ultramatic with ATF (Type F as recommended here) and was thankful that only a small drip leaked from the oil pan gasket overnight. This would be ok and I planned to replace it later, after the start session. Because I have no full exhaust I fitted a one-foot long pipe to take the exhaust away from the manifold. It was going to be noisy but I have good neighbours. Fitted the new radiator and water pipes, filled the sump with oil and there were no leaks. So far I was very pleased with the way things were progressing, with no coolant or oil leaks. I did a test crank and the engine was trying to run with intermittent firing. Seemed like timing might be out, although I had 'static' timed it carefully. Loosened the distributor and rotated it then cranked the engine again. It started quite easily and ran ok. Killed it after around two minutes and checked for any leaks etc. None found. Topped up the ATF to 'Full' on the stick (- obviously the Ultra converter had filled ok). Ran the engine again (at around 1200 rpm as good as I could guess) and selected different gears while listening for nasty noises in the transmission. All was ok, with wheels spinning in forward and reverse gears. Then I ran the engine again with vacuum advance disconnected to check timing with a strobe. Adjusted timing as per manual but engine slowed a little so I moved it a couple of degrees back and revs picked up. Possibly a distributor problem - to be checked later. Took off tappet covers and looked for oil in/ around valve springs etc. There was very little but opinion seems to be that when the car is driven at higher revs there should be plenty of oil splashed to the valve stems and guides etc. Hope that this is correct! Later I drained the transmission and made and fitted another gasket. Well . . . . this one leaked very badly so I drained the fluid again and the next day was lucky to find a parts place that had thick (1.5mm) gasket material. This stuff is hard to work with but I managed to make a new oil pan gasket after a lot of effort with a Gem Blade and scissors. Hopefully this will create a good seal. Now I'm working on rewiring the car, so will post again soon on progress. Merry Christmas to all!
Posted on: 2013/12/24 7:40
|
|||
|
1951 Packard Club Sedan | [url=ht
|
||||
|
||||
|
Re: Larry's 1951 Club Sedan Project
|
||||
|---|---|---|---|---|
|
Home away from home

|
Larry, congrats but please put a crease in your new bluey before doing movies.
Posted on: 2013/12/24 13:10
|
|||
|
The story of ZIS-110, ZIS-115, ZIL-111 & Chaika GAZ-13 on www.guscha.de
|
||||
|
||||
|
Re: Larry's 1951 Club Sedan Project
|
||||
|---|---|---|---|---|
|
Home away from home

|
Great job! Engine sounds really nice!
Posted on: 2013/12/24 15:07
|
|||
|
[url=h
|
||||
|
||||
|
Re: Larry's 1951 Club Sedan Project
|
||||
|---|---|---|---|---|
|
Home away from home

|
Thanks Ross, Charles and Guscha!
I'll ask my wife if she'll iron a crease in the 'overalls' to make me look a lot neater and like a real Packard Technician (- very necessary!).
Posted on: 2013/12/24 19:09
|
|||
|
1951 Packard Club Sedan | [url=ht
|
||||
|
||||
|
Re: Larry's 1951 Club Sedan Project
|
||||
|---|---|---|---|---|
|
Forum Ambassador

|
also the flippy floppies are a perfect Packard workman's shoe!
just teasin ;0) thanks for the video!
Posted on: 2013/12/24 23:34
|
|||
|
1937 Packard 138-CD Deluxe Touring Limousine
Maroon/Black 1090-1021 [url=https://packardinfo.com/xoops/html/modules/registry/View.php?ID=232]1955 Packard |
||||
|
||||
|
Re: Larry's 1951 Club Sedan Project
|
||||
|---|---|---|---|---|
|
Home away from home

|
Ah yes . . . . . They're special flip-flops which have a 'cone of protection' built in. Hardly ever lost a toe while wearing 'em!
Posted on: 2013/12/25 0:00
|
|||
|
1951 Packard Club Sedan | [url=ht
|
||||
|
||||
|
Re: Larry's 1951 Club Sedan Project
|
||||
|---|---|---|---|---|
|
Home away from home

|
(Trying to make up for my very poor 'posting performance' of late(!))
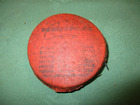
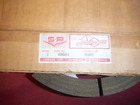
Zinc and Nickel Plating Been doing some Zinc and Nickel plating again. I last plated parts over 2 years ago and it was time to do a lot more as I put the car back together. There's going to be another couple of plating sessions sometime future because there are still many small parts that need to be done. Despite all the cleaning, buffing (and then more cleaning) involved it's a rewarding job when you see the results. I was given 20 litres of the best Nickel 'Watts solution' and Nickel anodes etc some years ago by a professional plater. So the results are really good for the Nickel plating. The only tedious part is keeping the bath at 65degrees constantly for around an hour. A 1500W immersion heater and a water bath does the trick. Before plating the instrument cluster surrounds I removed the old chrome in an electrolysis bath (Caustic Soda / Lead anode). The instrument cluster looks ok but some time I'll try and get a better one as there is a bit of pitting in places on the one I have. Cleaning up an instrument cluster  Getting old chrome off in a bath  Troublesome power supply trips out when started (design fault)  Built a circuit to prevent the trip-out (soft start)  Bumper bar bolts and door handle bezels to be Nickel plated  Nickel plated bolts  The Watts Nickel plating setup  Handbrake lever Nickel plated  Handbrake mechanism Zinced  Dozens more small parts were done . . . . It's tempting to plate loads of parts that were originally painted (just for the glam), but I resisted the temptation, not wanting to end up with a car that's not to original spec.
Posted on: 2013/12/26 7:07
|
|||
|
1951 Packard Club Sedan | [url=ht
|
||||
|
||||
|
Re: Larry's 1951 Club Sedan Project
|
||||
|---|---|---|---|---|
|
Forum Ambassador
|
Quite nice that you are able to handle the plating yourself -- it will sure save a bundle. I've done a bit with the Caswell CopyChrome product and the Eastwood Cadmium plate kit which are about all that is legal or available for the ordinary guy where I am. Not much you can do with the tiny kits but it does do the very small objects fairly well -- if the prep is perfect.
On the club sedan, you are right in that it is fairly unique car. My friend Mark is heavily invested in a 52 club he picked out of many Packard choices in the lot because it was different. He started like gangbusters and has done quite a bit on his -- to the point all it needs to finish now is electrical and ambition to bolt things together. Alas, he has discovered TBirds. His new beloved is well into them so all his time an money is invested there. Don't see much hope for the Packard ever getting on the road. If and by the time it does, am afraid all his work will be needing a do over so yours will be one of a dying breed.
Posted on: 2013/12/26 11:54
|
|||
|
Howard
|
||||
|
||||

