|
Re: BigKev's 1954 Packard Clipper Deluxe Sedan
|
||||
|---|---|---|---|---|
|
Webmaster

|
Happy Belated Birthday Randy!

Posted on: 2009/12/29 1:26
|
|||
|
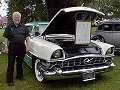
-BigKev
1954 Packard Clipper Deluxe Touring Sedan -> Registry | Project Blog 1937 Packard 115-C Convertible Coupe -> Registry | Project Blog |
||||
|
||||
|
Re: BigKev's 1954 Packard Clipper Deluxe Sedan
|
||||
|---|---|---|---|---|
|
Forum Ambassador

|
Great pic's Kev!
Posted on: 2009/12/29 1:43
|
|||
|
Mal
/o[]o\ ====  Bowral, Southern Highlands of NSW, Australia "Out of chaos comes order" - Nietzsche. 1938 Eight Touring Sedan - SOLD 1941 One-Twenty Club Coupe - SOLD 1948 Super Eight Limo, chassis RHD - SOLD 1950 Eight Touring Sedan - SOLD What's this?  Put your Packard in the Packard Vehicle Registry! Here's how! Any questions - PM or email me at ozstatman@gmail.com |
||||
|
||||

|
Re: BigKev's 1954 Packard Clipper Deluxe Sedan
|
||||
|---|---|---|---|---|
|
Webmaster
|
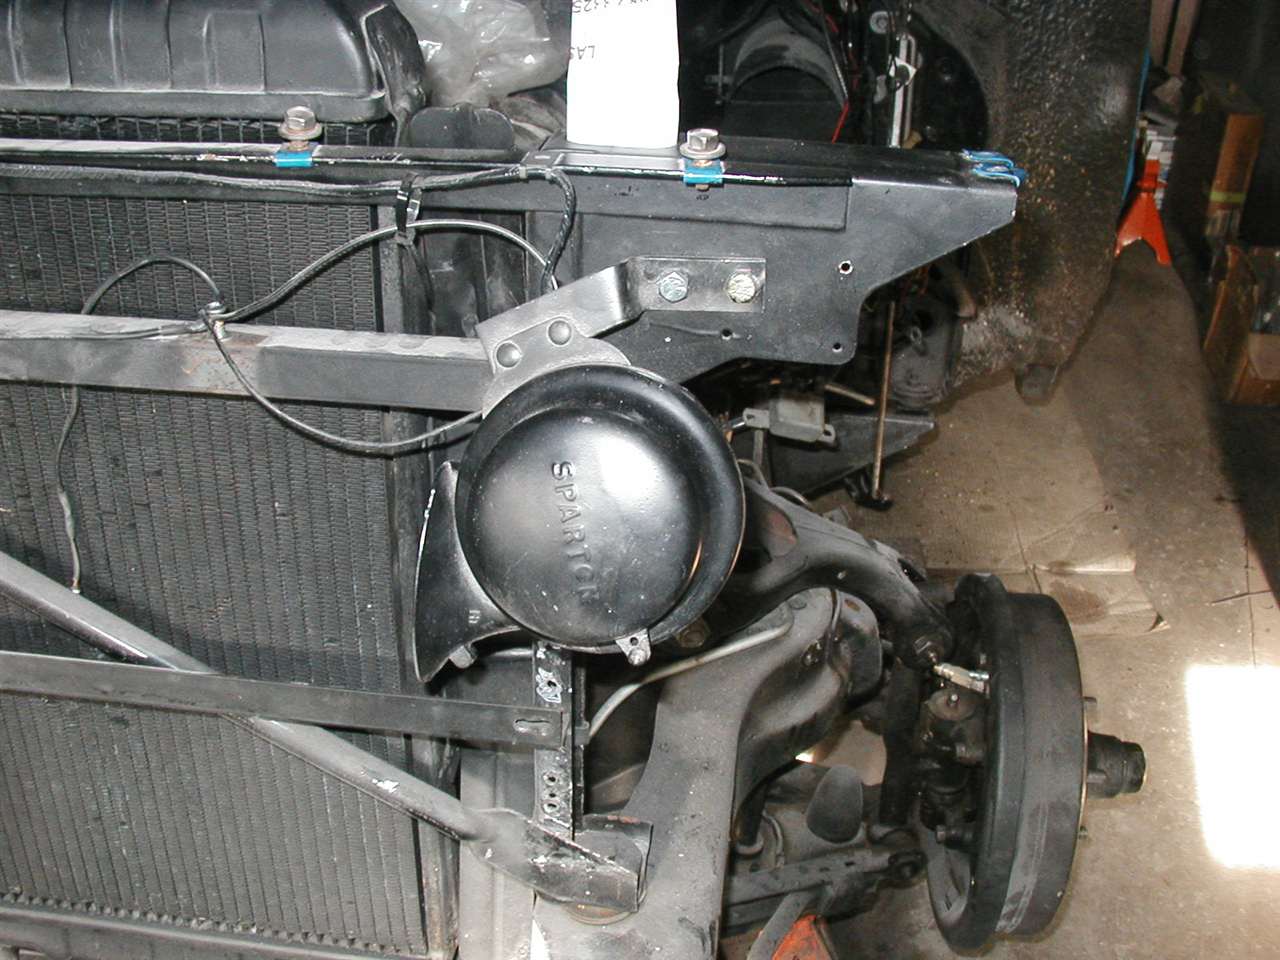
Interesting on the different mounting. The horns are a different design also. I wonder if the difference was because of the placement of the blower fan.
Posted on: 2009/12/29 21:52
|
|||
|
-BigKev
1954 Packard Clipper Deluxe Touring Sedan -> Registry | Project Blog 1937 Packard 115-C Convertible Coupe -> Registry | Project Blog |
||||
|
||||
|
Re: BigKev's 1954 Packard Clipper Deluxe Sedan
|
||||
|---|---|---|---|---|
|
Webmaster
|
Well after a late start due to some errands I had to run with the Mrs., I was able to get a few more things done in the garage.
First I discovered that the mailman had left a package for me. It was the fender mount for the power antenna from Jerry at Yesterdays Radio. Part looks great and fits great. One problem I discover is that my old manual antenna had a long brace that clamped around the antenna tube and then secured to a bolt in the bottom of the fender. Obviously that wont work. Does anyone have a picture of what the power antenna lower mount/brace looks like? Also I would like to see what the orientation of the motor is under the fender. I just want to make sure I didn't rotate the top portion when I was reassembling the unit. So pictures please if you have them! Next it was on to the horn. I had reversed them right to left. So I switched them. I also noticed that I had rotated the electrical portion in the housing on the driver side one upon reassembly as I assumed it was opposite of the other one. Even thought the horns are mirror images of one another, the electoral contact is always pointed towards the drivers side because of the way the harness is ran. I simply had to remove the bolts, rotate the horn in the housing, and reinstall the bolts. Simple fix. Then it was on to the big job of the day. Removing the long brake line leading from the master cylinder to rubber line in the rear. So first order of business was getting the car up on my poor-mans four-post lift (jack stands). They I shimmied myself under the car to have a peak how everything was ran and see what was going on. First thing I noticed has a huge lump of dried mud jammed in the "Y" where the rear portion of the X-brace meet the framerail. At first I though it was a giant mud dauber nest. But after chiseling it out with a screwdriver, it was just a huge chuck on harden mud. With that out of the way and quick brushing to remove the spiderwebs and loose dirt it was on with the inspection. The fuel line runs down the outside of the framerail, and is held in by two clips. So I unclipped it, so it is ready to go when I replace that line after the brakes are done. The brake line runs down the inside of the framerail. I unclipped the line from the three clips holding it in place. Next I sprayed the connection to the flex line with some PB Blaster as I was sure it was pretty much corroded in place. There is almost no room to swing wrench, so I used a set of channel-locks to twist the flex line while I held the tubing nut with the flair nut wrench. Success! Next next pain was trying to remove the brake line clip that holds the flex line in. It took several sprays of PB and some persuading with a large flathead screwdriver and a hammer to break it free. There is really no way to snake that large line out from the front or back in one piece. This is why the were installed before the body was dropped on. So really the best way was to pull the line out from the middle. Once you pull it out far enough to clear the cross member in the front and back in drops right out. The replacement line is two pieces so much easier to work back in. The first thing with to bend a 90 in the front of the line. This was done in the shorter of the two pieces. Then the line is snaked though the two oval opening in the front x-bracing. Then you screw the line loosely in the master cylinder to allow it to pivot, but not shift. Then it was back under the car. You need to then hand bend the line so it runs though the middle of the oval openings with out rubbing anything. Then you continue to bend it so that it lays flat against the framerail. Then it is secured to the first line clip. With it secured, make any other adjustments needed so the line with not chaff anywhere. Next the compression line coupler is added and snugged down. The longer of the two lines is used next. First the line is put through the hole in the rear cross member. The other end is loosely screwed in to the coupler. Then the line is clipped in place down the length of the framerail. Then you need hand bend the line to keep it center in the hole in the crossmember. Then the rest of the line is hand bent to go over the e-brake cable and then goes straight into the flexline connection. Once everything was adjusted for clearance, then I went back and tightened all the fittings. I still need to replace the rubber flex line in the rear, and also the rear hard lines over the axle. That should come tomorrow. Then all I need to do is fill the system with DOT 3, and purge the air, and adjust the brake shoes and then I should have a working brake system. Then it's on to the fuel lines and tank. Attach file:  (34.57 KB) (34.57 KB)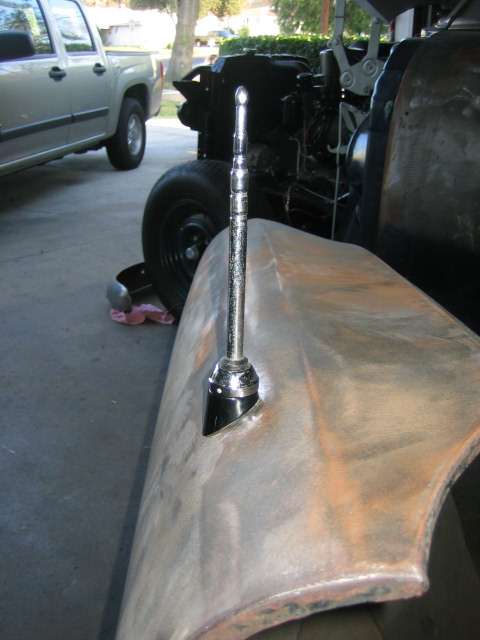 (38.79 KB) (38.79 KB)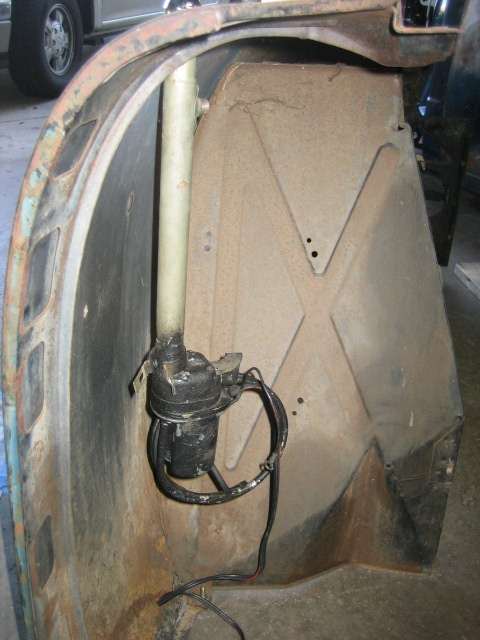 (24.21 KB) (24.21 KB)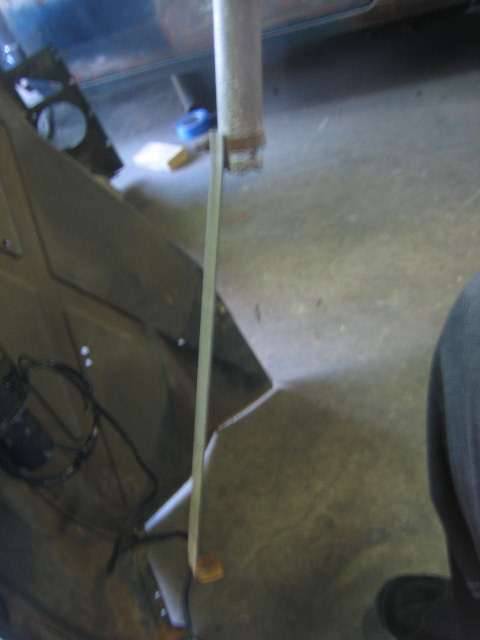 (40.88 KB) (40.88 KB)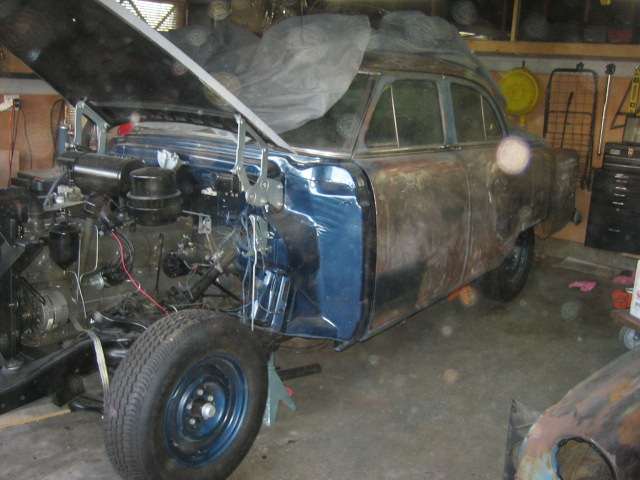 (35.52 KB) (35.52 KB) (34.86 KB) (34.86 KB)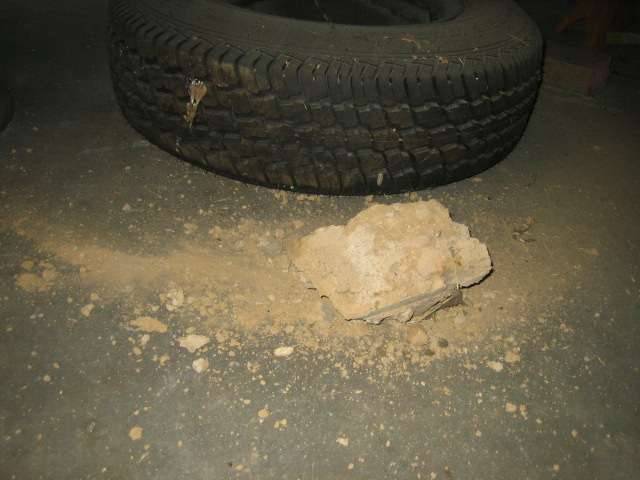 (35.62 KB) (35.62 KB)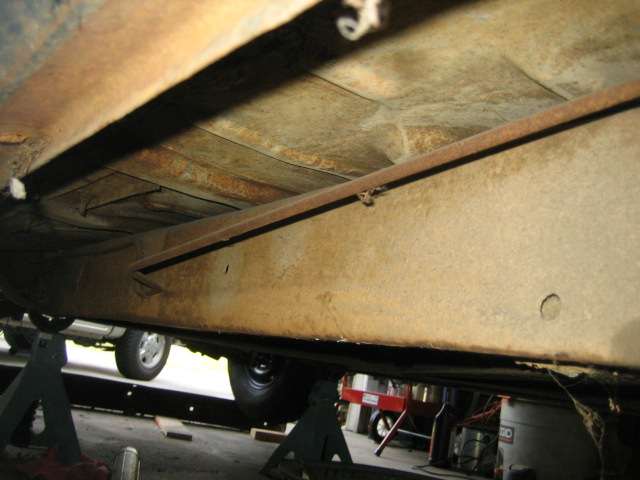 (37.93 KB) (37.93 KB)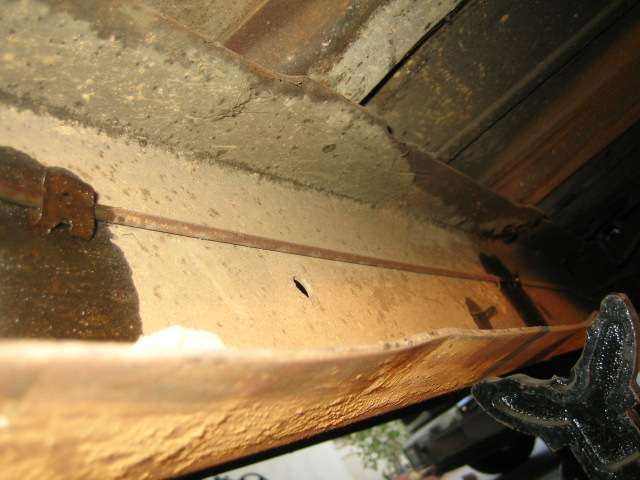 (43.51 KB) (43.51 KB) (43.85 KB) (43.85 KB) (36.48 KB) (36.48 KB) (31.23 KB) (31.23 KB) (33.90 KB) (33.90 KB) (31.69 KB) (31.69 KB) (38.55 KB) (38.55 KB)
Posted on: 2009/12/29 22:09
|
|||
|
-BigKev
1954 Packard Clipper Deluxe Touring Sedan -> Registry | Project Blog 1937 Packard 115-C Convertible Coupe -> Registry | Project Blog |
||||
|
||||
|
Re: BigKev's 1954 Packard Clipper Deluxe Sedan
|
||||
|---|---|---|---|---|
|
Forum Ambassador
|
Once again, great Pic's Kev. That sure is some lump of dirt, puts my Idaho undercar prospecting to shame.
Posted on: 2009/12/30 0:40
|
|||
|
Mal
/o[]o\ ==== Bowral, Southern Highlands of NSW, Australia "Out of chaos comes order" - Nietzsche. 1938 Eight Touring Sedan - SOLD 1941 One-Twenty Club Coupe - SOLD 1948 Super Eight Limo, chassis RHD - SOLD 1950 Eight Touring Sedan - SOLD What's this? Put your Packard in the Packard Vehicle Registry! Here's how! Any questions - PM or email me at ozstatman@gmail.com |
||||
|
||||
|
Re: BigKev's 1954 Packard Clipper Deluxe Sedan
|
||||
|---|---|---|---|---|
|
Webmaster
|
Mal that is one of those lumps of dried mud that you poke with a stick and prepare to run just incase!
Even thought there is a bit of surface rust on the frame, the underside of the car is surprising solid. Still has the factory paint/primer on the underside of the floor pans. Now the front pans are a disaster, but the rust is totally from the inside out. This from the carpet getting wet from sitting over many years it rusted through the floors in the exact pattern of the carpet jute. Where the jute was you could poke hole through the floor with a screw driver. Go one inch over were the there was no carpet jute, and the floors are solid. Crazy, At least because the rust was from the top, the inner and outer rockers are solid and are all the under floor supports. After I get the fuel and brake stuff taken care of, I plan on brush painting all the underside with some POR-15 or equivalent. So keep what is still good looking good for a long time.
Posted on: 2009/12/30 1:08
|
|||
|
-BigKev
1954 Packard Clipper Deluxe Touring Sedan -> Registry | Project Blog 1937 Packard 115-C Convertible Coupe -> Registry | Project Blog |
||||
|
||||
|
Re: BigKev's 1954 Packard Clipper Deluxe Sedan
|
||||
|---|---|---|---|---|
|
Webmaster
|
Any body have pictures of what the lower power antenna mount looks like?
Posted on: 2009/12/30 14:46
|
|||
|
-BigKev
1954 Packard Clipper Deluxe Touring Sedan -> Registry | Project Blog 1937 Packard 115-C Convertible Coupe -> Registry | Project Blog |
||||
|
||||
|
Re: BigKev's 1954 Packard Clipper Deluxe Sedan
|
||||
|---|---|---|---|---|
|
Forum Ambassador

|
Can't tell how tall that antenna is but the original 6v version used 51-?? has a short version of your manual type brace -- about 6-7 inches long and bolts to bottom of motor and fender. Believe there was a second version a little shorter overall with a larger coiled tube but more like the later ones. The 55-6 type (which I think you said your antenna was) uses a short brace over to a fender molding bolt. That is shown in 55-6 accessories section & believe the screw hole for that is what is on yours. Don't know if your fender molding bolts would work like that since your chrome is higher.
Attach file: (11.50 KB)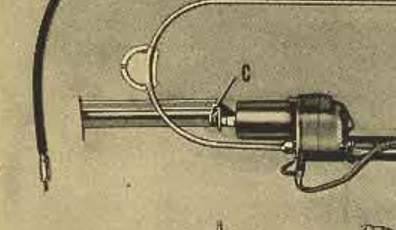
Posted on: 2009/12/30 15:10
|
|||
|
||||
|
Re: BigKev's 1954 Packard Clipper Deluxe Sedan
|
||||
|---|---|---|---|---|
|
Home away from home

|
Here are the pics of a power antenna bracket for a '51 200. It is 1-1/4" wide at the main part with a strengthening indent along it's length. I would measure how long my antenna body is, but I think it is in my trunk and the car is covered with snow right now. The bracket has the bolt stuck on that attaches to the bottom of the antenna motor. As stated before, your 55-56 may be a different size than the stock one. Hope this helps!
Attach file: (67.33 KB) (71.34 KB) (71.34 KB)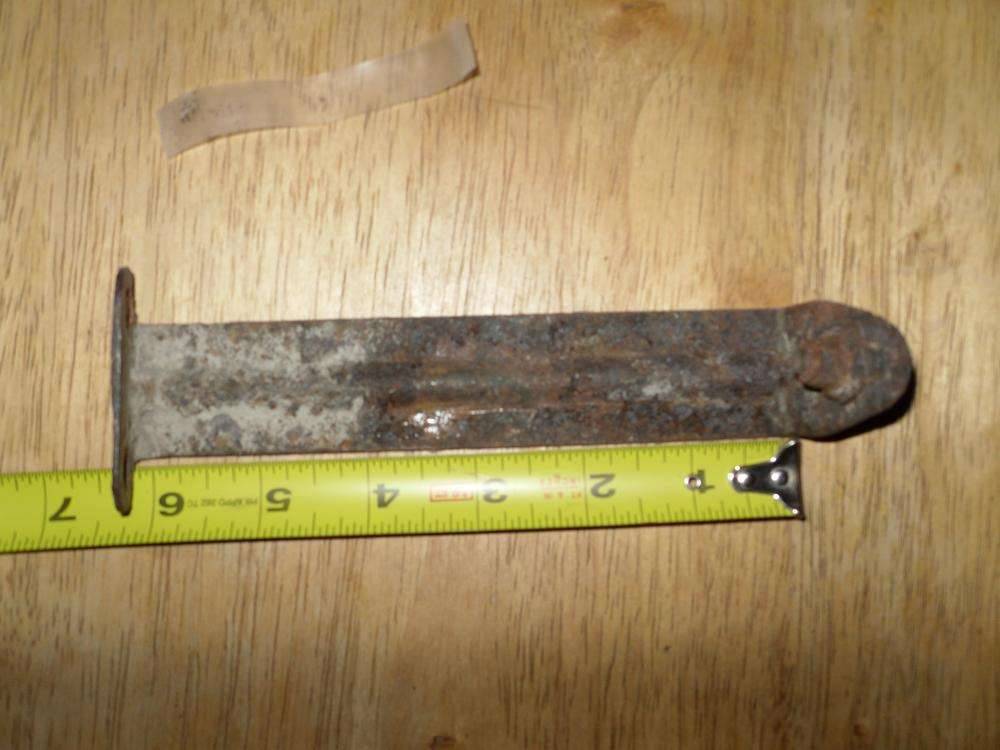 (67.53 KB) (67.53 KB) (71.13 KB) (71.13 KB)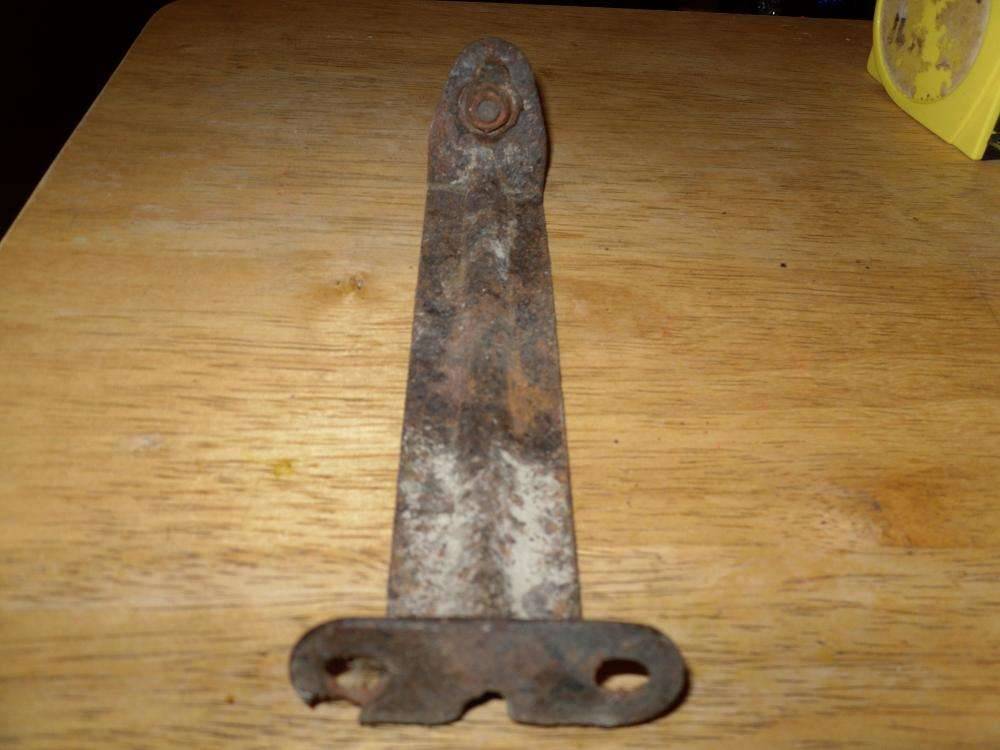
Posted on: 2009/12/30 20:06
|
|||
|
[url=h
|
||||
|
||||


