|
Re: Adventures with a 1955 Clipper
|
||||
|---|---|---|---|---|
|
Home away from home

|
Hello All,
I am jumping back to garage sessions worked before the one previously posted that dealt with the "Mysteriousgreenwire". There are two garage sessions discussed here as they were short one, productive, and not too intense, but progress was made. In the first of the two sessions I got the engine running, ignition timing, and idle speed set. It was nice to hear it running so smoothly again, and looking good. The running engine produced two oil leaks; one from the filter return line and another around the base of the distributor that did not look good. Further investigation revealed that I only had one leak - from the oil filter. Oil from the filter leaked to the top of the engine and under the intake manifold, flowed around the tappet valley cover, and then flowed to back of the engine and around the distributor. It first looked like there was oil coming from the distributor base. Good news, only one leak to fix. The fix took two tries. The leak was at the bottom of the filter housing were the return line to the engine fastens to the filter housing. After the first attempt failed, I took the filter off of the engine and took it apart. The problem was with the threads where the oil line fitting screws into the housing. I cleaned them up with a 1/8" NPT tap. I was careful not to go too far with the tap as it would make the tapered threads too large. I then got a new fitting and screwed it in tight with some Permatex thread sealer. I believe I caused the problem when I repainted the filter housing as I had removed the fitting. It had been installed with a thread sealer. I did not use a sealer when I reassembled the fitting into the filter housing. Usually I do not like to use sealers, but there is a time when they are required. After this, I reinstalled the filter, and started the engine (with some difficulty because of a balky ignition switch) and ran it until it warmed up. No more leaks. With the car running I backed it out of the garage and proceeded to clean up the dirty garage floor. I scrubbed the floor down with a small amount of mineral spirits to loosen the oil and grease that had accumulated. After that I washed the floor down and finished up with some Tide HE laundry detergent to cut the oily film left by the first cleaning. A good hosing down and the floor was returned to its former glory. The last session was an easy one - Applying some decals. The Packard Club has reproduced a number of engine compartment decals and I ordered a set. I think the decals add a nice finishing touch. I still need to figure out were the Trico windshield washer jar decals should be placed. With the decals applied, I declared a victory to the engine compartment cleaning and refurbishing. Now on to other areas, and there are many. Thanks for letting me share these efforts with you. Take care. (o{I}o) Attach file:  (29.56 KB) (29.56 KB) (40.77 KB) (40.77 KB)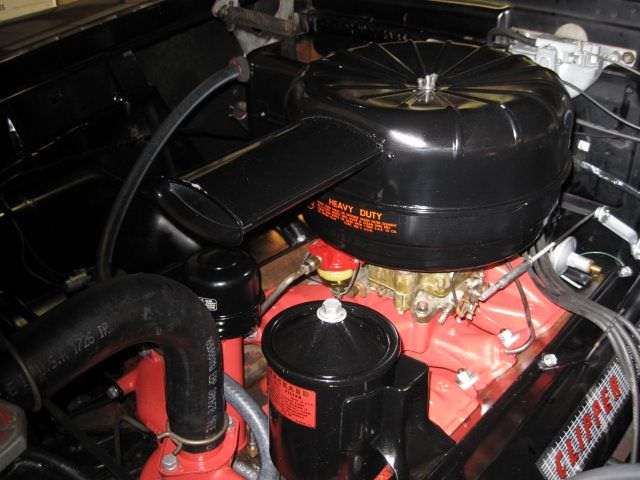 (40.79 KB) (40.79 KB)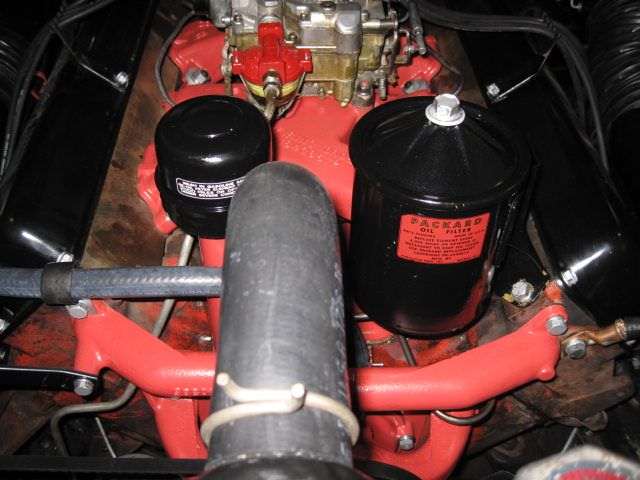 (45.26 KB) (45.26 KB)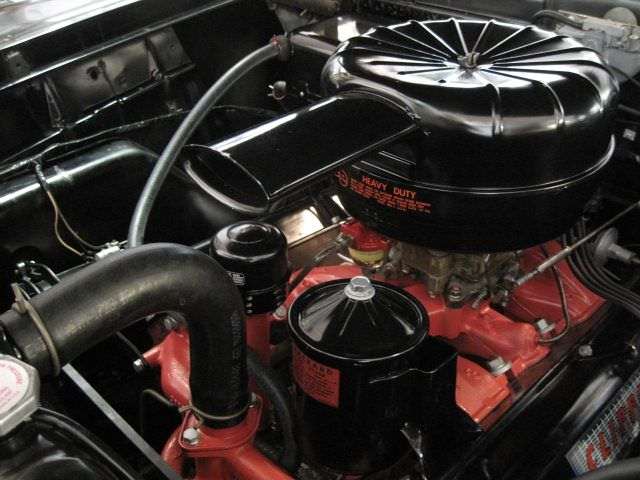 (43.86 KB) (43.86 KB)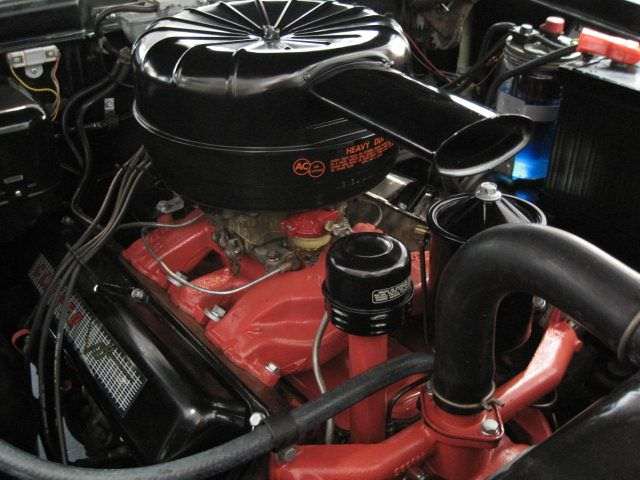
Posted on: 2011/7/1 10:56
|
|||
|
We move toward
And make happen What occupies our mind... (W. Scherer) |
||||
|
||||
|
Re: Adventures with a 1955 Clipper
|
||||
|---|---|---|---|---|
|
Webmaster

|
JW,
The curved one goes on the washer jar lid, and the rectangular one goes on the bottle bracket front. Or at least that is how it was originally on the mine when I bought used the washer and bracket.
Posted on: 2011/7/1 11:47
|
|||
|
-BigKev
1954 Packard Clipper Deluxe Touring Sedan -> Registry | Project Blog 1937 Packard 115-C Convertible Coupe -> Registry | Project Blog |
||||
|
||||
|
Re: Adventures with a 1955 Clipper
|
||||
|---|---|---|---|---|
|
Forum Ambassador

|
Sure looks nice. Max's decal placement list says top of lid for curved one on 51-6 washers and just jar for the other. PAC doesn't specify. I have several lids that were removed from cars and none show any remnants of the decal--nor do a couple of jars. Don't see any on the two pictures Kev posted of lids & jars in his parts for sale thread either but there is a question about a spot under the wires on one of his maybe showing a piece.
IMHO, either the original decals must have been very delicate & disintegrated or came off quickly or perhaps Packard didn't use them on all cars. Will be interested to hear what you come up with if you do any detailed research.
Posted on: 2011/7/1 11:53
|
|||
|
Howard
|
||||
|
||||
|
Re: Adventures with a 1955 Clipper
|
||||
|---|---|---|---|---|
|
Webmaster
|
From the PI engine room judging guide, looks like it's one decal or the other, but not both. Which makes sense as my washer pump, and bracket came from two different sources originally.
Attach file: (45.91 KB)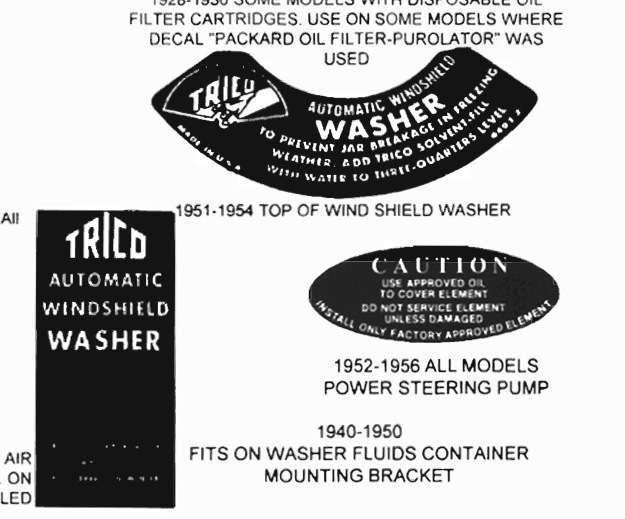
Posted on: 2011/7/1 12:22
|
|||
|
-BigKev
1954 Packard Clipper Deluxe Touring Sedan -> Registry | Project Blog 1937 Packard 115-C Convertible Coupe -> Registry | Project Blog |
||||
|
||||
|
Re: Adventures with a 1955 Clipper
|
||||
|---|---|---|---|---|
|
Home away from home
|
Kev and Howard,
Thanks for the input on the washer decals. I ended up using the curved decal on the jar lid and did not use the other one. I figured it was for a bracket, but not mine. It was too wide. I'll take a photo and send it out for folks to see. I did do a little Packarding today. Removed the front seat cushion and back for a good cleaning. The cushion foam needs to be replaced. I will take it to a trim shop next week. This will all be discussed in some future project blog. Nothing like working in the garage in the "Hot of Texas". Of course I don't expect any sympathy from you two who live in locales that are just as unpleasant during the summers. I did buy a large high capacity pedestal fan at Lowe's, and it helps quite a bit. Enjoy the holiday weekend. (o{I}o)
Posted on: 2011/7/1 14:27
|
|||
|
We move toward
And make happen What occupies our mind... (W. Scherer) |
||||
|
||||
|
Re: Adventures with a 1955 Clipper
|
||||
|---|---|---|---|---|
|
Home away from home
|
Hello All,
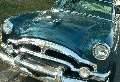
In the last garage sessions, I decided to work on the other end of the car. The previous owner had a long chrome plated extension welded to the end of the tail pipe. This extension drags on my driveway when I drive in and back out. The tail pipe needed to be shorter and mounted closer to the bumper to avoid scraping on the driveway. I made a visit to the nearby Auto Zone parts store and bought a piece of exhaust pipe tubing and a new clamp. I cut-off the tail pipe just in back of the hanger bracket so I could fit a proper length piece of pipe. I also decided to modify the hanger bracket to raise the tail pipe closer to the bumper. I cut-off the end of the new tail pipe extension at an angle to further provide more driveway clearance. It all went on nicely and I think this new pipe will now have enough clearance. Plus, I did not think the long chrome extension was attractive as shown in the first photo. My tail pipe fix looks more like what Packard would have done when the car was new. The next job was remove the inoperable electric fuel pump. I believe it stopped working when I switched the battery polarity from positive to negative ground. I would have removed it even if it was still working. I was not pleased with the aging installation. It was time for it to be renewed or removed. I think the photos tell a better story than my words. A length of 5/16" fuel hose and two clamps replaced the pump and all its hardware and plumbing. I have an aversion to electric fuel pumps. I don't think they are necessary if the fuel system is functioning properly. They do have value in priming the fuel system for starting the engine after it has been sitting for some time, and overcoming vapor lock. Unfortunately, vapor lock is becoming more prevalent with ethanol being added to our gasoline. I may be back under the car re-installing an electric fuel pump, but I hope not. Take care. (o{I}o) Attach file: (52.84 KB) (31.38 KB) (31.38 KB)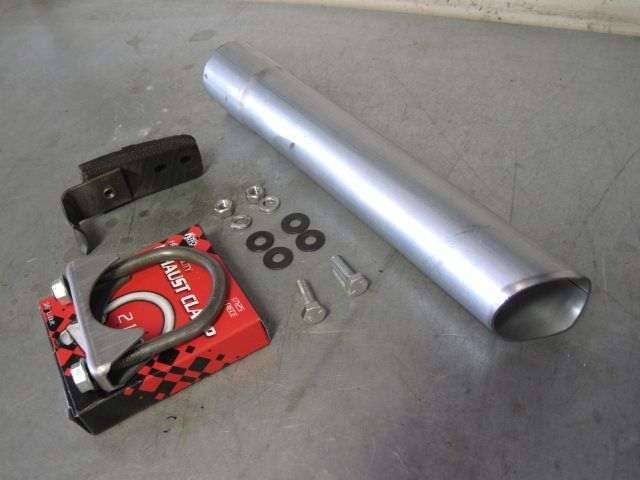 (30.52 KB) (30.52 KB)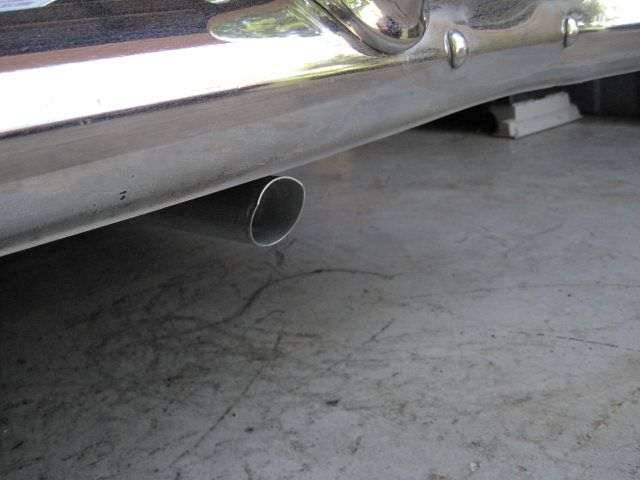 (27.56 KB) (27.56 KB)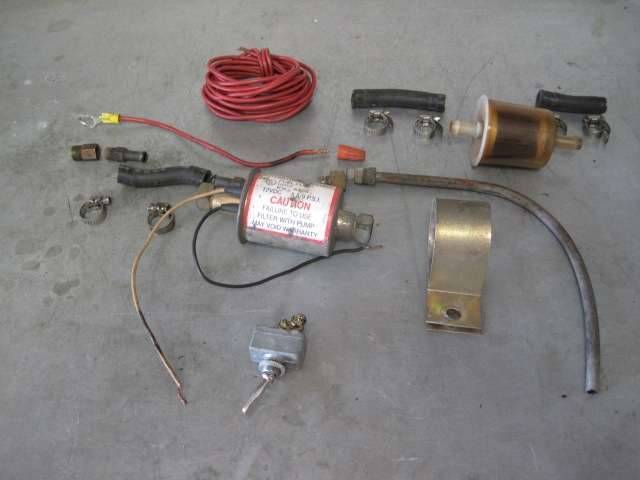 (28.91 KB) (28.91 KB)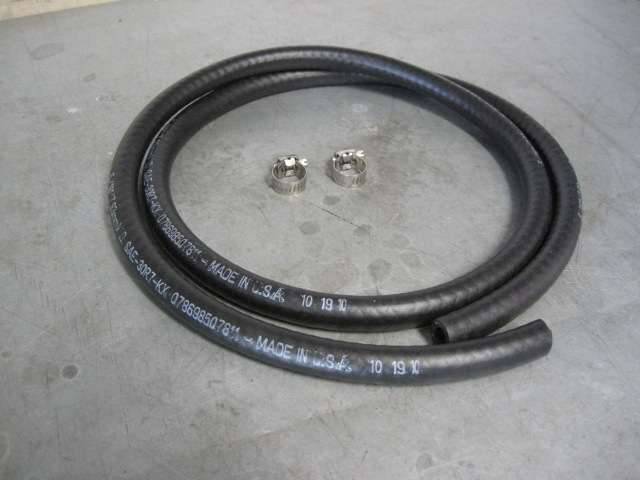
Posted on: 2011/7/3 16:53
|
|||
|
We move toward
And make happen What occupies our mind... (W. Scherer) |
||||
|
||||
|
Re: Adventures with a 1955 Clipper
|
||||
|---|---|---|---|---|
|
Home away from home
|
JW,
If the float bowl is holding gas (and it should except for evaporation), your foot makes an excellent fuel pump for priming prior to starting. Remember when every car was different, and some took one pump, others two or three, etc? Now, woe to you if you even touch the pedal before turning on the ignition.
Posted on: 2011/7/3 22:01
|
|||
|
Guy
Not an Expert |
||||
|
||||
|
Re: Adventures with a 1955 Clipper
|
||||
|---|---|---|---|---|
|
Home away from home
|
Guy, I don't mind using several short bursts of the starter to prime the fuel system. This also has another benefit of getting some oil circulated before the engine fires. This is another rationale I have for not having an electric fuel pump. Some people like the instant start. To each his own.
(o{I}o)
Posted on: 2011/7/4 12:29
|
|||
|
We move toward
And make happen What occupies our mind... (W. Scherer) |
||||
|
||||
|
Re: Adventures with a 1955 Clipper
|
||||
|---|---|---|---|---|
|
Home away from home
|
Hello All,
Perhaps the title of this update should be: "Be It Resolved". I turned my attention to the interior of the Clipper in the last garage sessions. I started with the door sill plates. There are made of aluminum stamped with a series of circles pattern and the word Clipper. I polished them with a "00" grade steel wool. Then I painted the "Clipper" in red. They make a nice welcome to the inside of the car. Next, I started looking around the interior and noticed how dirty the headliner and sun visors were. I removed the visors and cleaned them with a mixture of Tide and bleach. They are covered in the same material as the headliner. This mixture worked well and I finished off the job with some leather conditioner on the trim. The headliner would be a more difficult job. I would not be able to use the same procedure as on the sun visors. The headliner was heavily soiled with over 55 years of cigarette smoking residue, and general dirt and grime contamination. My daughter and a neighbor recommended Resolve as a good cleaning agent. My neighbor had a bottle of the Resolve that they use to spot clean carpets. As a test, I gave it a try on the headliner covering of the "C" pillar between the rear doors and the rear window. This area was badly water stained and had taken on a brown color. The Resolve managed to reduce the staining to where the material now looked the correct gray color instead of the brown staining it had before. With this success, I decided to do the rest of the headliner. The procedure involved spraying Resolve on one-half of one of the headliner sections; wait five minutes; and then carefully blot and wipe the surface with a dampened terry towel. I was very careful not to apply too much pressure in the blotting and wiping as I did not want to damage the headliner. I was mostly successful in not inflicting any damage. The edges that went under the rear window and windshield trim pieces were in a delicate condition and suffered some from the cleaning, but only in a couple of places. The rest of the headliner was sound and cleaned without further incident. The effect of the cleaning could not be fully seen until after drying, which took about 24 hours. I am pleased with the results. The photos do not really show how dirty the headliner was, nor do they show how nicely it cleaned. It looked even better after 48 hours. The photos of the spray bottle of Resolve and the new terry towel as compared to a towel after wiping and blotting one-half of one section show the extent of the soiling. It does not look new, but it is much improved. My goal is to get the car back to what it was like in 1980, not new but nice. Next I worked on the robe rope. These ropes are a throwback to earlier automobile times. They were used to drape a robe or blanket on the back of the front seat to be used to keep rear seat passengers warm when car heaters were either nonexistent and were not as efficient as they were when this car was new. Many people think they are to be used as a grab for entering and exiting the rear compartment. Anyway, the rope had faded. How do I know this? Well, the part that was under the fastening bracket was black and the rest that was exposed had faded to a brown/tan color. I got some black leather dye and used it to restore the color. It worked okay, but I want to see if I can find some fabric paint to use on the wind laces. The wind laces are attached to the inside of the door openings and serve, now days, to provide a finish trim around the openings. In the early days of motor cars the wind lace was the door seal. This was before rubber door seals came into use. The wind lace is black where has been up against the door seal, and has faded to a brown color, like the robe rope where it has been exposed. This will be a tricky job as I do not want to get any dye or paint on the surrounding materials. I'll let you know how this goes. As a last job, I removed the rear speaker grille hold down trim and covering and painted them black. The grille trim was a silver color and the covering had faded to an awful looking yellow color. Now they blend into the rear package shelf. Sorry, no photos on this at this time. Take care. (o{I}o) Attach file: (39.69 KB)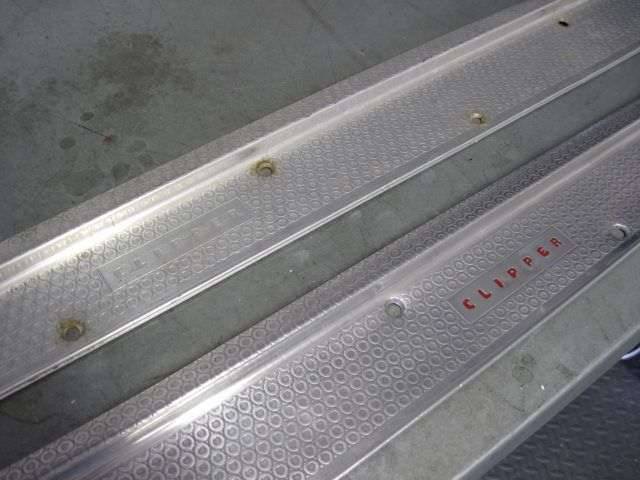 (29.51 KB) (29.51 KB)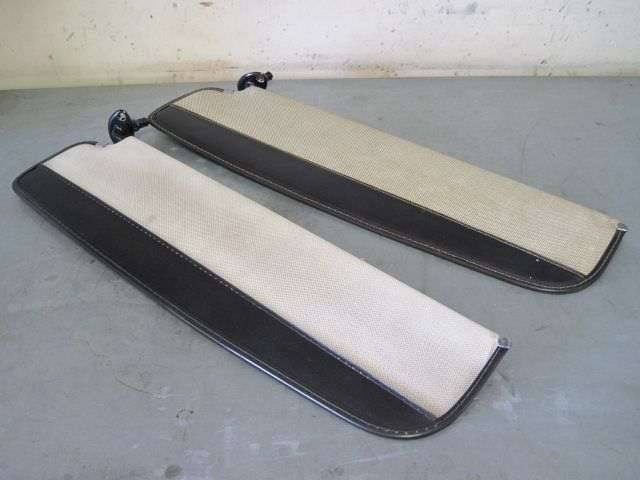 (47.18 KB) (47.18 KB)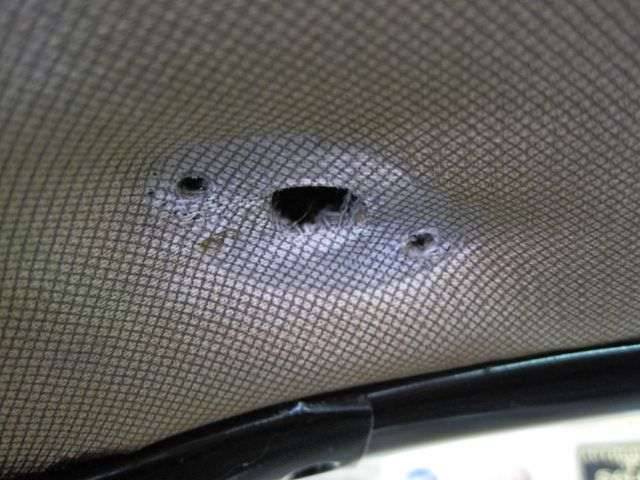 (43.83 KB) (43.83 KB)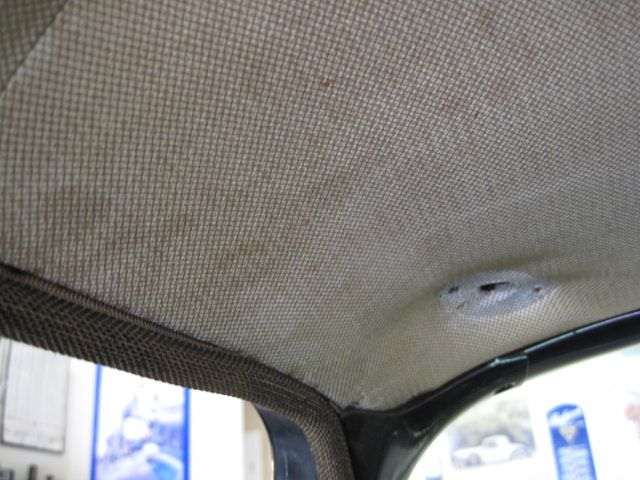 (50.41 KB) (50.41 KB)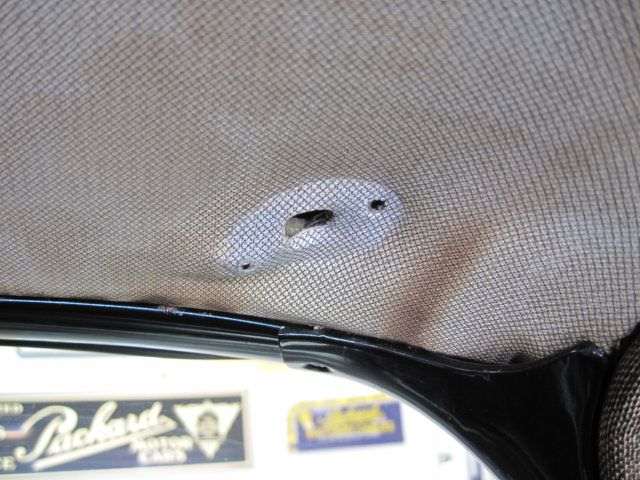 (30.45 KB) (30.45 KB)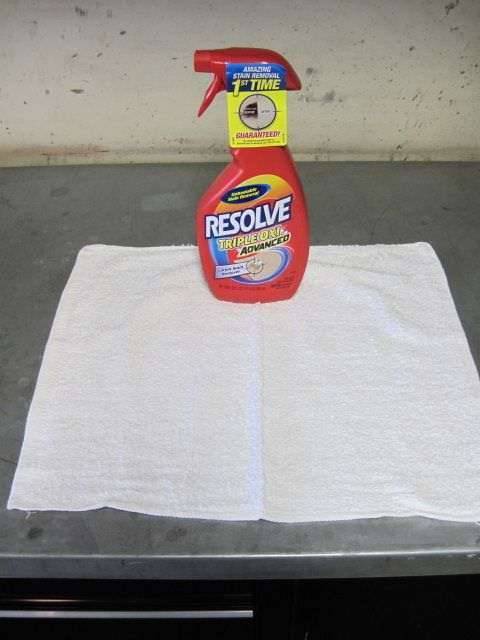 (39.23 KB) (39.23 KB)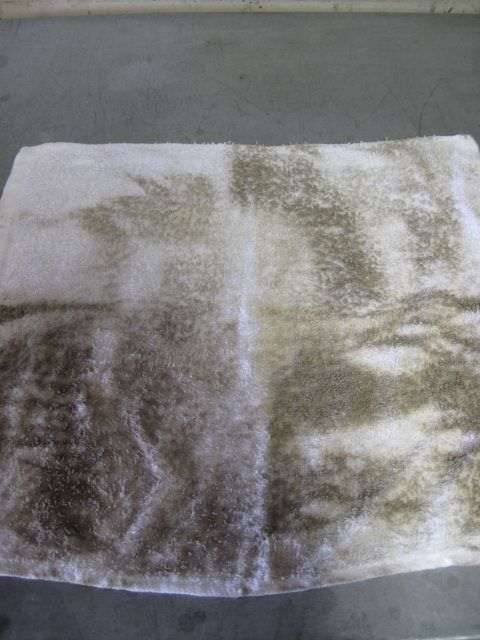 (29.41 KB) (29.41 KB)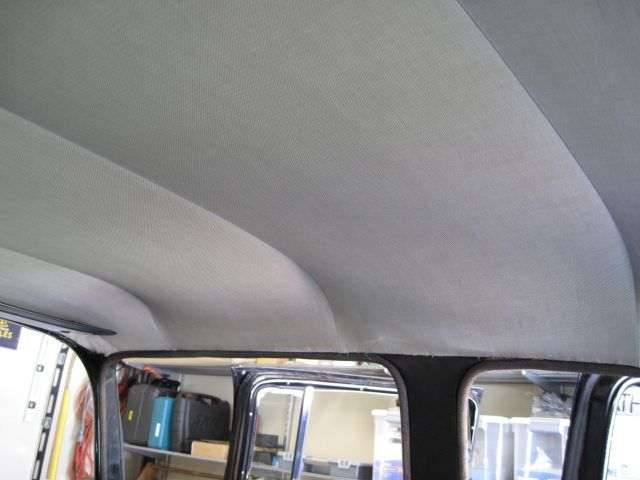 (25.41 KB) (25.41 KB)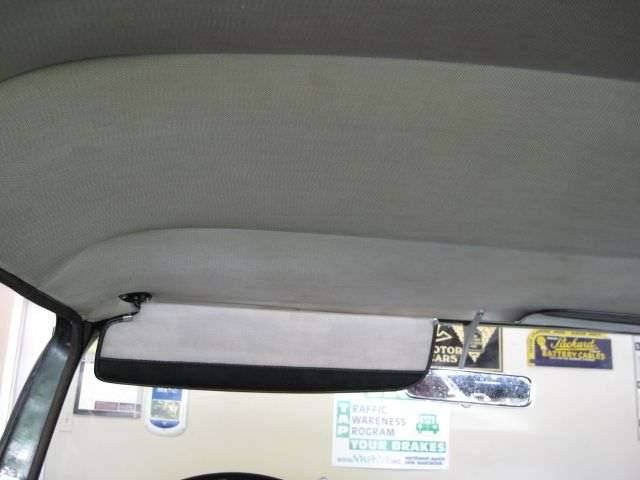 (29.97 KB) (29.97 KB)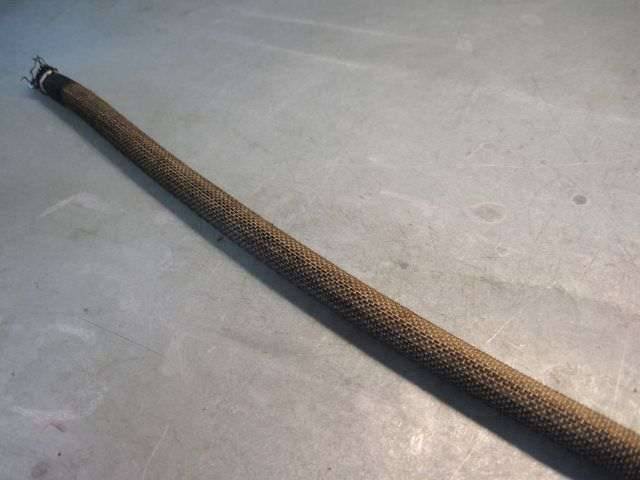 (30.37 KB) (30.37 KB)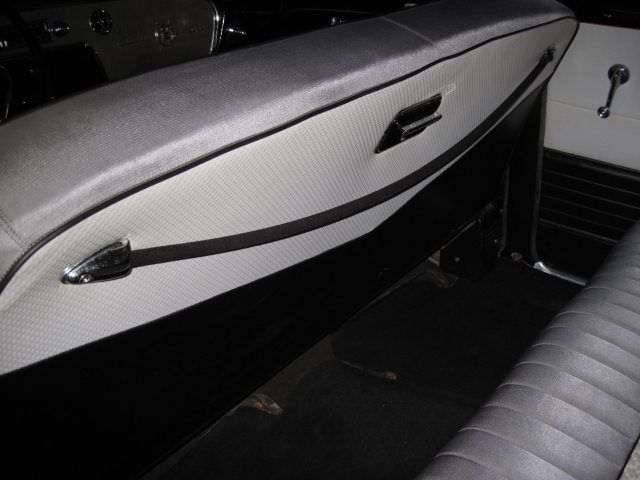
Posted on: 2011/7/6 12:26
|
|||
|
We move toward
And make happen What occupies our mind... (W. Scherer) |
||||
|
||||


