|
Re: Wade's Workshop
|
||||
|---|---|---|---|---|
|
Forum Ambassador

|
Tuesday 22nd February 2011
First up this morning the '34's steering box was re-adjusted. This had been done earlier in the piece but Wade felt it was a little overdone so backed it off a little. Then the '34 went up on Rick's hoist where the rear spring hangers were tightened up with reasonable undercar access now available. Lying on a creeper under a car is not the way to tighten these. The opportunity was also taken to adjust the rear brakes and check things out generally under the car. This inspection found a 5/8" ring/open end Fuller brand spanner(wrench) stuck on a bolt between the frame and x-member on the right side. The spanner(wrench) looks like it survived a round trip to Kangaroo Island at least but has now been removed and is inside the car. Another thing I noticed under the '34 is that neither of the running boards are bolted to their brackets! They are only held on by the bolts/nuts securing them to the mudguards(fenders) and valance panels. Another thing I noticed under there, well for the parts I could see, is that the woodwork has been replaced. After the undercar stuff was done, but still on the hoist, Wade checked indicator operation with only three out of the four working. The odd one not working was the left front indicator so, as a first step, the lens came off, bulb visually checked and also electrically checked and it was fine. Then traced the brown wire for the left front indicator to the left rear indicator where it is joined in, there Wade firmed up the connection. Mentioning brown wire, there's lots of brown wire on the '34, not exactly colour coded or helpful. Put the bulb and lens back on and......nothing! Now none of the blinkers worked! Wade then pulled and checked the fuse and re-installed it, now......they all work! Off the hoist and off for a test run, brakes work badly as Brian complained to Wade all the way back from Kangaroo Island, there's a major hesitation when accelerating, could be the carb accelerator pump, and there's a very slight weep from the stud hole that gave us trouble on the alternator mounting plate. Any way you turn there seems to be something demanding attention. But putting Mat's '34 aside until tomorrow, when it goes to Quickfit Mufflers at Gladesville for it's exhaust refresh, turned to the other '34 in the workshop, The Fossil. Well that was the plan, but things didn't progress too far. Plan was to re-unite the rechromed front and rear bumpers with their mounting brackets. Wade had fought to get the brackets off the bumpers some years ago and managed to do so because he didn't have to worry about keeping new paint and chrome from getting scratched or damaged. Getting these things back together is another matter altogether because the spring steel bumper brackets are wider than the bumpers. The bumper brackets are made of one piece of steel which must be somehow made to fit into the ends of the bumper itself. To do that the bracket was compressed, levered, stretched, bent, bowed, used a come along, used the engine hoist, used body weight, in fact used anything or anyway which "might" help to achieve the desired result, but all to no avail. I might have overdone the expressions used a little in an attempt to convey the struggles involved, just trying to set the scene and frustration encountered. In the end Wade said to leave it and he'll talk with Barry Smith tonight who has done this before and describes it as "a real bastard of a job". There had been a lot of standing around, scratching of heads, thoughts about how to do the job but no meaningful result. Attach file:  (30.15 KB) (30.15 KB) (31.84 KB) (31.84 KB)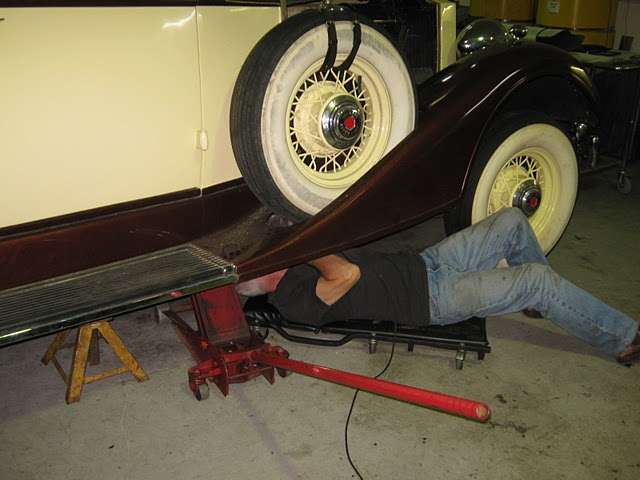 (27.62 KB) (27.62 KB) (28.65 KB) (28.65 KB)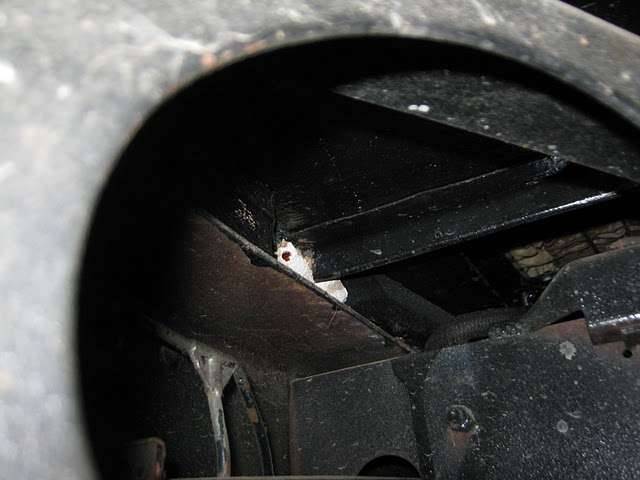 (38.35 KB) (38.35 KB) (28.68 KB) (28.68 KB)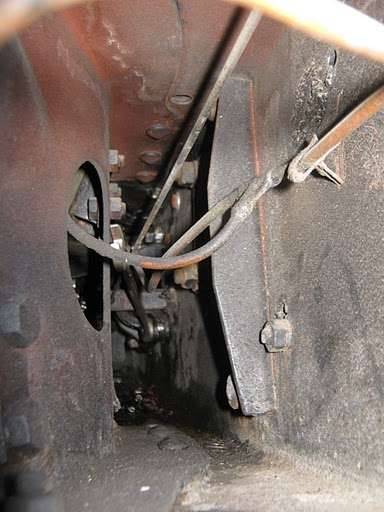 (29.17 KB) (29.17 KB) (25.16 KB) (25.16 KB)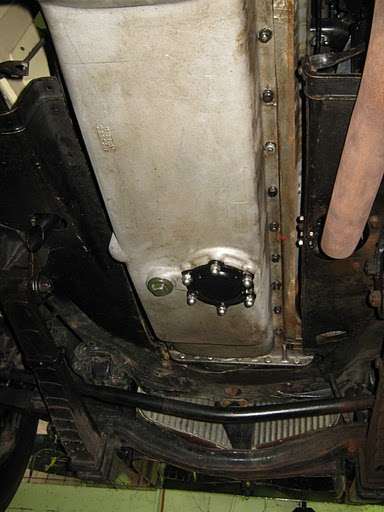 (45.65 KB) (45.65 KB)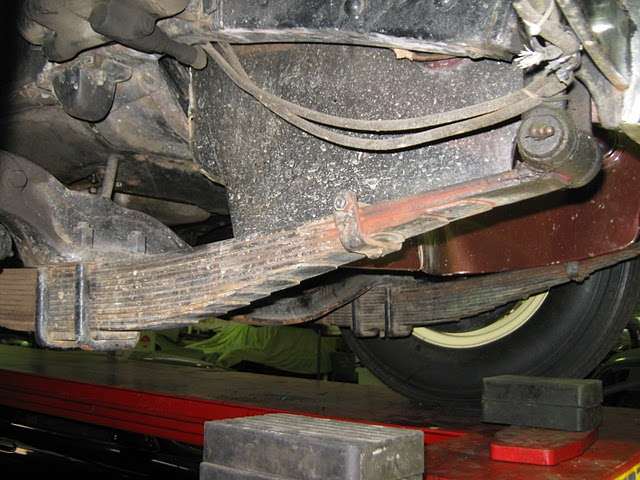 (36.82 KB) (36.82 KB)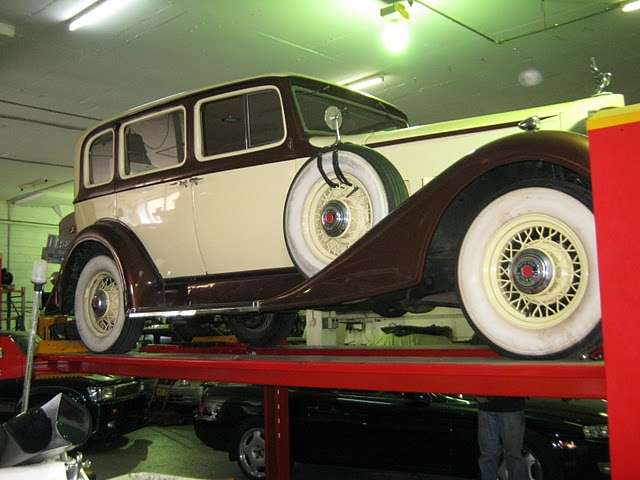 (22.45 KB) (22.45 KB)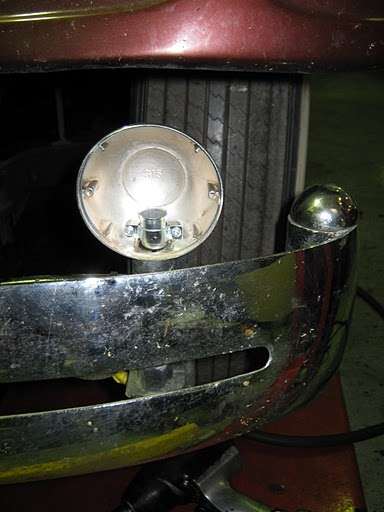 (39.25 KB) (39.25 KB)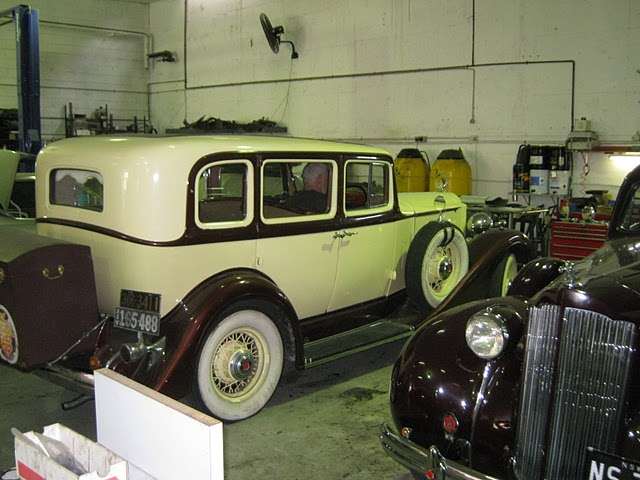 (41.48 KB) (41.48 KB)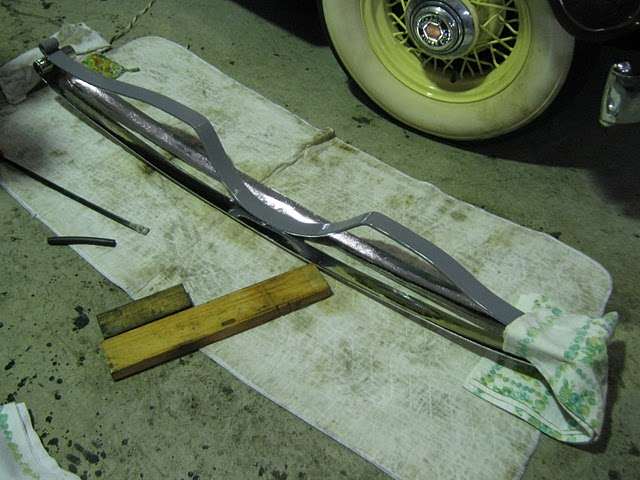 (38.39 KB) (38.39 KB)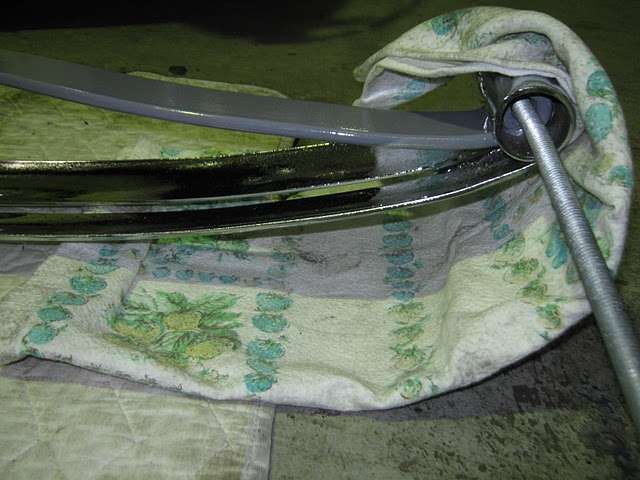 (30.89 KB) (30.89 KB)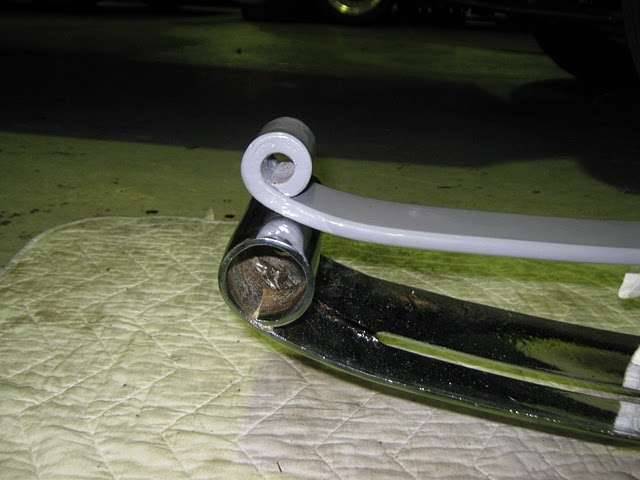 (33.95 KB) (33.95 KB) (29.37 KB) (29.37 KB)
Posted on: 2011/2/22 2:26
|
|||
|
Mal
/o[]o\ ====  Bowral, Southern Highlands of NSW, Australia "Out of chaos comes order" - Nietzsche. 1938 Eight Touring Sedan - SOLD 1941 One-Twenty Club Coupe - SOLD 1948 Super Eight Limo, chassis RHD - SOLD 1950 Eight Touring Sedan - SOLD What's this?  Put your Packard in the Packard Vehicle Registry! Here's how! Any questions - PM or email me at ozstatman@gmail.com |
||||
|
||||
|
Re: Wade's Workshop
|
||||
|---|---|---|---|---|
|
Forum Ambassador
|
Terry,
Like other things on Mat's '34 the dash instruments "need work". Temp gauge seems to be stuck on about 140, speedo does bounce, ammeter sticks and not sure if the fuel gauge works.
Posted on: 2011/2/22 14:14
|
|||
|
Mal
/o[]o\ ==== Bowral, Southern Highlands of NSW, Australia "Out of chaos comes order" - Nietzsche. 1938 Eight Touring Sedan - SOLD 1941 One-Twenty Club Coupe - SOLD 1948 Super Eight Limo, chassis RHD - SOLD 1950 Eight Touring Sedan - SOLD What's this? Put your Packard in the Packard Vehicle Registry! Here's how! Any questions - PM or email me at ozstatman@gmail.com |
||||
|
||||
|
Re: Wade's Workshop
|
||||
|---|---|---|---|---|
|
Forum Ambassador
|
Wednesday 23rd February 2011
Instead of going directly to the workshop this morning waited until Wade called me and met him at Quick-Fit Mufflers at Gladesville where he'd taken Mat's '34 for it's muffler and exhaust/tail pipe refit. Once at the workshop The Fossils bumper bar and bumper bracket situation was then addressed. I'd thought I had a brilliant idea  last night and rang Wade at the time to convey it. But in the harsh reality of day, once confronted by the recalcitrant parts, realised it wouldn't work. Fortunately a greater mind than mine, Wade's, had also been mulling the situation over and used a small part of my idea in the final solution to this conundrum. Solution was to chain one end of the bumper bar together with the bumper bracket with a long length of threaded rod through the joined eyes to the base of a concrete pillar. The pillar was first dressed with padding, to protect the rechromed bumper surface, by sticking it to the structure with packaging tape. Once chained in place the other end of the bumper bar and bracket were then pushed back against the pillar but the first attempt fell short. Not to worry, with advice from John and Rick the top of the bumper bar was then pulled flat against the pillar using a "come-along" and another long length of threaded rod. This attempt also fell short but wasn't far from succeeding. Final piece of the puzzle was to use a block of wood between the bumper and the bracket to provide a pivot point and a resulting shorter arc.....and success! Well, two guys, Rick and Mal, were holding the bracket in place and not permitting it to spring back. Wade was also there wielding a long tyre lever, which had it's head ground down, and was used to help lever the eye of the bracket into the eye of the bumper. A shout out to John, on the other side of the workshop, to bring a large hammer resulted in John joining in and hammering the block of wood out. This was accomplished, with some trepidation by everyone involved I'm sure, and we could tell it worked when there was a terrific BANG as it slotted into place. The BANG was accompanied by a loud cry of $hit, normally I don't swear much but this scared the crap out of me! And the funny thing is, once the bracket was in place in the bumper bar it was loose and rattling in there! One down and one to go so onto the rear bumper, which looked to be a greater challenge than the front presented. It's a longer bumper with a longer bracket so should be OK, but the bracket is not just longer but comparatively longer to boot than the front one. Same procedure again but to achieve the required amount of bend in the bracket a higher fulcrum point in the form of a bigger block of wood was required. Success again achieved and this time, knowing what was coming, didn't find it necessary to swear. last night and rang Wade at the time to convey it. But in the harsh reality of day, once confronted by the recalcitrant parts, realised it wouldn't work. Fortunately a greater mind than mine, Wade's, had also been mulling the situation over and used a small part of my idea in the final solution to this conundrum. Solution was to chain one end of the bumper bar together with the bumper bracket with a long length of threaded rod through the joined eyes to the base of a concrete pillar. The pillar was first dressed with padding, to protect the rechromed bumper surface, by sticking it to the structure with packaging tape. Once chained in place the other end of the bumper bar and bracket were then pushed back against the pillar but the first attempt fell short. Not to worry, with advice from John and Rick the top of the bumper bar was then pulled flat against the pillar using a "come-along" and another long length of threaded rod. This attempt also fell short but wasn't far from succeeding. Final piece of the puzzle was to use a block of wood between the bumper and the bracket to provide a pivot point and a resulting shorter arc.....and success! Well, two guys, Rick and Mal, were holding the bracket in place and not permitting it to spring back. Wade was also there wielding a long tyre lever, which had it's head ground down, and was used to help lever the eye of the bracket into the eye of the bumper. A shout out to John, on the other side of the workshop, to bring a large hammer resulted in John joining in and hammering the block of wood out. This was accomplished, with some trepidation by everyone involved I'm sure, and we could tell it worked when there was a terrific BANG as it slotted into place. The BANG was accompanied by a loud cry of $hit, normally I don't swear much but this scared the crap out of me! And the funny thing is, once the bracket was in place in the bumper bar it was loose and rattling in there! One down and one to go so onto the rear bumper, which looked to be a greater challenge than the front presented. It's a longer bumper with a longer bracket so should be OK, but the bracket is not just longer but comparatively longer to boot than the front one. Same procedure again but to achieve the required amount of bend in the bracket a higher fulcrum point in the form of a bigger block of wood was required. Success again achieved and this time, knowing what was coming, didn't find it necessary to swear.Back on what was now a padded bench, courtesy of some old sofa cushions to protect the chrome, the threaded roda were driven out and fitting of the bumper centre decorative piece and end bolts commenced. All the fittings are rechromed and because of this the end bolts presented some fitting refinement in the form of removing some of the chrome build up on the end bolt bolt and nut. Wade had also picked up some rubber bushes some years ago but unfortunately had only 4 bushes whereas 8 are required. There are 2 at each end bumper bolt, one top and one bottom. So off on a road trip to Grippy Rubber where 8 rubber door stops in lieu of the correct sized bushes were purchased. Door stops, you say? Yes, they didn't have the rubber bushes in the right size but by cutting down 8 rubber door stops the equivalent of the 4 rubber bushes required could be manufactured. Also dropped in to Lee Bros and picked up stainless steel flat and spring washers for the bumper centre pieces. Also, while on the road, received a call from Tony at Quick-Fit to advise Mat's '34 was ready. So then proceeded to Gladesville and picked up the '34 which I followed back to the workshop. On the way back saw the blinkers on the '34 are working as they should but the left brake light was so faint as to be almost non existent. Checked the tail light operation once back and the left side was also much fainter than the right. Off with the left bezel and lens and noted that both the tail light bulb and the brake light bulb are No. 63's. Also checked the right tail light bulbs to see if there was a reason they are so bright in comparison. There is, they have completely different bulbs, what they are I don't know but whatever they are they are very effective. Wade scratched around in the '34's glovebox and came up with a tin with some spare bulbs one of which was swapped for the left tail light bulb with improved results. Still not as bright as the right but certainly an improvement on the lack of light before. But, back to the Attach file: (21.91 KB)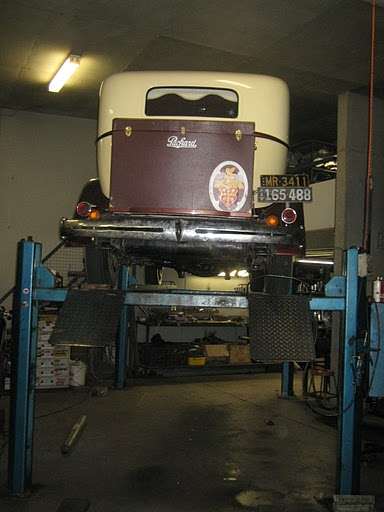 (49.30 KB) (49.30 KB)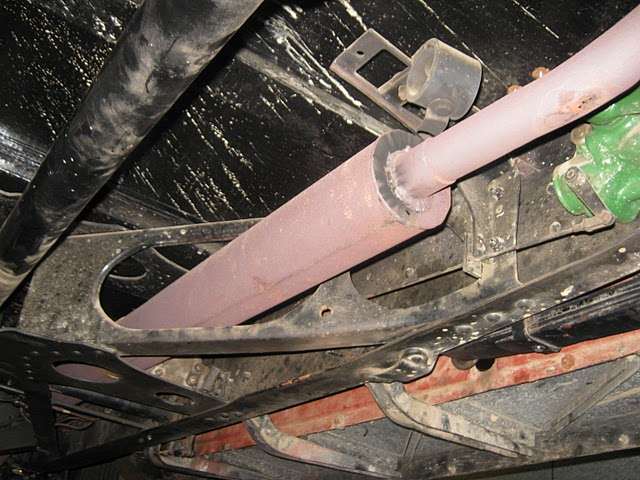 (33.95 KB) (33.95 KB) (40.62 KB) (40.62 KB) (49.72 KB) (49.72 KB)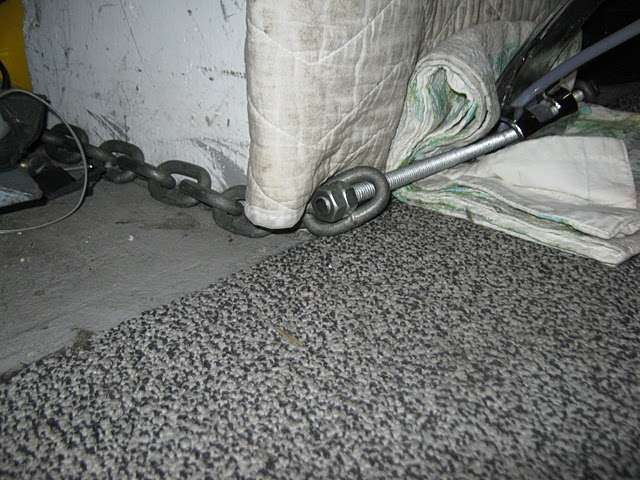 (24.52 KB) (24.52 KB)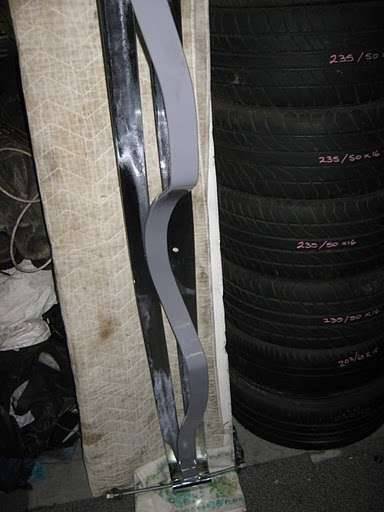 (20.87 KB) (20.87 KB)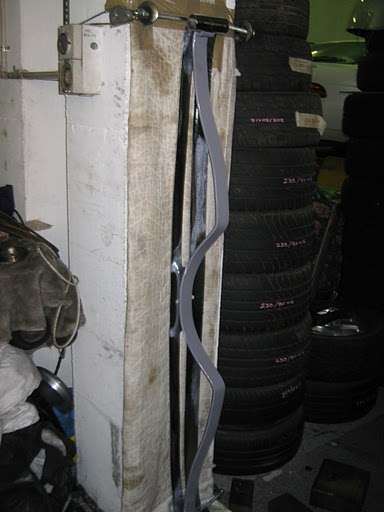 (31.42 KB) (31.42 KB)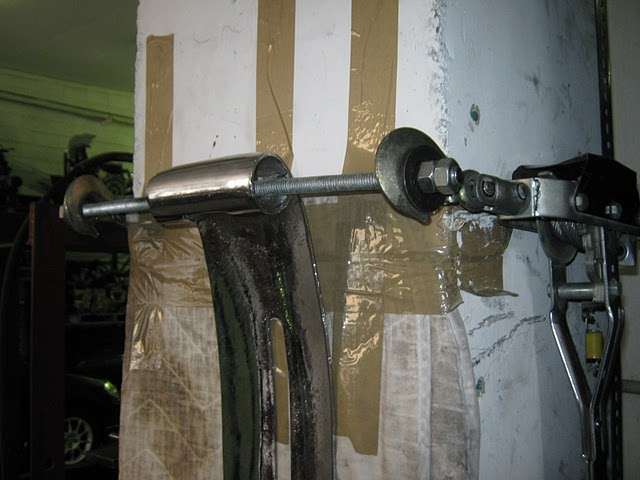 (19.97 KB) (19.97 KB) (28.23 KB) (28.23 KB)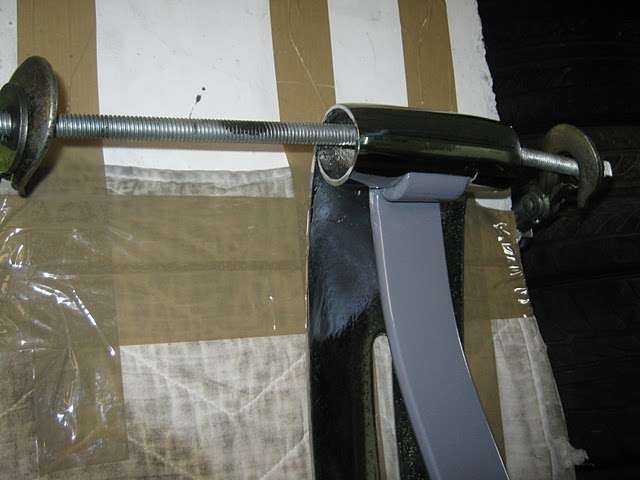 (27.86 KB) (27.86 KB)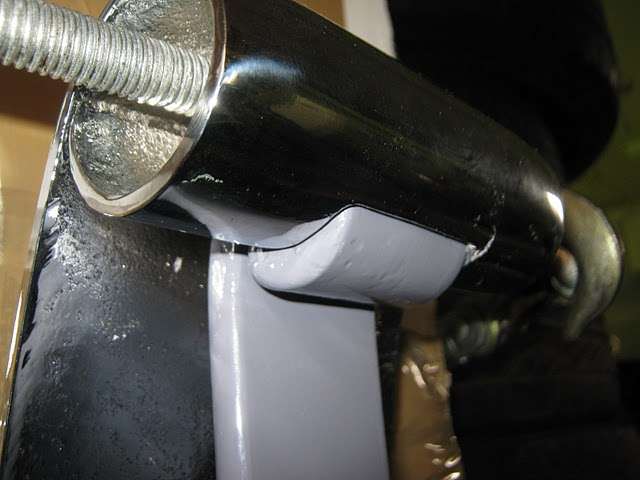 (31.53 KB) (31.53 KB)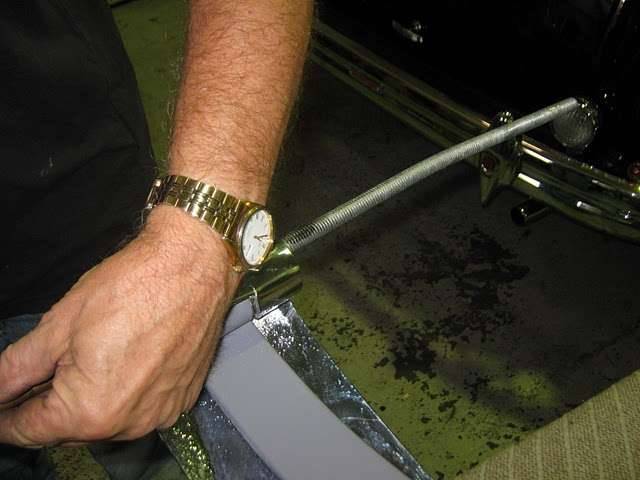 (30.51 KB) (30.51 KB)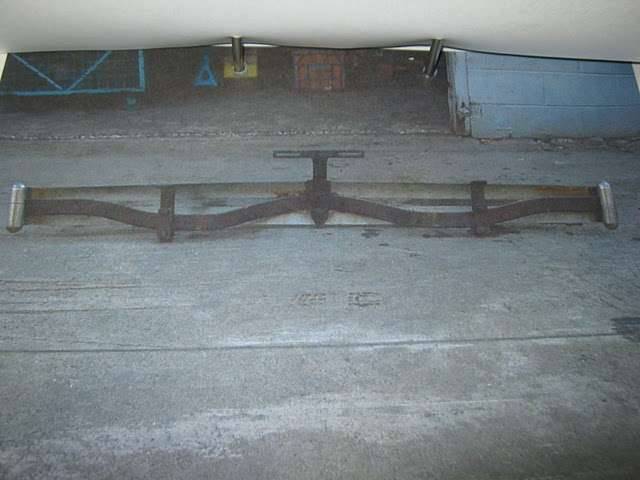 (31.60 KB) (31.60 KB)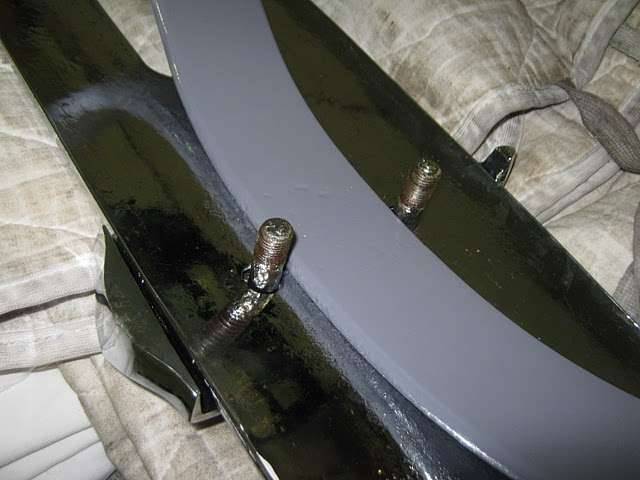 (29.21 KB) (29.21 KB)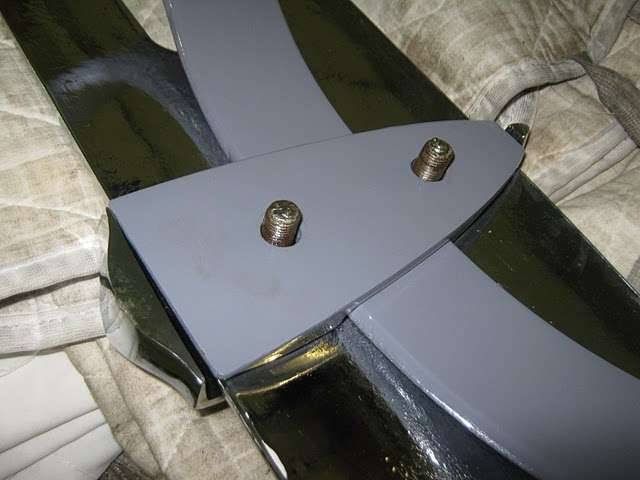 (29.79 KB) (29.79 KB)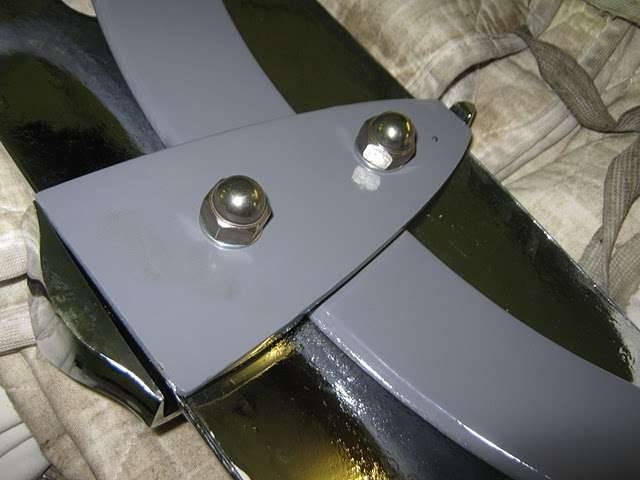 (26.23 KB) (26.23 KB) (23.26 KB) (23.26 KB)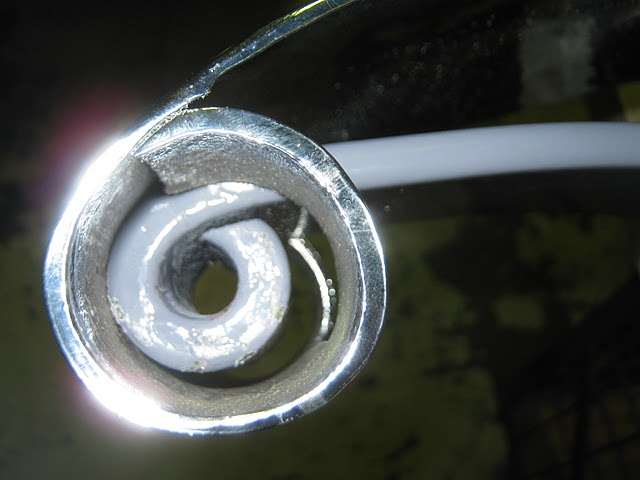 (23.08 KB) (23.08 KB)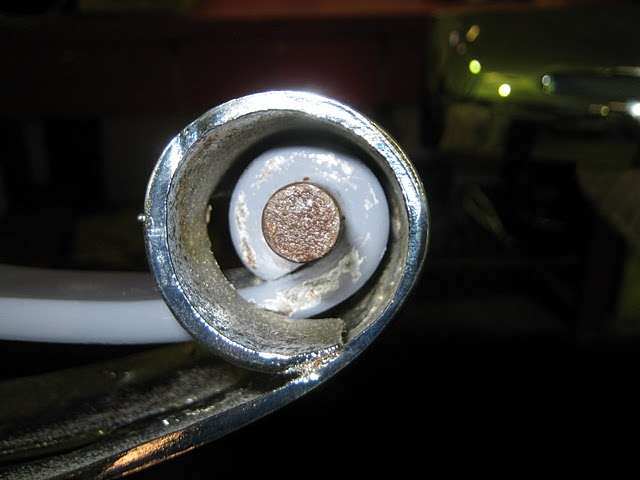 (32.51 KB) (32.51 KB)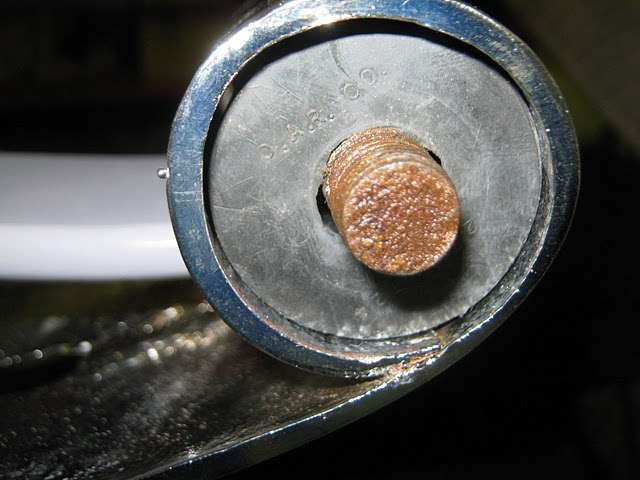 (39.48 KB) (39.48 KB) (43.29 KB) (43.29 KB) (28.33 KB) (28.33 KB)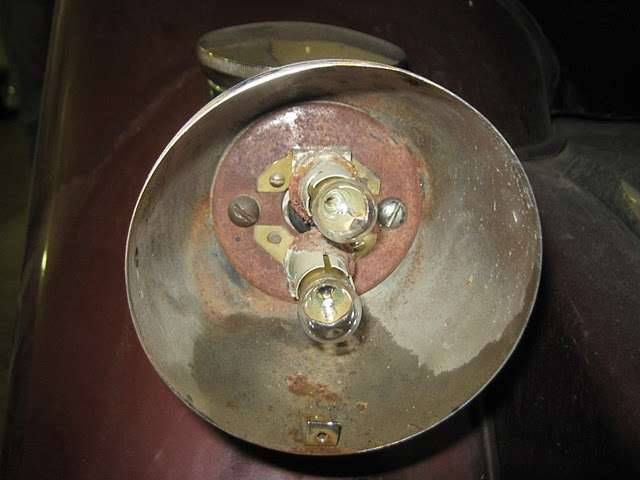 (27.05 KB) (27.05 KB)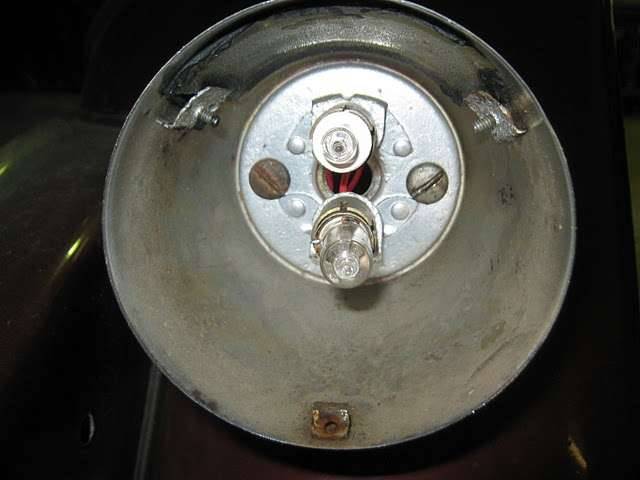 (33.94 KB) (33.94 KB) (23.03 KB) (23.03 KB)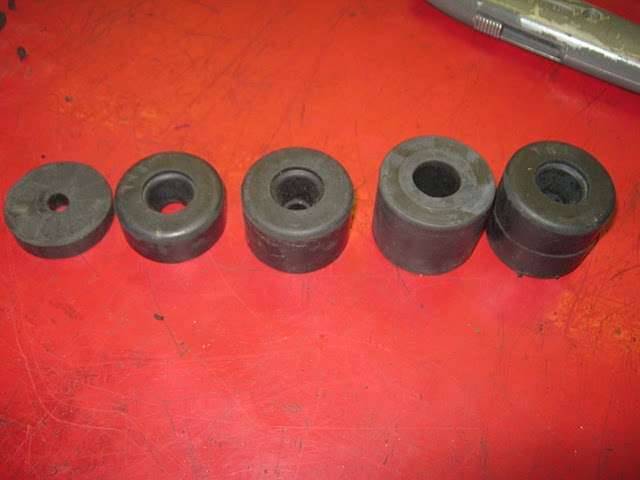 (40.75 KB) (40.75 KB)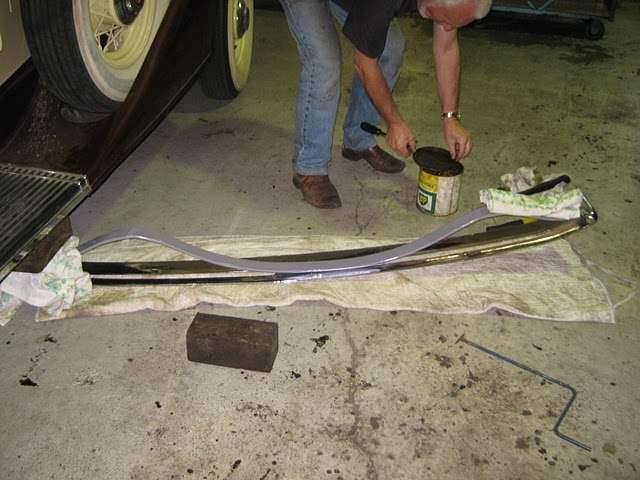
Posted on: 2011/2/23 5:29
|
|||
|
Mal
/o[]o\ ==== Bowral, Southern Highlands of NSW, Australia "Out of chaos comes order" - Nietzsche. 1938 Eight Touring Sedan - SOLD 1941 One-Twenty Club Coupe - SOLD 1948 Super Eight Limo, chassis RHD - SOLD 1950 Eight Touring Sedan - SOLD What's this? Put your Packard in the Packard Vehicle Registry! Here's how! Any questions - PM or email me at ozstatman@gmail.com |
||||
|
||||
|
Re: Wade's Workshop
|
||||
|---|---|---|---|---|
|
Forum Ambassador

|
Mal, I always enjoy reading your posts, in part because they are interesting and well-written, and also because I own a 34 Eight. I found the bumper fitting to the irons interesting because you have a 1-piece bumper whereas both front and rear on my 34 are two-piece, split at the center with a lap joint which in turn is covered by the center plate. MUCH easier to mount. Perhaps a running change, though I've not seen it mentioned in the Service Letters and the parts book doesn't seem to identify 2-piece bumpers. But my plater was sure happy to have pieces only half-length to deal with.
Posted on: 2011/2/23 9:10
|
|||
|
||||
|
Re: Wade's Workshop
|
||||
|---|---|---|---|---|
|
Forum Ambassador
|
Wednesday 2nd March 2011
Hadn't been down to the workshop for a while but I learned that, on Saturday, Mat came and claimed his '34. According to Russell, Russpackaus, Mat besides racking up hundreds of miles on the '34 over the weekend, also deposited an oil slick on Russ's once pristine driveway and tried to shift the blame. Shame, Mat, Shame!  Although the engine oil leaks were attended to the trans leaks weren't! Mat also participated in an American car display day. And apparently the alternator and mount are going well, although there is still a slight weep from that one lower mounting bolt. And.....on Monday Mat took the '34 to get the axle straightened. Don't know how that turned out although I was hoping to see Mat at the workshop today, when he came in to pick up his daily driver, but he hadn't showed by the time I left. Mat, could you please let us know how that went? Although the engine oil leaks were attended to the trans leaks weren't! Mat also participated in an American car display day. And apparently the alternator and mount are going well, although there is still a slight weep from that one lower mounting bolt. And.....on Monday Mat took the '34 to get the axle straightened. Don't know how that turned out although I was hoping to see Mat at the workshop today, when he came in to pick up his daily driver, but he hadn't showed by the time I left. Mat, could you please let us know how that went?And yesterday, went on an Oasis Club run to Albion Park Rail about 80 miles south of Sydney in the '41 Coupe while Wade drove Big Red. Visited the Historic Aircraft Restoration Society (HARS) Museum in the grounds of the Illawarra Regional Airport. The museum and hangar complex is open to the public seven days a week and we were taken on a guided tour of the complex. Very interesting. For pic's of the day see this Picasa album. Among the cars attending was a Lloyd Alexander, one of two surviving which are road going. On the way home I detoured to Ingleburn and picked up a 20 litre drum of Penrite HPR30 so I can change the oil in the '41 on Friday. Also have to pickup an oil filter tomorrow. In my absence Wade has been doing some work on The Fossil, including installing a couple of captive nuts above the rear wheels for refitting of the rear mudguards(fenders). However, before doing that fitment and the valances and running boards, the body needs to be properly mounted and door gaps set. So that's what happened this morning and part of the afternoon. Before doing that Wade fitted the "Brag Bar" from Old Blue to Big Red. He'd already repositioned the mounting arms for the bar to accommodate the wider bumper irons on the Senior over those of the Junior. But before mounting the bar on the car two more badges were added filling the new spaces made available. So after holes were drilled and badges bolted onto the bar, the bar was then bolted to the car. But back to mounting the body, not that there's a lot to tell, and the theory and practice of doing so. Your friend and mine, Randy Berger, used to have a saying as part of his signature being "In theory, theory and practice are the same. In practice, they are not." and that's exactly what happened in trying to square away the body and door gaps. Spacers of different thicknesses, tightening and loosening of hold down bolts, jacking the body at significant points then repeating this procedure, or variations of it, again and again and again. All with one of two results, it either changed nothing or made it worse! Late in all this Wade called Barry Smith, who has re-fitted the body to his '38 Twelve recently with great results, but his advice is to forget the theory because it doesn't work! Fortunately for Wade, Barry is dropping in tomorrow, well if you can call a 240 mile trip dropping in, and his hands on expertise will be put to the test. Unfortunately I won't be there, grand-daughters just don't understand about Packards, and I can't say no to them! After Wade put aside the frustrating body mounting and gap setting process he headed over to pick up the new vibration damper for Big Red while I stayed behind to mind the fort in case Mat arrived to pick up his daily driver. And, as noted earlier, he didn't! Wade also called into Award Diffs and picked up four Harley Davidson turn indicators from the guy there. These, I think, are going on The Fossil to assist in it's forays into modern traffic. While Wade fitted a pair of chrome trim rings to the front Harley turn indicators on Big Red I turned to prepping and painting the new vibration damper. And after a clean with Prepsol a coat of POR-15 Black followed. Wade wants to change the damper over before the weekend because on Sunday there's a PACA run to Morpeth about 100 miles north of Sydney so it'll be a good hit out for the Packards. And Dave, thanks for the kind words. It's easy to make it interesting when it is interesting. Well interesting to me at least. Had a look at the bumpers and there's no sign of a join or weld in the middle. Lucky you, but you missed out on a great fight!  Attach file: (39.75 KB)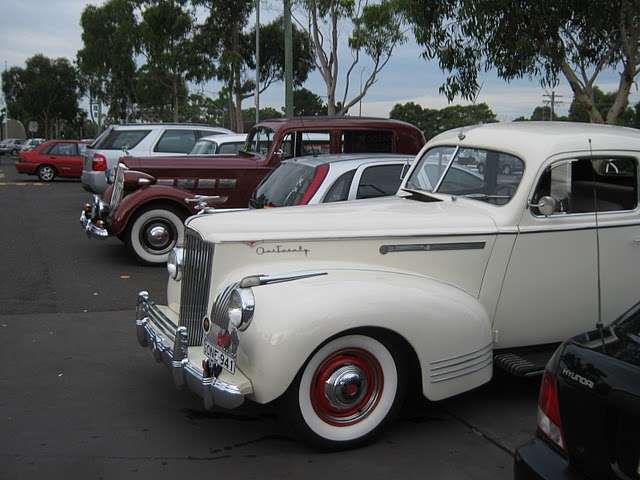 (40.17 KB) (40.17 KB)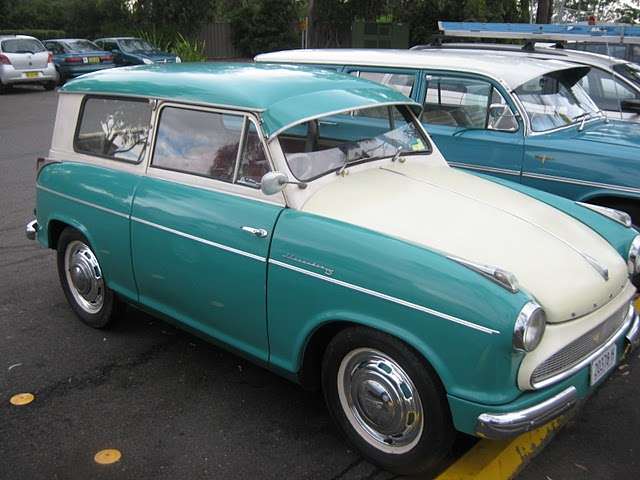 (42.07 KB) (42.07 KB)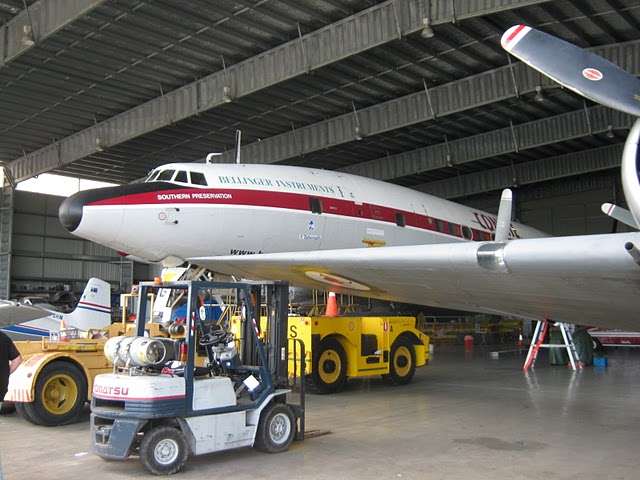 (46.00 KB) (46.00 KB)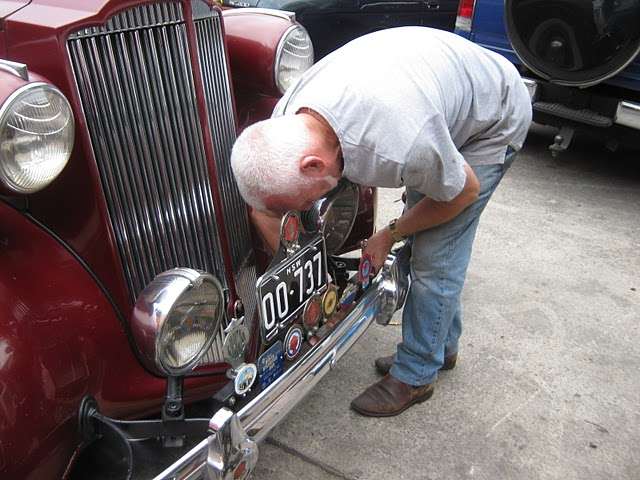 (53.85 KB) (53.85 KB)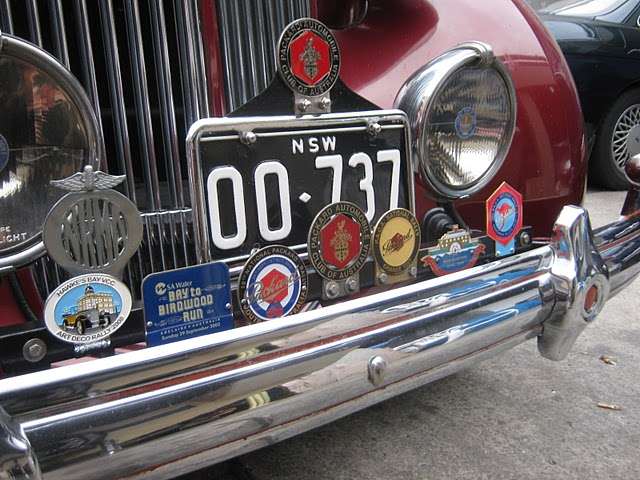 (42.46 KB) (42.46 KB) (32.54 KB) (32.54 KB) (28.37 KB) (28.37 KB)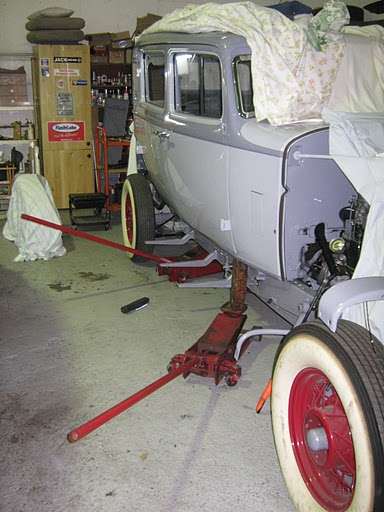 (14.47 KB) (14.47 KB)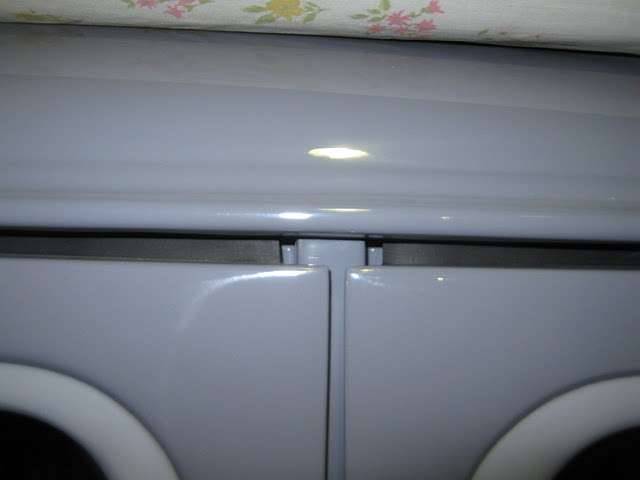 (40.31 KB) (40.31 KB)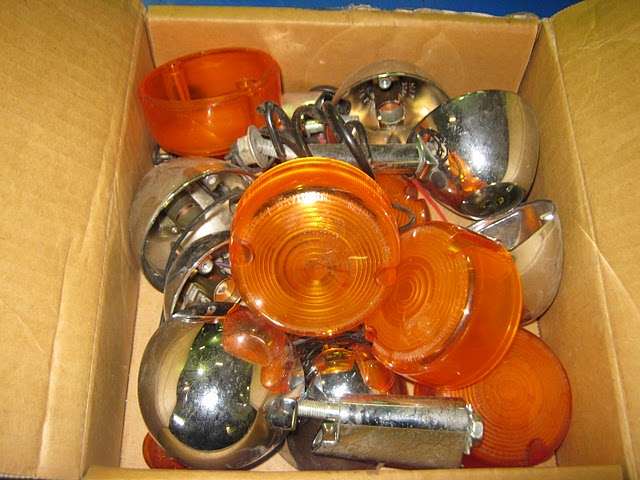 (29.68 KB) (29.68 KB)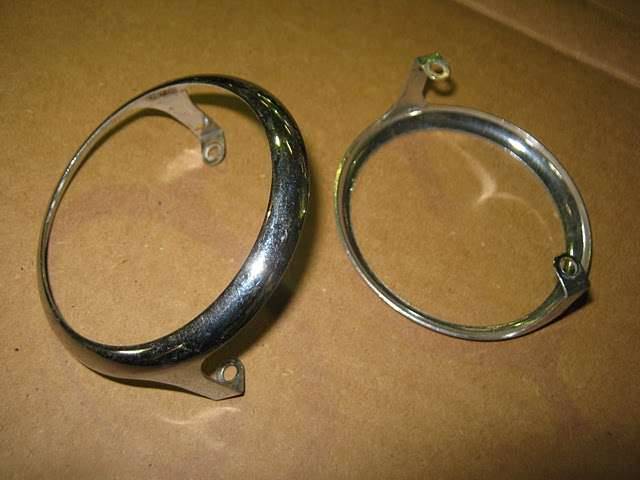 (29.27 KB) (29.27 KB)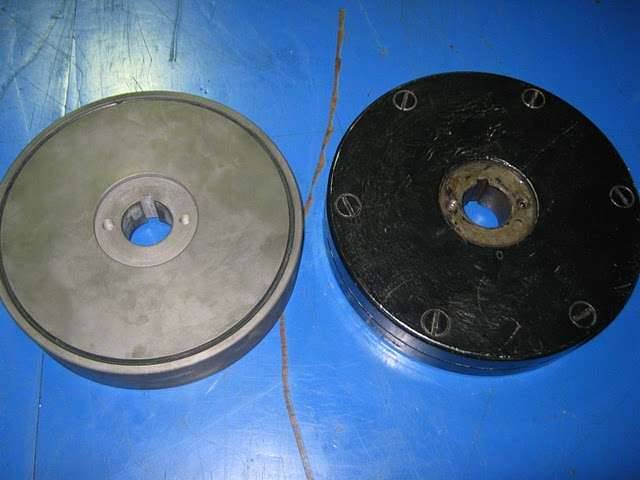 (24.09 KB) (24.09 KB)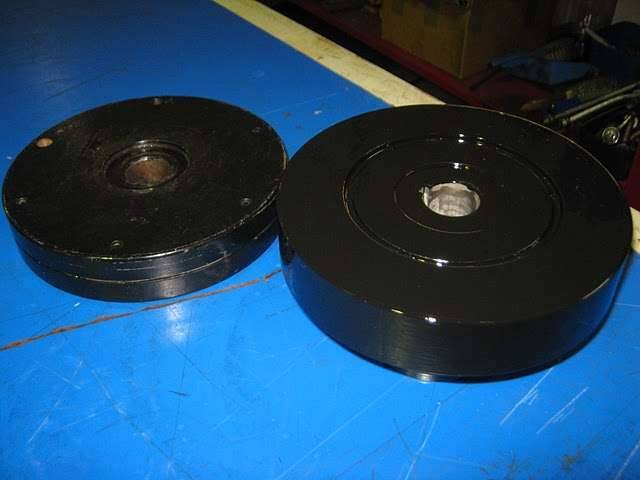 (29.43 KB) (29.43 KB) (25.80 KB) (25.80 KB)
Posted on: 2011/3/2 2:50
|
|||
|
Mal
/o[]o\ ==== Bowral, Southern Highlands of NSW, Australia "Out of chaos comes order" - Nietzsche. 1938 Eight Touring Sedan - SOLD 1941 One-Twenty Club Coupe - SOLD 1948 Super Eight Limo, chassis RHD - SOLD 1950 Eight Touring Sedan - SOLD What's this? Put your Packard in the Packard Vehicle Registry! Here's how! Any questions - PM or email me at ozstatman@gmail.com |
||||
|
||||
|
Re: Wade's Workshop
|
||||
|---|---|---|---|---|
|
Home away from home
|
Hi Guys,
First my appologies for not getting to the shed today, I will be down tomorrow, Between 2-3pm The 34 Packard is running FANTASTIC! I could not be happier! we went to a small car show on Sunday & won the best 30's car & surprisingly "Most original car" which I could not understand as I was parked right next to Sam Irwin's 24 Packard. I'm guessing they didnt look too closely under the 34's bonnet... On the Monday I headed to pro-axle (Top bunch of blokes ) they finished the truck they were working on then put my car on the hoist & done what was needed to straighten the axle. It turned out the camber was out by 1.5 degrees. About 1hr later the car was good as new again  I have no comments to say about that oil slick on Russell's driveway... I hold my head in shame! I will see you at the shed tomorrow, Cheers,
Posted on: 2011/3/2 6:58
|
|||
|
||||
|
Re: Wade's Workshop
|
||||
|---|---|---|---|---|
|
Forum Ambassador
|
Friday 4th March 2011
Drove the '41 down to the workshop this morning for an oil change prior to PACA's run to Morpeth, an old town about 100 miles north of Sydney, on Sunday. On Tuesday, on the way home from our run to Albion Park, I'd picked up 20 litres of oil for the job. And yesterday I'd ordered an oil filter cartridge from Mr Filter at Toongabbie. They didn't have it in stock when I called in about 1:00pm but they were able to have it by 4:30pm from their warehouse when they called me to say it had arrived. Left pickup until 7:00am this morning because of other matters needing to be attended to yesterday. The oil and filter had last been changed at about 77,000 miles on 15th September 2010 before departing for the PACA Kangaroo Island National Rally. Since then have clocked up over 3,000 miles with the change occurring at 80,110 miles. And it needed it, with the old oil being a nasty black colour. I was a little concerned about the filter with the cartridge being the right height but slightly wider than the one it was replacing. Fortunately there was "plenty" of room in the filter canister for the cartridge so it wasn't a problem. Worst part of the process was cleaning out the residual oil from the filter canister and did this using paper towels to soak, mop and wipe up the residue. Sump plug back in and new cartridge in first filled the oil filter canister then filled the sump(pan), tightened down the filter canister top and put the oil filler tube breather top back on. Fired up the '41, checked for oil pressure, it went up to about 45psi so that was a good sign and checked for oil leaks from the filter canister and top, there were none. After turning off the engine let the oil drain back to the sump(pan) and checked the level again, it was down a little, so topped it up. Used about 8 litres all up in the change, 1 litre is approximately 1 US quart, and with the filter and plumbing this was expected. While I was doing the above Wade was working on Big Red. On the way back from Albion Park she'd been running roughly and missing and, with Wade heading north to stay with PeterL prior to going on Sunday's PACA run, attention was being administered to return it to how it should run. A little aside here with a story Wade told me today, it goes like this: At the start of the week Wade had gone to his local shopping centre in Big Red. Finishing his shopping he returned to Big Red and got in. An old guy, well over 80 by Wade's estimate, then came over and started chatting with Wade. Told Wade he'd always liked the old Packards and that he used to work on them. Conversation over, he asked if Wade could start it up so hear could hear the engine running. Wade told him that it was already running and at that the old guy exclaimed "You must be ****ing kidding"! Whereupon Wade told him he wasn't!  Must have been before the Albion Park run. Must have been before the Albion Park run. What Wade did today to Big Red was pull the plugs, with all looking to be burning nicely, confirmed by John who couldn't see anything wrong with them. Conducted a compression test, with 130/135psi on all cylinders. Cleaned the plugs and put it all together again. Works fine now, no roughness or misses, why? You tell me. And just to backtrack a little to yesterday. Wade, together with Barry Smith, spent many hours working on the The Fossil's body mounts and trying to even up the door gaps but without success. Then Wade looked at the large picture of it, from 30/40 years ago, which hangs over his desk. From the looks of it the gap between the doors was always greater at the bottom than at the top. So what Wade is thinking is that this is the way it should be and next week the body will be bolted down and checked again. Mat's also going to cast a beady eye over his '34 to confirm or deny this, having made it to the workshop yesterday to pick up his daily driver and seeing The Fossil as it now is. Saw Mat last night at the PACA Committee meeting and he was able to cast some light on the front axle straightening of his '34. Took about an hour and involved the use of heat and pressure to achieve the desired result and Mat's pleased with the outcome. Earlier in the week Wade had received his long awaited care package containing various specialty fasteners and a length of material for use between the body and the valance panels. All good, just what he ordered but that was back in November! There had been a previous delivery but it contained nothing that he'd ordered although he was charged for it! Just as he was charged for the recent delivery too! Various emails over the last four months had gone unanswered so it looks like a early morning, Sydney time, phone call is required to sort things out. Tiring of the body fit process yesterday, Wade had turned to the fasteners and had mounted some between the grill shell and radiator collar. At least there was some progress made on The Fossil. The new vibration damper for Big Red was passed over and not installed yesterday although I see it's timing marks have painted. Last thing we did today was go for a run in the '41 over to Lane Cove to pick up a garage door lock for PeterL which Wade will install tomorrow. Reason we took the '41? Because of a noise I noticed on Tuesday on the run to Port Kembla. At first I thought it was OD related because it seemed to start when I engaged it. But whether running in, or locked out of OD, it was there. Then I thought it might be a blown manifold gasket but inspection today doesn't show anything amiss there, pun intended!  Noise is like a "ticking" sound that increases under load when accelerating. Wade suspects it might be a leak at one of the exhaust/muffler joins but it can't be fully investigated until next week. Annoying to keep hearing it, but I'll have to live with it till then. Wade also did "the old soap on the fan belt trick" on the '41, would you believe? That eliminated one noise but it wasn't the one we were concerned about. And Dave and Terry, I forgot to do the muffler measurements on The Fossil, but there's always next week! Noise is like a "ticking" sound that increases under load when accelerating. Wade suspects it might be a leak at one of the exhaust/muffler joins but it can't be fully investigated until next week. Annoying to keep hearing it, but I'll have to live with it till then. Wade also did "the old soap on the fan belt trick" on the '41, would you believe? That eliminated one noise but it wasn't the one we were concerned about. And Dave and Terry, I forgot to do the muffler measurements on The Fossil, but there's always next week!Attach file: (24.28 KB) (30.44 KB) (30.44 KB) (35.28 KB) (35.28 KB) (24.96 KB) (24.96 KB)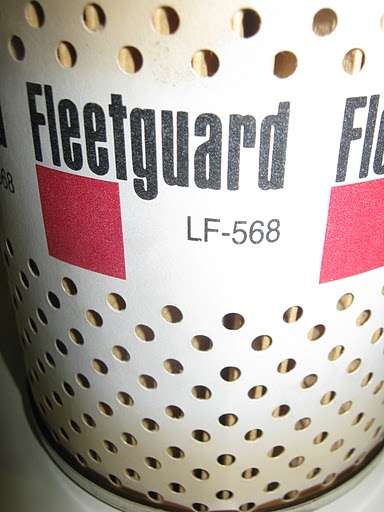 (22.78 KB) (22.78 KB)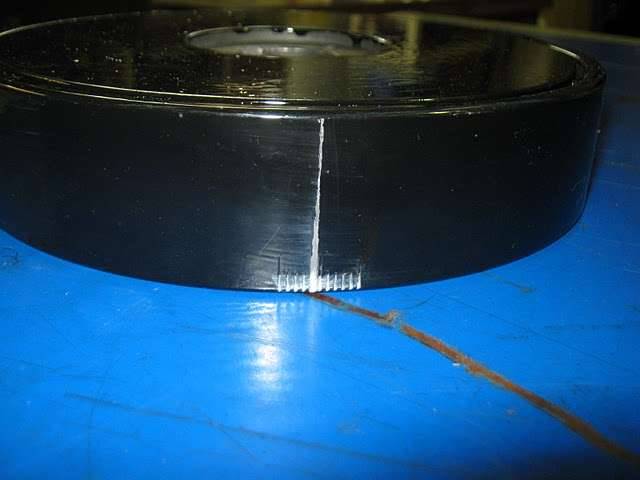 (34.59 KB) (34.59 KB)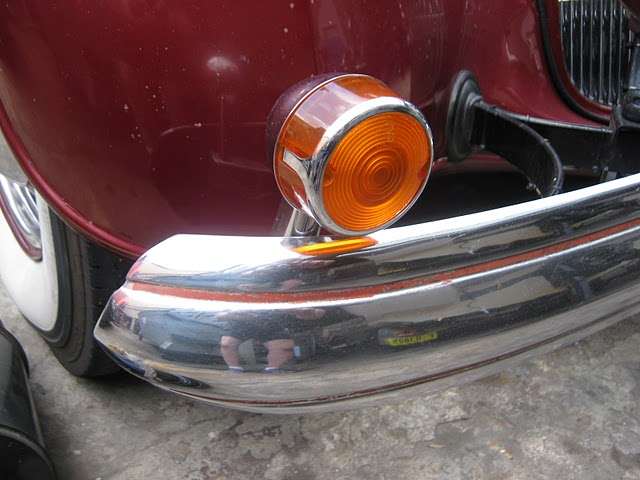 (32.96 KB) (32.96 KB)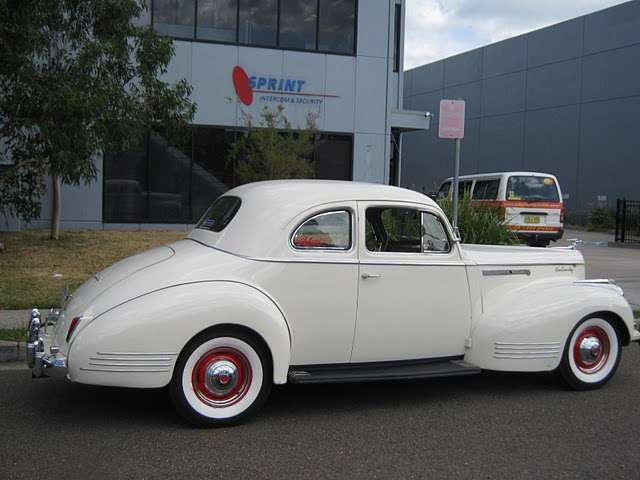 (10.85 KB) (10.85 KB)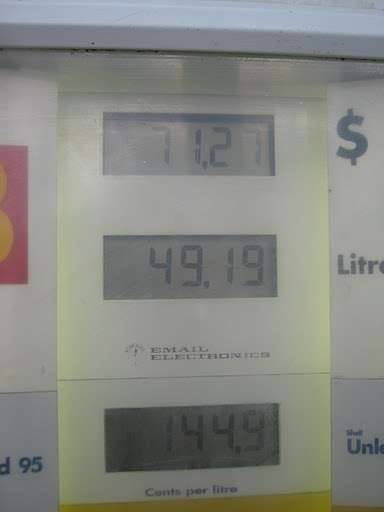
Posted on: 2011/3/4 0:19
|
|||
|
Mal
/o[]o\ ==== Bowral, Southern Highlands of NSW, Australia "Out of chaos comes order" - Nietzsche. 1938 Eight Touring Sedan - SOLD 1941 One-Twenty Club Coupe - SOLD 1948 Super Eight Limo, chassis RHD - SOLD 1950 Eight Touring Sedan - SOLD What's this? Put your Packard in the Packard Vehicle Registry! Here's how! Any questions - PM or email me at ozstatman@gmail.com |
||||
|
||||
|
Re: Wade's Workshop
|
||||
|---|---|---|---|---|
|
Forum Ambassador
|
Tuesday 8th March 2011
Quote: Ozstatman wrote:Friday 4th March 2011......Wade was working on Big Red. On the way back from Albion Park she'd been running roughly and missing and, with Wade heading north to stay with PeterL prior to going on Sunday's PACA run, attention was being administered to return it to how it should run.........What Wade did today to Big Red was pull the plugs, with all looking to be burning nicely, confirmed by John who couldn't see anything wrong with them. Conducted a compression test, with 130/135psi on all cylinders. Cleaned the plugs and put it all together again. Works fine now, no roughness or misses, why? You tell me..... Then like the Queen of Hearts in Alice in Wonderland it was "Off with it's head"! All went well there, the hardest part being lifting the head off the engine, must be getting old....er. It was readily apparent what had happened with a piece of gasket literally blown away from the narrow waist section in the gasket between the adjacent exhaust valves in #6 and #7. There was some indication that the narrow sections between #2 and #3, and between #4 and #5 exhaust valves could also have been in the early stages of this happening. Wade has a spare head gasket and that would have gone back on following clean up of the head and block surfaces but then Noel arrived. Noel said he thinks he has a genuine Packard head gasket that will fit and will bring it over tomorrow morning. And talking about "clean up of the head and block surfaces", there was a build up of copper particles in "strips" on both the head and block where the gasket had blown through. At first I thought they were furrows in the metal but scraping soon revealed it was a build up of copper and not the block or head surfaces which had suffered. Clean up done, but now waiting for Noel's head gasket, turned to the matter which was to be the original point of attention for Big Red today. This was installing the newly manufactured vibration damper. First the fan belt and fan were removed to permit access to the crankshaft pulley. On Sunday another piece of the puzzle was put into play with Harvey lending Wade the vibration damper puller he'd made. But before getting to that the crankshaft pulley bolt first needed to be taken off. For this Wade uses a large socket which has two flats surfaces filed on it and a crescent wrench to turn the socket, this because of space limitations between the radiator and the pulley bolt. The other ingredient in this "Special Packard Tool" is a lot of packing tape wrapped around the head of the wrench and the socket to hold them together. When you're trying to use this setup without any sort of binding between the two even a slight breath, let alone a heavy one, causes the "Special Packard Tool" to break into its component parts. Doesn't look pretty, but it works. Put the "Special Packard Tool" on the pulley bolt, Big Red in gear with the hand brake on, and the pulley bolt wouldn't budge. Enter the third component of the "Special Packard Tool" a 3' length of pipe with a flattened end which slips over the crescent wrench's handle. Nothing like increasing the mechanical advantage is there? Only trouble was it was the same result, wouldn't budge! Next attempt was wedging the "Special Packard Tool" complete with long lever in place and using the starter motors torque in an effort to break the pulley bolts death grip. Still wouldn't budge! There were a number of attempts with all these approaches to overcoming the problem and Graham had been enlisted to stand on the brake pedal to prevent the engine turning which it still wanted to do even in gear with the hand brake on! Of course, for the starter motor attempts it was out of gear. Then Graham came up with the idea of placing a block of wood at a distance from the "Special Packard Tool", a distance of 4" was all we could manage, and then engaging the starter. Tried it, block of wood was dislodged but........it worked! After that the pulley bolt was finger tight and came off easily.  Graham. Pulley came off easily, on with Harvey's puller and the vibration damper came off relatively easily. When I say on with Harvey's puller, that was difficult to do because of the location involved, but once on it worked as it should. The whole procedure was then reversed, vibration damper, crankshaft pulley, pulley bolt and washers, fan belt, fan and lastly generator. Only trouble is, it can't be tested until tomorrow when the head goes back on. Graham. Pulley came off easily, on with Harvey's puller and the vibration damper came off relatively easily. When I say on with Harvey's puller, that was difficult to do because of the location involved, but once on it worked as it should. The whole procedure was then reversed, vibration damper, crankshaft pulley, pulley bolt and washers, fan belt, fan and lastly generator. Only trouble is, it can't be tested until tomorrow when the head goes back on. Quote: Ozstatman wrote:......Dave and Terry, I forgot to do the muffler measurement on The Fossil, but there's always next week! Terry and Dave, I remembered today, the length of the body of the muffler on The Fossil is 4'. And Noel, concerning your query about the OneTwenty emblems on the '41, see the attached pics. Attach file: (47.57 KB) (47.96 KB) (47.96 KB) (48.06 KB) (48.06 KB) (54.20 KB) (54.20 KB) (23.11 KB) (23.11 KB) (33.42 KB) (33.42 KB) (34.79 KB) (34.79 KB) (47.13 KB) (47.13 KB)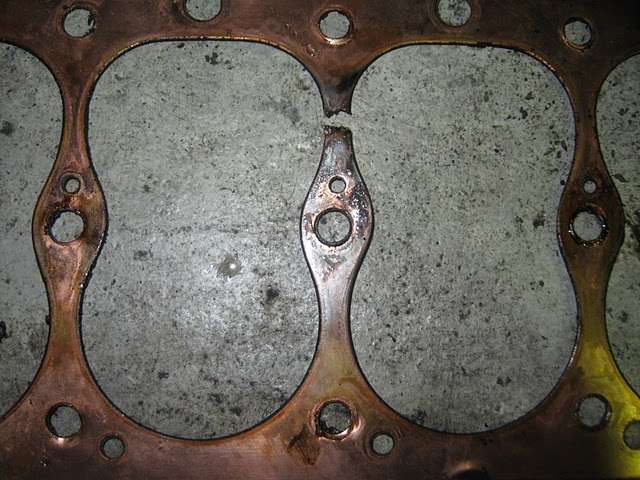 (34.30 KB) (34.30 KB)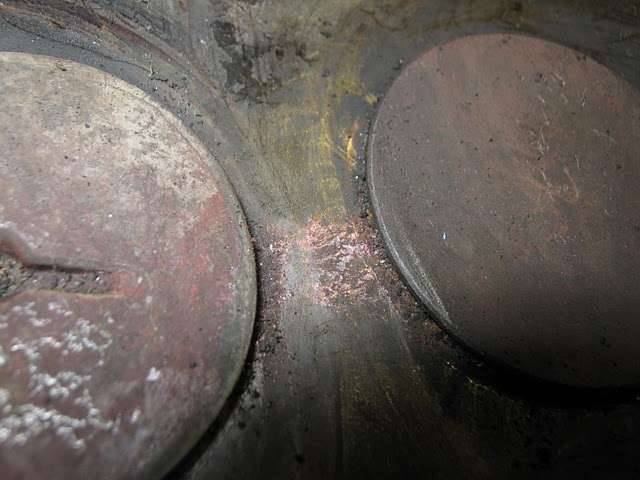 (34.30 KB) (34.30 KB) (45.64 KB) (45.64 KB)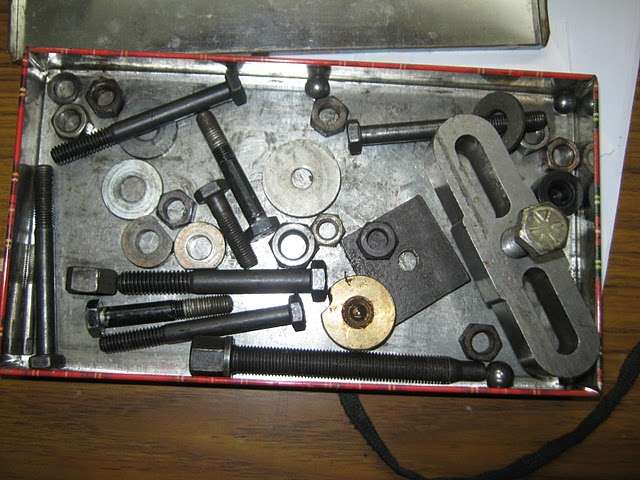 (32.64 KB) (32.64 KB) (30.08 KB) (30.08 KB)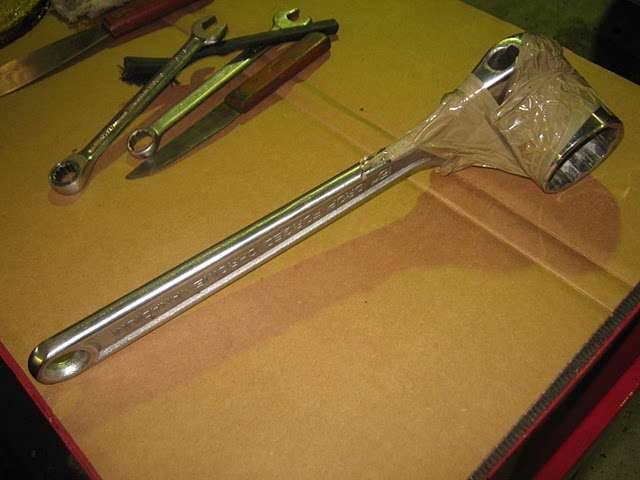 (30.79 KB) (30.79 KB)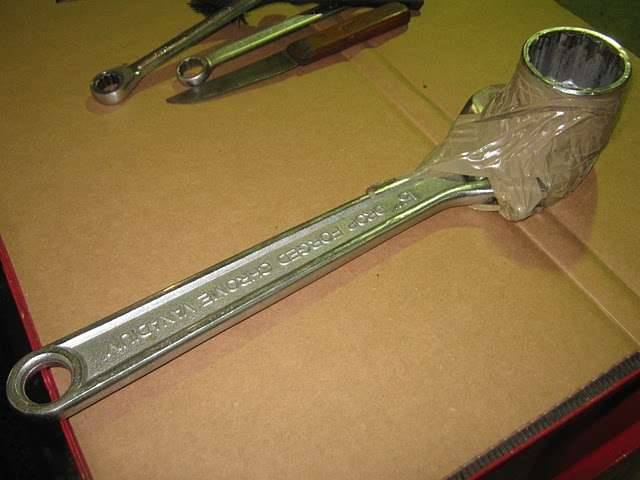 (23.24 KB) (23.24 KB)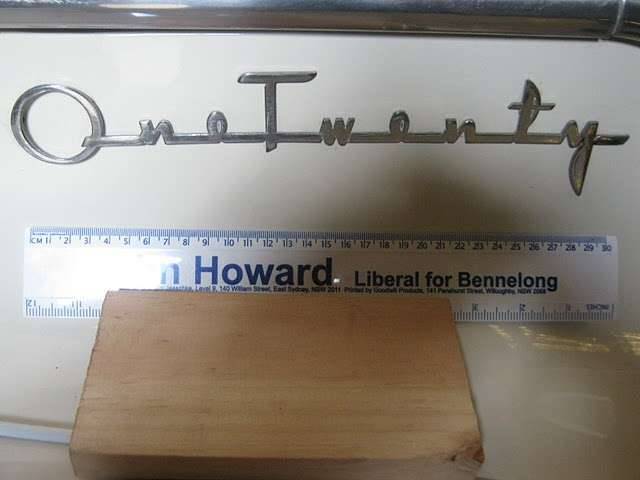 (23.08 KB) (23.08 KB)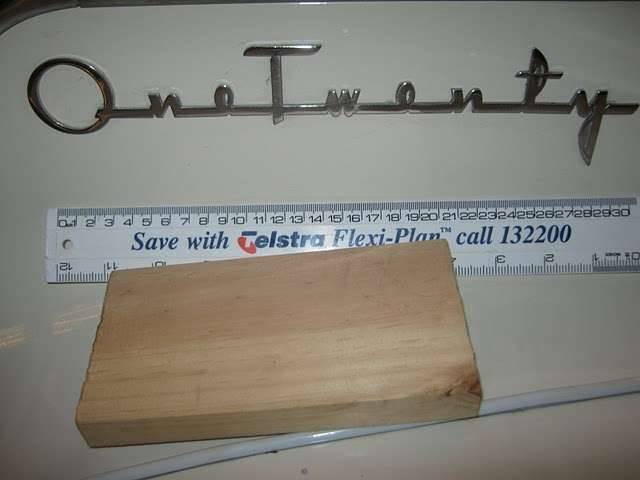 (18.32 KB) (18.32 KB)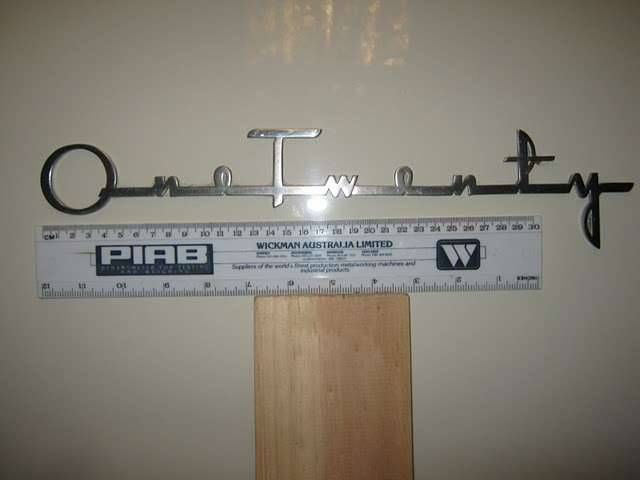
Posted on: 2011/3/8 2:46
|
|||
|
Mal
/o[]o\ ==== Bowral, Southern Highlands of NSW, Australia "Out of chaos comes order" - Nietzsche. 1938 Eight Touring Sedan - SOLD 1941 One-Twenty Club Coupe - SOLD 1948 Super Eight Limo, chassis RHD - SOLD 1950 Eight Touring Sedan - SOLD What's this? Put your Packard in the Packard Vehicle Registry! Here's how! Any questions - PM or email me at ozstatman@gmail.com |
||||
|
||||
|
Re: Wade's Workshop
|
||||
|---|---|---|---|---|
|
Home away from home
|
Quote:
"...All went well there, the hardest part being lifting the head off the engine, must be getting old....er..." You? Never! Mal, that could be the right moment to again mention the "c-clamp" method, which affording a firm grip and ergonomic handle even for three hands if necessary.
Posted on: 2011/3/8 15:39
|
|||
|
The story of ZIS-110, ZIS-115, ZIL-111 & Chaika GAZ-13 on www.guscha.de
|
||||
|
||||
Register To PostTopic is Locked


