|
Re: Wade's Workshop
|
||||
|---|---|---|---|---|
|
Forum Ambassador

|
Monday 11th May 2009
Half day only at the workshop this afternoon and while waiting for Wade took pic's of the bearing numbers and their boxes picked up last week from ABC bearings in response to "the flackmasters" exhortation. Have to think, could be difficult as I haven't done that for a long time, how I'm going to present the info gleaned. That aside, then cleaned more parts till Wade arrived. He'd brought the old valve radio with him that Harvey had dropped in some weeks ago to be repaired. Wade had to transpose two valves, replace some components and dodgy wiring and install a missing component among other things, no wonder it wouldn't work! Then it was into turning Big Red's engine on it's side so the sump("pan" for you US guys) could be removed. Needed John's help to do it, using the engine crane to lift the engine with John and me pulling and positioning the engine while Wade operated the hydraulic pump. No dramas, except for the obligatory oil loss. It's surprising how much oil they hold and how much doesn't drain when you empty it. Pan off, again no dramas, except for a "washer" which fell out of the sump when it came off the crankcase. Later when Wade was cleaning up the crankcase surface another "washer" fell out of the crankcase. And this is deja vu all over again as you'll see by the post below from last year! Quote: Ozstatman wrote: Saturday 19th April 2008.......In preparation for this Wade had the Super 8 up on Rick's hoist to service it. However after he drained the oil, when he took the cover off to remove and clean the oil pickup screen a nut and a washer came out as well as the screen! Needless to say this caused much consternation and resulted in Wade taking off the sump to check out the situation. Wade's guess was that a nut holding the oil piping in the sump had come loose, but this wasn't so. Couldn't find where it may have come from, even checked Kevin's engine on the bench to give other angles to look from for possible causes. Wade came to the conclusion that somebody may have dropped them down the oil filler tube at some stage in the car's past........... he was saying that since he brought in the Super 8 from the US last September he's put about 5000 miles on it. And thinks the nut and washer have been there at least since then!......... Accordingly there was much head scratching, muttering and cursing. Where are these things coming from? Are there any more? What's going on? Questions, questions, questions but no answers so far. Detailed inspected of crankcase internals revealed......nothing! Looked at some spare roller rockers to determine if they could have come from there......doesn't look like it! A remote "possibility" came from the fuel pump mounting which has the rear stud hole badly cracked! In fact it didn't have a stud in it but a long bolt. Wade thought that maybe, just maybe, because the bolt went all the way through into the oil filler shaft and maybe it was originally secured by a nut there(the one found last year). But the washers which fell out today are much too big for the bolt used so who knows???????? The other things presenting a query are the two "plugs" for want of a better term, found in the countersunk rear main bearing shafts. Are these "correct"? My terminology is very lacking here so please refer to the pic's attached will may be a better guide. Attach file:  (25.48 KB) (25.48 KB) (18.27 KB) (18.27 KB)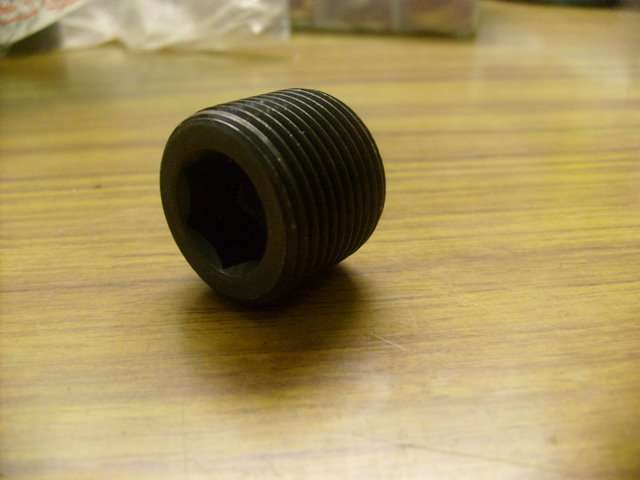 (16.56 KB) (16.56 KB)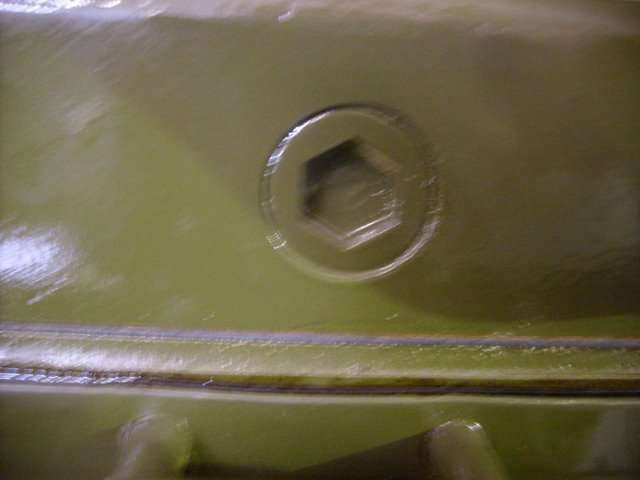 (34.88 KB) (34.88 KB)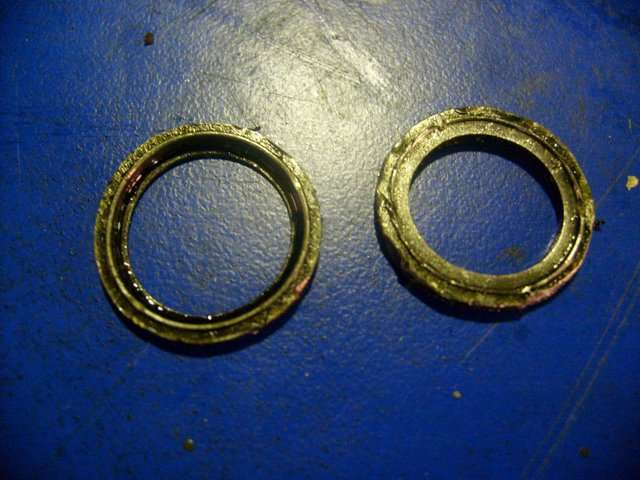 (31.16 KB) (31.16 KB)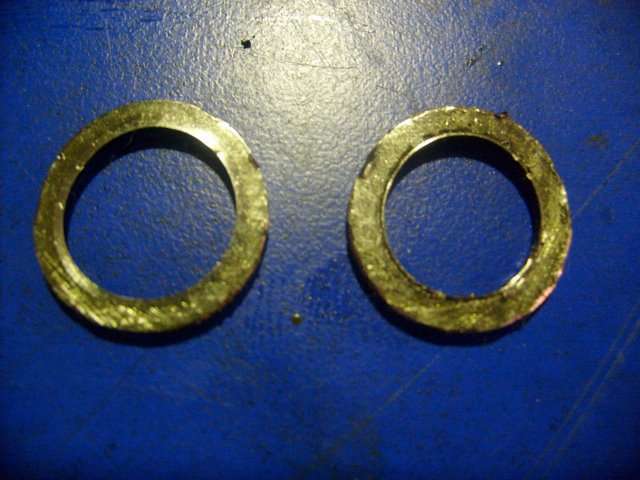 (34.55 KB) (34.55 KB)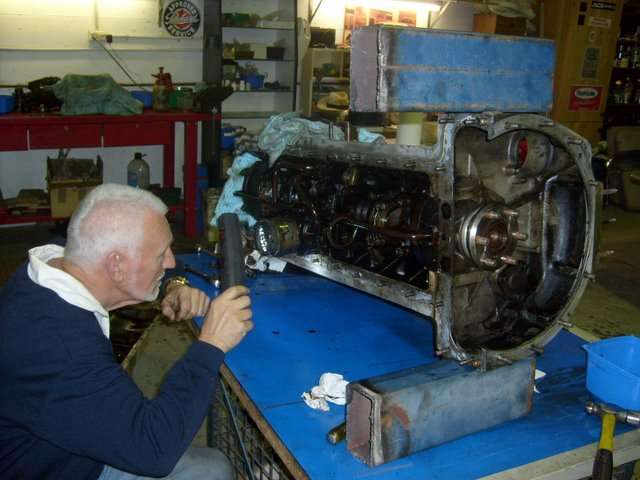 (16.69 KB) (16.69 KB)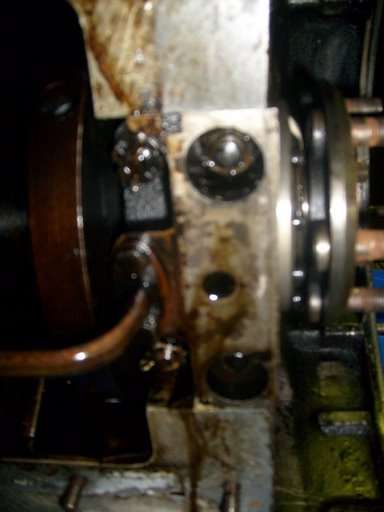 (19.65 KB) (19.65 KB)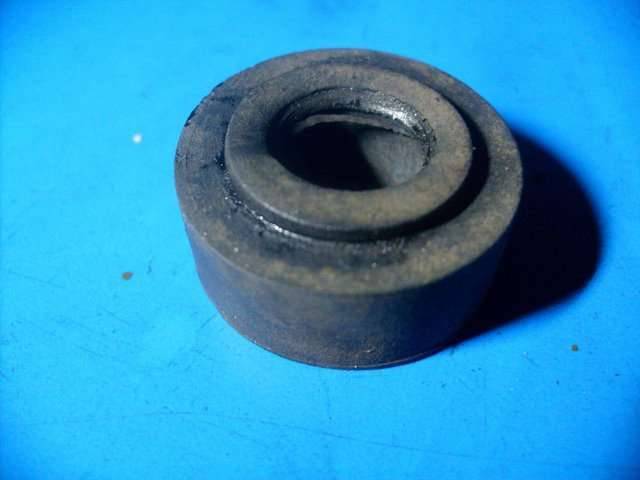 (23.28 KB) (23.28 KB) (35.89 KB) (35.89 KB) (24.94 KB) (24.94 KB)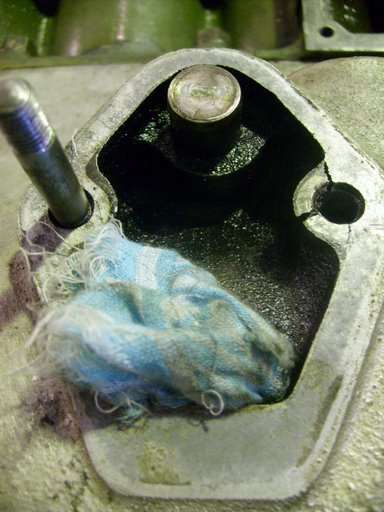
Posted on: 2009/5/11 5:14
|
|||
|
Mal
/o[]o\ ====  Bowral, Southern Highlands of NSW, Australia "Out of chaos comes order" - Nietzsche. 1938 Eight Touring Sedan - SOLD 1941 One-Twenty Club Coupe - SOLD 1948 Super Eight Limo, chassis RHD - SOLD 1950 Eight Touring Sedan - SOLD What's this?  Put your Packard in the Packard Vehicle Registry! Here's how! Any questions - PM or email me at ozstatman@gmail.com |
||||
|
||||
|
Re: Wade's Workshop
|
||||
|---|---|---|---|---|
|
Forum Ambassador

|
Don't think they look like washers either. Are they thin steel stampings? What diameter? Have seen things very similar on later but wouldn't think used then. If not type seals as 34Packard suggests, then another remote idea. Any ball or roller bearings or pressed in grease seals in that engine? If thin stamped pieces, those look very much like grease retainers used on sides of bearings--have seen more than one come loose from wear and old age.
Posted on: 2009/5/11 8:30
|
|||
|
||||
|
Re: Wade's Workshop
|
||||
|---|---|---|---|---|
|
Forum Ambassador
|
Tuesday 12th May 2009
When I arrived at the workshop Wade was trying to press the new modern oil seal into the timing cover housing, but without success. There are three little "pimples" around the edge of the recess into which the seal fits and for old style seals this isn't a problem while for the modern seals they present an obstacle which leaves the seal sitting crookedly. Not preferred, so the seal was taken out, to be thought over and returned to another day. Next, turned to the loose "washers" issue. Wade decided to look at the cam follower setup but that was on the side of the engine lying on the worktable, so first the engine had to be set upright again. After putting the sump back on, but only held by a few nuts this was accomplished together with more oil spillage, it must be running low now! The rocker covers were then removed and the rockers removed and there they were! Or rather there they weren't! A number of the roller cam followers were missing the collar from the outside ends of the shaft they rotate on. And that wasn't all, two of the rollers were stuck or frozen and one was pitted. Breakdown of the roller misfortunes - #1 Intake, missing collar, #1 Exhaust, missing collar, #3 Intake, roller pitted, #4 Exhaust, roller frozen, #5 Intake, roller frozen, #7 Intake, missing collar, #8 Exhaust, missing collar #8 Intake, missing collar. Found another loose collar but that only accounts for 3 of the 5, so what about the other 2? Probably drained out during an oil change at some stage is the most likely answer. Altogether what Wade didn't want to find but much better now rather than have a catastrophic failure at a later date. And now more parts are needed to wing their way across the Pacific to assist in Big Red's rehabilitation. Tom, are these what you were talking about in your post? Quote: 34PackardRoadsta wrote: Mal, Those 'washers' sure look like seals to me, like the ones under the end caps for the rocker shaft assembly. Unfortunately, I have no idea where they would have come from. Tom Next, an easier task, re-mounting the rear housing on the trans. Walked around to see Ivan and Sam and the rear housing was ready after being machined to slightly re-size to fit the new seal. Back at the workshop a new gasket was made, the new rear seal pressed into the housing, liberal amounts of gasket sealer applied, the universal yoke inserted and all bolted back together. Then the bell-housing breather was re-installed, this is a small vented plate on the bottom of the bell-housing. And although not a big achievement I'm quite proud of what I achieved in bringing it back from it's former bedraggled state. After cleaning it by soaking it the mesh holding the metal gauze in place had to be refastened under the retaining edge for this on the breather. So armed with a small screwdriver and a hammer pushed the gauze back in. Then pressing in the mesh and holding the vent with one hand hammered the rim back into shape with the other. Unfortunately didn't take any before or after pic's, or maybe it is fortunate otherwise they'd figure very prominently below. While doing that Wade was digging out a couple of flat headed screws with vee'd shoulders to replace the missing two. The 2 replacements both proved a little long so after some hacksaw and bench grinder treatment were then "fit for purpose". Next was the diff housing or correctly the bearing cones still in the housing needing to be removed. Wade fired up the oxy and heated up the outside of the housing around where the cones was located. Not too hot but hopefully hot enough to permit the cones to be removed. No luck with this, still wouldn't budge. So turned to plan B, welding bars but in this case cut-off bolts to the cones and using those to pull them out. Round to see Ivan and Sam again, this time in Wade's Ute as it's a long way to carry a diff housing. Sam, being the man, dropped everything, welded in the cut-off bolts and to top it off knocked out the cones and also tagged the shims from each side.John, I think this answers your query. Quote: Appin wrote: Well, when Wade says he is going to take something apart..........How did you finally get the retainer part of the rear axle bearing out? Back at the workshop we next turned to the right front lower suspension arm assembly which still needed the pin assembly to be pressed out. Although Wade has done this a number of times previously including the '41's last year he couldn't remember what he'd used to push them out and couldn't find something to suit. There was a failed attempt which resulted in the eye and one end of the pin being crushed and bent in the hydraulic press. So that left one end available to work on. After a false start using a large rattle gun socket of John's which started to move the pin but bound up a "tool" was found by John. Although some would call them, because there were 3 of them, Mazda parts John assured us they were a "Special Packard Tool" and who were we to argue especially since they did the job so well. They have now been assigned a special place in Wade's tool chest awaiting their next "Special Packard Tool" assignment. That's where we left things for the day. Tomorrow there won't be any workshop activity but Wade in his travels will 1) pick up his rebuilt shocks from Tony "Shocks", 2) drop in Big Red's radiator to Dennis at JJ Smith's for another clean and check, 3) pick up the '34 grill and other parts from All Metal Bumpers and 4) visit David at Antique Tyre Supplies for some cowl beading to replace that taken off when the holes were filled. I'll find out all about it on Thursday when I'm down there again. Attach file: (12.02 KB)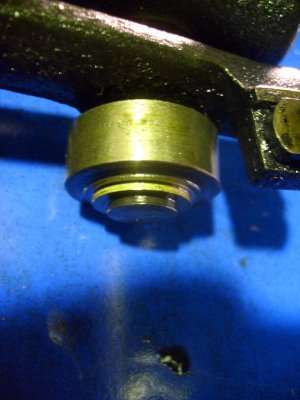 (14.48 KB) (14.48 KB) (11.97 KB) (11.97 KB)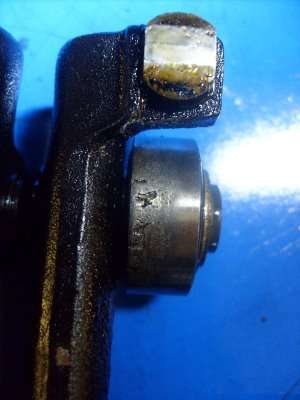 (25.00 KB) (25.00 KB) (12.31 KB) (12.31 KB) (19.25 KB) (19.25 KB)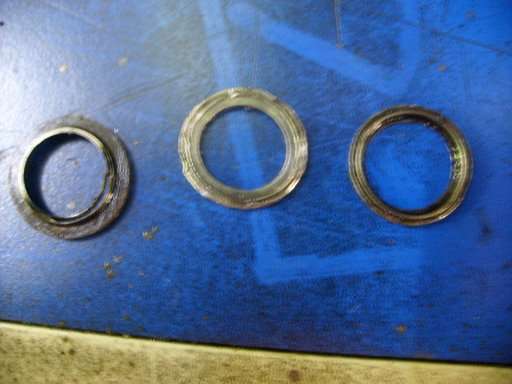 (22.46 KB) (22.46 KB)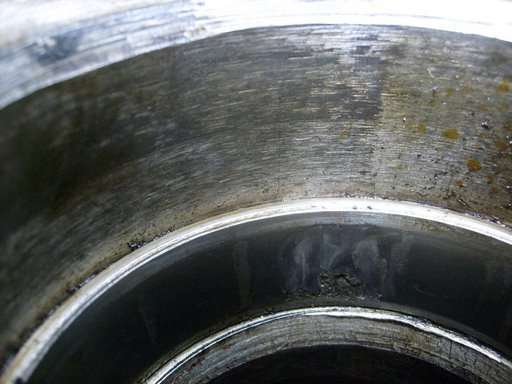 (17.08 KB) (17.08 KB)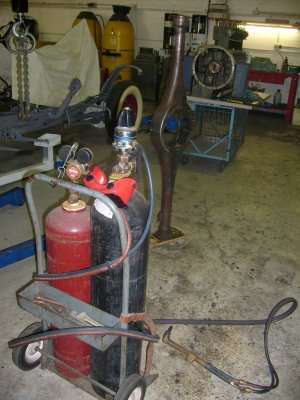 (17.44 KB) (17.44 KB)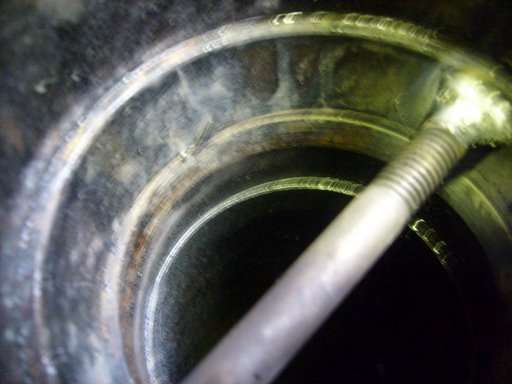 (15.51 KB) (15.51 KB)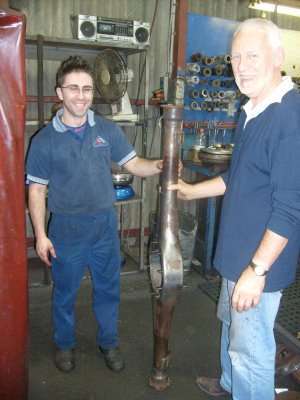 (15.29 KB) (15.29 KB)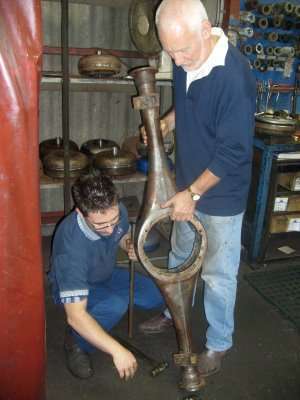 (18.34 KB) (18.34 KB)
Posted on: 2009/5/12 6:30
|
|||
|
Mal
/o[]o\ ==== Bowral, Southern Highlands of NSW, Australia "Out of chaos comes order" - Nietzsche. 1938 Eight Touring Sedan - SOLD 1941 One-Twenty Club Coupe - SOLD 1948 Super Eight Limo, chassis RHD - SOLD 1950 Eight Touring Sedan - SOLD What's this? Put your Packard in the Packard Vehicle Registry! Here's how! Any questions - PM or email me at ozstatman@gmail.com |
||||
|
||||
|
Re: Wade's Workshop
|
||||
|---|---|---|---|---|
|
Home away from home
|
Mal,
Yes. I did not explain it very well, but those are what I was talking about. Tom
Posted on: 2009/5/12 10:35
|
|||
|
||||
|
Re: Wade's Workshop
|
||||
|---|---|---|---|---|
|
Forum Ambassador
|
Hi Mal,
I am shocked the washers came un-swaged from the roller pins. These normally require grinding the swaging away and then pressing the pin out of the washer. The rollers and pins are available from Egge Machine. I replaced all of mine, the only trouble was the little thrust washers were two wide. I hade to surface grind and fit each one. A big pain in the $!#. The other surprising thing for me is that every one of these rocker assemblies (the set on my car, spare set I have, and all at swap meets and in friends private stash) I have ever encountered have been totally worn out. They typically seem to wear the tiny internal bushings out, as well as gull the pins pretty bad. What has Wades experience been with this style Packard rocker assembly? Jim
Posted on: 2009/5/13 21:39
|
|||
|
||||
|
Re: Wade's Workshop
|
||||
|---|---|---|---|---|
|
Forum Ambassador
|
Thursday 14th May 2009
Arrived at the workshop to find Wade already there with his goodies. Rebuilt shocks from Tony "Shocks", re-plated '34 grill and other parts by All Metal Bumpers and 4 metres of cowl beading from David at Antique Tyre Supplies. Had a look at a few of the chrome pieces and they look good, unfortunately the only pic I took didn't turn out too well. And last night/early this morning(Daytime in US) Wade had called Egge Machine about the availability of the roller cam followers and parts. They do have them but they differ from the ones Wade has in his '37 Super 8 engine. The only followers that Egge have, have a pin that presses into the rocker arm and then the end outside the roller is "swaged". While those out of Big Red have a pin with a flange on the roller end and between the flange and the roller is a "collar" like those which came loose and ended up floating through the engine. On the other side of the rocker shaft, which the pin fits snuggly, there is another washer and then a tiny circlip. Somewhat different from Egge and also what Tom and Jim described. It is to be noted the spares that Wade has are like those Egge, Tom and Jim describe. Question - Was there a change in this part of the cam follower assembly at some stage in Super 8 history. Any information and advice is welcomed to help Wade through this problem. Next on the agenda was dis-assembling one of rollers. Couldn't find a pair of circlip pliers with small enough points to do the job. So while Wade carried on there I moved onto cleaning parts again, this time in preparation for painting. Did right front suspension, backing plate, some engine parts and other "stuff". However before I was too far into cleaning there was a cry of anguish from Wade. He'd ground down the noses of his small pair of circlip pliers and managed to get a circlip off. Yeah - right off! Sproing! The circlip took flight literally and disappeared into that secret place all workshops have that gobbles up dropped nuts, bolts and washers, etc. After a fruitless search, of course, Wade then dis-assembled another but this time extra carefully. The difficulty in fitting the modern seal to the timing cover was overcome in two parts. First Wade ground off the 3 little "pimples" on the inside of the cover preventing the seal from seating level. Even then it was somewhat reluctant to do so, so was left in the press under pressure to "encourage" it to seat properly. Wade also fitted the re-built front shocks back on Big Red, first pieces of equipment to go back on the car. And Jim, in response to your post. I am shocked the washers came un-swaged from the roller pins.[i] These are not the swaged type but, as described above, have a flanged pin and circlip arrangement. [i]What has Wades experience been with this style Packard rocker assembly? I think, and I'll have to check with Wade, he's had experience with 3 Super 8 engines - 1) the one in his '34 which is completely rebuilt but I don't know how involved Wade was in this, 2) the one he rebuilt for Kevin, a '35, but I don't think the cam followers were an issue there, and 3) the '37 now being worked on. He also has some spares rollers and rockers but these came with the '34, I think. EDIT - Link to Picasa album with more pic's(near bottom) of cam followers. Ignore the out of focus ones by this inept photographer please.http://picasaweb.google.com/ozstatman/WadeSWorkshopMay2009# Attach file: (25.57 KB)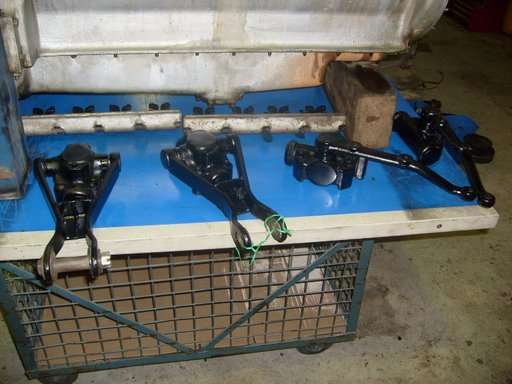 (19.68 KB) (19.68 KB)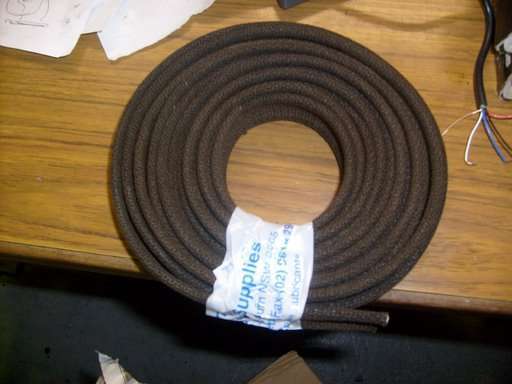 (19.54 KB) (19.54 KB) (11.82 KB) (11.82 KB) (17.97 KB) (17.97 KB)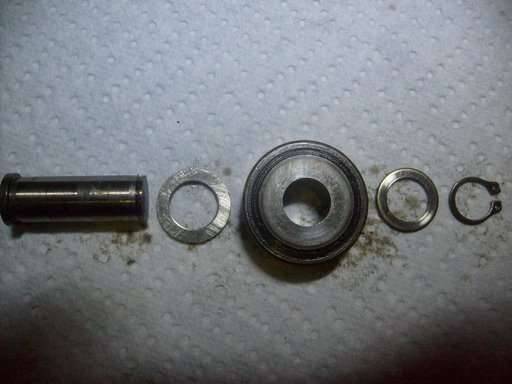 (17.63 KB) (17.63 KB) (12.73 KB) (12.73 KB)
Posted on: 2009/5/14 3:57
|
|||
|
Mal
/o[]o\ ==== Bowral, Southern Highlands of NSW, Australia "Out of chaos comes order" - Nietzsche. 1938 Eight Touring Sedan - SOLD 1941 One-Twenty Club Coupe - SOLD 1948 Super Eight Limo, chassis RHD - SOLD 1950 Eight Touring Sedan - SOLD What's this? Put your Packard in the Packard Vehicle Registry! Here's how! Any questions - PM or email me at ozstatman@gmail.com |
||||
|
||||
|
Re: Wade's Workshop
|
||||
|---|---|---|---|---|
|
Forum Ambassador

|
Regarding 39Super8's comments The other surprising thing for me is that every one of these rocker assemblies ....I have ever encountered have been totally worn out. They typically seem to wear the tiny internal bushings out, as well as gull the pins pretty bad. :
I've experience with three sets, all with the forged arms (earlier arms were stampings), one set from my spare engine, one set purchased loose, and the set in my own engine in my 34 Eight. But I only have history on the set in my engine - they were removed at about 47,000 miles when I did a valve job, and were in good condition and left as is. When at 89,000 it was time to rebabbit the rods and mains they were removed again; had my wallet been a bit thinner I would have left them alone as they seemed fine, but I did take the opportunity to replace them with the Egge variety. I suspect that those that show extreme wear may have come from engines with very high mileage or with excessive bearing clearances and thus low oil pressure. At least from 33-36 Packard serviced them as an assembly with the arm, and not individual replacement rollers. May or may not have continued this way throughout the service life of the engine, I don't know but the parts books (which I haven't checked) would give a clue, though it's possible the design could have been superceeded with a change but retaining the same part number.
Posted on: 2009/5/14 8:42
|
|||
|
||||
|
Re: Wade's Workshop
|
||||
|---|---|---|---|---|
|
Forum Ambassador
|
Hi Mal,
It looks like this engine already had the Egge type replacement pins. I am confused about what Egge told Wade, the ones I purchased from them a few years ago are pins that press through, with circlip grooves and tiny circlips that hold the assembly on. The Egge ones also do not run the bushing inside of the roller. They basically look like the close up picture of the disassembled one you posted. I really hope circlips coming dislodged isn't a regular situation. When I replaced mine, I wasn't thrilled with the circlip retaining method, but had no choice. This is an interesting design, such a tiny amount of bearing surface for such a high amount of load. As I read O_D's reply, it occurs to me that Packards may have gotten driven farther and harder in the southwest explaining the wear in key areas of these early engines. Lots of wide open space and long stretches in this part of the country. I will follow this thread with keen interest. It's fun to see the progress! Jim
Posted on: 2009/5/14 10:43
|
|||
|
||||
|
Re: Wade's Workshop
|
||||
|---|---|---|---|---|
|
Forum Ambassador
|
Friday 15th May 2009
Before going to the workshop rang David of Antique Tyre Supplies. Wanted to catch him before he left, he was delivering the 20 litres of oil Wade had ordered on Wednesday, to try and order some beading for the cowl of the '41. Missed him, as he was already on the road! First up at the workshop walked up to Mowad's, the panelshop up on the next corner, forgot to mention we went there yesterday. We'd taken up the grill surround from Big Red because Wade needed some paint to "touch up" the filling job that Paul had done on the holes behind the cowl beading. Picked up about 500mls of paint and now have to find an airtight container to store it in long term, depending on how much is left over. Back at the workshop David arrived soon after we did with the oil. I was able to give him my contact details and he'll call me later this afternoon when he gets back to his warehouse. I then Marine Cleaned and Metal Readied the parts cleaned yesterday in preparation for POR-15 on Monday. While I was doing that Wade re-installed the re-built brake master cylinder and the new hand brake cable from the the hand brake handle to the equaliser in the chassis. Wade is also mounting a 6V electric fuel pump and contemplating where to place it, probably as close to the fuel tank as possible. Then arriving home, in the mail was a Money Order from Terry(traumjaegercat) for the '34 shock links and front axle shock mount brackets. The parts were mailed today, so when received Terry will have to adapt them to his '34. Attach file: (16.94 KB)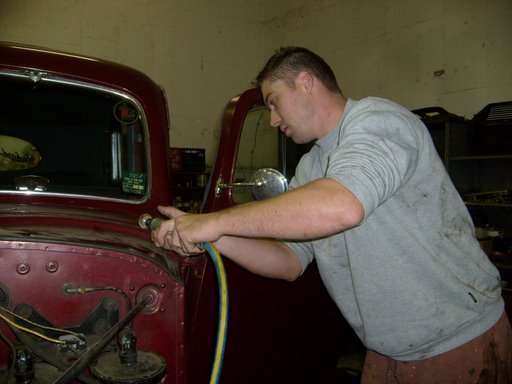 (10.84 KB) (10.84 KB)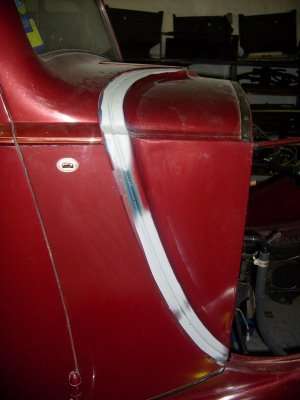 (9.28 KB) (9.28 KB)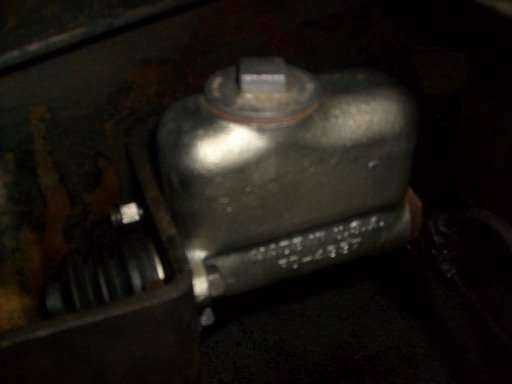 (17.65 KB) (17.65 KB)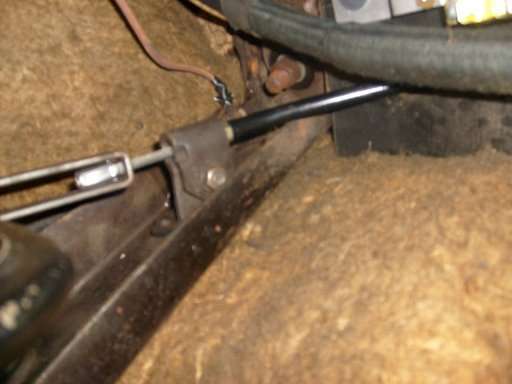 (14.26 KB) (14.26 KB)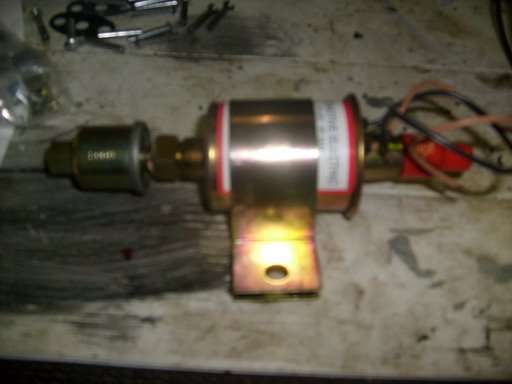 (11.43 KB) (11.43 KB)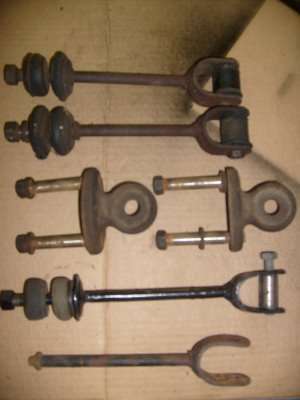 (10.32 KB) (10.32 KB)
Posted on: 2009/5/15 0:15
|
|||
|
Mal
/o[]o\ ==== Bowral, Southern Highlands of NSW, Australia "Out of chaos comes order" - Nietzsche. 1938 Eight Touring Sedan - SOLD 1941 One-Twenty Club Coupe - SOLD 1948 Super Eight Limo, chassis RHD - SOLD 1950 Eight Touring Sedan - SOLD What's this? Put your Packard in the Packard Vehicle Registry! Here's how! Any questions - PM or email me at ozstatman@gmail.com |
||||
|
||||
Register To PostTopic is Locked


