|
Taking her for a spin!
|
||||
|---|---|---|---|---|
|
Home away from home
|
After 2 years, I was able to take her out for a spin around the block!!!
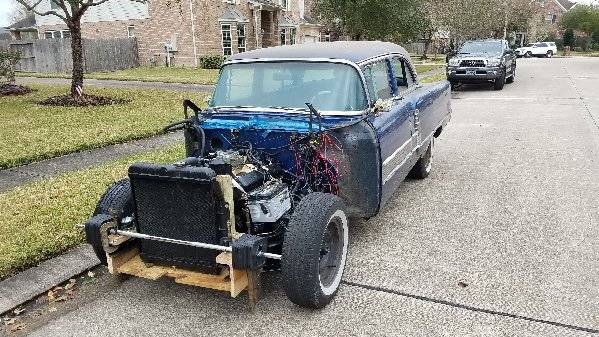
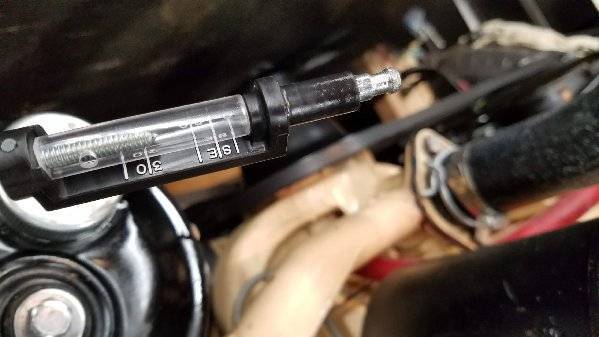
It felt good to get her going again. Good trial run with nothing falling off or breaking. A few things that I noticed: 1. Transmission is not 100%. Didn't seem to know what gear it was in and at first wouldn't move in any gear. But moving the shifter around helped to remind it and it seems mostly normal now. When in Park, it will roll backwards on a very slight incline. It seems to go forward okay, but seems a little sluggish. If it is in Park and I rev the engine, the car will rock forward (doesnt move but rocks forward then back as I let off the gas). Reverse works great. 2. Various leaks: coolant, transmission/PS, and oil. Just drips of each but need to be fixed before I get the front clip back on. 3. Rough idle. Has a 'shudder' at idle like a cylinder is not firing. Smooths out at higher rpm, but rough at ~700rpm which is as low as I can get it to idle with the idle screw all the way out. I went around the engine pulling the plug wires one by one to see if I could find one that had no effect, but couldn't tell the difference between cylinders. 3a. Carb funnies (it is a Carter WCFB). If I cover the air horn secondary side opening, the engine will rev higher then stall. I can't understand why as the secondary throttle valves seem tight when I have the carb out of the car. Plugged up vacuum lines that go to dist advance and brakes with no change. Tried spraying carb cleaner all around it as well as the unlit propane torch trick. No difference. Currently working through this thread to see if I have some similar challenges with the flatness of the throttle body casting. jalopyjournal.com/forum/threads/wcfb-woes-can-you-troubleshoot.92081/ 3b. Intermittent loss of spark. I put a spark tester and seemingly randomly there will not be a spark at a plug. I have tried multiple wires and the same thing: random, intermittent lack of spark. In the last 2.5 years (with very little driving), I have replaced the dist cap, rotor, spark plug wires, and within the last month have replace the points, dist condenser, battery, and plugs with a new battery grounding strap. Not sure what is left unless there is some dist shaft wear which is causing this. 4. Brakes work, but not as touchy as I would think for power brakes. I remember the same thought when I had th BTV rebuilt by Kanter in 2016. It works, but expected it to be "touchier". All in all, good to get it going! Suggestions always appreciated. -Bob
Posted on: 2018/12/17 22:17
|
|||
|
Bob
1955 Packard Patrician Sapphire Blue |
||||
|
||||
|
1 step forward, 2 steps back
|
||||
|---|---|---|---|---|
|
Home away from home
|
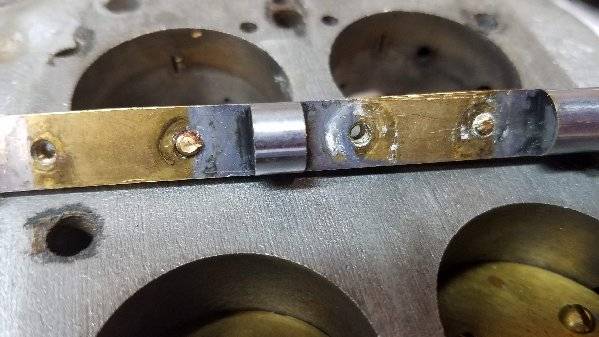
So I was trying to track down why there is any suction at all at the secondary part of the air horn. Took the carb off and I seemed to convince myself that there was some play in the secondary throttle valves when closed so presumably they could be sucked to open a little when the engine is running. Also felt like the primaries were hanging up a bit. So, I decided to fix that by pulling off the throttle valve plates to reinstall. Damn that red loctite works well, as I broke off 2 of the heads of the brass screws on the primary shaft :(
Trying to now drill them out, but I really don't have much in the way of precision machining/drilling capabilities. If I can get them out, I think I may have to drill and tap from a 4-40 screw to a 6-32 screw. OR maybe I should just get another primary shaft. Are they really that expensive??? Looking on line for Corvette WCFB parts, a new primary shaft is >$140 but I don't know if they are interchangeable with our WCFBs. Anyone have any leads on where to get a replacement that will work? Just got her driving so bummer that there will be no driving for while :(
Posted on: 2018/12/21 19:26
|
|||
|
Bob
1955 Packard Patrician Sapphire Blue |
||||
|
||||
|
Moving on to Rear Bushings for now
|
||||
|---|---|---|---|---|
|
Home away from home
|
I spent a lot of time trying to remedy the broken screws in the primary throttle shaft. I was able to to drill out one and retap it successfully. But the other one is giving me fits and I am doing more damage to the throttle shaft than anything. I have a drill press but no good way to hold the shaft and to prevent the small drill bits from skating across the rounded surface. Seems like replacements are not readily available so trying to find someone to do the drilling for me or to replace/repair the shaft and maybe see if it needs rebushing etc. My reason for taking it apart was to try to reset the throttle valves to see if I could address why I couldn't get an idle below ~700rpm and that if I covered only the secondary side of the air horn, the engine would rev higher then stall (I was thinking that maybe the primaries or secondaries weren't centered properly so I was getting more of an opening at idle than proper).
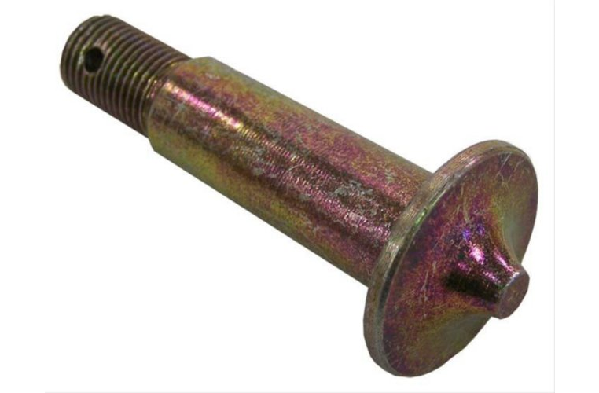
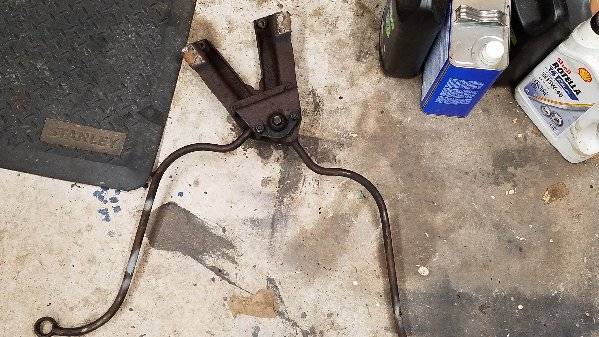
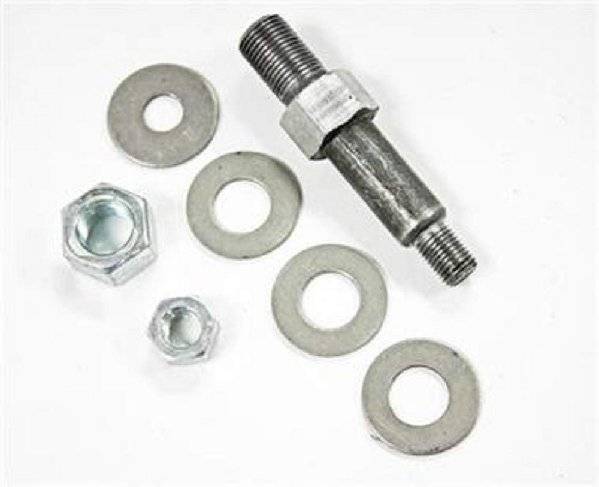
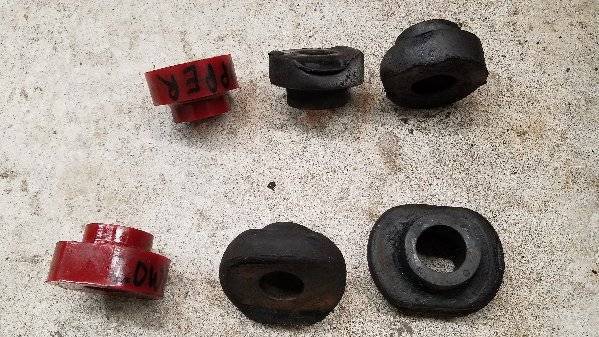
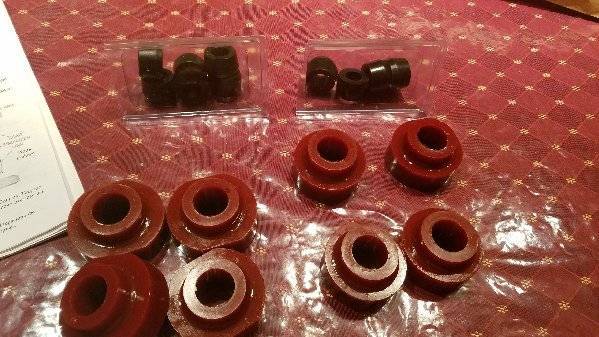
Frustration has moved me to another project for now, I will get back to the carb as soon as I can figure out how/who to drill out the remaining hole. So moving on the replacing the rear bushings. I replaced all the fronts with new ones from Max. After reading Dwight's article in the Cormorant last year and talking to him on the phone, I ordered his rear-only kit to give it a go. I also decided to do something different and properly use this project blog to document what I am currently doing vs just posting when I have problems.. Here is a picture of the bushings I received. They look very nice in red. There are the 4 uppers and 4 lowers for the arm as well as 10 of the same bushings for the Watts linkage Most of the motivation to replace the bushings came from me shearing off the nut for passenger side Watts linkage stud (see post #16 in this blog). I thought I was being careful the 2nd time with judicious use of PB Blaster and heat, but I sheared off the driver's side too... My plan is to not remove the front bolt/bushings from the "rear axle torque (or support) arms" to not deal with the load arm torque and Dwight's suggestion that the forward bushings for these arms usu don't need replacing. This may simplify some things, but also makes cleaning up the arms (removing rust, prime/paint) harder and finding a way to have someone weld new Watts linkage studs on in place of the broken ones. For now, I was going to try bolts [Rubicon Express RE2051 Shock Mount Stud Kit] as an interim fix. amazon.com/gp/product/B006GJOKAU/ref=oh_aui_detailpage_o00_s00?ie=UTF8&psc=1 I'm not sure where to find just replacement studs, but if I can verify the shoulder of these Crown J5352787 pins are 5/8" and the right length, maybe they will work.... It seems like tight quarters to weld in a replacement stud. Gerry at Packards SW has entire arms for $45 each which may be worth the price to avoid having to find the right replacement stud and someone to weld them with the arms installed. I pulled the Watts linkage tonight. There has a been a fair amount of posts regarding Watts linkage bushings etc and I intend to follow the process outlined by Howard (HH56) in grinding off the rivets and tapping that sleeve for new bolts to put back together. Plan for tomorrow is to take the Watts linkage apart, wire brush it and maybe paint it while I wait for those Rubicon shock mount studs to come on Monday. Dwight provided a fair amount of instructions and pictures but any suggestions from y'all are always very appreciated.
Posted on: 2018/12/27 22:07
|
|||
|
Bob
1955 Packard Patrician Sapphire Blue |
||||
|
||||
|
Re: Bob's '55 Patrician Blog
|
||||
|---|---|---|---|---|
|
Home away from home

|
Don't work too hard on those carb pieces, good parts carbs(WCFB)are well under $100.
Posted on: 2018/12/27 23:24
|
|||
|
||||
|
Re: Moving on to Rear Bushings for now
|
||||
|---|---|---|---|---|
|
Home away from home

|
If you can find a "V" block somewhere, you can clamp the shaft to it in order to start the drill hole. Or, you might be able to drill a hole the same size as the shaft into a piece of hardwood then cut it in half leaving half the hole, then clamp the shaft into that. Also, the judicious application of a little heat may aid in breaking the joint between the screw and the shaft.
Posted on: 2018/12/28 9:46
|
|||
|
||||
|
Re: Moving on to Rear Bushings for now
|
||||
|---|---|---|---|---|
|
Forum Ambassador
|
Most of the throttle shaft screws at that time were peened over on the end so they would not back out rather than be locktighted. If that one is peened, trying to remove it may have pulled the distorted threads up into the shaft threads and galled to the point the screw and shaft are one. If it is only a thread or two holding then drilling out from the broken side may provide enough force to break it free and let the remainder unthread.
Posted on: 2018/12/28 11:17
|
|||
|
Howard
|
||||
|
||||
|
so this happened
|
||||
|---|---|---|---|---|
|
Home away from home
|
Continuing on with rear suspension bushing replacement:
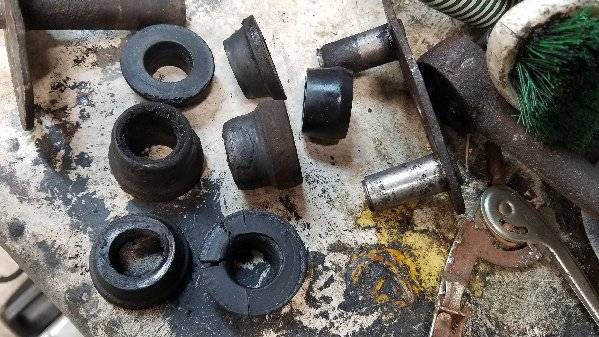
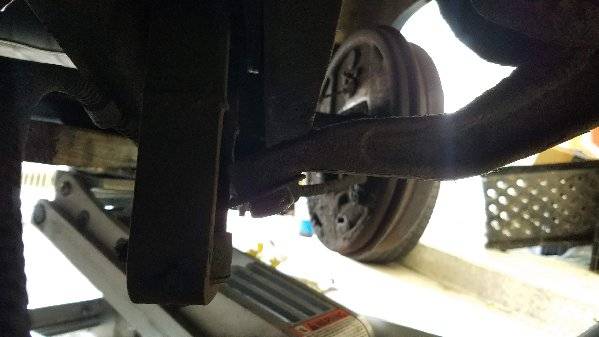
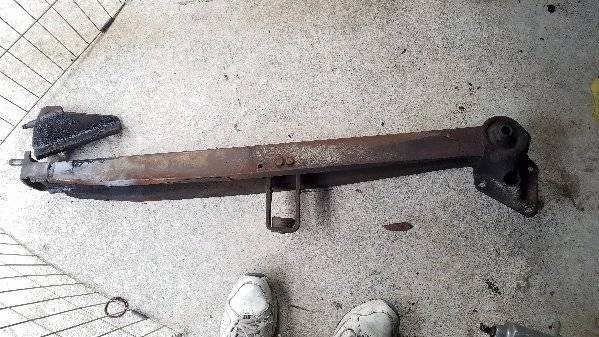
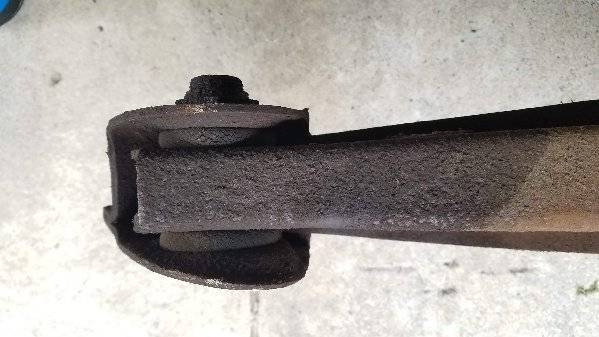
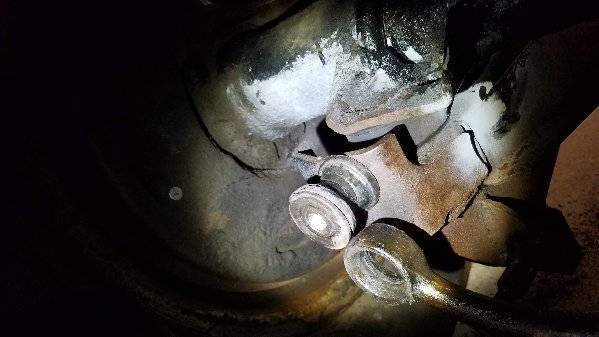
Took apart the Watts linkage today. The existing bushings (with the exception of 1) actually look pretty good. 1st pic is the 6 Center bushings along with one of the new ones. Dwight's kit provides 10 of the same bushings for all locations. Cleaned up the pieces and letting the primer dry now and will paint later. It was a pain grinding the old peened over ends of the center link and felt like they were welded, but got them out. Going to try to tap the pins tomorrow. With the Watts linkage out, I used my floor jack to raise the driver side frame to pull the tire and start on torque (support) arm bushing replacement. I noticed that the load arm separated from its stirrup. Must be with the Watts linkage out, this can occur. Not exactly sure how to get it back but there was a good discussion in "Stewarts 1955 Packard 400" blog (posts #271-#306 or so) that gives me some ideas. In my case, the body is on the frame so not as much flexibility as Stewart has. This has to be a common occurrence..(?) Since the load arm was no longer a factor, I decided there was no reason not to remove the entire torque arm. 3 easy bolts later it was out. I need to decide ASAP if I am better off taking these somewhere to have the old studs removed and new ones installed OR buy 2 from Gerry and install those instead ($45 each +shipping). Anyone done this before? Or know where to get the right studs to install?? Next picture is a comparison of the 4 old bushings and 2 of the new ones. I have to say that the old ones are in better shape than I assumed. Original? Hard to believe they are 60+ years old but I have replaced a lot of decent looking bushings on this car so maybe someone did all this within the last few decades. I'm thinking of not replacing the forward bushing of the torque arm for this reason (plus the fact that I don't have them on hand, which is the lazy reason). If I did buy 2 arms from Gerry I would order and install new fwd bushings; looks like Max has a set for ~$56 although I would also check with Dwight to see what he may have. Looking for advice here on replacing 2 arms or finding the proper studs and taking them somewhere to be properly welded. No progress on the Carb. Maybe tomorrow I will make one last attempt before I find someone to send it to to make it right. (Howard: i rebuilt the carb a few months ago and when I did I zinged off the ends of the existing screws to enable me to back them out. I then installed new brass 4-40 screws on this WCFB and was worried about properly peening them without bending the shaft so I used red Loctite instead. I didn't realize how good that works so when I tried to remove them last week, I sheared the heads off. Too many things at once, but enjoying the Christmas break to make real progress. Thanks for looking....
Posted on: 2018/12/28 19:35
|
|||
|
Bob
1955 Packard Patrician Sapphire Blue |
||||
|
||||
|
Re: Bob's '55 Patrician Blog
|
||||
|---|---|---|---|---|
|
Home away from home
|
Here is an excerpt from a Carter WCFB Service Manual on the subject of removing throttle valves.
"File off staked ends of throttle valve attaching screws and remove screws and throttle valves from the bores." Carter most likely marked the valve plates with a 'C' to indicate correct orientation in the carburetor flange. The plates must be returned to the original configuration. Carter recommends replacement of the throttle valve retaining screws . . . they are a 'use once' item. Flange and/or shaft wear maybe accommodated by bushings or plating. I would take the throttle shaft to a local machinist to drill the broken screws. You may have some luck by drilling from the broken head side with a 'right-hand' drill. I would start small and not attempt the correct tap drill size until an effort was made to drive the screw completely through the shaft . . . . meaning, without the head the screw should be able to pass through the shaft as a 'headless' set screw. I don't know if the 'LocTite' comment was genuine, but if it was there are recommendations on which product to use based on the screw size. If 'red' LocTite was used the assembly must be heated to destroy the locking characteristic of the product. If this is not done the product is stronger than the screw itself and the head will likely sheer in torsion. This heating process should also be done prior to drilling if the fondest hope of driving the screw out with the first drill size is ever going to happen. The LocTite website will have 'time at temperature' recommendations to defeat the locking feature of their products. I checked a few part numbers for the secondary throttle shaft and found that the Packard part was not unique, in fact the first 'other carburetor' I checked was for a '56 Chevy (Carter 2366S or 2366SA) and it had the same secondary throttle shaft part number. Given the accelerator pedal and transmission linkage, I suspect the primary shaft may become specific to a particular vehicle, but the shaft itself is likely same with a different lever swaged on. Likewise I found the throttle shaft screws seem to be ubiquitous, and are used in many, if not all, WCFBs. dp
Posted on: 2019/1/1 13:32
|
|||
|
||||
|
Re: Bob's '55 Patrician Blog
|
||||
|---|---|---|---|---|
|
Home away from home
|
I have a pile of non-Packard WCFB cores and I would be happy to check them out if you've not found a solution before my next Oregon shop visit. Likely you'll be back on the road by then but if not . . .
Posted on: 2019/1/1 13:38
|
|||
|
All generalities are false.
Once I thought I was wrong but I was mistaken. Don Pierson Packard / IMPERIAL page CA DMV Licensed Vehicle VIN Verification 1951 Henney-Packard 3-Door Long Wheelbase Air Force Ambulance The 1951 Henney-Packard is For Sale! 1954 Packard Patrician 1954 Packard Patrician Parts Car 1956 Clipper Custom Sedan |
||||
|
||||

 (468.11 KB)
 (259.31 KB)