|
Re: dashboard
|
||||
|---|---|---|---|---|
|
Just popping in
|
Is there any photos or more information you have on doing this? I just acquired a 1947 Clipper and the dash and all the instruments have been taken apart. Im just trying to get it back together and running but haven't found many leads on the best method to approach.
Thank you!
Posted on: 2021/12/16 16:50
|
|||
|
||||
|
Re: dashboard
|
||||
|---|---|---|---|---|
|
Forum Ambassador
|
There are not any detailed factory photos of the 47 dash I am aware of. The dash does attach to the body in the same fashion as bear's 49 but the details on the instrument cluster and panels and layout is different. Here are a few photos of my 47 dash before new woodgraining was done. The one or two photos I had showing the complete intact dash seems to have gone missing though.
Two instruments are each mounted on two plates and those two plates mount to the cluster body which in turn mounts to the dash. The speedometer shares one of the cluster screws and then has an additional two which will have some spacers to keep the speedo level and adjust the presentation in the dash. There will probably be some strips of fabric webbing between the metal cluster and speedo housings to the dash mounting points for noise and vibration suppression. Once the dash is in the body the hood and vent release handles mount to the bottom edge. Attach file:  IMG_0643.jpeg (88.00 KB) IMG_0643.jpeg (88.00 KB)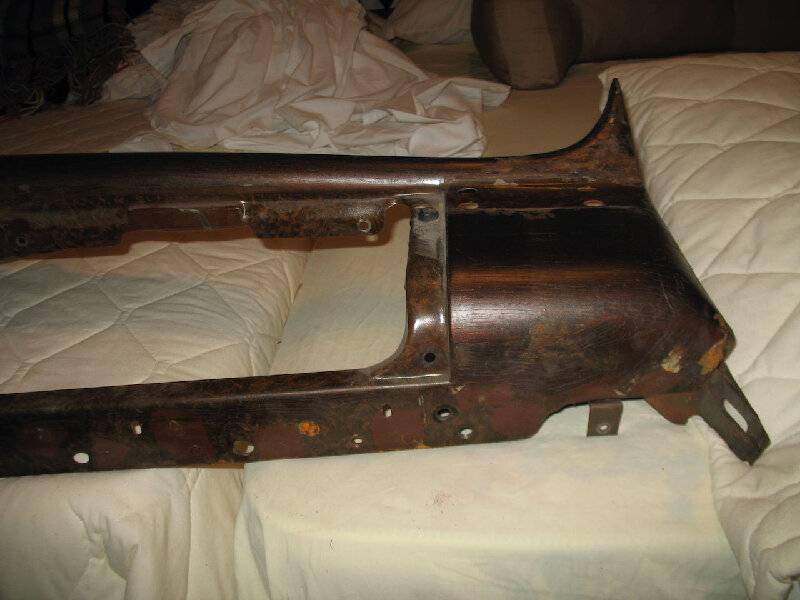  IMG_0644.jpeg (66.26 KB) IMG_0644.jpeg (66.26 KB)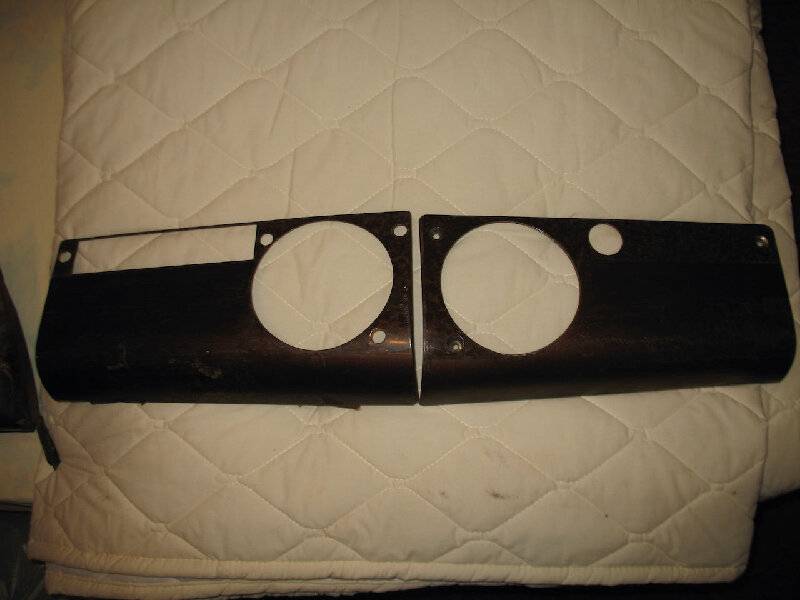  IMG_0645.jpeg (65.48 KB) IMG_0645.jpeg (65.48 KB)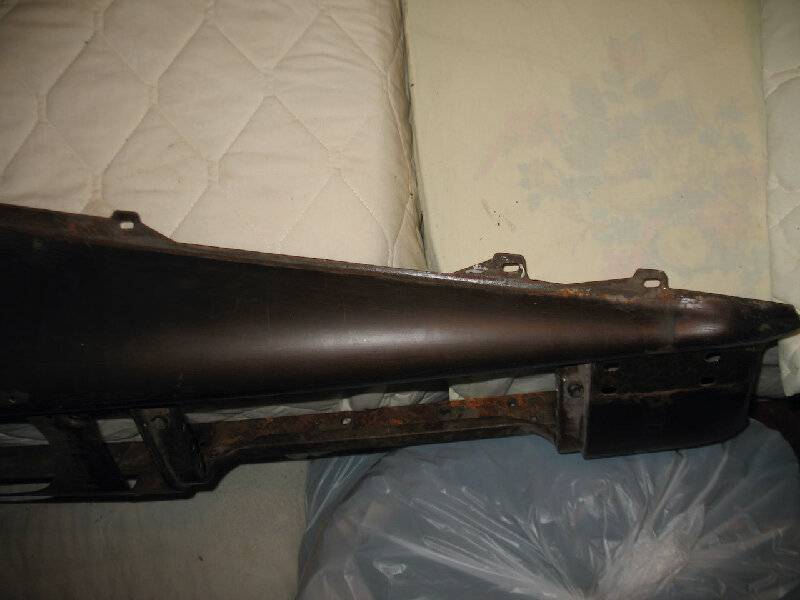  IMG_0646.jpeg (89.13 KB) IMG_0646.jpeg (89.13 KB)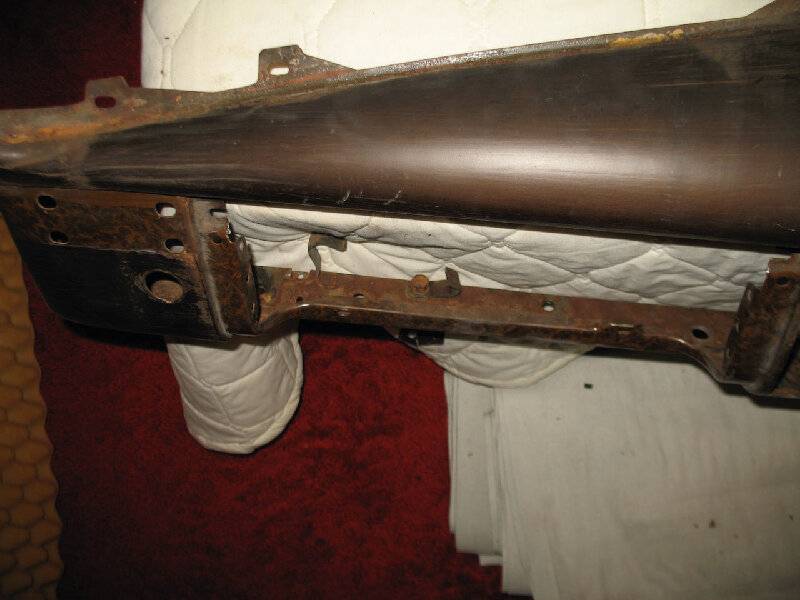  IMG_0647.jpeg (53.66 KB) IMG_0647.jpeg (53.66 KB)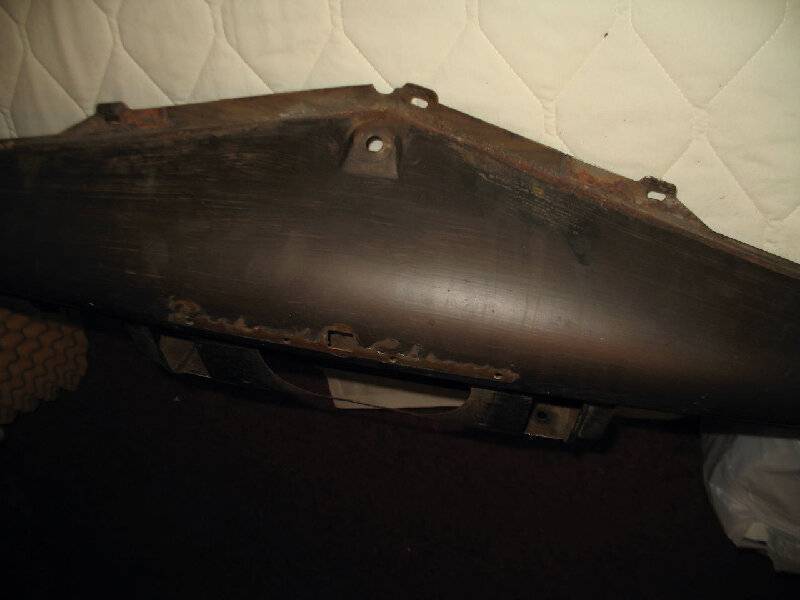  IMG_0648.jpeg (52.55 KB) IMG_0648.jpeg (52.55 KB)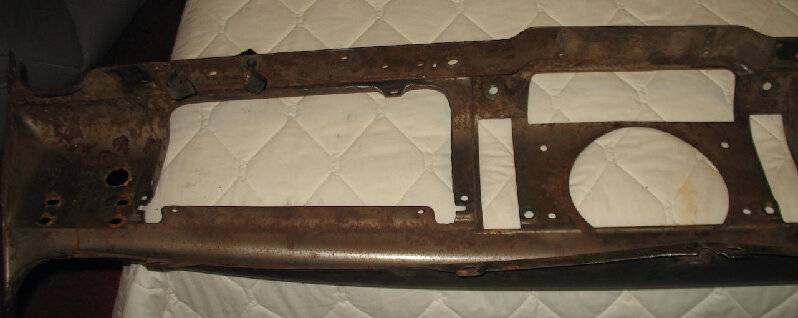  IMG_0852.jpeg (123.58 KB) IMG_0852.jpeg (123.58 KB)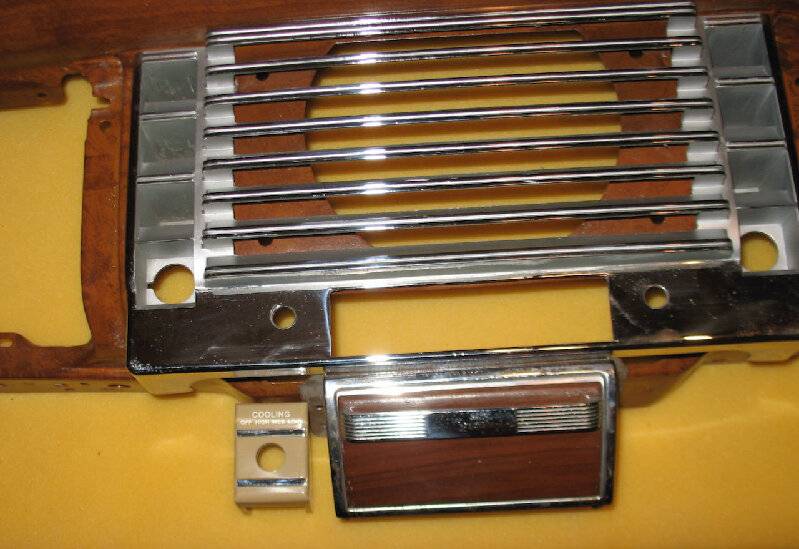  IMG_0847.jpeg (96.41 KB) IMG_0847.jpeg (96.41 KB)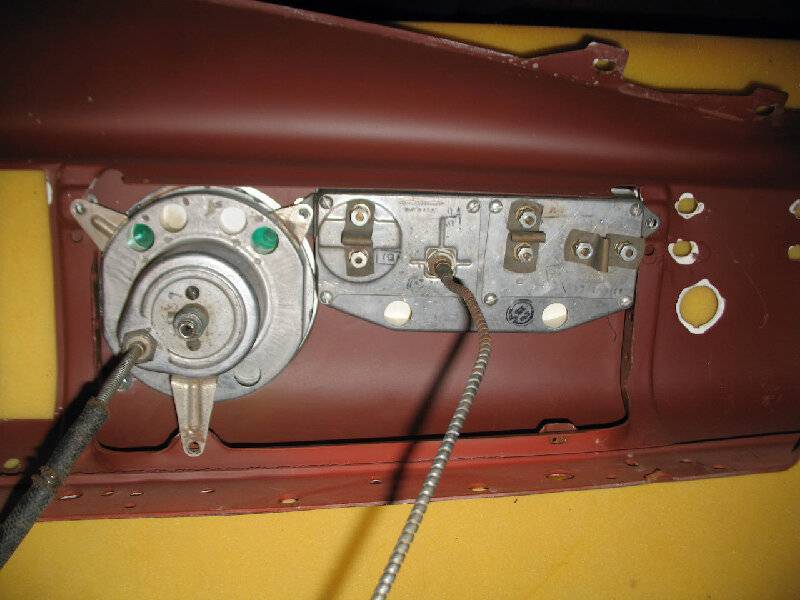  IMG_0848.jpeg (93.72 KB) IMG_0848.jpeg (93.72 KB)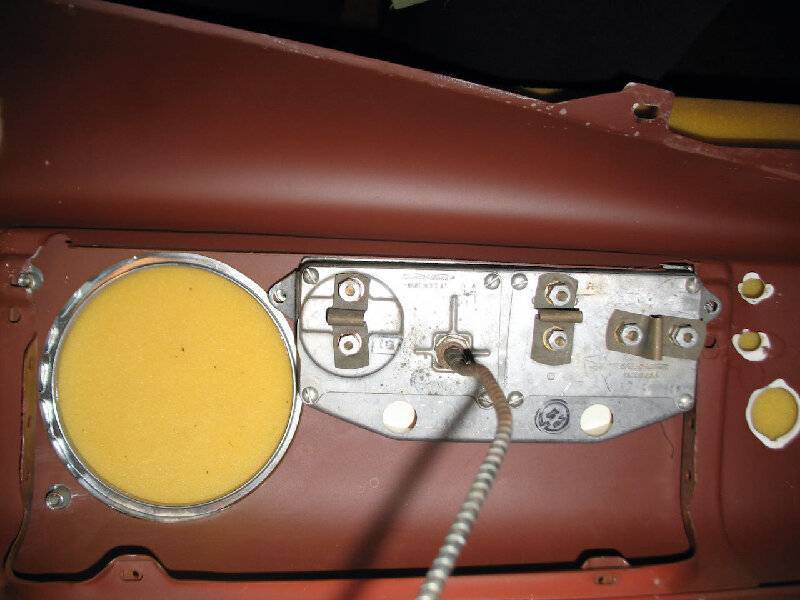  IMG_1116.jpeg (162.10 KB) IMG_1116.jpeg (162.10 KB)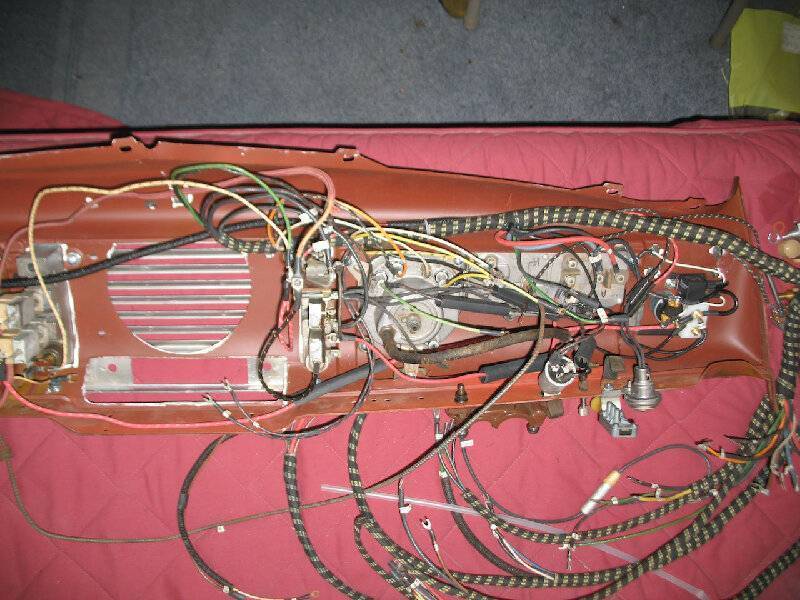
Posted on: 2021/12/16 21:14
|
|||
|
Howard
|
||||
|
||||
|
Re: dashboard
|
||||
|---|---|---|---|---|
|
Just popping in
|
Thanks HH56 the pictures will come in handy. My dash and instruments are in boxes, with loose wires coming in from the firewall so the pictures of what wires go where is very helpful. We could never find the screws that originally held it together. My uncle had originally pulled the dash to do wood grain, but with how long the car has set, I figured it would be best to put back the pieces and see if I can get the car at least running. Overall the interior is pretty rough so I figured I would try to address the cosmetic issues later on as time goes on. Do you think a new wiring harness is required or could I use the old one for the time being? Just wanting to make sure the motor is able to start.
Posted on: 2021/12/16 23:26
|
|||
|
||||
|
Re: dashboard
|
||||
|---|---|---|---|---|
|
Forum Ambassador
|
The problem with the old fabric covered wiring is the insulation under the outer fabric is rubber which due to heat and age can dry and becomes brittle. Just flexing the loom is frequently enough to crack the rubber and split the fabric covering so a chunk can fall off or pulverize to almost a powder. This is usually visible where the individual wires exit the loom but it can also happen in places under the woven outer loom wrap where the damage can not be seen. If it happens in adjacent wires it can result in a short.
Some of the old looms are in decent condition and can be reused while others are not in great shape. All I can say if you reuse the old loom is take care and treat it gently. Be sure to try and insulate any bare wires you find. Sometimes ordinary wrap on electrical tape will be sufficient but in other places a combination of brush on liquid vinyl tape and wrapping tape would work better. If damage appears to go inside the loom you may need to cut the woven loom outer wrap and examine the wires more closely.
Posted on: 2021/12/17 0:26
|
|||
|
Howard
|
||||
|
||||
|
Re: dashboard
|
||||
|---|---|---|---|---|
|
Home away from home
|
>>>Just wanting to make sure the motor is able to start.
I'm far from an expert so let me ask this as a question and those smarter than I hopefully will chime in. If your initial goal is to see if the motor starts, couldn't you bypass the vehicle wiring? Seems like you would need a battery, cable to block and starter, wire to the coil and maybe an external starter switch. That thought doesn't address gasoline, water temperature or oil pressure so maybe not a long run or drive around the block. Anyway, just a thought for further comments.
Posted on: 2021/12/17 4:34
|
|||
|
||||
|
Re: dashboard
|
||||
|---|---|---|---|---|
|
Home away from home
|
Jim has just the right idea. In a couple of minutes with two wires with alligator clips you can be set up to check out the engine without doing the tedious and unnecessary work of installing the dash with old wiring.
I say that because I fear that setting too difficult a hurdle will prove disheartening and provide extra disappointment if after all that the engine needs serious work AND you still have to put a new harness in the car.
Posted on: 2021/12/17 7:36
|
|||
|
||||
|
Re: dashboard
|
||||
|---|---|---|---|---|
|
Forum Ambassador
|
Very true on bypassing the dash entirely to just see if the motor will start. A couple of things to remember if the 47 is in stock condition.
The original coil is not like those used on more familiar cars with the two exposed terminals near the high voltage lead tower for connection to the ign switch and distributor. 47 coil is mounted on the firewall and the terminal you will need to power with an alligator clip is on the base of the coil which is accessed from inside the car. If the ign switch was taken out with the rest of the dash the terminal may be visible but if the ignition switch or at least the armoured cable is still attached, it will be covered by a plate which connected the armored cable and ign switch which must be removed. Packard used Autolite or Delco so depending on coil brand there are either folded over tabs which must be bent out straight to remove the cover or it will need to twist off. On connecting to the starter solenoid, if the engine is a 6 or the small 282 eight the solenoid is the typical variety most often seen mounted on top of the starter with one small terminal on top for the start command wire. You could just touch the alligator clip to that terminal. If the car is the Super or Custom eight with the 356 engine the solenoid is the pinion shift type and there are two small terminals for the start command which are positioned on the solenoid front end above the two large terminals for battery and motor. If there is old wiring connected, one of those terminals has the wire from the starter switch and the other is a ground connection. If the starter safety circuit is intact the ground side wire will be going to the voltage regulator but if the safety circuit has been bypassed it will go directly to a metal ground somewhere. You will need to verify which wire is going to the starter switch on the carburetor and touch the alligator clip to that wire and terminal only. If nothing is already connected you will need to provide a ground to one terminal and touch the alligator clip to the other.
Posted on: 2021/12/17 9:55
|
|||
|
Howard
|
||||
|
||||

