|
Re: 1940 110 Body mounts, bolts & shims
|
||||
|---|---|---|---|---|
|
Forum Ambassador

|
It kind of varies by location with thickness of cushions and how many shims are needed to take up a gap at a particular spot. It may be hard to photograph in some locations but perhaps someone can post an actual photo of the inner and outer mounts. Until then here is a bit from the parts manual showing a typical arrangement. In many models some of the bolts also have metal sleeves around the shank that prevent the bolt from being tightened too much and compressing the rubber hard enough to lose the cushioning effect. You may also need to go back and play with a location or two after you have the cushions installed since the cushions and shims can also affect door gap and possibly front clip alignment.
You can look in the 35-41 parts manual, body group 1 section, and find actual part numbers for the group numbers used in the illustration. By finding the bolt location and part number of a particular cushion used at that location and then going to the utility section 50 of the manual you will find the thickness and size details on most of the cushions. Packard typically started with bolt #1 being on the engine side at base of the cowl and worked back to the trunk. The manual can be downloaded from the literature archive if you don't have a printed copy. 
Posted on: 2024/5/31 22:17
|
|||
|
Howard
|
||||
|
||||
|
Re: 1940 110 Body mounts, bolts & shims
|
||||
|---|---|---|---|---|
|
Forum Ambassador

|
G'day Brian Hart,
 to PackadInfo. to PackadInfo.I invite you to include your '40 110 Coupe in PackardInfo's Packard Vehicle Registry.
Posted on: 2024/5/31 23:43
|
|||
|
Mal
/o[]o\ ====  Bowral, Southern Highlands of NSW, Australia "Out of chaos comes order" - Nietzsche. 1938 Eight Touring Sedan - SOLD 1941 One-Twenty Club Coupe - SOLD 1948 Super Eight Limo, chassis RHD - SOLD 1950 Eight Touring Sedan - SOLD What's this?  Put your Packard in the Packard Vehicle Registry! Here's how! Any questions - PM or email me at ozstatman@gmail.com |
||||
|
||||
|
Re: 1940 110 Body mounts, bolts & shims
|
||||
|---|---|---|---|---|
|
Just popping in

|
Thanks Howard,
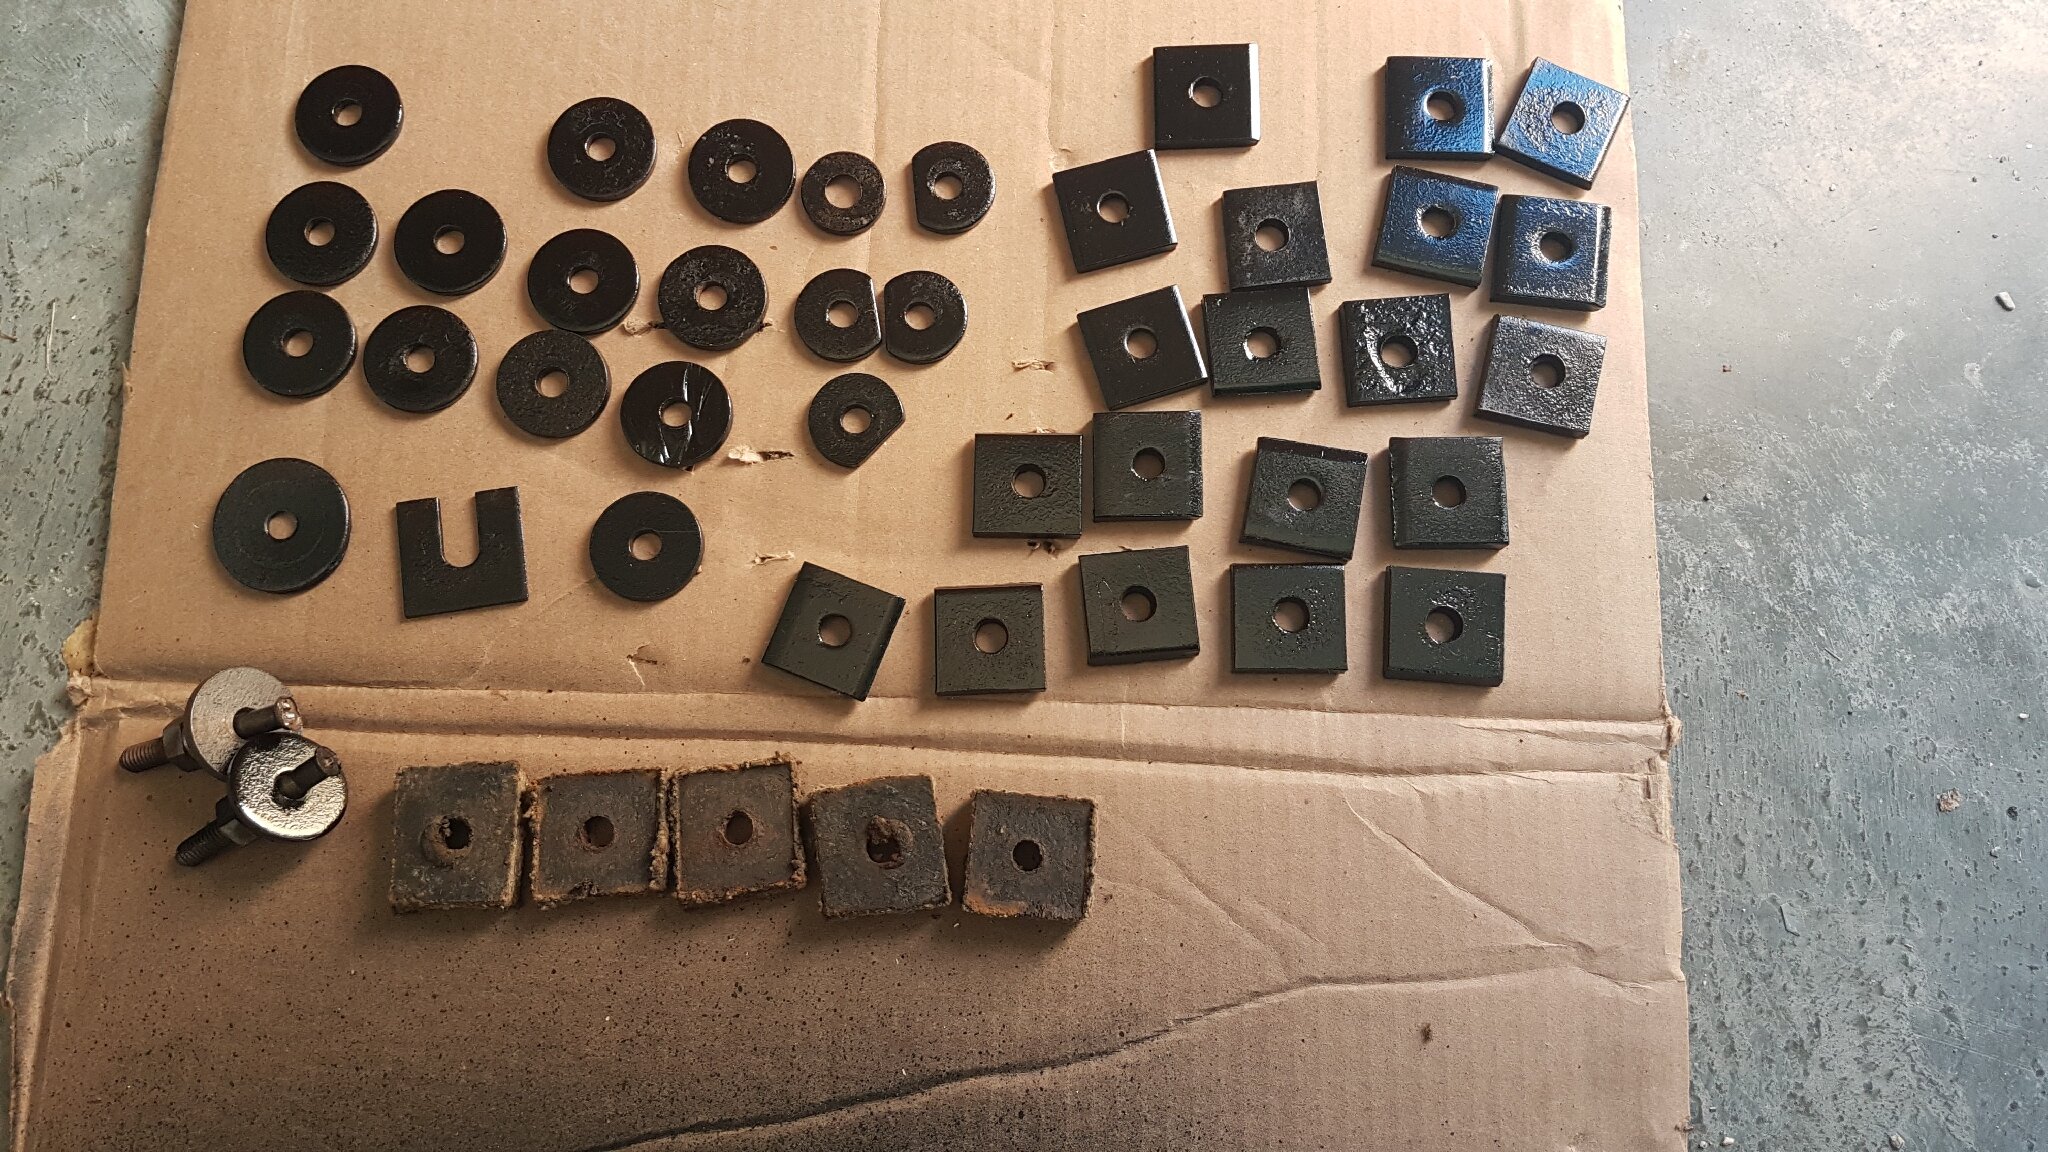
Yes, I have seen and downloaded that manual. I'm still trying to figure out which are the shims and which are pads. I don't believe we had any metal sleeves in the mounts when the body was removed, but this car has a long history... we're finding out bit by bit. Can I assume the pad is closer to & sandwiching the body or frame metal than the shim would be? Attach file:  209phpNpmJDe_sm.jpg (34.76 KB) 209phpNpmJDe_sm.jpg (34.76 KB)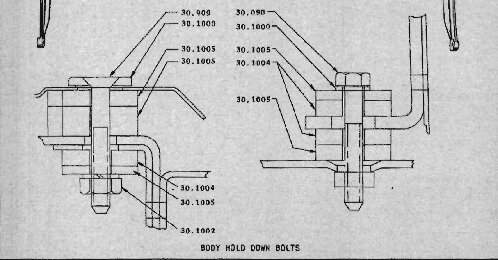
Posted on: 2024/6/1 18:18
|
|||
|
||||
|
Re: 1940 110 Body mounts, bolts & shims
|
||||
|---|---|---|---|---|
|
Forum Ambassador
|
Typically the rubber will sandwich the frame mounting hole and isolate the body and bolts from the frame but there are a few exceptions where cushions are placed nearer and on either side of body sheetmetal or some body reinforcement. I played mostly with postwar models which have similar structures and mounting but are still slightly different. Not being that familiar with the prewar bodies to know which version is more predominate I will defer to others for a definitive answer.
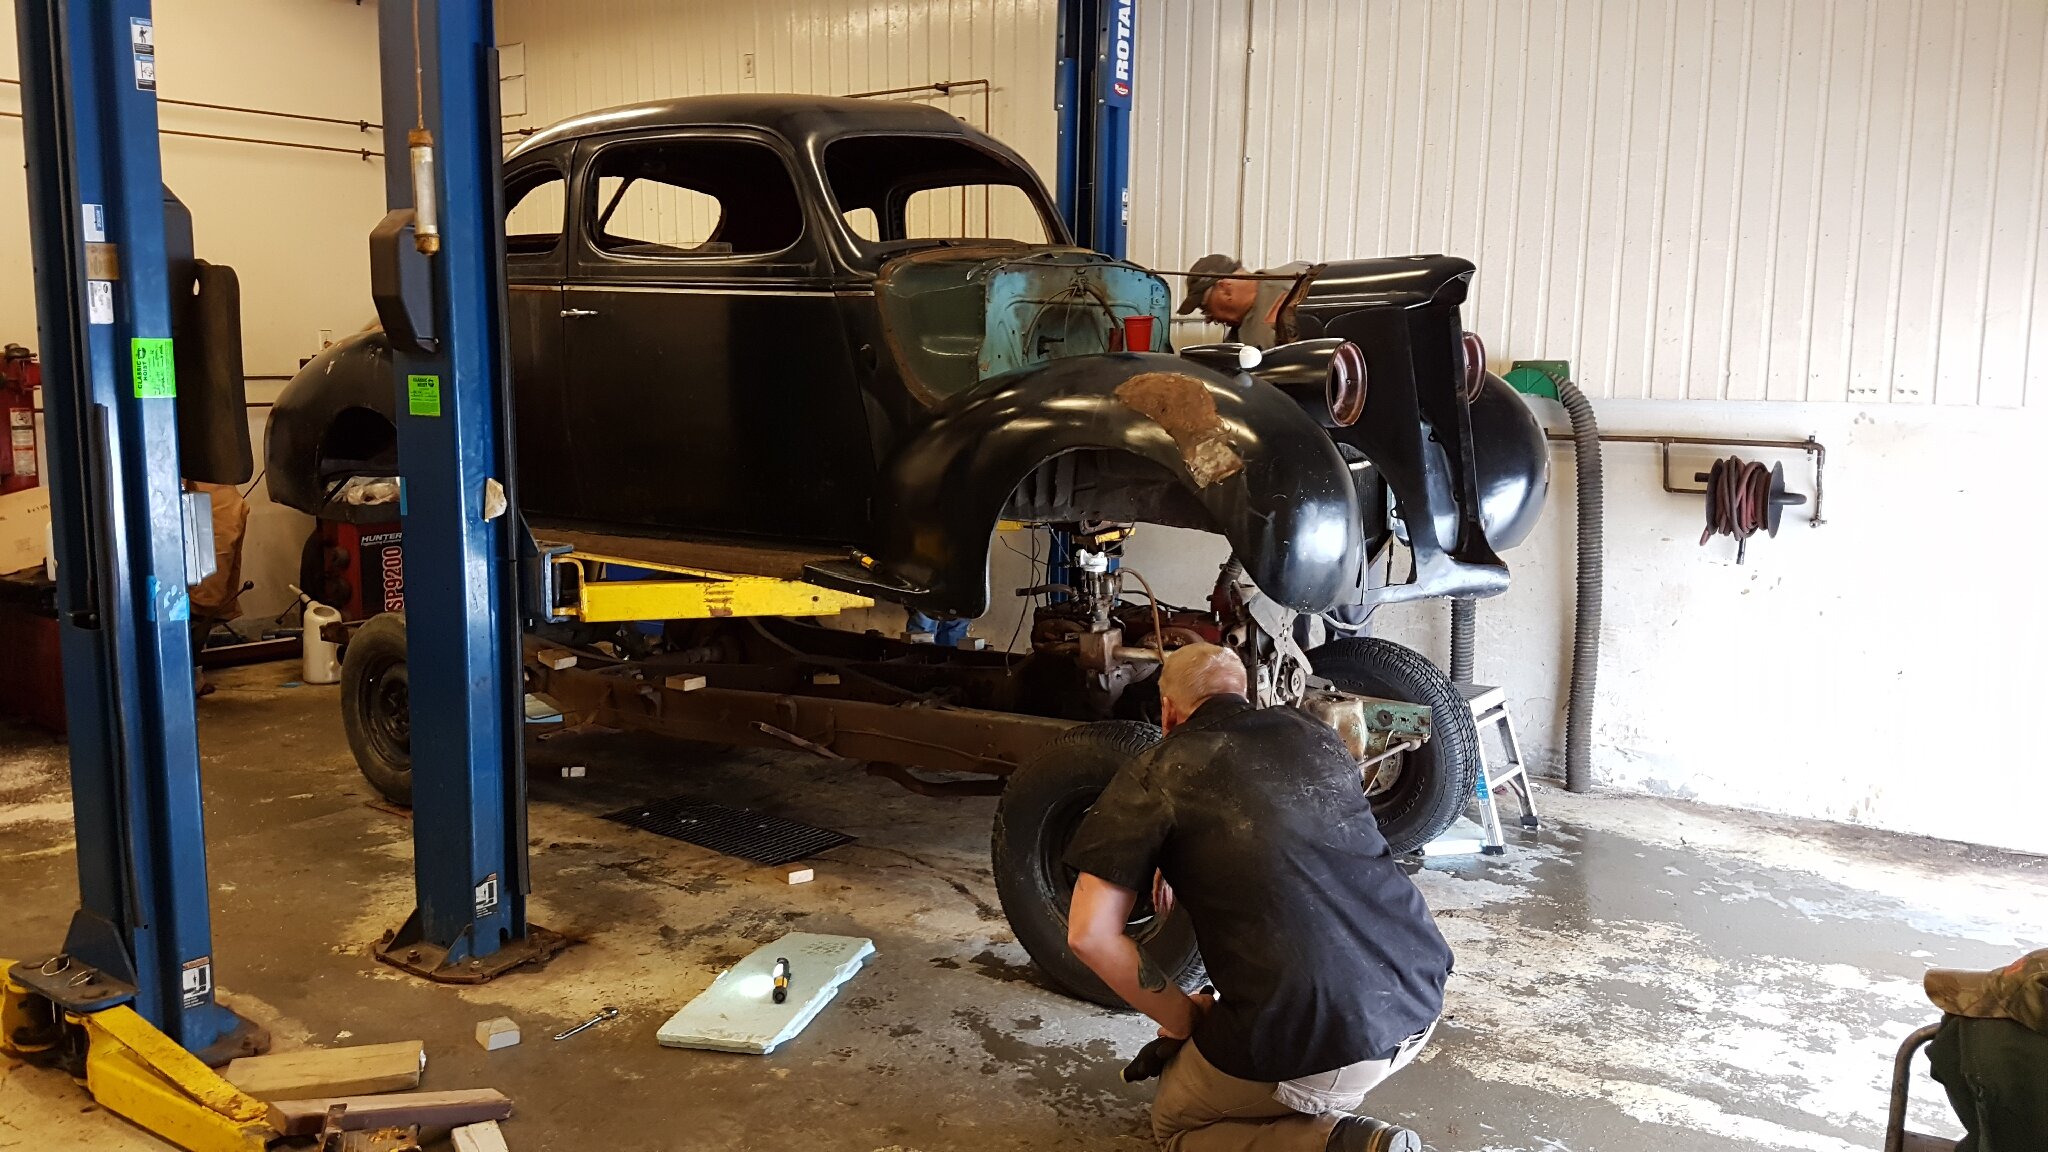
The drawings are very similar to what is used on later cars though so on the two applications I marked where I would place shims. Above the cushions next to the body on the left drawing would still allow full cushioning and on the right drawing I would place any at the opposite end. Shims are not always used so you may not need or have any. If you wind up with a gap at a mount point where drawing the bolt tight will tend to distort the body metal is a place where one or two might be needed. One place where shims are sure to be needed is the center bolt under the middle of the radiator cradle. Shims there control the height of the cradle which directly affects the gap at the rear of the front clip where it meets the cowl. Attach file: mounts.jpg (393.14 KB)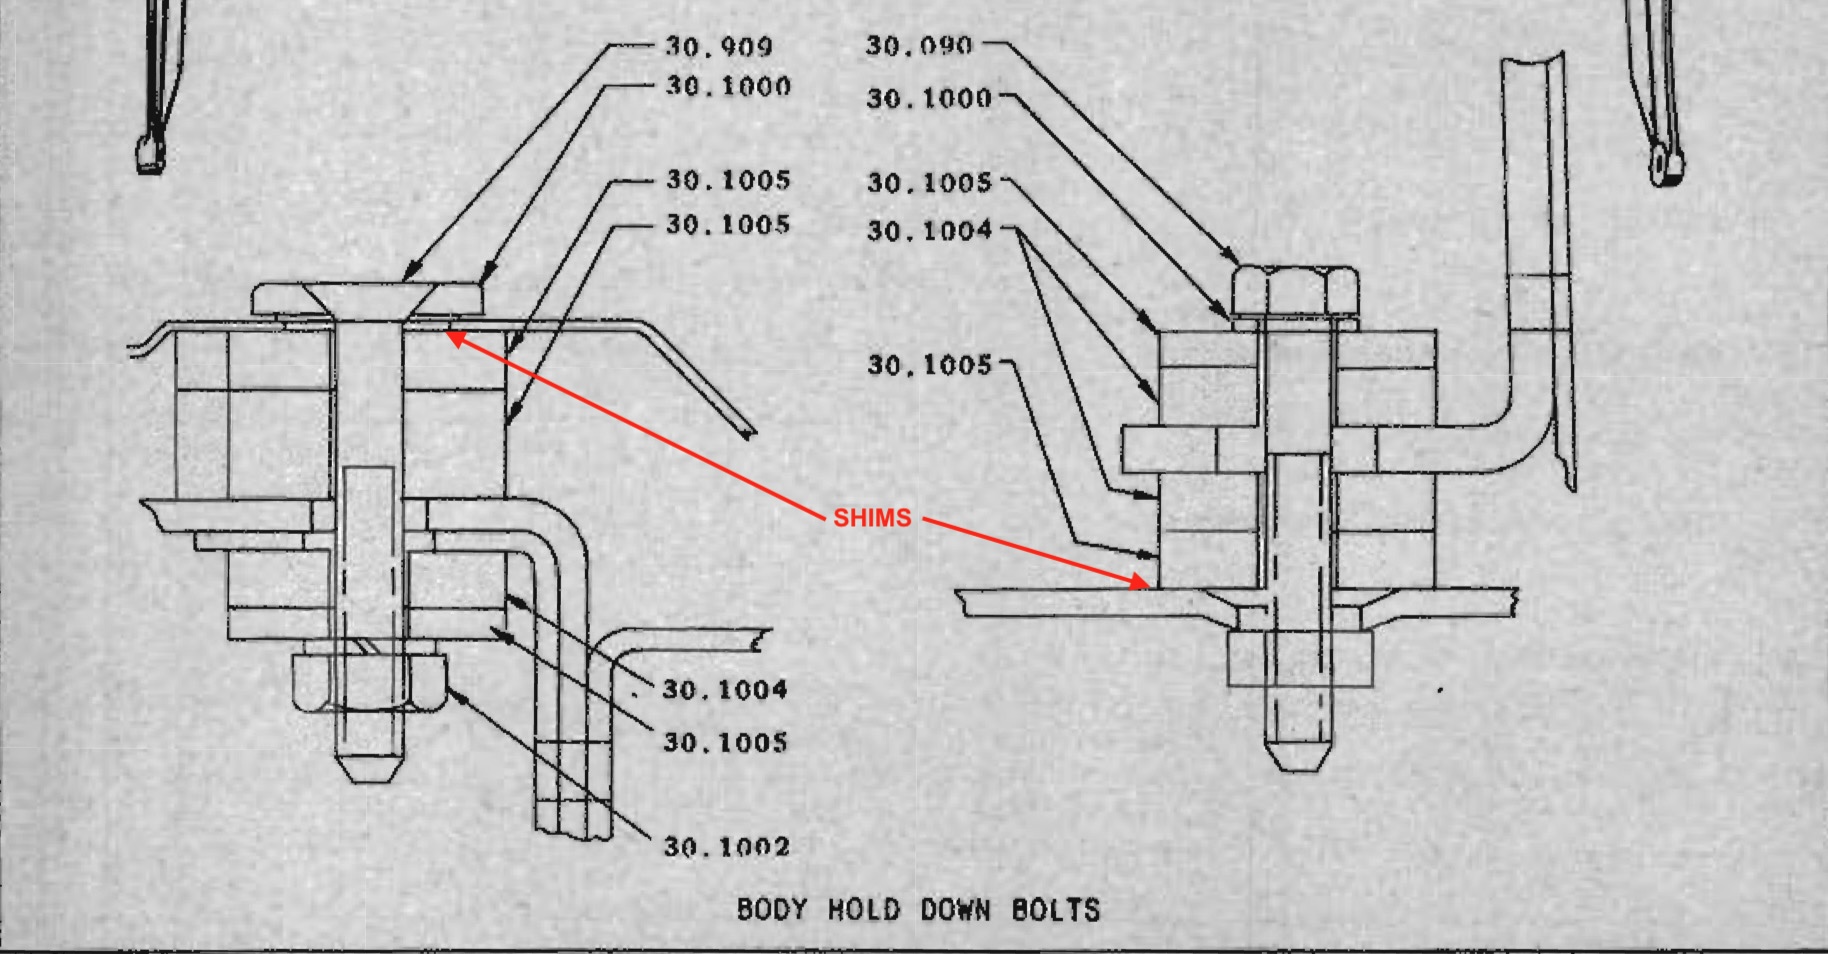
Posted on: 2024/6/1 19:17
|
|||
|
Howard
|
||||
|
||||
|
Re: 1940 110 Body mounts, bolts & shims
|
||||
|---|---|---|---|---|
|
Just popping in
|
Most helpful Howard. Thank you.
Posted on: 2024/6/2 9:34
|
|||
|
||||
|
Re: 1940 110 Body mounts, bolts & shims
|
||||
|---|---|---|---|---|
|
Just popping in
|
Follow up question;
We have the body on the chassis and, in general, there is about 3/4" clearance between the body at the mounting hole and the support bracket mounting face (at the hole) on the frame. This is too low since the running board support is fouling the chassis. What would be the correct starting height for the proper clearance between the body and frame at the mount? 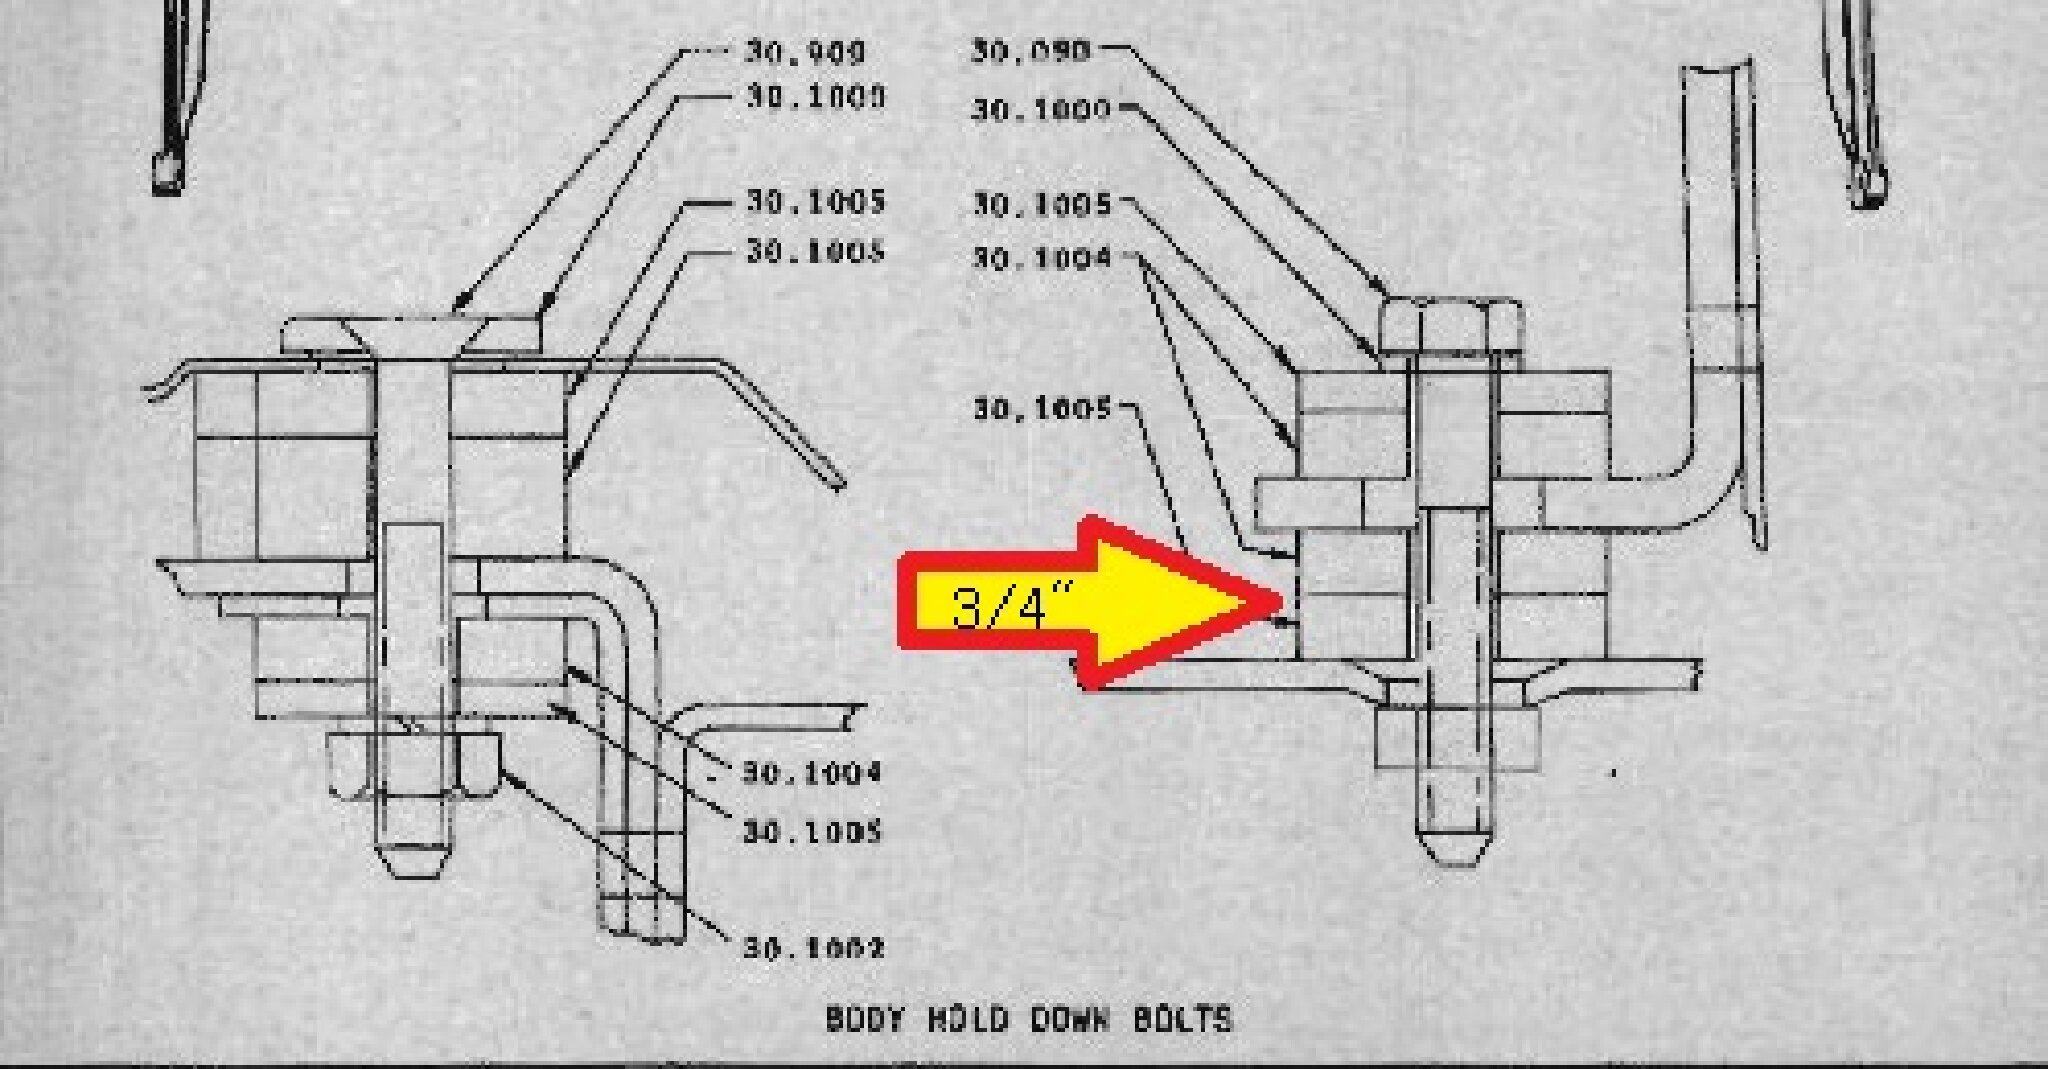 
Posted on: 2024/6/6 16:27
|
|||
|
||||
|
Re: 1940 110 Body mounts, bolts & shims
|
||||
|---|---|---|---|---|
|
Home away from home

|
I am unaware of any actual dimensions for this so it might take some trial an error to get it right. I’ve owned three 1940 110s and took a body off the chassis of a 1939 Six but never thought to make a note of it. Even if I had, it would probably vary from car to car owing to build-up of tolerances to or from one another.
Posted on: 2024/6/6 16:44
|
|||
|
All generalities are false.
Once I thought I was wrong but I was mistaken. Don Pierson Packard / IMPERIAL page CA DMV Licensed Vehicle VIN Verification 1951 Henney-Packard 3-Door Long Wheelbase Air Force Ambulance The 1951 Henney-Packard is For Sale! 1954 Packard Patrician 1954 Packard Patrician Parts Car 1956 Clipper Custom Sedan |
||||
|
||||
|
Re: 1940 110 Body mounts, bolts & shims
|
||||
|---|---|---|---|---|
|
Just popping in
|
Quote:
Makes sense. I guess I could just measure the average current space and then average out the pads & shims and see if I can find an appropriate place for each bundle of shims & pads.
Posted on: 2024/6/6 19:25
|
|||
|
||||


