|
Re: Keegan's 55 Clipper Deluxe
|
||||
|---|---|---|---|---|
|
Webmaster
|
Hey that looks great! Now I need to get one for my car!
 I actually have a 6' (yes 6 foot) long one of those that I had made up that is waiting to go on the wall in my garage. I just need to get the wall painted first.
Posted on: 2008/9/13 17:36
|
|||
|
-BigKev
1954 Packard Clipper Deluxe Touring Sedan -> Registry | Project Blog 1937 Packard 115-C Convertible Coupe -> Registry | Project Blog |
||||
|
||||
|
Re: Keegan's 55 Clipper Deluxe
|
||||
|---|---|---|---|---|
|
Home away from home

|
I'd take a couple of them, one for the Speedster and one for the daily.
Posted on: 2008/9/13 21:24
|
|||
|
||||
|
Re: Keegan's 55 Clipper Deluxe
|
||||
|---|---|---|---|---|
|
Home away from home

|
<a href="http://s187.photobucket.com/albums/x215/keeganchaput/Packard/?action=view¤t=SeatUnbolted.jpg" target="_blank"><img src="http://i187.photobucket.com/albums/x215/keeganchaput/Packard/SeatUnbolted.jpg" border="0" alt="Photobucket"></a>
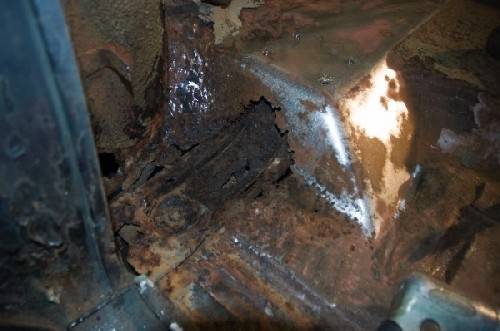
I began today with the removal of the front seat. The nuts came off with little complaint after a squirt of WD-40. I wished that I had a helper when wrestling the seat out of the car. I guess that this could be saved, but I've got another front seat waiting in the wings to be installed. I'll just have to transfer the seat tracks to the new seat. <a href="http://s187.photobucket.com/albums/x215/keeganchaput/Packard/?action=view¤t=FrontSeat.jpg" target="_blank"><img src="http://i187.photobucket.com/albums/x215/keeganchaput/Packard/FrontSeat.jpg" border="0" alt="Photobucket"></a> After getting lower rear seat out, I discovered the car had played host to a renter. When I removed this mouse nest I found it's owner inside having passed away. Bad Omen?? <a href="http://s187.photobucket.com/albums/x215/keeganchaput/Packard/?action=view¤t=MouseNest.jpg" target="_blank"><img src="http://i187.photobucket.com/albums/x215/keeganchaput/Packard/MouseNest.jpg" border="0" alt="Photobucket"></a> I had hoped that I would get away with just front floor pans, but after the rear seat was out I discovered some more. This rust started in the mounting bolt pocket and rotted out the floor section and did a good amount of damage to the floor brace underneath. Once I've got the bad metal cut out I'll see how bad the braces really are. <a href="http://s187.photobucket.com/albums/x215/keeganchaput/Packard/?action=view¤t=RearRust.jpg" target="_blank"><img src="http://i187.photobucket.com/albums/x215/keeganchaput/Packard/RearRust.jpg" border="0" alt="Photobucket"></a> <a href="http://s187.photobucket.com/albums/x215/keeganchaput/Packard/?action=view¤t=RearRust2.jpg" target="_blank"><img src="http://i187.photobucket.com/albums/x215/keeganchaput/Packard/RearRust2.jpg" border="0" alt="Photobucket"></a> I've got a lot of work ahead of me. There's some kind of sprayed undercoating on the surface of every piece of sheet metal. Some comes off easily, most is stuck pretty good. I'm finding that the air chisel with low pressure and a light touch is stripping most of it. Anyone with a proven way to remove this stuff cleanly, please speak up. Here's where I left it today. I'll be ordering some front pans tomorrow. I've never replaced floor pans in a car, this should be interesting. <a href="http://s187.photobucket.com/albums/x215/keeganchaput/Packard/?action=view¤t=EmptyFloor.jpg" target="_blank"><img src="http://i187.photobucket.com/albums/x215/keeganchaput/Packard/EmptyFloor.jpg" border="0" alt="Photobucket"></a>
Posted on: 2008/9/14 20:17
|
|||
|
||||
|
Re: Keegan's 55 Clipper Deluxe
|
||||
|---|---|---|---|---|
|
Home away from home

|
I like the "Inhalation Hazard" sign, and very handy when dealing with mouse feces! BTW, I happen to know where there's a power seat track for a '55 that should work with your manual seat if you're interested.
Posted on: 2008/9/14 23:19
|
|||
|
||||
|
Re: Keegan's 55 Clipper Deluxe
|
||||
|---|---|---|---|---|
|
Webmaster
|
Keegan,
The vinyl arrived today. It looks great! Thanks for sending me one. I will still in on the back window of my Colorado, as the Clipper wont see the light of day for at least another year probably. Thanks again!
Posted on: 2008/9/15 19:16
|
|||
|
-BigKev
1954 Packard Clipper Deluxe Touring Sedan -> Registry | Project Blog 1937 Packard 115-C Convertible Coupe -> Registry | Project Blog |
||||
|
||||
|
Re: Keegan's 55 Clipper Deluxe
|
||||
|---|---|---|---|---|
|
Webmaster
|
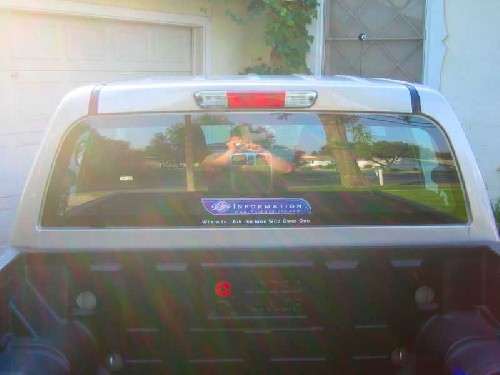
On the back of my '07 Colorado Crew-Cab (excuse the sun glare):
Posted on: 2008/9/15 19:31
|
|||
|
-BigKev
1954 Packard Clipper Deluxe Touring Sedan -> Registry | Project Blog 1937 Packard 115-C Convertible Coupe -> Registry | Project Blog |
||||
|
||||
|
Re: Keegan's 55 Clipper Deluxe
|
||||
|---|---|---|---|---|
|
Home away from home

|
Kev,
Are those decals available ? Maybe thru the same place as the T shirts ? RT
Posted on: 2008/9/15 21:20
|
|||
|
||||
|
Re: Keegan's 55 Clipper Deluxe
|
||||
|---|---|---|---|---|
|
Forum Ambassador
|
Quote:
Quote:
Keegan, If I ordered 100 decals I'd imagine that would help to get the price per decal down somewhat. Reason I picked that quantity is I'm thinking of our National Packard Rally here in Oz in 2009 and these would be a great give-away to the Packard owners attending. I'd also have some left over which I'd warehouse for other Aussies if they become Packardinfo members in the future. Could you let me know by PM what the cost of 100 decals plus the shipping cost to Australia would be please?
Posted on: 2008/9/15 21:36
|
|||
|
Mal
/o[]o\ ====  Bowral, Southern Highlands of NSW, Australia "Out of chaos comes order" - Nietzsche. 1938 Eight Touring Sedan - SOLD 1941 One-Twenty Club Coupe - SOLD 1948 Super Eight Limo, chassis RHD - SOLD 1950 Eight Touring Sedan - SOLD What's this?  Put your Packard in the Packard Vehicle Registry! Here's how! Any questions - PM or email me at ozstatman@gmail.com |
||||
|
||||
|
Floor Update
|
||||
|---|---|---|---|---|
|
Home away from home

|
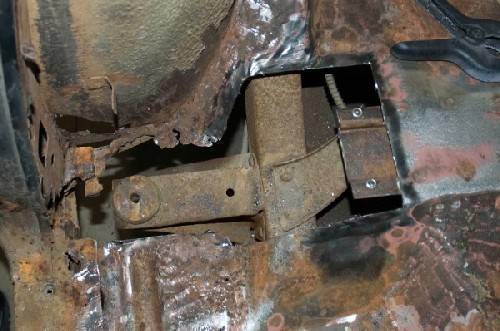
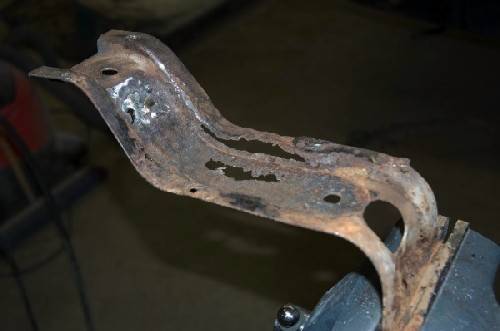
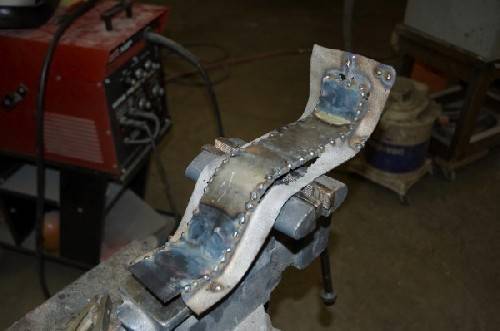
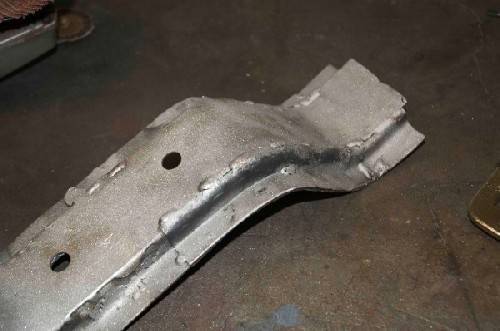
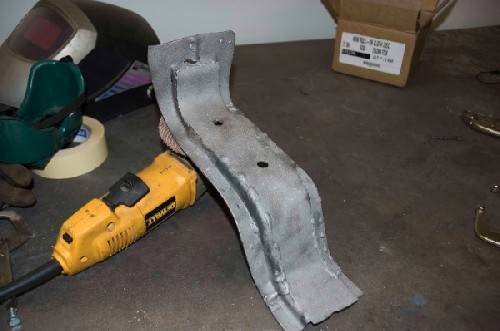
I started in on the floors with the rear passenger body mount area. It is badly rusted where the body mount bolt sits in the little depression in the sheet metal. As expected it rusted the floor and the floor brace underneath it. I decided to drill the spot welds along the brace and remove the damaged portion. I knew that I wasn't going to be able to fix it on the car.
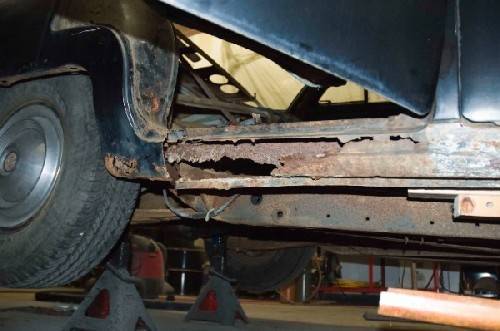
As you can see by the pictures, the basic shape was still there, but it wasn't going to be around much longer. Certainly I don't want to trust it's integrity. I got it cleaned up in my little blast cabinet (thanks craigslist!) and cut the first patch out of 16g. I did some hand forming over a pipe and tacked it into place, then just walked it down the brace with heat and clamps, tacking it as I went. The next two 16g patched went on the sided of the brace. A flat 90 bend, then more tacks and torch work until it conformed with the rest of the piece. Now just lather rinse repeat on the rest of the floor braces. I wish I could say that this one was in the worst shape. After the floor, the rockers!
Posted on: 2008/9/26 22:29
|
|||
|
||||

 (28.05 KB)