|
Re: The Duchess Project: 1940 Super 8 Convertible Sedan
|
||||
|---|---|---|---|---|
|
Home away from home

|
I worked late, so limited progress.
OUTER OIL SEAL is free. I used a knife to scrape around the edges and pounded it out. After it came out I noticed the outer edge of the seal was red. It seemed thicker than paint. INNER OIL SEAL is still in. I assembled the tool per Hans ( I think), but for the life of me could not figure how it can hook and hold. It slips off the rubber. The spring came out. I pulled a chunk of rubber out with pliers. I wonder if I have it hooked up right. I certainly understand how the Packard oil seal remover work because you can add tension to make the hooks hold. The hooks in the slide tool swing freely and prefer the path of least resistance, namely, coming out through the seal. It's late so giving up on inner, declaring victory on outer. Try again tomorrow. Thanks for help and suggestions. Must be painful to watch, but proceeding cautiously so I don't do any permanent damage. Attach file:  (30.30 KB) (30.30 KB)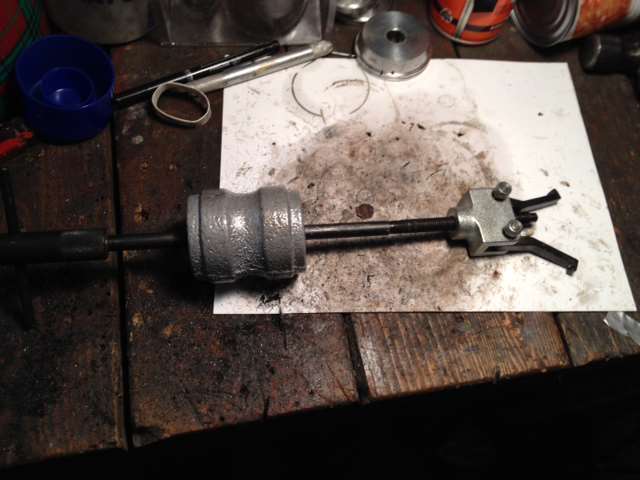
Posted on: 2014/1/22 1:58
|
|||
|
||||
|
Re: The Duchess Project: 1940 Super 8 Convertible Sedan
|
||||
|---|---|---|---|---|
|
Home away from home

|
I believe what I used years ago, and I still see available on ebay, was a heavy duty L shaped bar with a small but strong hook at the end of the long side of the L (or top), it was small enough to work behind the metal of the seal and then you can bang on the base (or bottom) of the tool with a hammer. On occasion I would take a cheap or old beat up good sized standard screw driver, heat and bend the tip so you had about half an inch bent tip to work behind the seal, using a hammer on the shaft of the screw driver.
The last time I had to do this was around fifteen years ago, but this is what I believe I had to do on the 40
Posted on: 2014/1/22 8:21
|
|||
|
||||
|
Re: The Duchess Project: 1940 Super 8 Convertible Sedan
|
||||
|---|---|---|---|---|
|
Forum Ambassador

|
I don't recall the brand(s) but I've seen new seals where the metal parts are coated or painted in a dark red. Let's hope that some fool who might have done the job before you didn't use red Locktite!
The internal puller I have used previously had 3 jaws and an arrangement to force the jaws outward and prevent them from retracting - apparently the puller you're using doesn't have that feature. In any case, stay patient - with the rubber and spring already out, you may have to resort to bending the outer face of the seal outwards so you might grab it with Vise-grips and with something to multiply the leverage, pull it out. I can appreciate your frustration but sometimes what you're experiencing is the norm with old cars - a job that should take 15 minutes takes hours and hours. But be patient and just think of all the smiling conversations you'll have about the job after it's done. The L-shaped bar that "tolandis" mentioned may be similar to what I called a "tomahawk" which I have used to remove some inner rear seals. It only applies force to one side so a proper multi-jawed tool should make the job easier.
Posted on: 2014/1/22 9:19
|
|||
|
||||
|
Re: The Duchess Project: 1940 Super 8 Convertible Sedan
|
||||
|---|---|---|---|---|
|
Forum Ambassador

|
I believe some images are in order, here (attached below).
I suspect that the seal puller that tolandis remembers may be something like what's still available from Harbor Freight. Kinda looks like half of the original tool that Packard recommend. I have the other type of seal puller - similar to what's available in the Lisle line. I selected this particular image because it also illustrates the tool's use. It works great as long as the seal is of sufficient inside diameter and not recessed too deeply. Attach file: (3.07 KB)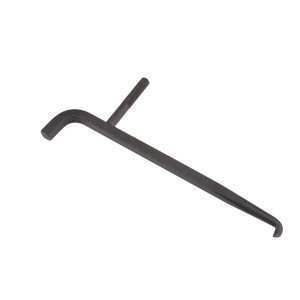 (6.24 KB) (6.24 KB)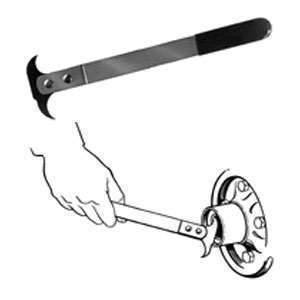
Posted on: 2014/1/22 9:53
|
|||
|
||||
|
Re: The Duchess Project: 1940 Super 8 Convertible Sedan
|
||||
|---|---|---|---|---|
|
Home away from home
|
Good news. The inner oil seal is out. So now it's a call to NAPA in the morning, and hopefully, on my lunch-hour I'll pick up a couple sets of oil seals. After tearing up one side with the slide tool and the vice-grips, the ultimate repair tool did the job in 2 pries.
EDIT: Just for the record, the typed dimensions are correct. The NAPA number (with the C/R) is discontinued, but the order desk was able to find it with the Packard Part number and the dimensions matched. 1803A (ambulance axles) INNER OIL SEAL NAPA # 16113 OUTER OIL SEAL NAPA # 22382 The TIMKEN BEARING 3576 didn't cross to NAPA brands. Attach file: (24.91 KB)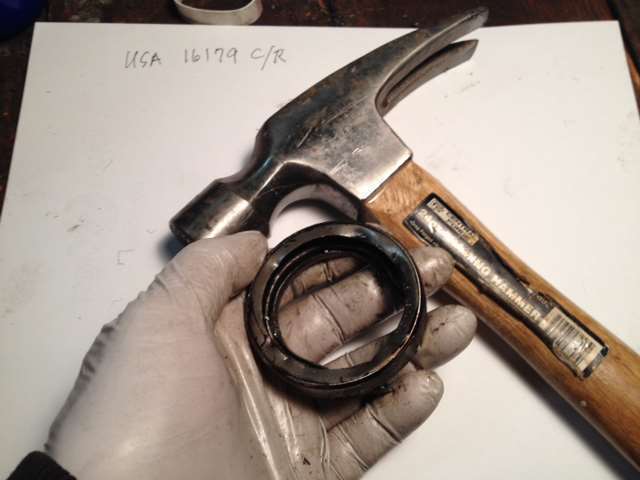 (80.99 KB) (80.99 KB)
Posted on: 2014/1/22 23:58
|
|||
|
||||
|
Re: The Duchess Project: 1940 Super 8 Convertible Sedan
|
||||
|---|---|---|---|---|
|
Home away from home
|
Congrats!!!
Posted on: 2014/1/23 5:26
|
|||
|
||||
|
Re: The Duchess Project: 1940 Super 8 Convertible Sedan
|
||||
|---|---|---|---|---|
|
Forum Ambassador

|
Ditto on the congrats. You have set a bad example for me
 so after having put it off long enough, decided to go for it. What a pain that inner seal is (was). so after having put it off long enough, decided to go for it. What a pain that inner seal is (was). Packards tool must be really good because instruction of tapping the end with a hammer I don't think would have cut it. Maybe they meant heavy blows. It laughed at the slide hammer but finally got it with the Lisle type pick and a cold chisel -- but not without a lot of grief and a totally destroyed seal. Yours looks pristine compared to how mine came out. I think it will take a tranquilizer, a good nights sleep and recharge of vocabulary before even thinking of starting to do the other side. Maybe I'll give your ultimate repair tool a try when that time comes --
Posted on: 2014/1/25 17:16
|
|||
|
Howard
|
||||
|
||||
|
Re: The Duchess Project: 1940 Super 8 Convertible Sedan
|
||||
|---|---|---|---|---|
|
Home away from home
|
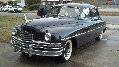
REAR AXLE REMOVE AND REPLACE
PREFACE Many will agree that I am the last person to do this... document an axle removal and replace, but I want to create an example of what would really help me, encourage me to attempt a repair, and do it in enough detail with pictures, so I'd know what to expect and not despair if I hit what appears to be an impasse. Thanks to Howard (HH56), who linked me to the 1947 Service Manual for axle R&R after the pain he suffered watching me struggle for a week to do one side, I know that there is some good, step-by-step literature. Most of the steps below are from that manual. I interjected some comments and many pictures. I did not perform one of the key steps, the end play adjustment. I'm waiting to hear back on some new bearings. But there was no endplay problem before pulling them to replace the oil seals, and there were several shim, including a homemade one by someone who made a conscious effort to adjust end play. So for now I left it. BigKev informed me that the only way to intersperse images in the text is to use links to the images. That, or individual posts. So I prepared the text and the photos off-line, so I can load them in order in to the thread. You may laugh, it's ok, at the some of things I included. But I believe seeing some of the minutia would help motivate someone by giving them a sense of accomplishment, say, in removing a hubcap. DISASSEMBLY Removing Axle Shafts 1. Remove hubcap. I use an awkward contraption from NW Packards that reduces scratching of the hubcaps. Attach file: (32.95 KB)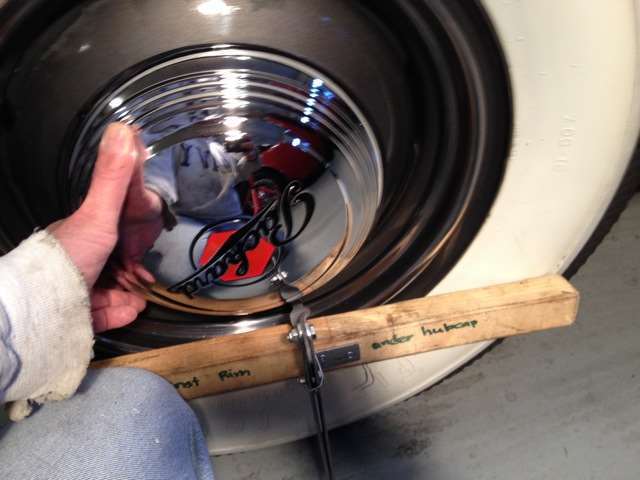
Posted on: 2014/2/1 0:21
|
|||
|
||||
|
Re: The Duchess Project: 1940 Super 8 Convertible Sedan
|
||||
|---|---|---|---|---|
|
Home away from home
|
2. Break the grip of the lug bolts one turn. Because my wheels have been subject to so many pneumatic wrenches, the holes enlarged to where they couldn't be depended on to hold a bolt. Studs were cut and welded, and nuts added.
3. I placed some blocks under the front wheels before I jacked up the frame. 4. Jack up car in the rear section of the frame. Jacking up the differential or axle will not provide enough clearance to remove the wheel. Remove one wheel and the axle shaft cotter pin and washer. Remove the brake drum and hub assembly, using Puller KMO-476. (See figure 1.) Attach file: (23.30 KB)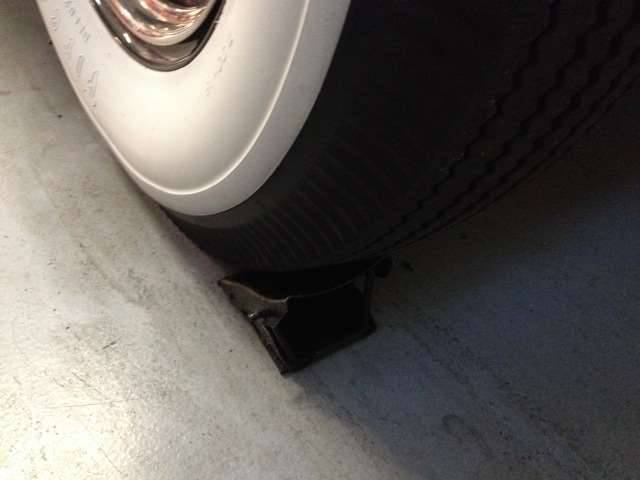 (30.23 KB) (30.23 KB)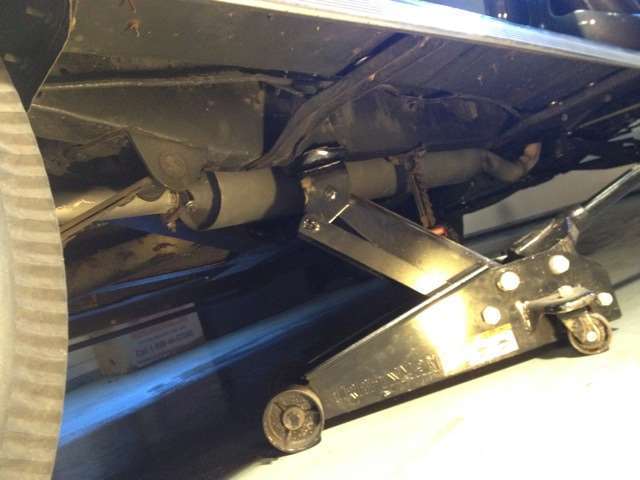 (25.63 KB) (25.63 KB)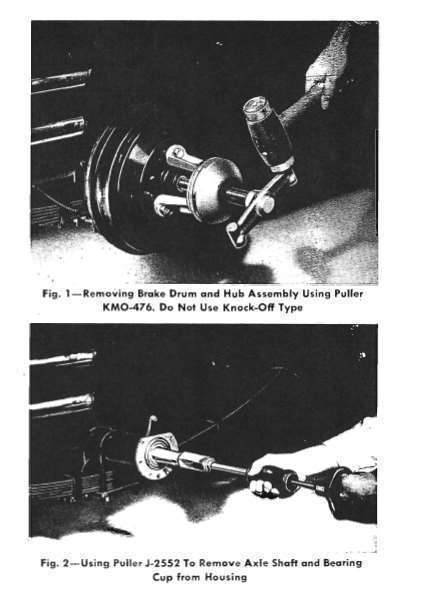
Posted on: 2014/2/1 0:24
|
|||
|
||||


