|
Re: Resurrecting my 56’ Patrician
|
||||
|---|---|---|---|---|
|
Forum Ambassador

|
Answering b and d, the access plate in the floor is for filling the master cylinder if the car had standard brakes. Max lists a cylinder seal kit for both Bendix and Monroe. From what I can see that looks like a Bendix cylinder but make sure you get the correct kit. There is also an article in one of the service counselors showing the correct orientation of the seal. Some mechanics must have had questions or made mistakes so if you have any concerns you might refer to it.
Posted on: 2023/10/5 15:46
|
|||
|
Howard
|
||||
|
||||
|
Re: Resurrecting my 56’ Patrician
|
||||
|---|---|---|---|---|
|
Home away from home
|
My bleeding method:
When bleeding brakes I always start with the longest brake line and go through to the shortest, usually this is Passenger rear, Driver's rear, Passenger's front, Driver's front. In this way the air is expelled through the entire system from long to short leaving no air bubbles behind, I grant you this is on a single style master cylinder, but it works on a duel master too. As to bleeding the brakes, being a shade tree guy I do it by myself and it goes like this: (Car on level) 1-Find a container that you can pour some brake fluid into, (I use a cleaned out soup can). 2-Attach a vacuum hose or windshield washer rubber line from the nipple on the bleed screw to the container making sure the line is long enough it stays below the level of the fluid in the container. Loosen bleed screw. (Clip line to container if necessary. Prop the container too if it is unstable) 3-SLOWLY press the brake peddle down by hand until you reach the end of the throw, then allow it to slowly return. Going slow ensures no agitating the fluid to introduce any unwanted bubbles at the master. (Air cannot enter the system as long as the drain line from the wheel cylinder stays below the top level of the container, it will be forced to come into the system through the vent on the master cylinder's cap) 4-Repeat a few cycles and check the master cylinder and fill as necessary, also check the container to make sure it is not too full. If so, tighten the bleed screw and simply replace this fluid into the master cylinder (IF A NEW SYSTEM FILL, if you are replacing old fluid, dispose of it properly.) Repeat until no air comes out of that line and each cycle of the pedal sends an equal amount to the container. You can tell easily as the container fills rapidly once the air is gone. 5-Repeat at the next longest line until all 4 are done, closing (tightening) the bleed screw after each purge and removing the rubber hose/container and moving it to the next wheel cylinder. You can also do this by pressing with your foot, but I have found a more sensitive feedback through my hand than my foot to feel when the line is properly flushed. Last step after you think all is good is to press as hard as possible on the brake pedal to see if you have a 'hard' pedal. There will likely be a bit more travel than you want at first as you can now go around and adjust the shoes more accurately as they will now have been better seated than when you set them 'cold'. As Big Kev pointed out too, a final tweak after a test drive may find even more dialed in adjusting needed after further shoe seating occurs with some heat from the test drive. Also it is important to get under the car and verify after the static brake test that you have NO fluid leaks at any line joints or wheel cylinders and of course the master.
Posted on: 2023/10/5 16:09
|
|||
|
||||
|
Re: Resurrecting my 56’ Patrician
|
||||
|---|---|---|---|---|
|
Home away from home

|
Kanter also has a Bendix kit.
https://www.kanter.com/p-35858-1955-and-1956-packard-parts.html#15
Posted on: 2023/10/5 17:51
|
|||
|
'55 400. Needs aesthetic parts put back on, and electrical system sorted.
'55 Clipper Deluxe. Engine is stuck-ish. |
||||
|
||||
|
Re: Resurrecting my 56’ Patrician
|
||||
|---|---|---|---|---|
|
Just can't stay away

|
Update and questions:
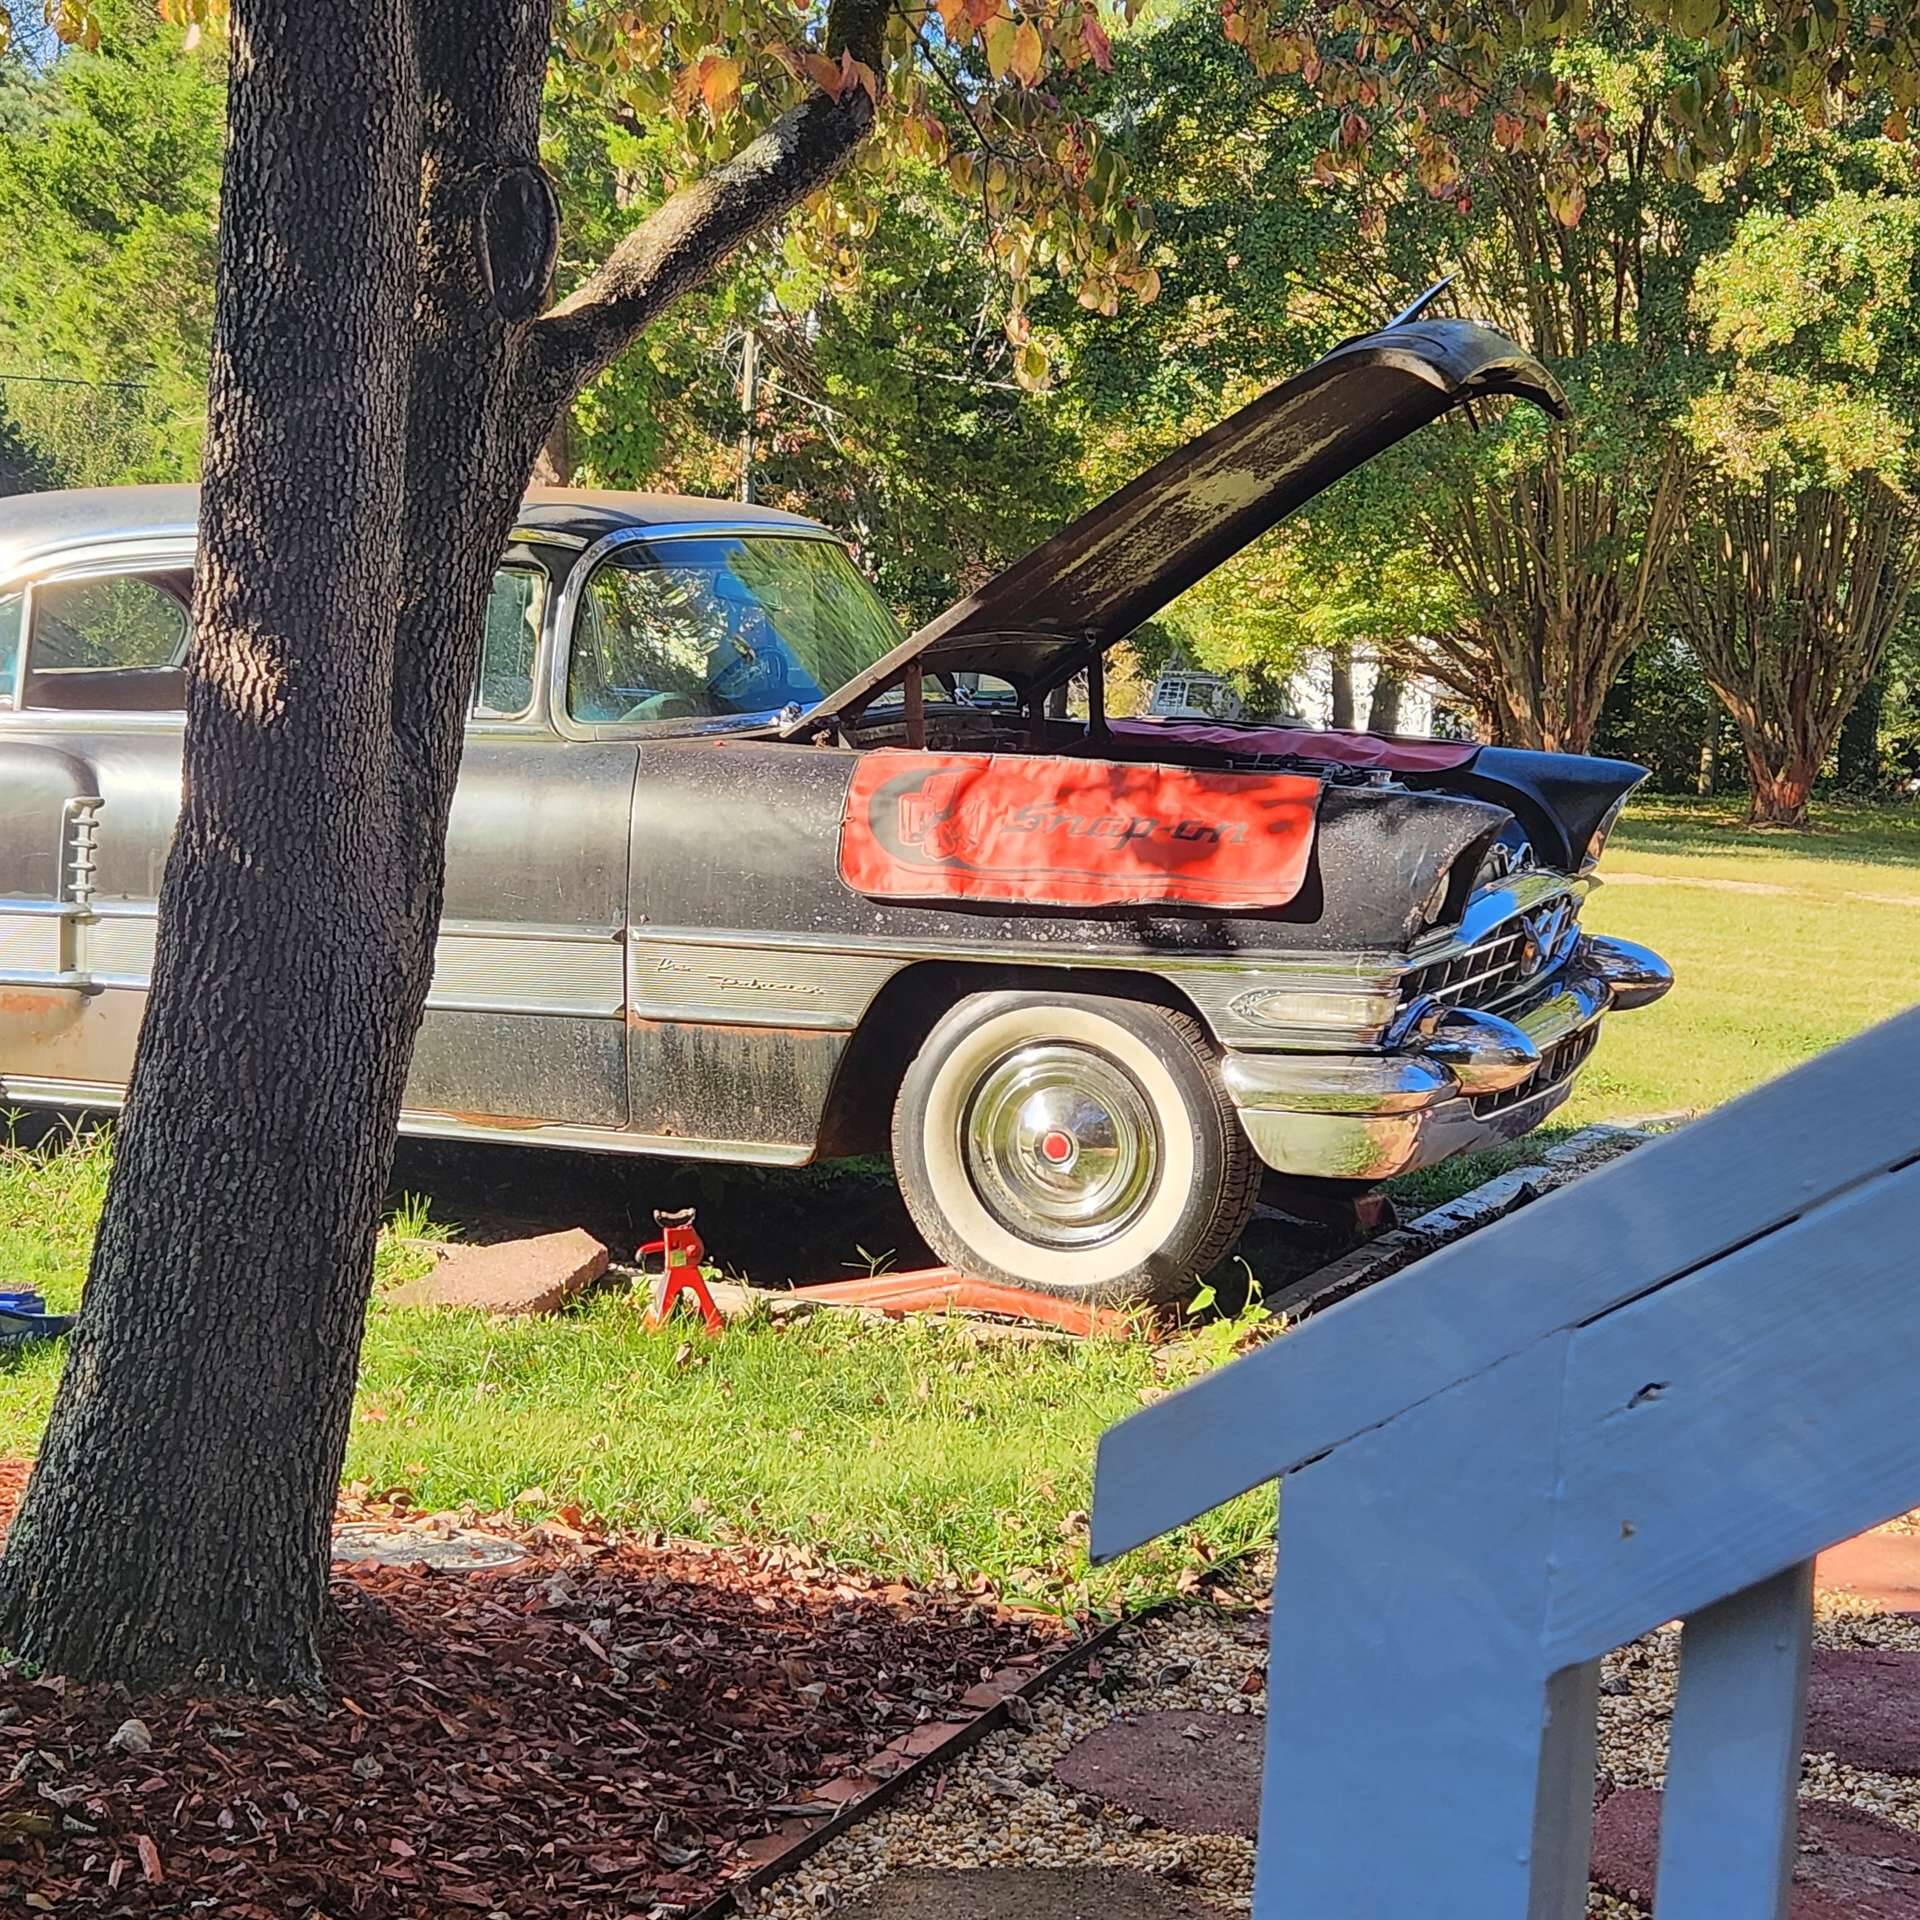
I have rewired one side of the car under the hood. It definitely requires patience and time. Verified good oil pressure and coolant flow. Trying to get the car to run better. Properly set the timing, but the carburetor has presented issues. I am not proficient in tuning four barrels, did alright on the 1 barrel my 68 F100 had but four barrels to me are a little intimidating. Researching how they work only made it worse. I purchased a vacuum gauge and connected it to the primary vacuum port for the power brakes. Everything I have read states that the port must be unmetered like for the vacuum advance. When I start the car, it is at 20, but once the choke is fully open, it falls to around 15. Using a flat head screwdriver, I turn one then the other fuel mixtures screw at a ¼ of a turn and would wait a bit to see how the vacuum pressure would change. No change. It did not matter if I turned the screws out or in. At one point I had both mixture screws all the way in. (I was careful not to screw in too firm as to distort the tips) Never did the pressure change. Frustrated, I went to turn the car off, and it knock a few times before becoming quiet. So, this morning I called Ross, describing my problem. He believes I have a clogged port or ports in the carburetor causing it to run lean and all the symptoms point to this conclusion. My hope was that he could clean and rebuild the carb, but this is something he rather not do, and suggested that I reach out to the forum for suggestions on who can and tips in attempting this myself. Does anyone have a recommendation for a person to rebuild the carb? What is the best solution for soaking and cleaning a carb if I choose to rebuild? One recommendation is acetone. Who makes the best kit for a carb rebuild? This is way down the road, but is there a source for the fabric in my Packard? Attach file:  wiring 20231007_183602.jpg (456.51 KB) wiring 20231007_183602.jpg (456.51 KB)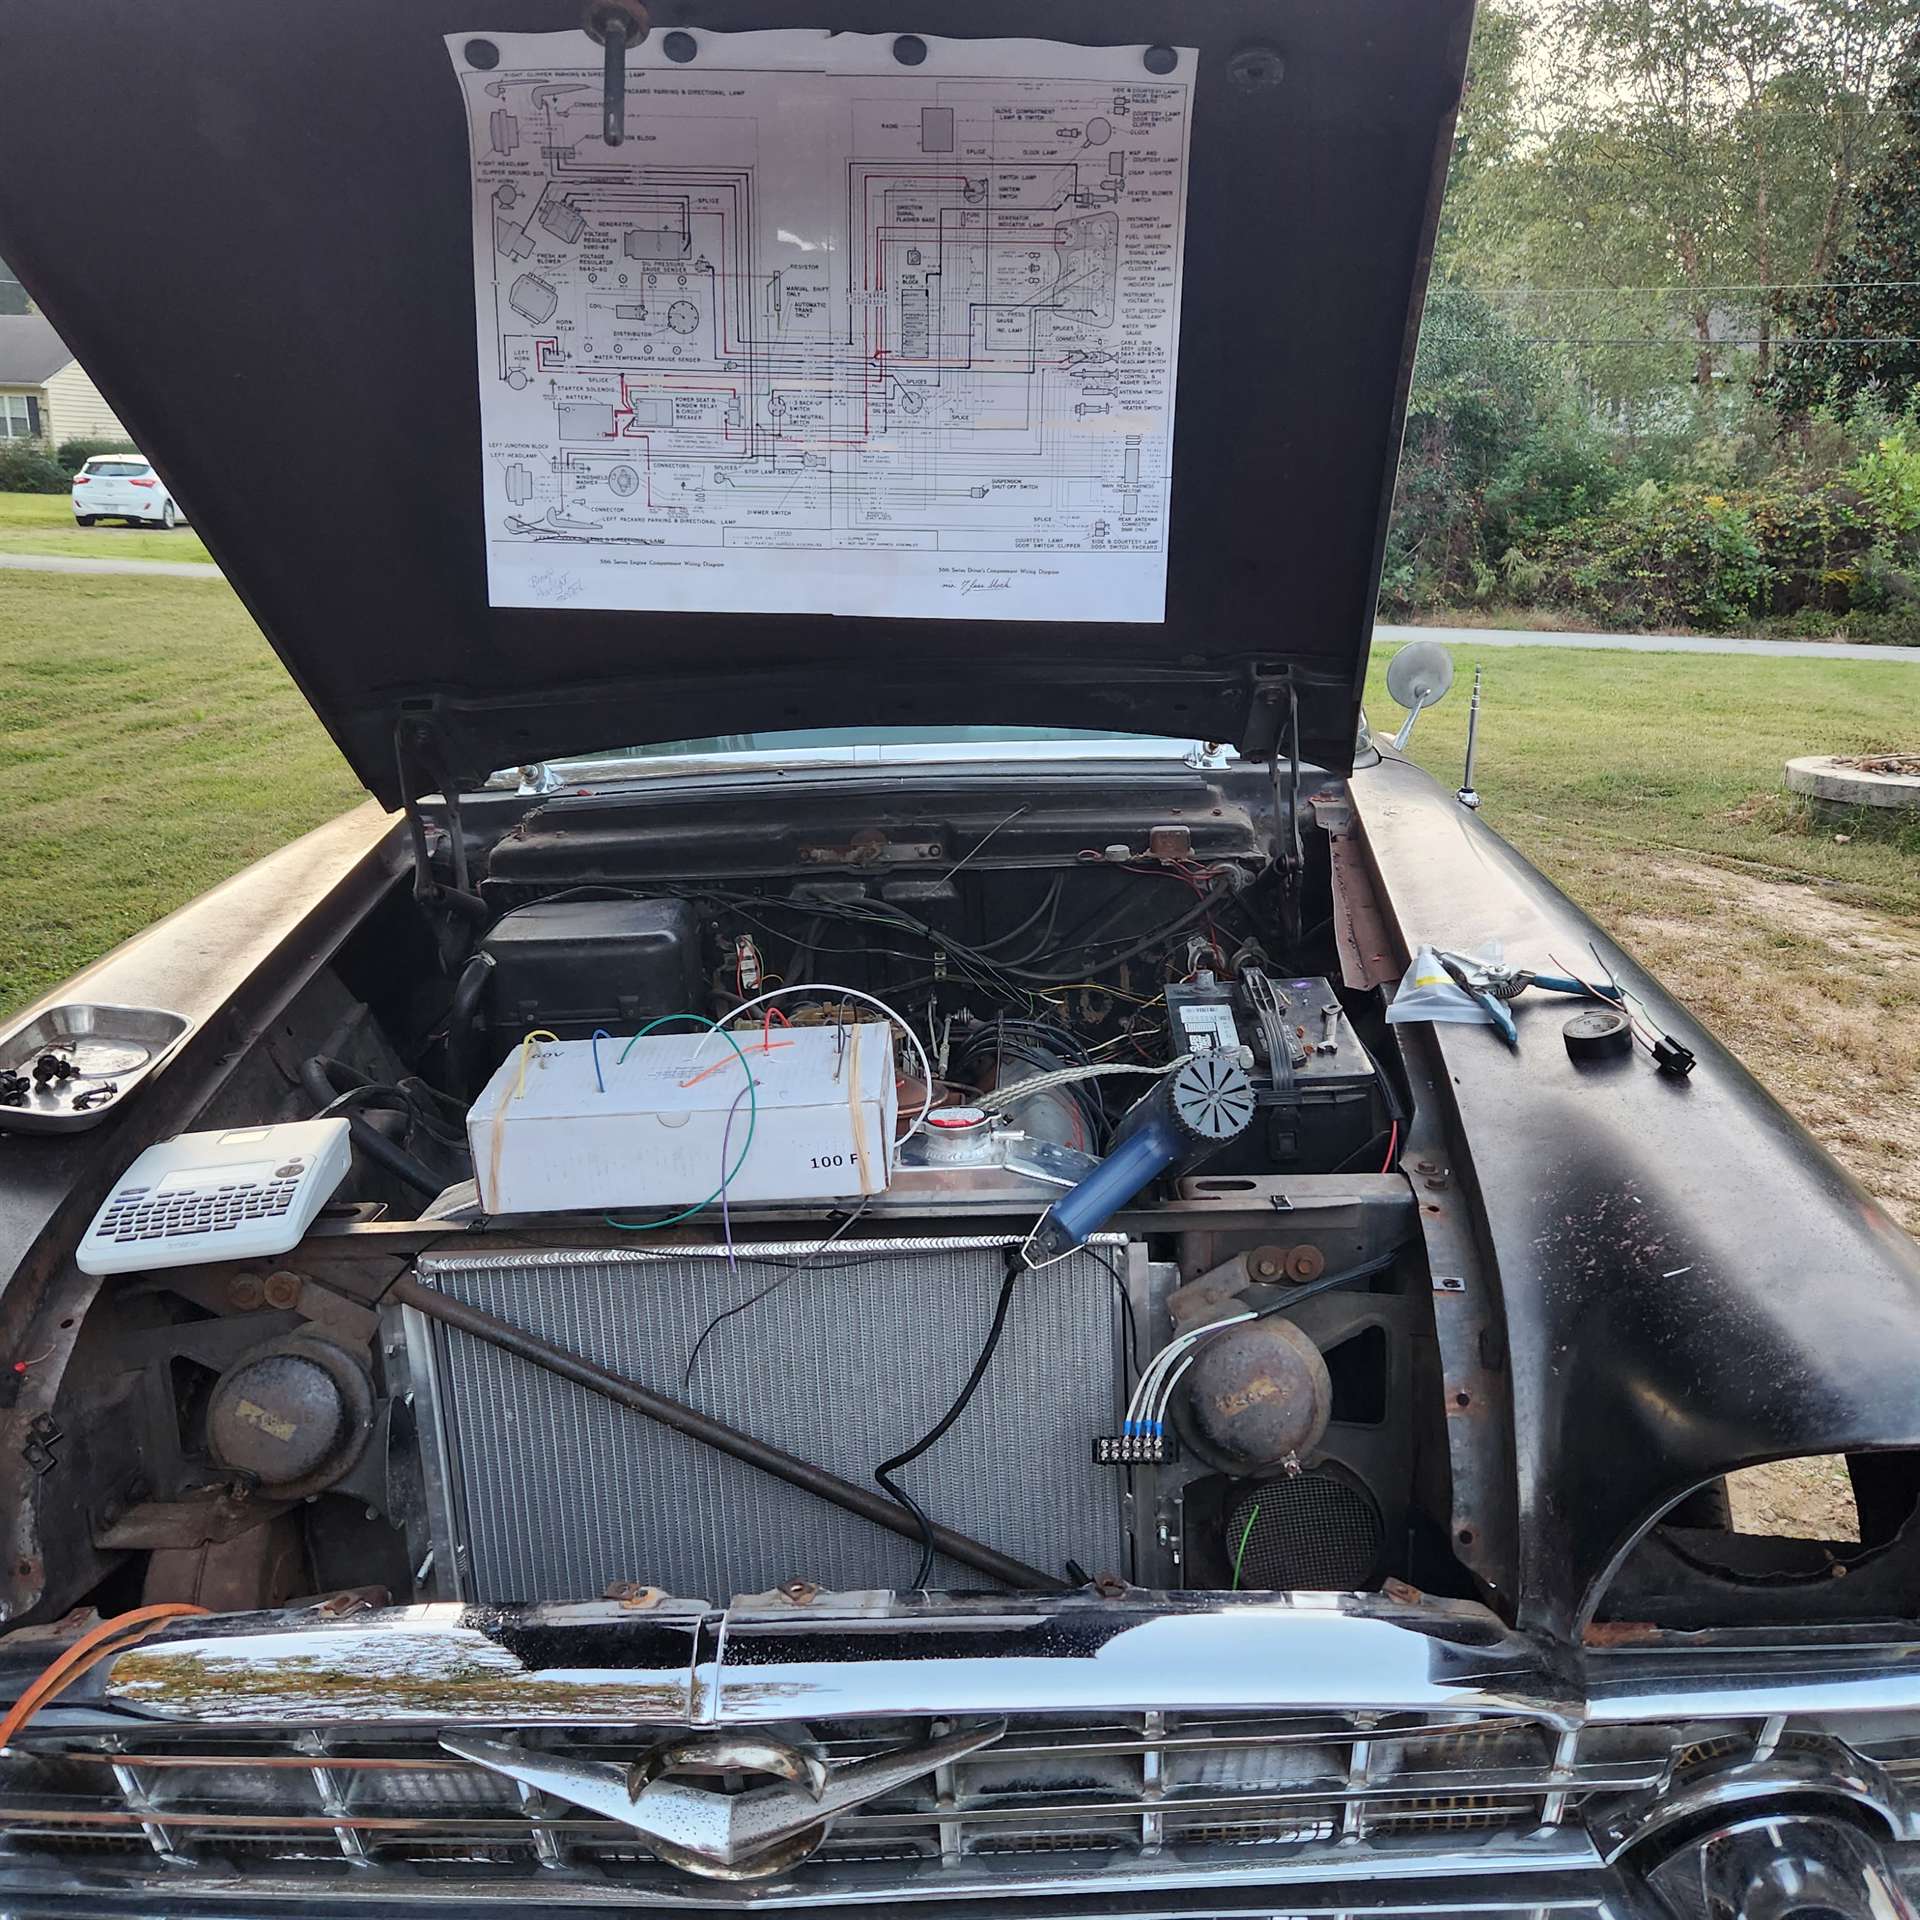 horn relay.jpg (217.90 KB) horn relay.jpg (217.90 KB)
Posted on: 2023/10/19 15:18
|
|||
|
||||
|
Re: Resurrecting my 56’ Patrician
|
||||
|---|---|---|---|---|
|
Home away from home
|
Chicago Carb makes a rebuild kit as do others. You can also get kits from NAPA.
SMS Fabrics is pretty much the only interior option around. Have them send you some samples. Their lead times for many things are about a year.
Posted on: 2023/10/19 15:29
|
|||
|
'55 400. Needs aesthetic parts put back on, and electrical system sorted.
'55 Clipper Deluxe. Engine is stuck-ish. |
||||
|
||||
|
Re: Resurrecting my 56’ Patrician
|
||||
|---|---|---|---|---|
|
Home away from home

|
Carb rebuild kits can be ordered through big Packard suppliers like Max Merritt and Kanter. Mike's Carb and Daytona Carb are two other sources. Any of those will have what you need and can probably ship immediately.
I used a gallon bucket of Berryman's carb cleaner when I did mine. It comes with a basket to put parts into and drop into the solution. I let them sit for a while then pulled them out and cleaned them up. It's a very messy job. Acetone would probably work too but smells very strong and is very volatile. There might be some videos out there going over the rebuild of similar carbs. The biggest thing is to take lots of pictures while you disassemble and keep everything labeled and organized. -Kevin
Posted on: 2023/10/19 18:51
|
|||
|
||||
|
Re: Resurrecting my 56’ Patrician
|
||||
|---|---|---|---|---|
|
Home away from home

|
The power brakes have a vacuum storage canister so did you block it off? If not, you’ll never get a good reading at the point.
Posted on: 2023/10/19 18:53
|
|||
|
||||
|
Re: Resurrecting my 56’ Patrician
|
||||
|---|---|---|---|---|
|
Just can't stay away
|
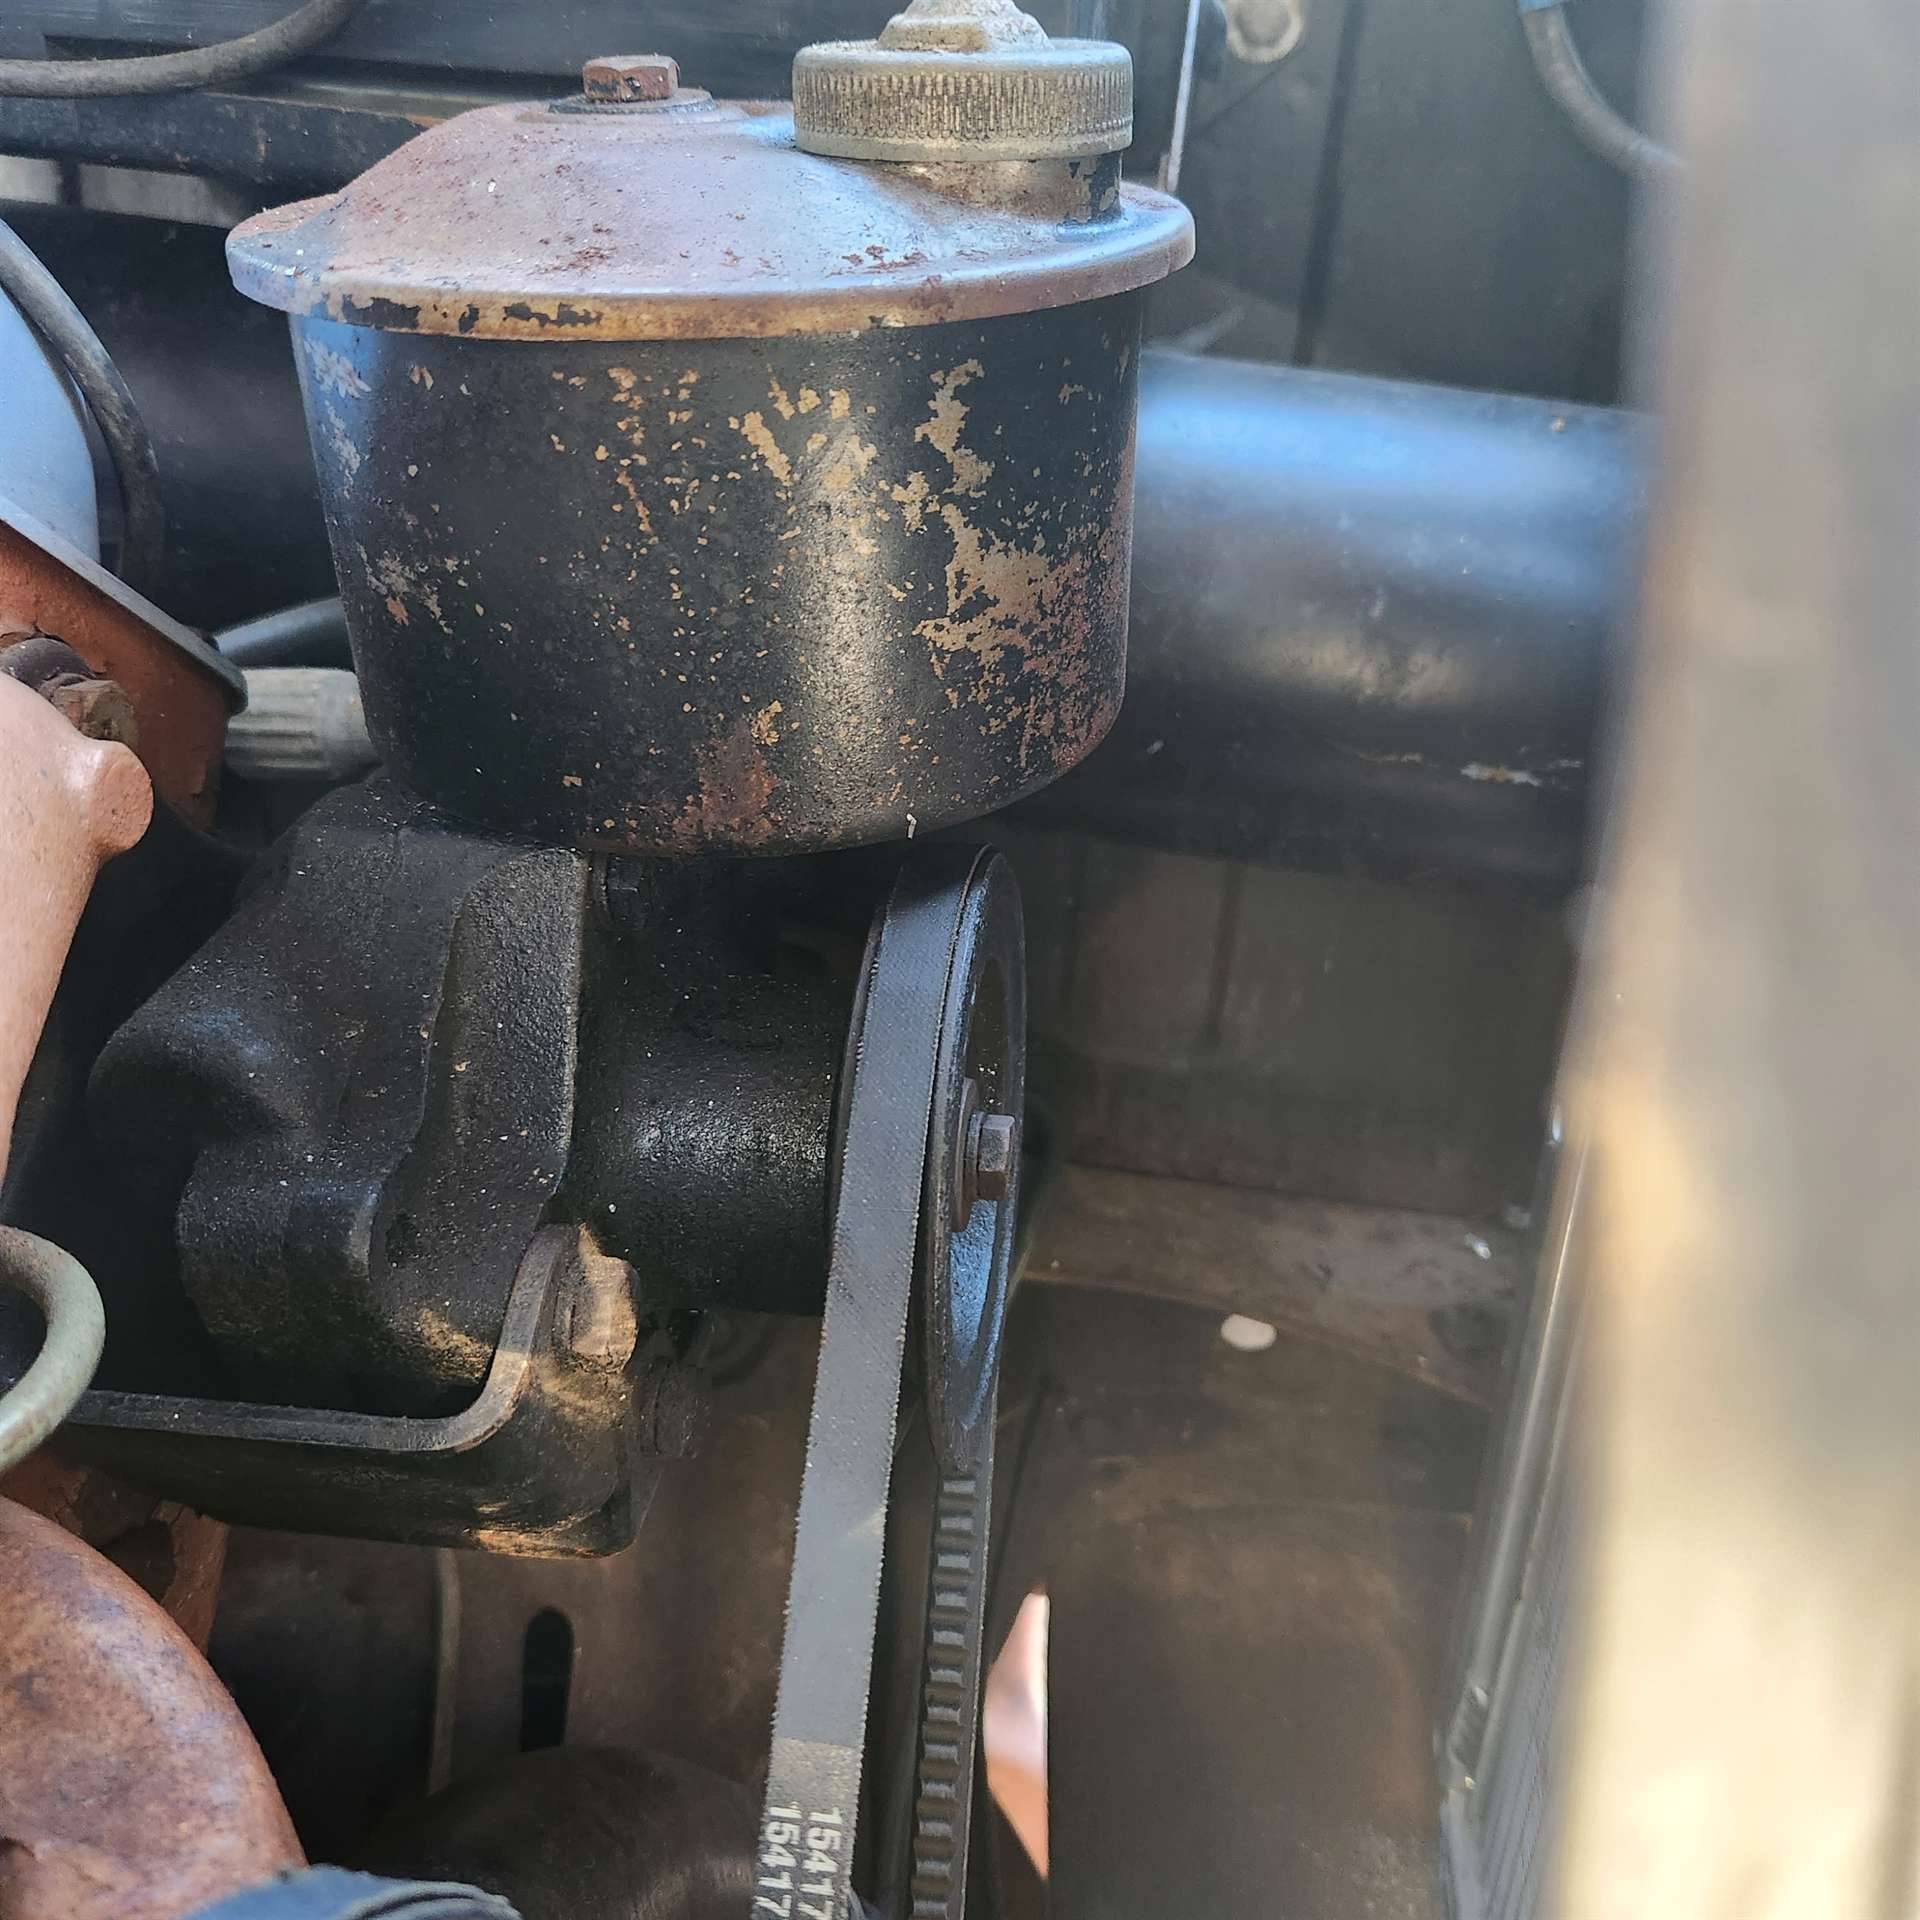
Not sure if you can tell in the photo, but I connected on the port for the power brakes. Didn't see a better source.
Attach file: 20231019_183118.jpg (349.67 KB)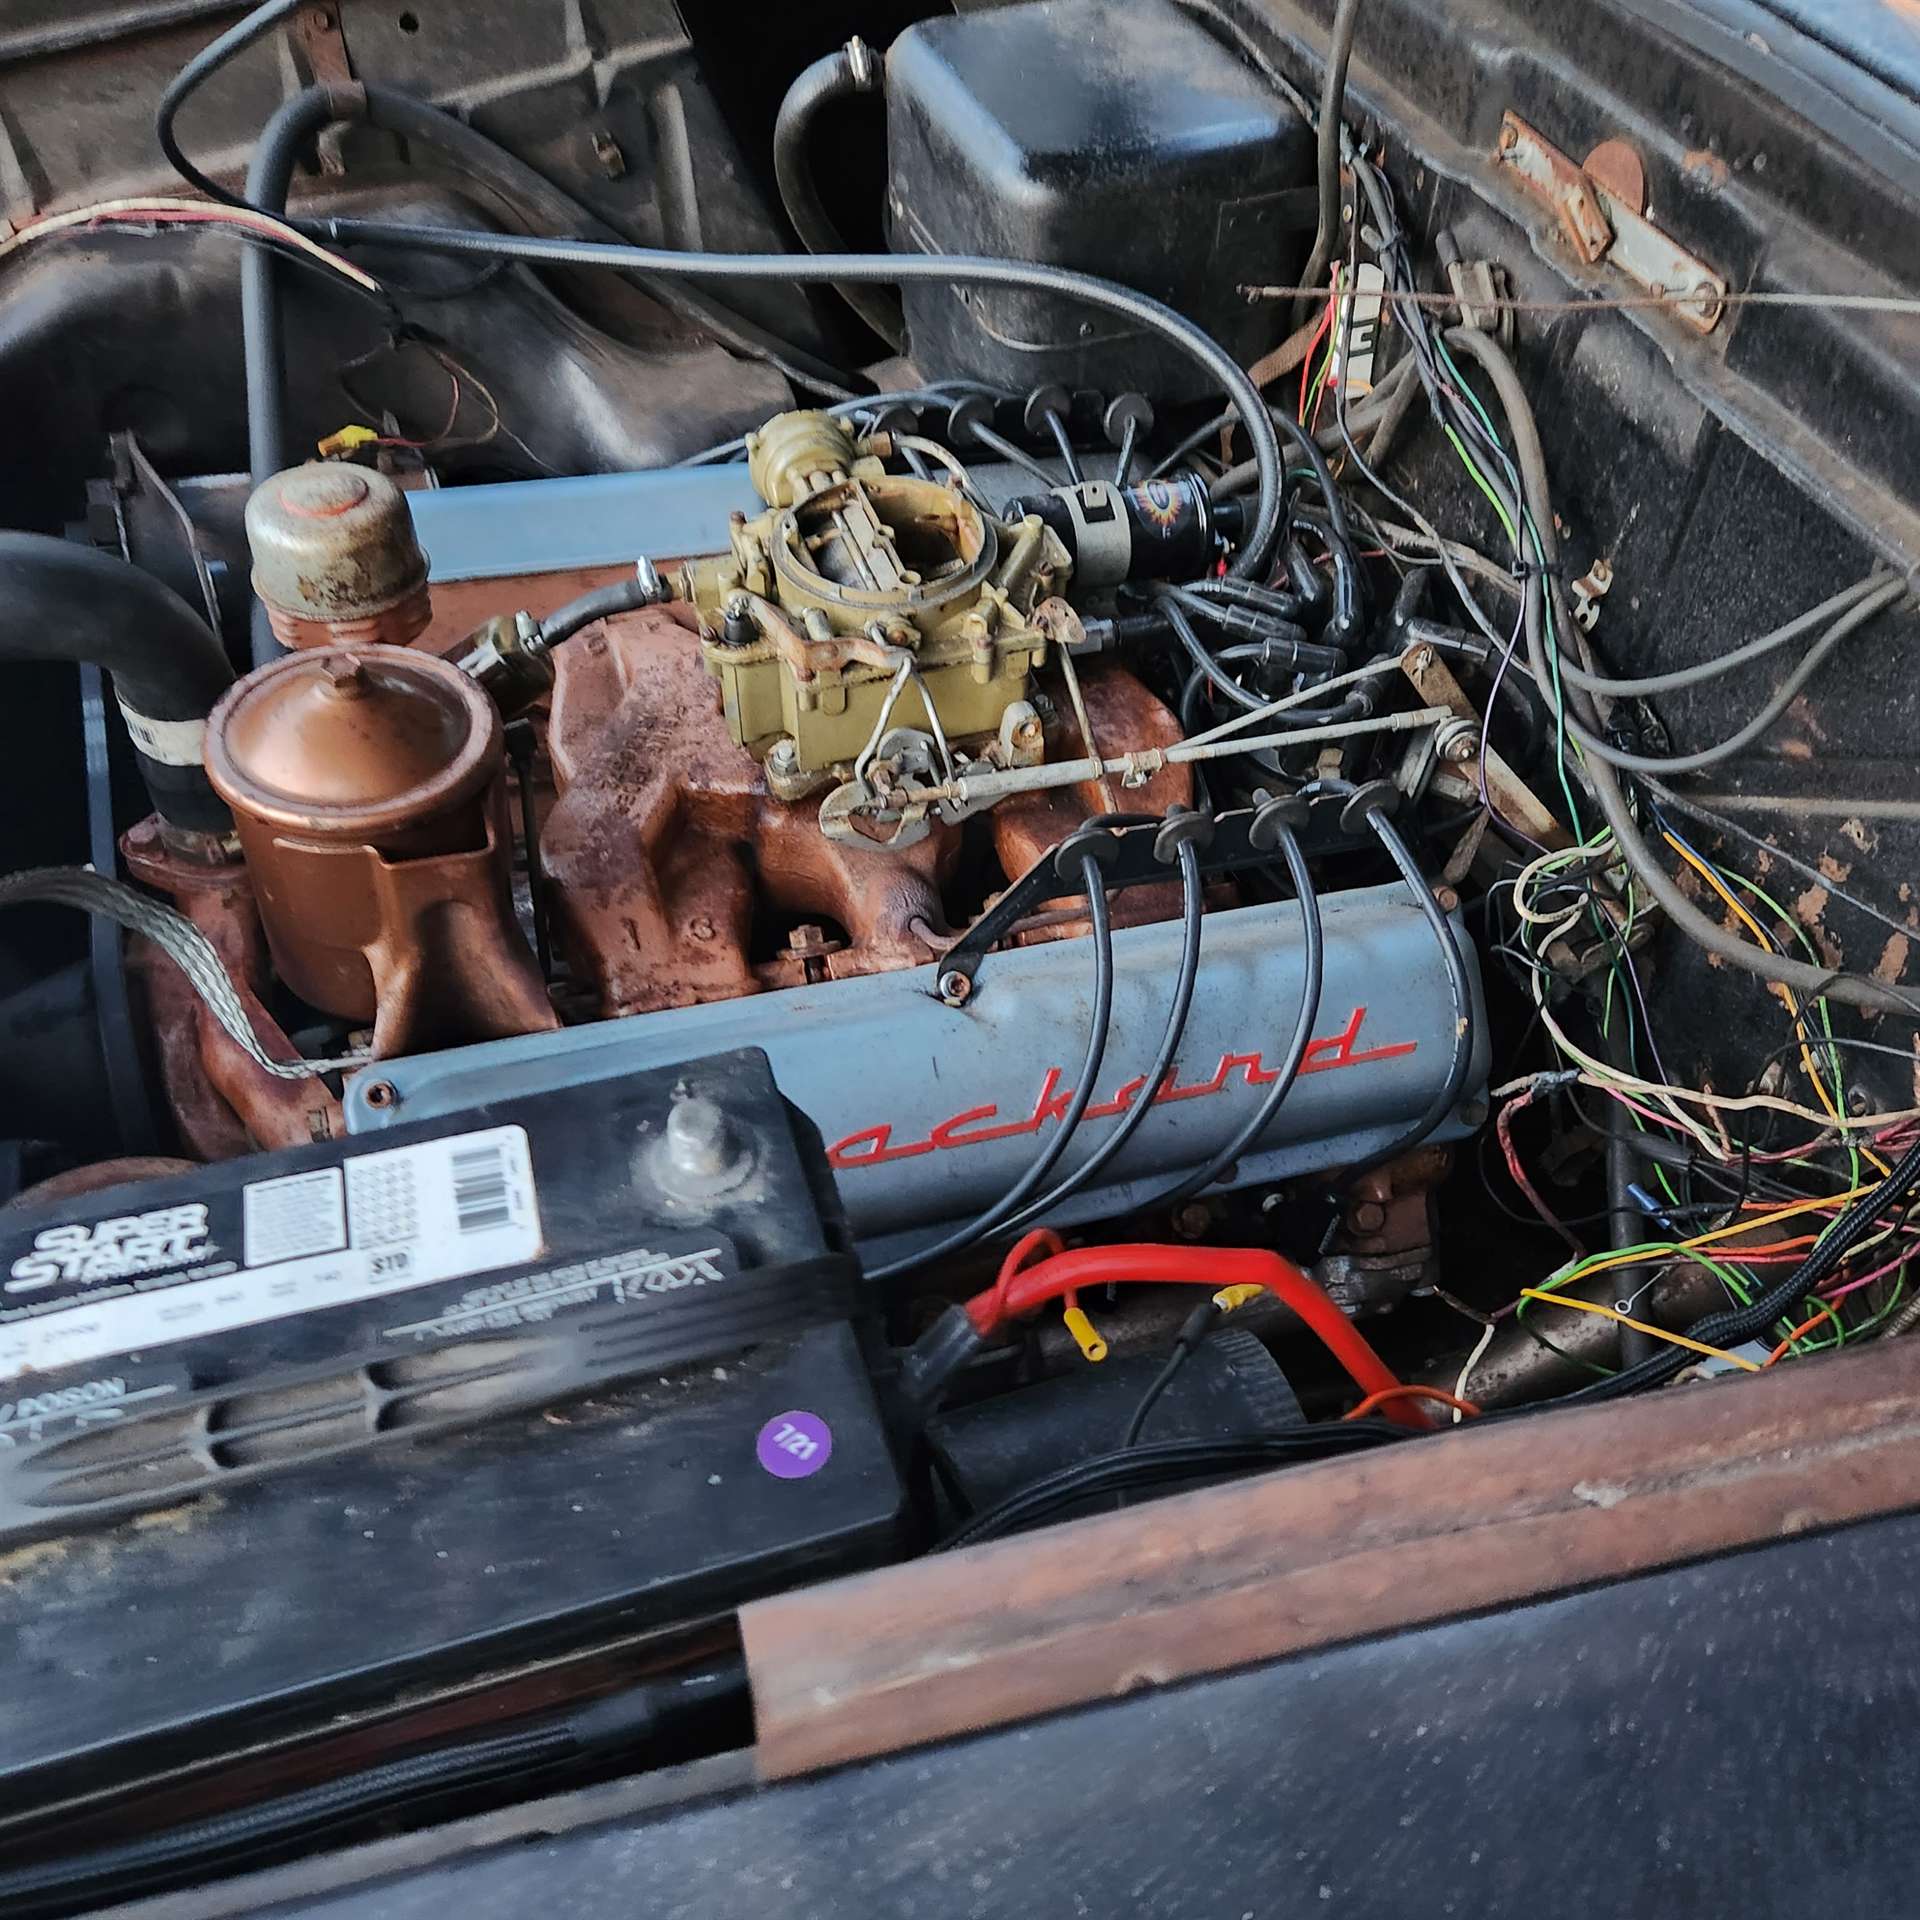 20231019_183126.jpg (366.02 KB) 20231019_183126.jpg (366.02 KB)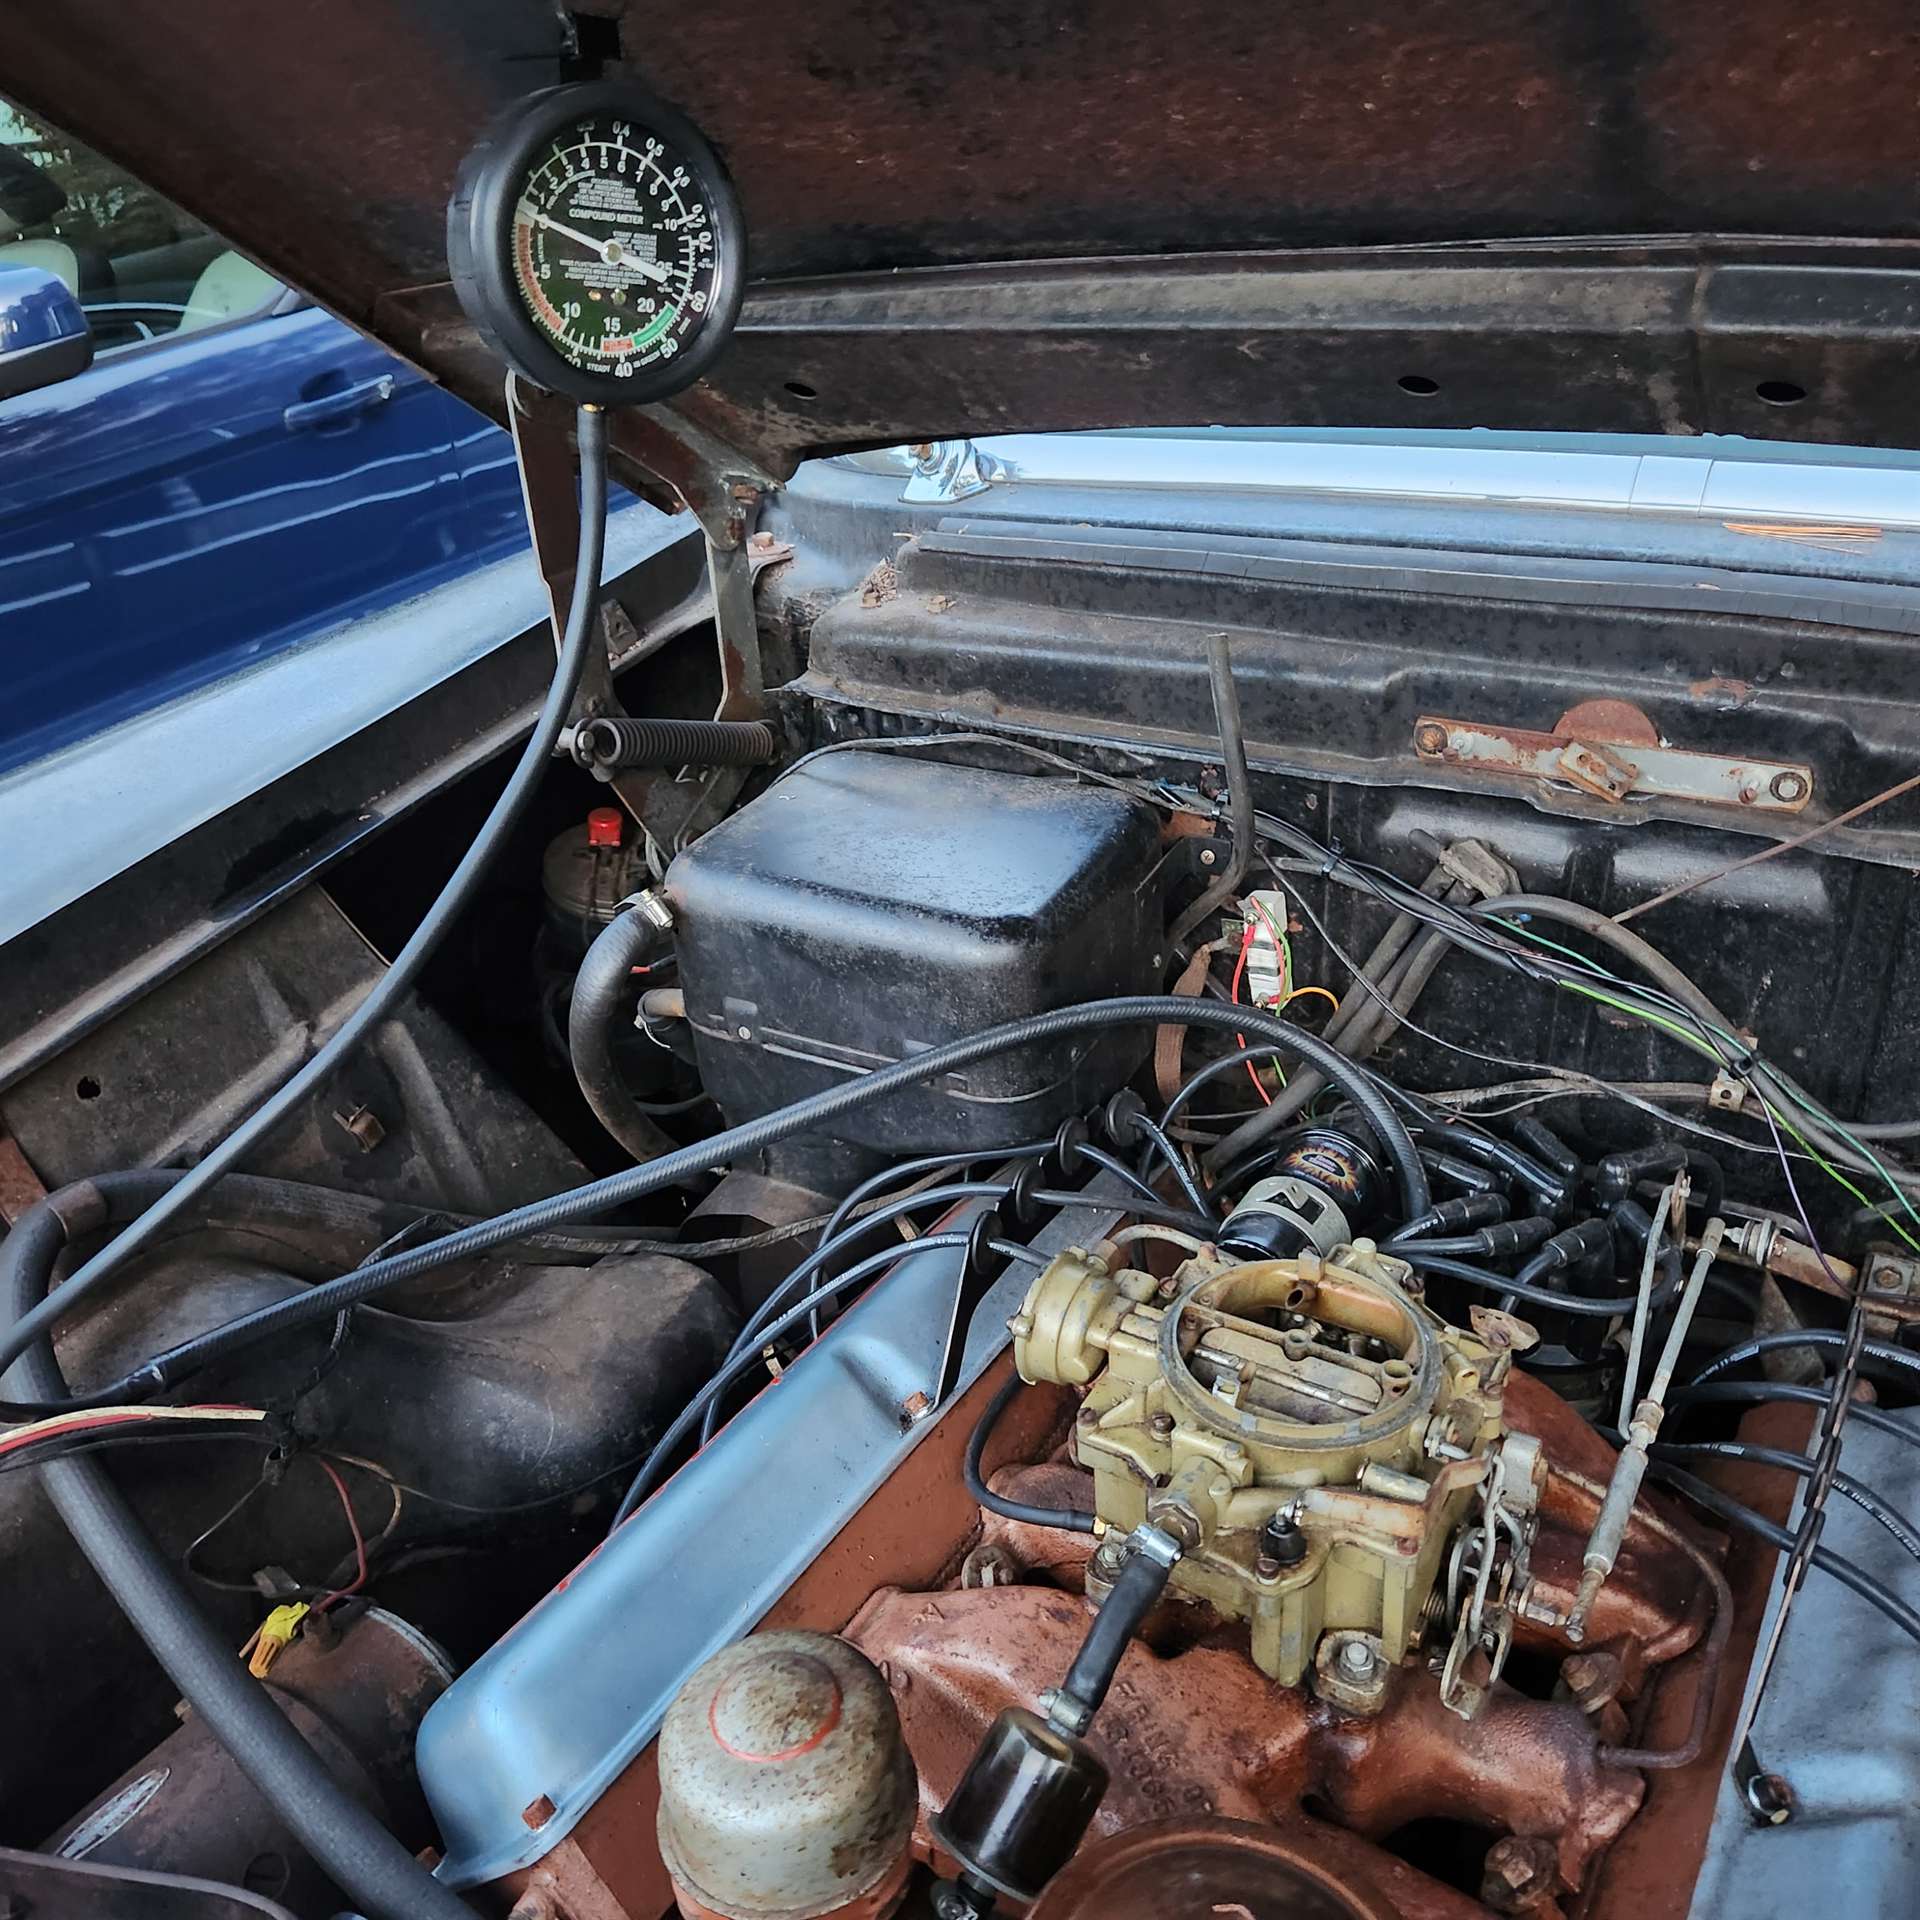
Posted on: 2023/10/19 19:13
|
|||
|
||||
|
Re: Resurrecting my 56’ Patrician
|
||||
|---|---|---|---|---|
|
Home away from home
|
It appears that you are connected to the one-way check valve that the brakes use so you need to find a proper open vacuum source and use that. I am not familiar enough with the V8s to be able to make a specific suggestion but looking at the photos maybe adding a T to the vacuum advance line and connecting to it might be a better choice.
Posted on: 2023/10/19 20:27
|
|||
|
||||


