|
Re: 1937 120 Conv. Sedan - Blanche
|
||||
|---|---|---|---|---|
|
Home away from home

|
I think normally you just remove the gauges themselves from the dash? The oil you MIGHT be able to depending on the design. But I think those old water temp gauges were sealed units.
Posted on: 3/20 15:52
|
|||
|
'55 400. Needs aesthetic parts put back on, and electrical system sorted.
'55 Clipper Deluxe. Engine is stuck-ish. |
||||
|
||||
|
Re: 1937 120 Conv. Sedan - Blanche
|
||||
|---|---|---|---|---|
|
Webmaster

|
The oil tube is removable from the guage. The temp tube is NOT. You have to loosen the temp tube fitting at the motor and then carefully feed it back through the firewall. Don't kink or break that tube line otherwise you'll have to send that and the guage out for repair.
Posted on: 3/20 19:18
|
|||
|
-BigKev
1954 Packard Clipper Deluxe Touring Sedan -> Registry | Project Blog 1937 Packard 115-C Convertible Coupe -> Registry | Project Blog |
||||
|
||||
|
Re: 1937 120 Conv. Sedan - Blanche
|
||||
|---|---|---|---|---|
|
Home away from home
|
ok thank you all. Given that, I will do my best to clean things up and install as is.
Posted on: 3/21 6:32
|
|||
|
||||
|
Re: 1937 120 Conv. Sedan - Blanche
|
||||
|---|---|---|---|---|
|
Home away from home
|
Getting things cleaned up. Removing all the nuts and screws where the wires are attached and removing all the crud and rust.
Looking to get the bulb sockets removed and ready for the new harness. Question: I received new bulb tips with the harness. What is best way to remove the brown piece the tips sit in. It is loose and spins but does not want ti come off. Does it come off? Or is this a part that I need to purchase Thoughts appreciated Ben 
Posted on: 3/23 11:05
|
|||
|
||||
|
Re: 1937 120 Conv. Sedan - Blanche
|
||||
|---|---|---|---|---|
|
Forum Ambassador

|
Have you tried pushing the wire thru the brown sleeve to see what is involved? The usual socket treatments are wire is soldered or crimped into a sleeve which inserts in the brown insulator or in non protected sockets, is soldered directly to a metal center button which is part of the phenolic insulator. In insulator acts as the spring seat as well as the base support for the bulb contact.
If wire is soldered, just melt the solder, pull out the wire and clean out the sleeve for the new wire. If crimped you will need to cut the wire close to the sleeve and try and drill out enough of the old wire to leave enough space or a hole you can use to solder the new wire into the old contact. Here are a couple of examples of typical sockets borrowed from the RI wiring website where you can buy new sockets and some individual pieces if yours are in really bad shape. Yours is probably an older version of socket 1. Attach file:  socket 1.jpg (54.72 KB) socket 1.jpg (54.72 KB)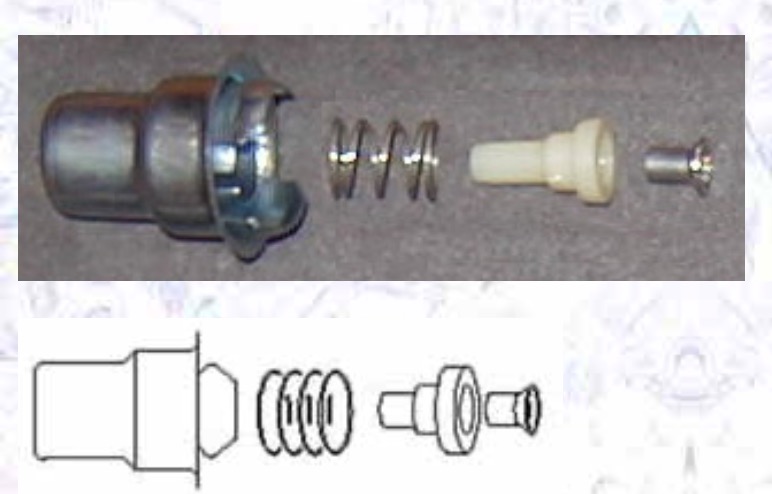 socket2.jpg (51.75 KB) socket2.jpg (51.75 KB)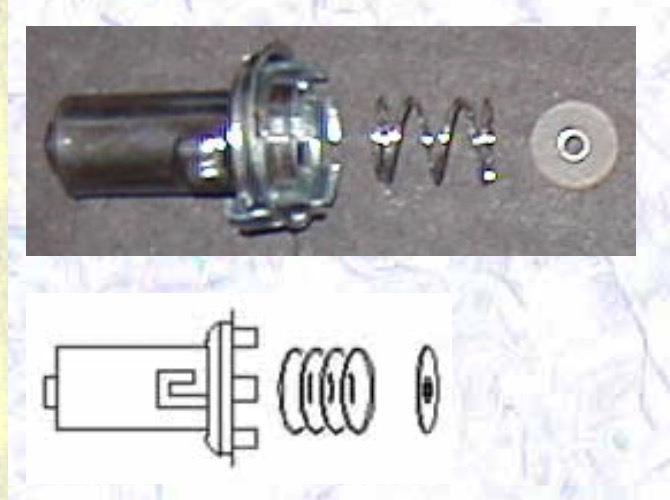
Posted on: 3/23 11:46
|
|||
|
Howard
|
||||
|
||||
|
Re: 1937 120 Conv. Sedan - Blanche
|
||||
|---|---|---|---|---|
|
Home away from home
|
On mine it was a matter of heating up the end with a soldering iron to melt the solder joint that held the brass cap onto the Bakelite insulator, then I threaded the new wire through the assembly and re-soldered it together.
Bob J. Attach file: old lamp socket.jpg (24.67 KB)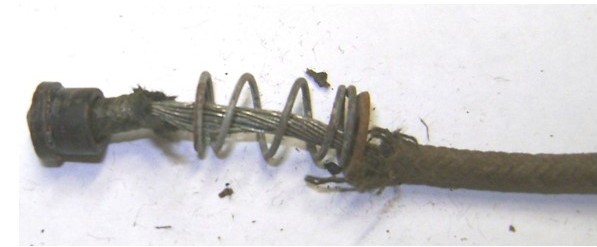 high beam bulb holder-5.JPG (898.29 KB) high beam bulb holder-5.JPG (898.29 KB) high beam bulb holder-4.JPG (773.02 KB) high beam bulb holder-4.JPG (773.02 KB)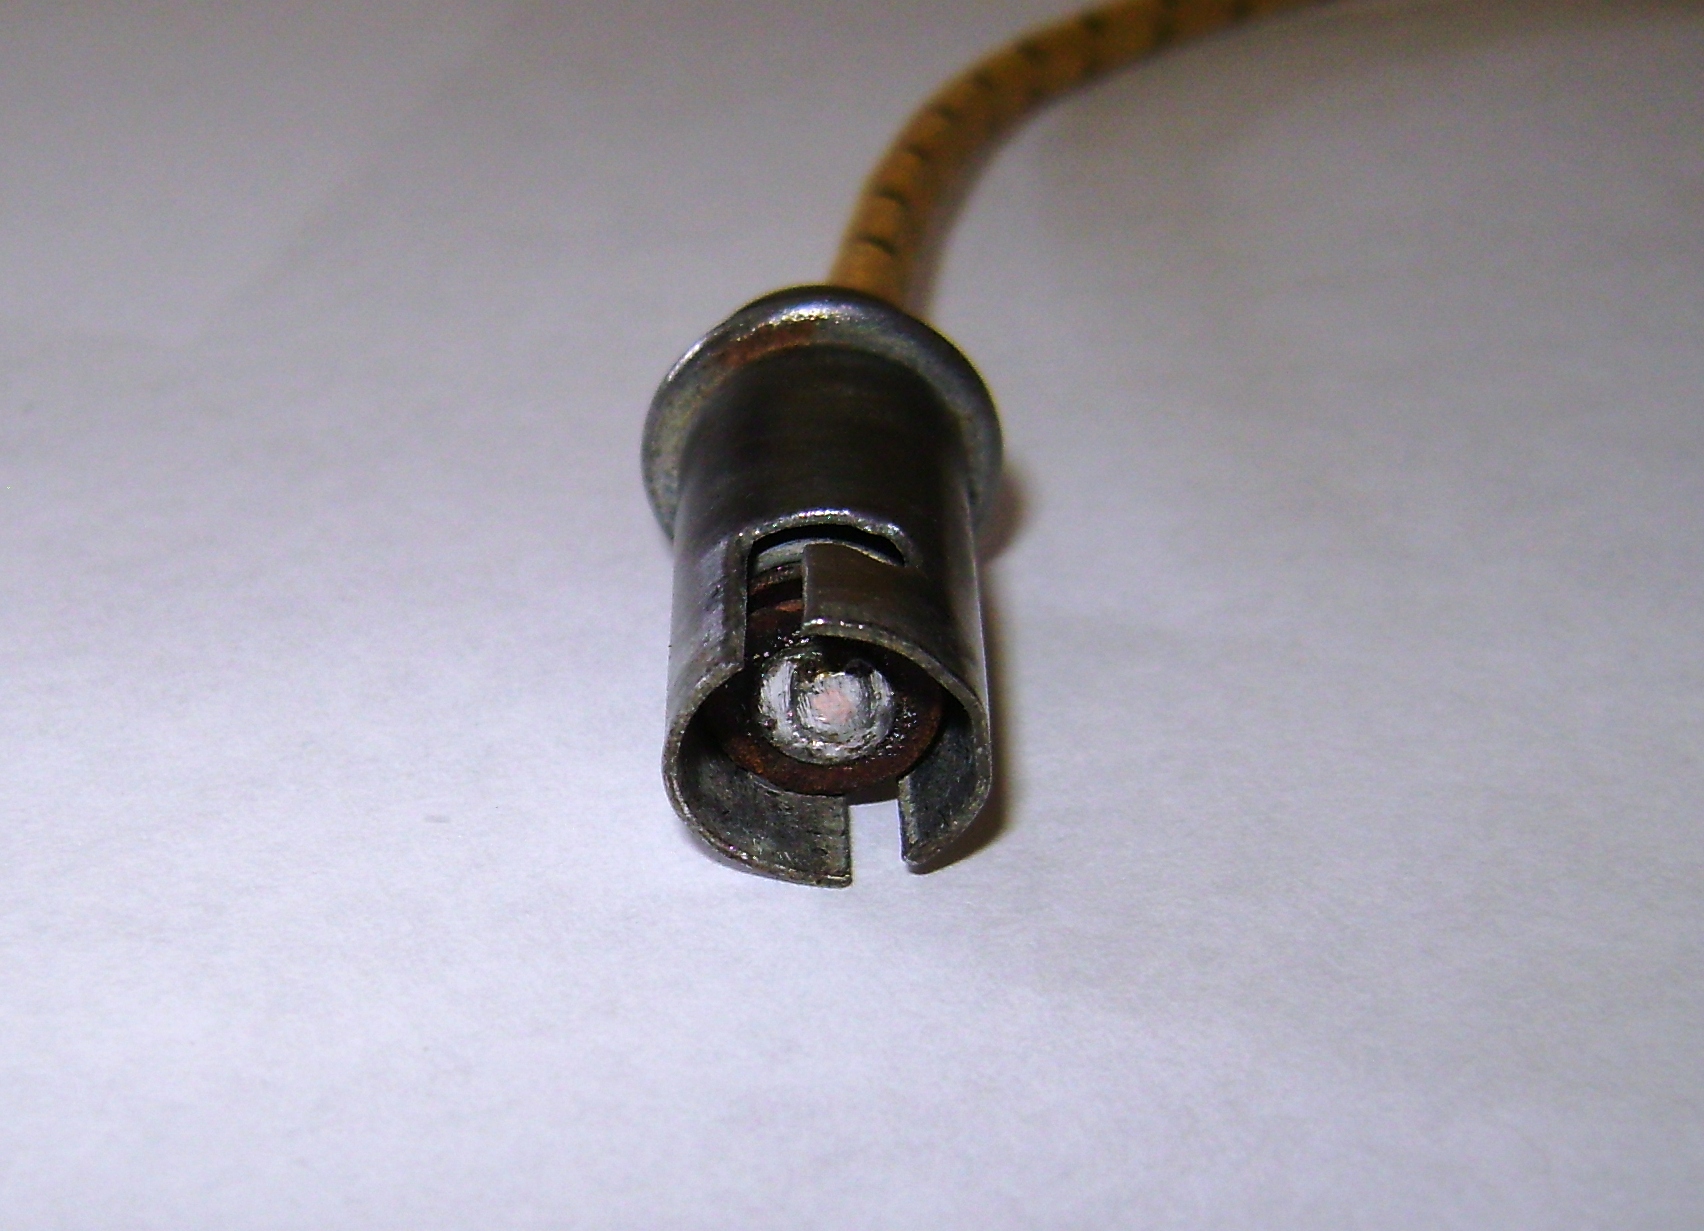
Posted on: 3/23 12:14
|
|||
|
||||
|
Re: 1937 120 Conv. Sedan - Blanche
|
||||
|---|---|---|---|---|
|
Home away from home
|
Great. Thank you. Mine do look to be soldered in place.
Posted on: 3/23 12:21
|
|||
|
||||
|
Re: 1937 120 Conv. Sedan - Blanche
|
||||
|---|---|---|---|---|
|
Home away from home
|
Made some nice progress today. Thanks Howard and Bob for the insights on the light bulb wiring. Bob, I may come back for clarification when I tackle those.
Today, I was able to remove the old wire harness, snake the new one through behind the dash, and get started on the install, hooking up all engine points. I'm going to tackle the dash next, and the lights/turn signal will be last. Before I wire the dash, I think I will paint it. When I removed the dash panels, they looked very dark brown. I think I remember someone referencing Walnut by Rustoleum as the darkest brown out there. Joe Goss still does the woodgraining, so I will be sending the Dash panels out in April, when he is back from his travels. (thanks for the lead!) Also, sent my Speedometer to Pat (Bill's Speedometer) to tune up. It had been making a grinding noise, even fter i replaced the Speedo cable, and applied white grease. Pat said he will get it right. Cheers Ben 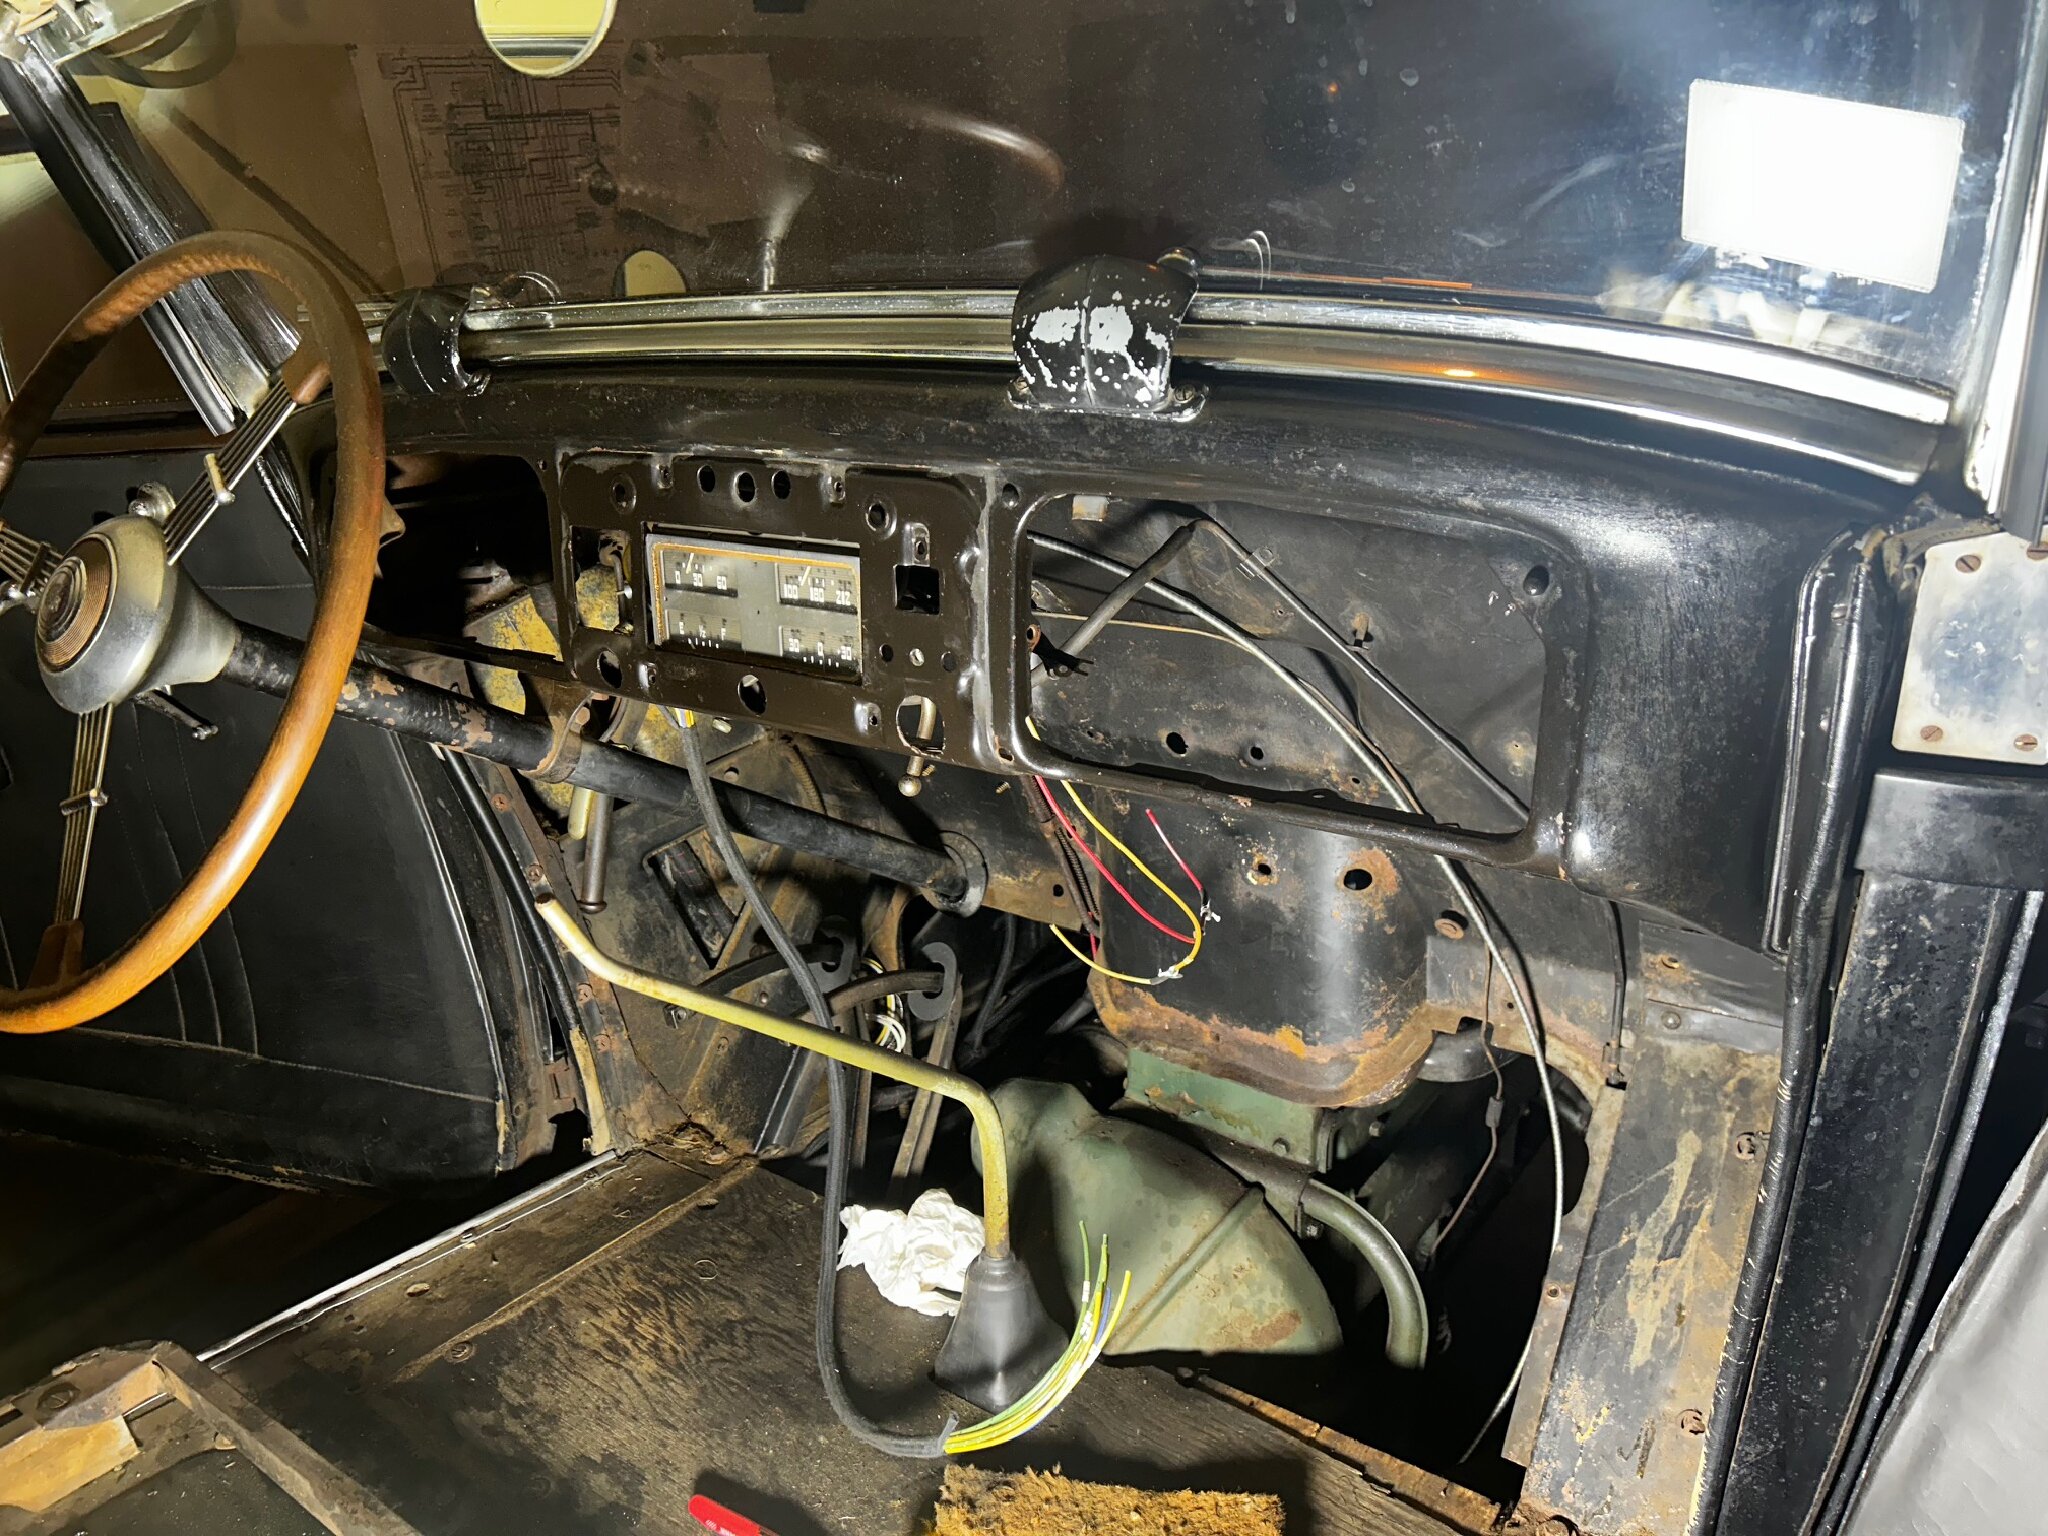 
Posted on: 3/23 18:37
|
|||
|
||||
|
Re: 1937 120 Conv. Sedan - Blanche
|
||||
|---|---|---|---|---|
|
Webmaster
|
Yes, the dash structure should be the darkest brown you can find. Think very dark chocolate. I used dark walnut spay can. But it is even darker than that.
Posted on: 3/23 18:55
|
|||
|
-BigKev
1954 Packard Clipper Deluxe Touring Sedan -> Registry | Project Blog 1937 Packard 115-C Convertible Coupe -> Registry | Project Blog |
||||
|
||||


