|
Re: V-12 Water Pump Removal
|
||||
|---|---|---|---|---|
|
Home away from home

|
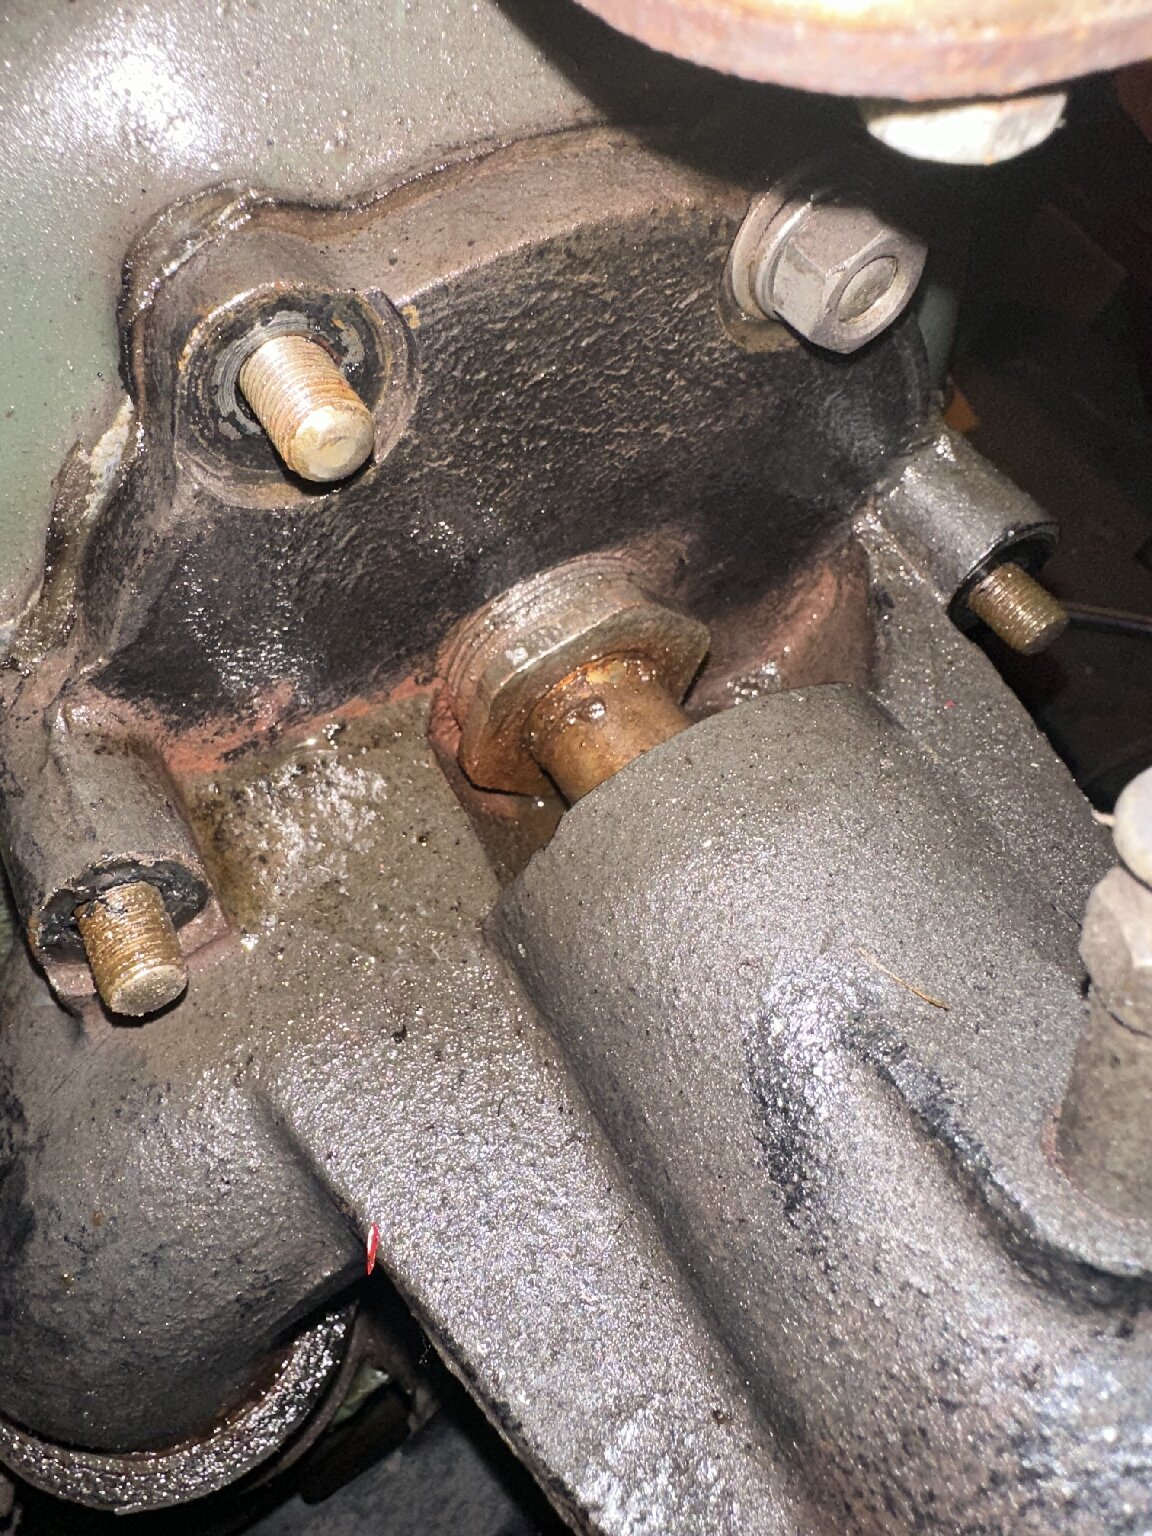
A cross-section shop manual view of the mid-1930s V-2 pump indicates that it projects back into the block behind the bolt flange. Your pump is probably stuck in that area and perhaps also on the mounting studs. As far as I know, applying penetrants and gently tapping on it with a plastic hammer is about all you can do. Some installations similar to that have 2 or more tapped holes in the flange which allow screwing bolts in to push the pump casting off the studs. If those are not present, patience and gentle persuasion are the only options. I'd go heavy on patience to avoid marring the pump or breaking it.
Posted on: 3/4 21:12
|
|||
|
||||
|
Re: V-12 Water Pump Removal
|
||||
|---|---|---|---|---|
|
Forum Ambassador

|
Probably just "stuck" fom the effects of corrosion or the type of gasket compound used. Keep trying gentle persausion together with working a putty knife around the water pump as you attempt to remove it.
Posted on: 3/4 21:14
|
|||
|
Mal
/o[]o\ ====  Bowral, Southern Highlands of NSW, Australia "Out of chaos comes order" - Nietzsche. 1938 Eight Touring Sedan - SOLD 1941 One-Twenty Club Coupe - SOLD 1948 Super Eight Limo, chassis RHD - SOLD 1950 Eight Touring Sedan - SOLD What's this?  Put your Packard in the Packard Vehicle Registry! Here's how! Any questions - PM or email me at ozstatman@gmail.com |
||||
|
||||
|
Re: V-12 Water Pump Removal
|
||||
|---|---|---|---|---|
|
Forum Ambassador

|
Be clear the far bigger$$$ risk is cracking the aluminum timing cover.
Best I can offer is an "armchair prayer" that the gods of patience and care shine upon your dilemma.
Posted on: 3/4 22:25
|
|||
|
||||
|
Re: V-12 Water Pump Removal
|
||||
|---|---|---|---|---|
|
Home away from home
|
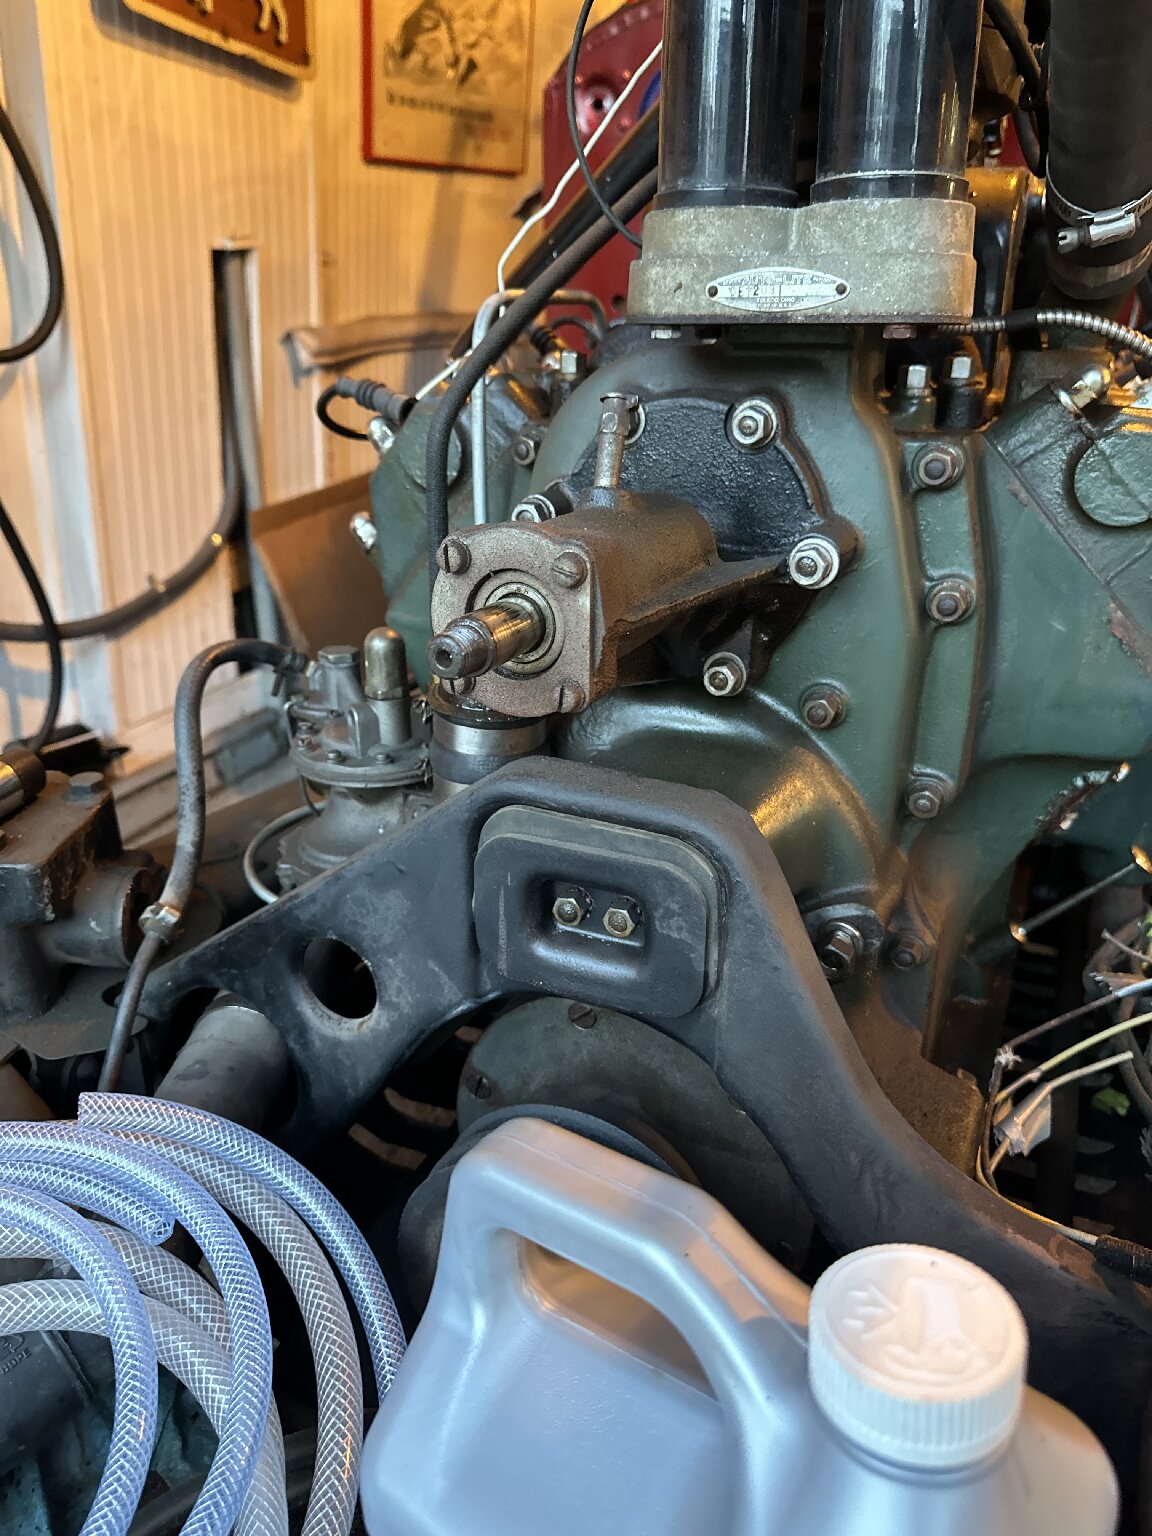
I can take a picture tomorrow.
Of cover and impeller
Posted on: 3/5 2:55
|
|||
|
Riki
|
||||
|
||||
|
Re: V-12 Water Pump Removal
|
||||
|---|---|---|---|---|
|
Home away from home
|
If the cover that the pump mounts in is aluminum, that's probably where the problem lies.
Aluminum often causes sticking problems in such assemblies due to corrosion. If you can get all the oil off the area and out from around the studs, applying a mild acid, like BlecheWhite tire cleaner, may loosen the pump. It would need to be squirted into the gaps around the studs, or forced in by some means, and kept wet. If the inside of the cover is accessible, applying Blechewhite there would be helpful. **Given the rarity of the parts, pulling the cover and pump assembly would probably be the best way to proceed. Pulling the assembly would allow much better access to the problem area.
Posted on: 3/5 9:35
|
|||
|
||||
|
Re: V-12 Water Pump Removal
|
||||
|---|---|---|---|---|
|
Quite a regular
|
Private Message me and I'll email you my brother's contact info (45 years as a Packard mechanic working on my 1507 V12 engine currently)
...he may be able to facetime with you and walk you through his procedure (not foolproof)...a prayer and intervention by the gods of combustion are still in order per Flack's note...definitely get some thick long shim material (0.010-0.020 thick steel) on hand to curve/bend/push/ease into all mating surfaces to clear gunk, sealant adhesion, corrosion, etc. Also, make up some hardwood slim wood wedges (2-5 deg taper on them; make a few sets as you go...low angle ones first, replaced by higher angle ones...easy does it uniformly around the periphery) once you clear the mating surfaces, to go around (5-8 locations) the mating flange so you dont apply too much prying force in one place (which will crack the underlying aluminum casting). Dan M.
Posted on: 3/5 11:35
|
|||
|
||||


