|
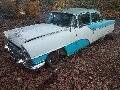
Re: Cortes121's 1955 Clipper Custom
|
||||
|---|---|---|---|---|
|
Forum Ambassador

|
If you do not have suitable luck with buying a complete premade set from one of the tubing places and do not have or wish to send anything for a pattern you might see what Kanter can do. They have arrangements with someone who makes their replacement sets and might have more patterns.
Another option might be to get premade tubes at Napa. Almost all of the stock tubes can be duplicated with various short lengths available and the long length to the rear can be done with two lengths and a coupling. The coupling can be hidden on top of one of the body outriggers and if any of the shorter premade lengths are still a bit long creative bending can take care of that.
Posted on: 2021/4/8 16:43
|
|||
|
Howard
|
||||
|
||||
|
Re: Cortes121
|
||||
|---|---|---|---|---|
|
Just can't stay away
|
Howard & Kevin,
Thank you both for the advice. I just went ahead and bit the bullet on buying some Nicopp and a flare tool and bender. I've always wanted to try making my own lines so I figure this is a good opportunity. On another note, I picked up the gas tank from the acid dip place I dropped it off at last week. It looks really nice. But they had to drill a hole in the tank as part of their process, so the tank is with a radiator shop for a small patch and pressure test. Looking forward to getting it back and into the car. I went ahead an bought a '57 thunderbird fuel sender as some on this forum suggested. I was looking at the two units side by side and noticed they had some differences.. The travel of the arm, while a bit shorter on the new unit is fairly close. Was hoping others here could verify I purchased the right one? Also, It seems I'm missing the gasket, which is frustrating. Is it too far fetched to get one on its own or make one possibly? Otherwise I'll have to order another unit. Attach file:  IMG_7144.jpg (262.92 KB) IMG_7144.jpg (262.92 KB)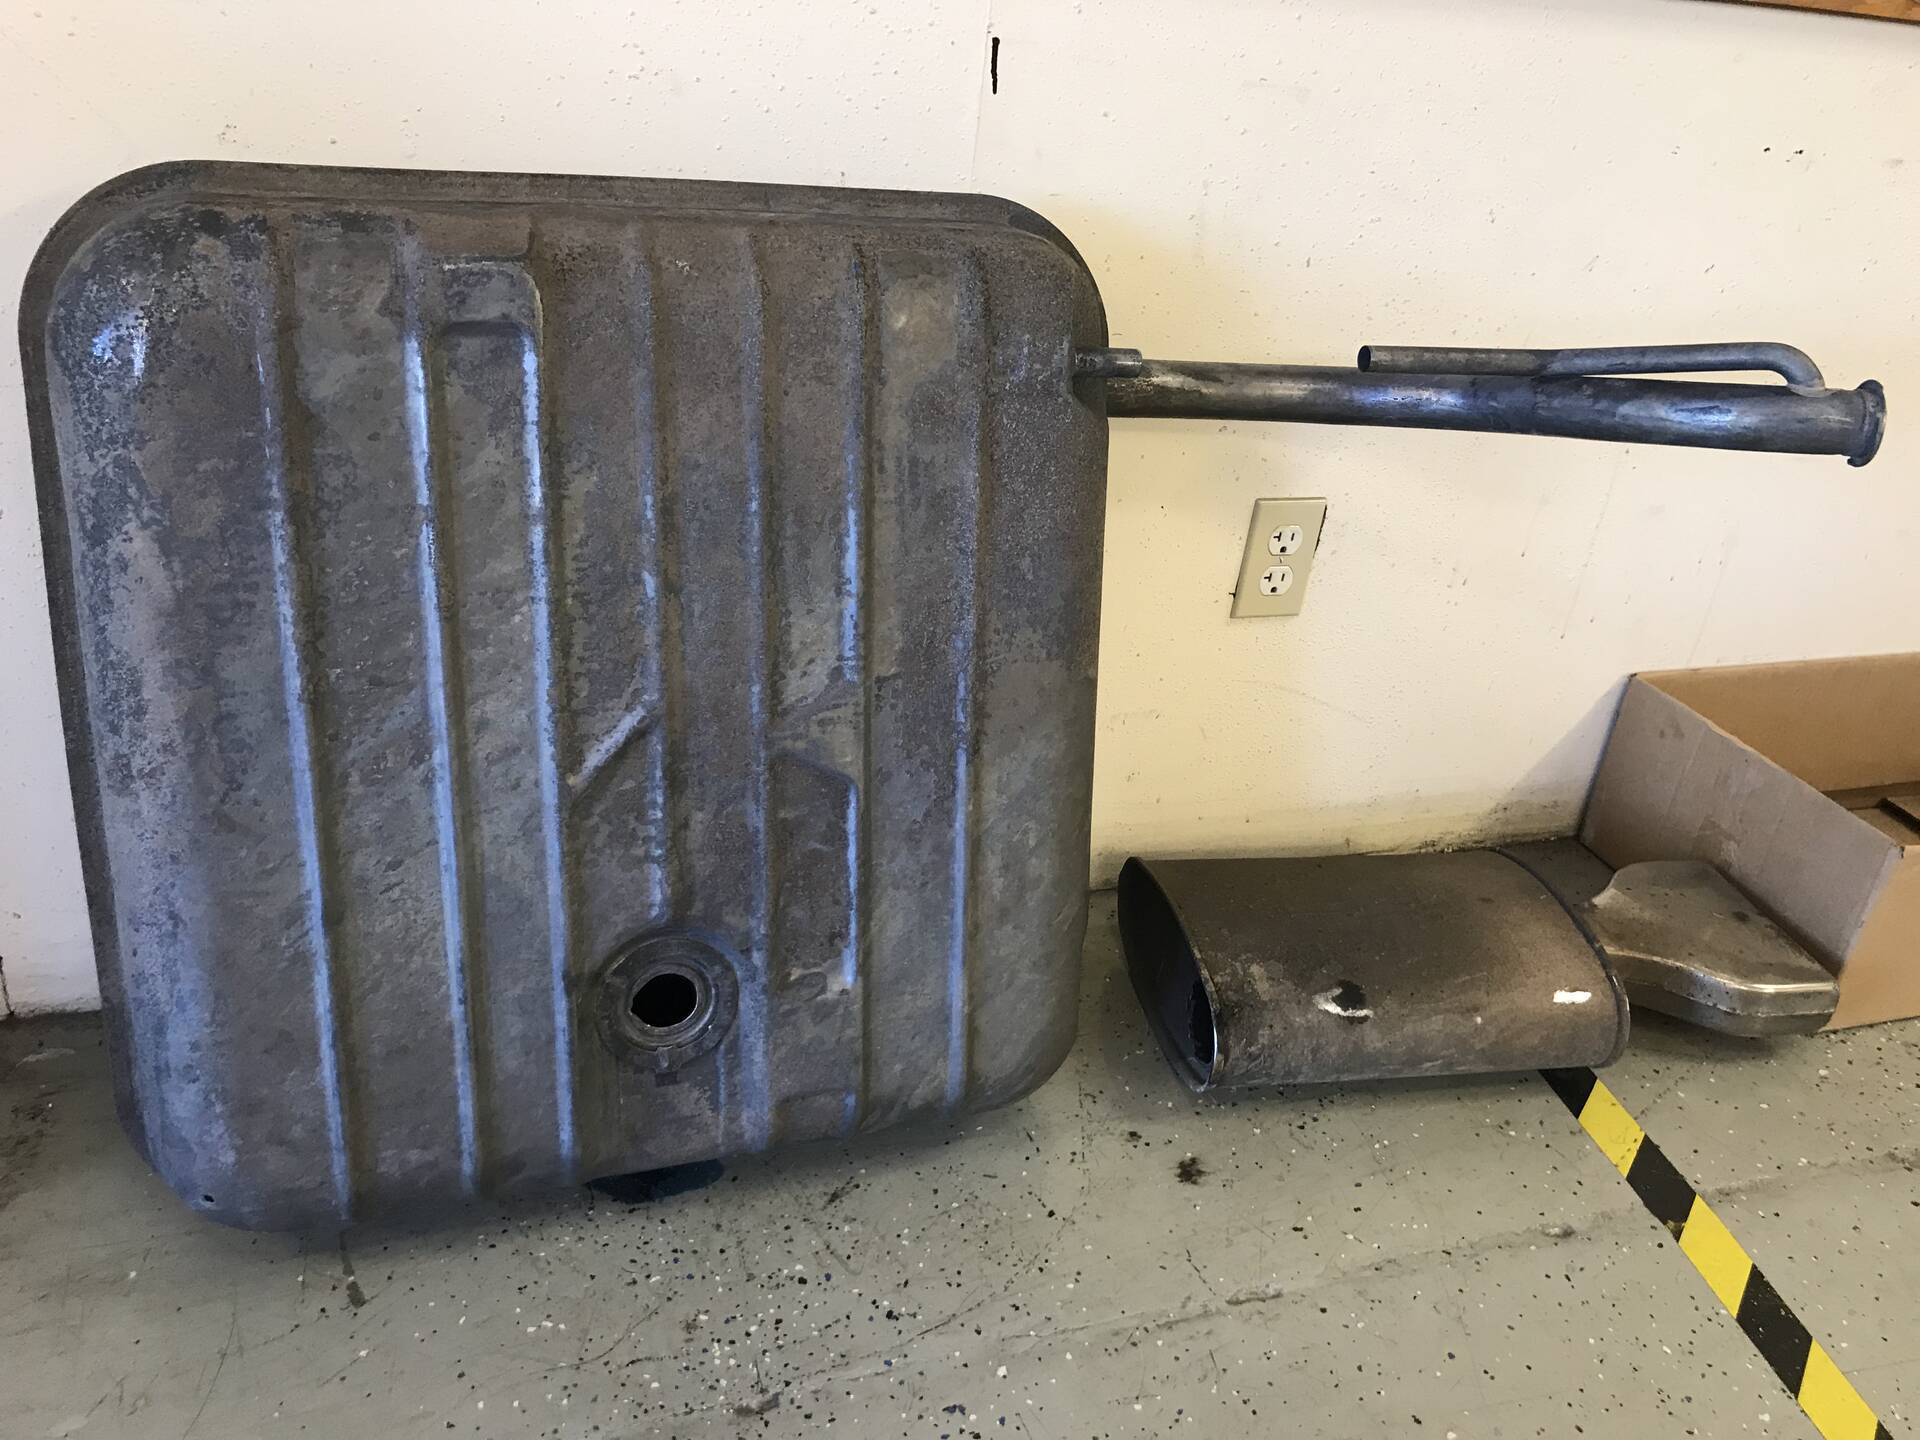 IMG_7133.jpg (386.63 KB) IMG_7133.jpg (386.63 KB)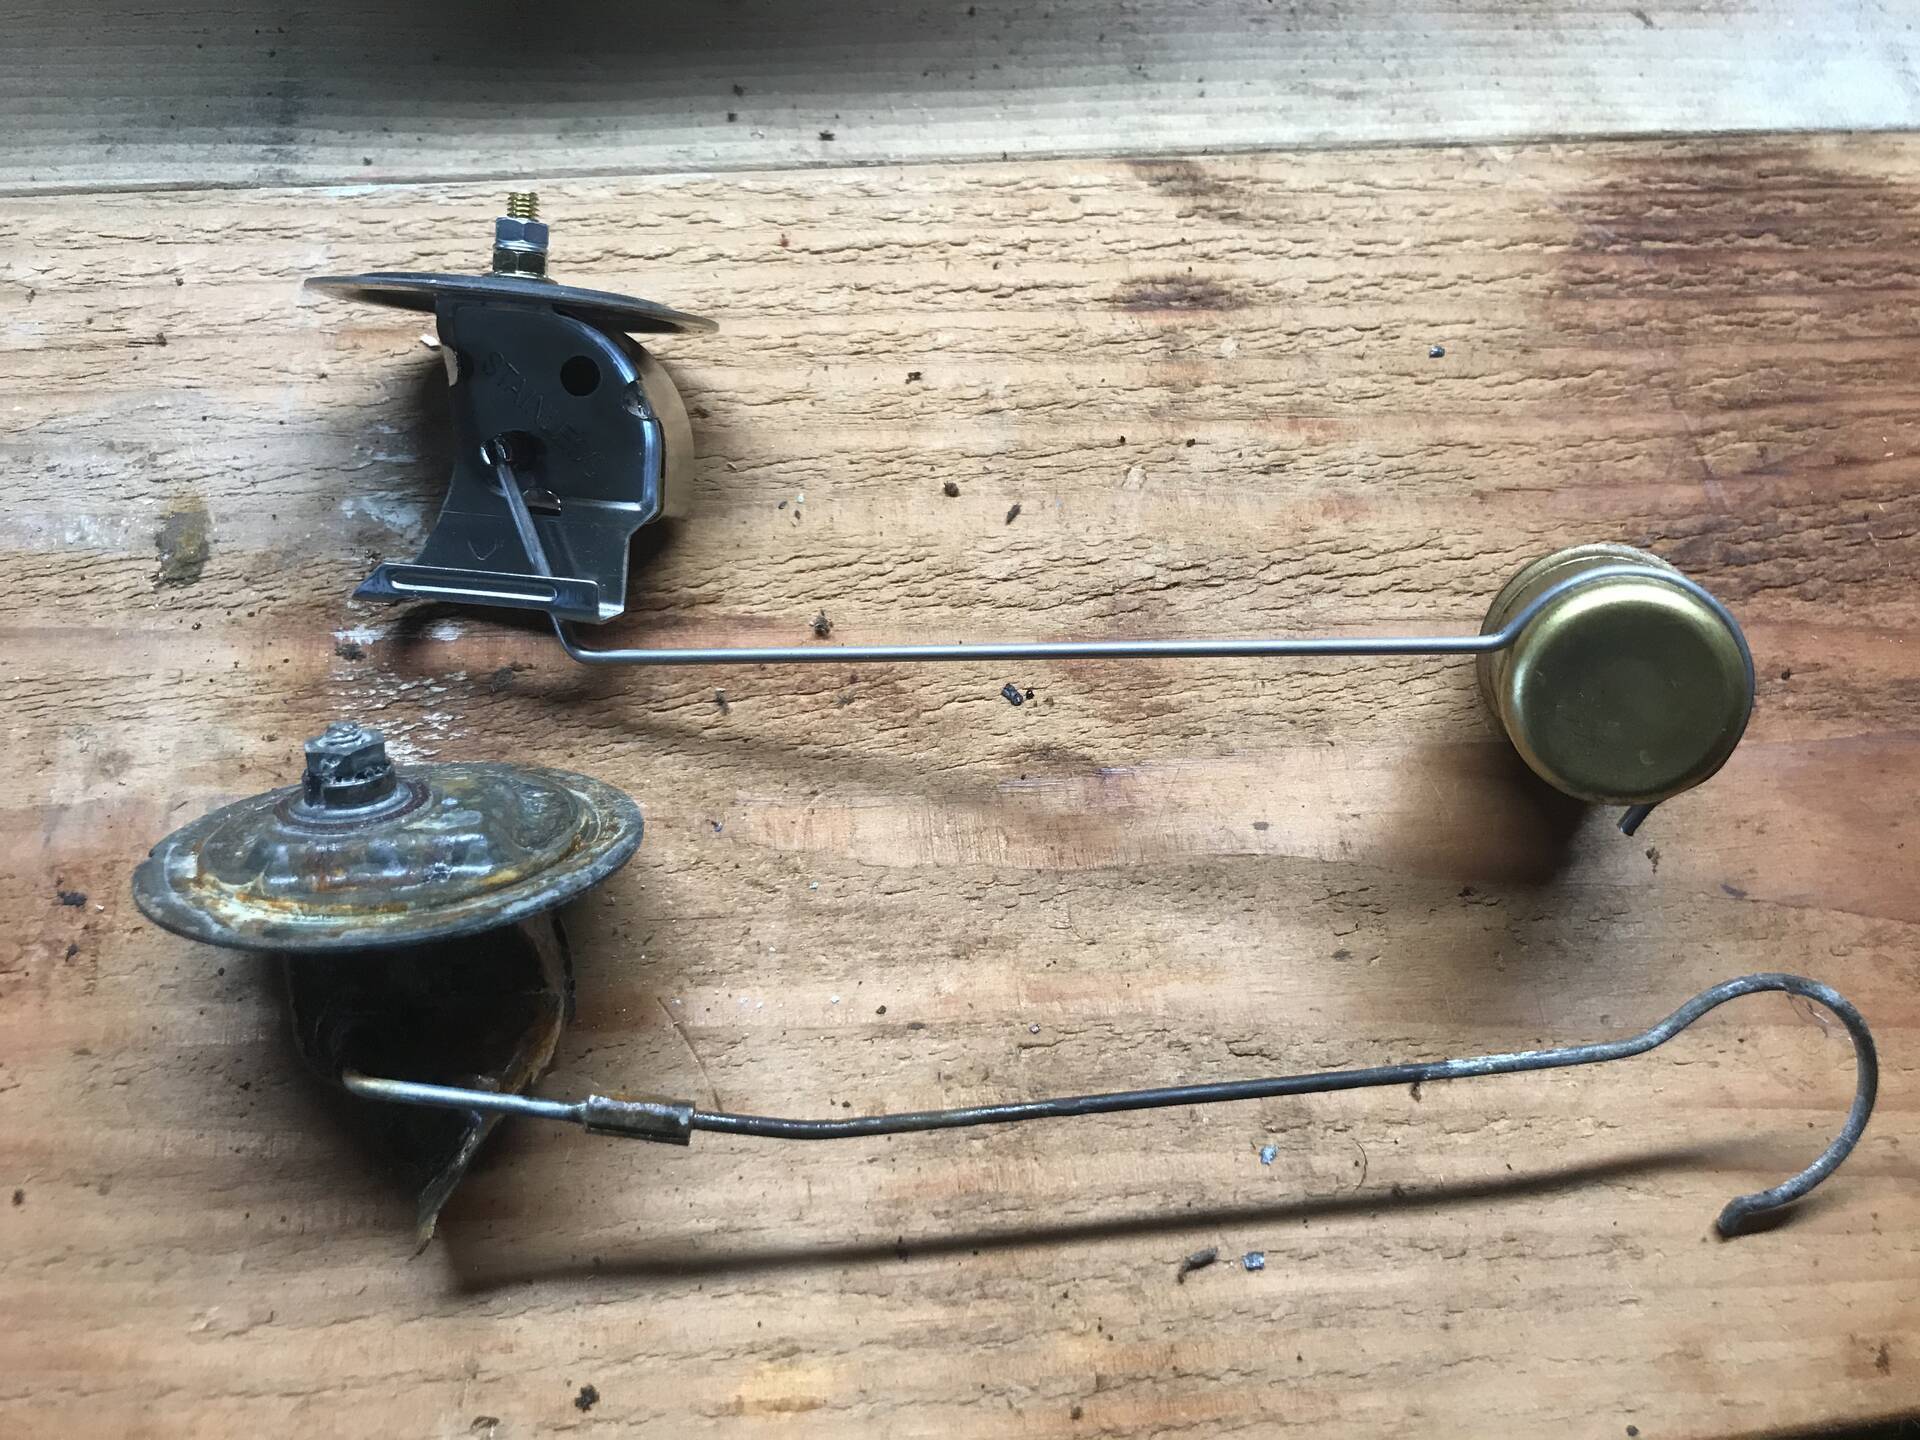
Posted on: 2021/4/16 22:57
|
|||
|
- Anthony
1955 Packard Clipper Custom 1951 Kaiser Deluxe |
||||
|
||||
|
Re: Cortes121
|
||||
|---|---|---|---|---|
|
Forum Ambassador
|
On the sender, best you can do is try it out by ensuring the flange stays still and float of both units when at full position starts at a fixed reference point. The top of the float at the full position should be almost the same height as the flange to reach the top of the tank. If the stops for the float arm on the sender body are fixed in such a way that even though the arm is shorter, the float moves the same distance as it drops to empty then it should be OK. If it stops short on either end you may need to cut the arm wire and lengthen it to match the Packard distance. You can do this by using a butt splice type electrical crimp connector. Just be sure to remove the plastic over the connector first. The results will be similar to what the Packard sender mfg did to attach the longer arm. If measuring with an ohmmeter, when at full position the reading will be approx 10 ohms and when empty, around 75 ohms +/-.
On the gasket, MaxMerritt has them if something suitable is not available faster at Napa. It is an ordinary O ring although it does need to be of fuel safe rubber. Napa might have something listed for Ford products. You might also think of cutting a hole in the trunk floor in case you do run into problems and need to change it. So much easier than needing to drop the tank again. I believe the dimensions Ross posted for the hole in a 51-4 model will also work for 55-6.
Posted on: 2021/4/17 9:17
|
|||
|
Howard
|
||||
|
||||
|
Re: Cortes121
|
||||
|---|---|---|---|---|
|
Just can't stay away
|
Howard,
I will hook up a meter and check the ohms readout, thank you very much for providing the bit about the crimp connector, that makes total sense. And Thanks for posting the link to the gasket - that makes life super simple. Sometimes the bumps in the road to getting a car back on the road can get discouraging, always feels good when there is a clear path forward. :) As for the trunk... I've seen that mod on this forum, and I believe Ross has stated it should work (correct me if I'm wrong here). I wouldn't mind doing that mod... if and when I can get into the trunk. The trunks locked and I don't have the key. I know i could get a key made by removing a door tumbler, but The doors are so rusty, if i remove a door handle and tumbler, the area where it is held to the door may disintegrate. I imagine many here have faced this issue. I was going to ask how to remove the back seat (i'll poke around the repair manual) but i've been reluctant as i'm going to have to crawl into a nasty, rusty possible rat turd filled trunk in the dark. I've attempted picking the lock but i'm no pro.
Posted on: 2021/4/17 14:38
|
|||
|
- Anthony
1955 Packard Clipper Custom 1951 Kaiser Deluxe |
||||
|
||||
|
Re: Cortes121
|
||||
|---|---|---|---|---|
|
Forum Ambassador

|
Once you have the rear seat removed and have access into the trunk, if there are no obstructions between you and the trunk latch area, you can hook enough socket wrench extensions together such that you can reach the two bolts that hold the latch bar, I believe the bolts are 7/16" or 1/2". Then just unbolt the latch bar and trunk is free to open.
Posted on: 2021/4/17 15:11
|
|||
|
||||
|
Re: Cortes121
|
||||
|---|---|---|---|---|
|
Forum Ambassador
|
Quote:
If the car still has original locks and keys, removing a door tumbler will not work to get a key made for the trunk. Ignition and doors are on the round head key and glove box and trunk were the octagonal key.
Posted on: 2021/4/17 15:37
|
|||
|
Howard
|
||||
|
||||
|
Re: Cortes121
|
||||
|---|---|---|---|---|
|
Just can't stay away
|
Howard,
Good point. I was confused between what keys fit what... unfortunately all I have is the ignition key and the ignition is not original. I'm not too terribly focused on locks at the moment. If someone wants to get in this unsightly beast, they're more than welcome to as much mold and rust as they want  I finally got back my tank from the acid dip and radiator shop. The tank is super clean and I'm excited to get it back in the car. It now has drain plug on top, and has been pressure tested. I sprayed some WD40 inside to keep flash rust at bay. I've also been tearing down the BTV. It is in fairly rough shape. I read on Ross' guide that "pits are not a problem but roughness is" so the housing may still be usable? I can say for sure the big spring isn't reusable, seems to have snapped in two places. I ordered another junk Packard BTV off eBay, so now I'll have two nasty BTV's and hopefully with a rebuild kit I'll get one mildly good one out of the lot. Attach file: Before.jpg (318.23 KB) After.jpg (442.46 KB) After.jpg (442.46 KB) CleanTank.jpg (260.16 KB) CleanTank.jpg (260.16 KB)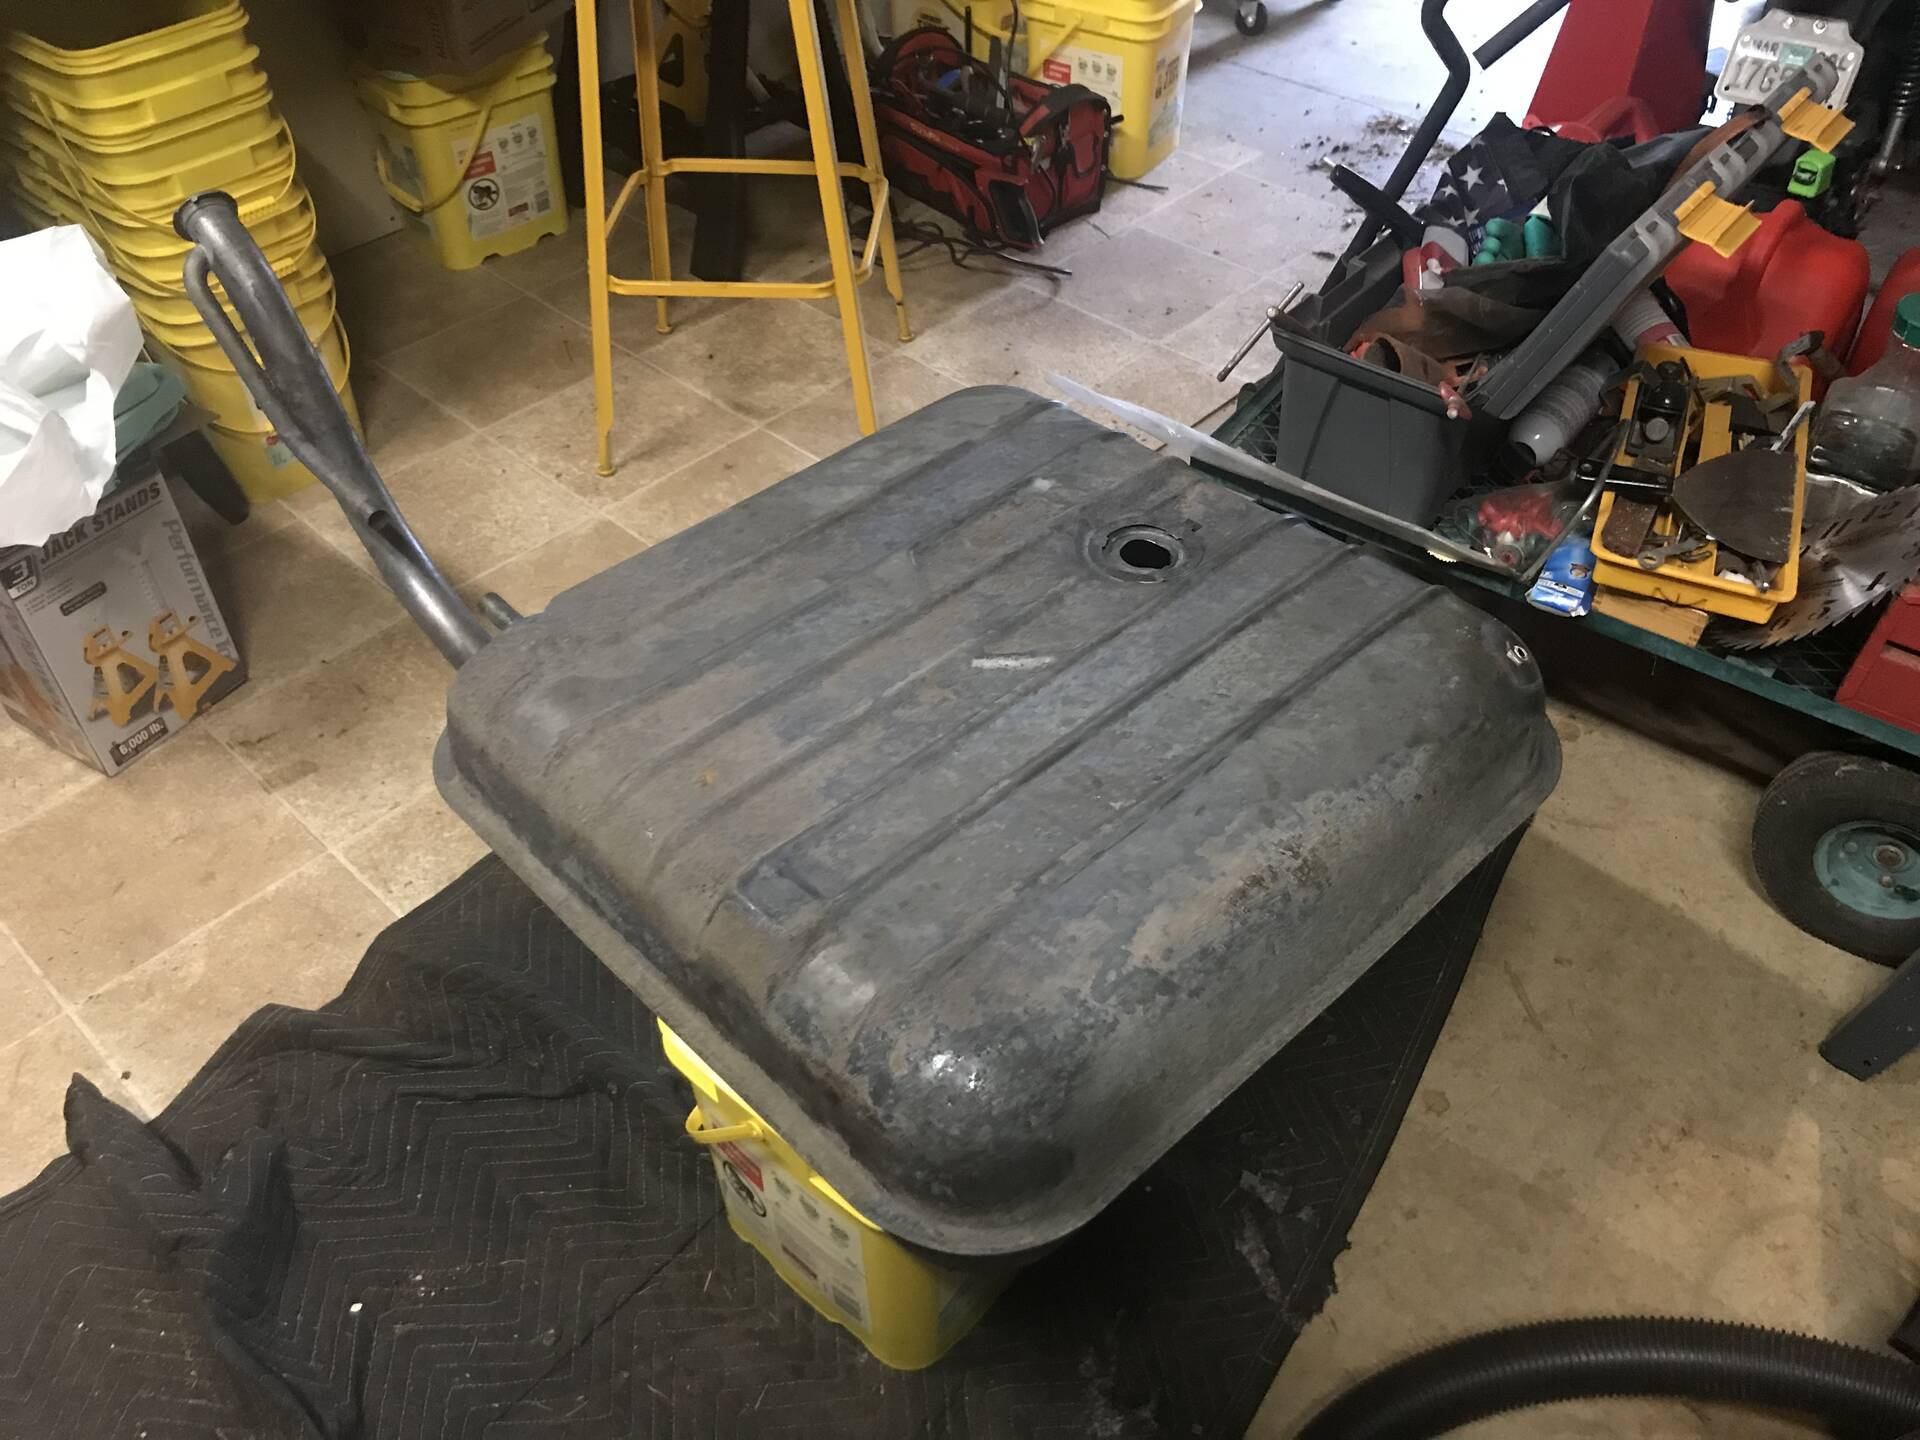 NewDrainPlug.jpg (134.89 KB) NewDrainPlug.jpg (134.89 KB)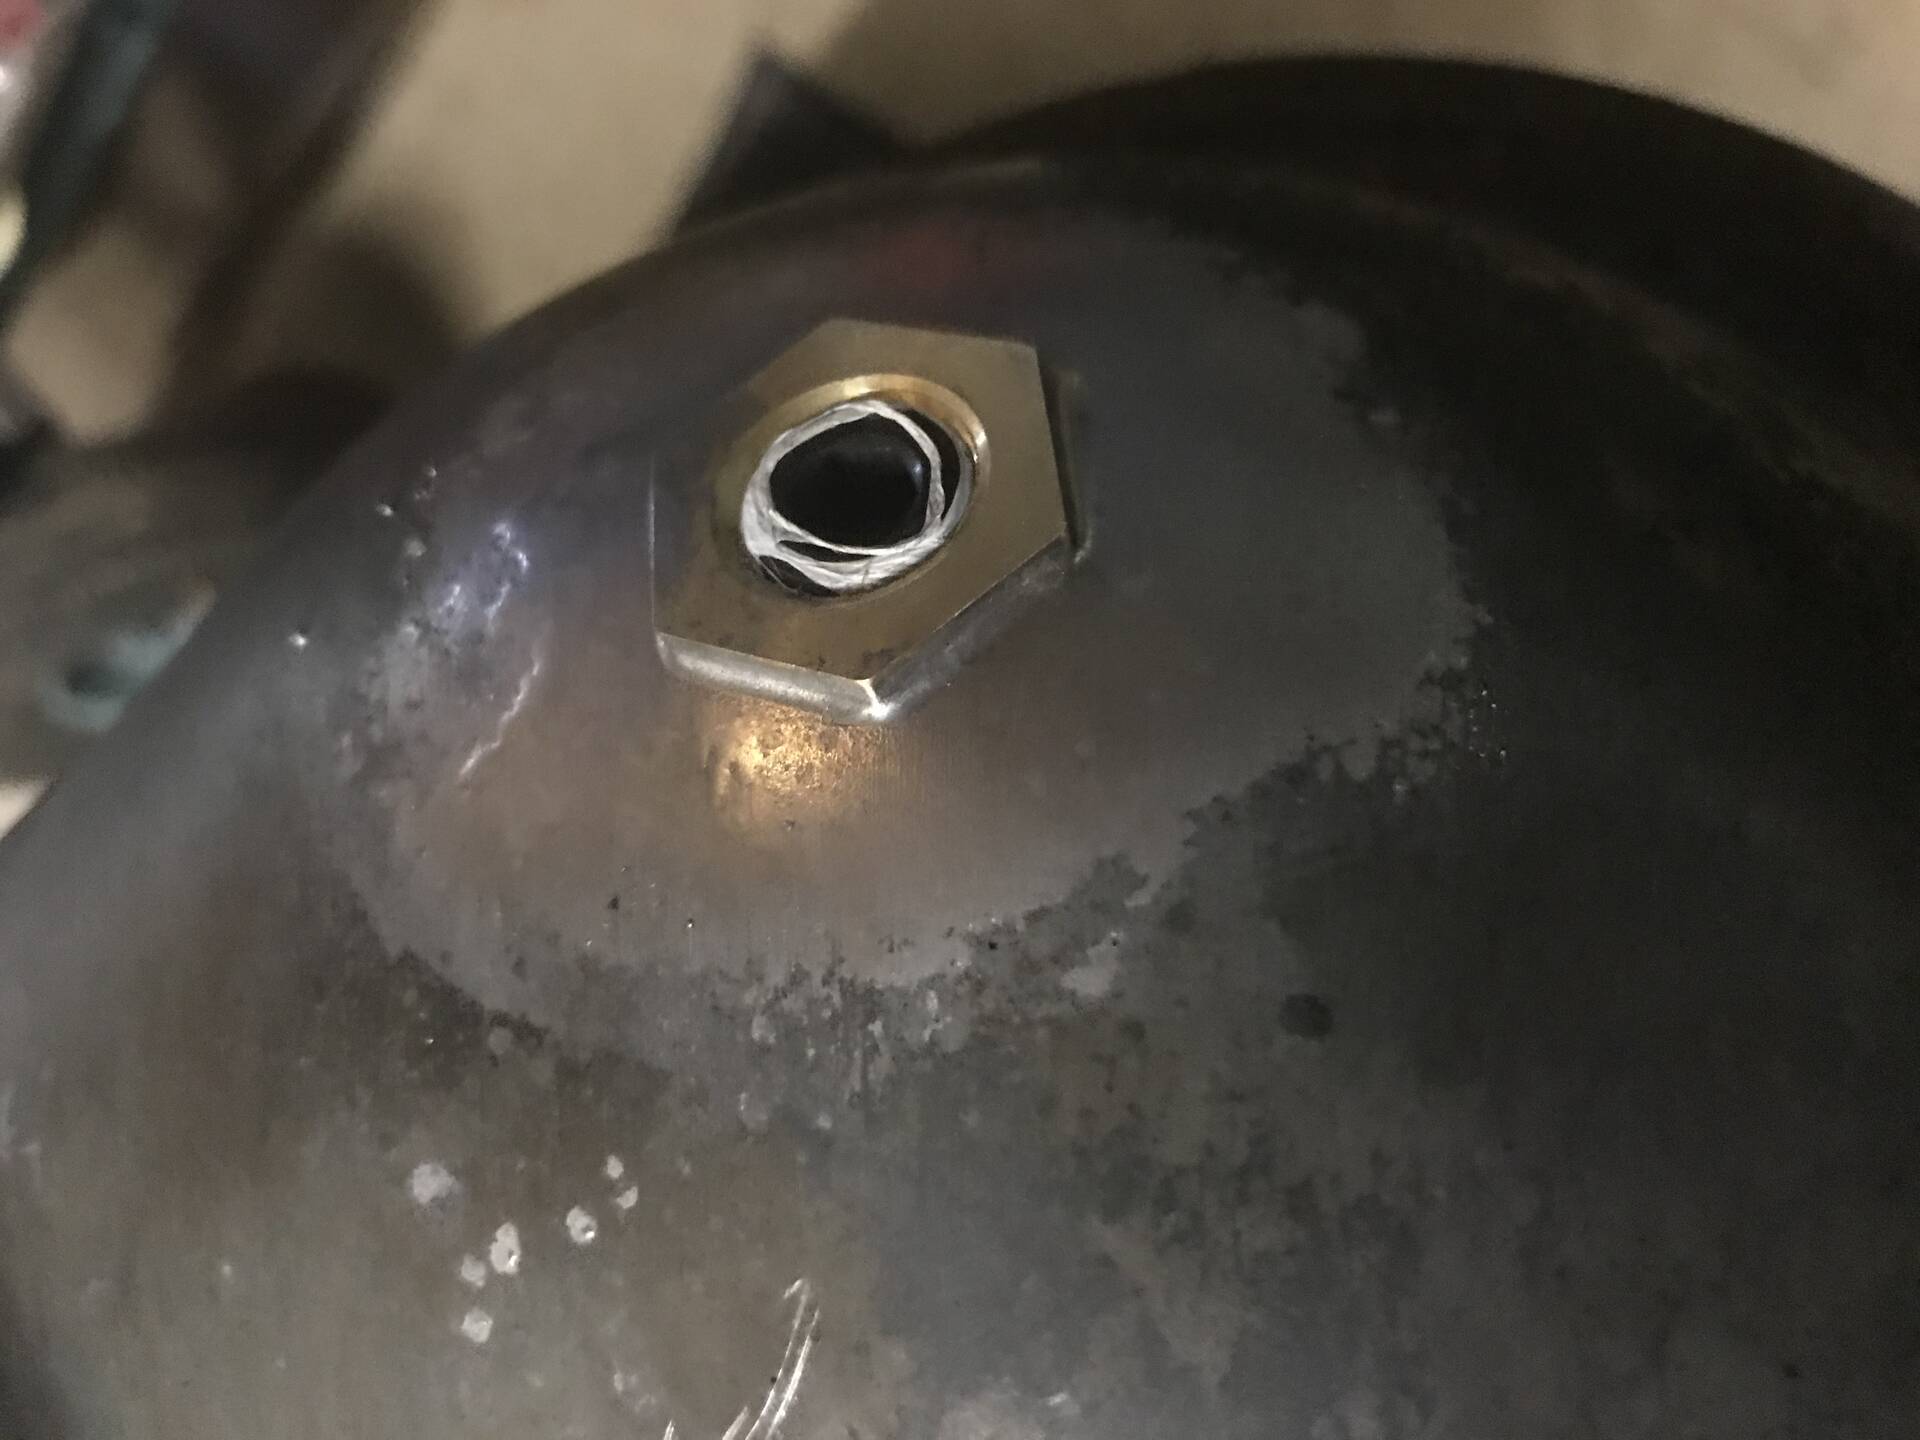 BTVTopPlateOff.jpg (216.63 KB) BTVTopPlateOff.jpg (216.63 KB)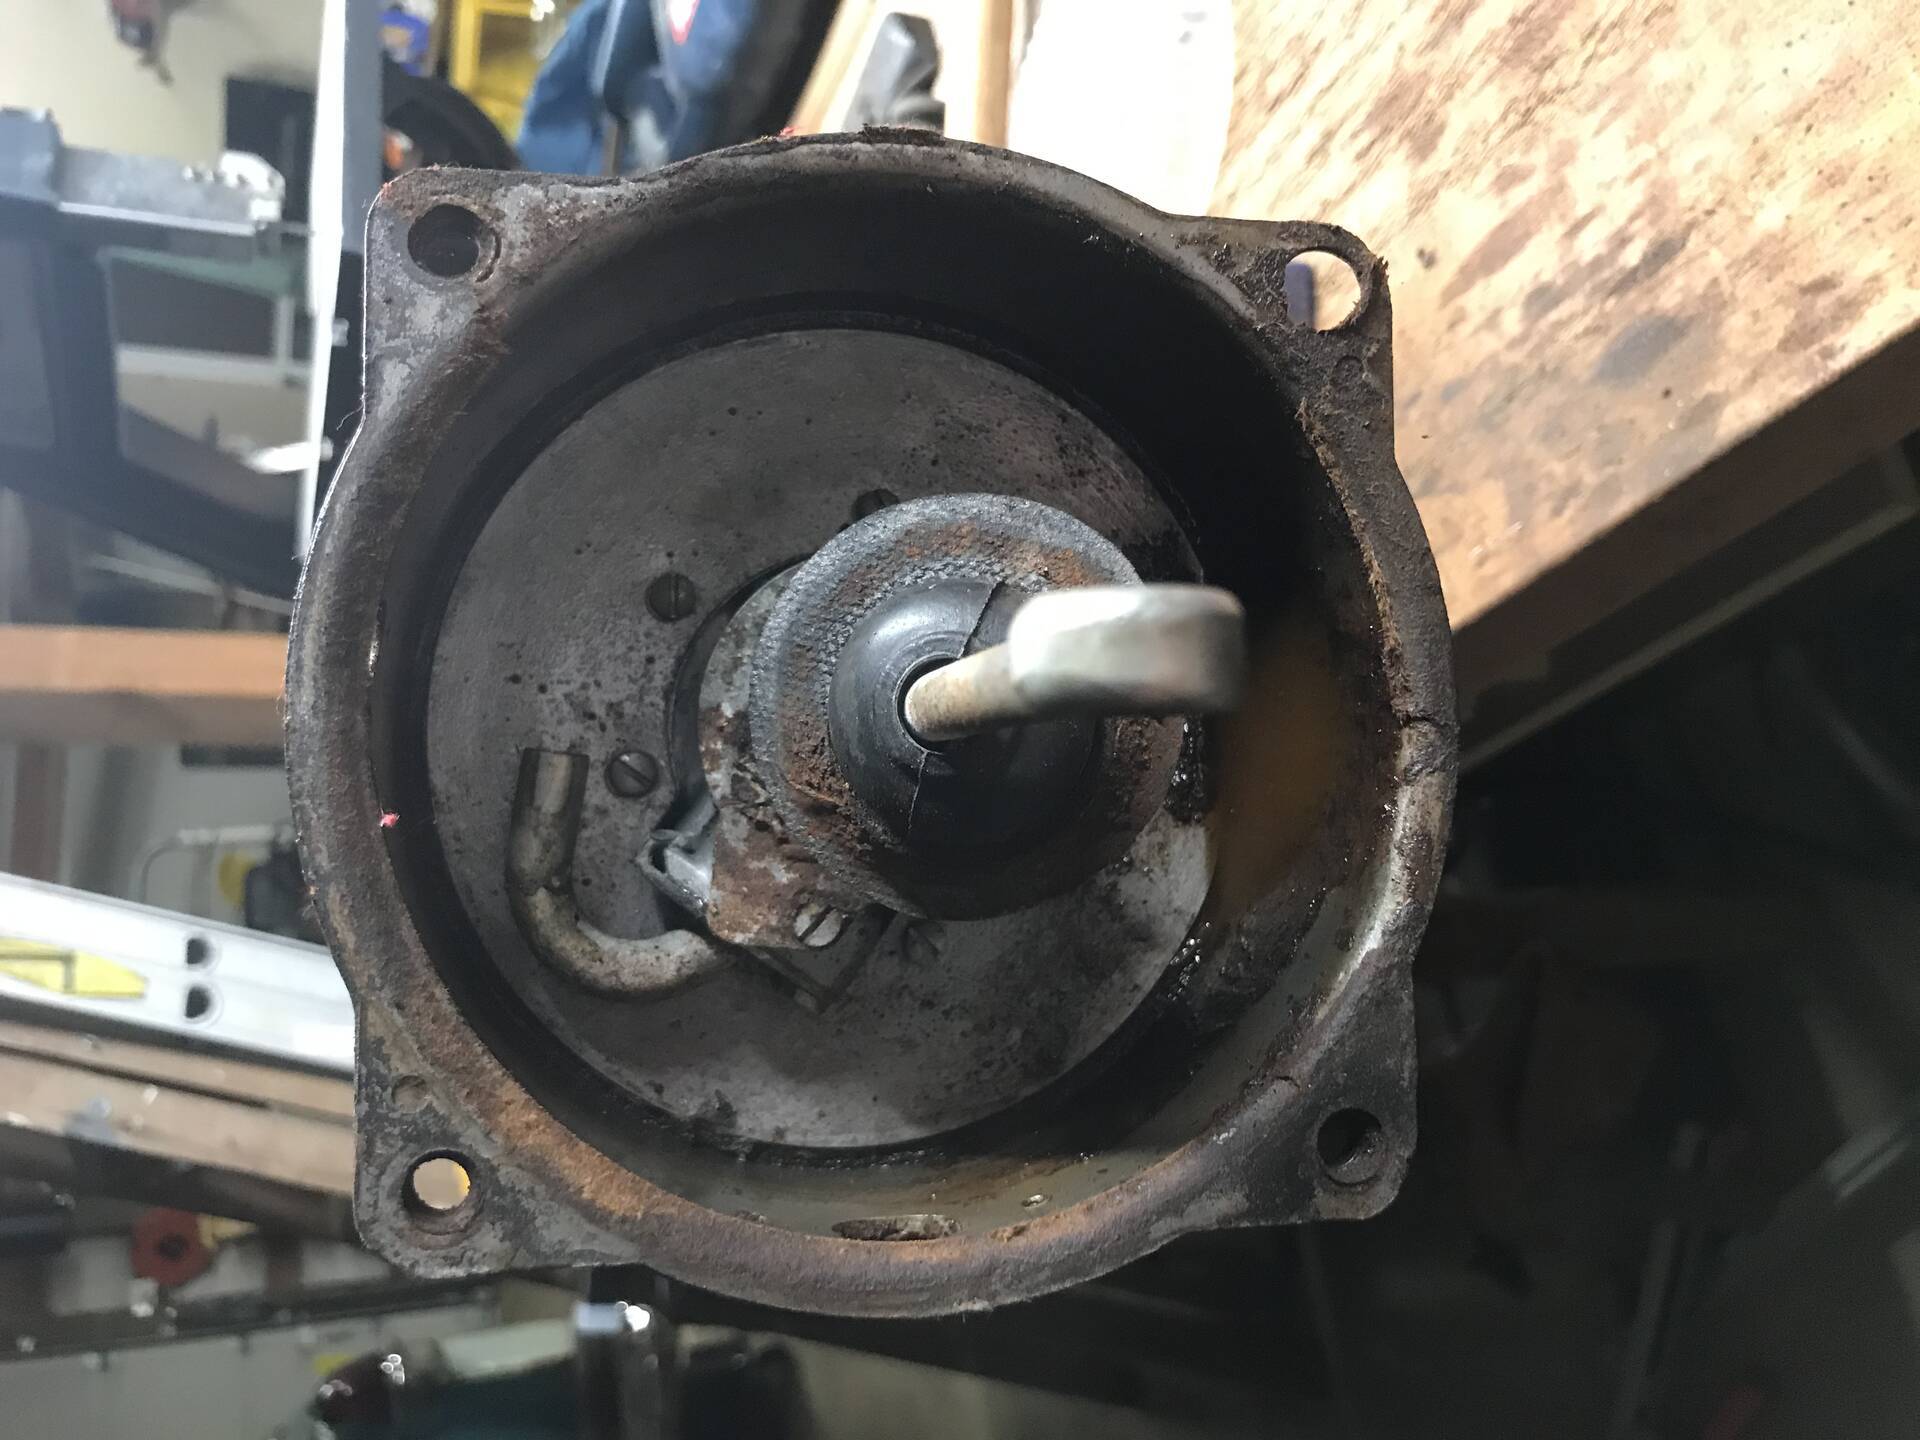 BTWCleanedItems.jpg (380.69 KB) BTWCleanedItems.jpg (380.69 KB)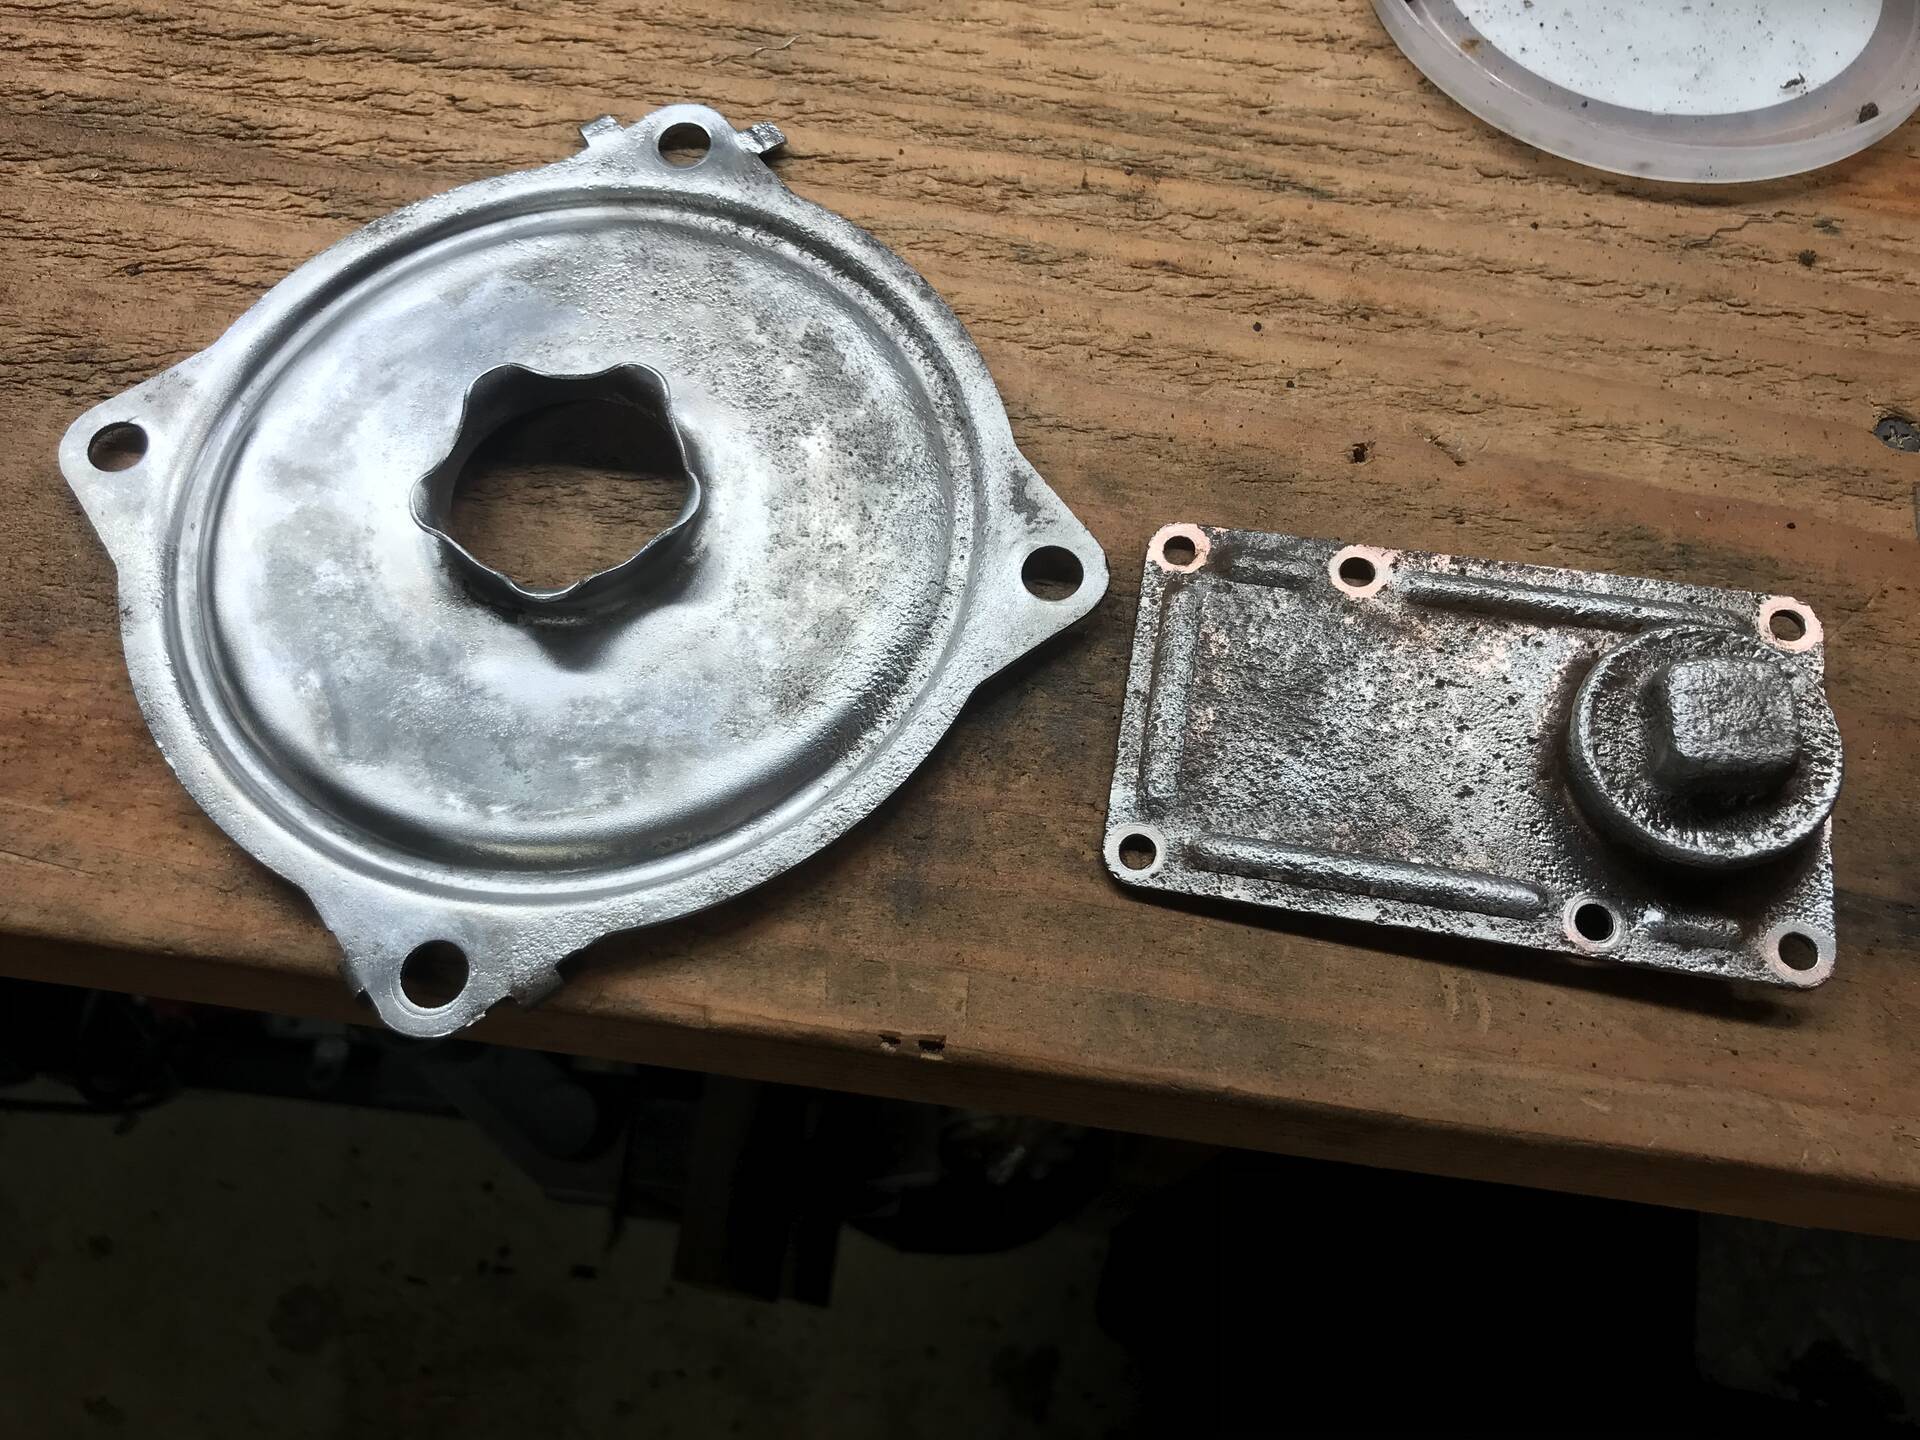 BTVBrokenSpring.jpg (441.53 KB) BTVBrokenSpring.jpg (441.53 KB)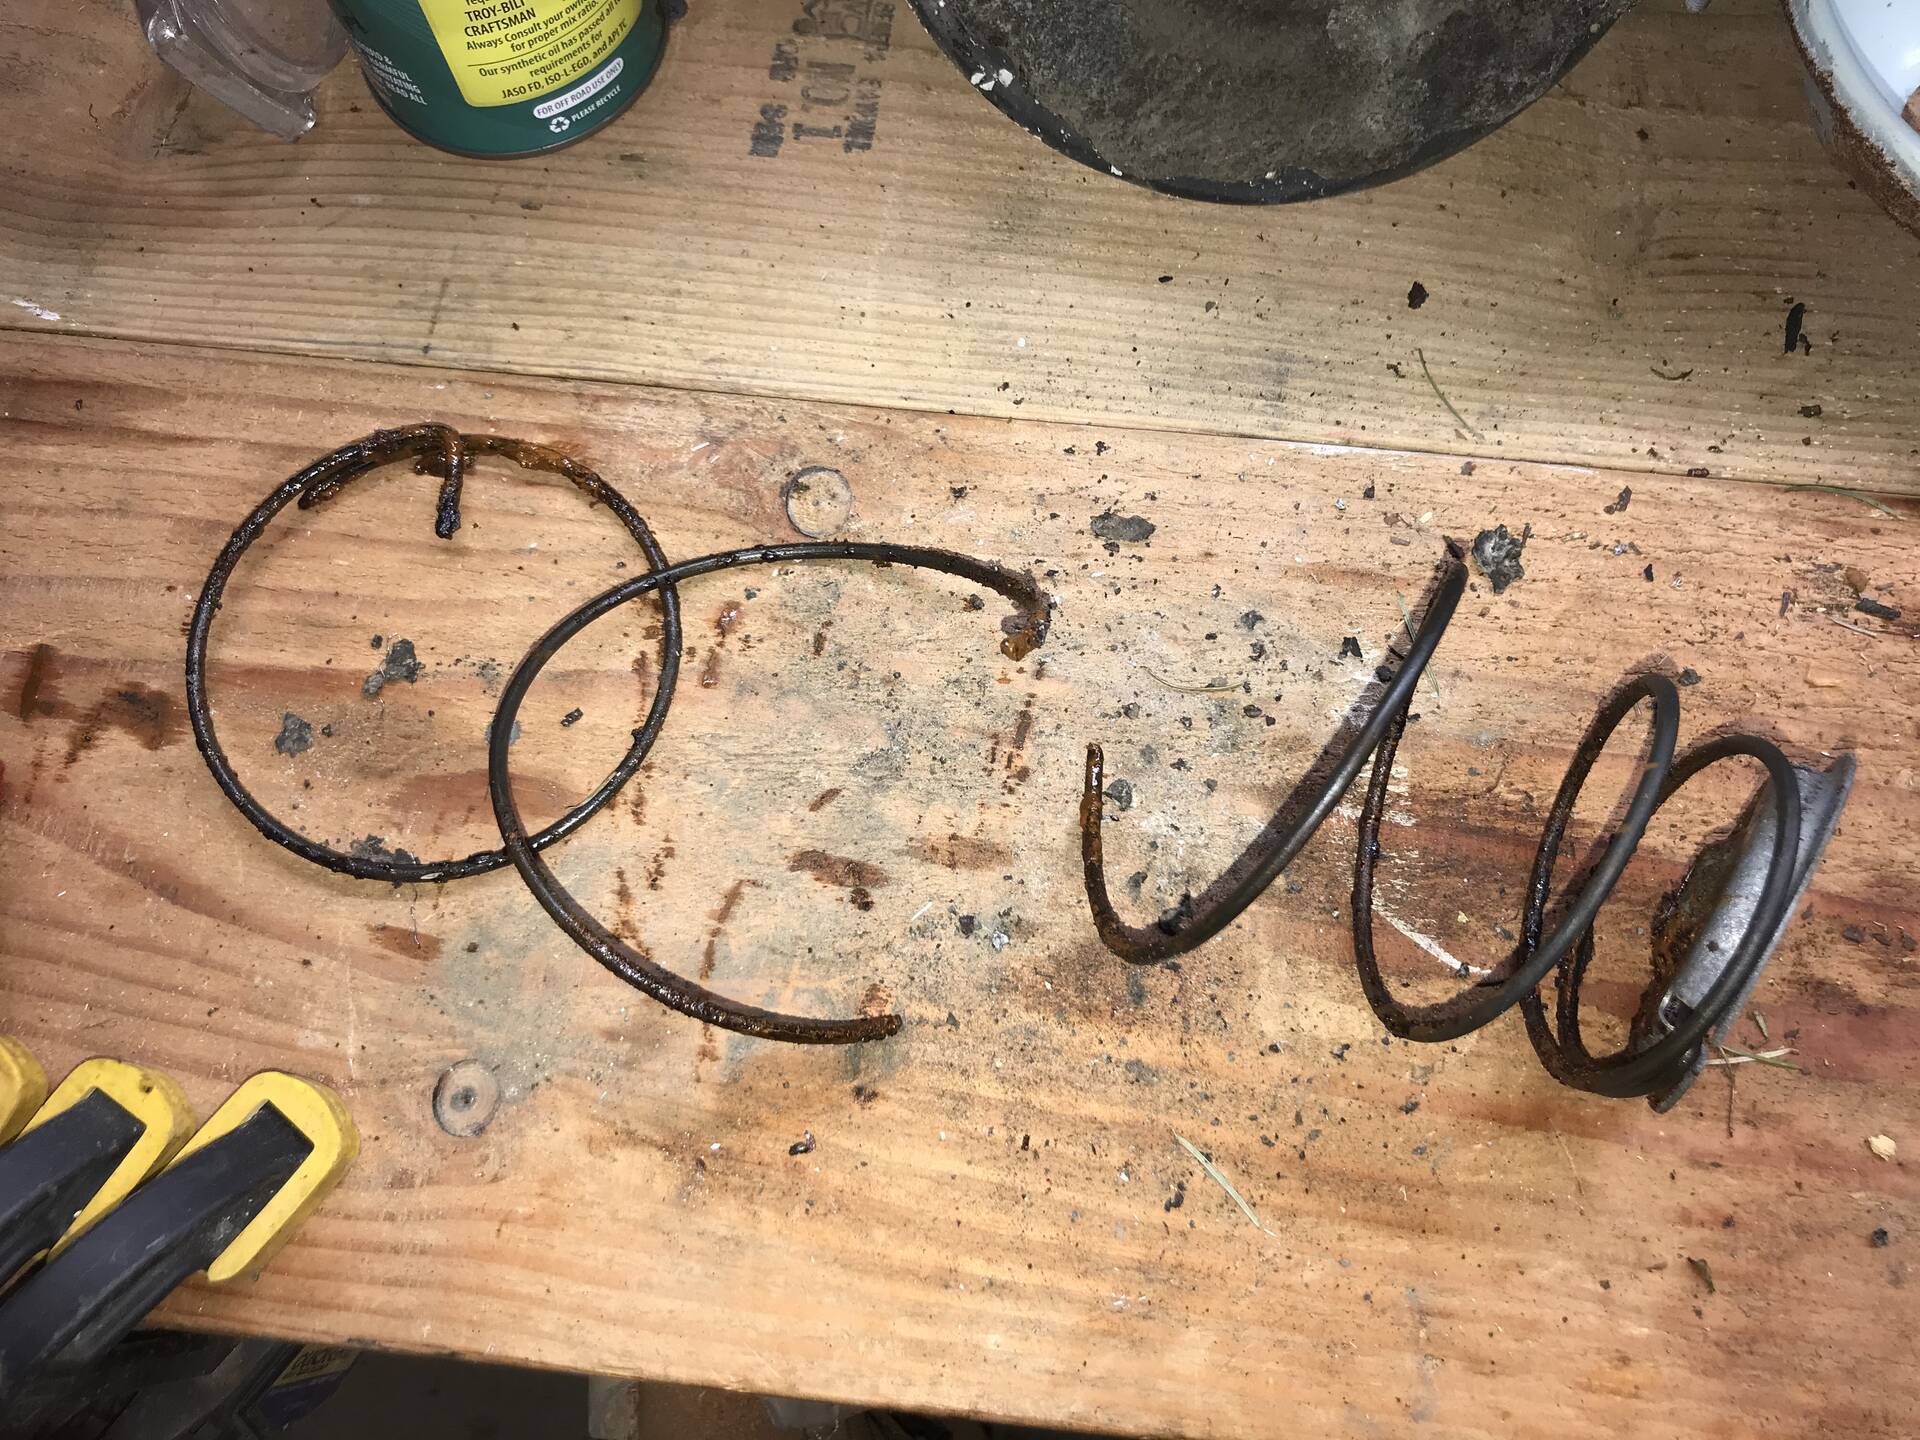 BTVPiston.jpg (241.04 KB) BTVPiston.jpg (241.04 KB)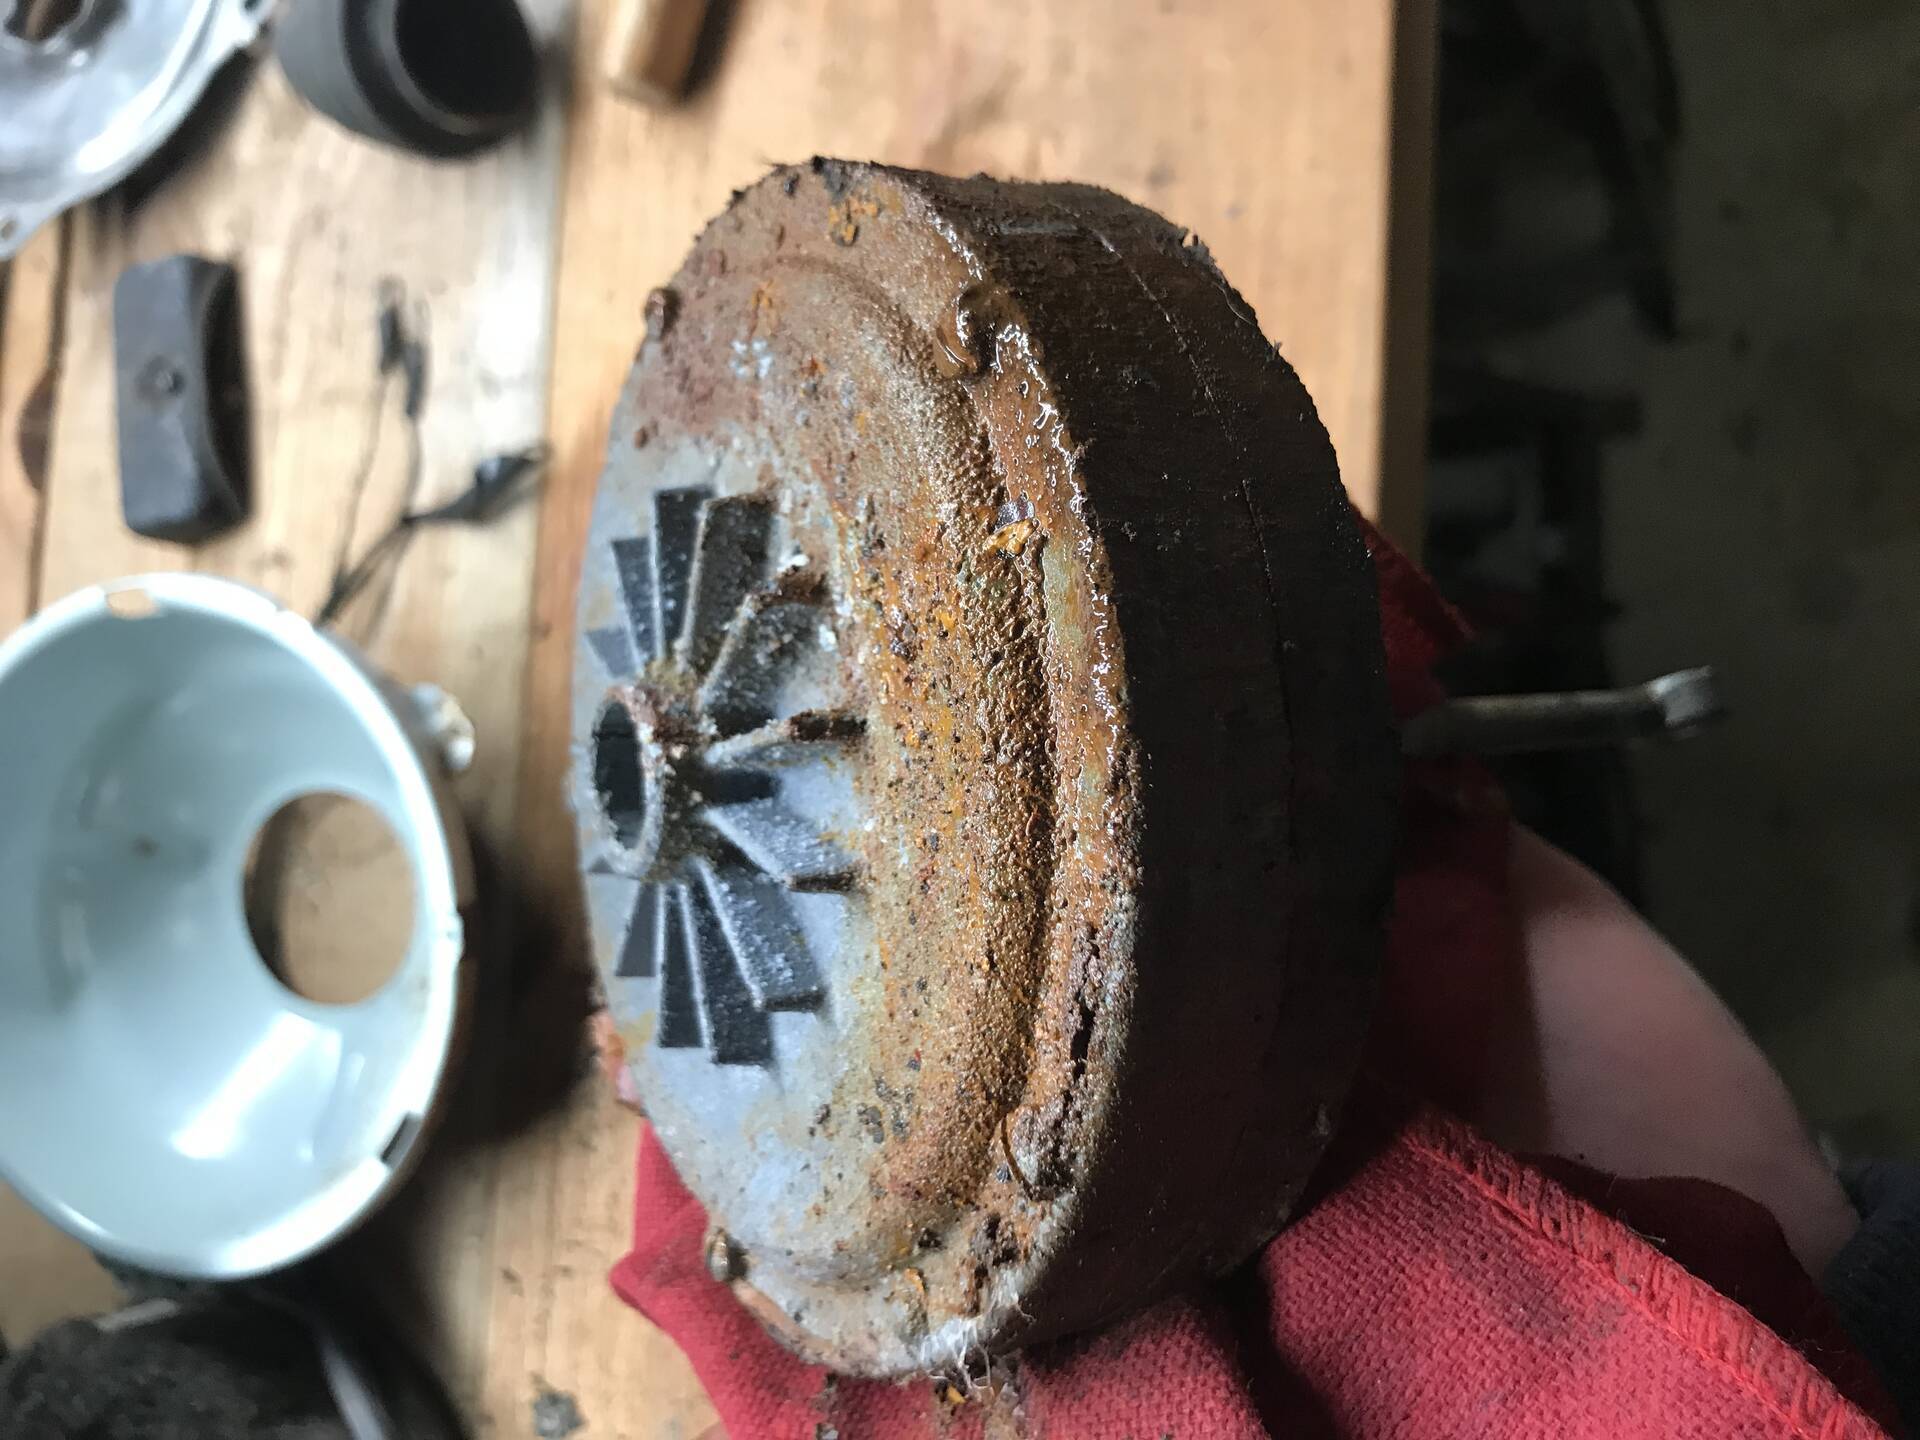 BTVPistonSide.jpg (365.67 KB) BTVPistonSide.jpg (365.67 KB)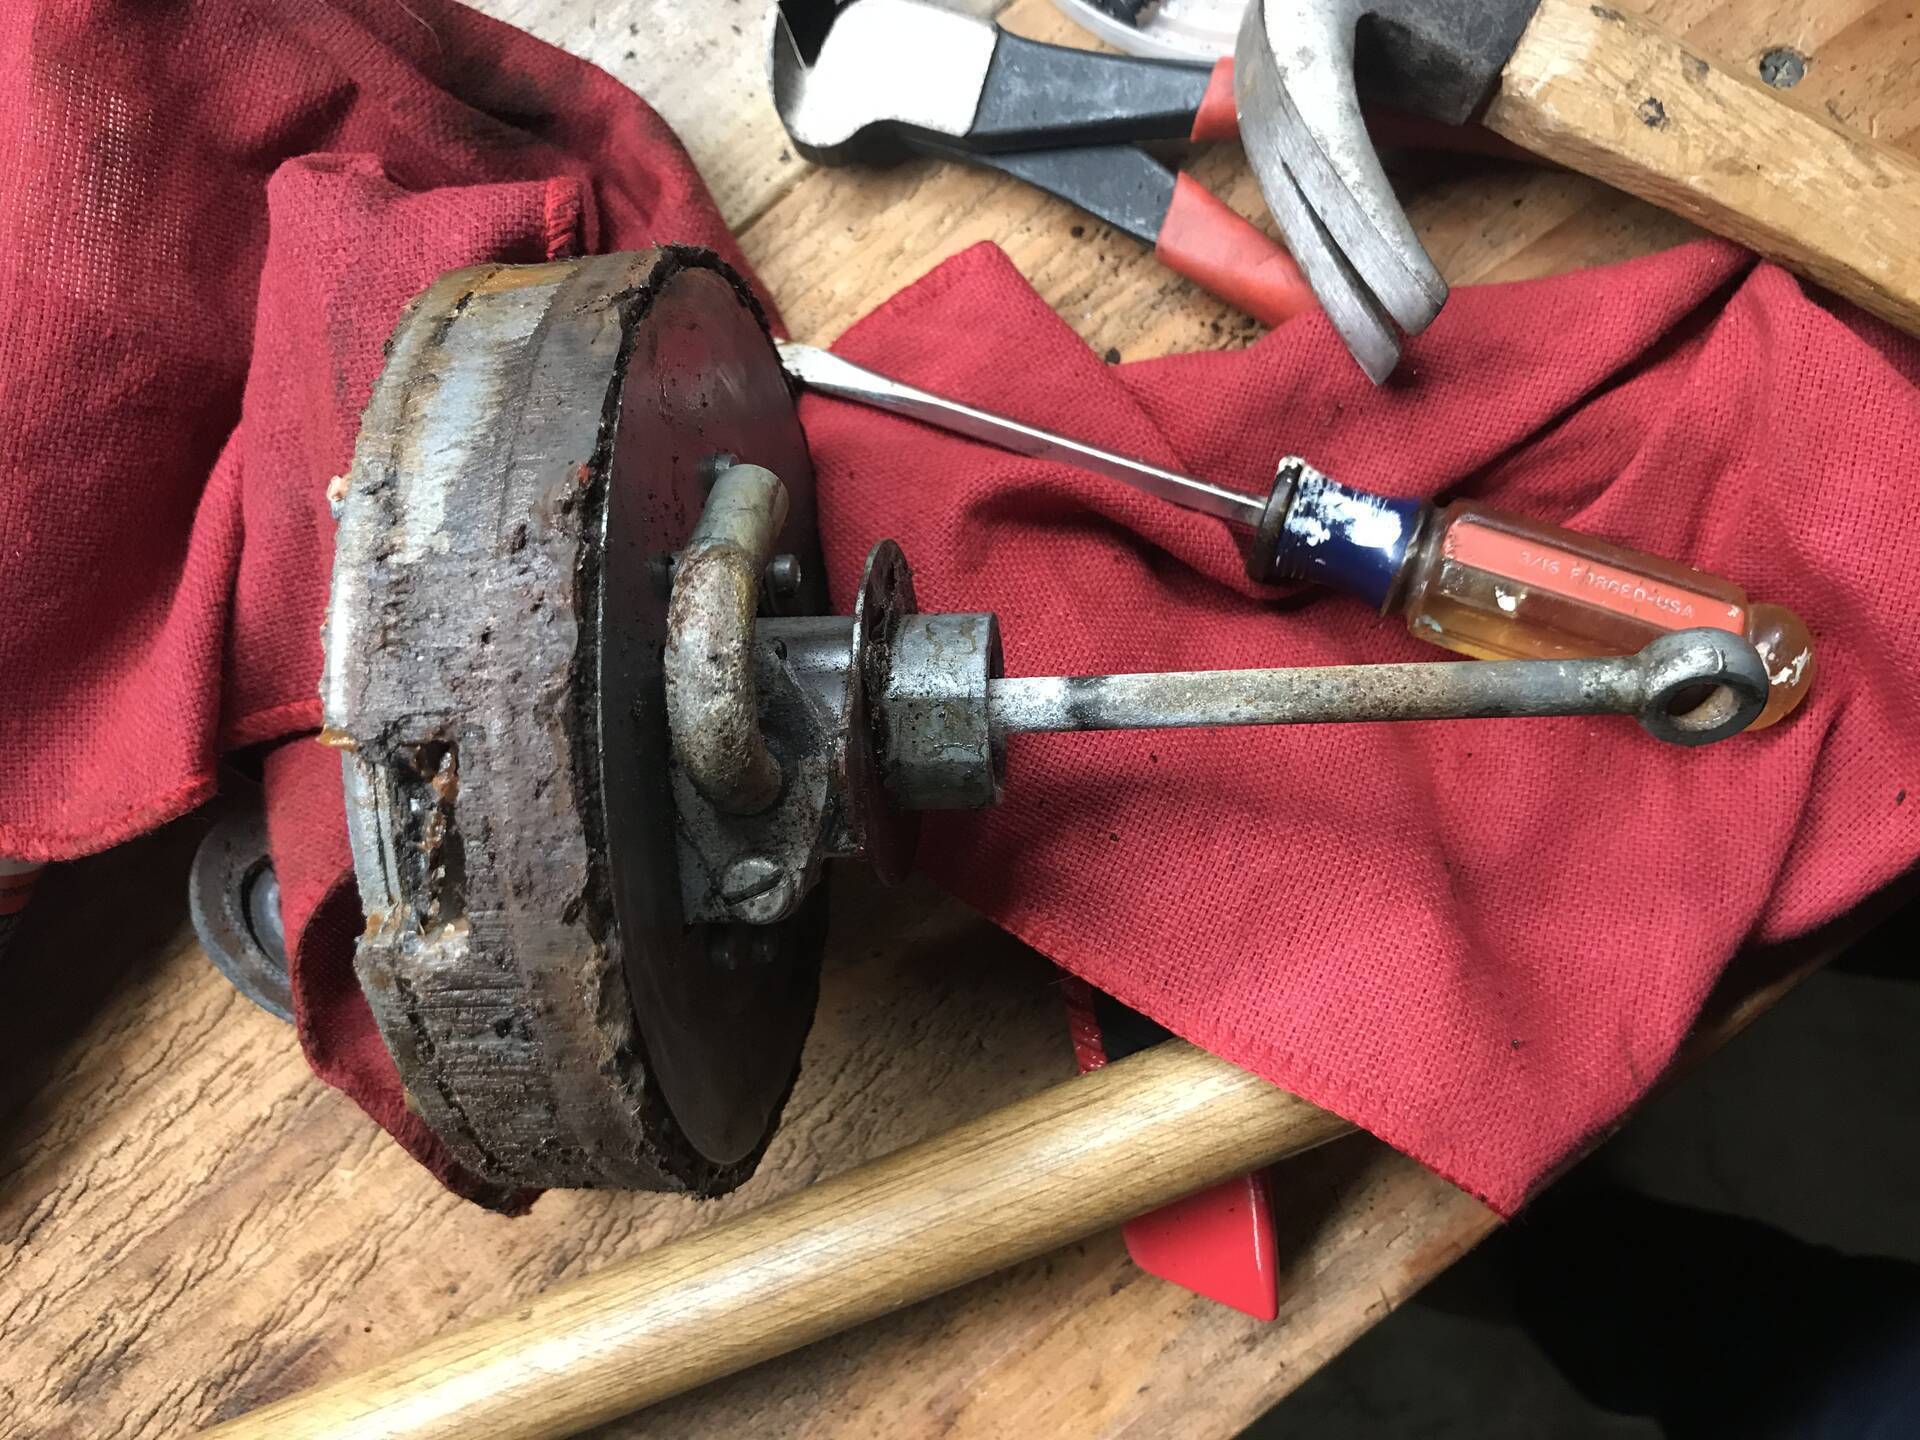
Posted on: 2021/4/25 19:54
|
|||
|
- Anthony
1955 Packard Clipper Custom 1951 Kaiser Deluxe |
||||
|
||||
|
Re: Cortes121
|
||||
|---|---|---|---|---|
|
Home away from home

|
You need to get a sealer into that tank or it will flash rust above the fuel level on any day when the temperature drops and condensation forms.
Posted on: 2021/4/26 5:41
|
|||
|
||||
|
Re: Cortes121
|
||||
|---|---|---|---|---|
|
Home away from home

|
Does the flash rust also happen on a new tank? I've never had my tank all the way full and now I'm wondering if I should.
-Kevin
Posted on: 2021/4/26 8:40
|
|||
|
||||


