|
Re: Replacing Cowl Vent Gasket
|
||||
|---|---|---|---|---|
|
Home away from home

|
I don't know about your specific car, but generally you can unfasten the "lid and scoop" from the levers under the dash and lift it out.
Posted on: 2023/10/4 12:58
|
|||
|
||||
|
Re: Replacing Cowl Vent Gasket
|
||||
|---|---|---|---|---|
|
Home away from home

|
I have a 37 but I suspect it is a similar assembly method. The gasket went in quite easily with the vent off.
Mine has two #10 screws/washer/nuts holding the vent to the pivot arm under the dash. (Not a great place to reach and could surely do with cage nuts instead but it is only two, thank you Packard.) I have attached two images, they are heavily cropped from images of other subjects so are a bit grainy and small but show the two holes in the vent plate and the one bolt/nut/washer fastener under the dash after assembly. Attach file:  Vent.JPG (33.92 KB) Vent.JPG (33.92 KB)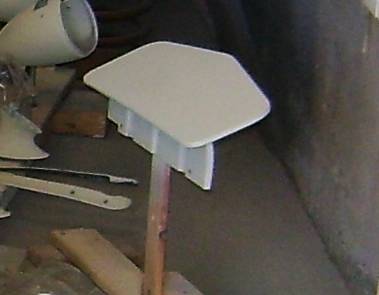 Vent fastener.JPG (116.14 KB) Vent fastener.JPG (116.14 KB)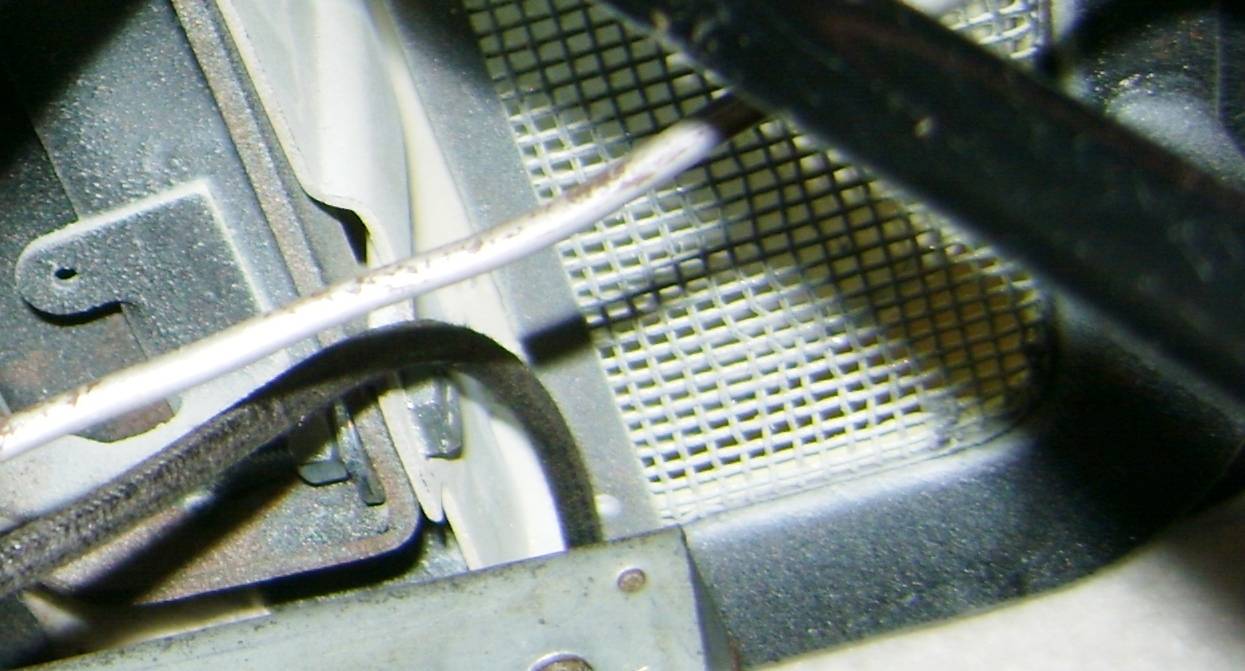
Posted on: 2023/10/4 13:37
|
|||
|
||||
|
Re: Replacing Cowl Vent Gasket
|
||||
|---|---|---|---|---|
|
Home away from home
|
Thanks. I hadn't yet done the dash floorboard slide check so this is super helpful.
Posted on: 2023/10/4 15:55
|
|||
|
||||
|
Re: Replacing Cowl Vent Gasket
|
||||
|---|---|---|---|---|
|
Home away from home
|
Any tips on getting the hardened/melted rubber off here?
Also, what should be used to bind the new rubber down? Attach file: PXL_20231007_213748386.jpg (335.17 KB)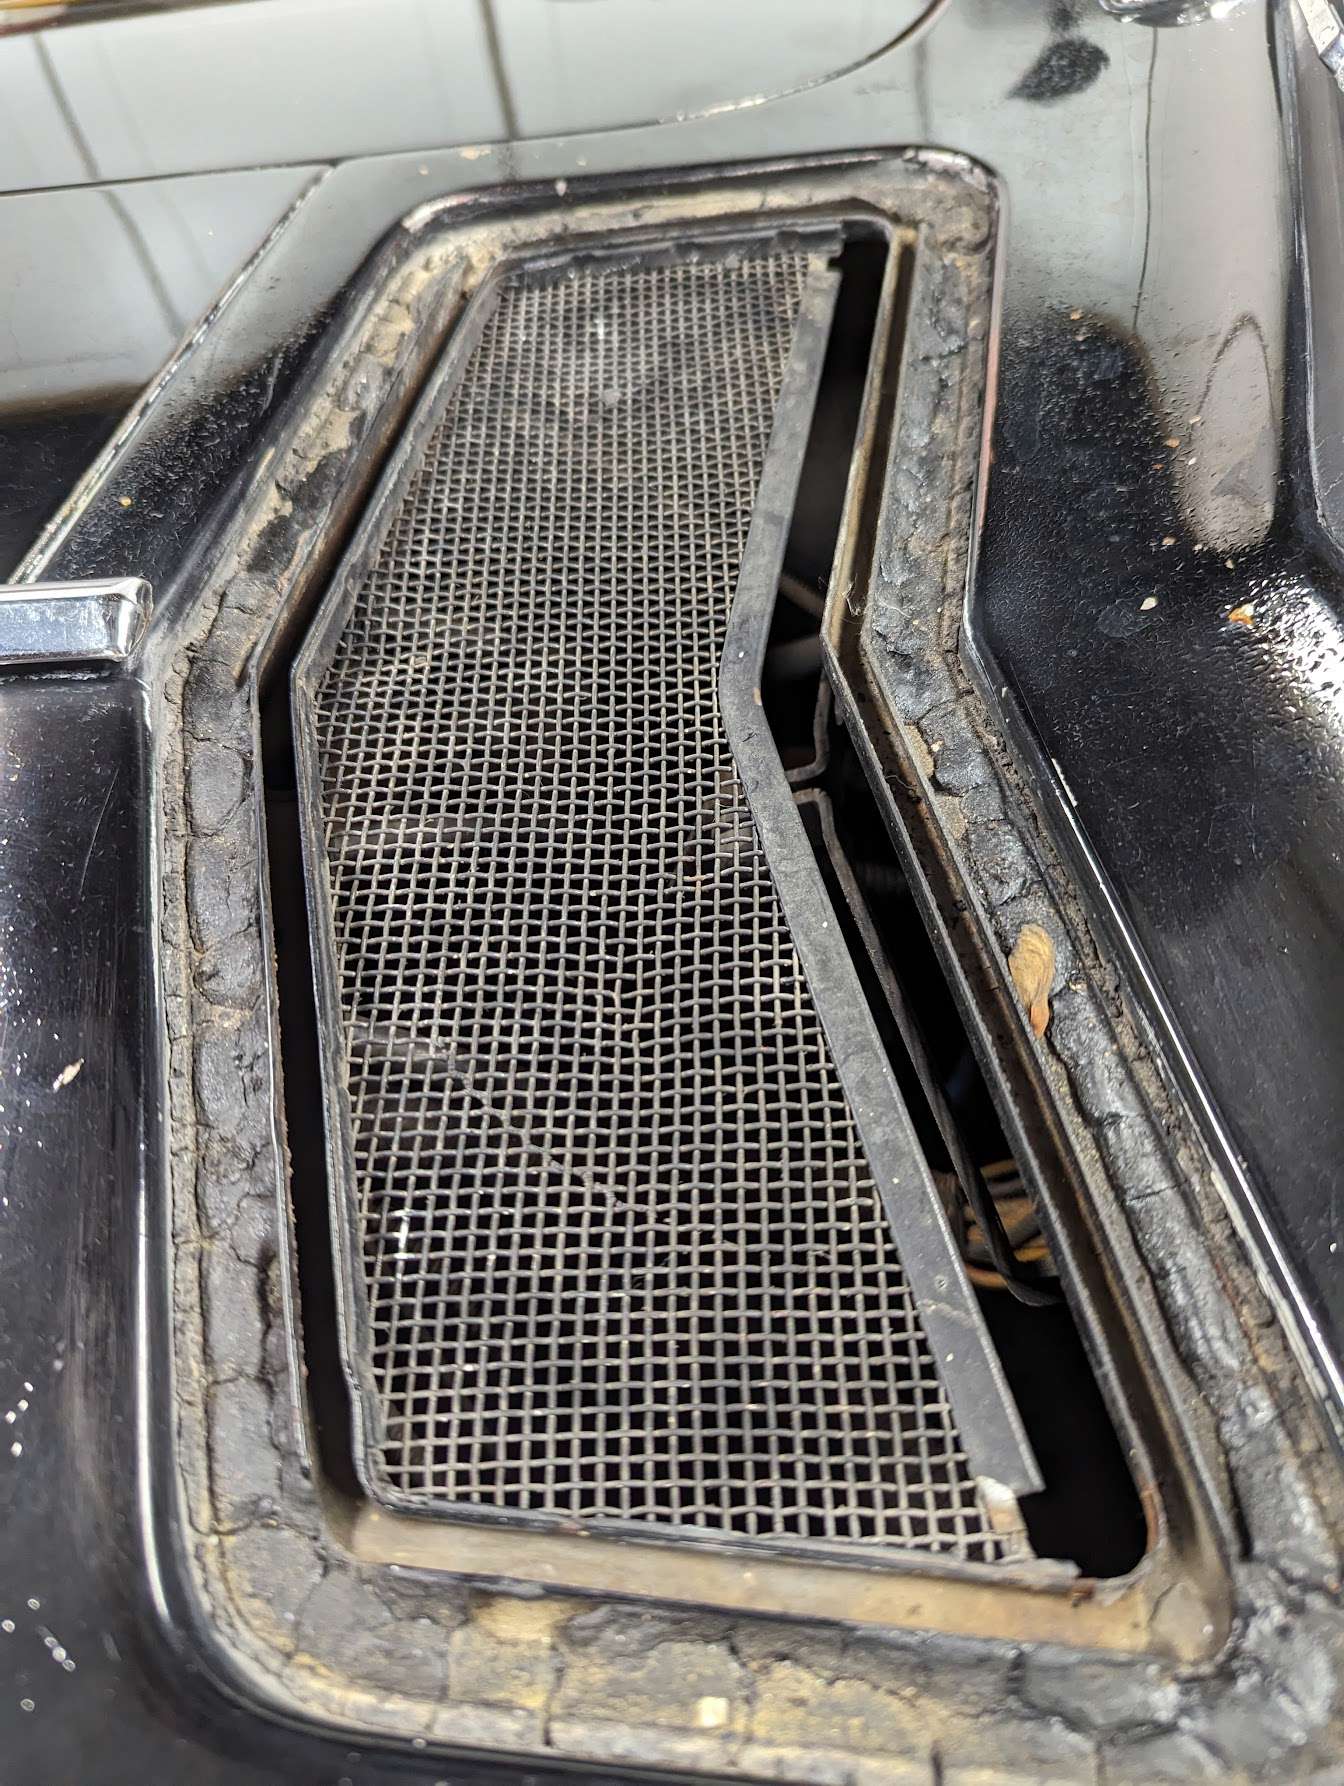
Posted on: 2023/10/7 19:46
|
|||
|
||||
|
Re: Replacing Cowl Vent Gasket
|
||||
|---|---|---|---|---|
|
Home away from home
|
My 39 turned out to have 4 holding it down. Thanks.
Posted on: 2023/10/7 19:49
|
|||
|
||||
|
Re: Replacing Cowl Vent Gasket
|
||||
|---|---|---|---|---|
|
Home away from home

|
You could try putting gasoline in the trough and letting it soak. It should curl up and soften the rubber. So you can push it out.
Posted on: 2023/10/7 20:28
|
|||
|
||||
|
Re: Replacing Cowl Vent Gasket
|
||||
|---|---|---|---|---|
|
Forum Ambassador

|
You can't do better than 3M's Weatherstrip Adhesive to retain the new gasket.
Posted on: 2023/10/7 20:28
|
|||
|
||||
|
Re: Replacing Cowl Vent Gasket
|
||||
|---|---|---|---|---|
|
Home away from home
|
I think it would be a good idea to take your time here too. It looks like getting the old gasket out will leave a good portion of raw steel exposed. Tape off the area not affected on the cowl first. Clean and sand the grooved area as smooth as practical. Then coat using metal etching primer, then an epoxy primer and then a top coat of spray paint. The colour only needs to be close as it is mostly blinded by the gasket and its vent.
This will properly seal up the gasket well's surface. I know this all adds days to the project but doing it right is never a waste of time. Once dry it will also allow a good surface for the adhesive to work at its best to hold the gasket in place and not allow any rust blemish to occur later on. No sense getting the new gasket in only to have issues later down the road as it is an area water lays in and takes a long time to dry, even washing the car introduces it as you will not likely be taking her out in the rain. Note too there are two drain pipes that help shed the water and these drain through the firewall with flexible hoses. With the gasket being as it is, they are likely rotted and embrittled too so you will likely need to have new hoses put on. Have fun! Bob J.
Posted on: 2023/10/7 22:33
|
|||
|
||||
|
Re: Replacing Cowl Vent Gasket
|
||||
|---|---|---|---|---|
|
Home away from home

|
An old glass shop guy here used to put waterless, GoJo type hand cleaner on old gaskets to soften them. He'd smear on hand cleaner for a couple of days and the lanolin would soften the old rubber.
Posted on: 2023/10/8 9:18
|
|||
|
||||


