|
Re: Wade's Workshop
|
||||
|---|---|---|---|---|
|
Home away from home
|
Congrats on the new camera, Mal.
We joke about "cleaning" parts but at times I enjoy it. Taking a grime covered thing and making it whole again gives a sense of accomplishment to me. Attach file:  (207.01 KB) (207.01 KB)
Posted on: 2009/5/18 5:14
|
|||
|
Carpe Diem!!
 Registry Registry
|
||||
|
||||
|
Re: Wade's Workshop
|
||||
|---|---|---|---|---|
|
Home away from home
|
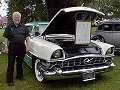
Above, Wade and Mal without grease and Gina looking good as always.
Posted on: 2009/5/18 5:18
|
|||
|
Carpe Diem!!
Registry
|
||||
|
||||
|
Re: Wade's Workshop
|
||||
|---|---|---|---|---|
|
Forum Ambassador
|
Wade is a snappy dresser. I particularly like the watch chain. Mal is like me - too casual to give a damn.
Posted on: 2009/5/18 16:22
|
|||
|
||||
|
Re: Wade's Workshop
|
||||
|---|---|---|---|---|
|
Forum Ambassador

|
Tuesday 19th May 2009
Arrived at workshop to find a tin of POR-15 had already arrived by courier, so no excuses this time. Wade cleaned up the steering box and column while I quickly cleaned some more bolts to paint. While Wade painted the steering I started on one side of the windchimes setup. Then when Wade had finished painting the steering he started on the other side of the windchimes. Only one minor drama when I tipped over the paint container, a round plastic throwaway, but fortunately only lost a little. Of course, seeing I was wielding a brush ended up with paint on me while Wade, snappy dresser that he is, avoided that! Painting finished I turned to cleaning still more parts on the wire wheel and using the blasting cabinet as required. Will Marine Clean and Metal Ready those tomorrow after todays painting has dried and the windchime apparatus once again becomes available. While I was doing that Wade was working on getting the boom gate to the rooftop carpark working. Last night he took home a water damaged circuit board from the controller and repaired it. Today he replaced the cable between the control box and the card reader post. Still has to refit the post and the new card reader then the boom gate will be back in business. Wade also removed the clutch shaft bearing cover, made a new gasket and reinstalled it. While we in the midst of painting Tony, Noel's mate, arrived. Tony, a retired panelbeater, had made a new metal water distribution plate to go inside the side water jacket cover. Was checking with Wade to see that it was OK, and it sure was, looks real good. He'll be back with the finished product later in the week, all going well. Attach file: (29.81 KB)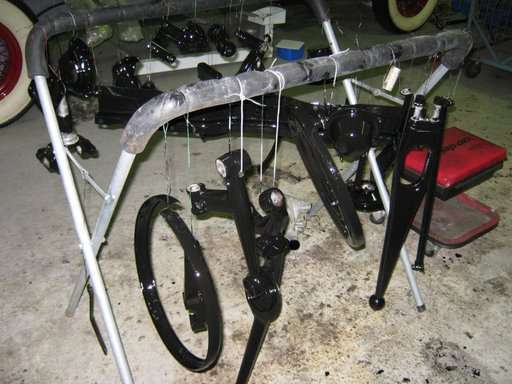 (24.10 KB) (24.10 KB)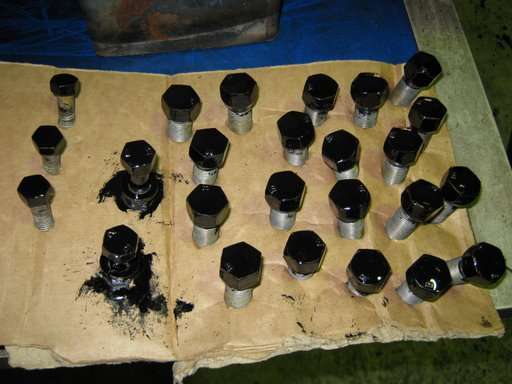 (15.64 KB) (15.64 KB)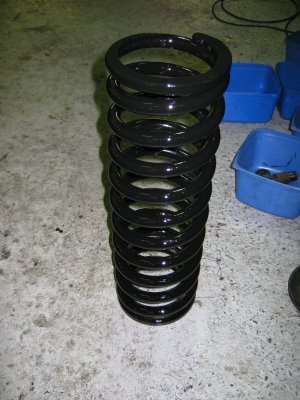 (17.96 KB) (17.96 KB)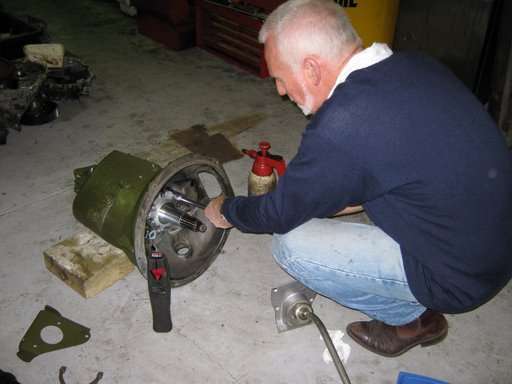
Posted on: 2009/5/19 4:48
|
|||
|
Mal
/o[]o\ ====  Bowral, Southern Highlands of NSW, Australia "Out of chaos comes order" - Nietzsche. 1938 Eight Touring Sedan - SOLD 1941 One-Twenty Club Coupe - SOLD 1948 Super Eight Limo, chassis RHD - SOLD 1950 Eight Touring Sedan - SOLD What's this?  Put your Packard in the Packard Vehicle Registry! Here's how! Any questions - PM or email me at ozstatman@gmail.com |
||||
|
||||
|
Re: Wade's Workshop
|
||||
|---|---|---|---|---|
|
Forum Ambassador
|
Wednesday 20th May 2009
After a morning with the granddaughters arrived at the workshop to find Wade had disassembled the windchimes structure and re-situated the painted parts. He'd also finished the re-assembly of the trans but the gear shift will come off again to 1) make a gasket for it and 2) so it can be put back in BigRed, a little difficult to do so with it in place. First up was re-installing the steering box and shaft with Wade doing all the work of positioning and lifting while I sat under the fender and pushed the securing bolts through the frame. Then while Wade was putting the pedals back together I was blasting the insides of the hubcaps of rust(the outsides are quite good) prior to POR-15'ing. During that exercise I came back over to Wade a couple of times and co-incidentally was able to assist in 1) pushing the new roller bearings back into the clutch pedal and 2) holding the new machined pedal shaft by it's custom flats so it wouldn't turn while Wade tightened the large nut holding it to the chassis. Marine Cleaned another lot of parts in preparation for Metal Ready and POR-15 tomorrow. Quote: acolds wrote:......I think I know why Wade has his hands in his pockets.......he has the ever present dirty finger nail look associated with people who work on old cars. Its a badge of honor only given to hands on workers. Al, You're right. it is a "badge of honour" as well as an occupational hazard of working on old cars. Attach file: (12.18 KB)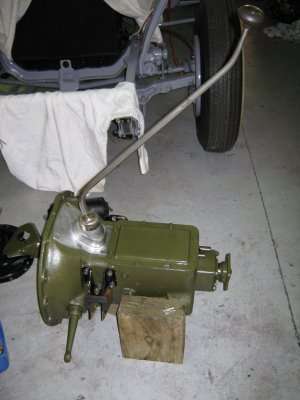 (28.99 KB) (28.99 KB)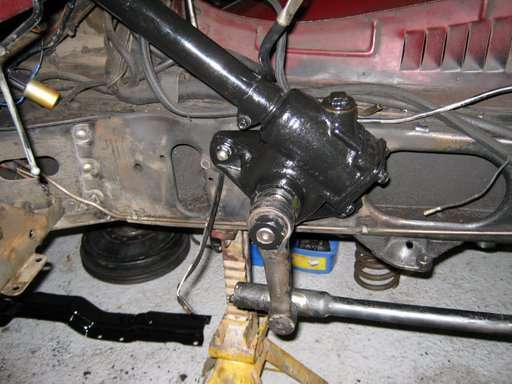 (30.25 KB) (30.25 KB)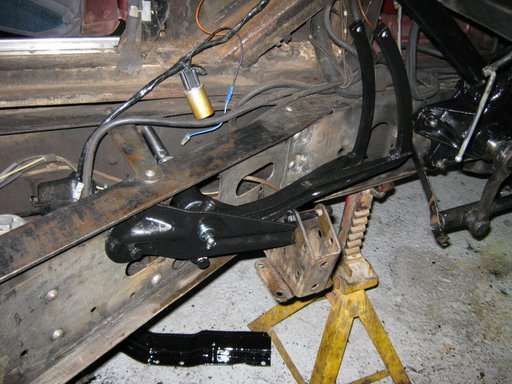 (13.54 KB) (13.54 KB)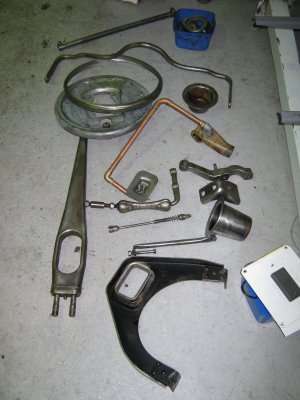 (27.18 KB) (27.18 KB) (18.71 KB) (18.71 KB)
Posted on: 2009/5/20 15:32
|
|||
|
Mal
/o[]o\ ==== Bowral, Southern Highlands of NSW, Australia "Out of chaos comes order" - Nietzsche. 1938 Eight Touring Sedan - SOLD 1941 One-Twenty Club Coupe - SOLD 1948 Super Eight Limo, chassis RHD - SOLD 1950 Eight Touring Sedan - SOLD What's this? Put your Packard in the Packard Vehicle Registry! Here's how! Any questions - PM or email me at ozstatman@gmail.com |
||||
|
||||
|
Re: Wade's Workshop
|
||||
|---|---|---|---|---|
|
Forum Ambassador
|
Thursday 21st May 2009
Arrived at the workshop to find Wade in discussion with John about the roller rockers. Showing John the differences between the spare rockers and those in Big Red's engine. Reason being Wade had called Egge about 8:00am Sydney time(Approx 4:00pm their time on the 20th) and was informed that they no longer stocked the rollers! Looks like this will necessitate a Plan B along the lines of adapting spare rollers, using stainless washers as spacers and replacing all the "collars" like the ones that came adrift to prevent future problems, although Wade is still wrestling with what to do. I then Metal Readied the parts Marine Cleaned yesterday while Wade Fabrication Industries sprang into action and made 2 gaskets for the Super 8 gear shift. Why two? Because he didn't have one on the '34 and they're the same. Next was putting the trans back into Big Red. Placed the trans on a block of wood(for clearance) on the trolley jack and wheeled it over next to Big Red. Then with John's advice re-balanced it on the jack. With John controlling the jack and Wade in the engine compartment the trans was wheeled into place in front of the position it needs to be. Where was I? Well apart from one quick pic of John in action I was stationed at the open right front door ready to slip bolts into the trans mounts once the holes were aligned. The rubber backed trans mounts were bolted to the trans and this necessitated the trans being raised enough to clear the brackets the mounts bolt to then being slid back on the jack and then lowered into place. Bolt for the right side slipped in easily while those for the left side went in after a bit of jiggling and a few light hammer taps. While I started stringing together a new set of windchimes, aka parts hanging from rack prior to PR-15 painting, Wade was under Big Red bolting the trans cross member back in and installing and tightening the nuts and washers for the trans mounts. I was just about ready to start painting when Wade said that Noel had called earlier and said all the rubber parts he was waiting for should soon be here including new rubber balls for the dog bone. Dog bone? Yes, dog bone, the trans stabiliser mounted to the right side of the trans. Hadn't dis-assembled it so took it apart, cleaned and prepped the pieces and strung it up for POR-15'ing. Painting commenced with me clad in rubber gloves and a long sleeved top for protection. But I was surprised, no  is more like it, when after I'd been going about 5 minutes Wade asked if I had any paint on me yet! Now I know I have a reputation that is warranted for having skin that attracts POR-15, but at the least he could have waited until I'd finished painting! As it was there were a few marks above my left knee(I was wearing shorts) and some on the right wrist(Putting my arm down inside the coil spring to paint it) but with some POR-15 thinners managed to remove these, a first! When Wade wasn't insulting me, he was pushing in the right front king pin bushes and the outer lower bushes for the wheel support arm assembly. He then started the reaming process on the king pin bushes using the reamer set picked up from Peter on Sunday. is more like it, when after I'd been going about 5 minutes Wade asked if I had any paint on me yet! Now I know I have a reputation that is warranted for having skin that attracts POR-15, but at the least he could have waited until I'd finished painting! As it was there were a few marks above my left knee(I was wearing shorts) and some on the right wrist(Putting my arm down inside the coil spring to paint it) but with some POR-15 thinners managed to remove these, a first! When Wade wasn't insulting me, he was pushing in the right front king pin bushes and the outer lower bushes for the wheel support arm assembly. He then started the reaming process on the king pin bushes using the reamer set picked up from Peter on Sunday.Attach file: (17.34 KB)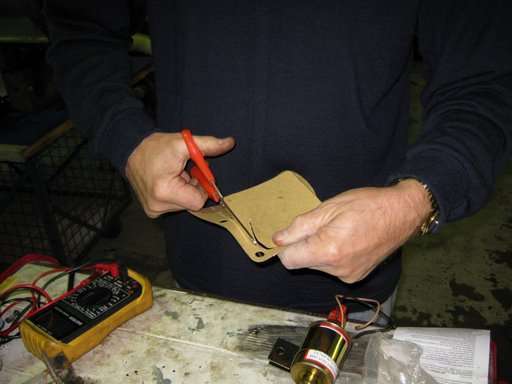 (19.83 KB) (19.83 KB)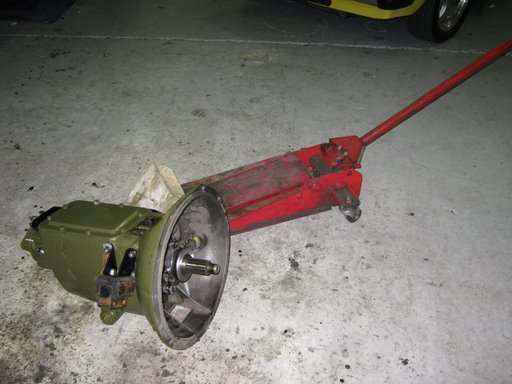 (22.23 KB) (22.23 KB)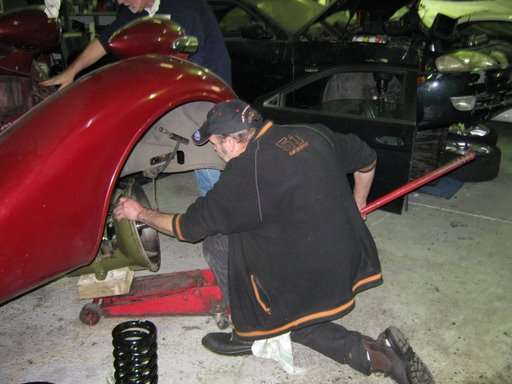 (29.63 KB) (29.63 KB)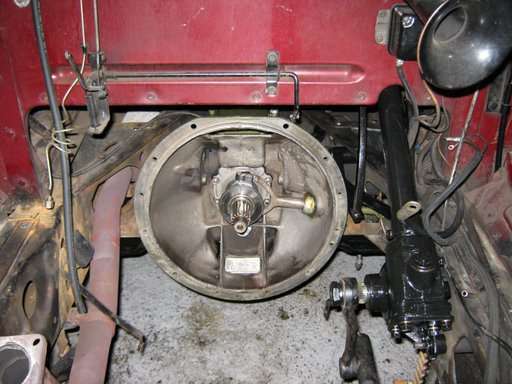 (17.13 KB) (17.13 KB)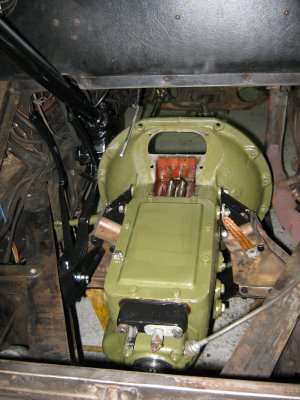 (27.45 KB) (27.45 KB)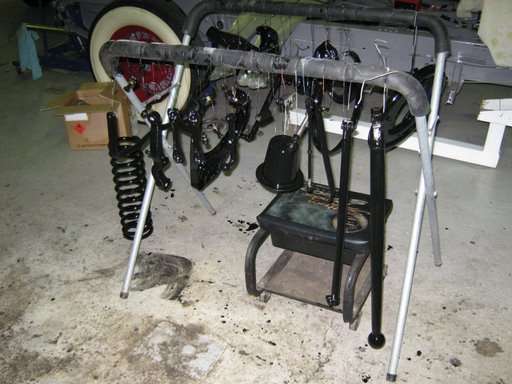 (24.10 KB) (24.10 KB)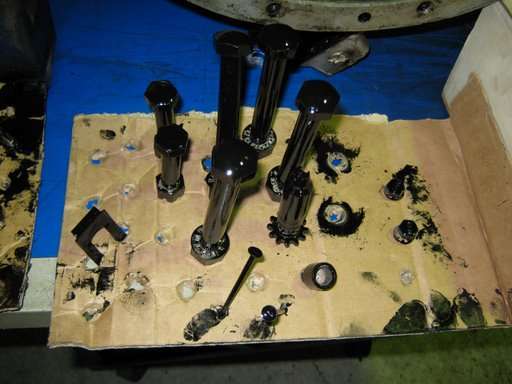 (16.78 KB) (16.78 KB)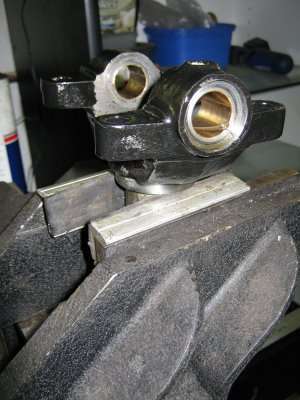
Posted on: 2009/5/21 4:18
|
|||
|
Mal
/o[]o\ ==== Bowral, Southern Highlands of NSW, Australia "Out of chaos comes order" - Nietzsche. 1938 Eight Touring Sedan - SOLD 1941 One-Twenty Club Coupe - SOLD 1948 Super Eight Limo, chassis RHD - SOLD 1950 Eight Touring Sedan - SOLD What's this? Put your Packard in the Packard Vehicle Registry! Here's how! Any questions - PM or email me at ozstatman@gmail.com |
||||
|
||||
|
Re: Wade's Workshop
|
||||
|---|---|---|---|---|
|
Forum Ambassador
|
Friday 22nd May 2009
Wade was busy dis-assembling my latest windchime when I arrived today, this after he's re-installed the newly painted trans stabiliser rod. Finished the dis-assembly by placing the painted parts back in their respective allotted areas. Then the re-built rear shocks and the sway bar were re-installed in Big Red. This operation comprised Wade under Big Red on a creeper and Mal squatting under a rear fender feeding the shock bolts through the chassis. Wade then tightened up the nuts, finishing using a looong bar so they won't come off in a hurry. Next the sway bar went into place but without the necessity for high torque tensioning. Should probably have pumped up each shock individually before the sway bar went in but Wade solved that by doing them together and raised a bit of a sweat doing so. Tony the other day had said he'd be back by the end of the week with the water jacket sideplate cover and true to his word there he was. Looks great, Wade is certainly pleased with it. After Tony left we turned to Big Red's engine as it needed to taken off it's bench and placed on a wheeled wooden trolley. Reason being, Wade's having the cracked fuel pump boss welded up and then will drill and tap the hole again. Hoisted the engine, slid out the bench, it's on wheels, lowered the engine to the ground, then with John's help muscelled it over so it lying on it's right side and presenting the fuel pump boss for easy welding access. Turned then to the partly reamed right king pin bushes and completed that task. Also reamed the right lower supporting arm outer bushes. And was just getting organised to press the king pin into the upright support arm when PACA members Barry and Cheryl arrived. They dropped in a power steering box for PACA member Paul's '54 convertible. Needless to say tools were downed and it wasn't long before lunch was upon us. Barry and Cheryl are accompanying Wade today to experience the workshop's long Friday lunch. Unfortantely I had to pass up this opportunity because of prior commitments. Attach file: (16.28 KB)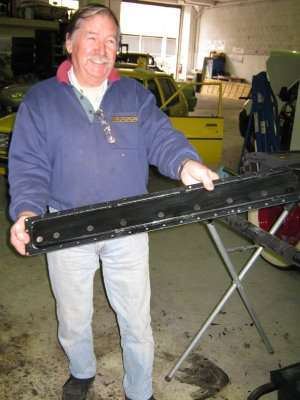 (23.86 KB) (23.86 KB)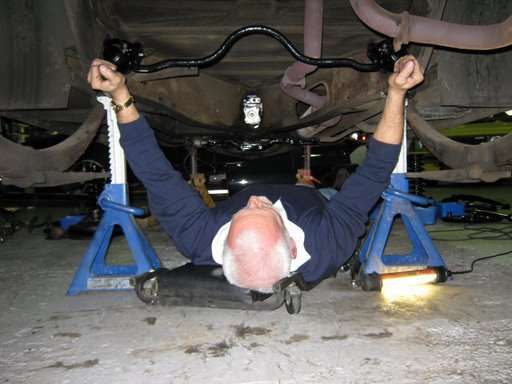 (25.39 KB) (25.39 KB)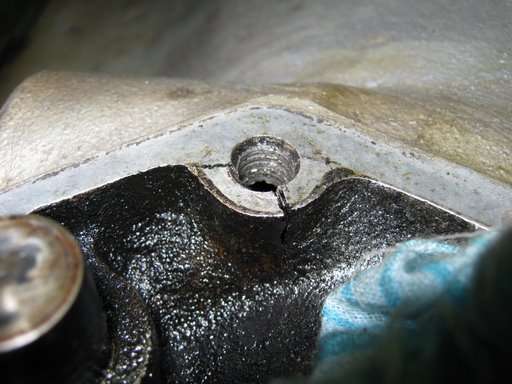 (23.86 KB) (23.86 KB) (15.61 KB) (15.61 KB)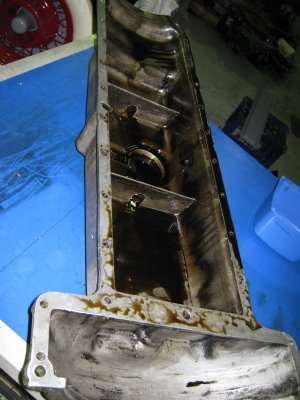 (25.59 KB) (25.59 KB)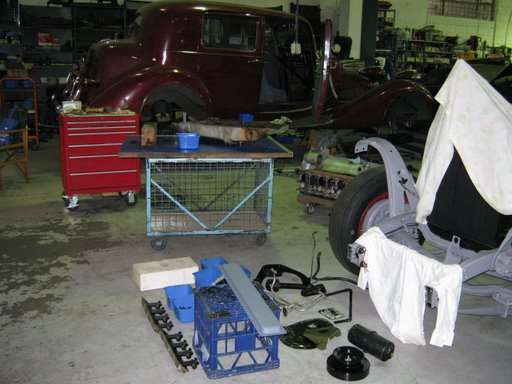 (20.52 KB) (20.52 KB) (22.08 KB) (22.08 KB)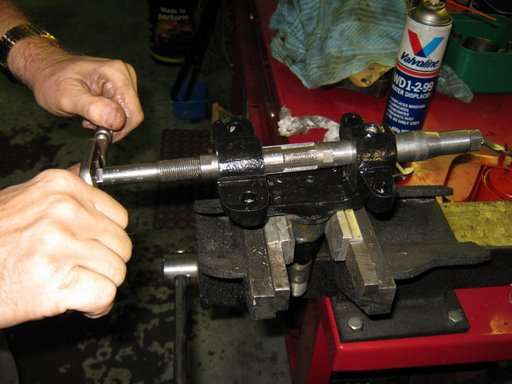 (26.29 KB) (26.29 KB)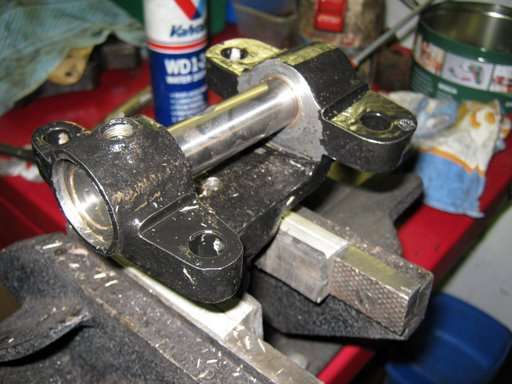 (28.16 KB) (28.16 KB)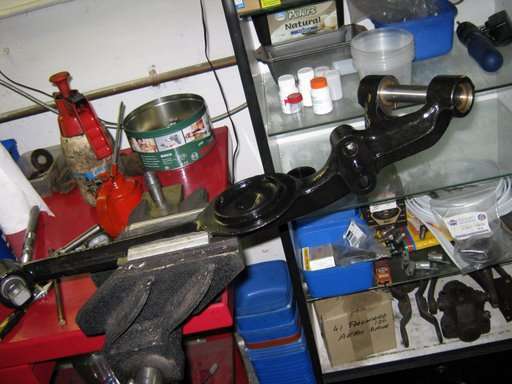 (9.77 KB) (9.77 KB) (41.68 KB) (41.68 KB) (24.81 KB) (24.81 KB)
Posted on: 2009/5/22 1:12
|
|||
|
Mal
/o[]o\ ==== Bowral, Southern Highlands of NSW, Australia "Out of chaos comes order" - Nietzsche. 1938 Eight Touring Sedan - SOLD 1941 One-Twenty Club Coupe - SOLD 1948 Super Eight Limo, chassis RHD - SOLD 1950 Eight Touring Sedan - SOLD What's this? Put your Packard in the Packard Vehicle Registry! Here's how! Any questions - PM or email me at ozstatman@gmail.com |
||||
|
||||
|
Re: Wade's Workshop
|
||||
|---|---|---|---|---|
|
Home away from home

|
Mal, we had a presentation at the Texas Packard Meet in Salado in March where the presenter discussed rebuilding front end components. Specifically, he talked about installing new king pin bushings and the need to burnish them for proper fit and wear. He passed around a tool he uses to do this. It has a series of dimples that when pulled through the bushing treats the surface in a certain way for the material to fit and wear properly. Just wondering if Wade has any experience with burnishing bushings after reaming them. This was new to me, but the presenter said it was a critical step for the job. Maybe one of the members can shed more light on this subject.
I really enjoy your posts. I see some folks are wearing jackets now. Must be getting cooler. Take care - John
Posted on: 2009/5/22 10:03
|
|||
|
We move toward
And make happen What occupies our mind... (W. Scherer) |
||||
|
||||
|
Re: Wade's Workshop
|
||||
|---|---|---|---|---|
|
Forum Ambassador

|
Can't remember specifically for Packard, but burnishing kin pin bushings was a very standard practice, all shops I know of that specialized in front end work did it routinely.
PS - and never use any process that can leave an abrasive (like a wheel cylinder hone) behind, or close the lubricant pockets in the bronze. Ream and burnish is the standard method, burnishing "work-hardens" the surface, I suspect for longer bushing life.
Posted on: 2009/5/22 10:07
|
|||
|
||||
Register To PostTopic is Locked


