Happy Thanksgiving and welcome to Packard Motor Car Information! If you're new here, please register for a free account.  
Login
Username:

Password:

Remember me


Lost Password?

Register now!
FAQ's
Main Menu
Recent Forum Topics
Who is Online
372 user(s) are online (328 user(s) are browsing Forums)

Members: 2
Guests: 370

Packard Don, kevinpackard, more...
Helping out...
PackardInfo is a free resource for Packard Owners that is completely supported by user donations. If you can help out, that would be great!

Donate via PayPal
Video Content
Visit PackardInfo.com YouTube Playlist

Donate via PayPal


« 1 2 3 (4) 5 6 7 ... 21 »

Re: Adventures with a 1955 Clipper
#31
Home away from home
Home away from home

JWL
See User information
Hello All,

Lots of progress in my last garage session. I did some wiring work and got most of the parts back on the Clipper. Because so much was accomplished, I will talk about it in two posts.

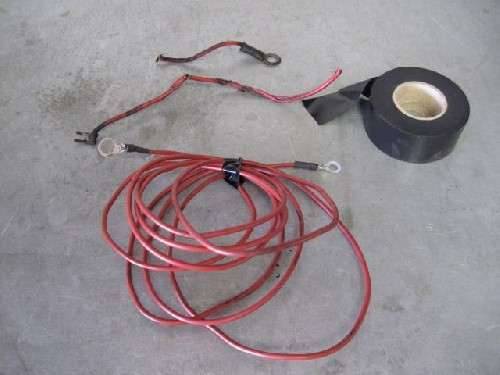
Electrical work consisted of running a new battery wire from the starter switch to the voltage regulator. The starter is on the bottom of drivers side of the engine and the regulator is mounted on the passengers side top front of the compartment. This is about as far apart as you can get. The original wire had burned on the voltage regulator end at some point in the Clipper's past life. A new wire had been run, but it was only run on the outside of the wiring loom, and made with crimp-on terminals. I cut off the ends of the old wire and left it in the loom. I then soldered some proper terminals on the new wire and ran it from the starter switch to the voltage regulator following the wiring loom route.

I re-wrapped the loom to secure the new wire with some non-adhesive vinyl tape. The loom looks undisturbed. The tape I used matches the original loom tape. I decided to use this tape rather than the often used adhesive backed vinyl electrical tape as this type is stiff and does not look authentic. There are other types of wiring loom wrapping which do a good job, but again they are not authentic looking. The tape I used is easy to wrap. Tie it at the beginning, wrap the length, and then tie it off at the end. Much easier than trying to handle the sticky conventional type.

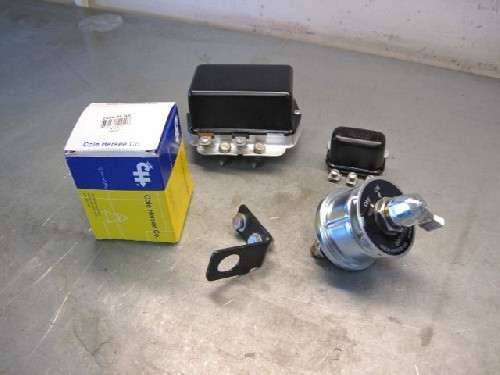
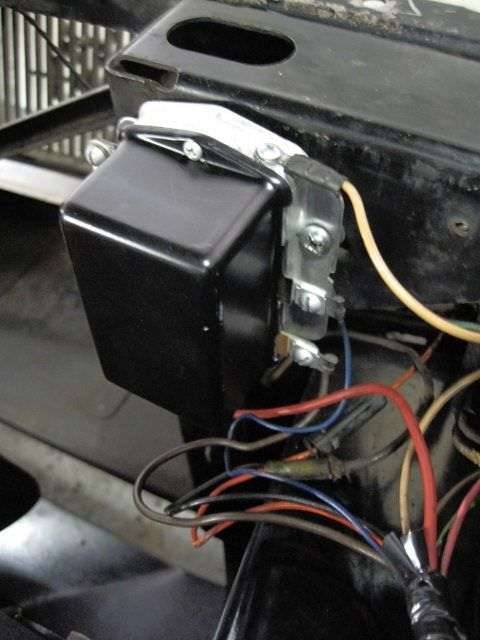
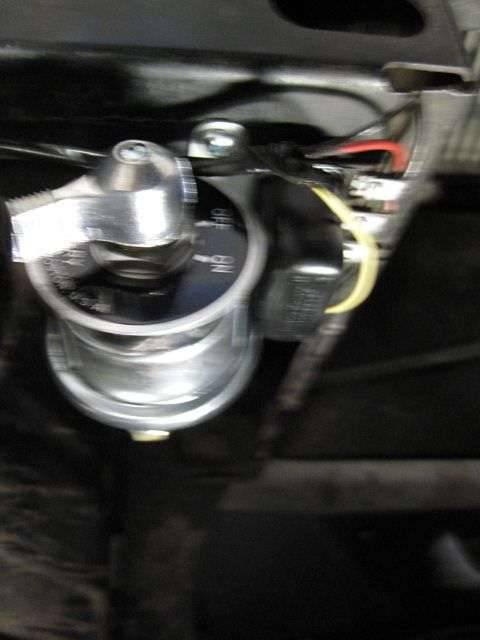
After this, I installed the voltage regulator, horn relay, and battery cut-off switch. The cut-off switch is to provide a way to disconnect the battery from the Clipper's electrical system. The switch is for safety and security

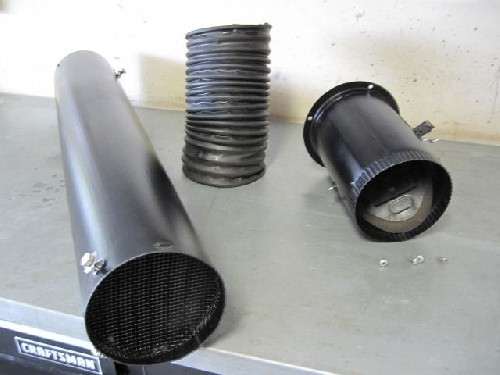
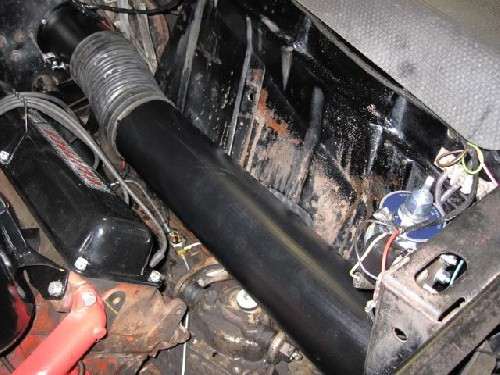
After electrical work I installed the drivers side fresh air vent pipe, flapper valve, and flex hose. The pipe resembles an old-time round stovepipe. The finish was in terrible shape, having spent its life under the battery and subject to spills from its upper neighbor, but the metal was sound. It looks almost new and will contribute to a better looking compartment.

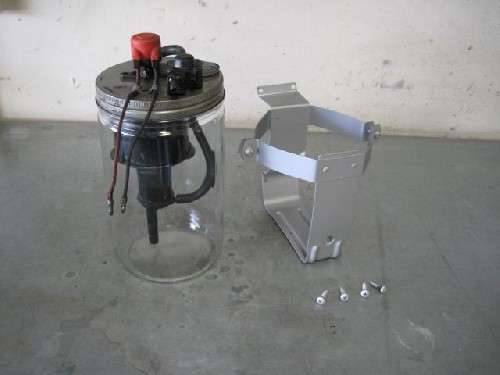
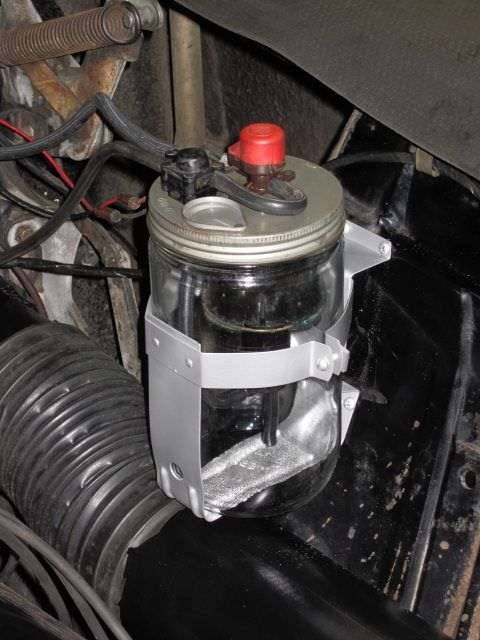
Next on the agenda was the windshield washer jar and bracket. It is a wonder this Mason Jar type container has survived all these years. The bracket was in need of refinishing and the jar needed a good scrubbing. It will squirt fluid on the windshield.

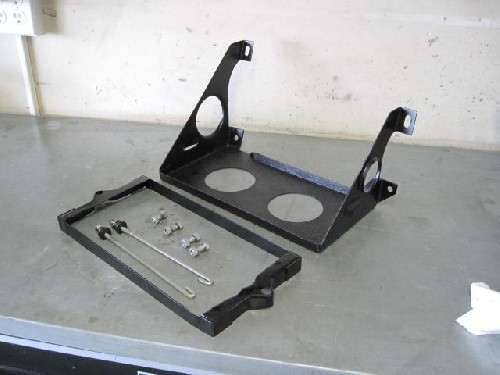
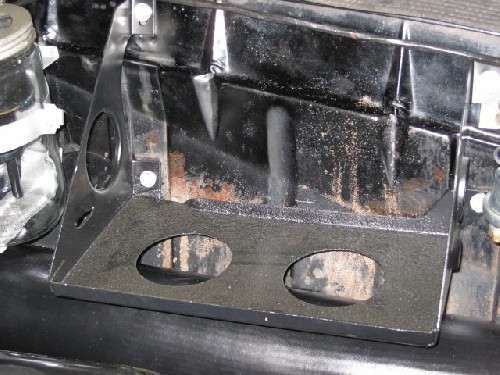
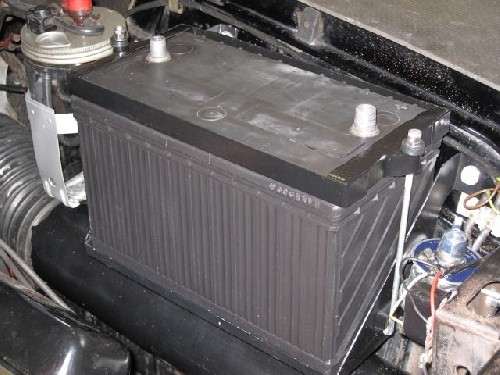
To conclude today's post and the work on this side of the Clipper are some photos of the battery, case, and hold down. All these reattached parts do a good job of covering up the badly stained lower part of the drivers side inner fender panel.

Take care.

(o{I}o)

Attach file:


jpg  (33.50 KB)
565_4df63cb29beb1.jpg 640X480 px

jpg  (37.63 KB)
565_4df63cc59695d.jpg 480X640 px

jpg  (28.25 KB)
565_4df63cd81807b.jpg 480X640 px

jpg  (34.22 KB)
565_4df63cf0a1540.jpg 640X480 px

jpg  (30.78 KB)
565_4df63d02a9a33.jpg 640X480 px

jpg  (52.45 KB)
565_4df63d1764d1c.jpg 640X480 px

jpg  (26.33 KB)
565_4df63d2a9b52a.jpg 640X480 px

jpg  (43.25 KB)
565_4df63d3927200.jpg 480X640 px

jpg  (30.03 KB)
565_4df63d4ee6709.jpg 640X480 px

jpg  (52.23 KB)
565_4df63d65b7027.jpg 640X480 px

jpg  (47.62 KB)
565_4df63d758ec5f.jpg 640X480 px

Posted on: 2011/6/13 11:52
We move toward
And make happen
What occupies our mind... (W. Scherer)
 Top  Print   


Re: Adventures with a 1955 Clipper
#32
Forum Ambassador
Forum Ambassador

Owen_Dyneto
See User information
Great progress!

What make and Group is that battery? It certainly isn't a Group 60 yet it seems to fit the carrier and hold down perfectly; I've not yet found a non-Group 60 that fits that well.

Posted on: 2011/6/13 12:08
 Top  Print   


Re: Adventures with a 1955 Clipper
#33
Webmaster
Webmaster

BigKev
See User information
JW,

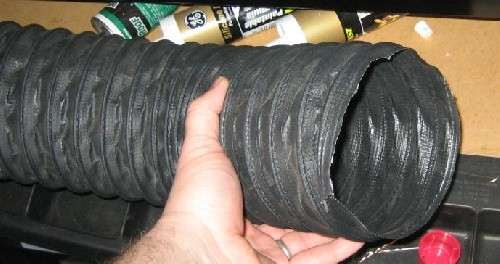
If you are interested, PI So Cal Region sells reproduction flexible vent ducting. Exact match to the original ones Packard used.

Attach file:


jpg  (43.86 KB)
1_4df6448b447b8.jpg 689X364 px

Posted on: 2011/6/13 12:10
-BigKev


1954 Packard Clipper Deluxe Touring Sedan -> Registry | Project Blog

1937 Packard 115-C Convertible Coupe -> Registry | Project Blog
 Top  Print   


Re: Adventures with a 1955 Clipper
#34
Forum Ambassador
Forum Ambassador

HH56
See User information
Also want to chime in & congratulate you on the great progress. One thing I am curious about is the voltage regulator mount. There seems to be several different ways they are done & just wondering what the consensus is. I see you mounted your Autolite vertically. There is one picture I found in SM radiator section showing it that way but then I see an extra hole on your support which appears to have been used at some time. Mine is Delco & horizontal with the safety cover over the terminals which face up and uses that hole. Looks as if there is no room to go vertically without sharing a hole either and terminals down, would be awfully hard to get to. As far as I know, original way on mine. Looking in the photo archives, there are a couple that appear to be mounted on an angle. Anyone know if they changed by regulator brand or by car model?

Posted on: 2011/6/13 12:45
Howard
 Top  Print   


Re: Adventures with a 1955 Clipper
#35
Forum Ambassador
Forum Ambassador

Randy Berger
See User information
Neat workmanship. I thought 55 VRs were mounted vertical with the terminals facing the fender and 56 mounted VRs with the terminals facing up and requiring that rubber sleeve to protect from shorts. The battery looks like group 31, but also looks like positive terminal faces front of car??

Posted on: 2011/6/13 13:22
 Top  Print   


Re: Adventures with a 1955 Clipper
#36
Home away from home
Home away from home

55PackardGuy
See User information
Might I suggest something that will take little time to R&R and may be helpful in keeping the engine compartment spiffy? The area inside of the fender and wheel well, under and behind the battery carrier, seems to have had the finish eaten away from spills the same way as the vent pipe was.

Perhaps a good cleaning and spray with rubberized black finish would be a semi-permanent fix for this condition. Most of this area is hidden, and a slightly non-matching finish would be less noticeable than bare metal.

Looking forward to more installments! BTW, what is the purpose of the horn relay cutoff? Once the battery is effectively "dead" the horn should receive zero power anyway?

Posted on: 2011/6/13 13:35
Guy

[b]Not an Expert[/
 Top  Print   


Re: Adventures with a 1955 Clipper
#37
Forum Ambassador
Forum Ambassador

HH56
See User information
I thought 55 VRs were mounted vertical with the terminals facing the fender and 56 mounted VRs with the terminals facing up and requiring that rubber sleeve to protect from shorts.

Maybe so, although I believe one of the angled ones I mentioned was on a 55. The cradle assy is the same both years so interesting if they all mount vertically in 55. The Delco I have has two mounting screws on one side which I don't think could both be used if mounted vertically and sure looks like the bottom one would share the top radiator mount hole.

Posted on: 2011/6/13 13:53
Howard
 Top  Print   


Re: Adventures with a 1955 Clipper
#38
Forum Ambassador
Forum Ambassador

Owen_Dyneto
See User information
The 55s I've seen that seemed original enough to have their OEM voltage regulators had them mounted at a diagonal. 56, Delco at least, are mounted horizontally with the terminals facing upwards. The original little rubber sleeve that slipped over the naked terminals to protect them has been reproduced, by Joel Ray I believe.

Posted on: 2011/6/13 14:19
 Top  Print   


Re: Adventures with a 1955 Clipper
#39
Home away from home
Home away from home

JWL
See User information
Quote:

Owen_Dyneto wrote:
Great progress!

What make and Group is that battery? It certainly isn't a Group 60 yet it seems to fit the carrier and hold down perfectly; I've not yet found a non-Group 60 that fits that well.


Dave, I don't have any info on the battery. There were no stickers on it, except a date tag of 8/07. Perhaps Dwight can recall. This would be good information for us V-8'ers to have. I have received like comments from others admiring the size and fit.

(o{I}o)

Posted on: 2011/6/13 16:16
We move toward
And make happen
What occupies our mind... (W. Scherer)
 Top  Print   


Re: Adventures with a 1955 Clipper
#40
Home away from home
Home away from home

JWL
See User information
Quote:

55PackardGuy wrote:
Might I suggest something that will take little time to R&R and may be helpful in keeping the engine compartment spiffy? The area inside of the fender and wheel well, under and behind the battery carrier, seems to have had the finish eaten away from spills the same way as the vent pipe was.

Perhaps a good cleaning and spray with rubberized black finish would be a semi-permanent fix for this condition. Most of this area is hidden, and a slightly non-matching finish would be less noticeable than bare metal.

Looking forward to more installments! BTW, what is the purpose of the horn relay cutoff? Once the battery is effectively "dead" the horn should receive zero power anyway?


Guy,

I wish now that I would have done what you suggest, to paint the inner fender panel. Maybe I will go back and do this. It is not a good idea to have metal in this condition.

The cut-off switch is for the battery, not the horn relay. I just mounted the switch next to the relay. Also, the photo is pretty bad, and I apologize for the poor quality.

(o{I}o)

Posted on: 2011/6/13 16:21
We move toward
And make happen
What occupies our mind... (W. Scherer)
 Top  Print   


« 1 2 3 (4) 5 6 7 ... 21 »


- The following Google Ad-Sense Advert helps fund the cost of providing this free resource -
- Logged in users will not see these. Please Join and Donate to help support the website -
Search
Recent Photos
Photo of the Day
Recent Registry
Upcoming Events
32nd Annual Florida Packard Club Meet
01/26/2025
46th Annual Texas Packard Meet
04/03/2025 - 04/06/2025
Packard Salon - Calling All Twelves
05/27/2025 - 05/29/2025
58th Annual National Meet
05/31/2025 - 06/06/2025
AACA Fall Meet (Hershey)
10/06/2025 - 10/10/2025
Website Comments or Questions?? Click Here Copyright 2006-2024, PackardInfo.com All Rights Reserved