|
Re: Wade's Workshop
|
||||
|---|---|---|---|---|
|
Forum Ambassador

|
Thursday 15th April 2010
Wade is still away, but I spent the day at the workshop working on the '41! Doing what, and am I qualified to do anything by myself? Well I have to have a go sometime and seeing what I was about to do wasn't mechanical in nature I decided to give it a go. It was installing heat and sound insulating rubber backed aluminium foil sheeting on the cabin floor. Although I'd bought some of this sheeting about 2 months ago, the other day when we went over to Grippy rubber I saw they had sheeting with thicker rubber but at a cheaper price and purchased 2.5 metres to use instead. And why is this being installed, it's not kosher you know? Because an authority higher than any Concourse judge deemed it must be so! What higher authority is there? My good wife, Kath, that's who! If she's getting hot on Packard runs most anything will be done, except install air-conditioning, to alleviate heat transfer from the engine and exhaust into the cabin. Started by removing the carpet, underlay and the rubber matting I'd made last year for the front cabin area. This necessitated unbolting the front seat from the floor, 2 bolts aside, and sliding the seat back and bottom assembly into the rear floor area. The insulating sheeting comes in rolls a little over 1 metre wide which is just about perfect for the underseat/underfloor coverage required. Using the rubber sheet I'd made for the front floor from the toe board to under the front seat as a template cut my first piece of insulation. And it's easy to cut, using just a pair of scissors. Measured, marked and cut out around the transmission inspection plate. Marked and using a hole punch cut holes for the trans plates mounting screws. Finally cleaned up the trans plate and coated it and the foil side of the insulation with contact adhesive let them "go off" and then put them together carefully. And it worked! Mounted the trans plate back in the car using just 2 screws. Then because the piece for the trans plate had been cut from the bigger floor piece placed the bigger piece in place, marked it because I was cutting it roughly down the middle to facilitate fitment a little later. With the front seat pushed back I couldn't just put it in place in one piece. Had previously punched a hole for the tension spring for the front seat in the insulation so used that as a point where the cut pieces intersected. That done a clean up of the right side of the floor and application of adhesive to both surfaces. Waiting for the adhesive to "go off" then started measuring and marking the left side piece to cut out the battery access plate. By this time was able to install the right side piece and managed to get it in without mishap. My biggest fear all throughout this process was having the adhesive adhere in the wrong place with consequent anguish and frustration. Finished cutting out the battery plate piece so cleaned up and applied adhesive to the left floor and floor piece. While that was "going off" started on the toe board piece by measuring and cutting it approximately to shape. Also measured and cut a small piece to cover the front of the trans plate which necessitated more holes being punched. Back to the left floor piece as it was now ready for installation, and Oh oooH! The cut out for the battery plate was about an inch too short on the inside edge. Not to fear though, just cut the offending piece out, fortunately it received very little adhesive so was easily fixed. Cleaned up battery plate, applied adhesive. Also applied adhesive to the small piece at the front of the trans cover and went back to measuring and fitting of the toe board piece. This piece provided the most challenges to accommodate the accelerator pedal and shaft, the top of the trans plate, the clutch/brake pedal plate and the present firewall insulation which "dips down" above the area of the pressure plate. A lot of trial fitting, trimming, cutting followed by a lot of trial fitting, trimming, then some more trial fitting, trimming, etc, etc. During the course of this also attended to the battery plate and front of trans plate adhesions, both without incident. Phew! For the toe board ended up cutting out a separate piece for the brake/clutch plate and working with that. Finally all was ready to apply adhesive to the toe board piece, the clutch/brake piece and one small filler piece for the left side. But first a trial fit to ensure I had a good chance of fitting it without a snafu. Looked promising so cleanup of surfaces, application of adhesive and a tidy up while waiting for it to "go off". Carefully handing the toe board piece the accelerator shaft was passed through it's requisite hole and then starting around the top of the trans plate it was pressed into place. The left side around the clutch/brake plate was then pressed to fit before moving around to the right side to finish it of. Again, all went well, so a big sigh of relief that it all went where it should. One thing I noted, and now that I think back the same thing happened when I was measuring cutting and fitting the rubber sheeting to the floor, was the amount of in and out, side to side, back to bench, bench to car movement required for all of this. Quote: Guscha wrote:......I use the tools of company Bosch since decades. They have an acceptable price-performance ratio and they are even available in your country. Yes, I have a Bosch Jigsaw and many years ago had a Bosch nibbler, fine tools. If they'd had a Bosch belt sander like the one in your illustration I would have been very interested because it looks perfect for the job I have in hand. As it is Bosch tools are in the premium price range here so I opted for the cheapie because this is a one-off project and unlikely to be used again. Attach file:  (28.63 KB) (28.63 KB)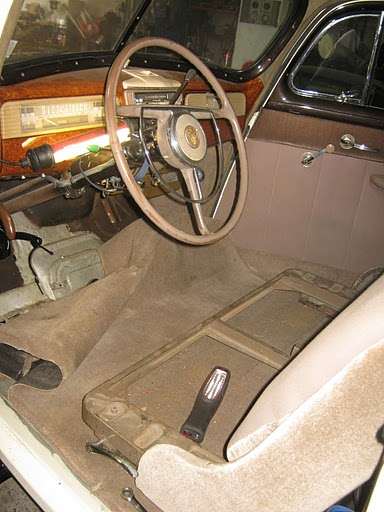 (42.02 KB) (42.02 KB)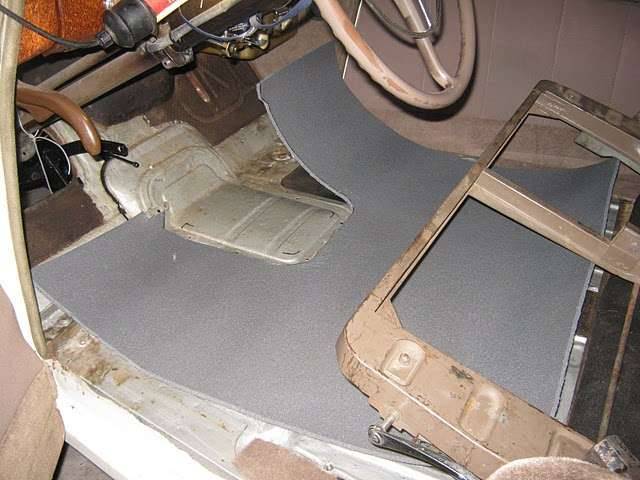 (36.25 KB) (36.25 KB)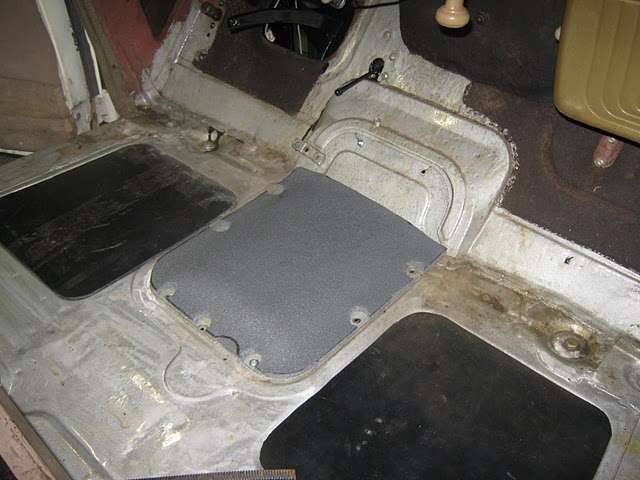 (36.01 KB) (36.01 KB)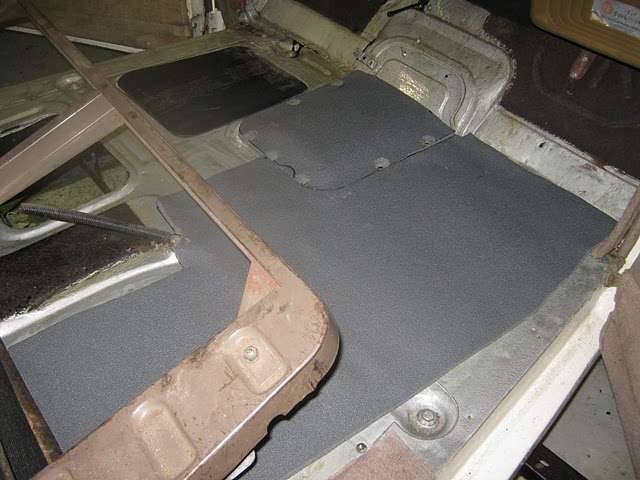 (41.36 KB) (41.36 KB)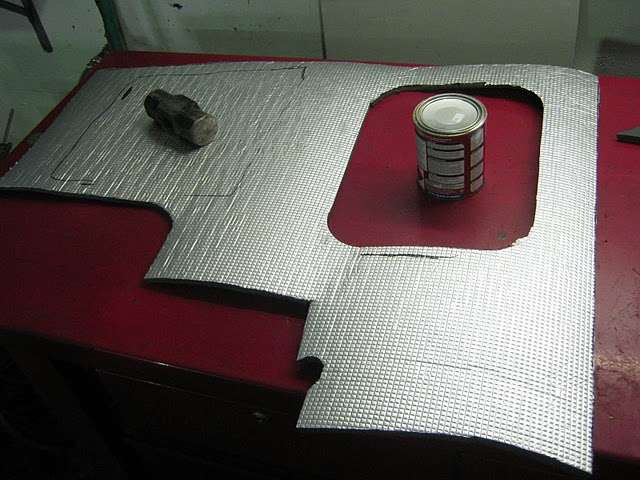 (35.46 KB) (35.46 KB)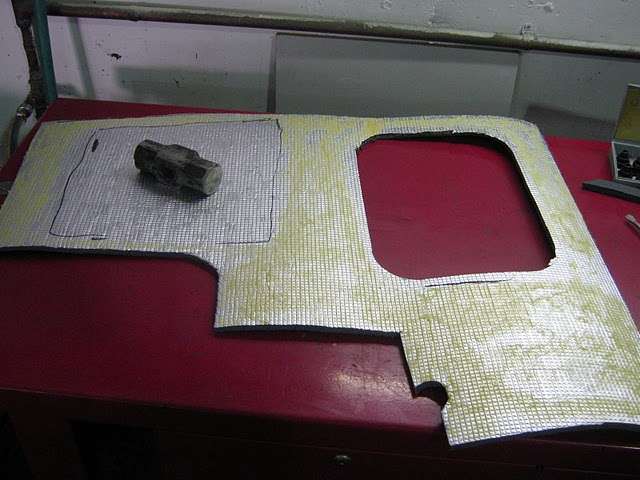 (38.04 KB) (38.04 KB)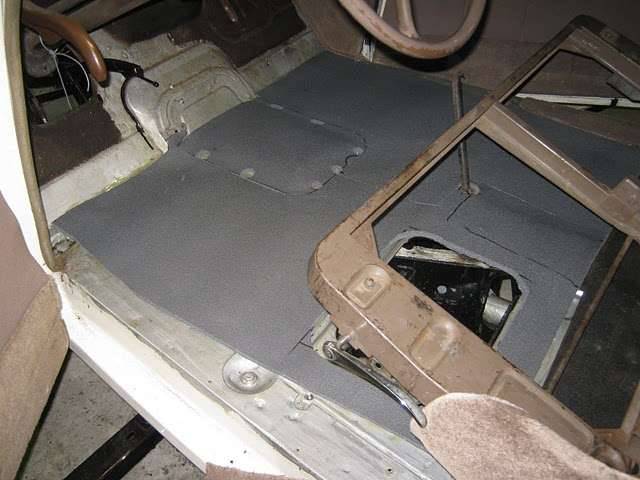 (32.83 KB) (32.83 KB)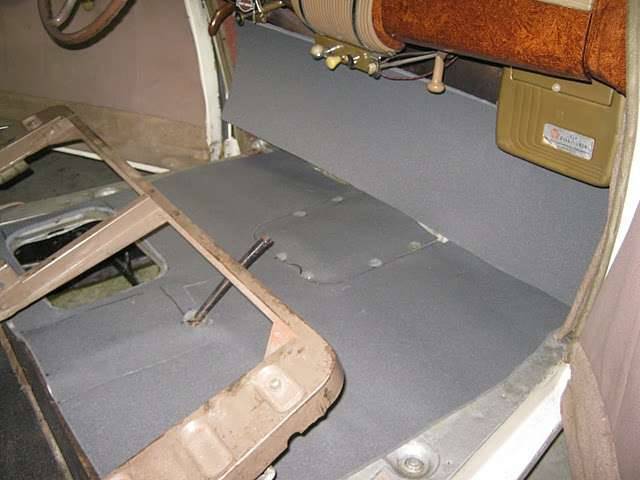 (26.37 KB) (26.37 KB)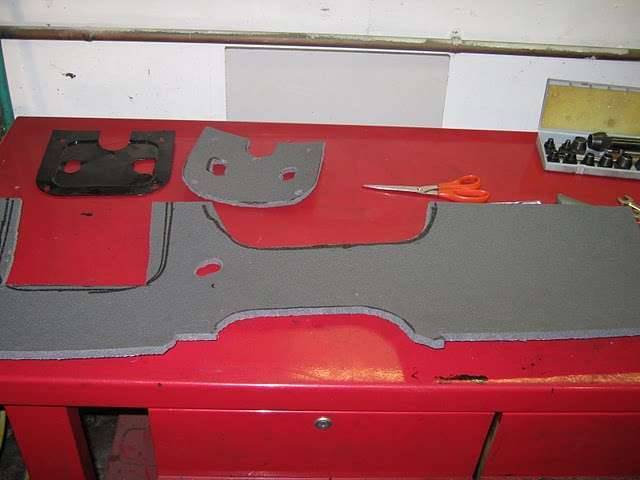 (38.40 KB) (38.40 KB)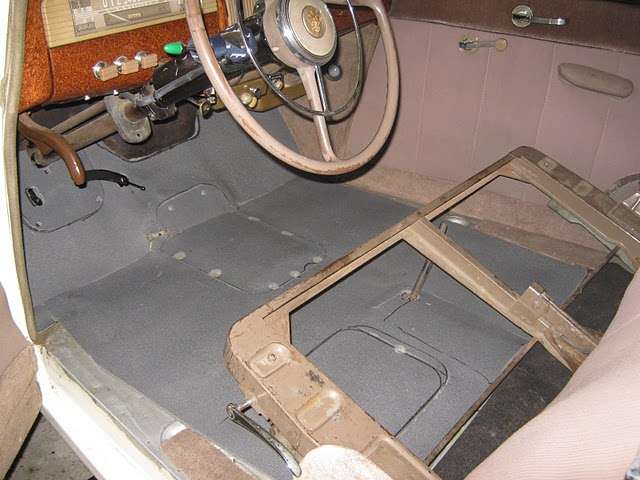 (10.61 KB) (10.61 KB)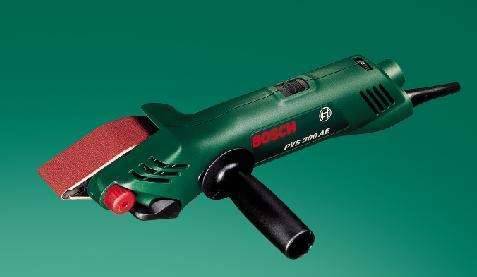
Posted on: 2010/4/15 5:33
|
|||
|
Mal
/o[]o\ ====  Bowral, Southern Highlands of NSW, Australia "Out of chaos comes order" - Nietzsche. 1938 Eight Touring Sedan - SOLD 1941 One-Twenty Club Coupe - SOLD 1948 Super Eight Limo, chassis RHD - SOLD 1950 Eight Touring Sedan - SOLD What's this?  Put your Packard in the Packard Vehicle Registry! Here's how! Any questions - PM or email me at ozstatman@gmail.com |
||||
|
||||
|
Re: Wade's Workshop
|
||||
|---|---|---|---|---|
|
Home away from home
|
Mal
I hate to say this, but it is very obvious that the guy spraying your Rhino Lining doesn't know what he's doing. They should be no where near that rough when they're done spraying. He needs to have a talk with the Rhino Lining guy in Minneapolis, Minnesota, or with Dave Mitchell.
Posted on: 2010/4/15 11:42
|
|||
|
West Peterson
1930 Packard Speedster Eight Runabout (boattail) 1940 Packard 1808 w/Factory Air 1947 Chrysler Town and Country sedan 1970 Camaro RS https://packardinfo.com/xoops/html/modules/newbb/viewtopic.php?topic_id=4307&forum=10 http://aaca.org/ |
||||
|
||||
|
Re: Wade's Workshop
|
||||
|---|---|---|---|---|
|
Forum Ambassador
|
Quote:
West Peterson wrote:.....They should be no where near that rough when they're done spraying...... All I can say is, I know.  The whole running board re-rubbering saga has been a learning one with advice along the way from yourself, Dave Mitchell and Keegan. Suffice to say the guy doing the Rhinoing has had no experience with using that process for this type of application. To start with I didn't realise when I gave him instructions for a couple of very light coats that the holes along the length of the board wouldn't fill in with Rhino. The holes are there for 160/180's and except for the ones at each end aren't used on 120's. The initial coats were a lot smoother with much less orange peel which I hand sanded back together with the filler used to plug the superfluous holes. With the latest application I instructed the guy to use heavier coats of Rhino because I would sand out any imperfections later. I didn't expect what he presented and he was very sheepish about what he'd done. Meanwhile with the situation I've created for myself I'll continue with my remedial work and eventually aim to end up with a pair of "reasonable" Rhinoed running boards for the '41 120 Club Coupe. The whole running board re-rubbering saga has been a learning one with advice along the way from yourself, Dave Mitchell and Keegan. Suffice to say the guy doing the Rhinoing has had no experience with using that process for this type of application. To start with I didn't realise when I gave him instructions for a couple of very light coats that the holes along the length of the board wouldn't fill in with Rhino. The holes are there for 160/180's and except for the ones at each end aren't used on 120's. The initial coats were a lot smoother with much less orange peel which I hand sanded back together with the filler used to plug the superfluous holes. With the latest application I instructed the guy to use heavier coats of Rhino because I would sand out any imperfections later. I didn't expect what he presented and he was very sheepish about what he'd done. Meanwhile with the situation I've created for myself I'll continue with my remedial work and eventually aim to end up with a pair of "reasonable" Rhinoed running boards for the '41 120 Club Coupe.And some good news - Friend Noel took his '41 160 Club Coupe boards with him on a US trip a few months back and Hunley Acuff re-rubbered them, he's doing '41's now! I'll be interested to see them when they arrive in Oz shortly.
Posted on: 2010/4/15 18:25
|
|||
|
Mal
/o[]o\ ==== Bowral, Southern Highlands of NSW, Australia "Out of chaos comes order" - Nietzsche. 1938 Eight Touring Sedan - SOLD 1941 One-Twenty Club Coupe - SOLD 1948 Super Eight Limo, chassis RHD - SOLD 1950 Eight Touring Sedan - SOLD What's this? Put your Packard in the Packard Vehicle Registry! Here's how! Any questions - PM or email me at ozstatman@gmail.com |
||||
|
||||
|
Re: Wade's Workshop
|
||||
|---|---|---|---|---|
|
Webmaster

|
Quote:
Do those count as checked or carry on luggage? 
Posted on: 2010/4/16 0:24
|
|||
|
-BigKev
1954 Packard Clipper Deluxe Touring Sedan -> Registry | Project Blog 1937 Packard 115-C Convertible Coupe -> Registry | Project Blog |
||||
|
||||
|
Re: Wade's Workshop
|
||||
|---|---|---|---|---|
|
Forum Ambassador
|
Friday 16th April 2010
Wade was working on completing the interior fitment of Big Red when I arrived this morning. The battery access plate was loose so some sponge tape was applied to take up the slack. Only trouble was it was too thick necessitating sectioning the sponge to overcome this obstacle. Then the carpet was relaid and the clutch and brake pedal plates were re-installed together with the rubber covers. Lastly came the front seat squab and that was that, Big Red was ready to roll again. Wade entered the front seat, adjusted it's location and it slid easily back, then started up Big Red and drove it slightly forward and back, so it works! I thought the next step would be to do the workshop shuffle. And no, it's not a dance, it's just moving cars around to 1) get Big Red out of the corner. 2) move the '34 Body into the corner slot, 3) move the '34 Chassis into the slot where Big Red currently is, 4) shuffle the '41, if required, it'll have to move out to let Big Red through but will go back more or less to where it is now, 5) repark Big Red or Old Blue where the '34 Chassis is now, and 6) possibly bring down Noel's '39 for it's re-wiring. However because John was very busy, the whole re-shuffle scenario is being left till Monday when workshop activity should be a lot calmer. Instead there was a minor tidy up of the corner slot to accommodate the '34 Body with mainly my '41 parts being shelved or re-organised to free up some space. That done I suggested that the front seat could be bolted back in the '41 after yesterday's insulation installation. Now back in 2008 I'd both removed the front seat and replaced in the '41 entirely by myself and it was a struggle. Not just to get it in out and in of the car but to locate and tighten the mounting bolts and there's only 2 per side. This time the seat was in the car, I had Wade helping me, and I had the benefit of the experience of having done it before. Didn't matter! It was still a struggle, even with Wade's assistance to line up the bolts and the holes then to start a bolt in any of the holes. Started on the right side and after about the 14th attempt thought I had the front mounting bolt started so came round to the left side to start one of those. Instead, as I'm coming round, Wade gave me the news that it wasn't started. However I then started on the left side and this was more compliant with the front bolt starting after about 12 attempts. Then the left rear bolt went in after only a couple of attempts. Back to the right side, thinking things must be better aligned, so must be easier now. Alas, it was not to be. Many attempts later, lost count of the number, still hadn't started the bolt. Wade suggested and found a slightly longer bolt and again after many attempts finally got it started. Now to the rear right, all the others were started so this one should now be easy. Not to be, I did start it but it was going in at an angle and starting to cross thread. Stepping back, figuratively not literally, I then observed that the right front was also slightly sqew-whiff so was causing the problem at the rear. out they both came, another re-alignment of seat frame, wooden mounting strap, re-insertion of the longer bolt completely vertical and in it went. More re-alignment at the rear and it too started and went in. Tighten everything up, put the squab back in and it's only taken about an hour for what should be a 5 minute job! But Wade's letting me do the work seeing it's my car so it's probably to be expected. With time available Wade turned to looking what could be done for the '41 especially motor parts to ready them for the engine's return and re-assembly. Speaking of which I rang Graham Wilkins to be advised they were working on the last details and expected everything to be done late morning or early afternoon and he'd ring me when ready. Graham rang after I'd returned home, and just before I started this post, to advise all the work was done and ready for pickup. Had to advise Graham that it would now be Monday when Wade and I would be able to do that. Anyway things that can be done are: rebuilding the water pump, re-bushing the distributor and rebuilding the oil pump. Although all these were working it was decided to take this opportunity to rebuild things now. Turned to the oil pump, dis-assembled it and in cleaning it found there were 3, yes three, washers under the oil pump spring, and not flat washers either but split washers! Plus the pressure relief piston was worn and, as the rebuild kit doesn't come with a replacement, Wade cannibalised one from the incomplete 120 engine that Barry had given me about a year ago. Wade suggested that Stan, the machine man, drill the necessary hole in the new oil pump shaft for the pin required. Will follow that up next week, probably after re-shuffle and engine parts pickup completed. And here's a video of Big Redrunning and rolling. Quote: BigKev wrote: Quote: I'd like to say he booked a separate seat for them because he couldn't let them travel by themselves but....they went as checked luggage. However they aren't being afforded the same level of carriage on their return to Oz, because they are being sent by what Noel calls "the Pirate Ship". Attach file: (31.64 KB)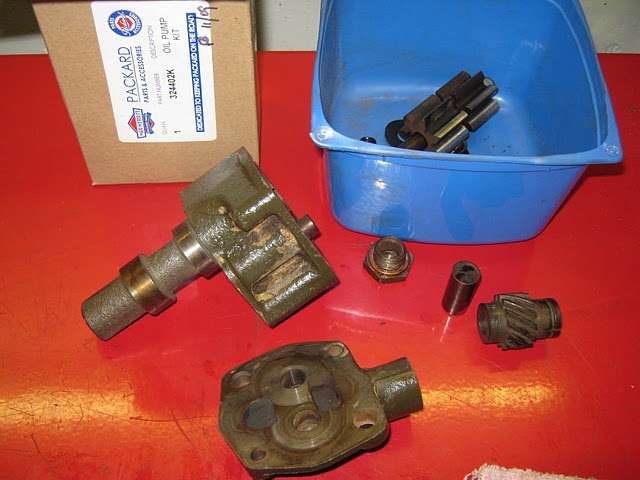 (47.25 KB) (47.25 KB) (27.17 KB) (27.17 KB) (28.83 KB) (28.83 KB)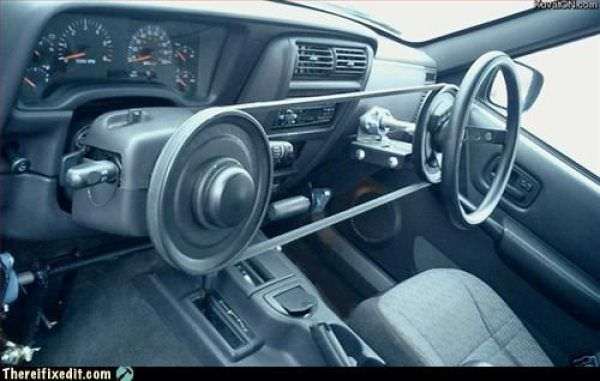
Posted on: 2010/4/16 1:17
|
|||
|
Mal
/o[]o\ ==== Bowral, Southern Highlands of NSW, Australia "Out of chaos comes order" - Nietzsche. 1938 Eight Touring Sedan - SOLD 1941 One-Twenty Club Coupe - SOLD 1948 Super Eight Limo, chassis RHD - SOLD 1950 Eight Touring Sedan - SOLD What's this? Put your Packard in the Packard Vehicle Registry! Here's how! Any questions - PM or email me at ozstatman@gmail.com |
||||
|
||||
|
Re: Wade's Workshop
|
||||
|---|---|---|---|---|
|
Forum Ambassador
|
Just received a pic from my Dad. He's been going through old photos and found this one from January 1946 when he and my Mum visited the Jenolan Caves. He said "we were going to go by bus then we discovered the long wheelbase Packard". They are the couple in the middle of the pic, Dad on the left and Mum on right in pants suit.
Attach file: (42.85 KB)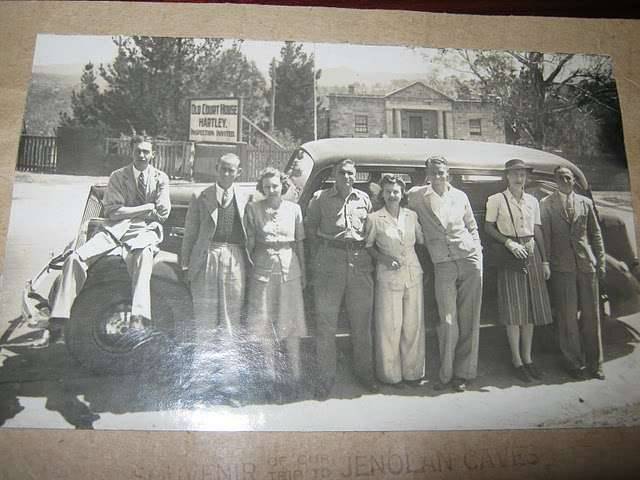
Posted on: 2010/4/16 2:57
|
|||
|
Mal
/o[]o\ ==== Bowral, Southern Highlands of NSW, Australia "Out of chaos comes order" - Nietzsche. 1938 Eight Touring Sedan - SOLD 1941 One-Twenty Club Coupe - SOLD 1948 Super Eight Limo, chassis RHD - SOLD 1950 Eight Touring Sedan - SOLD What's this? Put your Packard in the Packard Vehicle Registry! Here's how! Any questions - PM or email me at ozstatman@gmail.com |
||||
|
||||

|
Re: Wade's Workshop
|
||||
|---|---|---|---|---|
|
Forum Ambassador
|
Saturday 17th April 2010
Running boards! Spent half a day working on the running boards with the new belt sander. The right side one is now about 80% done, being about 90% complete for rough sanding because the inside curve cannot be accessed with the sander I have. Probably buy another of the little palm sanders to do that, most likely next weekend. The other 10% being the finer sanding required to then finish it. Also started rough sanding the left side one and I'm probably about 40/50% through that process. So things are progressing with the running boards, but there's still a way to go. My daughter keeps a Private Blog of her family's activities concentrating on our granddaughters of course. And I'm pleased she included some of the pic's I took last Sunday on the PACA run as part of the visuals. I've included one of her pic's here, of her and her family enjoying the day. Quote: HH56 wrote:.....can't help but compare your mom in the pants suit and the other ladies in dresses to mine. Mine also wore them in the 50's when most women went back to dresses. Remember some lively discussions taking place with my father and grandmother about the proper attire for ladies. Know mine told them both quite plainly that she wore them during the war and no one was going to tell her not to after. Yes, attitudes are hard to change, but your mother appears to have a strong personality and sticks up for herself. The steering wheel pic was, of course, included as a joke but your response and insights into those matters was more than interesting to say the least. Attach file: (34.89 KB)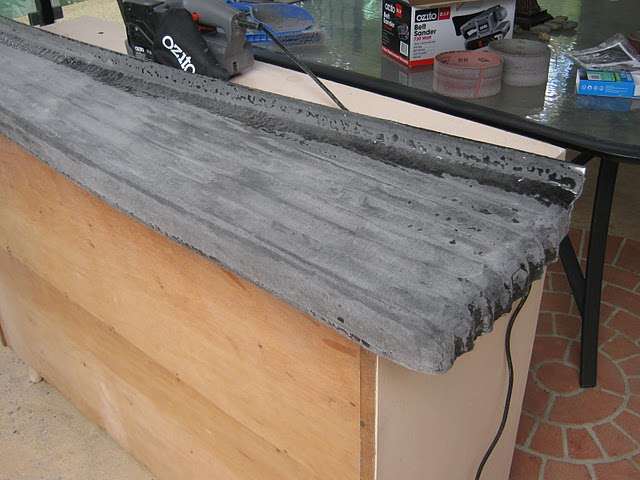 (37.76 KB) (37.76 KB)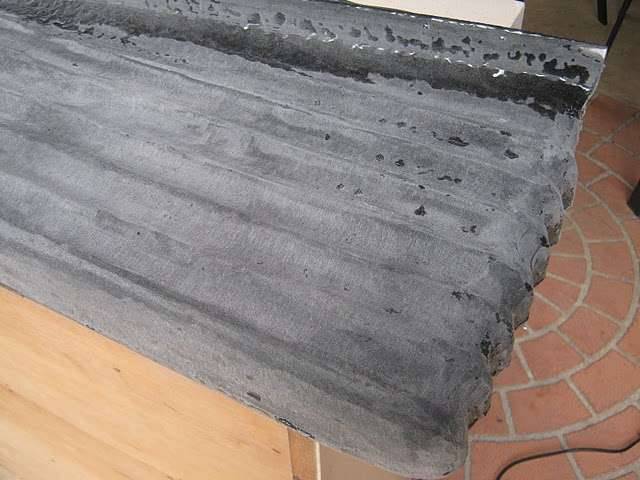 (29.43 KB) (29.43 KB)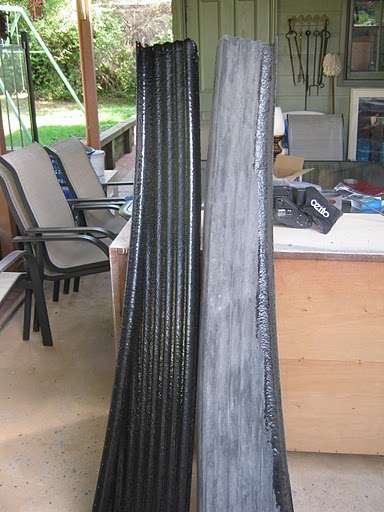 (39.24 KB) (39.24 KB)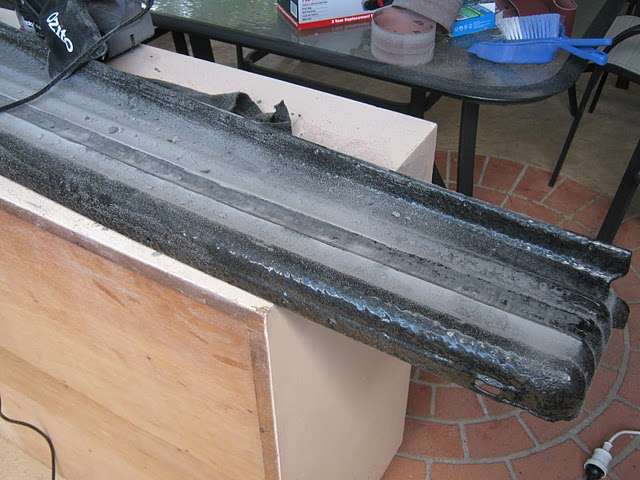 (39.00 KB) (39.00 KB) (23.39 KB) (23.39 KB)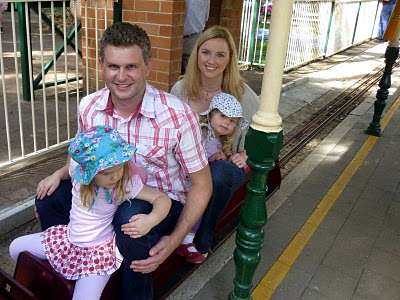
Posted on: 2010/4/17 2:48
|
|||
|
Mal
/o[]o\ ==== Bowral, Southern Highlands of NSW, Australia "Out of chaos comes order" - Nietzsche. 1938 Eight Touring Sedan - SOLD 1941 One-Twenty Club Coupe - SOLD 1948 Super Eight Limo, chassis RHD - SOLD 1950 Eight Touring Sedan - SOLD What's this? Put your Packard in the Packard Vehicle Registry! Here's how! Any questions - PM or email me at ozstatman@gmail.com |
||||
|
||||
|
Re: Wade's Workshop
|
||||
|---|---|---|---|---|
|
Forum Ambassador
|
Monday 19th April 2010
First up this morning was car shuffling with some of Rick's and John's customer vehicles moved outside. Then the front bumper and clip for the '41 were moved out of the way, the '41 pushed into the slot in front of John's hoist and Big Red started up and driven to the front door of the shop. Next 3 floor jacks were positioned under the timber supporting the '34 body, with one under the front support and one at each side of the rear support. In unison the body was moved at a 45 degree angle across to where Big Red had been sitting next to the shelving on the side wall. The front wheels of the '34 chassis had been lowered to the floor previously and now a floor jack was placed under the centre of the diff and the rear jack stands removed. The chassis was rolled back on the jack and close to a 180 degree turn executed so the Chassis could sit parallel and alongside it's body. Then the '41 was pushed back into almost the same position it had formerly occupied. At this point re-shuffling was suspended as Wade and I embarked aboard Big Red for it's shakedown run after the rebuild. There was also another reason for the run, but I'll get to that in due course. So out the shop door, along the driveway and into the street. It has been 1 year 2 weeks and 3 days since Big Red was last on a public road. The car ran strongly, smoothly and without incident, probably about 4 miles in total. Good oil pressure, water temp went up to about 180 degrees then dropped back to about 160 after the radiator shutters opened fully. And instead of going back to the workshop we went to Tyre and Wheel, just around the corner, to see if they could do a wheel alignment of Big Red. Formerly Wade used to use BrianH, a guy in the old car movement with a wheel aligning machine, but just recently Brian has sold the business and retired so another alignment facility was required and that's where Tyre and Wheel came in. They fitted the new radials for Big Red some months ago as well as the radials I put on the '41 last year. Initially there were some fears Big Red might be too big for their hoist but some quick pacing and measuring by Wade soon put that concern to rest. Once on the hoist Big Red was then rigged up with measuring equipment on each wheel, all of which was connected to a PC and displayed the various readings in millimetres, degrees and angles. For a front end that was set up by eye, Wade's that is, it was pretty close and a minimum of adjustment was required. Returning to the workshop Big Red was temporarily parked next to Old Blue outside then Wade and I jumped into his ute to go and pick up the block, crank, rods, pistons, etc, etc for the '41 from Graham Wilkins. After I got over the "$ticker $hock" for the cost involved, didn't know machining and set up services were that expensive, everything was loaded into the ute and we returned from whence we came. On the drive back my costs concerns were put somewhat to rest when Wade gave me a ballpark figure for his Super 8 rebuild. I'm now more than glad I "only" have a 120. From what he told me I could only afford the Super 8 engine, the rest of the car wouldn't even be in the picture! Unloaded everything, once back at the workshop, setting up the bare block on the "engine table". The next step was going to be putting the block in the parts washer to remove any debris left from the machining processes. But before doing so Wade, on checking the oil galleries, found the oil galleries to still have a fair bit of gunk in them. This necessitated using a long rod to push through the large loose bits. Then spraying the galleries with brake cleaner and with a piece of rang on the end of the rod numerous run throughs to clear the galleries completely. Next were the oiling holes for the tappets and the external plug holes. All these had some gunk and there were a number that appeared to be completely blocked! Used more brake cleaner, a lot more, and also a lot more rodding. Had to reclean the long galleries again after this and also the holes servicing the main bearings. All done, into the parts washer, loaded up with fresh water and detergent and away it went for about 20 minutes. Out of the washer, a blow out with compressed air to clear any water remaining from the water jacket then the block was hoisted back onto the engine table. Then more blowing of every surface, hole and orifice to ensure all water was removed and everything was clean. During all this Wade had backed in Old Blue to where the '34 chassis had been. Tonight Wade is driving Big Red home and tomorrow the re-assembly of the '41's engine begins. Video - On the road again Attach file: (36.79 KB)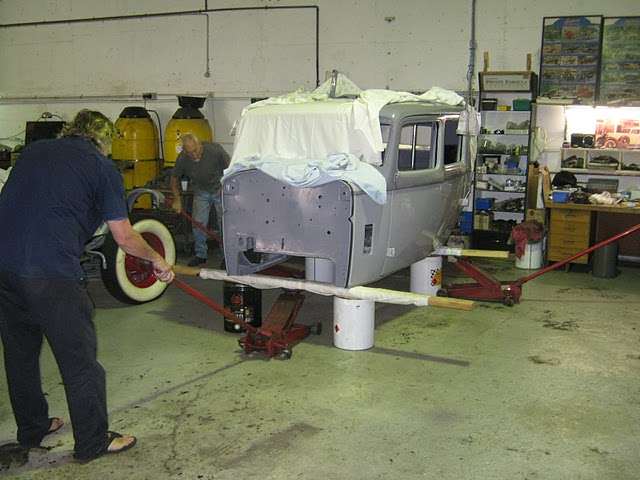 (34.69 KB) (34.69 KB) (40.12 KB) (40.12 KB)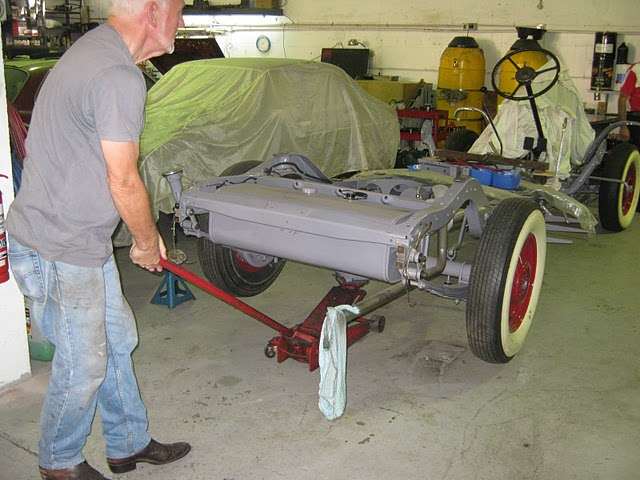 (38.09 KB) (38.09 KB)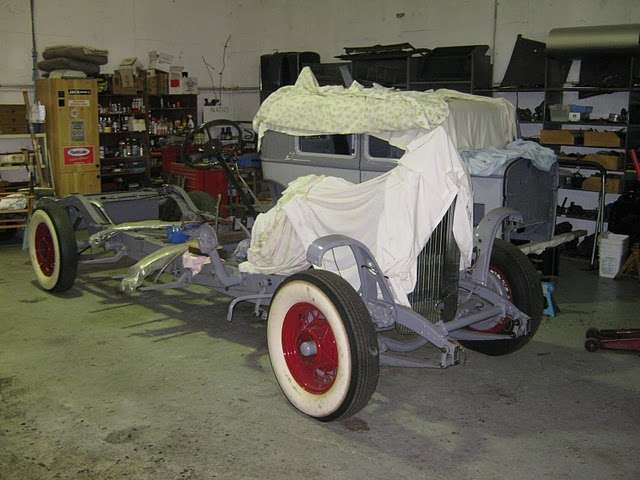 (42.29 KB) (42.29 KB) (33.81 KB) (33.81 KB) (36.42 KB) (36.42 KB)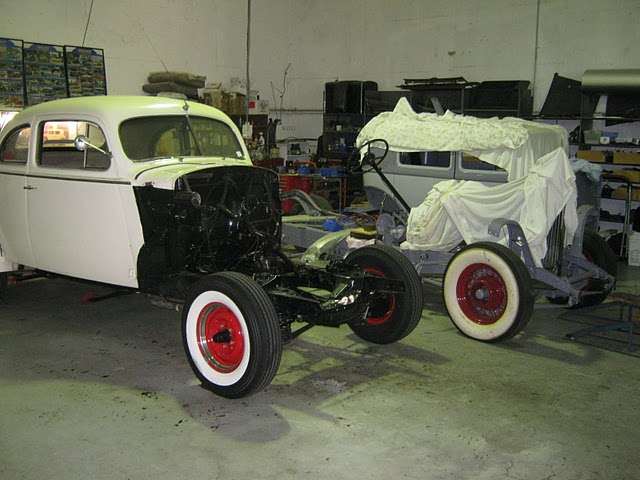 (35.97 KB) (35.97 KB) (43.04 KB) (43.04 KB)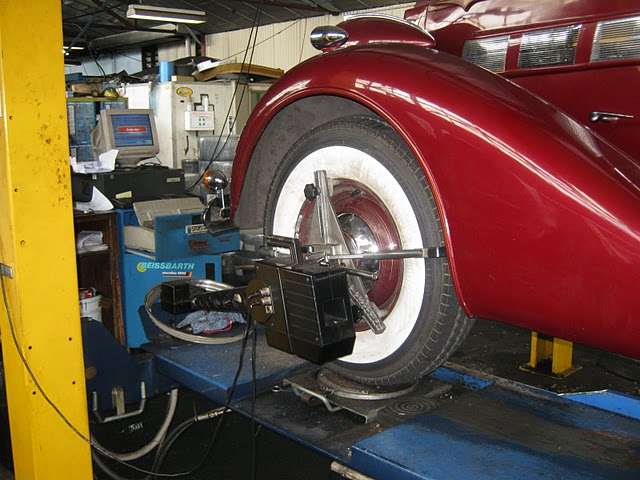 (43.48 KB) (43.48 KB)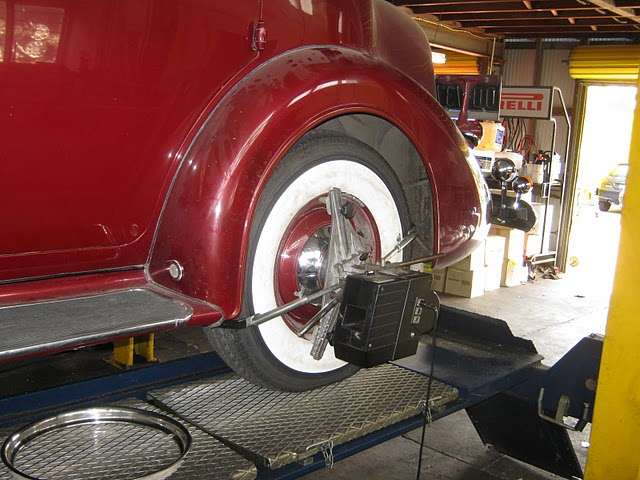 (27.82 KB) (27.82 KB)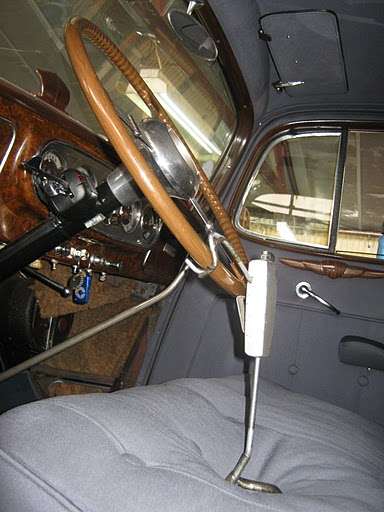 (26.46 KB) (26.46 KB)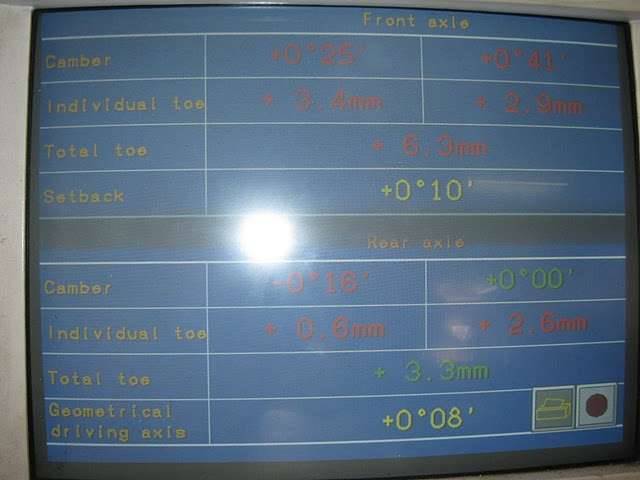 (26.21 KB) (26.21 KB) (40.07 KB) (40.07 KB) (30.69 KB) (30.69 KB) (46.84 KB) (46.84 KB)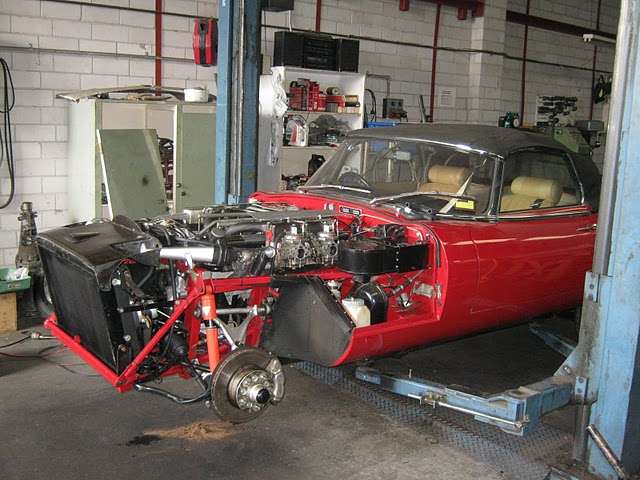 (47.99 KB) (47.99 KB) (27.28 KB) (27.28 KB) (59.33 KB) (59.33 KB)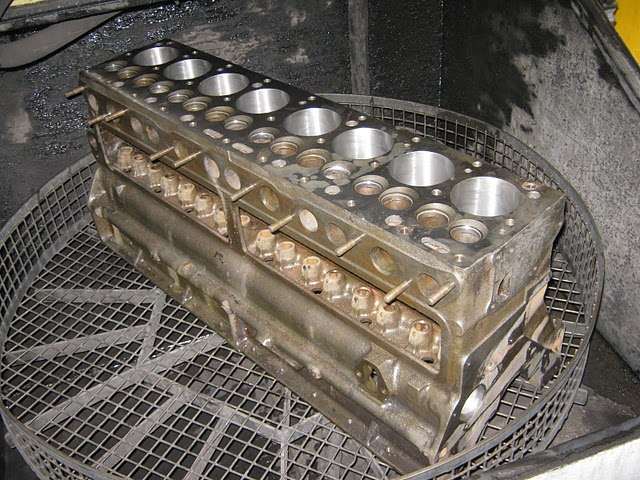 (54.97 KB) (54.97 KB)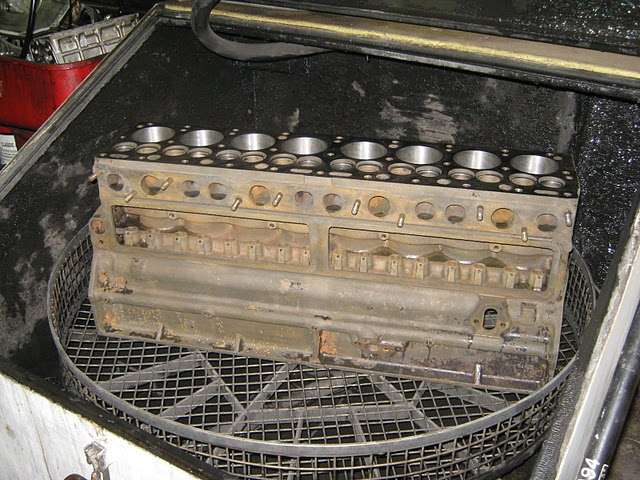 (34.77 KB) (34.77 KB) (38.56 KB) (38.56 KB)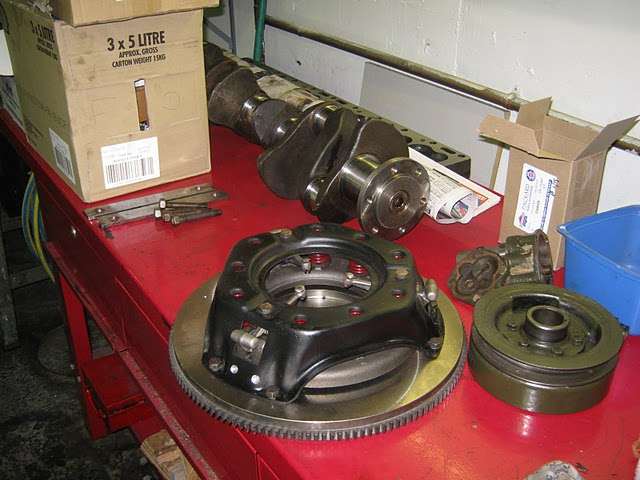 (30.69 KB) (30.69 KB)
Posted on: 2010/4/19 6:17
|
|||
|
Mal
/o[]o\ ==== Bowral, Southern Highlands of NSW, Australia "Out of chaos comes order" - Nietzsche. 1938 Eight Touring Sedan - SOLD 1941 One-Twenty Club Coupe - SOLD 1948 Super Eight Limo, chassis RHD - SOLD 1950 Eight Touring Sedan - SOLD What's this? Put your Packard in the Packard Vehicle Registry! Here's how! Any questions - PM or email me at ozstatman@gmail.com |
||||
|
||||
|
Re: Wade's Workshop
|
||||
|---|---|---|---|---|
|
Forum Ambassador
|
Tuesday 20th April 2010
Because Wade had a few concerns after driving Big Red home last night, a slight vibration, a chirping noise and the heat riser valve not working, I was given instructions on a step by step basis on how to start the '41 120 engine re-assembly process. While I was engaged in that, Wade began tinkering with Big Red attempting to find the cause and to rectify his concerns. Wade thought his best diagnostic tool to identify the vibration would be John so he took him for a short run to listen and feel for it. John's opinion - It's not a vibration but a slight miss. Back at the workshop checks were performed for spark and fuel delivery finding nothing amiss(pun intended). Next compression testing was performed with 120lbs+ registered on every cylinder, so a sticking valve was ruled out. Because of Wade's recent experiences where holes had been blown through the bottoms of two manifold hot boxes this was the next area investigated. Necessitated removal of the carburettor and visual and mechanical inspection inside the base and sides of the intake manifold below the carb. Didn't find any holes so good news in that regard, but the problem still remained. Inspection of the sealing of the intake manifold to the block didn't find anything amiss either. Although because of similar problems some months back with obtaining a good seal on Old Blue led Wade to undertake check and re-tighten all the intake manifold nuts. And here something did turn up, one of the studs and nuts was stripped, all the others being fine. By means of a new nut with a pristine thread Wade managed to overcome this impediment and snug down the nut securely. During the course of the carb removal the chirping noise was also found. It was the small heat shield at the front and side of the carb between it and the exhaust manifold at that point. The screw securing it to the carb had fallen out and the heatshield was rubbing against the exhaust manifold, the screw lodging between the intake and exhaust manifolds! Easily fixed with a new screw when the carb went back on. Next was the heat riser valve. Wade has installed a new one but because there wasn't one there previously, the old valve had been wired shut, wasn't too sure about how the spring to operate it should be installed. Didn't appear to be working the way it was and it appears it can only go in two ways so Wade was flipping it over to try the other way but with reservations about doing this. At this point I had to leave because of grandfatherly baby sitting committments so will find out tomorrow how it all turned out. Video - Compression test Appears all the work was being done on Big Red, but not so, there was work done on the '41's engine I just choose to focus on Big Red initially. First up I was tasked with ensuring the cam followers were all clean and the holes they ride in were likewise. I was returning each cam follower to the hole it had come from, but during the cleaning found a number of followers had worn or suspect surfaces. Fortunately Harvey had been kind enough to bring along some NOS cam followers to the recent PACA run. Before this they weren't going to be used but now they came in very handy indeed. Cam followers installed, next were the fore and aft oil gallery plugs. Cleaned these up and installed using Loctite to ensure they weren't going anywhere. Next lubed up the cam with what can only be described as the stickiest substance I've ever encountered, an engine assembly lube that sticks and stays ensuring on initial start up that lubrication is present until oil begins circulating. Next the cam retaining plate was installed, similarly lubed up. I didn't do all this by myself as there was a lot of backwards and forwards between Wade and myself and Big Red and the '41 engine. It was just easier to write it this way otherwise there would have been a lot of chopping, changing and fragmenting of the story. Attach file: (24.67 KB)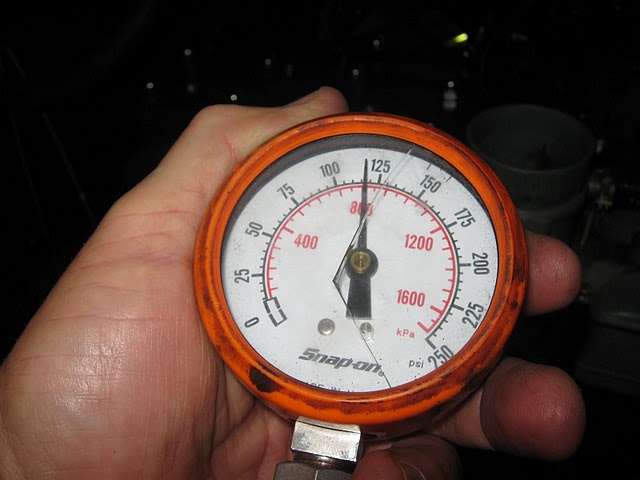 (47.11 KB) (47.11 KB) (46.89 KB) (46.89 KB) (40.40 KB) (40.40 KB) (17.57 KB) (17.57 KB)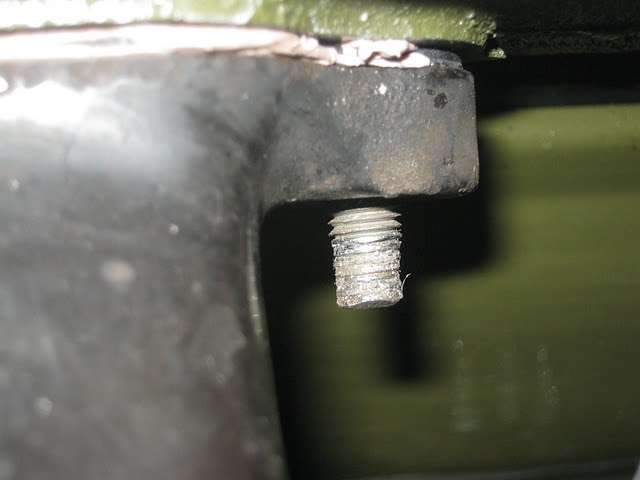 (35.15 KB) (35.15 KB)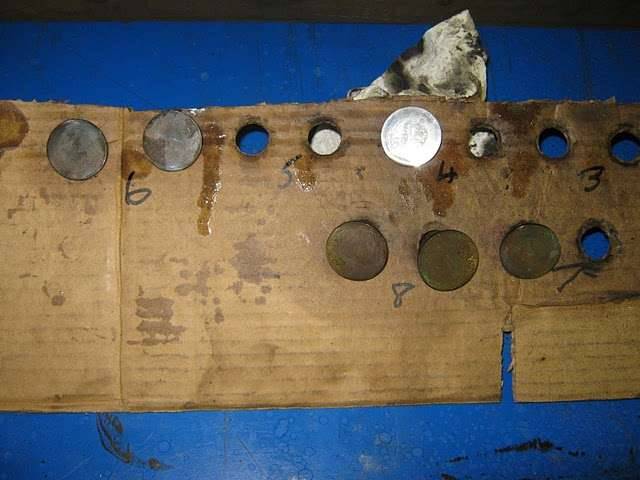 (31.86 KB) (31.86 KB)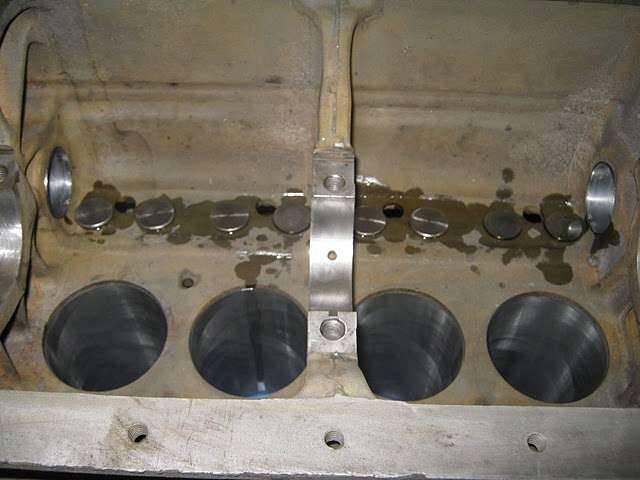 (42.84 KB) (42.84 KB) (27.65 KB) (27.65 KB)
Posted on: 2010/4/20 6:26
|
|||
|
Mal
/o[]o\ ==== Bowral, Southern Highlands of NSW, Australia "Out of chaos comes order" - Nietzsche. 1938 Eight Touring Sedan - SOLD 1941 One-Twenty Club Coupe - SOLD 1948 Super Eight Limo, chassis RHD - SOLD 1950 Eight Touring Sedan - SOLD What's this? Put your Packard in the Packard Vehicle Registry! Here's how! Any questions - PM or email me at ozstatman@gmail.com |
||||
|
||||
Register To PostTopic is Locked


