|
Re: KPack
|
||||
|---|---|---|---|---|
|
Home away from home

|
BigKev - that is great advice. I have not done the brake adjustment, and I honestly haven't checked the manual for the brakes yet. I will do so before I get the drums back on the front.
Tonight I fixed my error on the front brakes, and now have everything correctly mounted. Just need to clean the old grease out of the bearings and repack. Then do major brake adjustment and get the drums back on. My drum puller came in. I picked it up from Amazon: https://www.amazon.com/gp/product/B012P0QV5K/ref=ppx_yo_dt_b_asin_title_o00_s00?ie=UTF8&psc=1. Worked like a charm. The passenger side drum did not come off without a fight. I drove the screw as far as my neighbors very nice air impact gun would go. Didn't budge. So I fired up the torch and heated up the drum for a minute or two and it popped right off. You can see the smoke in the picture. Driver's side came off with the impact gun in like two seconds. Brake shoes on both sides are very thin. Passenger side was pretty greasy on the inside. I disassembled the passenger side with lots of pictures. Everything is very dirty. The two gaskets that are in there....they are very thin. My roll of gasket material is too thick if I'm going to make them the same. Do I just use something like thin cardboard, or a manila envelope? I'm going to take all the replaceable parts to NAPA and see what they can replace. -Kevin Attach file:  Passenger rear drum released.jpg (169.81 KB) Passenger rear drum released.jpg (169.81 KB)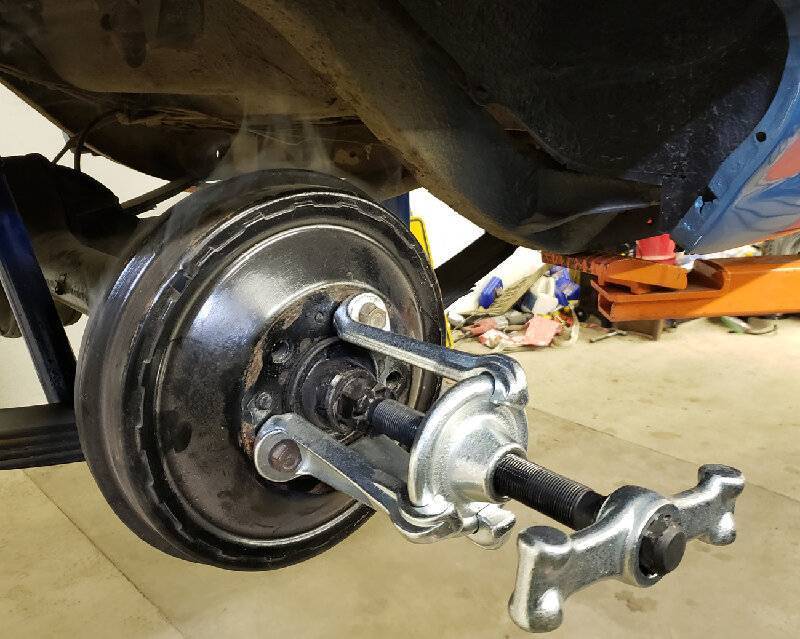  Passenger rear brakes.jpg (153.42 KB) Passenger rear brakes.jpg (153.42 KB)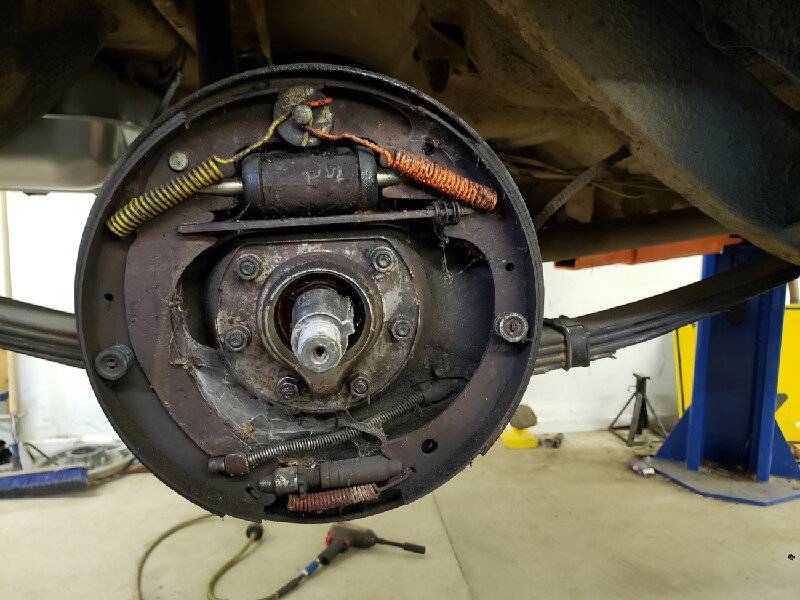  Driver rear brakes.jpg (145.82 KB) Driver rear brakes.jpg (145.82 KB)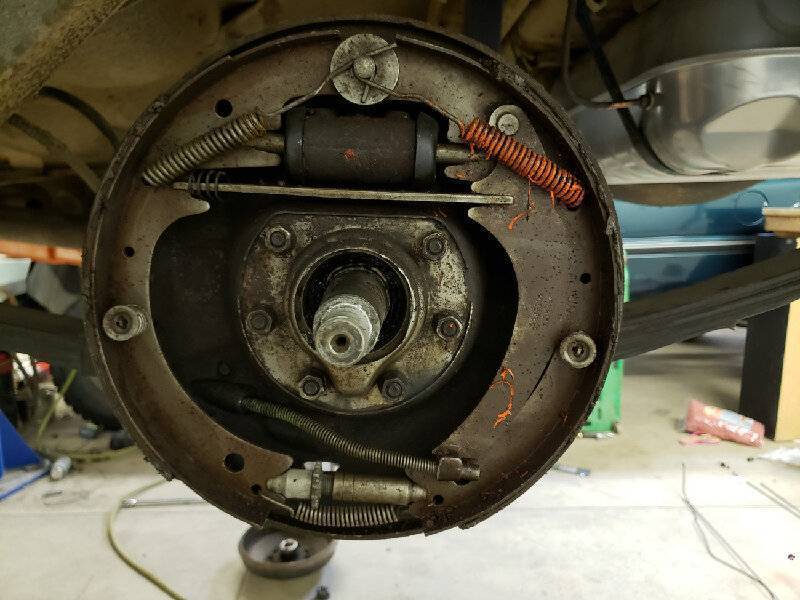  Rear brake disassembling.jpg (157.68 KB) Rear brake disassembling.jpg (157.68 KB)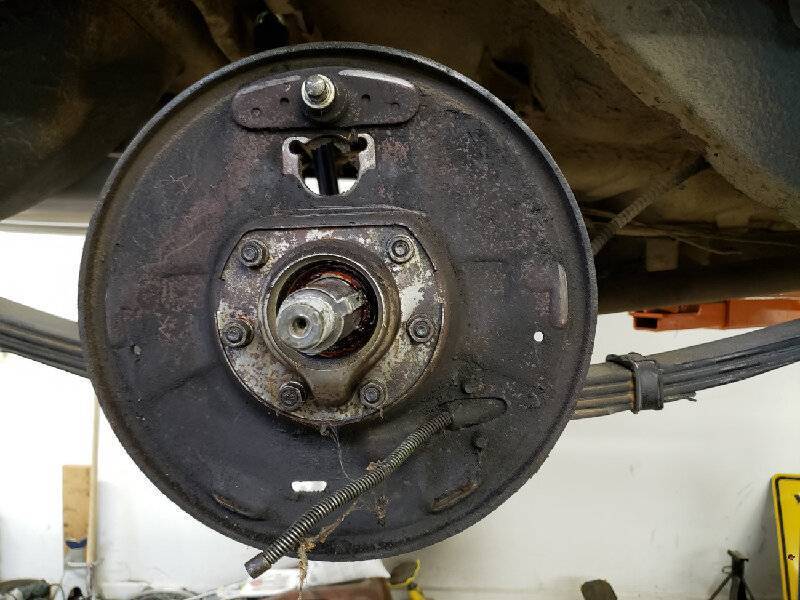  First gasket.jpg (138.07 KB) First gasket.jpg (138.07 KB)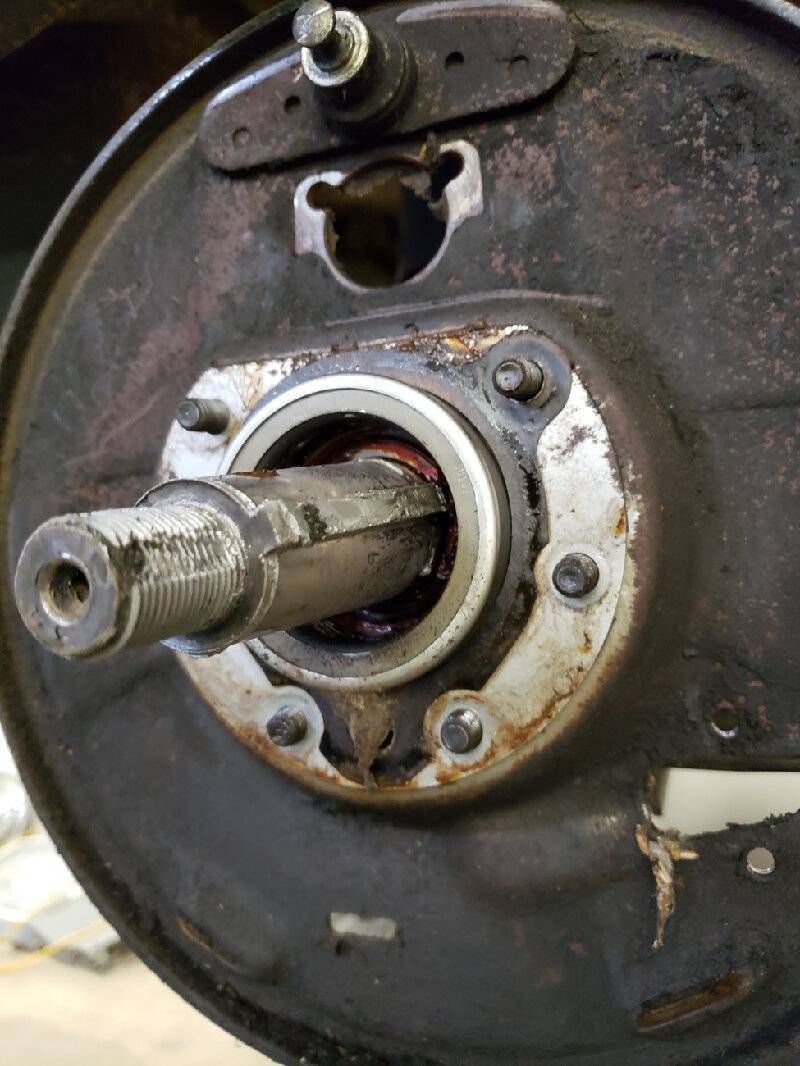  Gasket two.jpg (180.01 KB) Gasket two.jpg (180.01 KB)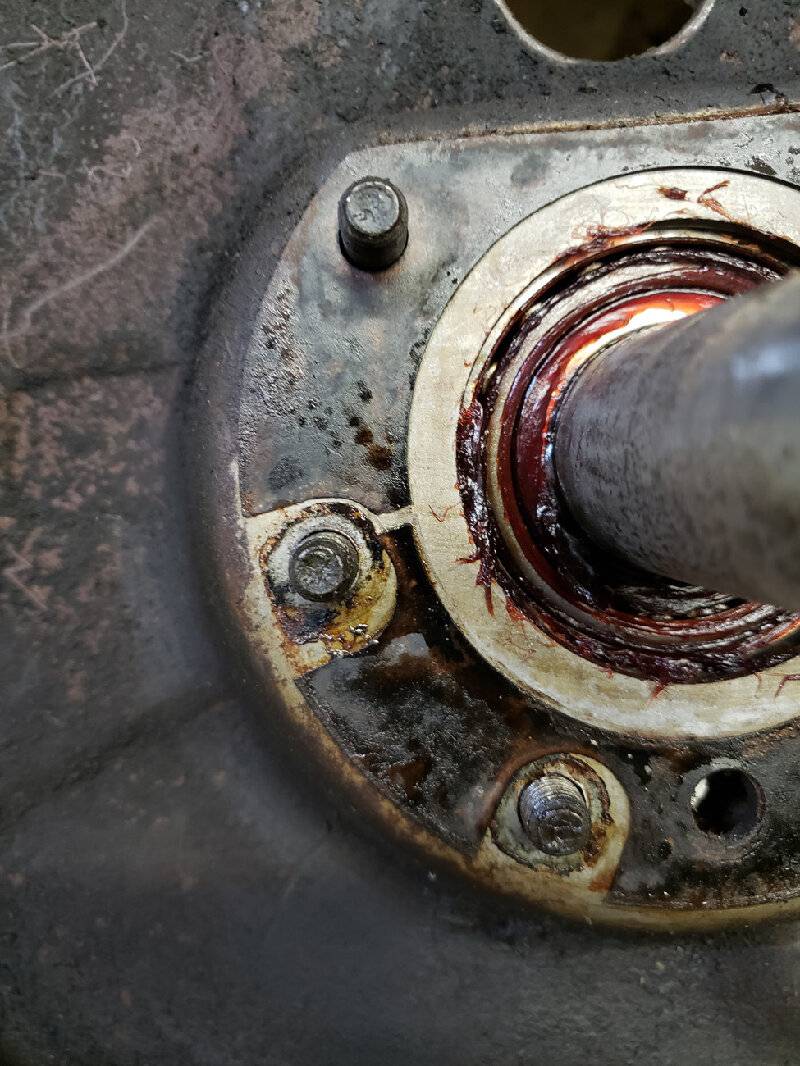  Down to the axle.jpg (115.09 KB) Down to the axle.jpg (115.09 KB)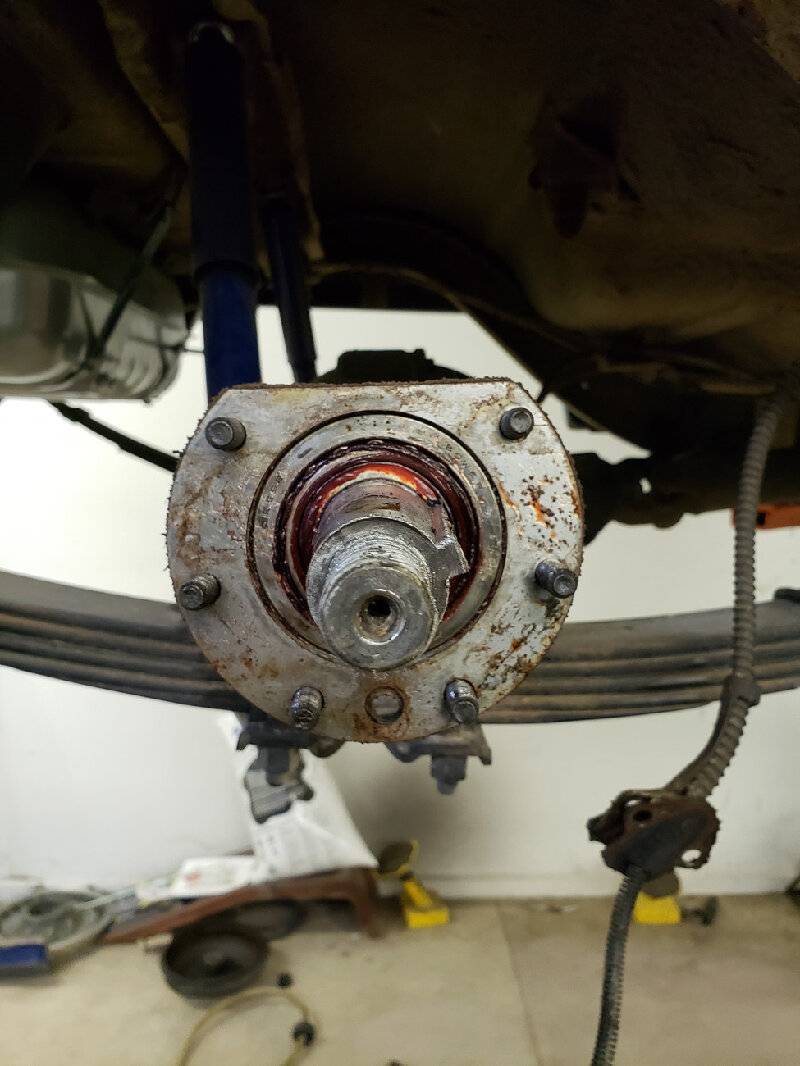
Posted on: 2021/4/1 0:12
|
|||
|
||||
|
Re: KPack
|
||||
|---|---|---|---|---|
|
Webmaster
|
Usually it's a good time to drain the diff via the drain plug and refill, since you have to replace the axle seals.
Be warned, my diff fluid was the smelliest stuff ever. Like a skunk wrapped in a burning tire. I swear the smell penetrated thought the nitrile gloves I was wearing.i must have washed my hands 20 times and could still smell it.
Posted on: 2021/4/1 6:45
|
|||
|
-BigKev
1954 Packard Clipper Deluxe Touring Sedan -> Registry | Project Blog 1937 Packard 115-C Convertible Coupe -> Registry | Project Blog |
||||
|
||||
|
Re: KPack's 1954 Panama
|
||||
|---|---|---|---|---|
|
Home away from home

|
BigKev - I had already drained and refilled the diff when I first got the car. The old fluid was obviously not original....it smelled like normal gear oil and was pretty clean. I'm probably going to reuse the new gear oil when I drain it this time. The car has probably only traveled 3 miles since then....up and down the driveway and to the neighbor's house.
-Kevin
Posted on: 2021/4/1 9:53
|
|||
|
||||
|
Re: KPack
|
||||
|---|---|---|---|---|
|
Home away from home

|
Progress is slow. I pulled the passenger rear axle with a slide hammer. Came right out. The bearing and race look brand new. I might as well pull the bearing off and repack it though...how do I get it off the axle?
The inner seal was removed using the same slide hammer, but with a two-finger attachment. Took a couple hits and it came out. The outer seal was removed from the carrier flange by using a punch and hammer. Came out in good shape. I sandblasted the brake parts and backing plate for the rear passenger drum. Then cleaned and painted them. I didn't bother matching the color on the return springs....I just used what I had on hand...black and gray. Now I'm waiting for parts. Seals are coming from Hagen, brake shoes from NAPA (crazy hard to find), new hold down springs from NAPA. I need to make new gaskets for the backing plate....do I just use thin cardboard for this? The original seals are almost paper thin. -Kevin Attach file:  Rear axle pulled.jpg (154.32 KB) Rear axle pulled.jpg (154.32 KB)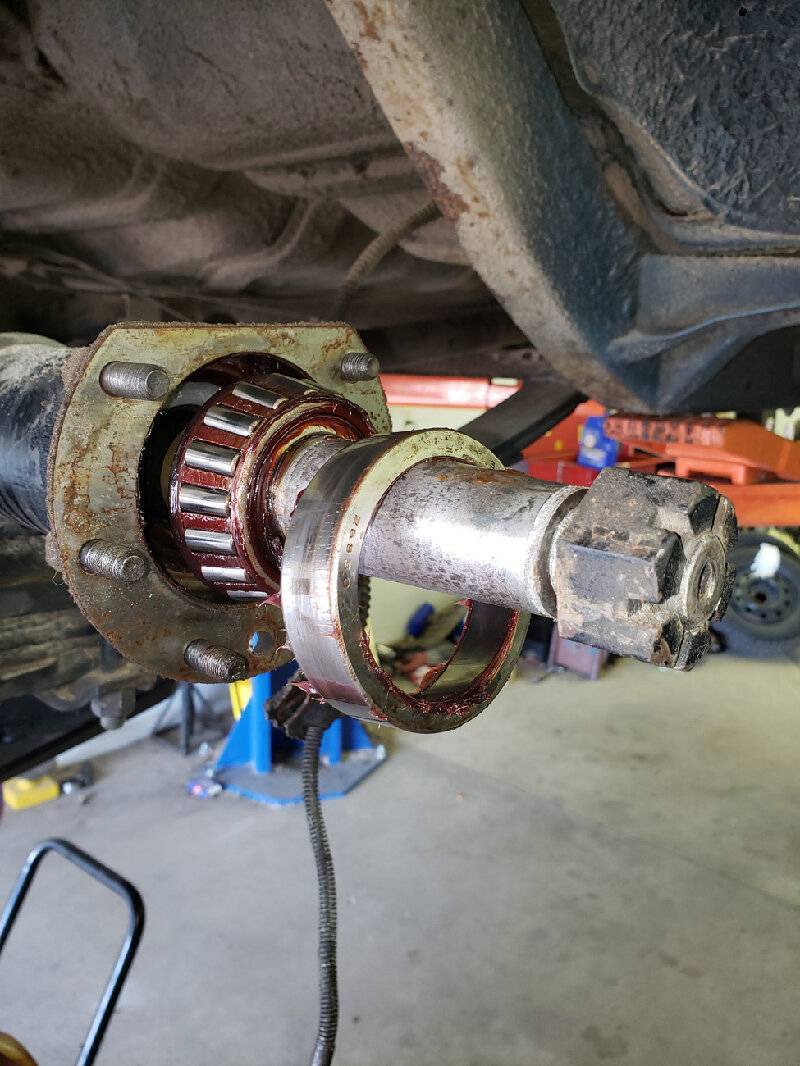  Inner seal removed.jpg (105.83 KB) Inner seal removed.jpg (105.83 KB)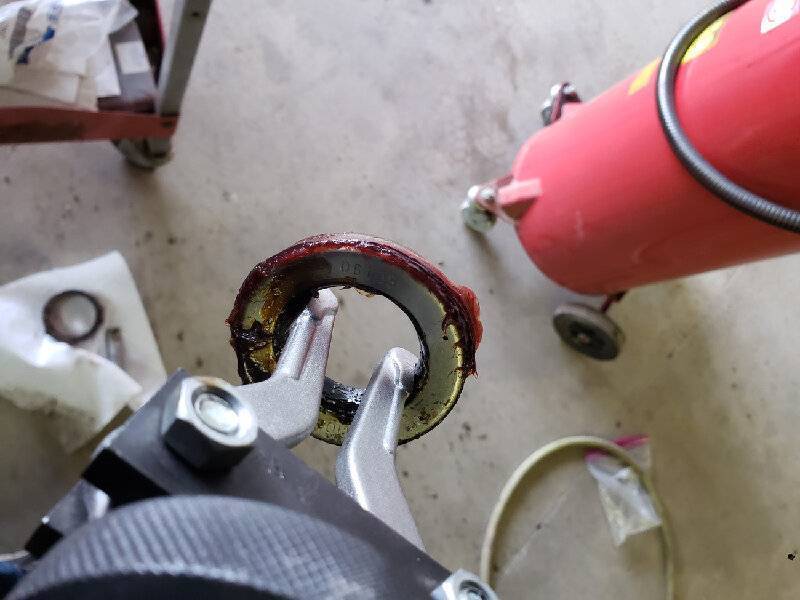  Open axle.jpg (153.70 KB) Open axle.jpg (153.70 KB)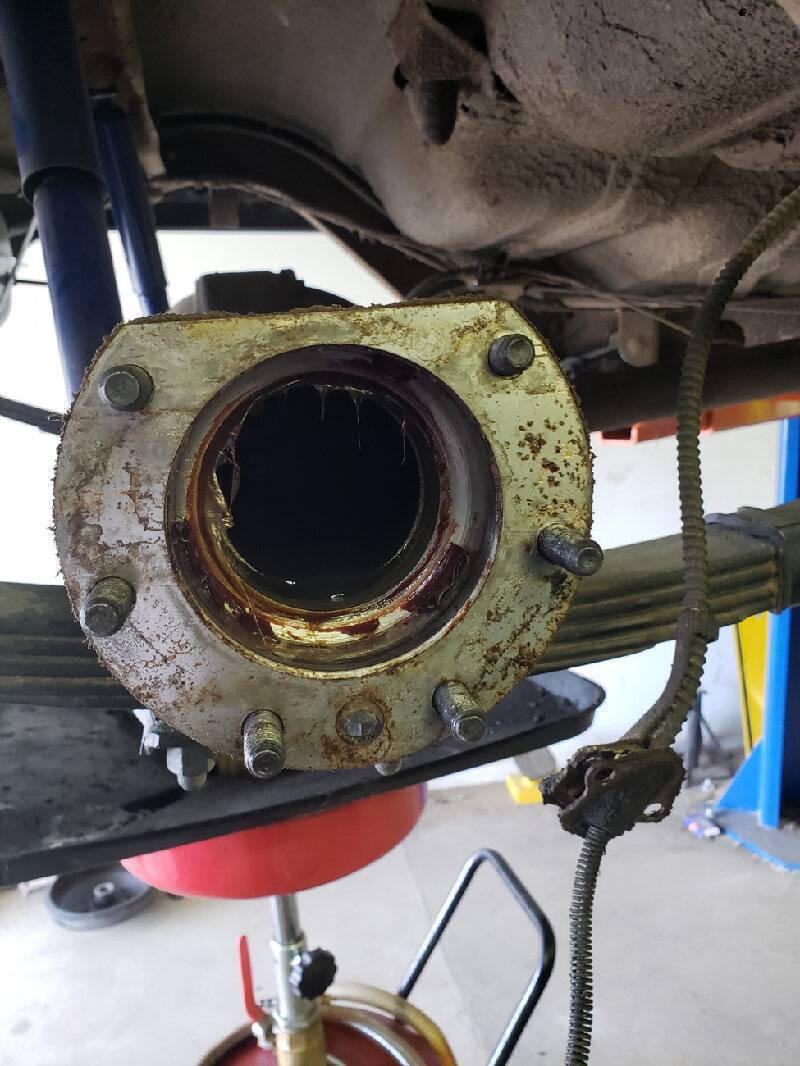  Rear drum parts.jpg (248.48 KB) Rear drum parts.jpg (248.48 KB)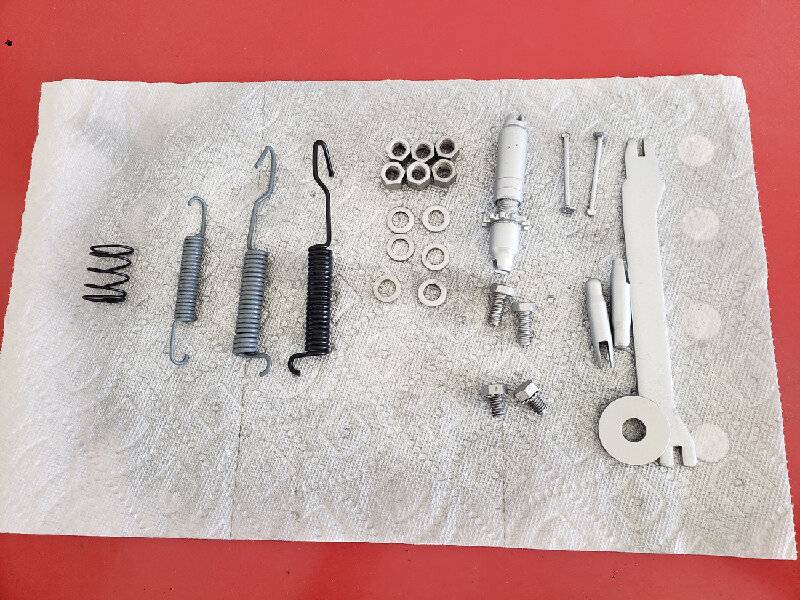
Posted on: 2021/4/5 17:23
|
|||
|
||||
|
Re: KPack
|
||||
|---|---|---|---|---|
|
Forum Ambassador
|
On the Napa shoes and even some of Kanters you may find the support web is thicker than the Packard shoes. If so you may need to find new shoe to cylinder pin links with wider slots or else widen yours so they will slide over the webbing. The adjusting screw slots may also be narrow and require some thought.
Posted on: 2021/4/5 17:55
|
|||
|
Howard
|
||||
|
||||
|
Re: KPack's 1954 Panama
|
||||
|---|---|---|---|---|
|
Home away from home
|
Kevin, that bearing is packed, or repacked in place, meaning installed on the axle. The shop manual for your car is available on this site, and if you look in Section XV there on page 9 is a photo of the technician packing the rear axle shaft bearing. That design bearing does not lend itself to easy removal as would be the case for say the outer front wheel bearing.
The thickness of the outer most gasket is not critical dp
Posted on: 2021/4/5 18:21
|
|||
|
||||
|
Re: KPack's 1954 Panama
|
||||
|---|---|---|---|---|
|
Home away from home
|
Pretend you never saw those gaskets and put a VERY thin smear of silicone gasket maker in their place. Life is too short to make those things. That will have no effect on the end play whatsoever.
Posted on: 2021/4/5 19:25
|
|||
|
||||
|
Re: KPack's 1954 Panama
|
||||
|---|---|---|---|---|
|
Home away from home

|
Howard - Good to know. The shoes I bought have a $6 core charge, so for that I think I might just keep my old shoes in case I they come in handy later. Not sure when the new shoes will be here, but when they come I'll check them out.
David - That is also good to know. I'll admit to not having read that part of the manual (I do have the manual downloaded). I had just assumed that it was removed and repacked just like the others. Ross - Good advice. I'll probably end up just using the gasket maker. -Kevin
Posted on: 2021/4/6 10:30
|
|||
|
||||
|
Re: KPack
|
||||
|---|---|---|---|---|
|
Home away from home

|
Seals came in from Hagen's today, so I spent a few minutes getting the passenger axle put back in.
The inner seal was the exact part number for the original, so they must be NOS. The outer seal is nothing like the original, but is roughly the same dimensions (slightly shallower). But I don't think this outer seal is as critical. It should still fit fine. I repacked the bearing on the axle the best I could...it was a messy process and I'm really not sure how well I got the new grease in there. The old grease still looked really good, so it's obvious someone had been in here not that long ago. All the bearings I've seen look brand new. And the tapered axles on both sides of the rear have fresh anti-seize on them (to keep the drums from getting stuck on I presume). So I wasn't too concerned about getting every bit of old grease out on the rear bearings. I then installed the new inner seal but using a large socket and tapping it into place until it was fully seated. The outer seal was installed into the grease catch plate. Should work. The axle was carefully reinserted without damaging the seal, then seated, and race tapped in around the bearing. No hitting the axle. I then reinstalled the backing plate. I used gasket maker to replace the very thin gaskets that were on there previously. I put the gasket maker where the old gaskets covered. Very thin layer. Then installed both of the plates, and torqued down the bolts that hold it all together. Lastly, I cleaned off the tapered end and -Kevin Attach file:  New seals from Hagens.jpg (145.55 KB) New seals from Hagens.jpg (145.55 KB)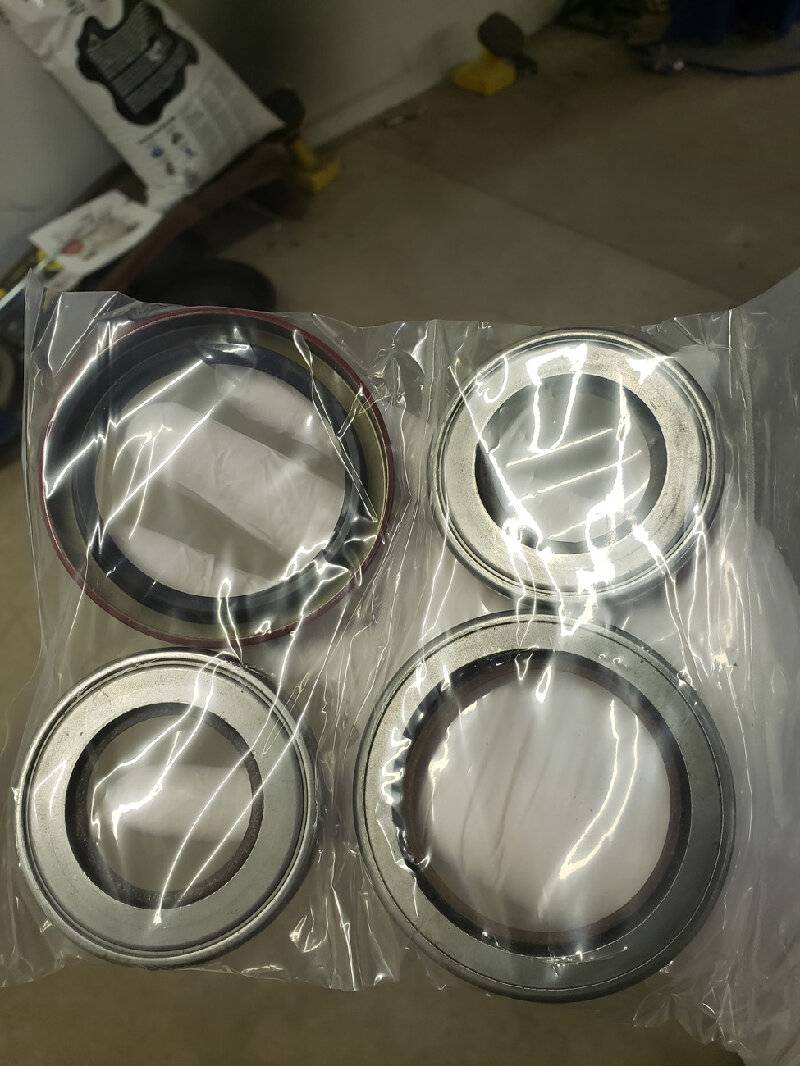  New on the left, old on the right.jpg (129.89 KB) New on the left, old on the right.jpg (129.89 KB)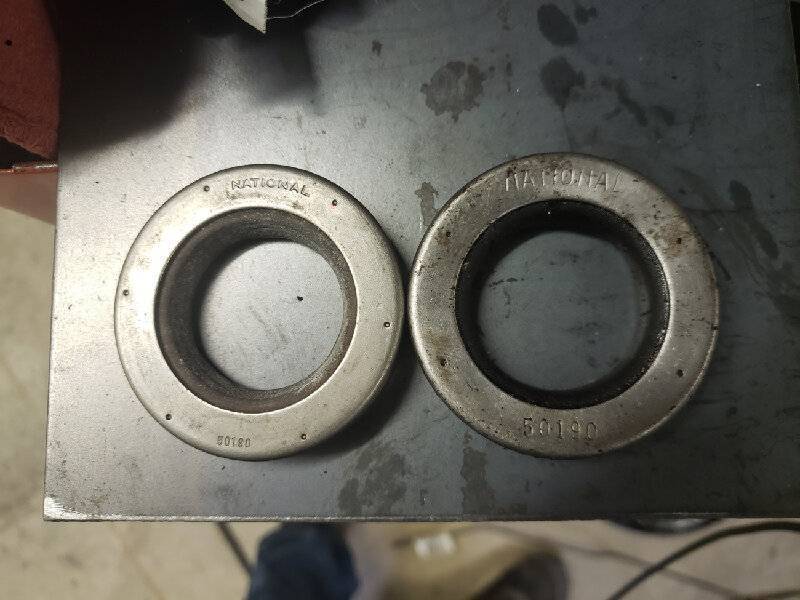  New inner seal installed.jpg (137.09 KB) New inner seal installed.jpg (137.09 KB)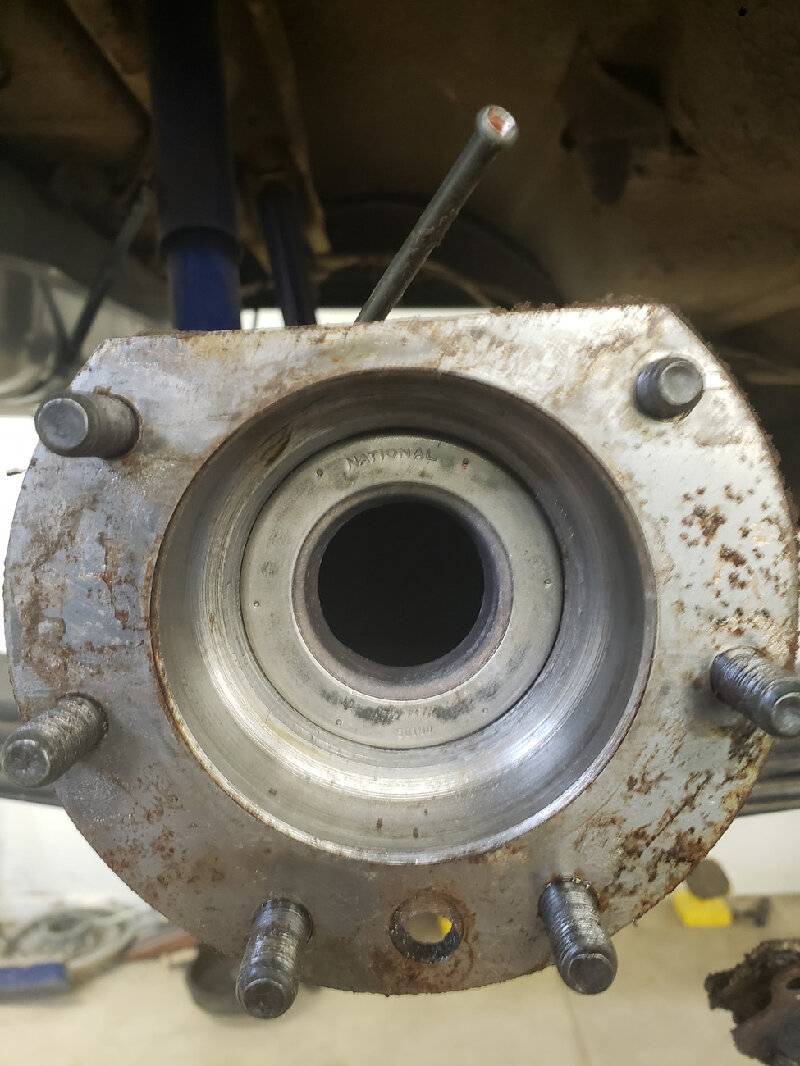  Outer seal installed.jpg (127.25 KB) Outer seal installed.jpg (127.25 KB)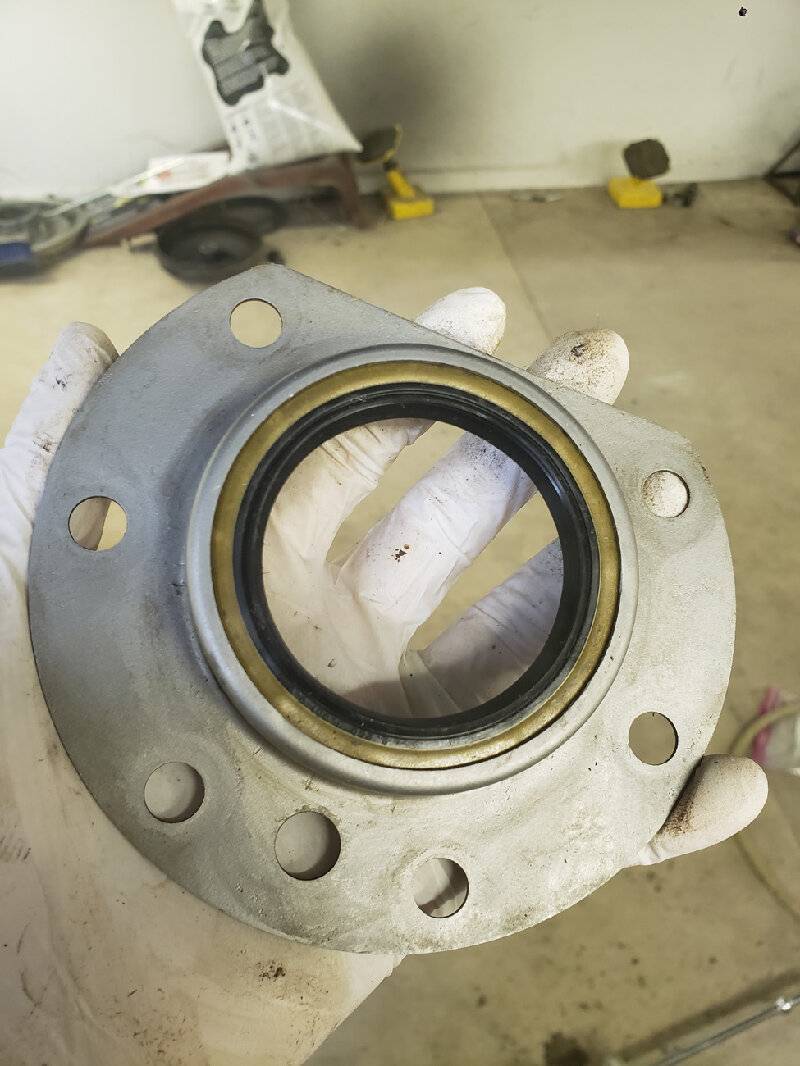  Axle reinstalled.jpg (104.27 KB) Axle reinstalled.jpg (104.27 KB)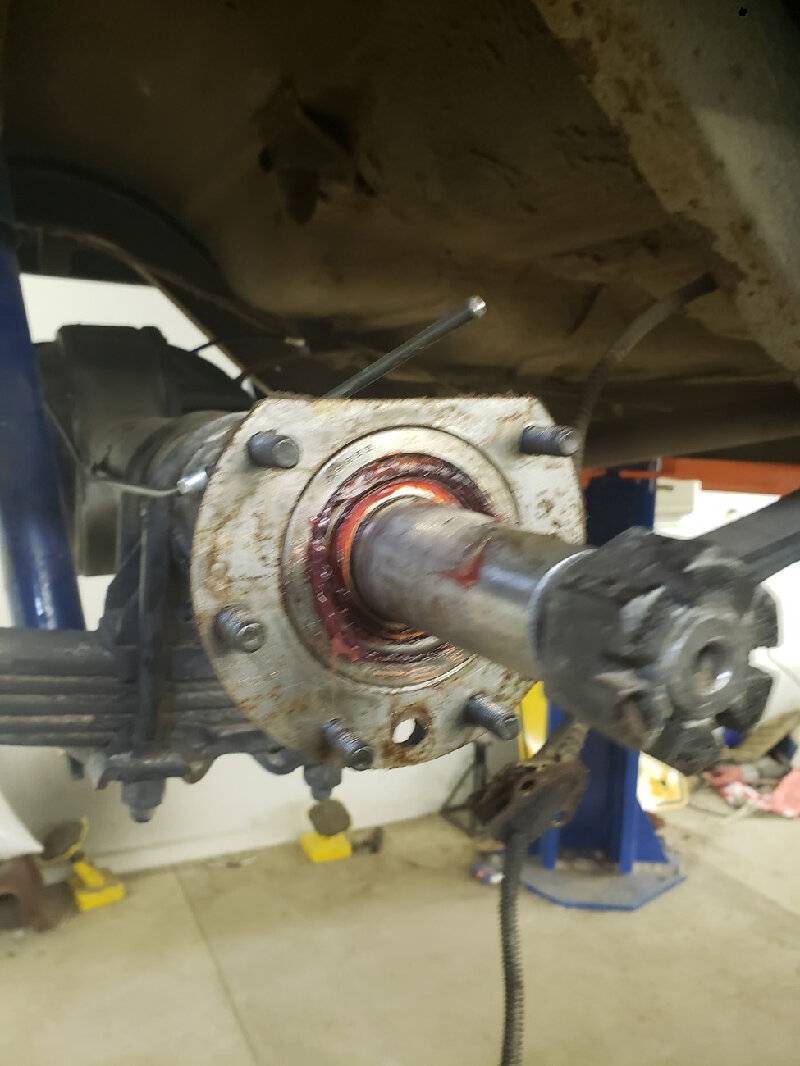  Backing plate reinstalled.jpg (159.28 KB) Backing plate reinstalled.jpg (159.28 KB)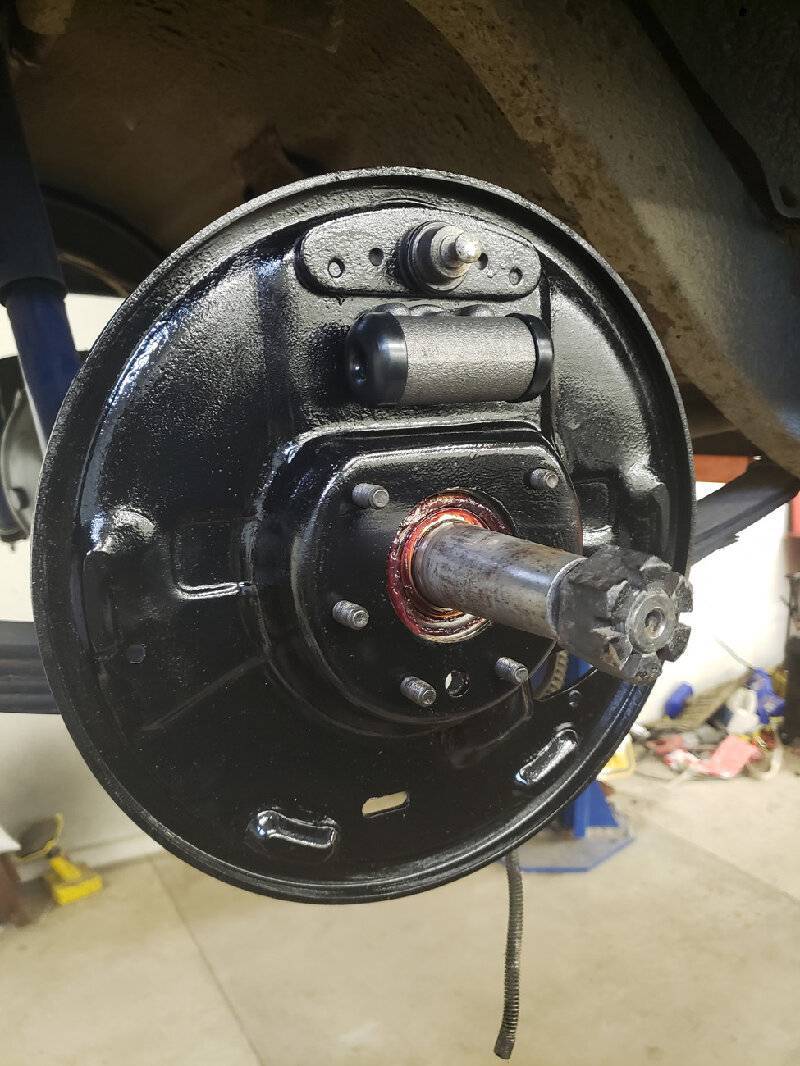  Gasket maker.jpg (163.17 KB) Gasket maker.jpg (163.17 KB)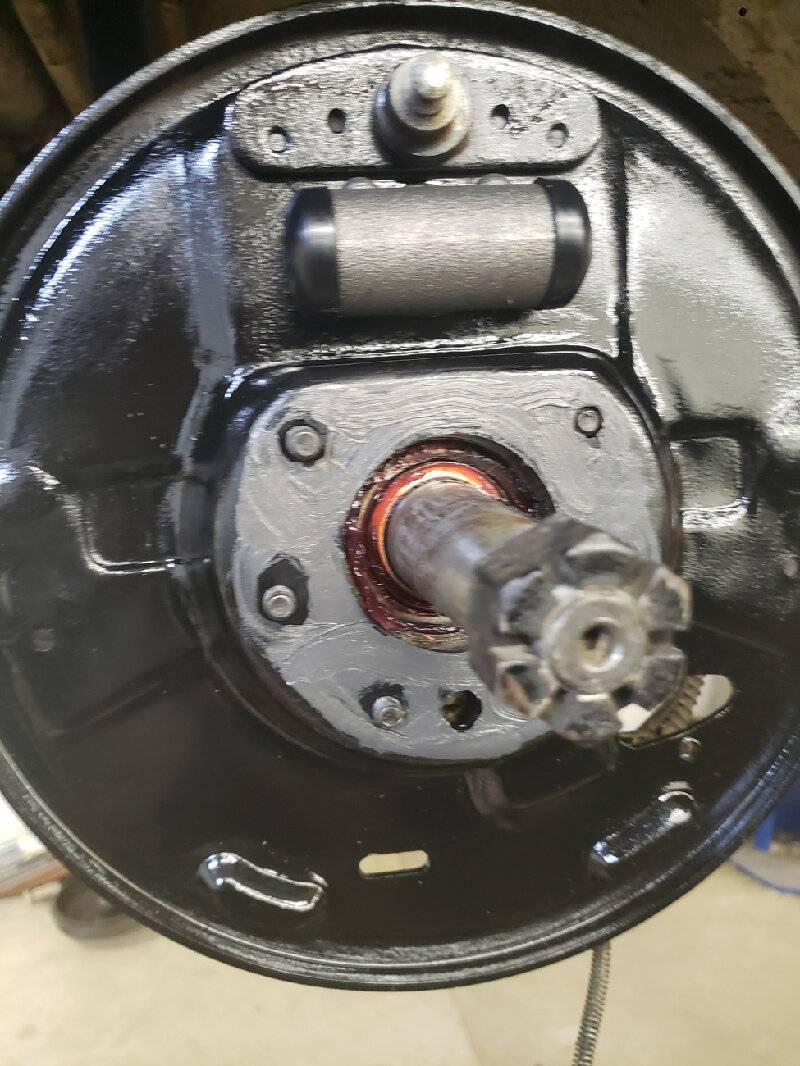  grease catch plates reinstalled.jpg (177.63 KB) grease catch plates reinstalled.jpg (177.63 KB)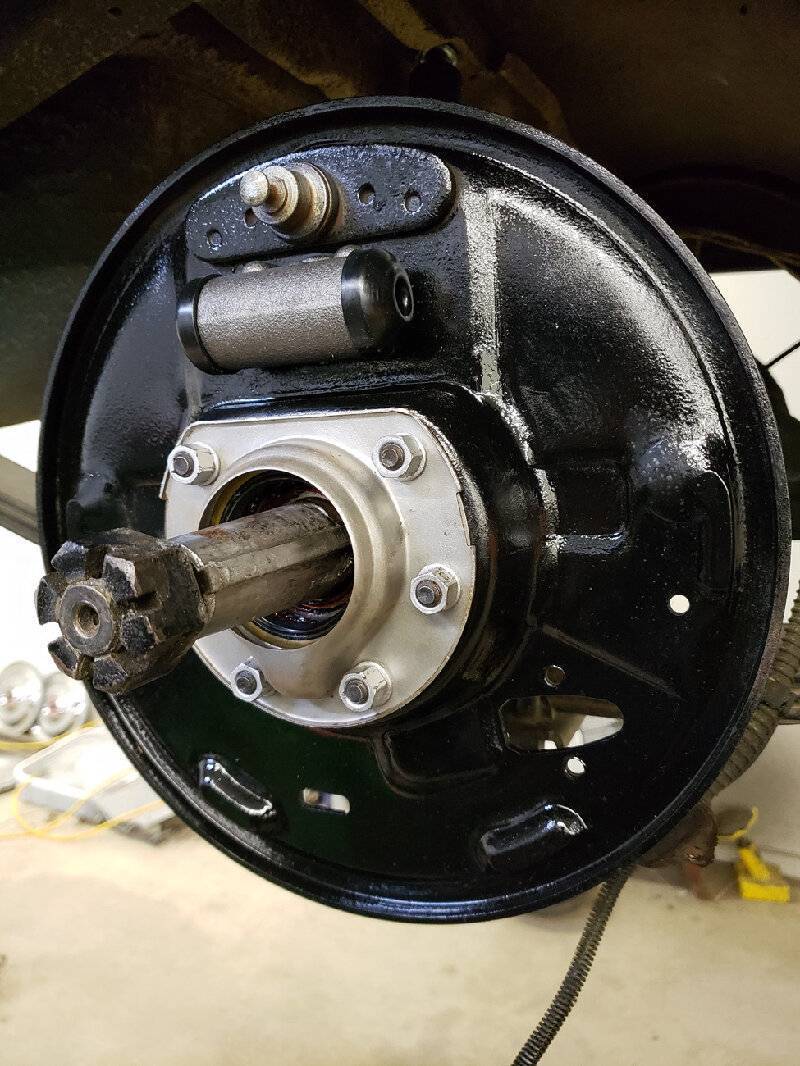
Posted on: 2021/4/8 0:17
|
|||
|
||||


