|
Re: Adventures with a 1955 Clipper
|
||||
|---|---|---|---|---|
|
Home away from home

|
If u'll do a search in this forum on "Hash pump" or just "oil pump" u'll most likely find alot more than u would ever want to know.
EDIT: This mite give more insight: https://packardinfo.com/xoops/html/modules/newbb/viewtopic.php?topic_id=208&forum=3&post_id=1116#forumpost1116
Posted on: 2011/6/2 17:26
|
|||
|
VAPOR LOCK demystified: See paragraph SEVEN of PMCC documentaion as listed in post #11 of the following thread:f
https://packardinfo.com/xoops/html/modules/newbb/viewtopic.php?topic_id=7245 |
||||
|
||||

|
Re: Adventures with a 1955 Clipper
|
||||
|---|---|---|---|---|
|
Home away from home

|
Hello All,
I got a little ahead of the story in the previous garage session description. These sessions are being done after the fact, and I must try harder to keep them in the correct order. Much progress was made in this garage session. Assemblying clean and repainted parts is much more fun than removing, cleaning, and painting them. Before installing the water pump on the front of the engine, I wanted parts on the top and back of the engine to go on first. The first to go back on was the lifter valley cover and crankcase vent tube. I needed to get the large hole on the top covered before I dropped something into it. Next to go on/in was the distributor. The distributor had been overhauled by Ross Miller as part of the work he did. A Delco Remy distributor with a Petronic solid-state breaker kit was on the Clipper. I wanted the original type Auto Lite distributor with breaker points and condenser as the car came with. The previous owner had it and Ross exchanged units and installed new parts in the Auto Lite. Like the Carter fuel system components, I am most pleased that I now have the proper Auto Lite electrical equipment on the car. I disassembled the distributor and cleaned it mostly to see what I had. I used the new parts Ross had installed as they were not worn. A squirt or two of rattle can black paint and it looks good as new. Then I mounted a couple of items on the newly cleaned firewall. I worked on doing more cleaning of the painted sheet metal in the engine compartment. I found that Meguiar's Cleaner and Wax did a good job of restoring the finish. The windshield wiper motor and the ballast resistor for the ignition coil were then attached to the firewall. Nothing too exciting about the Trico vacuum windshield wiper motor, except it does not have the compensator unit and seems to function. The ballast resistor reduces the voltage supply to the ignition coil from 12-volts to around 7-volts to prolong breaker point life. Delco and Auto Lite resistors are different. I have the correct Auto Lite resistor. Then intake manifold, coil, and carburetor were installed in that order. I wanted to get these hard to reach items installed before too much other stuff got in the way. The coil is a used one I found from Echo Hills Packard, a parts supplier in Lafayette, California (my old stomping grounds). The coil that came with the car is a high performance one to go with Petronic solid-state conversion system for the old Delco distributor. Also, it had a home made bracket. I wanted original type ignition system and needed to replace the coil and bracket with an appropriate Auto Lite unit. Whether it will work or not is yet to be discovered, but it looks nice. The intake manifold was installed on the engine with new gaskets. The gaskets are a shim metal type with embossed areas around the ports. The embossing is crushed when the manifold is torqued down and provides the seal. These type of gaskets cannot be reused because once the embossing has been crushed it will no longer reseal. I installed the gaskets dry, that is with no cement or other sealing agent, and with squeaky-clean surfaces on the cylinder heads and manifold. Once the manifold was on I installed the refinished oil filler tube and crankcase breather. The paint I am using for the engine is Krylon's Gloss Tomato. The accessories and equipment are painted a Krylon Gloss or Satin Black. The Tomato comes close to the orange-red color Packard painted these 320 cu. in. engines. The carburetor is a Carter WCFB four barrel, basically two carburetors in one body. It looks to be in remarkably good condition and even has its brass identification tag. The manufacturer, to identify the specific unit, attached a brass tags to the carburetor. In the old days some "mechanics" would keep the brass tags as souvenirs thereby leaving the next person to service the carburetor without critical information. The fuel filter is also an original type Carter unit. These filters use a ceramic element to filter the gasoline. Not seen any more, but were the best in the day. The ceramic filter elements are still available and I installed a new element and gasket. In the next garage session I will attach the Clipper to the generator. Take care. (o{I}o) Attach file:  (31.25 KB) (31.25 KB)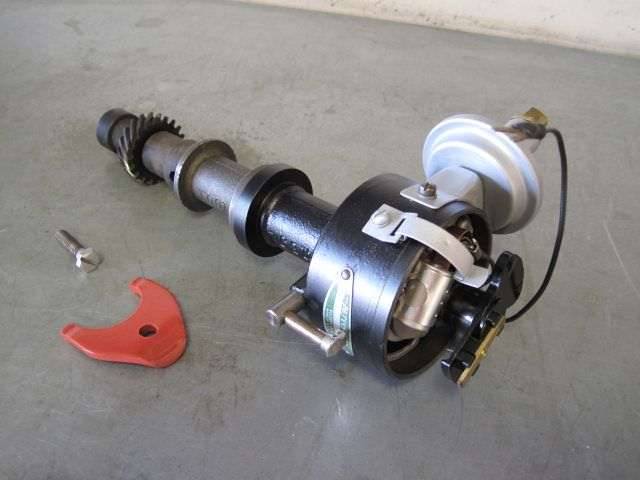 (32.98 KB) (32.98 KB)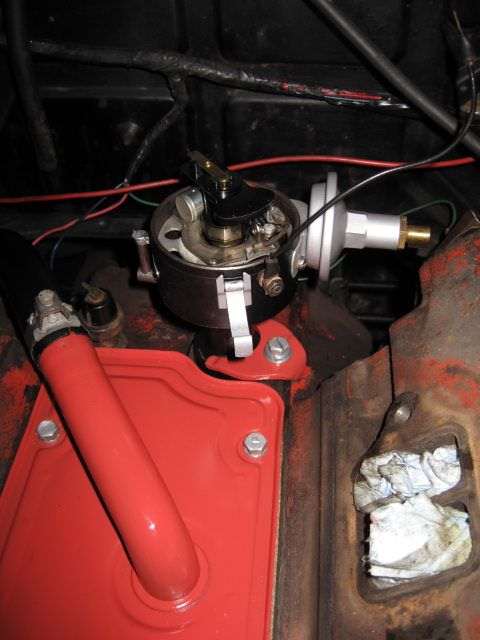 (3.72 KB) (3.72 KB) (3.06 KB) (3.06 KB) (4.46 KB) (4.46 KB)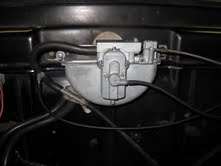 (29.93 KB) (29.93 KB)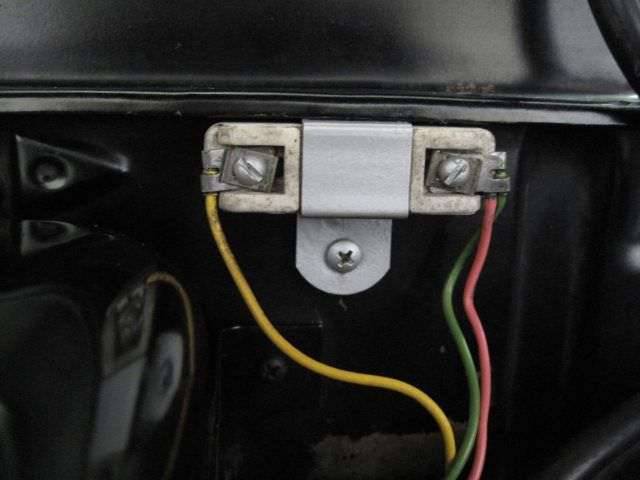 (4.42 KB) (4.42 KB)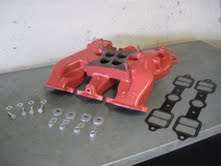 (4.05 KB) (4.05 KB) (4.54 KB) (4.54 KB) (2.92 KB) (2.92 KB)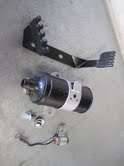 (5.94 KB) (5.94 KB)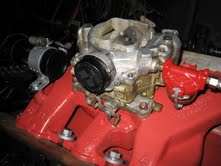
Posted on: 2011/6/8 10:54
|
|||
|
We move toward
And make happen What occupies our mind... (W. Scherer) |
||||
|
||||
|
Re: Adventures with a 1955 Clipper
|
||||
|---|---|---|---|---|
|
Forum Ambassador

|
Looking very nice indeed, JW. I admire your efforts to keep it authentic.
Posted on: 2011/6/8 11:11
|
|||
|
||||
|
Re: Adventures with a 1955 Clipper
|
||||
|---|---|---|---|---|
|
Home away from home
|
Quote:
"The 56J version of the Packard V8 oil pump (with no vacuum pump) simply uses a flat bottom plate with NO bushing. I believe it was an article published by PAC some years ago that expressed the notion that the "Hash" pump used a cast bottom plate with bushing." ok. Then it was one of the Nash or Hudsons with Packard V8 engine that used the pump with lower plate and BUSHING. I have one in my possesion. It was a pump that T'Packman sent me about 4 years ago.
Posted on: 2011/6/8 12:16
|
|||
|
VAPOR LOCK demystified: See paragraph SEVEN of PMCC documentaion as listed in post #11 of the following thread:f
https://packardinfo.com/xoops/html/modules/newbb/viewtopic.php?topic_id=7245 |
||||
|
||||
|
Re: Adventures with a 1955 Clipper
|
||||
|---|---|---|---|---|
|
Home away from home

|
JW: Looking very fine. Here is an extra detail that many folks miss: The area around the engine # was white. From taking many engines apart, here is how it seems Packard did it:
1: The engine # area was given a dab of white paint with a brush. 2: The engine # was stamped right through the white paint. 3: A piece of 3/4" masking tape was placed over the engine number. 4) the engine was painted and the tape was pulled off. So basically you end up with the engine number in the middle of a white rectangle. If you look carefully, you can see this in many original factory/shop manual photos. I believe this holds true for all postwar engines and possibly some prewars as well. All that said, I usually just mask off a little rectangle and dab on some white paint after the engine has been painted.
Posted on: 2011/6/8 12:41
|
|||
|
||||
|
Re: Adventures with a 1955 Clipper
|
||||
|---|---|---|---|---|
|
Home away from home
|
Ross, when done the engine compartment looks respectable. Not new, but much better. More to follow. Here is a photo of my engine number. It is as you describe. Take care.
(o{I}o) Attach file: (39.72 KB)
Posted on: 2011/6/8 13:19
|
|||
|
We move toward
And make happen What occupies our mind... (W. Scherer) |
||||
|
||||
|
Re: Adventures with a 1955 Clipper
|
||||
|---|---|---|---|---|
|
Home away from home
|
Quote:
Dave, thanks for the compliment. I like things to look stock. There will be a couple of deviations from this later on, but the changes will be hidden. When I do vary from stock I do it in a way that whatever has been changed can be easily put back to original-like appearance. No permanent damage done. Take care. (o{I}o)
Posted on: 2011/6/8 13:25
|
|||
|
We move toward
And make happen What occupies our mind... (W. Scherer) |
||||
|
||||
|
Re: Adventures with a 1955 Clipper
|
||||
|---|---|---|---|---|
|
Home away from home
|
JW,
Thanks for the info on R&R of the intake manifold. I have made plans to do this with any engine of unknown history before attempting to start it. If I guess right, this will make it possible to get some lubricant onto the pushrods and possibly down to the lifters before trying to turn over an engine that has not run in years. If this procedure is not worthwhile, maybe someone could comment as to why not. I know this doesn't pertain to your recently running Packard, but thought it would be a worthwhile addition to your procedure. Now I know that the intake gaskets must be replaced, and not to use any sealers. Also, the manifold makes a nice little workbench for tinkering with and removing the carb!
Posted on: 2011/6/9 0:45
|
|||
|
Guy
[b]Not an Expert[/ |
||||
|
||||
|
Re: Adventures with a 1955 Clipper
|
||||
|---|---|---|---|---|
|
Home away from home
|
Guy,
That is a great idea. Doing this will also give you a view of the camshaft, lifters, and push rods. Removing the rocker arm covers will let you look at the valves and springs too. The manifold and covers are relatively easy to remove, and time doing this would be well spent. Some here have recommended and used a copper spray gasket sealant. I decided to go without any sealant, and the gaskets sealed perfectly. Nice to see some benefit is being seen in these blog posts - that is what it is all about - sharing experiences and knowledge. (o{I}o)
Posted on: 2011/6/9 10:48
|
|||
|
We move toward
And make happen What occupies our mind... (W. Scherer) |
||||
|
||||


