


|
Re: Adventures with a 1955 Clipper
|
||||
|---|---|---|---|---|
|
Forum Ambassador

|
Great progress!
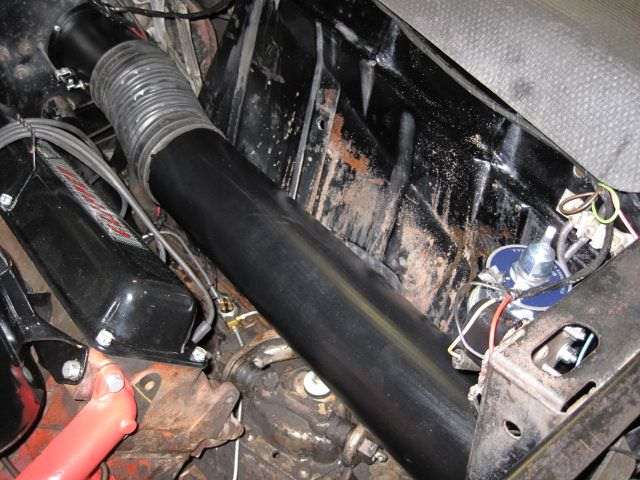
What make and Group is that battery? It certainly isn't a Group 60 yet it seems to fit the carrier and hold down perfectly; I've not yet found a non-Group 60 that fits that well.
Posted on: 2011/6/13 12:08
|
|||
|
||||
|
Re: Adventures with a 1955 Clipper
|
||||
|---|---|---|---|---|
|
Webmaster

|
JW,
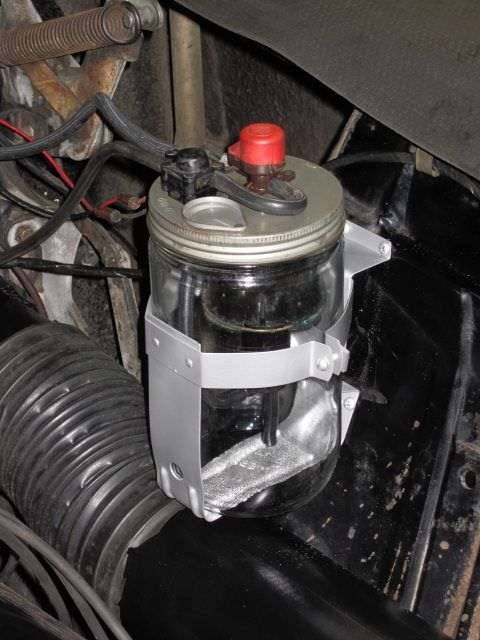
If you are interested, PI So Cal Region sells reproduction flexible vent ducting. Exact match to the original ones Packard used. Attach file:  (43.86 KB) (43.86 KB)
Posted on: 2011/6/13 12:10
|
|||
|
-BigKev
1954 Packard Clipper Deluxe Touring Sedan -> Registry | Project Blog 1937 Packard 115-C Convertible Coupe -> Registry | Project Blog |
||||
|
||||
|
Re: Adventures with a 1955 Clipper
|
||||
|---|---|---|---|---|
|
Forum Ambassador

|
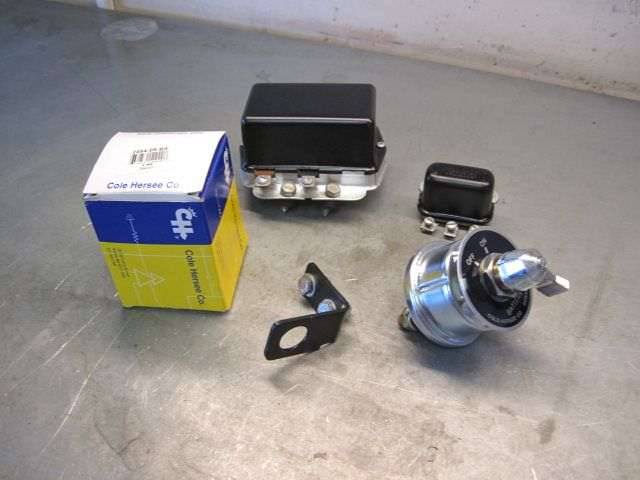
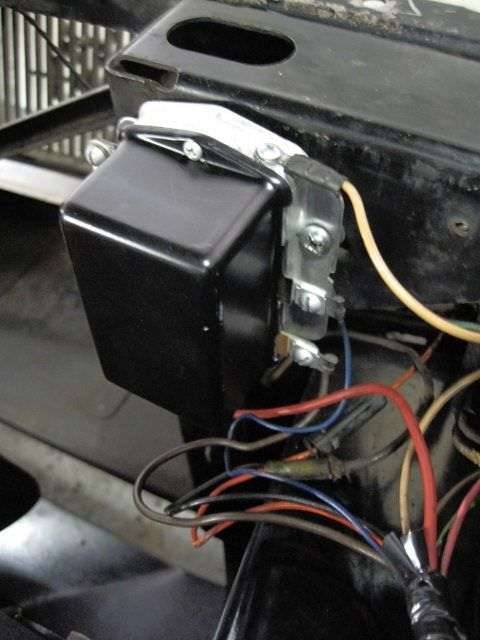
Also want to chime in & congratulate you on the great progress. One thing I am curious about is the voltage regulator mount. There seems to be several different ways they are done & just wondering what the consensus is. I see you mounted your Autolite vertically. There is one picture I found in SM radiator section showing it that way but then I see an extra hole on your support which appears to have been used at some time. Mine is Delco & horizontal with the safety cover over the terminals which face up and uses that hole. Looks as if there is no room to go vertically without sharing a hole either and terminals down, would be awfully hard to get to. As far as I know, original way on mine. Looking in the photo archives, there are a couple that appear to be mounted on an angle. Anyone know if they changed by regulator brand or by car model?
Posted on: 2011/6/13 12:45
|
|||
|
Howard
|
||||
|
||||
|
Re: Adventures with a 1955 Clipper
|
||||
|---|---|---|---|---|
|
Forum Ambassador
|
Neat workmanship. I thought 55 VRs were mounted vertical with the terminals facing the fender and 56 mounted VRs with the terminals facing up and requiring that rubber sleeve to protect from shorts. The battery looks like group 31, but also looks like positive terminal faces front of car??
Posted on: 2011/6/13 13:22
|
|||
|
||||
|
Re: Adventures with a 1955 Clipper
|
||||
|---|---|---|---|---|
|
Home away from home

|
Might I suggest something that will take little time to R&R and may be helpful in keeping the engine compartment spiffy? The area inside of the fender and wheel well, under and behind the battery carrier, seems to have had the finish eaten away from spills the same way as the vent pipe was.
Perhaps a good cleaning and spray with rubberized black finish would be a semi-permanent fix for this condition. Most of this area is hidden, and a slightly non-matching finish would be less noticeable than bare metal. Looking forward to more installments! BTW, what is the purpose of the horn relay cutoff? Once the battery is effectively "dead" the horn should receive zero power anyway?
Posted on: 2011/6/13 13:35
|
|||
|
Guy
[b]Not an Expert[/ |
||||
|
||||
|
Re: Adventures with a 1955 Clipper
|
||||
|---|---|---|---|---|
|
Forum Ambassador
|
I thought 55 VRs were mounted vertical with the terminals facing the fender and 56 mounted VRs with the terminals facing up and requiring that rubber sleeve to protect from shorts.
Maybe so, although I believe one of the angled ones I mentioned was on a 55. The cradle assy is the same both years so interesting if they all mount vertically in 55. The Delco I have has two mounting screws on one side which I don't think could both be used if mounted vertically and sure looks like the bottom one would share the top radiator mount hole.
Posted on: 2011/6/13 13:53
|
|||
|
Howard
|
||||
|
||||
|
Re: Adventures with a 1955 Clipper
|
||||
|---|---|---|---|---|
|
Forum Ambassador
|
The 55s I've seen that seemed original enough to have their OEM voltage regulators had them mounted at a diagonal. 56, Delco at least, are mounted horizontally with the terminals facing upwards. The original little rubber sleeve that slipped over the naked terminals to protect them has been reproduced, by Joel Ray I believe.
Posted on: 2011/6/13 14:19
|
|||
|
||||
|
Re: Adventures with a 1955 Clipper
|
||||
|---|---|---|---|---|
|
Home away from home

|
Quote:
Dave, I don't have any info on the battery. There were no stickers on it, except a date tag of 8/07. Perhaps Dwight can recall. This would be good information for us V-8'ers to have. I have received like comments from others admiring the size and fit. (o{I}o)
Posted on: 2011/6/13 16:16
|
|||
|
We move toward
And make happen What occupies our mind... (W. Scherer) |
||||
|
||||
|
Re: Adventures with a 1955 Clipper
|
||||
|---|---|---|---|---|
|
Home away from home
|
Quote:
Guy, I wish now that I would have done what you suggest, to paint the inner fender panel. Maybe I will go back and do this. It is not a good idea to have metal in this condition. The cut-off switch is for the battery, not the horn relay. I just mounted the switch next to the relay. Also, the photo is pretty bad, and I apologize for the poor quality. (o{I}o)
Posted on: 2011/6/13 16:21
|
|||
|
We move toward
And make happen What occupies our mind... (W. Scherer) |
||||
|
||||


