|
Re: Mal's '41 120 Coupe
|
||||
|---|---|---|---|---|
|
Forum Ambassador

|
Wednesday 10th December 2008
I did in fact go to the workshop today, but later than usual, to do some work on the '41. But first up, I understand that when Santa called in earlier he found Wade had got the horn going and Santa was able to test it for Mal - PAAAAAARRRRRP. Wade had found a small spring at home which he was able to use in assembling the horn ring and contact. Wade also took a pic of Santa next to the '41 and by the look of it you'd think he owned it! But when I arrived, there was no standing around taking pictures, it was straight into the removal of the left front shackle, and because of the weld like effect rust has on rubber, this was difficult to remove. I must say all the rubber bushes exhibited this to some extent necessitating longer levers and bigger hammers until broken free of the death grip they were in. And it isn't easy lying on your back on a creeper trying to get leverage under a Packard. But suffice to say all were removed and the shackle bolts, nuts and retainer plates cleaned up. Seems like the previous owner or his mechanic had replaced a few rubbers with something close and cut to fit. And it appears this was done on the right side only, probably because of the proximity of the exhaust pipe. But we got the correct replacements in, sometimes with a little difficulty, but get them in we did. All helped by the liberal application of rubber grease to all rubber surfaces. Next removed the bump stop rubbers from each side of the chassis above the diff housing. This was made difficult my the POR-15 with which they were painted. Right side came off after a battle while the left side bolts both snapped. Left things at that stage and will clean up surfaces, etc and install the new bump stops tomorrow. Attach file:  (18.14 KB) (18.14 KB)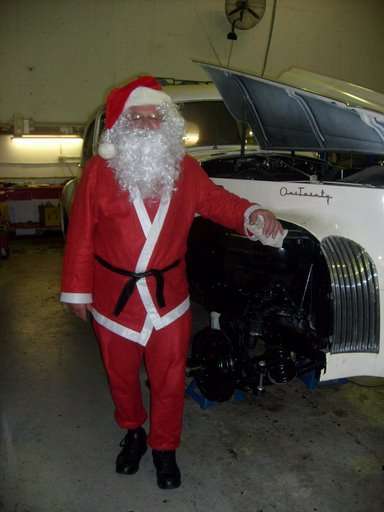 (15.18 KB) (15.18 KB)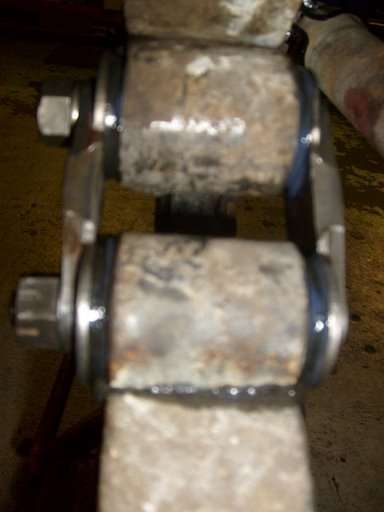
Posted on: 2008/12/10 1:56
|
|||
|
Mal
/o[]o\ ====  Bowral, Southern Highlands of NSW, Australia "Out of chaos comes order" - Nietzsche. 1938 Eight Touring Sedan - SOLD 1941 One-Twenty Club Coupe - SOLD 1948 Super Eight Limo, chassis RHD - SOLD 1950 Eight Touring Sedan - SOLD What's this?  Put your Packard in the Packard Vehicle Registry! Here's how! Any questions - PM or email me at ozstatman@gmail.com |
||||
|
||||
|
Re: Mal's '41 120 Coupe
|
||||
|---|---|---|---|---|
|
Forum Ambassador
|
Thursday 11th December 2008
On arrival at the workshop found Wade had been working on the front fender lights. Putting in new contacts and wires also cleaned them up and dug out the new fender to housing gaskets I'd bought. Not MBM's, because these are visible and probably beyond my abilities anyway. Wade finished off the lights while I cleaned up the hardware for the diff bump stop rubbers and gave them a quick coat of POR-15. While Wade went about replacing all the connectors between the O/D wiring harness and the main harness I was instructed to finish the inner fender panels. This will then enable the front fenders to be re-fitted and the front end wiring completed. As I hadn't put any lock washers on the screws and nuts holding the new MBM rubber skirts to the inner fender panels, that was my first task. Except I then had to take off the right side one again because the rear part of the skirt has two metal bars inside the panels which clamps the rubber to it and I'd missed doing that initially. The left side, after the lock washers were added and tightened up, had a further trial fitting and trimming of the rubber skirt to clear the Optima battery parked on top of the chassis. Then came fitting of the right side front fender, While Wade held it in place I inserted and did up two bolts only, enough to hold the fender steady together with it resting on the front fender bracket, and then Wade could relax, phew! But just as well there's no wind in the workshop or it'd start flapping around like a bird gone berserk. Attach file: (39.94 KB)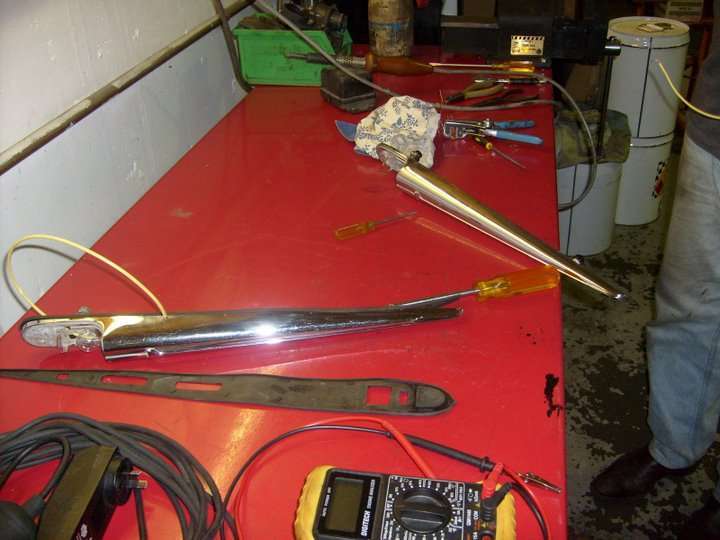 (32.60 KB) (32.60 KB) (27.96 KB) (27.96 KB)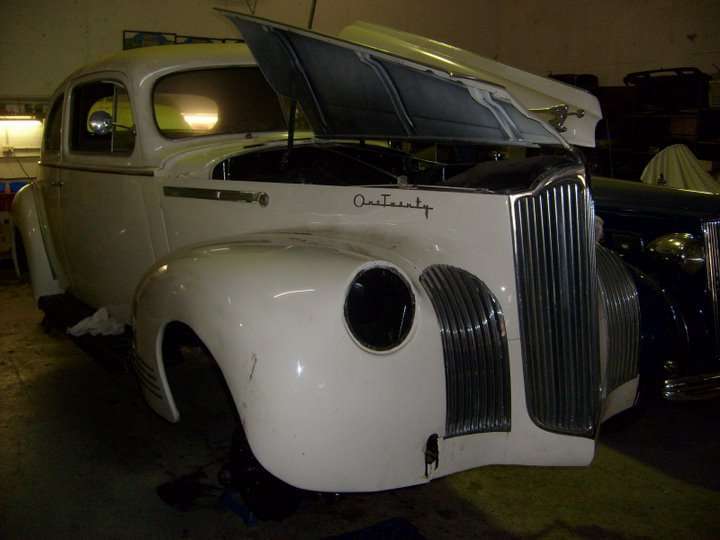 (35.66 KB) (35.66 KB)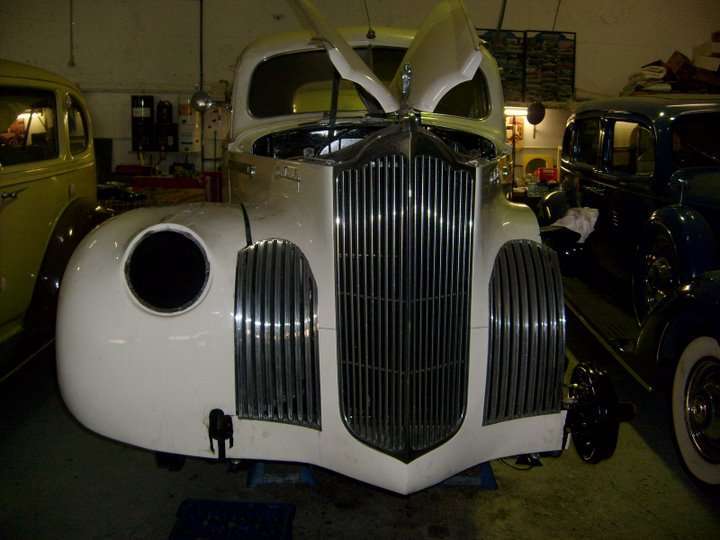 (15.67 KB) (15.67 KB)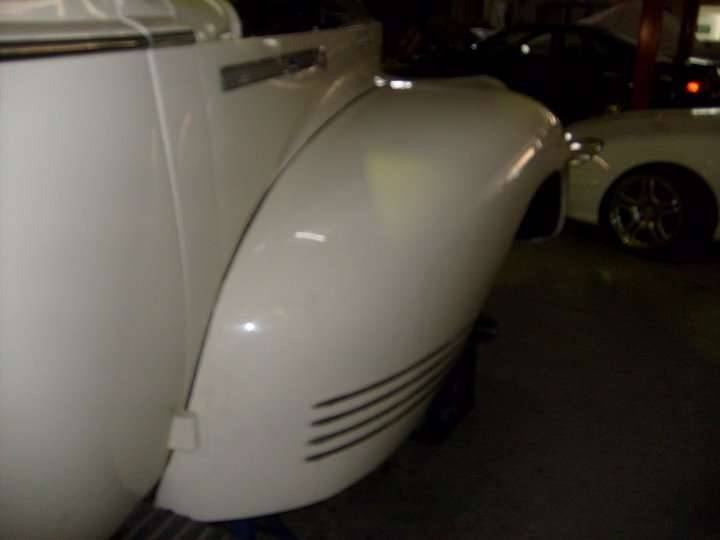
Posted on: 2008/12/11 3:25
|
|||
|
Mal
/o[]o\ ==== Bowral, Southern Highlands of NSW, Australia "Out of chaos comes order" - Nietzsche. 1938 Eight Touring Sedan - SOLD 1941 One-Twenty Club Coupe - SOLD 1948 Super Eight Limo, chassis RHD - SOLD 1950 Eight Touring Sedan - SOLD What's this? Put your Packard in the Packard Vehicle Registry! Here's how! Any questions - PM or email me at ozstatman@gmail.com |
||||
|
||||
|
Re: Mal's '41 120 Coupe
|
||||
|---|---|---|---|---|
|
Forum Ambassador
|
Monday 15th December 2008
Arrived at the workshop to find Wade in his "civvies" as he'd left his work clothes at home after washing them on the weekend. But soon after, his personal valet, AKA wife Gina turned up with his work gear. Phew, there would be Packard work today! Then, just as Gina left, Peter L arrived to pick up the Solenoid for his '38 O/D which Wade had repaired. So by the time Peter left a good hour plus had elapsed, it's never just a drop-in because Packard related matters have to be discussed, and we could then get to work. Oh, and Wade had the radio for the '41 sitting on the bench. He'd replaced the vibrator with the one out of his '37 Super 8 rather than continue waiting for the replacement on order from the US. First up, with Wades assistance I mounted the rubber bump stops for the diff, and I was told by Peter a little earlier "If only he'd known, as he has a new pair! The left front fender was then re-mounted on the '41, initially with just a couple of bolts and resting on the front fender bracket. Then as Wade went about re-installing the radio I put in the other fender bolts, and where required nuts because some of the retained nuts were missing. Had help on a few occasions because of the difficulty in securing bolts and nuts in those positions which didn't have them originally. And in my absence on Friday Wade had re-positioned the inner fender panels from the outside to the inside of the body, this way all fitted properly. During the course of this I was very pleased to hear the radio break into song with a beatles record playing on the AM station I'll probably have tuned in most of the time. The station is 2CH, 2 being the State code adopted by radio here in it's infancy(New South Wales = 2) and CH being an abbreviation for Churches the first owners of the station, see wikipedia linkhttp://en.wikipedia.org/wiki/2CH , and link to the 2CH websitehttp://www.2ch.com/index.php?option=com_frontpage&Itemid=1 They play plenty of 50's and 60's stuff, which suits me fine. I had to leave the workshop for a couple of hours and during that time Wade worked on John's '39 110 replacing the starter solenoid with a good used one which Peter provided today. He also replaced the clutch return spring because the original had been replaced somewhere in it's life and wasn't effective. Should be back with John in a few days after another couple of trips home with Wade overnight to ensure all's working well. Wade also hooked up the heater wiring, he'd left this till after the radio was fitted so the wiring was sited properly. He then fitted the heater controls panel under the dash and remade a screw for the heater control valve knob as the screw in it was plainly not acceptable. Wade Manufacturing Industries (WFI) swung into gear, sourcing a screw of the right thread, cut off the head, cut a slot in the head end then ground it down to the right length. And now "it looks like a bought one", much much better than the abomination it replaced. Last task for the day was to fit the white plastic fender beading to the right front fender. A bit 'hit and miss' as cutouts were made to accommodate the fender bolts and "Vee's" cut to permit the beading to bend without kinking. Final tightening, and the left side, will be done tomorrow as there are still two nuts and bolts to be installed on the right side. And yesterday I had a call from Harvey to thank me as he'd got a job doing a dash for Peter T(Peter Packard on this Site) for his '37 Super Eight Coupe. I also found out that Harvey had been a previous owner of the coupe, small world. Although Harvey thanked me, because Peter saw the pic's of the dash for the '41, he shouldn't. Because without Harvey I wouldn't have a re-woodgrained dash in the '41 so it's really my thanks to Harvey rather than vice versa. Attach file: (28.33 KB) (16.40 KB) (16.40 KB)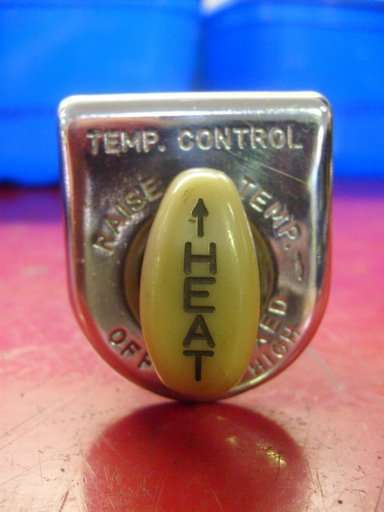 (36.56 KB) (36.56 KB) (39.28 KB) (39.28 KB)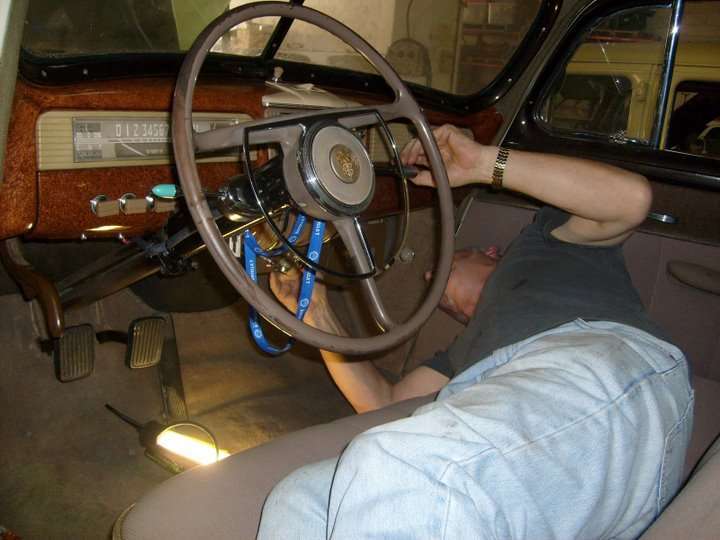 (46.89 KB) (46.89 KB)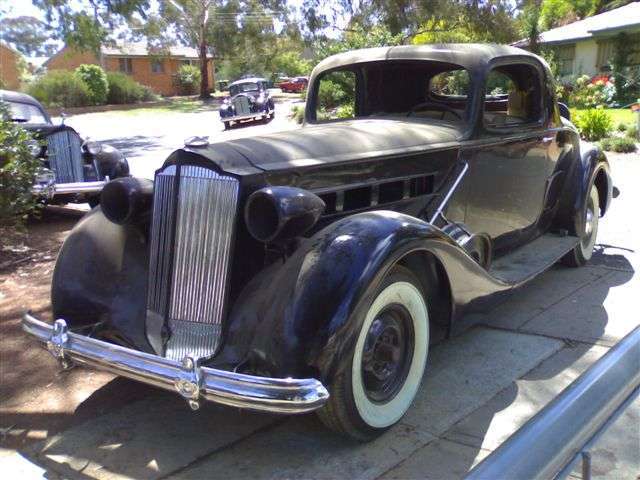
Posted on: 2008/12/15 4:18
|
|||
|
Mal
/o[]o\ ==== Bowral, Southern Highlands of NSW, Australia "Out of chaos comes order" - Nietzsche. 1938 Eight Touring Sedan - SOLD 1941 One-Twenty Club Coupe - SOLD 1948 Super Eight Limo, chassis RHD - SOLD 1950 Eight Touring Sedan - SOLD What's this? Put your Packard in the Packard Vehicle Registry! Here's how! Any questions - PM or email me at ozstatman@gmail.com |
||||
|
||||
|
Re: Mal's '41 120 Coupe
|
||||
|---|---|---|---|---|
|
Forum Ambassador

|
  damn you for teasing me with the 37 coupe again!!!! DAMN YOU I SAY!! damn you for teasing me with the 37 coupe again!!!! DAMN YOU I SAY!!j/k! ;0) have a good one!
Posted on: 2008/12/15 9:49
|
|||
|
1937 Packard 138-CD Deluxe Touring Limousine
Maroon/Black 1090-1021 [url=https://packardinfo.com/xoops/html/modules/registry/View.php?ID=232]1955 Packard |
||||
|
||||
|
Re: Mal's '41 120 Coupe
|
||||
|---|---|---|---|---|
|
Forum Ambassador
|
Tuesday 16th December 2008
Just a brief hour and a half at the workshop this morning. First up, with help from Wade, installed the left front fender beading. Then, while Wade returned John's '39 110, I tightened up the bolts and bolts & nuts securing both front fenders. There are still a few to do because of the difficulty of trying to be under the '41 and up inside the engine compartment at the same time. So these will be finished on Thursday when I get back to the workshop. And Hank, although no pic's taken today, just for you I've thrown in some of the three Aussie '37 Coupes I've seen! Attach file: (51.67 KB)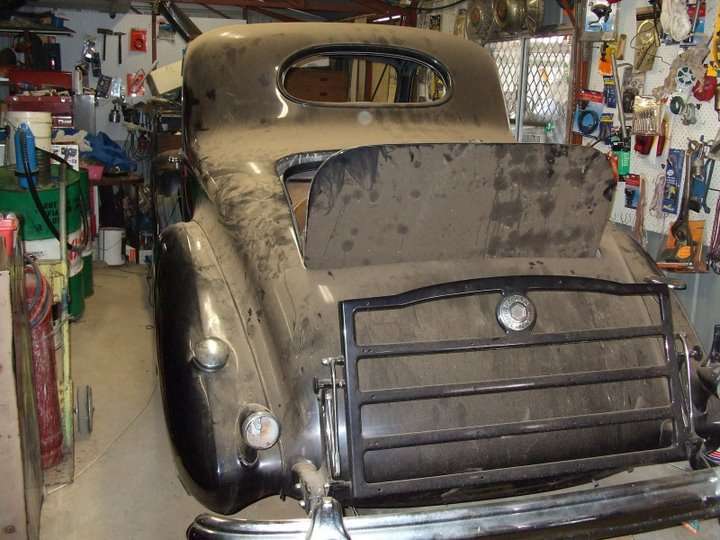 (36.38 KB) (36.38 KB) (48.40 KB) (48.40 KB)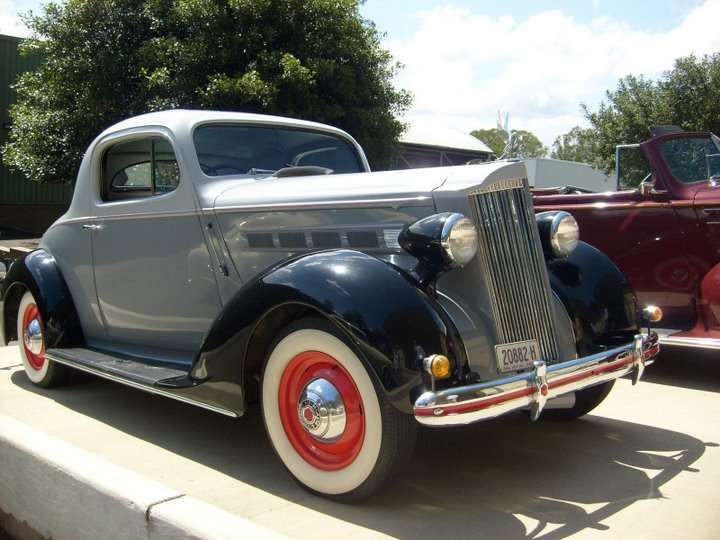
Posted on: 2008/12/16 0:30
|
|||
|
Mal
/o[]o\ ==== Bowral, Southern Highlands of NSW, Australia "Out of chaos comes order" - Nietzsche. 1938 Eight Touring Sedan - SOLD 1941 One-Twenty Club Coupe - SOLD 1948 Super Eight Limo, chassis RHD - SOLD 1950 Eight Touring Sedan - SOLD What's this? Put your Packard in the Packard Vehicle Registry! Here's how! Any questions - PM or email me at ozstatman@gmail.com |
||||
|
||||
|
Re: Mal's '41 120 Coupe
|
||||
|---|---|---|---|---|
|
Forum Ambassador
|
   thanks for those photos! i love them!!! so, i am just kidding about getting mad, i love the 37s!! so, keep them comming!  
Posted on: 2008/12/16 0:59
|
|||
|
1937 Packard 138-CD Deluxe Touring Limousine
Maroon/Black 1090-1021 [url=https://packardinfo.com/xoops/html/modules/registry/View.php?ID=232]1955 Packard |
||||
|
||||
|
Re: Mal's '41 120 Coupe
|
||||
|---|---|---|---|---|
|
Forum Ambassador
|
So do I, so do I.
  
Posted on: 2008/12/16 1:01
|
|||
|
Mal
/o[]o\ ==== Bowral, Southern Highlands of NSW, Australia "Out of chaos comes order" - Nietzsche. 1938 Eight Touring Sedan - SOLD 1941 One-Twenty Club Coupe - SOLD 1948 Super Eight Limo, chassis RHD - SOLD 1950 Eight Touring Sedan - SOLD What's this? Put your Packard in the Packard Vehicle Registry! Here's how! Any questions - PM or email me at ozstatman@gmail.com |
||||
|
||||
|
Re: Mal's '41 120 Coupe
|
||||
|---|---|---|---|---|
|
Home away from home
|
My dad had a '37 sedan when I was a little kid...either a 115 or 120. It never ran...

Posted on: 2008/12/16 22:39
|
|||
|
||||
|
Re: Mal's '41 120 Coupe
|
||||
|---|---|---|---|---|
|
Forum Ambassador
|
Thursday 18th December 2008
Arrived at the workshop to see a little Mazda Ute parked outside. I've loved little Utes ever since a mate of mine had a Morris 8/40 Ute over 40 years ago. It was like a sewing machine on wheels, well it sounded a bit like one when it was running and it wasn't very big! Anyway, once inside the workshop, started finishing off the tightening of the front fenders and inner fenders and the front inner grill panels. Got all the remaining nuts and bolts done for the fenders and inner fenders with Wades help. Then we turned to the inner panels between the radiator and the side grills. Although they were in place when installing the fenders we'd put them inside the fender when they should have been on the outside. So took off the bolts holding them to the radiator frame and because the nuts & bolts to hold them to the side grills hadn't been mounted we were able to re-align them. Had to also loosen off the two lower nuts & bolts holding the front fenders to the bottom piece that runs under the grill. Then came the trickier part aligning the holes to bolt the panels to the side grills. A fair bit of effort was expended doing this and because of the position of the holes Wade, in his natural position under the car, had difficulty in inserting the little bolts but in the end got there. Also installed, loosely, the front bumper irons and Steele's rubber irons to body gaskets. During all this Tony, a friend of Noel's the guy with the '41 160 Coupe, arrived. When Tony and Noel were here some months ago, Tony took my good lower front fender stay(the other one was "butchered") and said he could make a new one. As it was also time to remount the fender stays Wade had rung Noel earlier to be told that Tony hadn't made only one stay, but four, and Noel would deliver them on Monday. Therefore we were pleasantly surprised to see Tony today with my original and only one of the one's he'd made in his hand, the rest could be for Noel for his Coupe? Didn't stay long, as he could see we were busy, and when Wade asked him how much we owed him, said "I don't know", shrugged his shoulders and grinned. So I said I'd have to buy him a drink and what did he like. Thereupon he replied "Port, but not too expensive, or you'll spoil me". What a guy! And I forgot to take his pic, to add to the rogue's gallery of characters here, or pic's of the original and replicated stays. Next we turned to the headlights. Wade had swung WFI(Wade Fabrication Industries) into gear a week or so ago and made a spring that clips the headlight holder to the headlight bucket. There are 2 for each headlight but the '41 came with 2 on one side and only one on the other. Then came the fun part, trying to clip the springs once they were attached to the headlight holder to the mounting hooks on the headlight bucket. Wade tried various long nose pliers, screwdrivers of different lengths and sizes but all to no avail except frustration. Wade figured out he'd have to modify a screwdriver so it had a slot or groove on the on the blade to catch and hold the spring so it could then be pushed into and under the hooks holding it to the headlight bucket. While Wade was swinging WFI into action again I spent time cleaning up more bolts, these for the bottom panel under the grill. By the time I'd finished that, plus a dozen screws to hold the headlight buckets to the fenders(6 a side), Wade had made the tool and attached both headlight holders to their respective buckets. Mounted the completed headlight bucket assemblies to the fenders using the Steele Rubber gaskets bought recently. Then mounted the headlight wiring harness to each bucket assembly, this time using recently made MBM gaskets. The fender lights were next, and because the studs holding them were the worse for wear, the studs were replaced with bolts I cut to size with a hacksaw and finished on the bench grinder. All the new bolts screwed in easily on the workbench but putting them together on the fenders especially the left side was another matter altogether. Finally got there but then discovered the front bolts, although longer than the rear bolts, were too long. So after more hacksawing and grinding on my part finally got the fender lights mounted. Turned then to mounting the lower fender stays. The outer mountings of these attach to the bottoms of the front fenders just behind the wheel arch where they level off and continue rearward. While the inner mount is under the chassis and held by a bolt which is cushioned by formed rubber gaskets, but we didn't have any of these! This time MBM Gaskets swung into action cutting out 4 large rubber gaskets about 1&1/2" in diameter with a hole to fit the small metal tube that runs through their middles. During this Wade scrounged up 2 'O' rings to fit and fill the middle between where the rubber gaskets fit each side of the metal stay. And I'm pleased to say mission accomplished, although no pic's were taken in the heat of the action. Now the fenders, especially the right side which had previously been pulled under at the bottom, are now firmly anchored in place. What next, you ask? The overdrive cable came the reply. A little Elf(AKA Wade) after I'd left one day recently, had straightened the kink that had previously been in the metal sheath where the O/D cable exits its armoured coiled housing. Discovered he could screw the sheath off the coil cable housing, straightened the sheath in the vice and also straightened the kink in the cable itself. A good man to have around, especially when you're not around yourself! Now to remount it. Wade fed it through the cable access hole in the firewall, then while he was mounting the control knob end and the switch wiring in the cabin I was re-aligning the MBM cable access hole gasket. Both tasks should have been relatively straight forward. But both were not to be so. The MBM gasket had been cut and installed some while ago, but since then the dash had been re-installed, the speedo cable hooked up and various other cables and controls "played" with to say the least. What had been easy before now attained a significant degree of difficulty. However help was attained somewhat by re-routing the two cable which still had free ends, the choke and the O/D cables. Adjusting the position of the coil cable by easing off the coil mounting and rotating the coil about 45 degrees. And undoing one of the heater hoses so the speedo cable and oil pressure line passed inside it instead of outside it. Wade meanwhile had mounted the O/D control under the steering column only to find he had to take it out again to mount the O/D switch, it being too restrictive to reach while in situ. That was one end of the O/D cable, now came the undercar part. First Wade was on the creeper under the car while I fed the O/D cable down to him. It took about three re-routings before a satisfactory route was found and then checked to ensure the control knob end was in the correct position in the cabin. The O/D cable was mounted to the chassis X-member when it was removed earlier this year, but looking at that Wade believed it could be the cause of the kink in the cable because it wasn't positioning the cable in the same plane as the lever it actuates. A few trial positionings found that if the cable mounting was moved to one of the bottom bellhousing cover bolts it would allow the O/D actuation to operate in the one plane without twisting stresses. So while Wade laid on the creeper I drilled out the mounting hole on the bracket to accept the larger diameter of the bellhousing cover plate bolt. And when all was mounted the O/D actuation cable worked well. Kudos to Wade again! Is there more? Yes! By this time I thought we may have reached the end of our day but it wasn't to be. Wade suggested lowering the '41 back to earth from it's previously lofty perch on jack stands since early December 2007. So while Wade fetched the floor jack I rounded up the lug bolts and the rear tires. And pretty soon - TOUCHDOWN, Houston, we have touchdown! The '41 returned from whence it came - the concrete floor of Wade's Shed, as he calls it! Then to the front end, the process was repeated and all four tires were once again in contact with what was now considerably dirtier concrete than when they left it. Ensured all the wheel lug bolts were tight by borrowing John's long socket bar and tightening accordingly. Wade tightened up the front and rear axle bolts and split-pinned them and the front axle gease cup covers installed. What a day! Little did I think when we started that the '41 would return to looking like a car rather than it's hovering presence up on the jack stands. In fact I was tempted to drive it home but, seeing there are still some things to attend to, that must wait for another day! Attach file: (39.45 KB)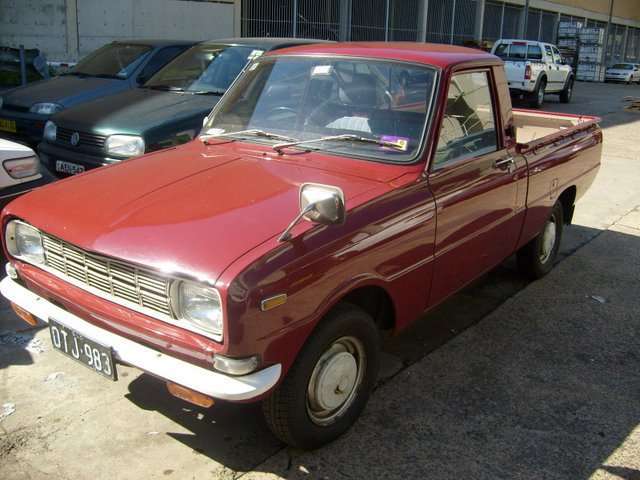 (24.35 KB) (24.35 KB)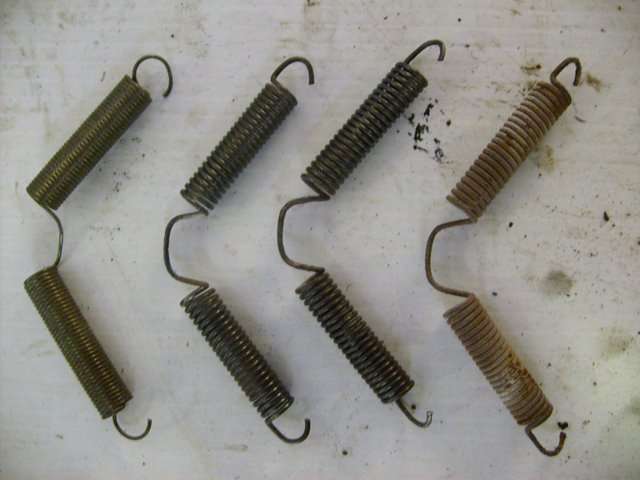 (23.45 KB) (23.45 KB)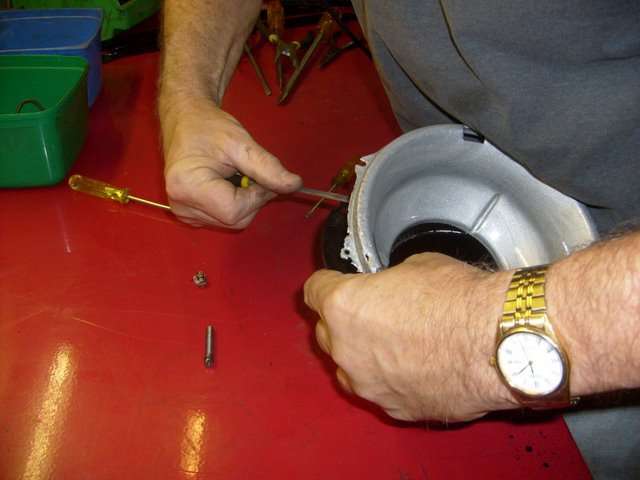 (16.76 KB) (16.76 KB)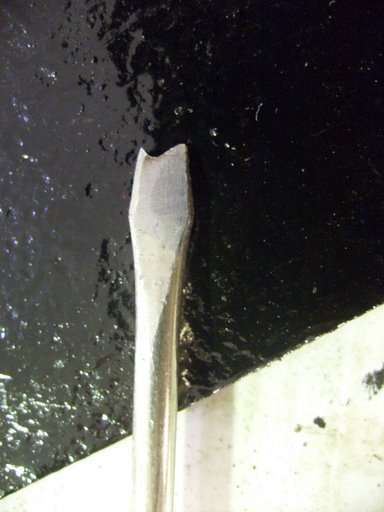 (30.73 KB) (30.73 KB)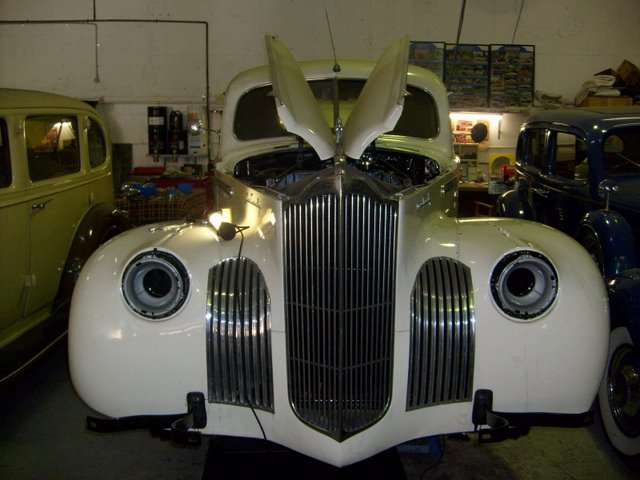 (32.32 KB) (32.32 KB) (13.22 KB) (13.22 KB)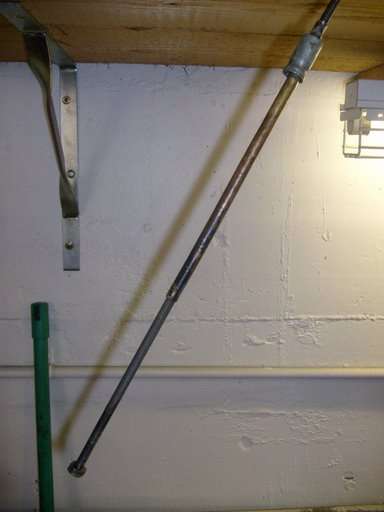 (16.07 KB) (16.07 KB)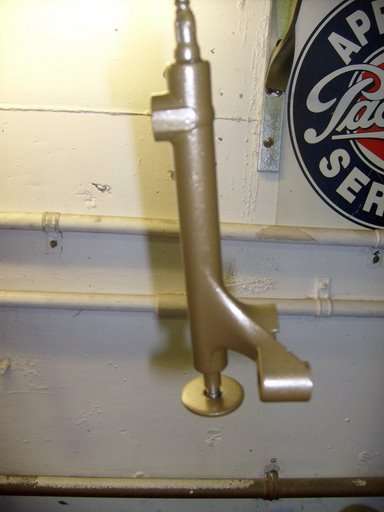 (29.77 KB) (29.77 KB)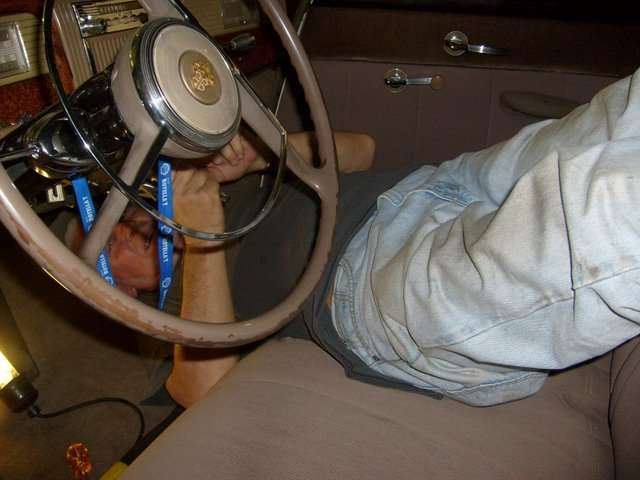 (30.06 KB) (30.06 KB)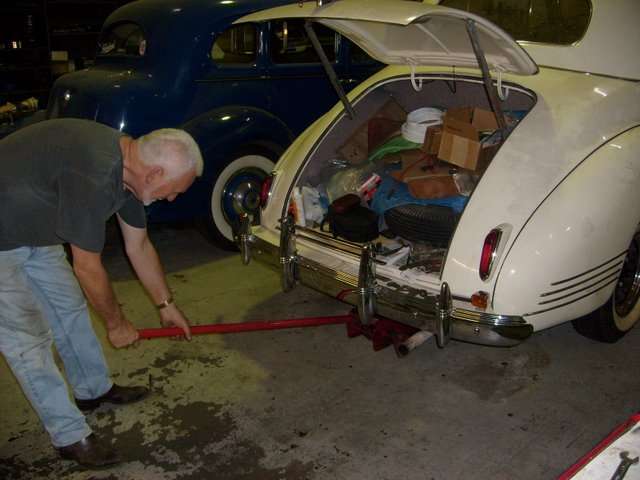 (28.18 KB) (28.18 KB)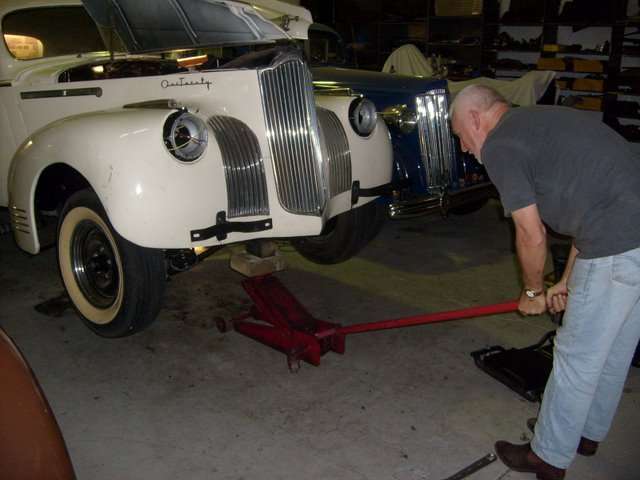
Posted on: 2008/12/18 5:32
|
|||
|
Mal
/o[]o\ ==== Bowral, Southern Highlands of NSW, Australia "Out of chaos comes order" - Nietzsche. 1938 Eight Touring Sedan - SOLD 1941 One-Twenty Club Coupe - SOLD 1948 Super Eight Limo, chassis RHD - SOLD 1950 Eight Touring Sedan - SOLD What's this? Put your Packard in the Packard Vehicle Registry! Here's how! Any questions - PM or email me at ozstatman@gmail.com |
||||
|
||||

Register To PostTopic is Locked


