|
Re: 1924 Sport 136
|
||||
|---|---|---|---|---|
|
Home away from home
|
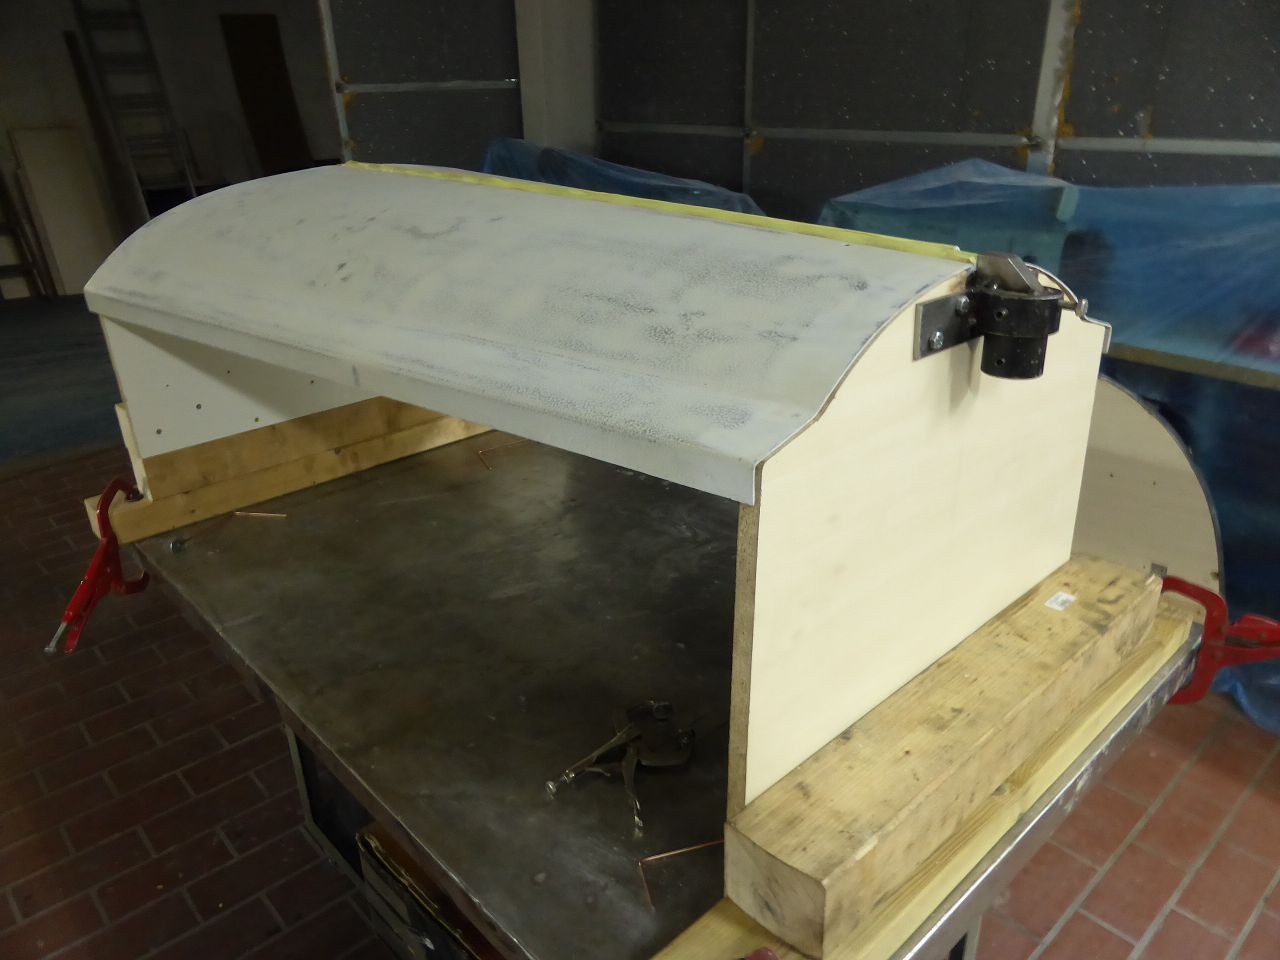
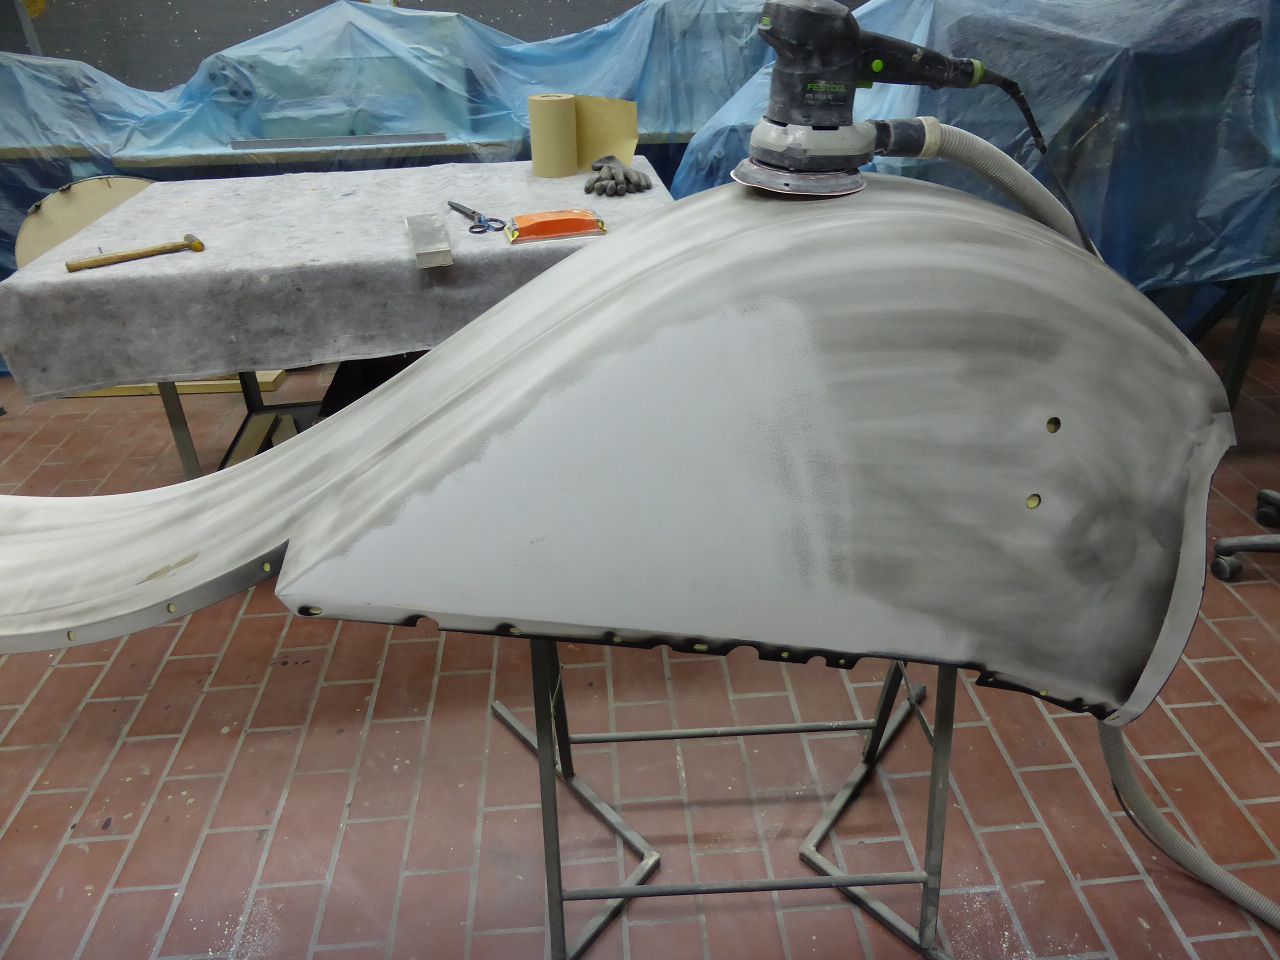
The hood had dents, deformations and rust scars everywhere. Unfortunately I no longer have an English Wheel or an “ECKOLD” power former. So I had to use the old school method with a torch and heat to get the hood back to its old shape. This is very risky if you have little experience with it. You can ruin the whole picture. Thanks heaven I smooth out the dents and shrinkage spots. With a lot of work with the smoothing hammer and also with the hand iron. In any case, it only took a little bit of filler/putty to get the hood in a straight line. By the way, the hood is one of the most visually important parts when you look at a car for the first time. The Packard hood of these models is visually very striking. I used sandpaper the most on this hood...compared to other components. If you do not want distortion or unwanted waves, you should not apply pressure when sanding crosswise and always use sharp sandpaper. So I changed the paper in a quarter of the usual time and took my time.
Karl Attach file:  k-P1040281.JPG (135.88 KB) k-P1040281.JPG (135.88 KB) k-P1040331.JPG (141.45 KB) k-P1040331.JPG (141.45 KB)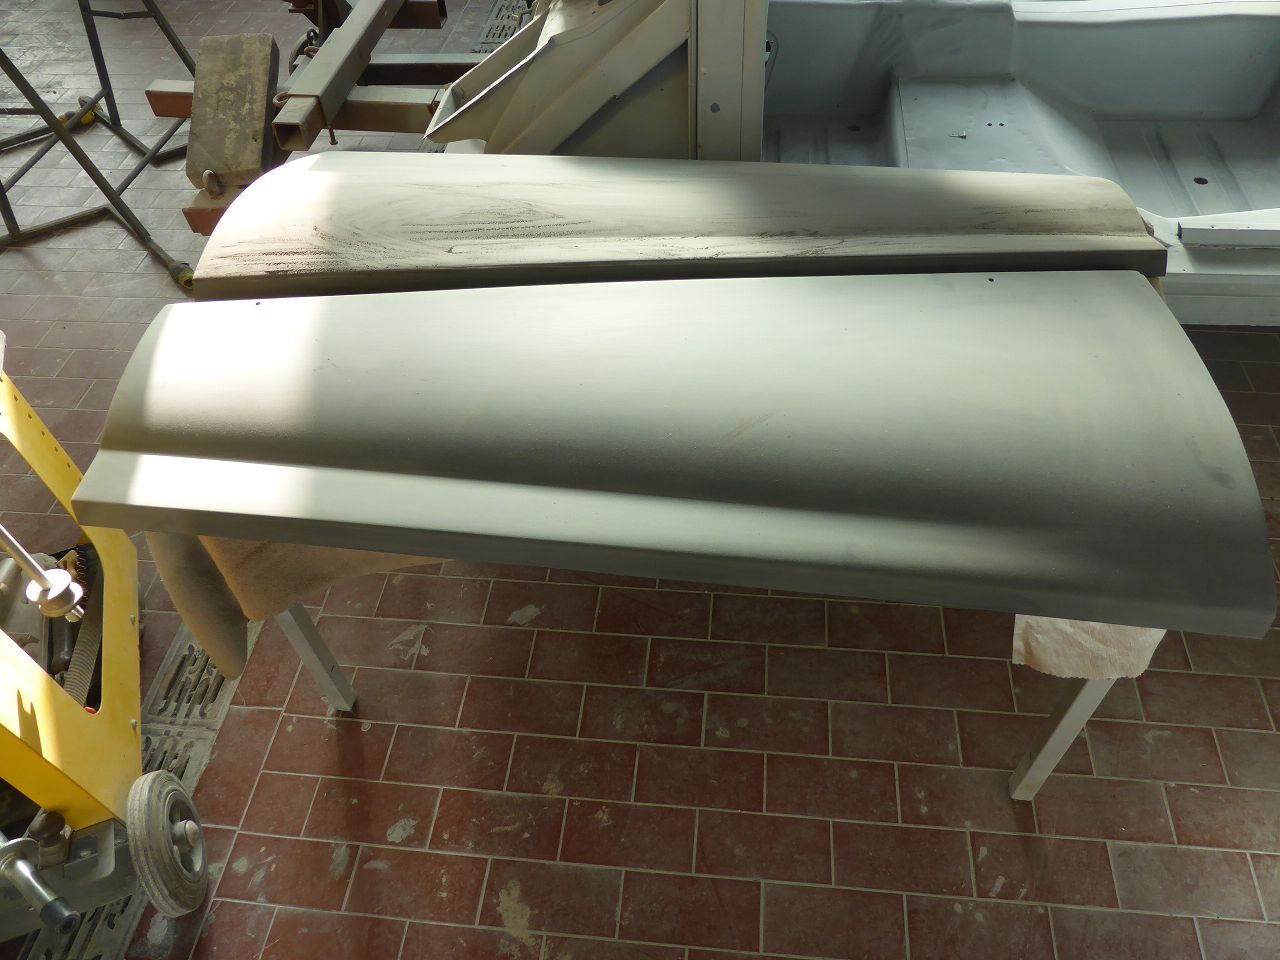 k-p1040361 - kopie.jpg (278.45 KB) k-p1040361 - kopie.jpg (278.45 KB)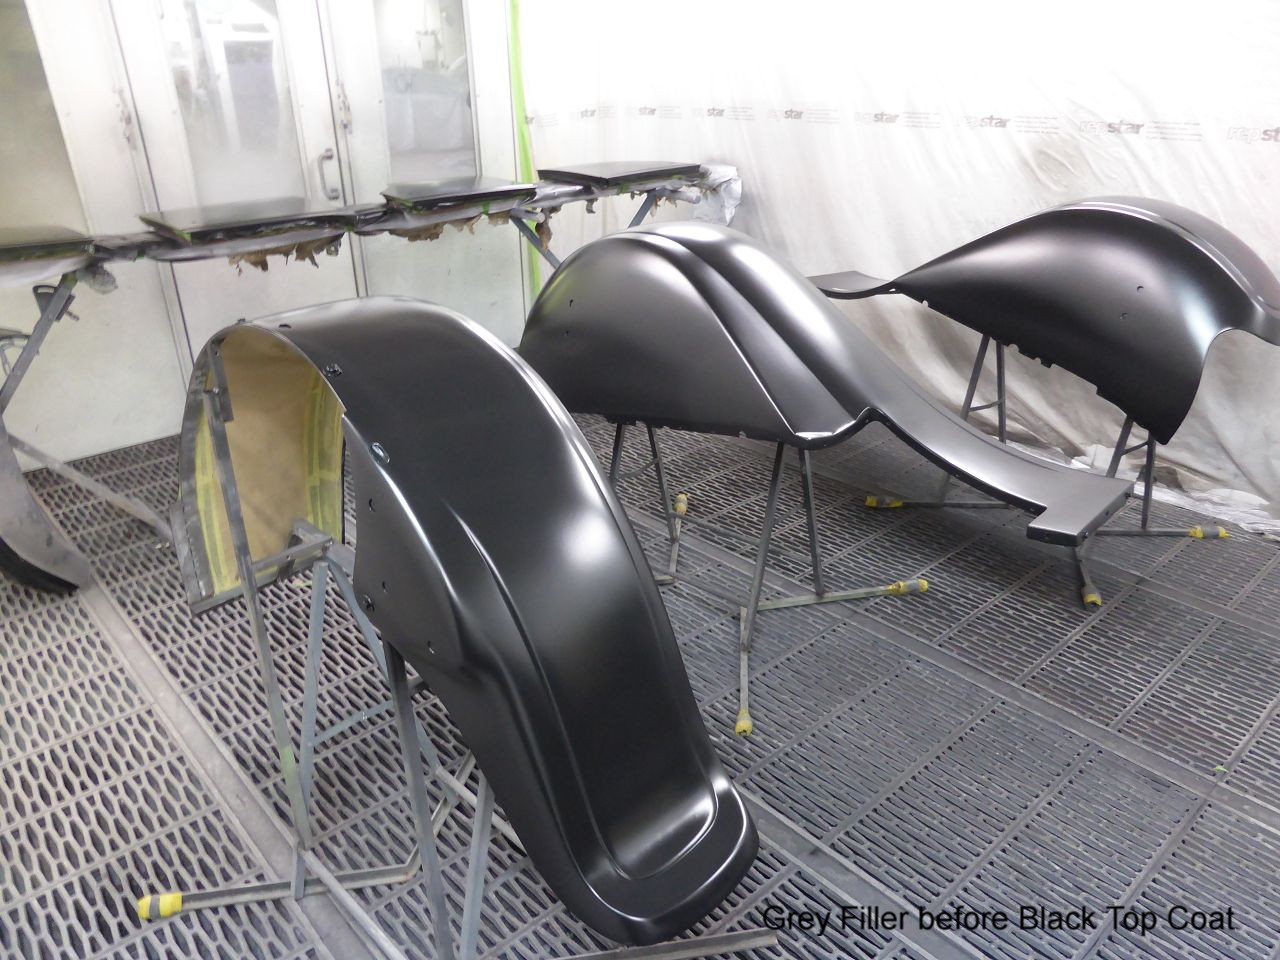 k-p1040362 - kopie.jpg (234.32 KB) k-p1040362 - kopie.jpg (234.32 KB)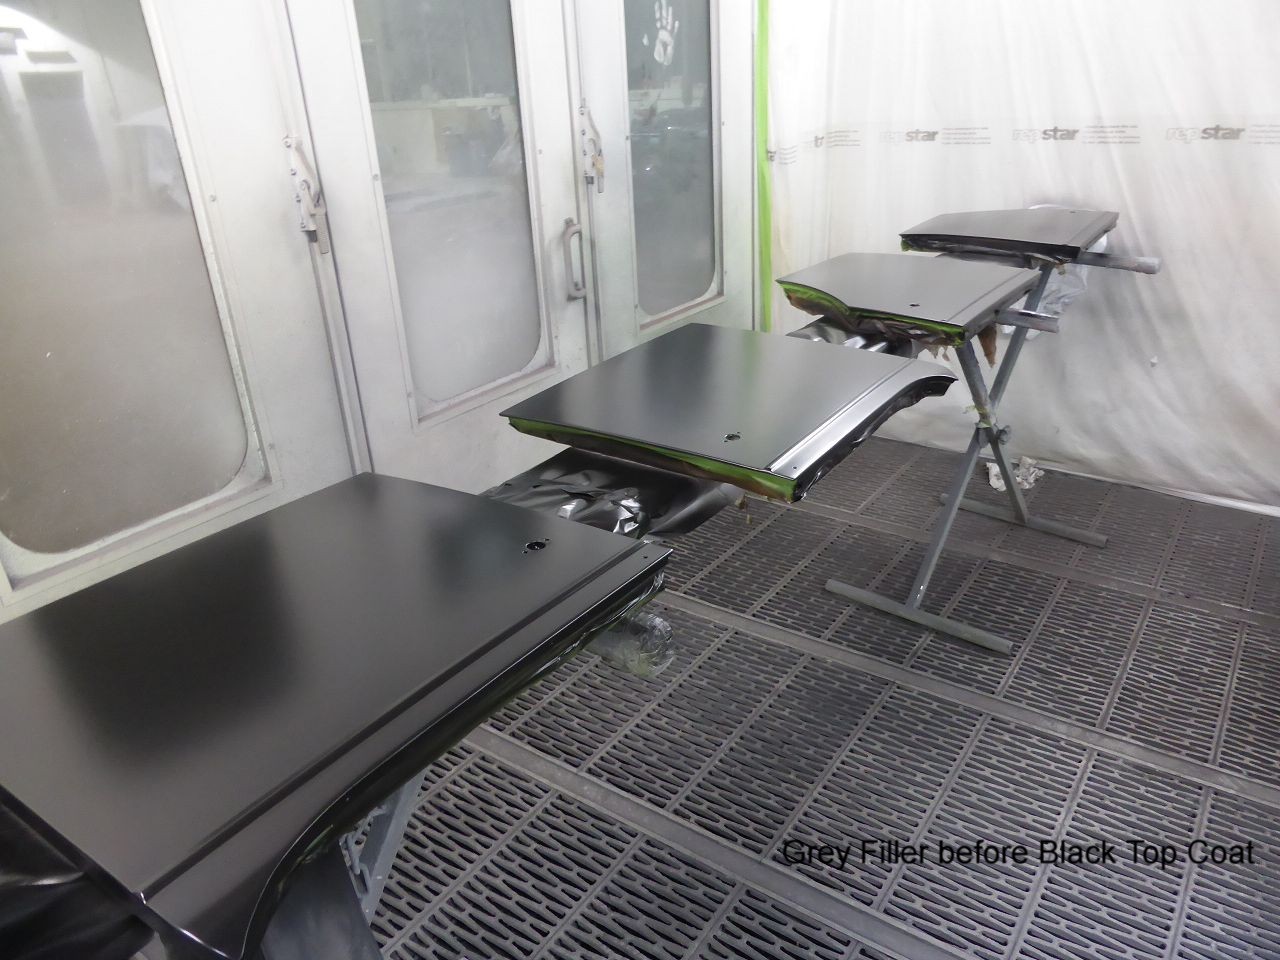 k-p1040365 - kopie.jpg (202.28 KB) k-p1040365 - kopie.jpg (202.28 KB)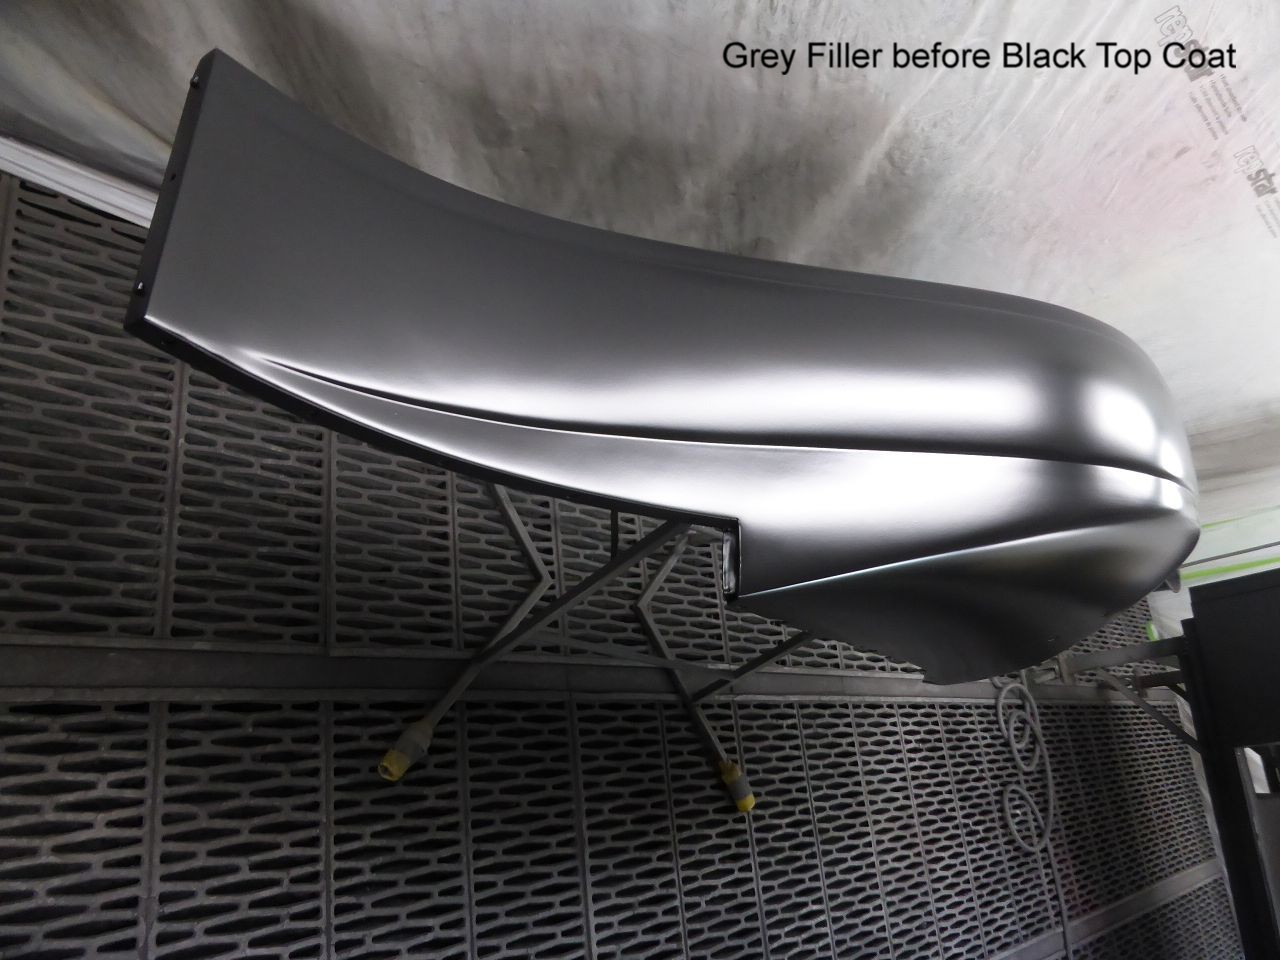 k-p1040379 - kopie.jpg (234.01 KB) k-p1040379 - kopie.jpg (234.01 KB)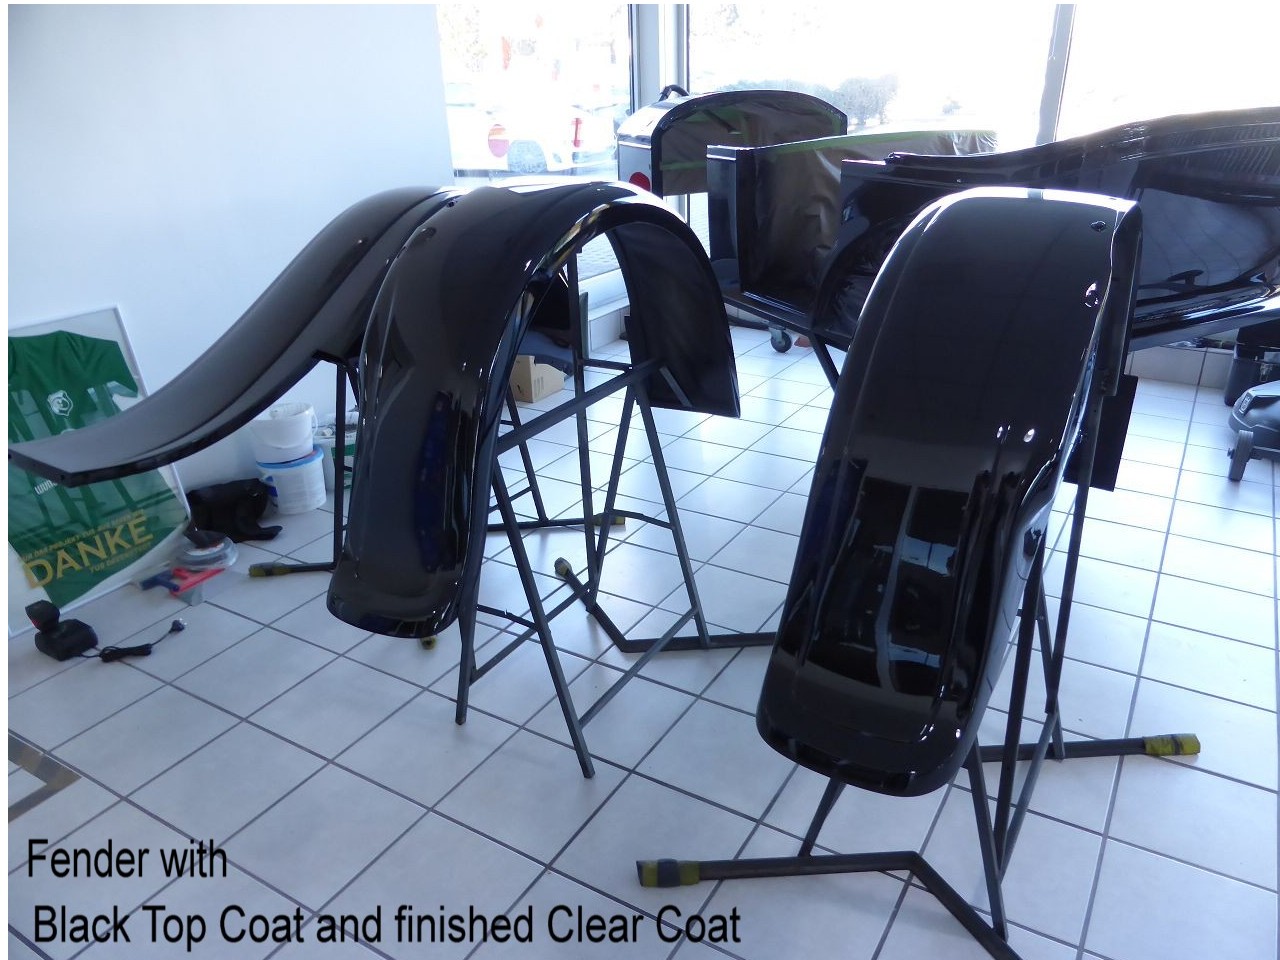
Posted on: 2/7 10:23
|
|||
|
||||
|
Re: 1924 Sport 136
|
||||
|---|---|---|---|---|
|
Webmaster

|
It looks wonderful, Karl!
Posted on: 2/7 10:54
|
|||
|
-BigKev
1954 Packard Clipper Deluxe Touring Sedan -> Registry | Project Blog 1937 Packard 115-C Convertible Coupe -> Registry | Project Blog |
||||
|
||||
|
Re: 1924 Sport 136
|
||||
|---|---|---|---|---|
|
Home away from home
|
The chassis……well…. the chassis does not differ in any way from the miserable condition of the previously described body parts. Deep rust scars everywhere. The frame was sandblasted, primed and satin painted.
All bushings in the chassis were worn, as were the brake linkages and joints. After I removed all layers of paint from the brake rods, I could see that they were so badly rusted that in some cases only half of the rod diameter was left. I made all the bushings from gunmetal on my lathe. I cut a thread into the bushings of the leaf springs, welded a matching threaded screw to my impact hammer and knocked out the bushings. I made a suitable tool on my lathe to press in the bushings. I remade all the brake rods from stainless steel, recut the appropriate threads at the ends and reused the well-preserved universal joints (forks?). I re-drilled the holes in all the rocker arms and universal joints to the smallest possible next size. I reworked the integrated bolts of the leaf springs on the lathe and adjusted the bushings accordingly. I found a good answer to the completely worn out front link lever and front brake cable ball joint. I thought it was hopeless to find a replica of this component anywhere. So a good solution was needed that could be made from existing components. I found a ball joint that fits exactly where the old bracket was attached. I had 2 matching extension rods made from high-quality steel because my lathe no longer works accurately in the hundredth range. I found the ball joint in the parts list of a 1980 Jaguar XJ6 4.2. Since I have some experience with Jaguar parts, I also found a universal joint for the cardan shaft... but more on that later. Karl Attach file: k-k-P1030182.JPG (192.64 KB)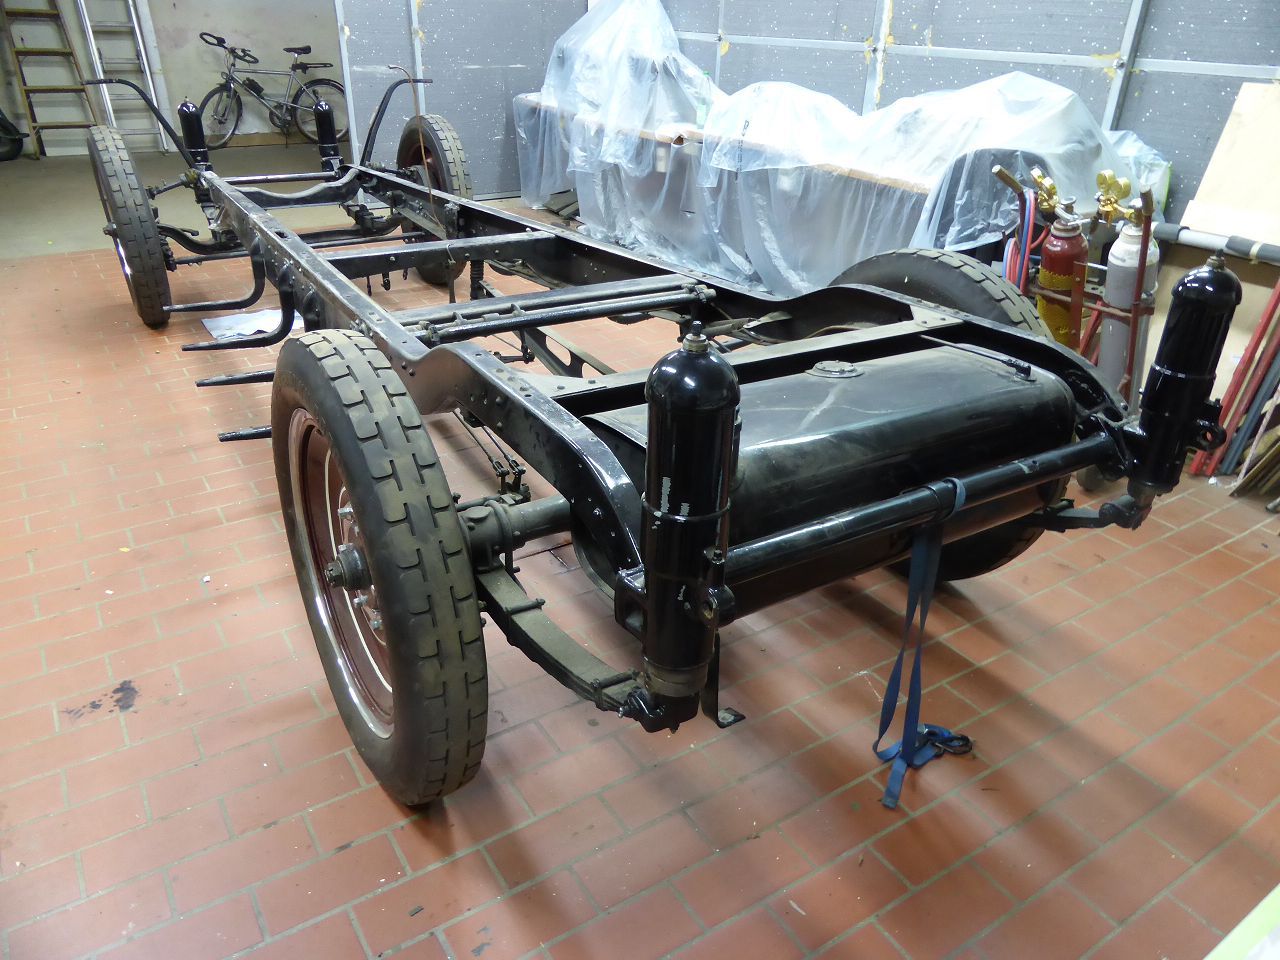 k-P1030462.JPG (163.98 KB) k-P1030462.JPG (163.98 KB)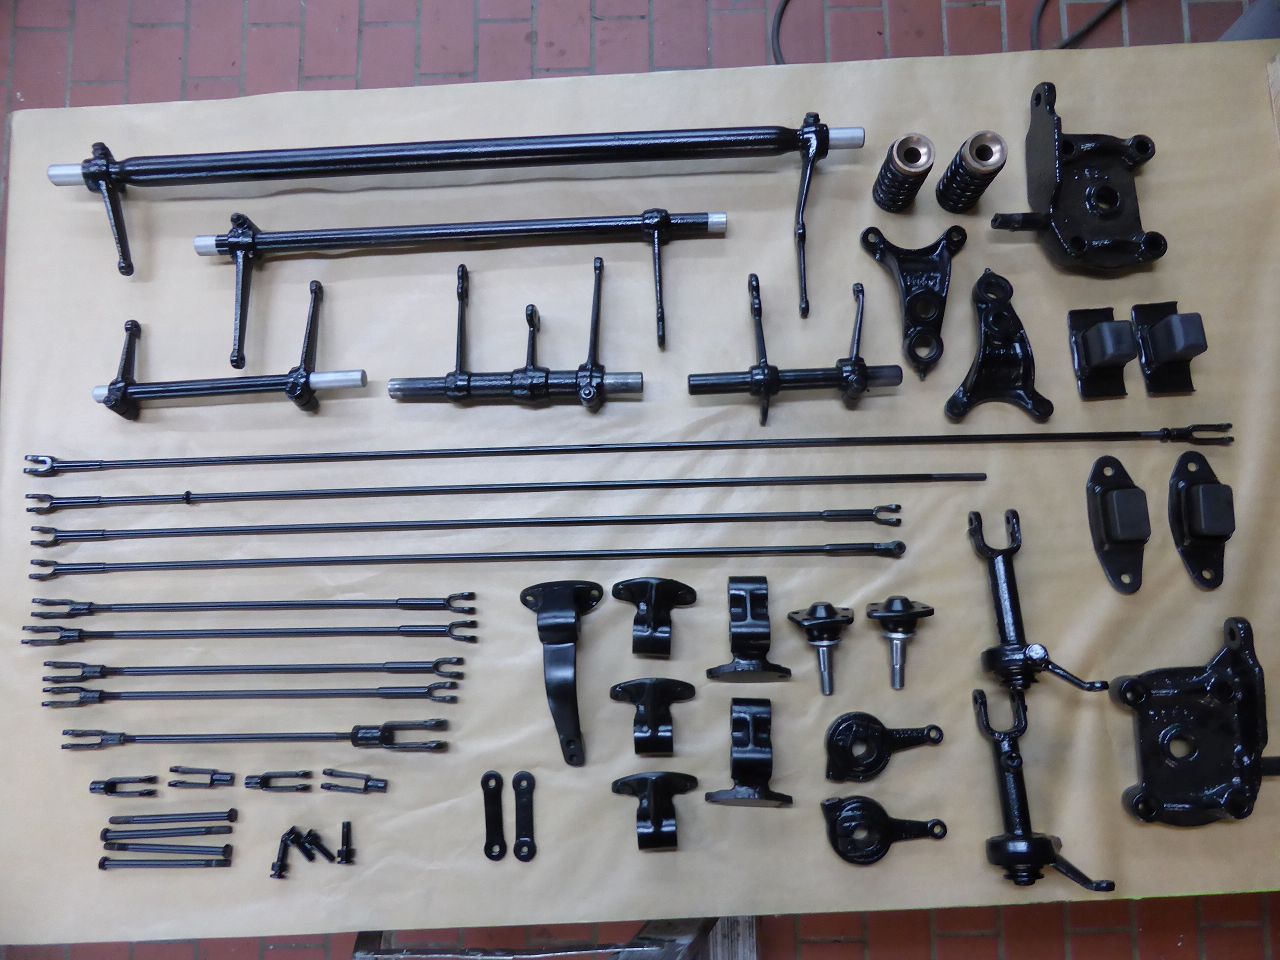 k-P1030722.JPG (109.91 KB) k-P1030722.JPG (109.91 KB)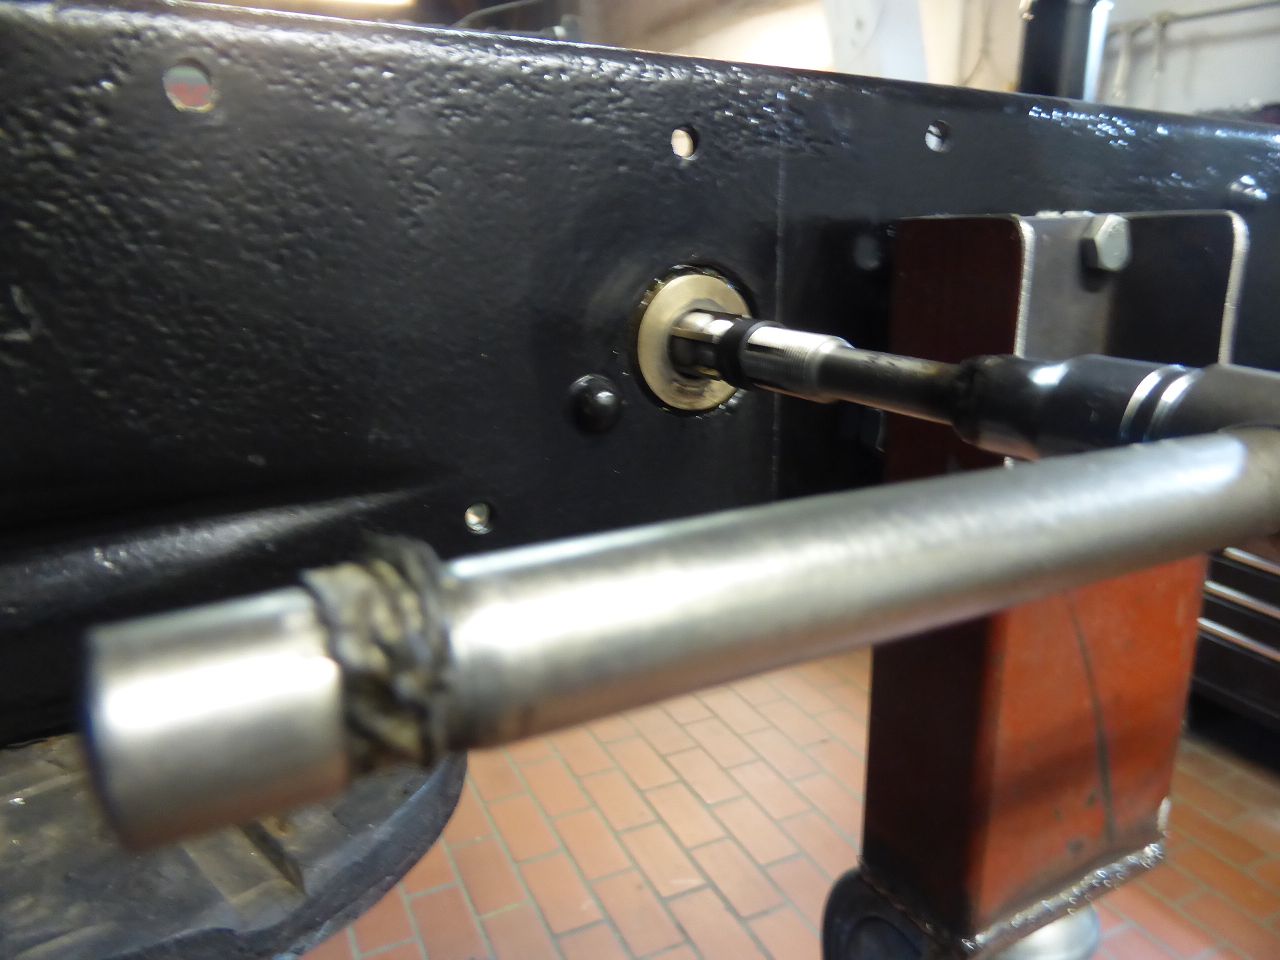 k-P1030723.JPG (150.53 KB) k-P1030723.JPG (150.53 KB)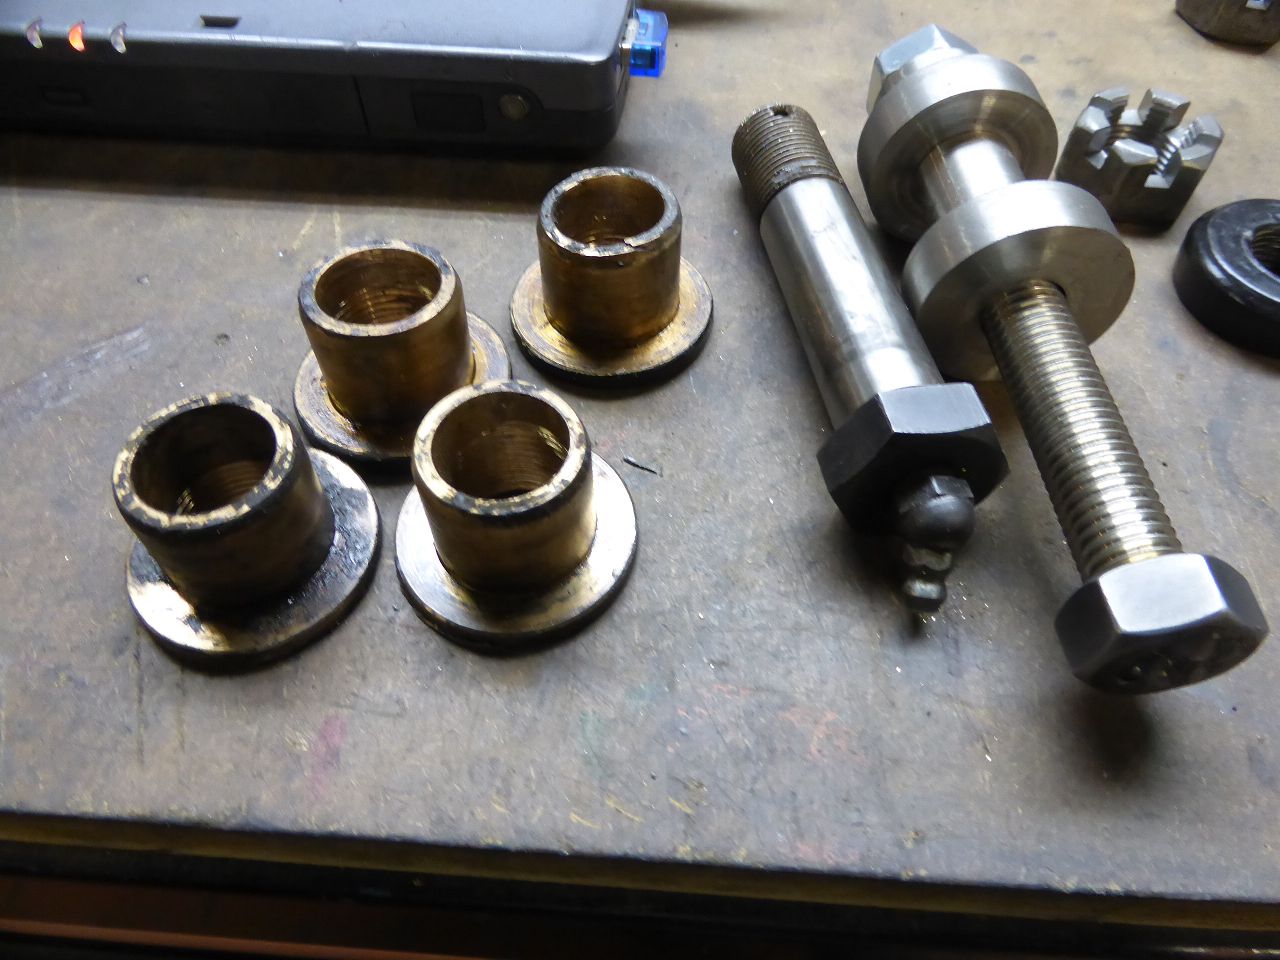 k-P1030740.JPG (210.20 KB) k-P1030740.JPG (210.20 KB)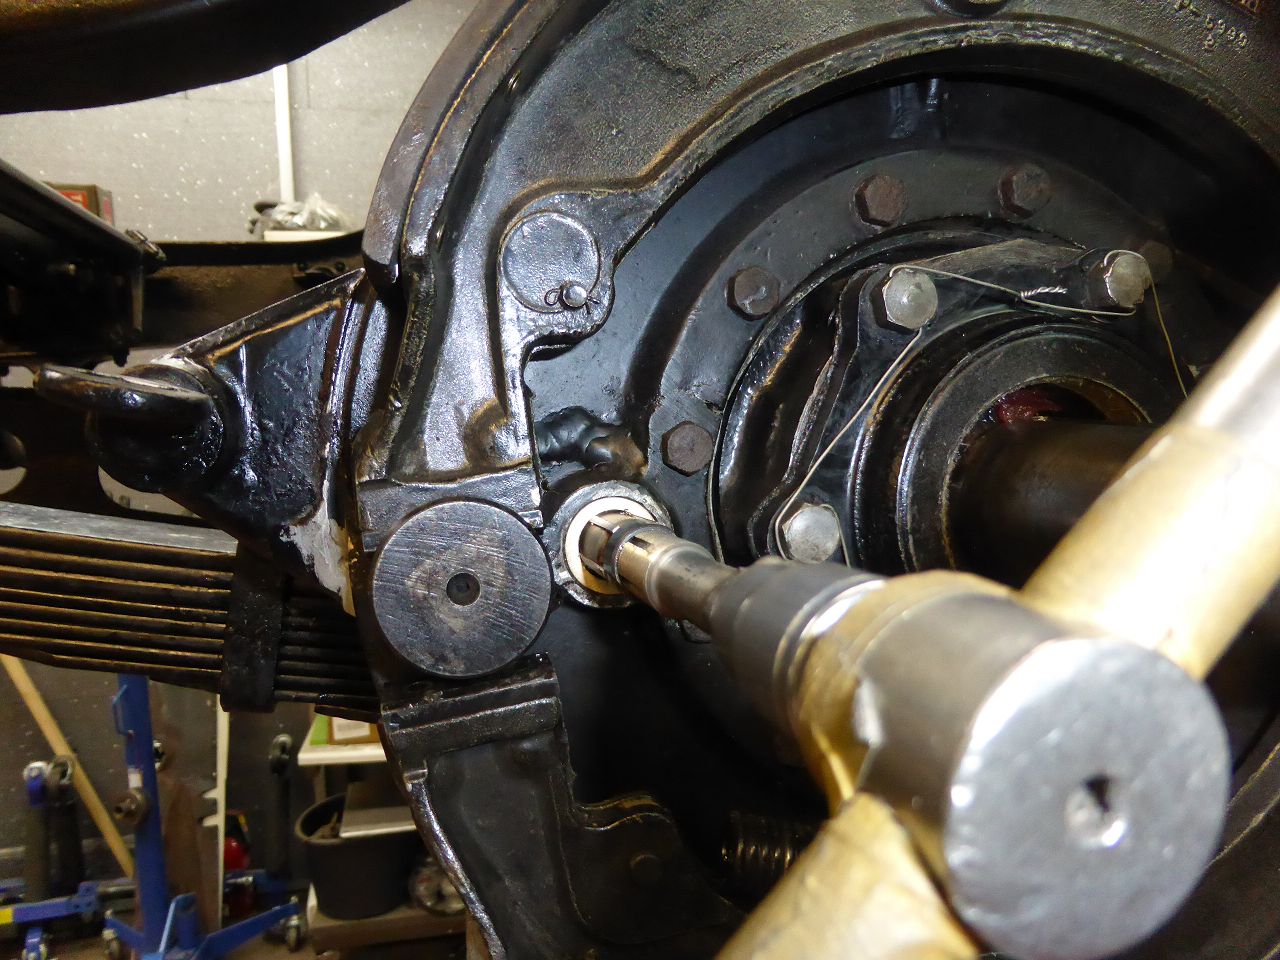
Posted on: 2/11 10:29
|
|||
|
||||
|
Re: 1924 Sport 136
|
||||
|---|---|---|---|---|
|
Home away from home
|
And here my answer for the very worn out ball joints of the front brake lever.
Karl Attach file: k2-P1030183.JPG (102.39 KB)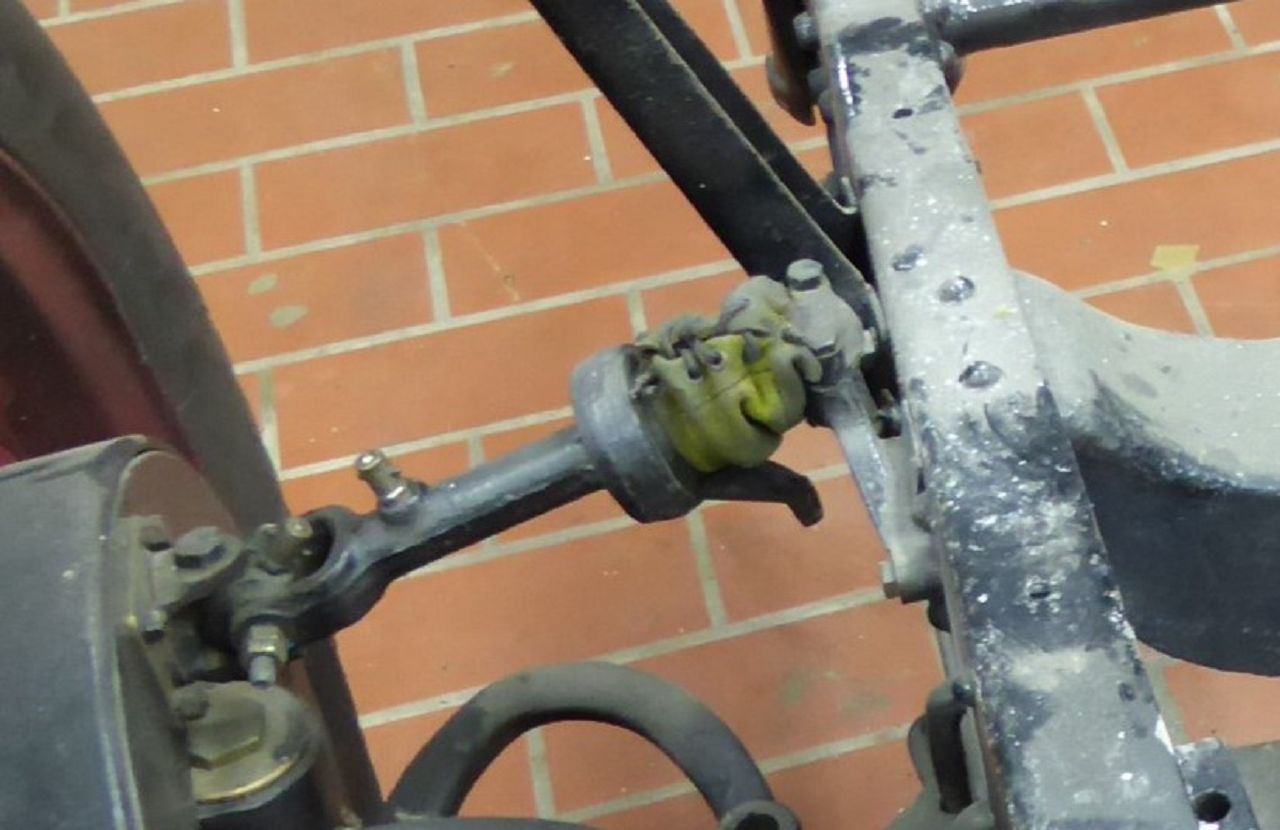 k-P1030505 - Kopie.JPG (105.28 KB) k-P1030505 - Kopie.JPG (105.28 KB)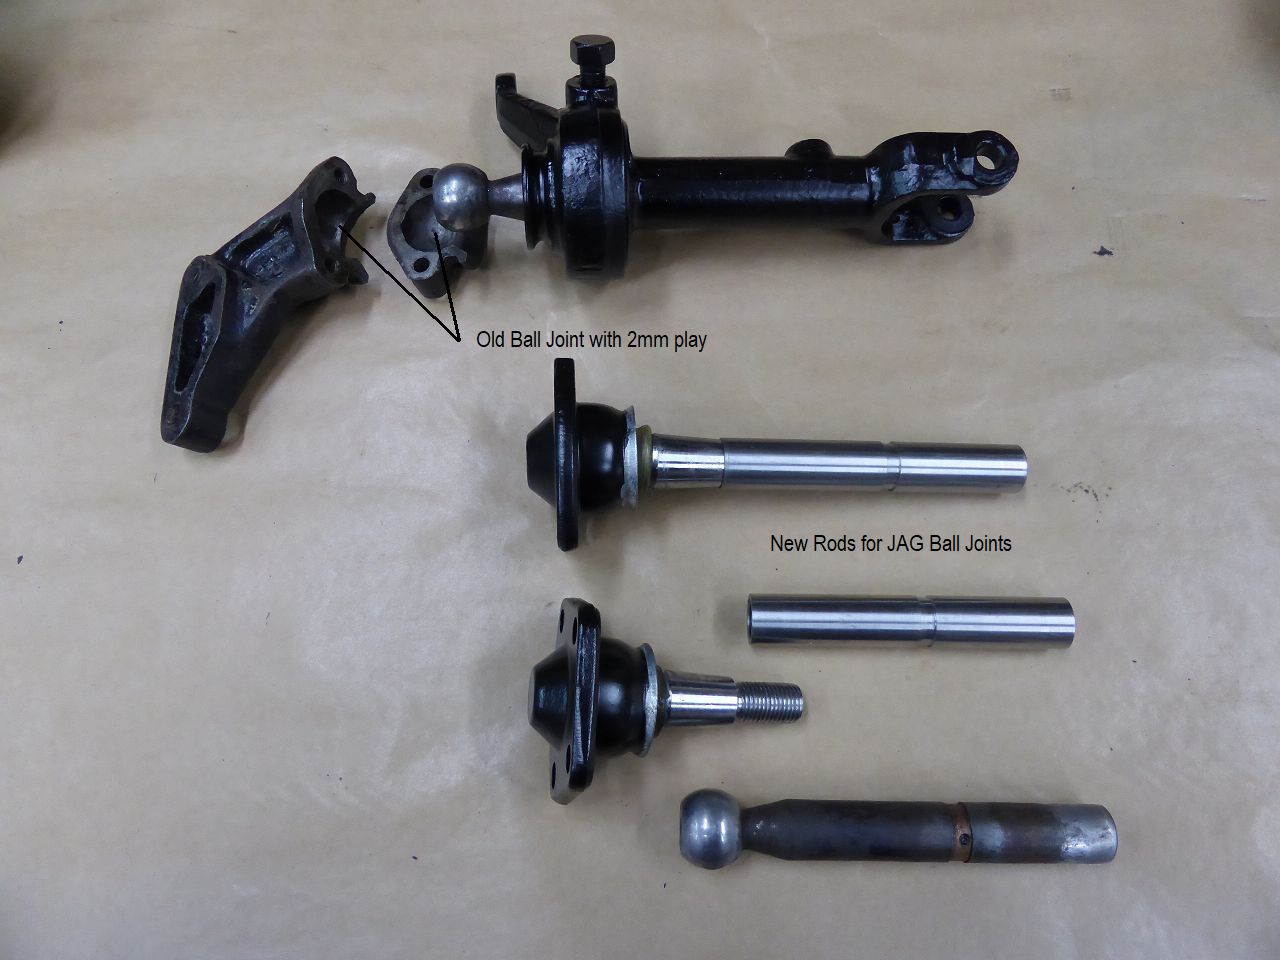 k-P1030738.JPG (142.81 KB) k-P1030738.JPG (142.81 KB)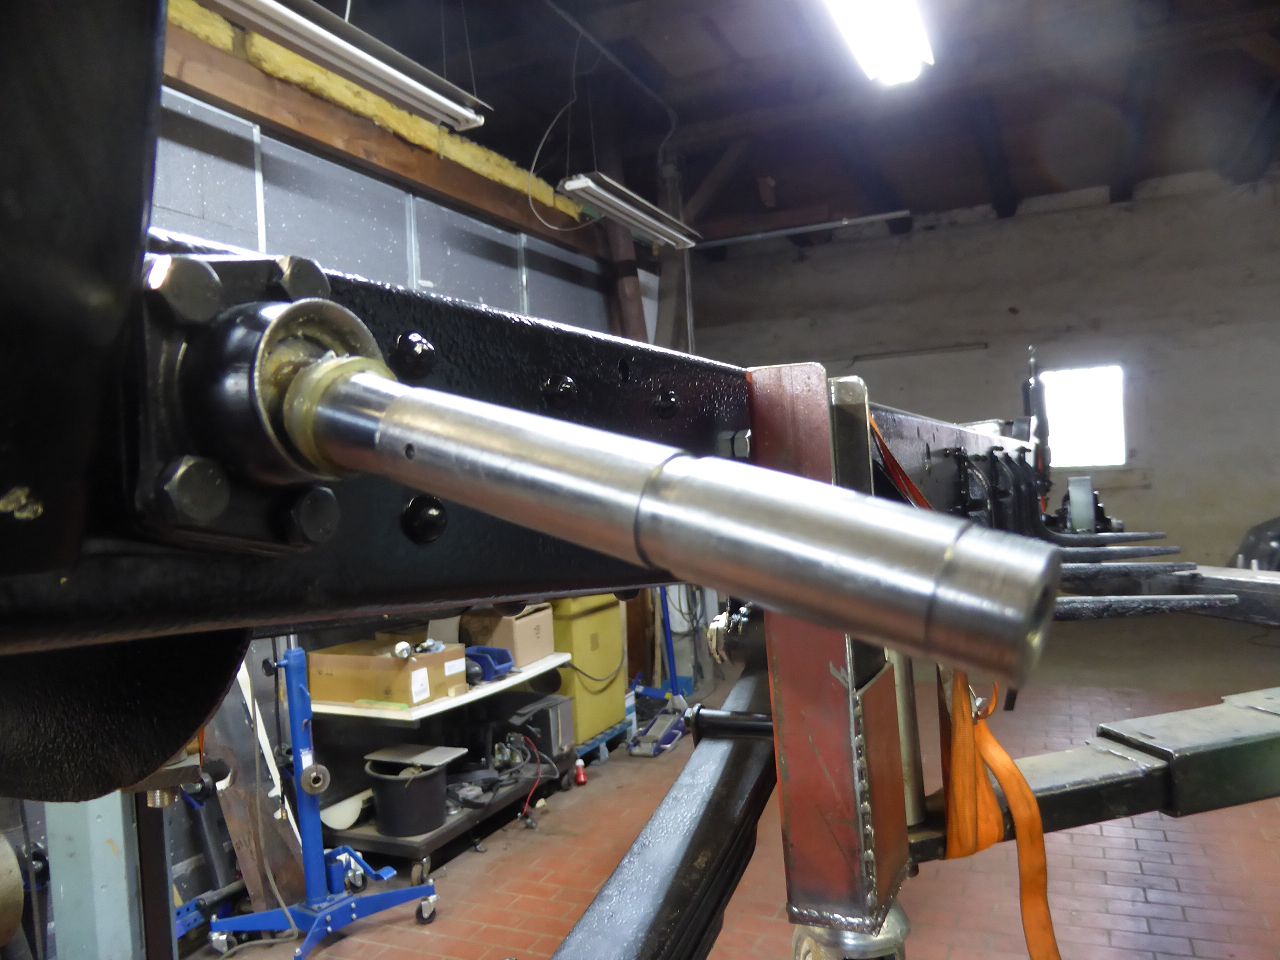 k-P1030735.JPG (169.33 KB) k-P1030735.JPG (169.33 KB) k-P1030261.JPG (177.72 KB) k-P1030261.JPG (177.72 KB)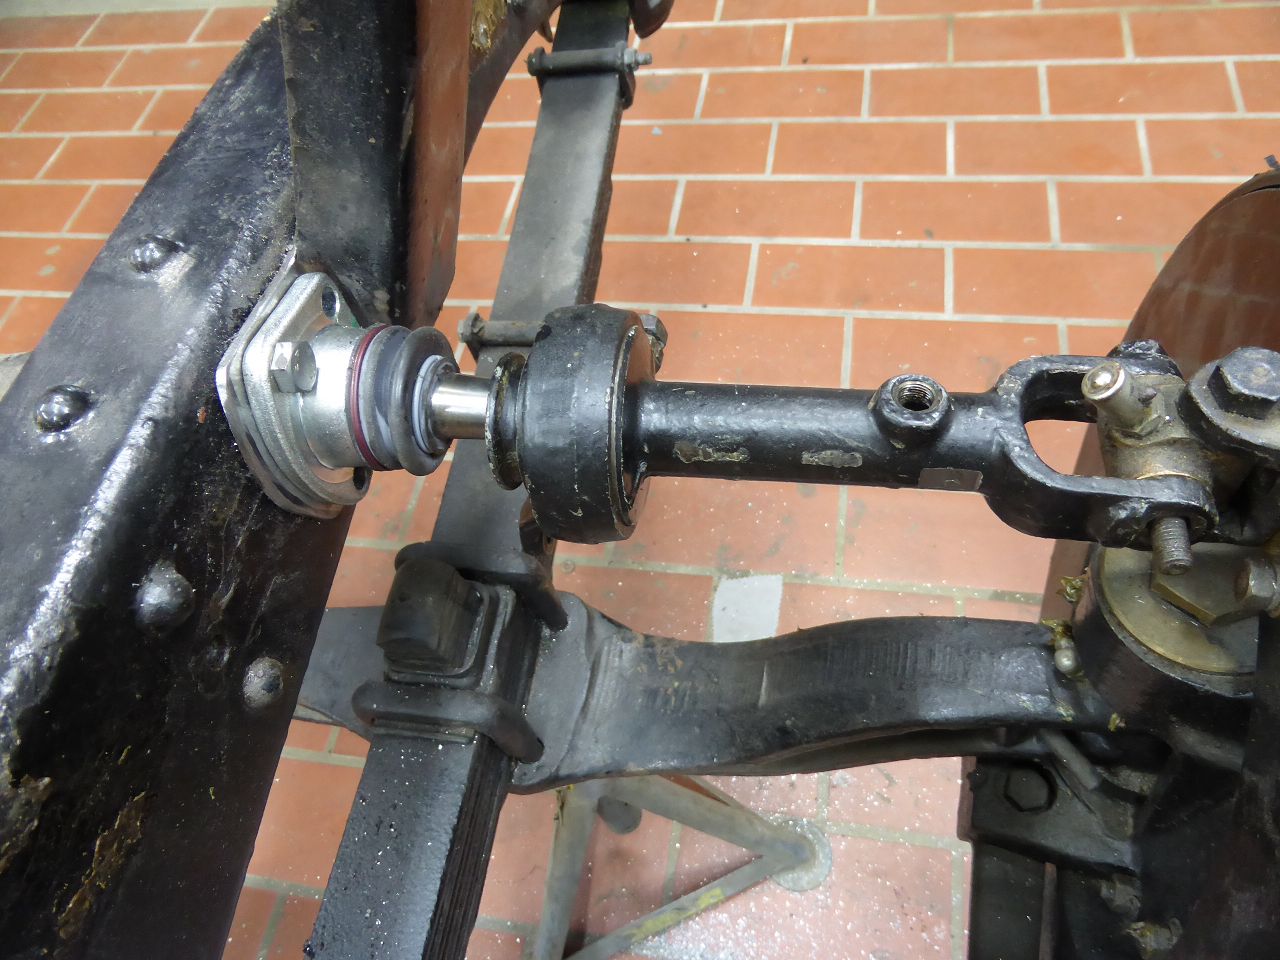
Posted on: 2/11 11:41
|
|||
|
||||
|
Re: 1924 Sport 136
|
||||
|---|---|---|---|---|
|
Home away from home
|
I'm still waiting for half of my body parts to be painted. But there is still some other work to be done. In one of my “Pre War” posts I reported on the making of my Leaf Gaiters (!!). I will post these pictures here again to complete this restoration blog and to show the missing illustrations of the gaiters.
I had underestimated the time involved in making the gaiters and had forgotten how much time it took to make them. I made the last gaiters for my Jaguar XK 140 28 years ago. A total of 88 leather pieces had to be cut. What makes matters worse is that at some point someone changed the brackets of some of the spring leaves and the cuts had to be specially adjusted. In addition, all the parts in front of and behind the axles are of different lengths. I was able to buy the belt at the ends of the gaiters ready-made. They just had to be cut. To tie the gaiters together, I riveted in 192 lace hooks. 16 pieces of leather had to be sharpened on the leather splitting machine in order to fold over the edge and thus enable optimal riveting of the tip hooks. Karl Attach file: k-P1030727 - Kopie.JPG (153.09 KB) k-P1040336.JPG (117.17 KB) k-P1040336.JPG (117.17 KB)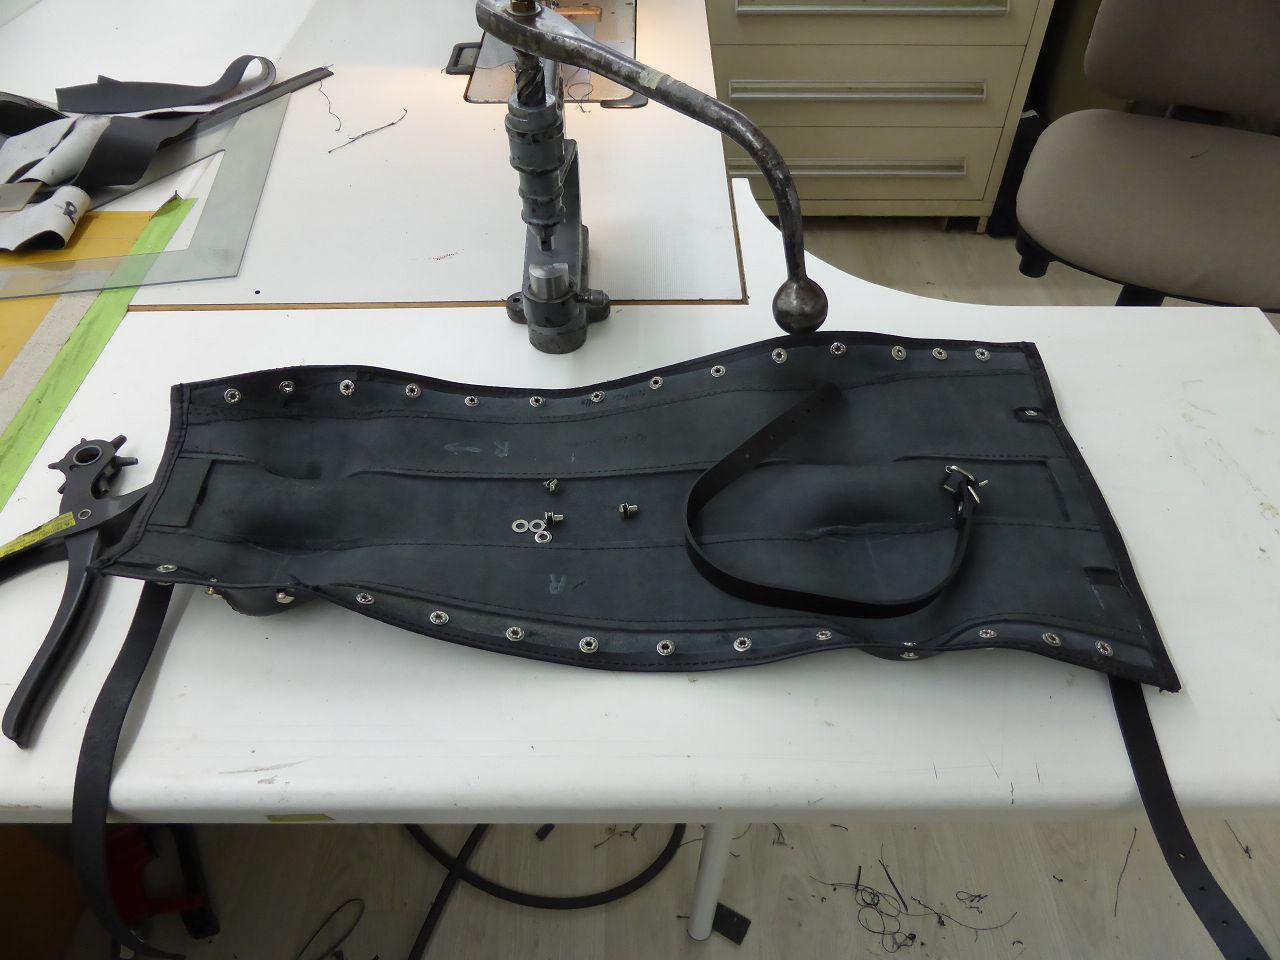 k-P1040337.JPG (103.90 KB) k-P1040337.JPG (103.90 KB)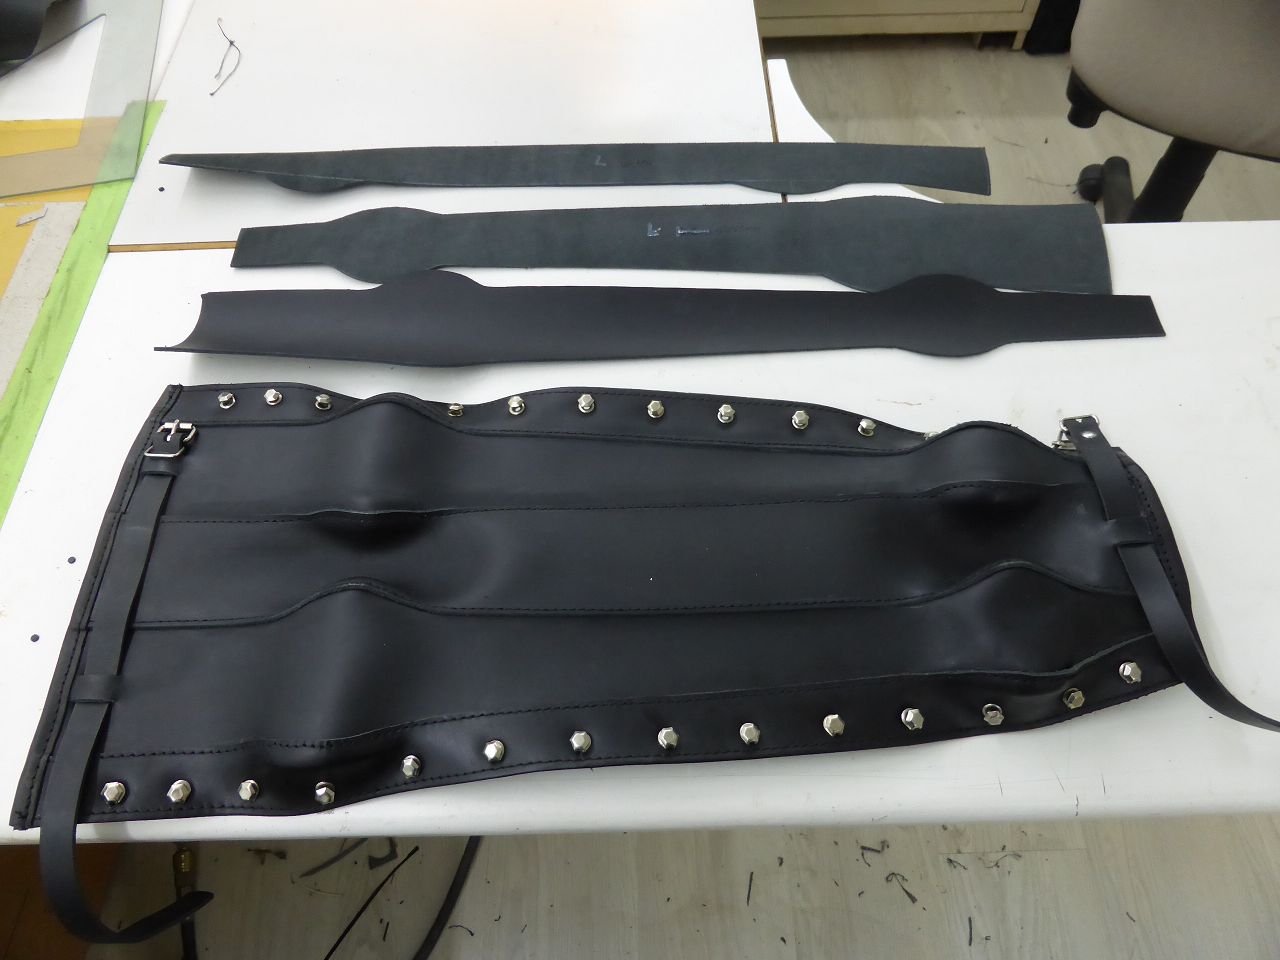 k-P1040390.JPG (81.96 KB) k-P1040390.JPG (81.96 KB)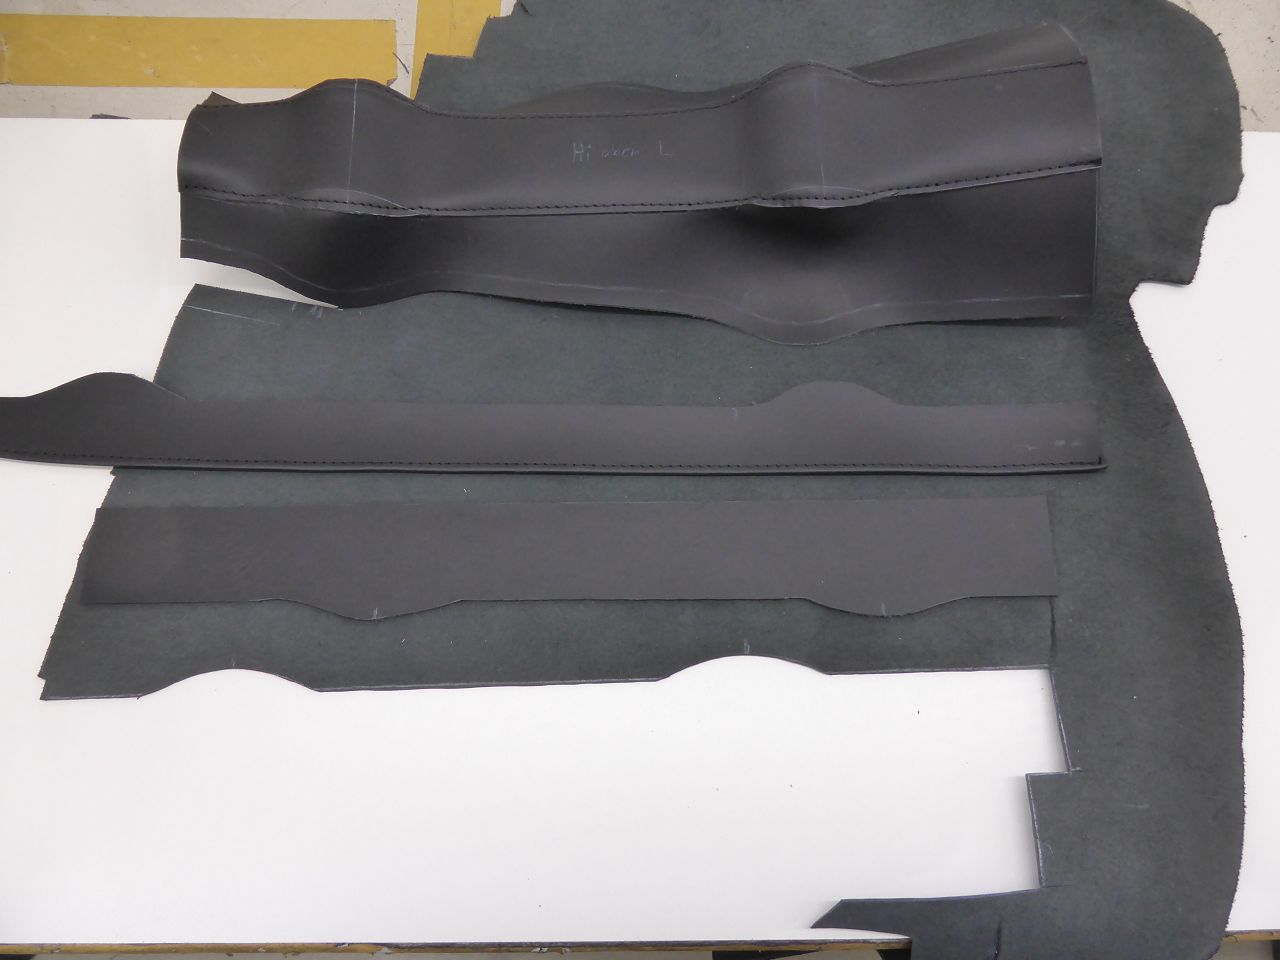 k-P1040392 - Kopie.JPG (90.76 KB) k-P1040392 - Kopie.JPG (90.76 KB)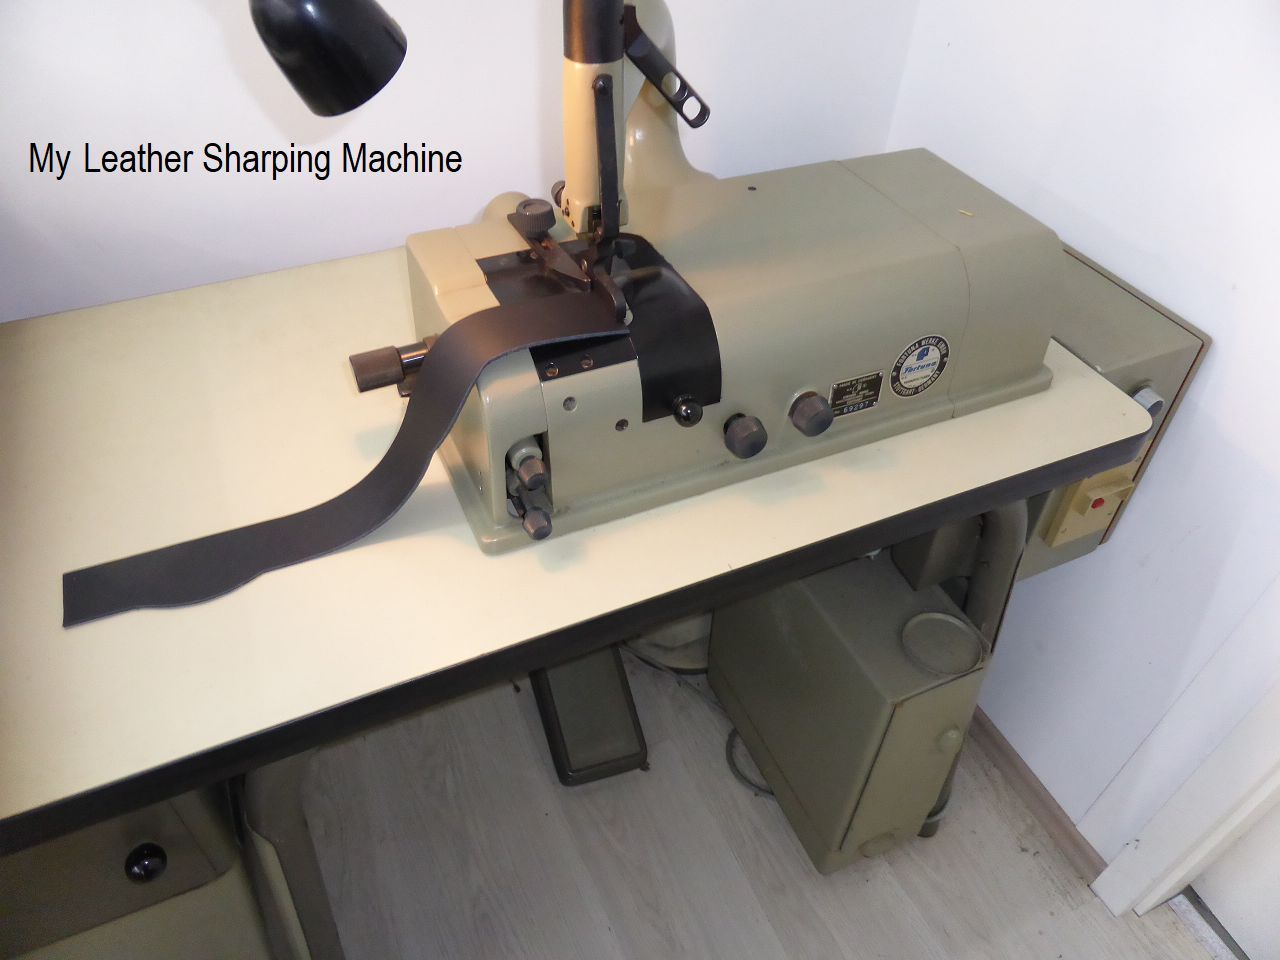 k-P1040393 - Kopie.JPG (93.91 KB) k-P1040393 - Kopie.JPG (93.91 KB)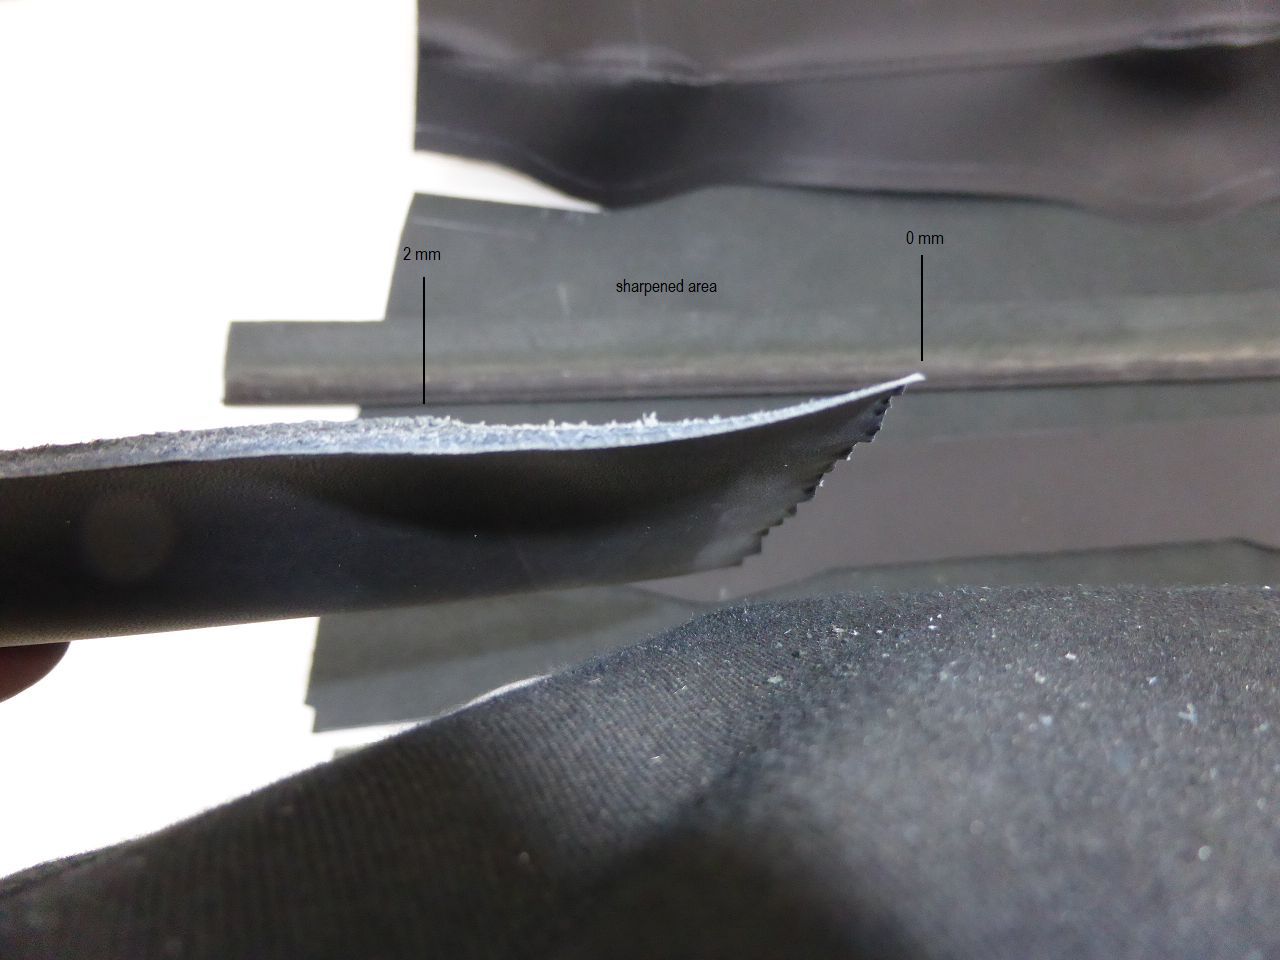 k-P1040394 - Kopie.JPG (121.11 KB) k-P1040394 - Kopie.JPG (121.11 KB)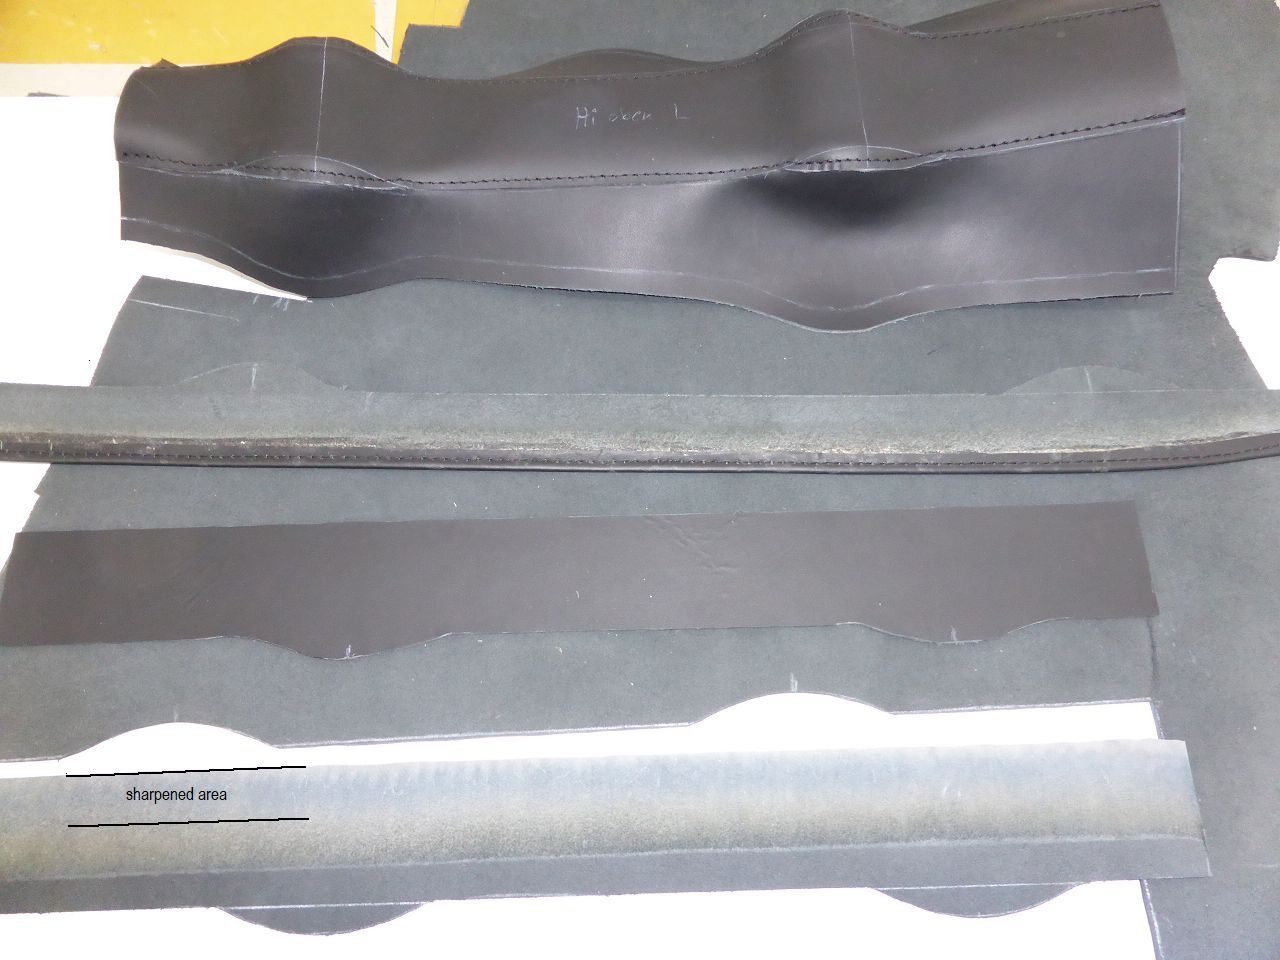 k-P1040339.JPG (131.74 KB) k-P1040339.JPG (131.74 KB)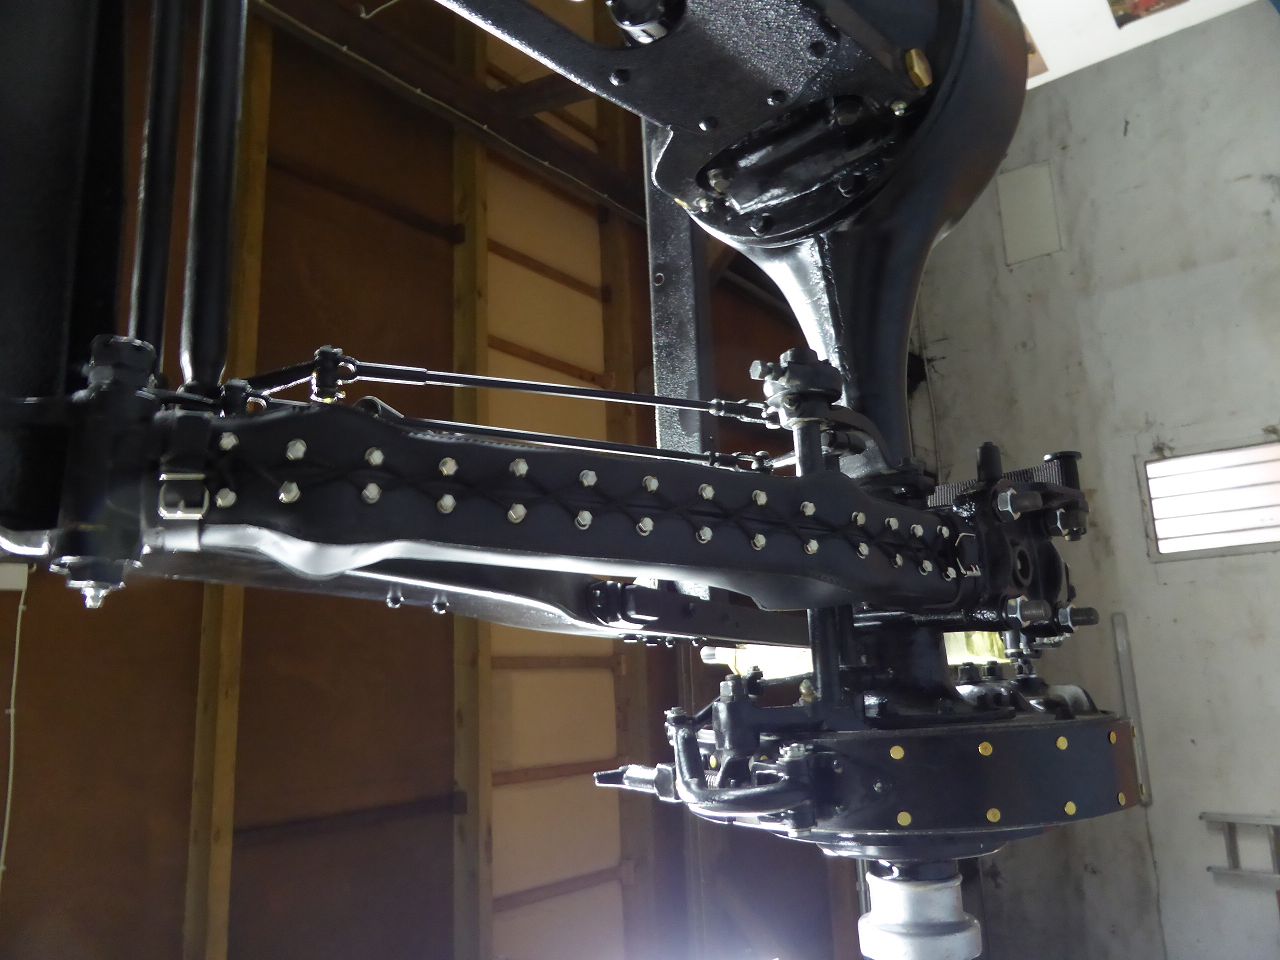 k-P1040342.JPG (143.91 KB) k-P1040342.JPG (143.91 KB)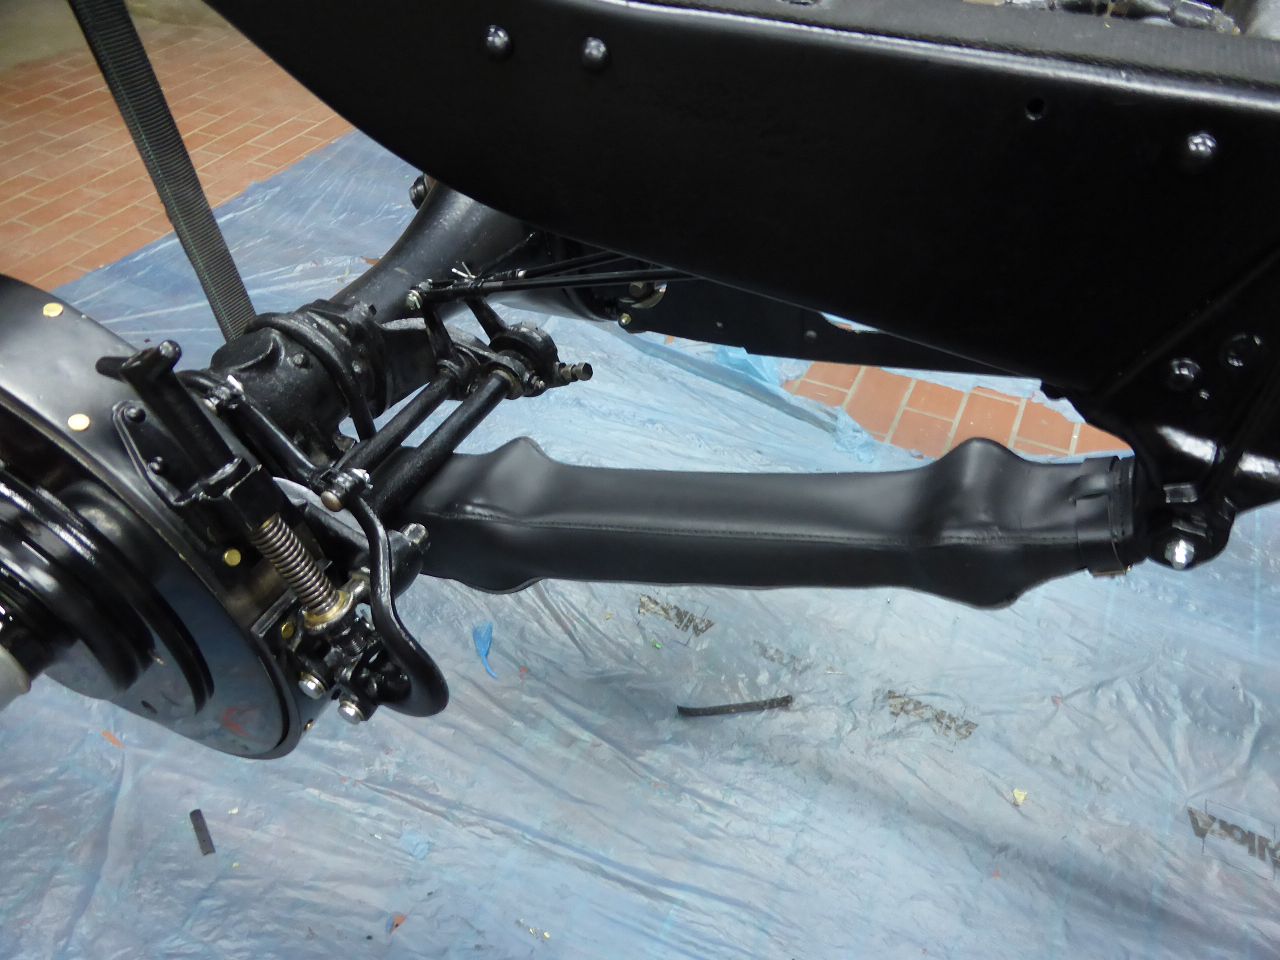
Posted on: 2/18 14:09
|
|||
|
||||
|
Re: 1924 Sport 136
|
||||
|---|---|---|---|---|
|
Home away from home
|
The rear axle and the differential gear had to be completely overhauled. All components on the rear axle, such as the brake lever, were dismantled, sandblasted and painted. All bearing bushes were newly manufactured and replaced.
A particular surprise revealed the difference. After removing the housing cover, it looks like someone put “Skippy” in the gearbox. However, it is also possible that the transmission oil has not been changed since 1924. After thoroughly cleaning and rinsing the gear parts, the component tests revealed, to my great surprise, that there was no wear on the ball bearings and no unacceptable play between the Pinion and Drivin Gear. The ball bearings to the propeller shaft make no noise, which is why I decided not to loosen the spacer tube between the bearings and to remove the ball bearings. To seal the drive shafts, I made and installed new felt sealing rings. The Tork arm bearing/bushing was in good condition and does not need to be replaced. Karl Attach file: k-P1030306.JPG (327.47 KB)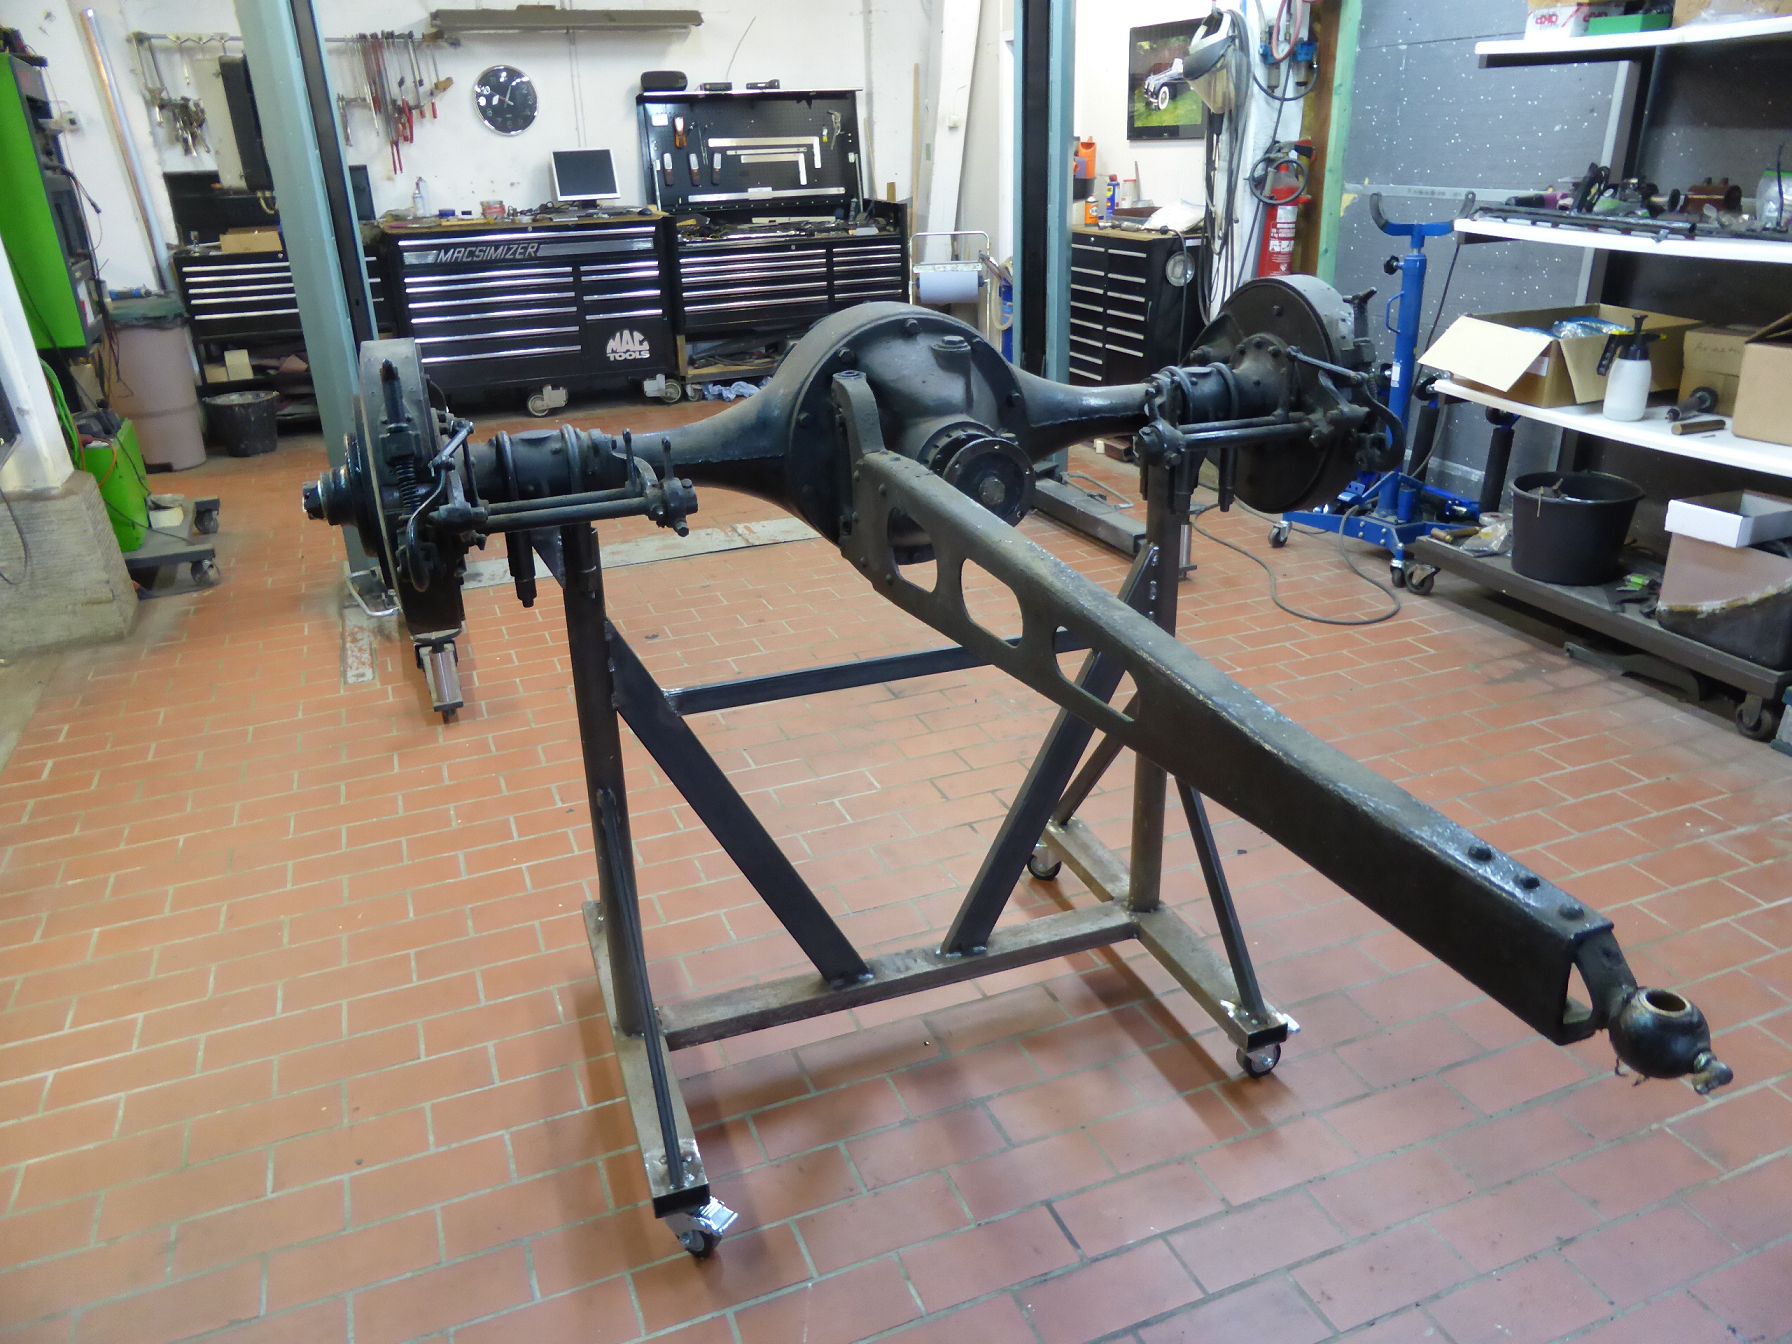 k-P1030330.JPG (349.45 KB) k-P1030330.JPG (349.45 KB)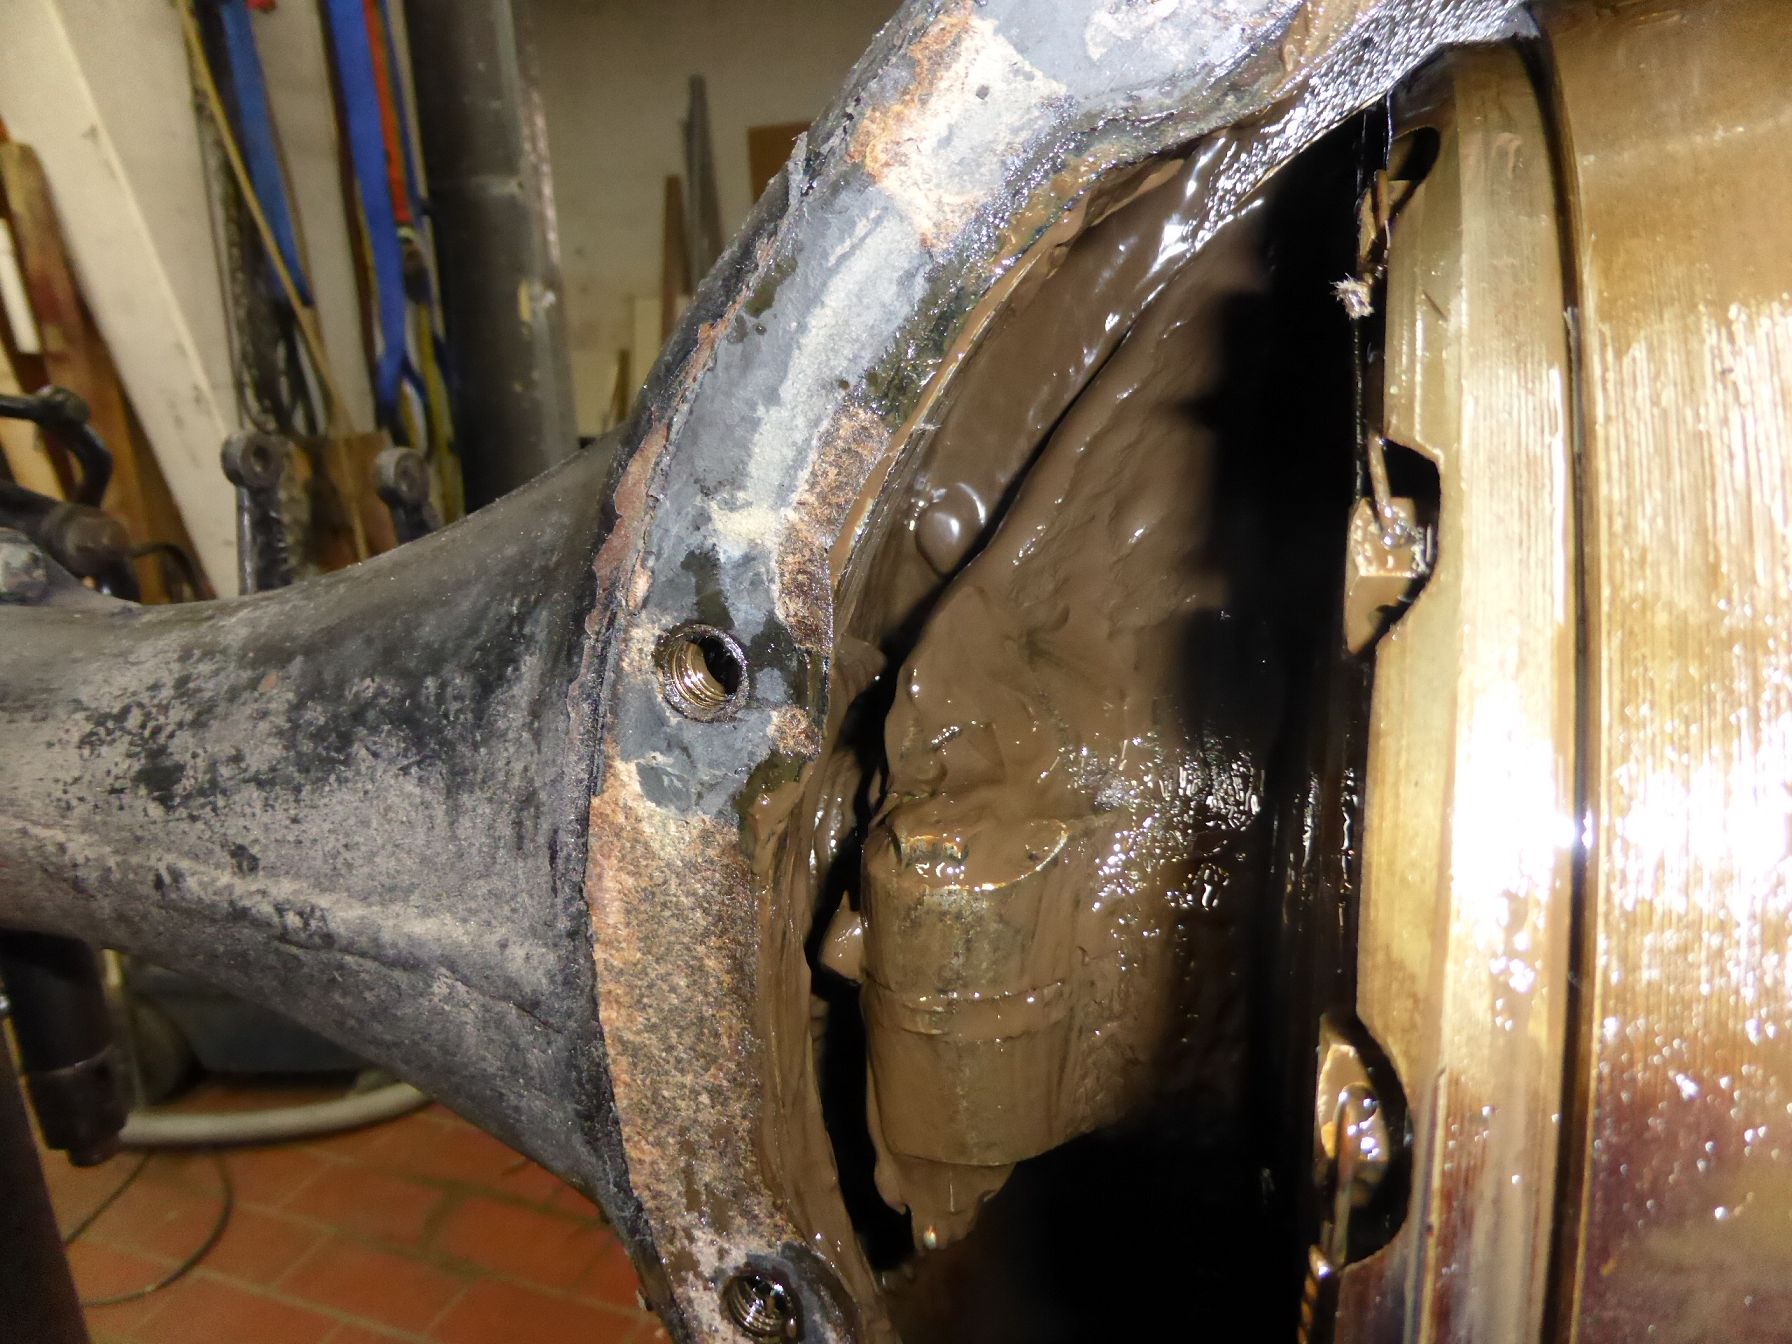 k-P1030422.JPG (255.79 KB) k-P1030422.JPG (255.79 KB)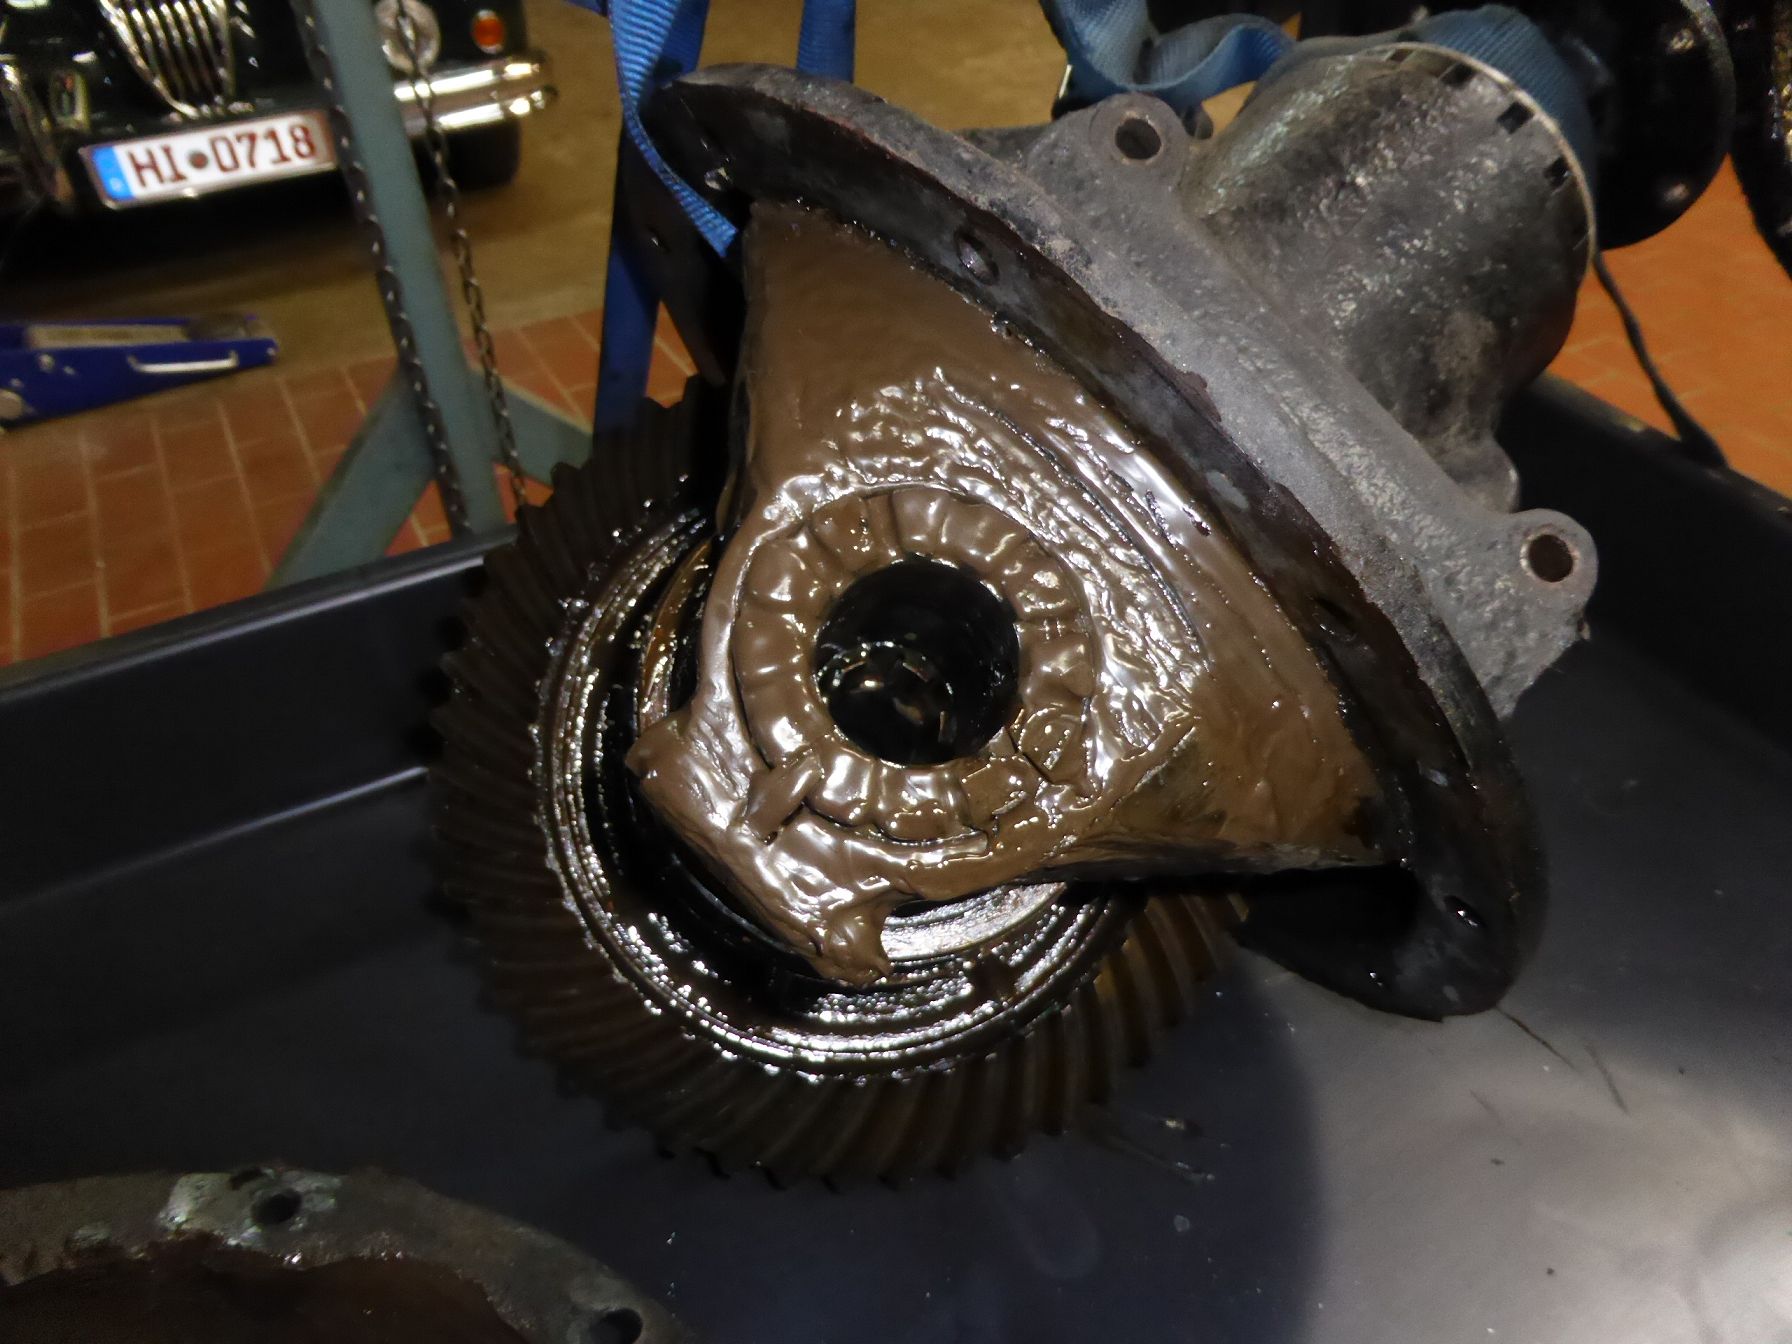 k-P1030426.JPG (244.70 KB) k-P1030426.JPG (244.70 KB)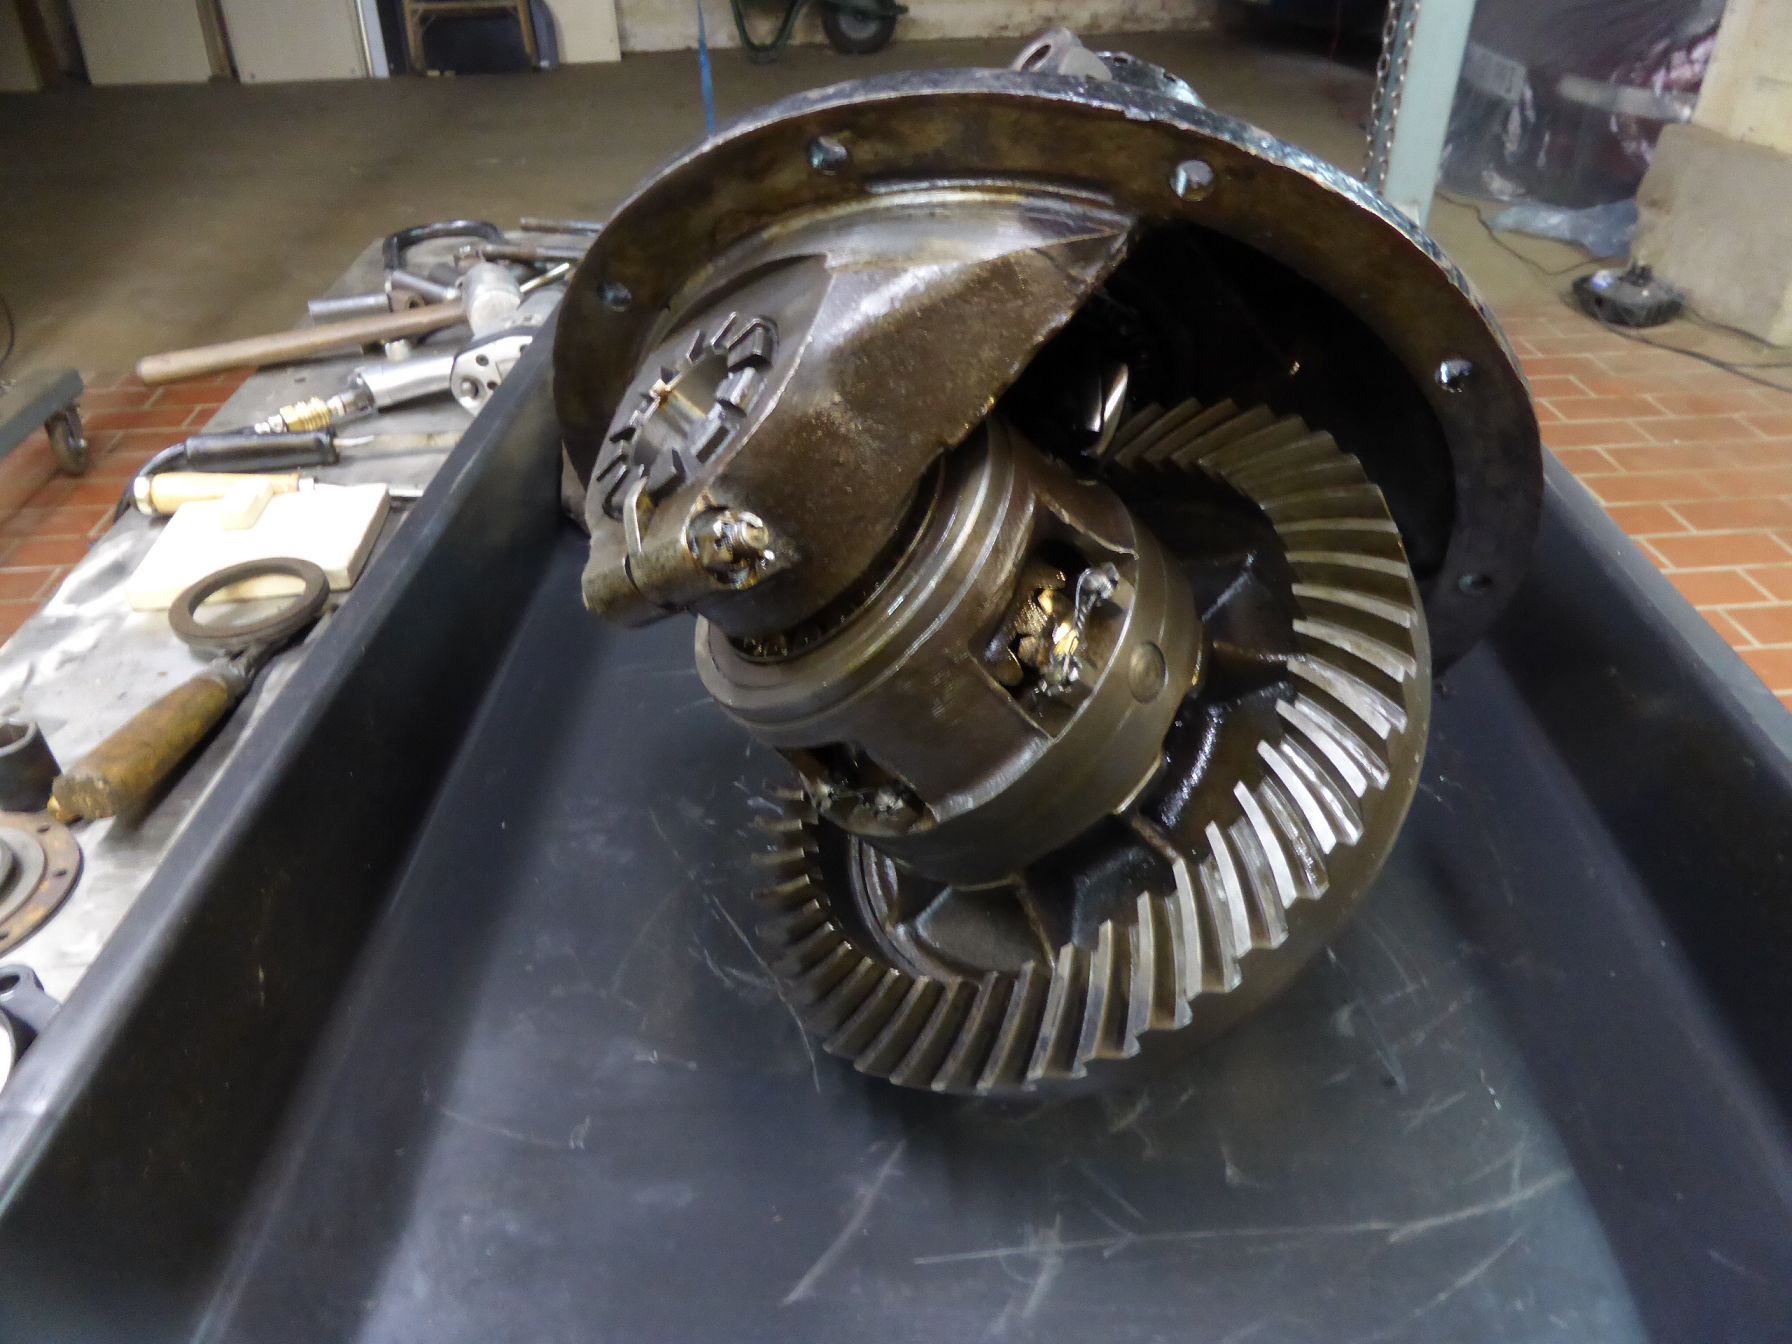 k-P1030428.JPG (1,160.66 KB) k-P1030428.JPG (1,160.66 KB)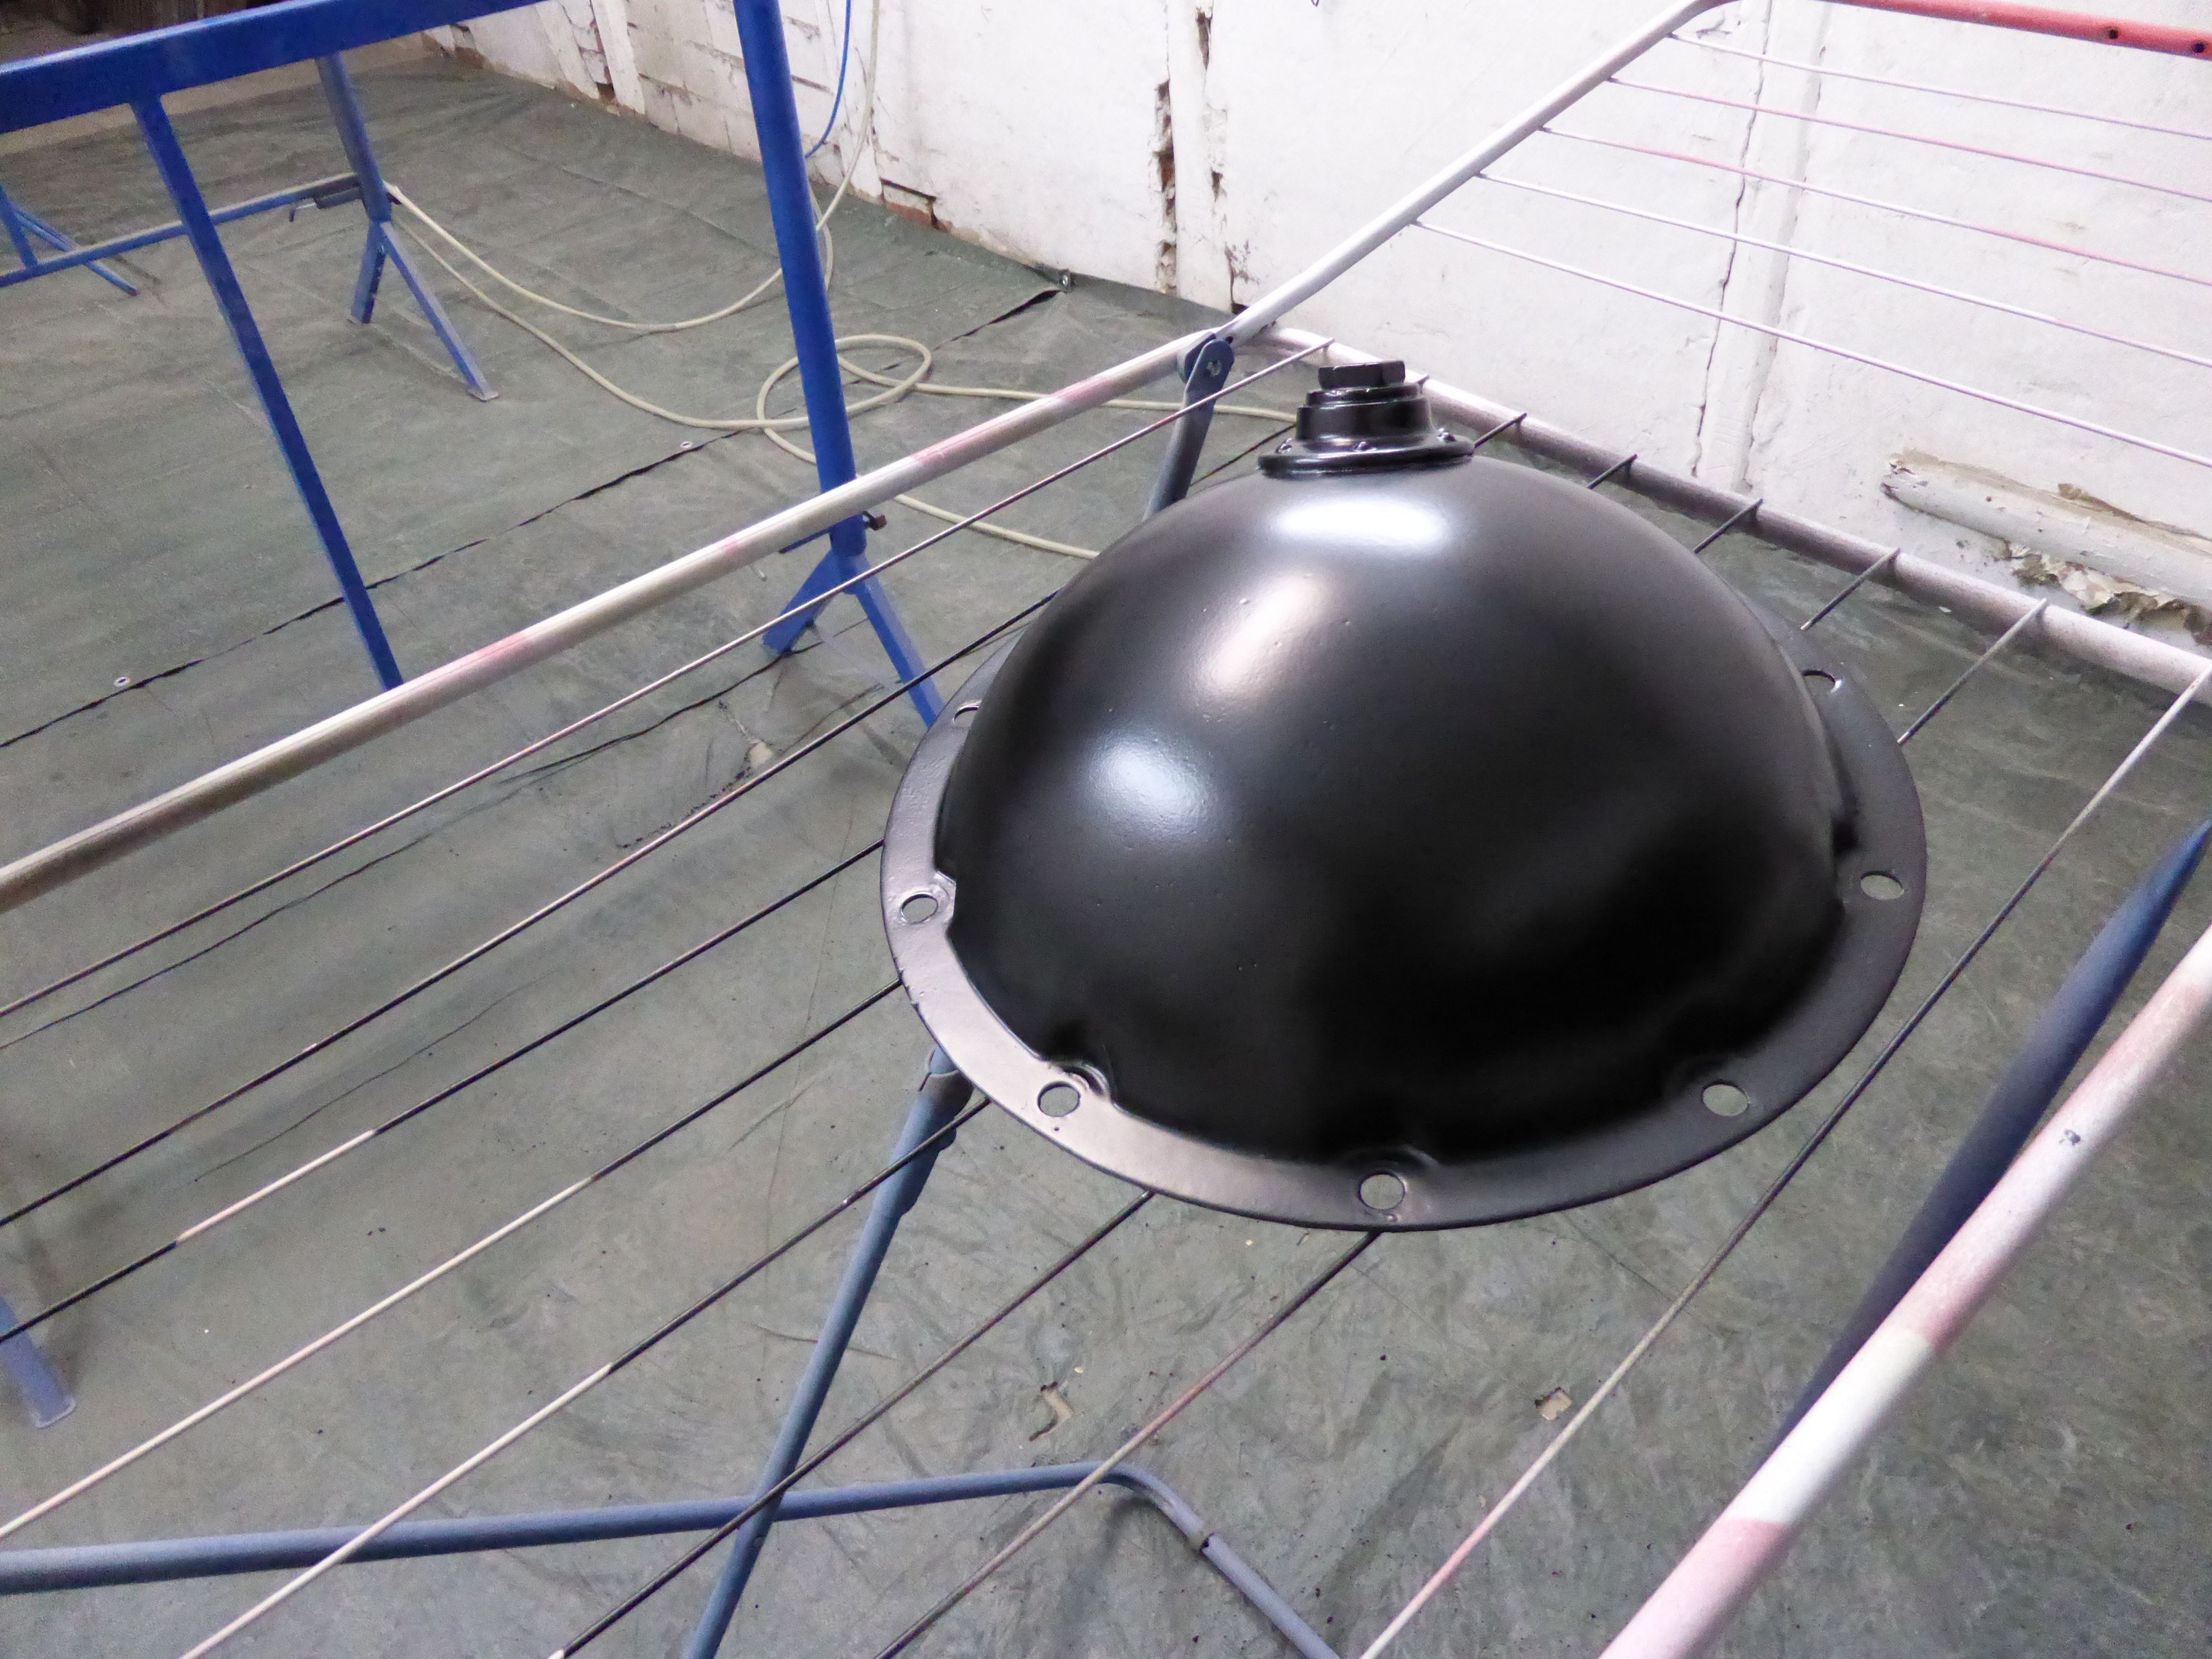
Posted on: 2/20 7:58
|
|||
|
||||
|
Re: 1924 Sport 136
|
||||
|---|---|---|---|---|
|
Home away from home
|
Quote:
... it looks like someone put “Skippy” in the gearbox ... Karl, with the practiced eye of a trained car mechanic, I'll tell you that Skippy is a slightly lighter shade. However, I also have to acknowledge that Nutella is darker. I therefore conclude that it could be a mixture. Attach file: Skippy vs Nutella.jpg (988.94 KB)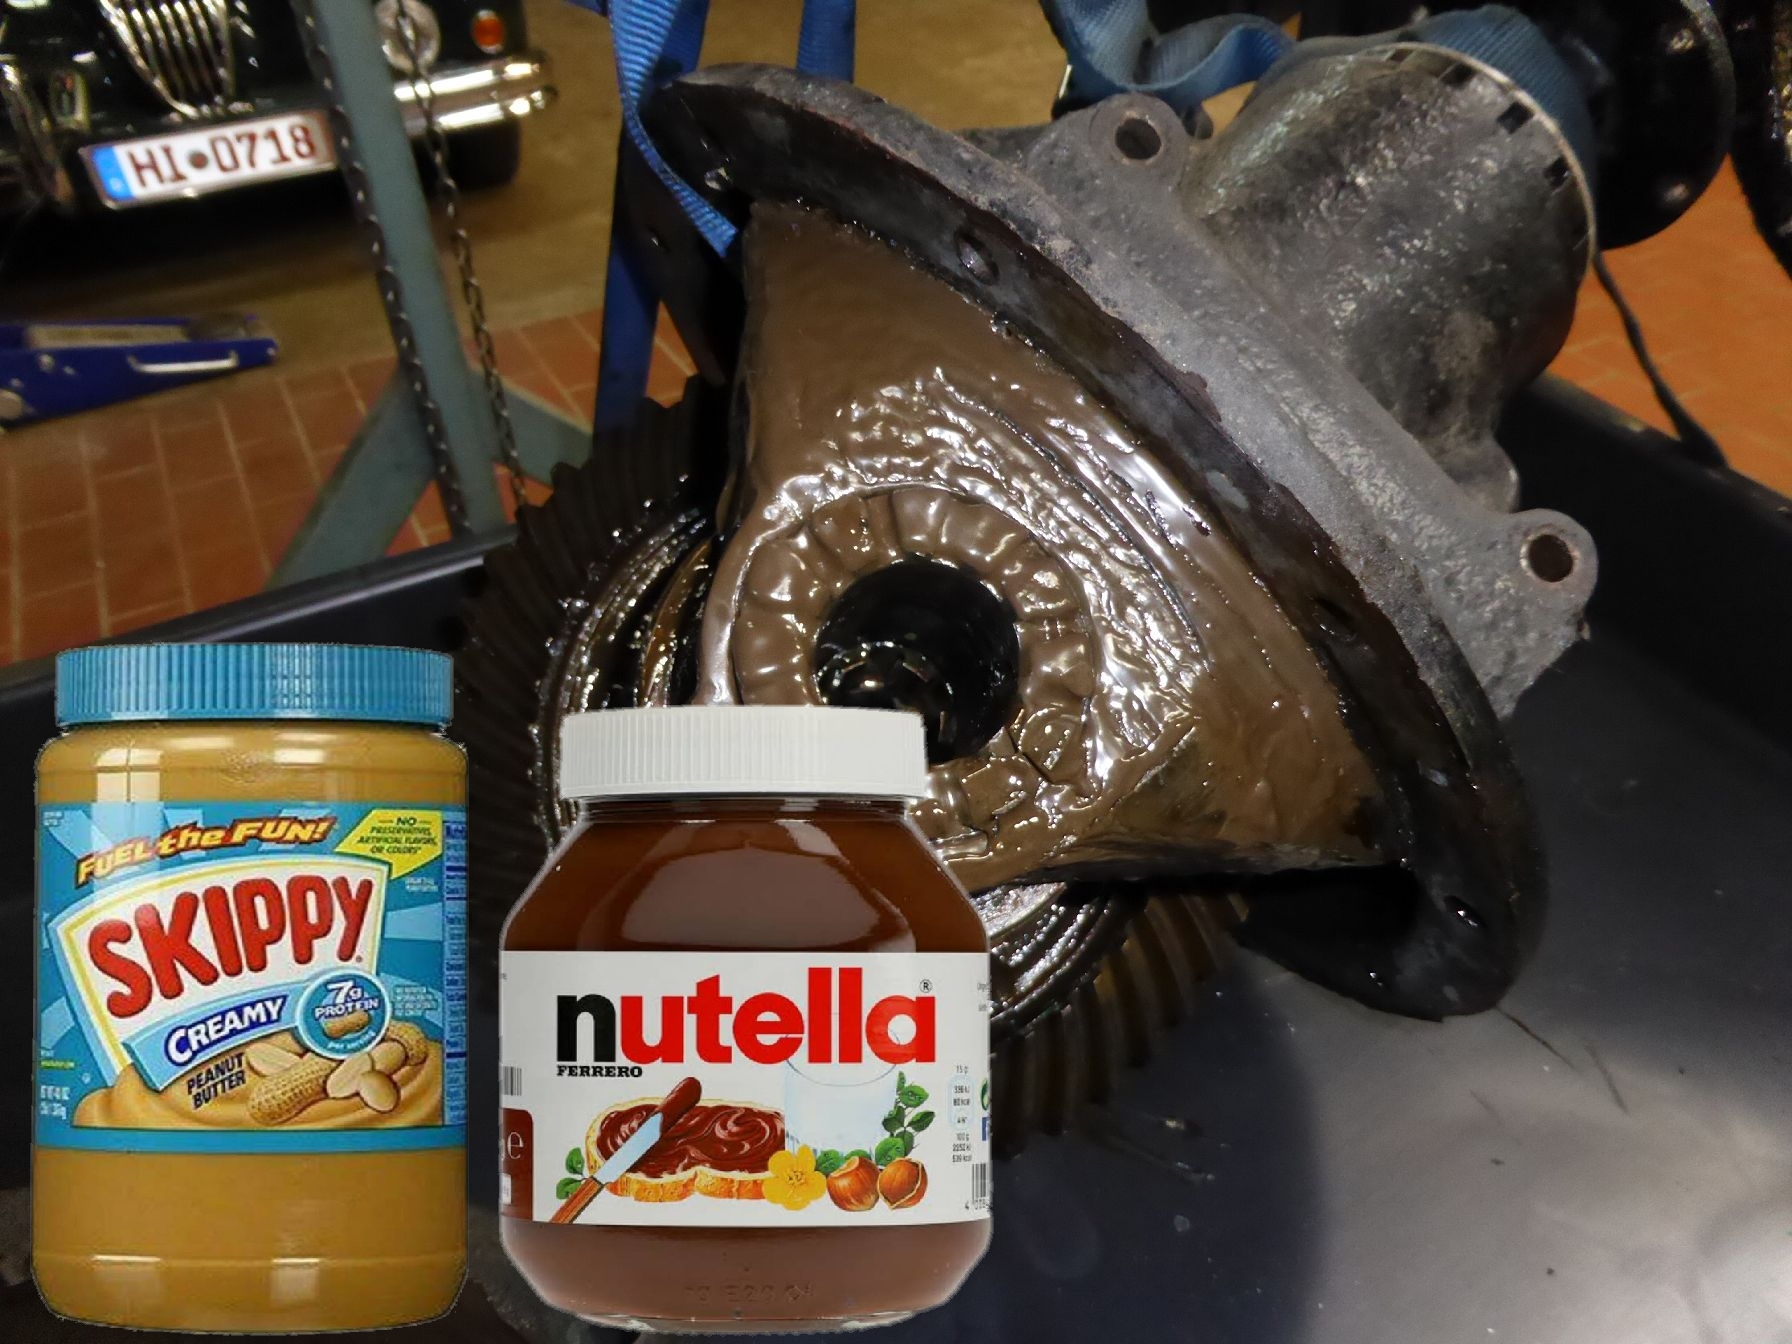
Posted on: 2/20 12:45
|
|||
|
The story of ZIS-110, ZIS-115, ZIL-111 & Chaika GAZ-13 on www.guscha.de
|
||||
|
||||
|
Re: 1924 Sport 136
|
||||
|---|---|---|---|---|
|
Home away from home
|
Gerd,
I think it should be Skippy after all. Nutella only has 31% fat compared to Skippy with 52.2% fat... which would explain the good condition of the differential. But I couldn't try it for health reasons because both would be like poison for me. Karl 
Posted on: 2/20 13:18
|
|||
|
||||
|
Re: 1924 Sport 136
|
||||
|---|---|---|---|---|
|
Forum Ambassador

|
Imagine my confusion
 (a normal state of mind for me) to see the term "Skippy" referred to in relation to lubricant in a differential. In Australia the term "Skippy" has been adopted to refer to Kangaroos generally, this followed the success of the late '60's TV show Skippy the Bush Kangaroo. But my faith in Skippy remaining a cultural Aussie icon, and not differential lubricant was restored on then reading Gerd's post. (a normal state of mind for me) to see the term "Skippy" referred to in relation to lubricant in a differential. In Australia the term "Skippy" has been adopted to refer to Kangaroos generally, this followed the success of the late '60's TV show Skippy the Bush Kangaroo. But my faith in Skippy remaining a cultural Aussie icon, and not differential lubricant was restored on then reading Gerd's post.An example of the lore of Skippy would be this ficticious, but loosely based on series, "conversations" between Sonny, the boy in the series, and Skippy. Sonny: What is it Skip? Skippy: Tck, Tck, Tck, Tck, Tck (Apparenty this is Kangaroo language) Sonny: (Tranlatng from Kangaroo) What! A '34 Dietrich Packard has crashed in the gully and needs to be pulled out? Episodes often featured similar dialogue. 
Posted on: 2/20 14:38
|
|||
|
Mal
/o[]o\ ====  Bowral, Southern Highlands of NSW, Australia "Out of chaos comes order" - Nietzsche. 1938 Eight Touring Sedan - SOLD 1941 One-Twenty Club Coupe - SOLD 1948 Super Eight Limo, chassis RHD - SOLD 1950 Eight Touring Sedan - SOLD What's this?  Put your Packard in the Packard Vehicle Registry! Here's how! Any questions - PM or email me at ozstatman@gmail.com |
||||
|
||||


