|
Re: Wade's Workshop
|
||||
|---|---|---|---|---|
|
Forum Ambassador

|
Monday 30th November 2009
A morning with the granddaughters was followed by afternoon with Packards. Wade was working on removing the shutterstat rear plate and actuating arm from John's 110 radiator top tank. Wade had already taken off the thermostat housing and upper radiator hose before I arrived and in inspecting the in-line hose filter installed discovered it full of crud. And this from a rebuilt engine with rebuilt water pump, good water distribution tube, and a flushed and cleaned radiator. It's also had very little running time, a couple of short 5 minute test drives and some stationary running time in the workshop, probably not more than 1/2 an hour all up. But the real reason for this activity was to 1) fit a thermostat in the thermostat housing(had been assembled and run while waiting for the parts to arrive from Max) and, 2) fix the improperly mounted shutterstat mechanism. At this point Harvey arrived with a couple of things for me and some for Wade. For me he had what he thought was a '41 door handle, well it might be but it's not the same as the ones on my 120. And also an old Packard Service Manual, titled Tool Catalog, which I'll have scanned and uploaded to the Site soon. Only problem is it's missing the first 12 pages. And he had a cheque for the engine parts Wade had imported for Harvey's rebuild of his bosses '39 120 Convertible Coupe. He also had the inner speedo cable out of his bosses other '39, 'Kermit', the 110 Business Coupe. The cable was broken about 4" from the end. Wade couldn't help, but Harvey rang later to say that General Instruments at Lidcombe, the guys that Wade uses, had made him a new cable in about 5 minutes. Back to the shutterstat. After the removal of the cover plate and pivot arm and comparing it with the one on Noel's '39 120 it appears that the pivot arm is "incorrect". It may be a fabricated piece but in doing so it pivots the wrong way. That is, it's pulling the shutters shut instead of pushing them open when it heats up! So all that blame heaped on Dave and his guys at the radiator shop for installing it in the top tank incorrectly was in error. It could only be installed one way, the way it was. Now that it was figured out what was wrong, how to fix it? After some discussion and more figuring it was decided to cut the pivot post off, turn it round by 90 degrees and weld it back on to the shaft. With the whole plate then rotated 180 degrees the lever will now push the shutters open. A quick trip around to see Brendan, at Col's brake shop, whose welding expertise was used and there we had it, a properly functioning shutter operation lever. Bolted it all back together and connected the pivot lever to the shutter actuating lever, re-installed the thermostat housing, now complete with new thermostat and retainer, filled the 110 with water and fired her up and no leaks. Went for a test run around Wades circuit down to the ferry wharf at Shepherds Bay, stopped and saw the shutters were now opening and also took a few pic's, then back to the workshop. On return, with the engine now well warmed up, re-torqued the head nuts. And last thing, Wade installed the rubber bumps stops in the front suspension, these had also been on order from Max. So in the near future Wade will drive the 110 to/from the workshop for a couple of days to ensure all's well before handing it back to John. And speaking of driving to/from the workshop, on Friday Wade had completed the work on Noel's '39 120. You'll remember that on Thursday I'd dropped Wade off at Col's to see him about the fluid leak from the banjo fitting on the front of the master cylinder. Ended up that Wade used a thicker washer because the new copper one supplied wasn't thick enough because the threaded hollow bolt bottomed out before it sealed properly. That was one problem solved but taking the 120 home that night Wade found the re-welded trans rod to be giving all sorts of problems. This prompted Wade to return to the workshop on Saturday to remedy that. Rather than try again to rework the rod, which by this time was almost more weld than rod, another approach was taken. From John or Rick's spare parts Wade found a rod, I know, I know it's not Packard(probably off a Mazda or a Holden  ) but after the necessary re-working it works and keeps a Packard on the road until Noel can source a "correct" replacement. Upshot of it all is that it is now shifting well and so much so, that with Noel's permission, and as part of the road test program Wade will take the 120 on the Morris Minor Picnic Club run tomorrow. Unfortunately I can't make it, a flimsy excuse of "having a dental appointment". Believe me, I'd rather be driving a Packard any day than be in the Dentists chair! ) but after the necessary re-working it works and keeps a Packard on the road until Noel can source a "correct" replacement. Upshot of it all is that it is now shifting well and so much so, that with Noel's permission, and as part of the road test program Wade will take the 120 on the Morris Minor Picnic Club run tomorrow. Unfortunately I can't make it, a flimsy excuse of "having a dental appointment". Believe me, I'd rather be driving a Packard any day than be in the Dentists chair!Quote: hardtop wrote: Mal, at least your garage looks a lot better then mine...... Pic's can lie! Quote: 39super8 wrote: Mal, What happens after the running boards are sanded out? Do they get re-coated, painted, or something else?......Jim Quote: BigKev wrote: Couldnt the boards be stripped to bare metal, the extra holes either MIG\TIG welded or brazed closed, and then coated Quote: DavidM wrote: Mal, I had the same thought as BigKev, if it was mine I would strip it and start again however I would fill the holes with soft solder. I have had good results with this method........If you did this and sanded all the filling back to a smooth finish I would think you would get a much better result. David The holes come back to my naivety, knew they were there but didn't think they'd be a problem and then discovered otherwise after being Rhino coated. Solution was to fill them with urethane, rub the filling back and recoat with Rhino. Peter, the Rhino guy, did the filling and I've started the rubbing back with a view to his alternate suggestion of then re-finishing using black bumper paint for the final coats. But in doing the rubbing back I've found that I've rubbed through the Rhino in some places(too thin) and the orange peel is quite bad in others. Because of these two recent developments I'm now thinking along the lines of re-coating with Rhino AGAIN! First time around I suggested to Peter that thin coats were the way to go but I'm thinking that a couple of thicker coats may now be better. Thanks to all for their suggestions, and if I was doing it all again from the start the boards would certainly be prepared differently. Attach file:  (35.18 KB) (35.18 KB)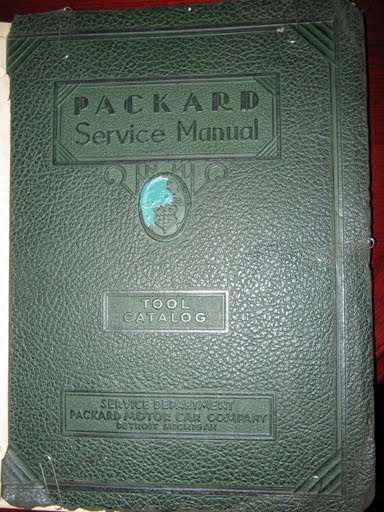 (53.53 KB) (53.53 KB)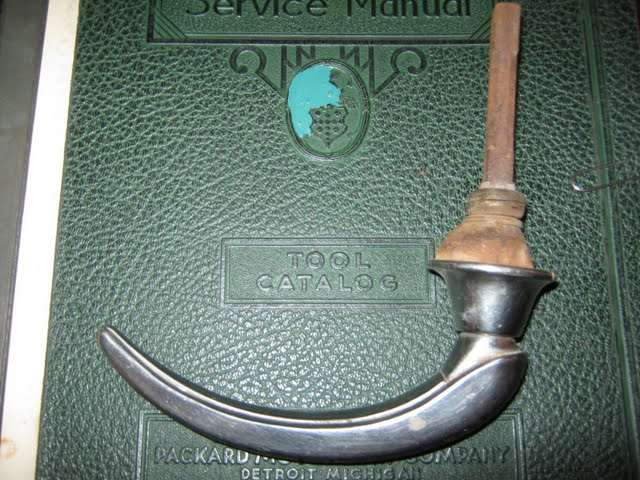 (15.26 KB) (15.26 KB)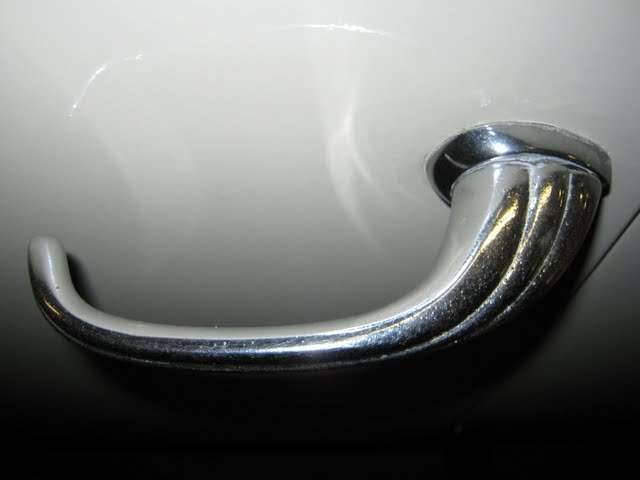 (32.84 KB) (32.84 KB)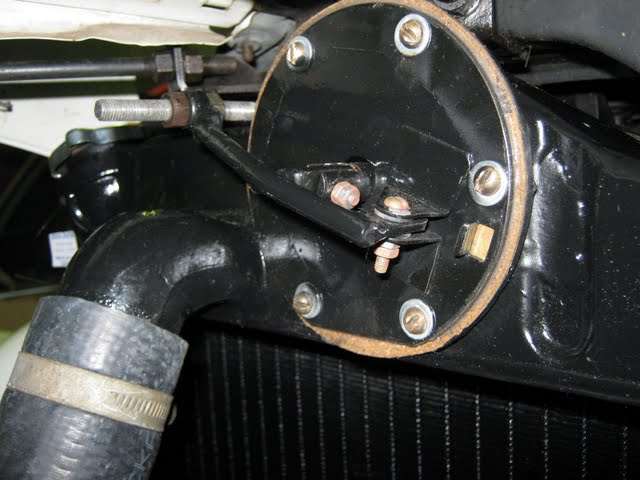 (46.32 KB) (46.32 KB)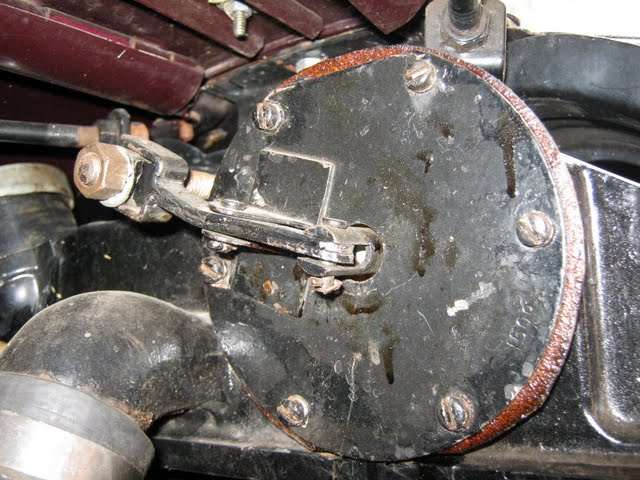 (30.93 KB) (30.93 KB)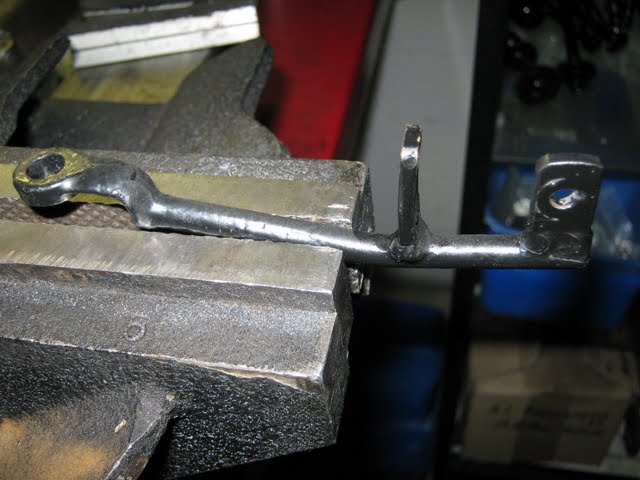 (29.22 KB) (29.22 KB)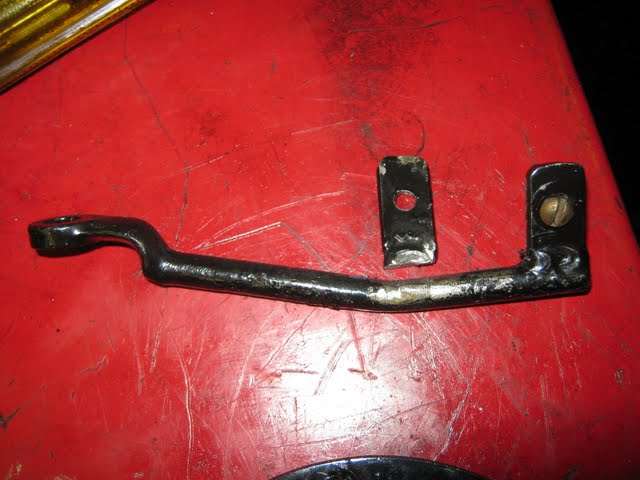 (29.77 KB) (29.77 KB)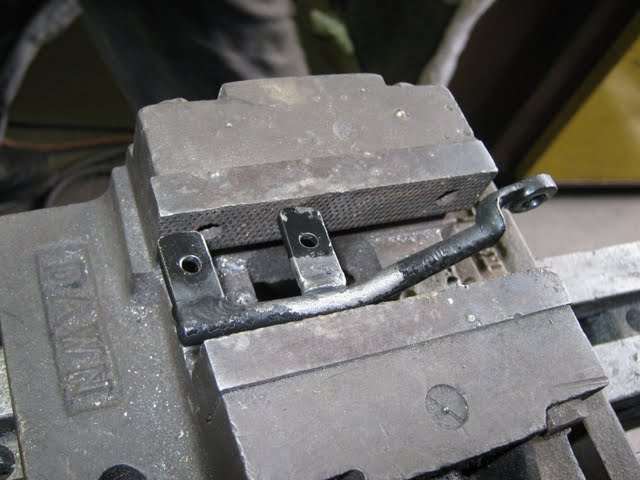 (27.49 KB) (27.49 KB)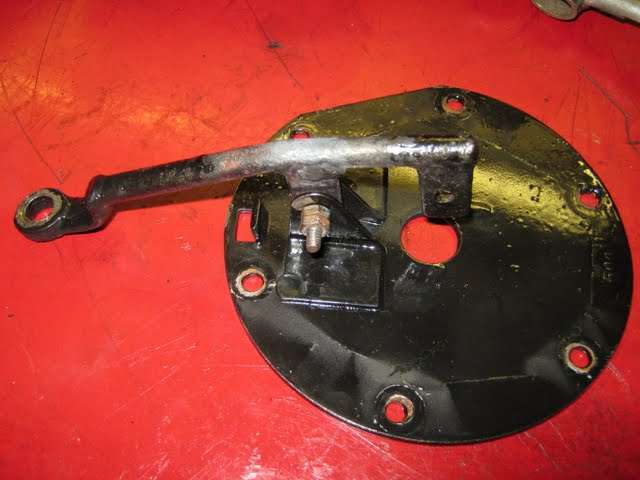 (34.24 KB) (34.24 KB) (24.56 KB) (24.56 KB) (32.76 KB) (32.76 KB) (28.10 KB) (28.10 KB) (28.19 KB) (28.19 KB)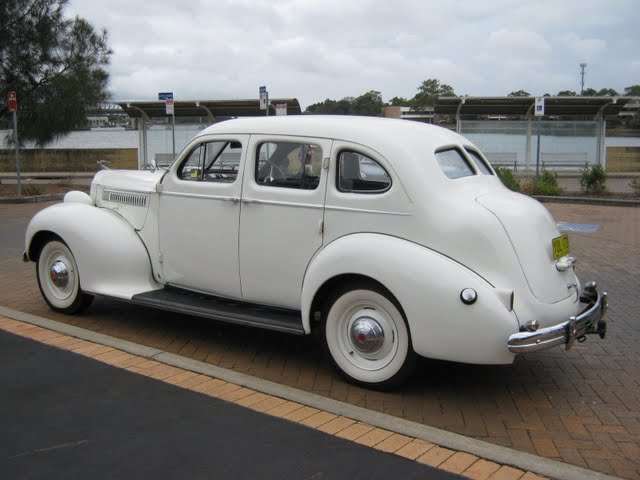 (32.33 KB) (32.33 KB) (24.44 KB) (24.44 KB) (38.72 KB) (38.72 KB) (25.44 KB) (25.44 KB)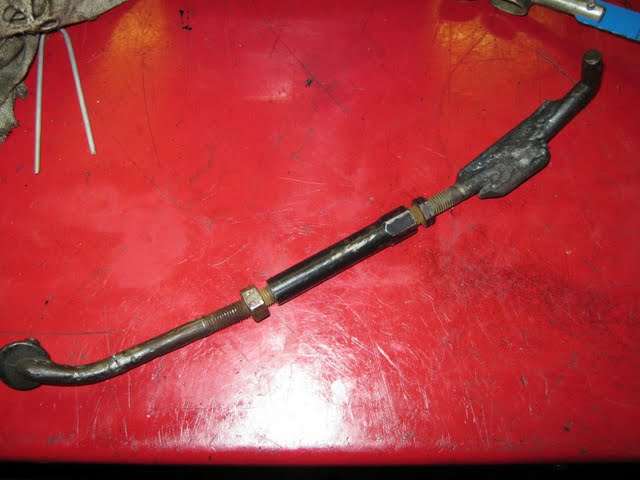 (29.45 KB) (29.45 KB)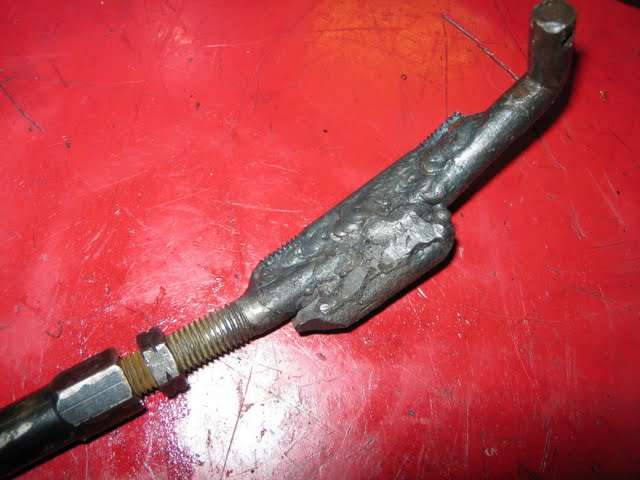 (22.38 KB) (22.38 KB)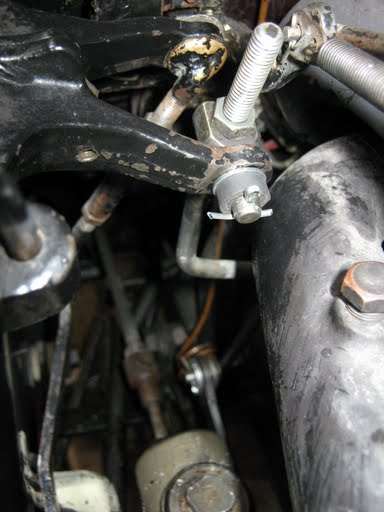 (21.30 KB) (21.30 KB)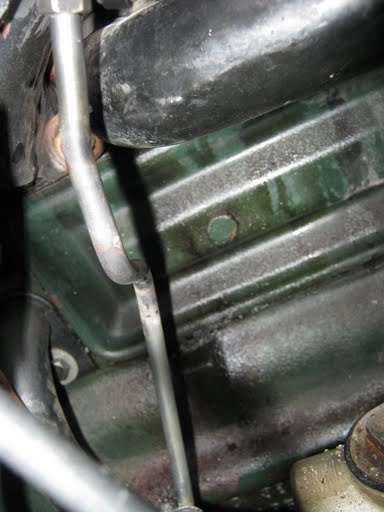
Posted on: 2009/11/30 16:36
|
|||
|
Mal
/o[]o\ ====  Bowral, Southern Highlands of NSW, Australia "Out of chaos comes order" - Nietzsche. 1938 Eight Touring Sedan - SOLD 1941 One-Twenty Club Coupe - SOLD 1948 Super Eight Limo, chassis RHD - SOLD 1950 Eight Touring Sedan - SOLD What's this?  Put your Packard in the Packard Vehicle Registry! Here's how! Any questions - PM or email me at ozstatman@gmail.com |
||||
|
||||
|
Re: Wade's Workshop
|
||||
|---|---|---|---|---|
|
Webmaster

|
Mal, looking forward to seeing the tool catalog. It should be a nice companion to the KM Post War tool catalog.
Posted on: 2009/11/30 21:52
|
|||
|
-BigKev
1954 Packard Clipper Deluxe Touring Sedan -> Registry | Project Blog 1937 Packard 115-C Convertible Coupe -> Registry | Project Blog |
||||
|
||||
|
Re: Wade's Workshop
|
||||
|---|---|---|---|---|
|
Home away from home
|
Mal,
Your door handles look suspiciously like my 1940 ones........
Posted on: 2009/12/1 5:19
|
|||
|
Carpe Diem!!
 Registry Registry
|
||||
|
||||
|
Re: Wade's Workshop
|
||||
|---|---|---|---|---|
|
Forum Ambassador
|
Wednesday 2nd December 2009
Arriving at the workshop found Wade making a battery hold down strap for Noels '39 120. He'd had trouble starting it this morning as the battery was very low and even with the trip to the workshop, about 8 miles, it didn't charge up. So because Wade's doing a wedding on Friday for a friend, and using Noel's 120 because Big Red is still seriously inconvenienced, Wade's also using his Optima battery to ensure he gets to the church on time. Optima installed, then it was into replacing the sparkplugs because there was a miss with the 120. And yesterday, apart from that, the 120 performed flawlessly on the Morris Minor Picnic Club run. So the Autolites I'd cleaned up and gapped the other day were replaced by Wade's spare set of Champions, but with no discernible difference. Must be the points, because Wade had replaced them with a used set from Old Blue. Next the 120 was put on Rick's hoist and greased, Noel had mentioned he would like to do that, and seeing the hoist was vacant I took the opportunity to do so. While it was up on the hoist Wade noticed that the flywheel had a white paint mark on it and seeing there wasn't a mark on the front pulley or a pointer either for that matter he used John's timing light to more scientifically set the timing. So 120 lowered on hoist, timing light connected to #1 plug lead and stowed on chassis rail, engine started, hoist raised, under the 120, timing light doesn't work! 120 lowered on hoist, engine off, timing light disconnected and back to the bench to disassmble and fix it. Turns out to be the contact at the lens end was moving and avoiding contact. A drop or two of superglue to hold it in place and back together again. Then timing light connected to #1 plug lead and stowed on chassis rail, engine started, hoist raised, under the 120, and timing light works but no sign of the white marking on the flywheel. Advancing or retarding the distributor fails to find the white marking either. So has it been timed to another cylinder, #6 maybe? 120 lowered on hoist, engine off, timing light disconnected, re-connected to #6 plug lead, engine started, hoist raised, under the 120, and timing light works and again no sign of the elusive white marking on the flywheel. Didn't try further, surmised the white marking could be anything and, rather than pogo-sticking a '39 Packard on a hoist, Wade set the distributor timing with his finely tuned ear while under the 120. Next was adjusting the shutters on John's 110, Such a good a job was done on ensuring they would open now they wouldn't close properly! After some to and fro Wade finally found the necessary balance so now they close properly as well as open as they should. Back to the 120. Harvey had mentioned that the steering boxes of both '39's he's working on were bone dry and suggested it wouldn't hurt to check Noel's if Wade had the chance. Well here was the chance, Wade took the filler plug out and what do you know? Bone dry! Fortunately Wade had some Penrite Steering Box Lube on the shelf which has on it's instructions "Easy to use being just pourable at ambient temperature." Well if you believe that you'd still be waiting for the first drop to pour and it's now about 5 hours since Wade did it. And how did he do it? Into the microwave for 30 seconds, not much happening. Another 30 seconds, still not much happening. And a final 60 seconds, now we had something pourable. The turned to Big Red, not much has been done with the old girl for a some time while waiting for parts and machining. Now have all the parts but the crankshaft and rods haven't returned from being balanced so there's still a big holdup there. But the right front brake drum has been off for a while and, now that the fluid leak at the wheel cylinder has been fixed, back on it went. Wade also had the front seat out to resew the buttons back into it. He'd done all the rear seat, squab and back, at home as well as the front seat squab. But because the upholstery for front seat back is integral with the seat back surround it was too big and cumbersome to take home to work on. Plus there was the added disadvantage of the steel seat back not allowing access to rear of the upholstered back unlike the other back and the squabs which didn't have that impediment. Rather than have the upholstery undone to access the back an alternative solution was to drill holes in the steel back to permit Wade to thread through a nylon line to re-secure the errant buttons. Sounds easy, doesn't it? Should be, but to get there required perseverance and some trial and error. There were 2 buttons on the front seat back which had "popped" but Wade was re-securing all 6 just as he'd done for the others replaced at home. Some measuring and marking on the steel seat back and a hole was drilled. Wade used a long mattress needle to push through from the button position on the upholstery to the hole drilled at the back but no amount of fiddling and jiggling could get the needle to the hole. Some eye-balling of the hole relevant to button position revealed it was about 2" out of whack! New holes drilled, this time 2, as part of Wade's plan for securing the buttons and after a lot of further fiddling and jiggling got the needle into the hole. The passage of the needle wasn't helped at all by the wadding, padding and springs and things which conspired to be in the way of it's journey to the seat back hole. However, that done a button was threaded onto the eye of the needle and with me pulling the pointed end through with a pair of pliers, surprising how hard it was to pull through, we got there. After the first one was in place it was comparatively easier as the first holes now served as a reference point and as our technique improved with practice. At the moment the buttons are loosely tied and will probably be finished tomorrow. Oh, and here's something interesting, check out this thread Matt Snapes Speedster?. Turns out Matt dropped into see Wade the other day, and it turns out he did so because Matt's son has his car serviced by John at the workshop and told Matt about Wade and his Packards. Matt's interested in Wade's spare '34 rolling chassis, engine, trans, etc for his proposed racing Packard. Wade also has a copy of Robert Neal's "Packards at Speed" which he's lending to Matt and, Matt if you read this, it's now sitting in the workshop waiting for you to drop by to borrow it! Quote: Appin wrote: Mal, Your door handles look suspiciously like my 1940 ones........ Which handle? The one from Harvey or the one on my Coupe? I'll be giving Harvey his handle back on Sunday, and if you're there you might be able to negotiate a change of ownership with him. Attach file: (36.68 KB)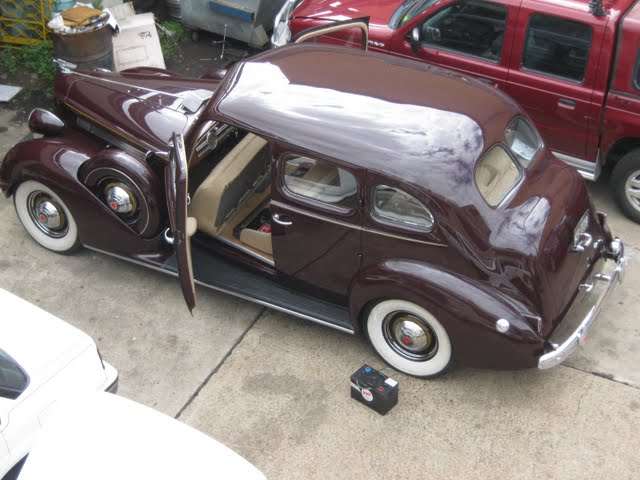 (30.50 KB) (30.50 KB)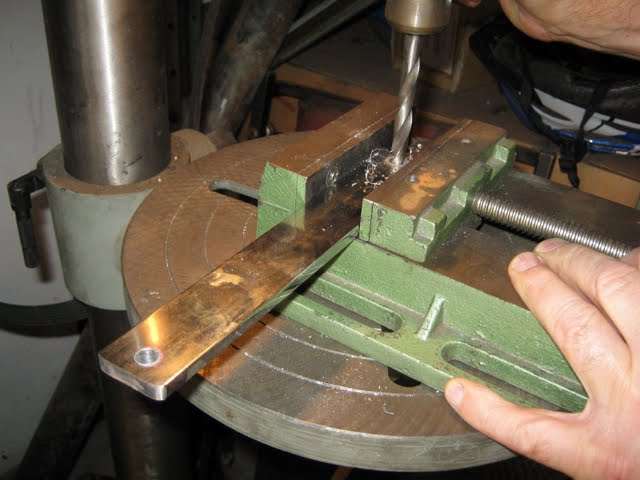 (20.65 KB) (20.65 KB)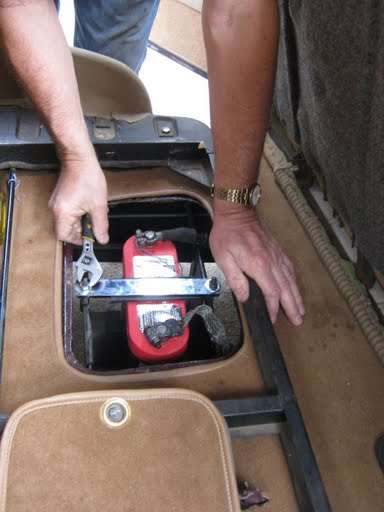 (29.92 KB) (29.92 KB) (26.19 KB) (26.19 KB)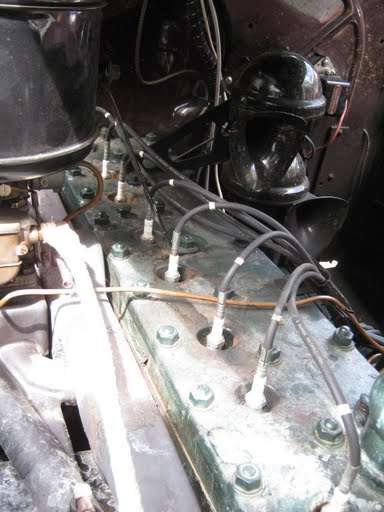 (18.90 KB) (18.90 KB)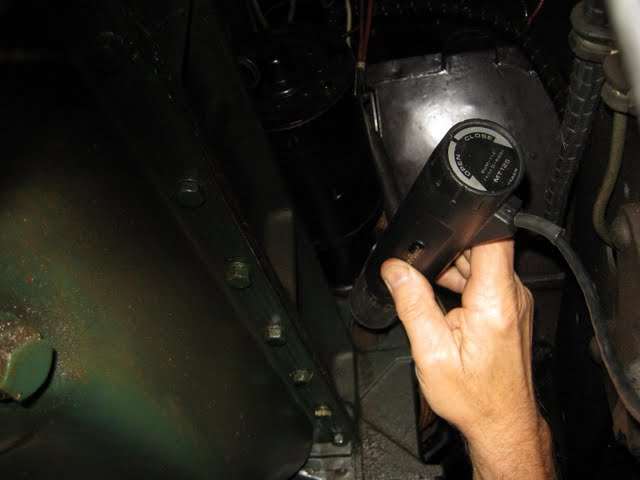 (42.86 KB) (42.86 KB)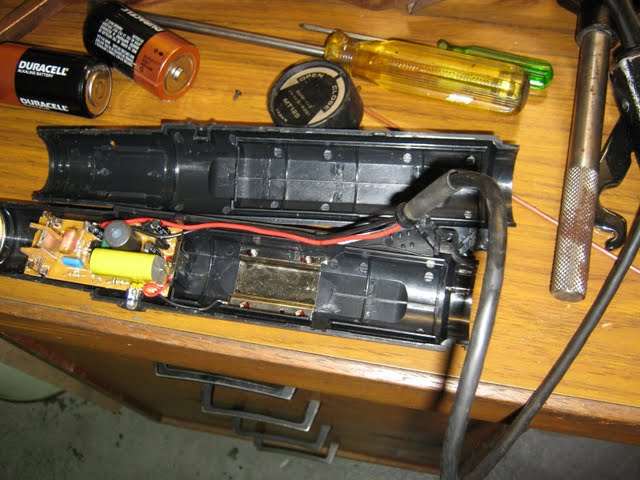 (34.46 KB) (34.46 KB) (24.87 KB) (24.87 KB)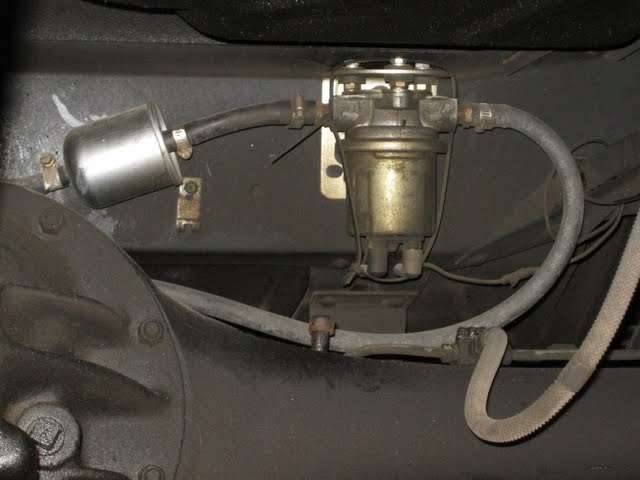 (19.27 KB) (19.27 KB)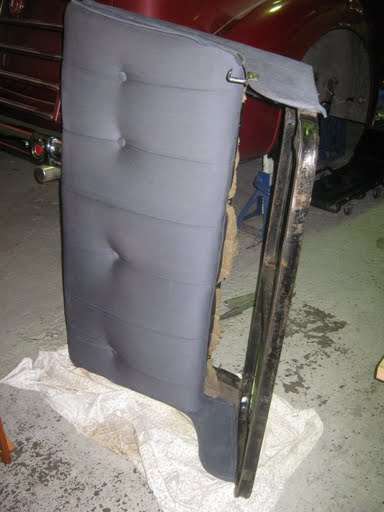 (39.49 KB) (39.49 KB)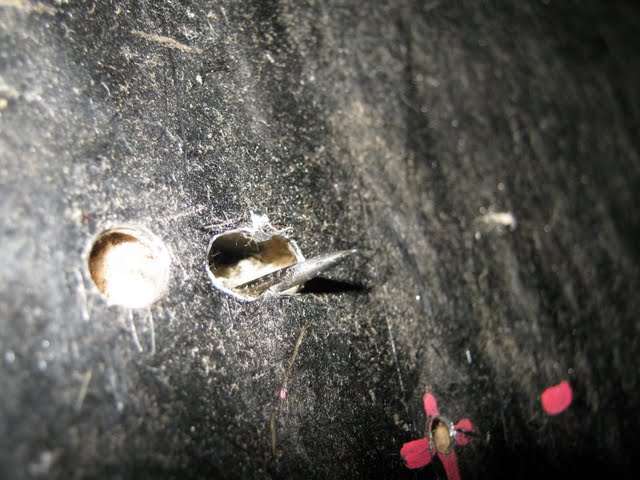 (13.31 KB) (13.31 KB)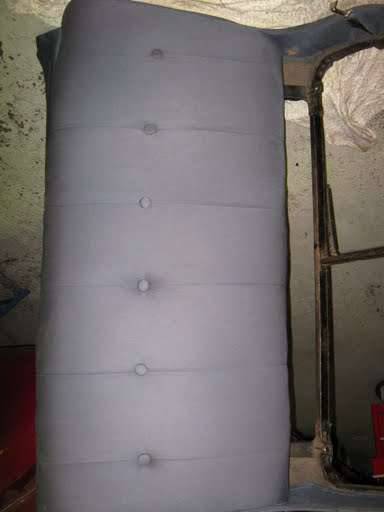 (27.27 KB) (27.27 KB)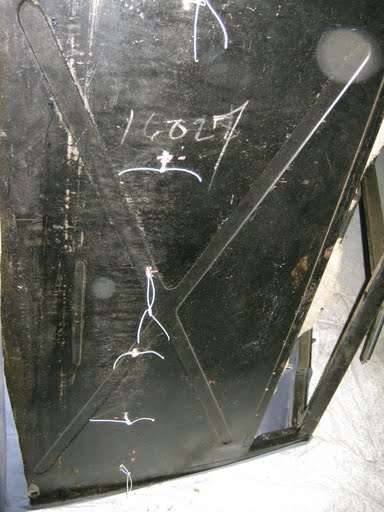 (20.10 KB) (20.10 KB)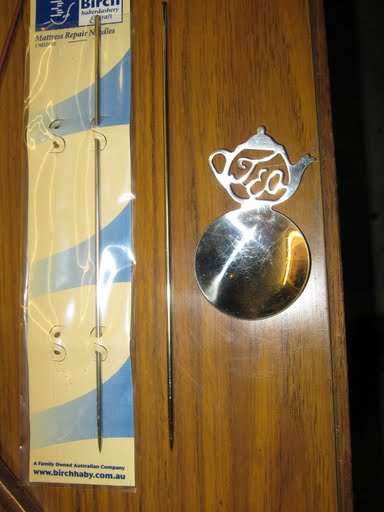 (29.86 KB) (29.86 KB)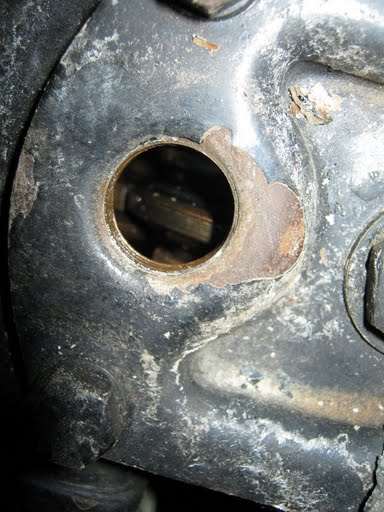 (27.43 KB) (27.43 KB)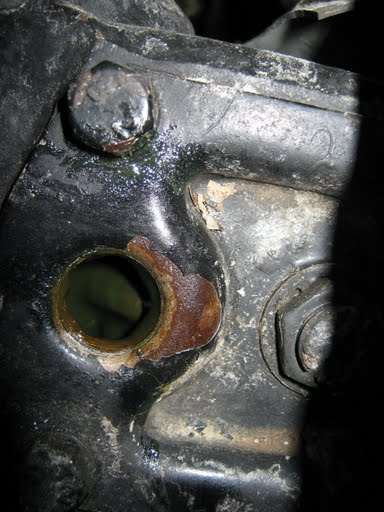 (24.41 KB) (24.41 KB)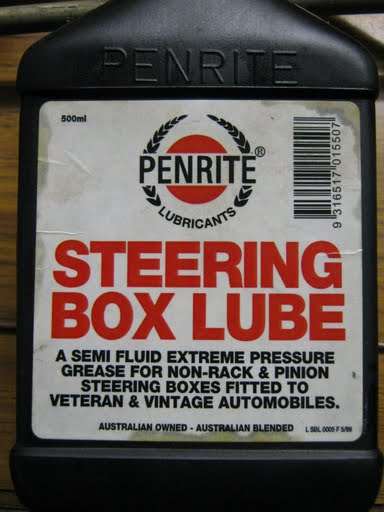 (26.50 KB) (26.50 KB)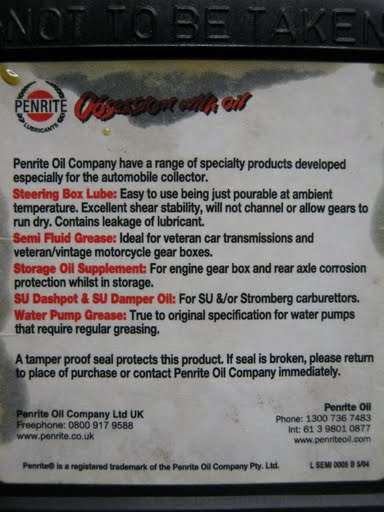 (22.72 KB) (22.72 KB)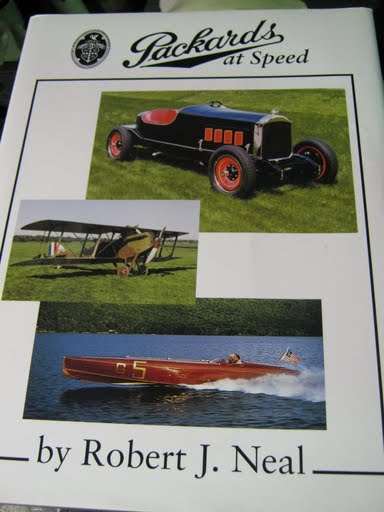 (26.14 KB) (26.14 KB) (29.10 KB) (29.10 KB)
Posted on: 2009/12/2 4:27
|
|||
|
Mal
/o[]o\ ==== Bowral, Southern Highlands of NSW, Australia "Out of chaos comes order" - Nietzsche. 1938 Eight Touring Sedan - SOLD 1941 One-Twenty Club Coupe - SOLD 1948 Super Eight Limo, chassis RHD - SOLD 1950 Eight Touring Sedan - SOLD What's this? Put your Packard in the Packard Vehicle Registry! Here's how! Any questions - PM or email me at ozstatman@gmail.com |
||||
|
||||
|
Re: Wade's Workshop
|
||||
|---|---|---|---|---|
|
Home away from home
|
The door handles currently on your 41 look like the ones on my 40. Harvey's look different than mine.
The assumption here is that my handles are correct for 1940 (which I think are correct but I am not the one to ask to be sure).
Posted on: 2009/12/2 5:14
|
|||
|
Carpe Diem!!
Registry
|
||||
|
||||

|
Re: Wade's Workshop
|
||||
|---|---|---|---|---|
|
Forum Ambassador
|
Quote:
Snapey wrote: Hi Mal - this is a pretty incredible thread you have going here. Great to see such enthusiasm.........Thanks to all of those that are currently helping with my enquiries re Racing Packards and to yourself and Wade in particular for being so generous with both your time and expertise...... Matt,  for the kind words, and yes I am enthusiastic. Does it really show that much? for the kind words, and yes I am enthusiastic. Does it really show that much? As for time and expertise, well Wade certainly has the expertise so I must be the one with the time.  It'll be good to see you next week down at the workshop.
Posted on: 2009/12/3 7:15
|
|||
|
Mal
/o[]o\ ==== Bowral, Southern Highlands of NSW, Australia "Out of chaos comes order" - Nietzsche. 1938 Eight Touring Sedan - SOLD 1941 One-Twenty Club Coupe - SOLD 1948 Super Eight Limo, chassis RHD - SOLD 1950 Eight Touring Sedan - SOLD What's this? Put your Packard in the Packard Vehicle Registry! Here's how! Any questions - PM or email me at ozstatman@gmail.com |
||||
|
||||
|
Re: Wade's Workshop
|
||||
|---|---|---|---|---|
|
Home away from home
|
Hi Mal and Wade, Please be advised that I believe Noel's engine to be assembled with the valve timing one tooth retarded. You will have to time it by ear until the next time the engine front clip is removed and the valve timing corrected. It does not develop its full horsepower but it goes well under the circumstances. Best regards Peter Toet
Posted on: 2009/12/3 8:10
|
|||
|
I like people, Packards and old motorbikes
|
||||
|
||||
|
Re: Wade's Workshop
|
||||
|---|---|---|---|---|
|
Forum Ambassador
|
Quote:
Ozstatman wrote:......While it was up on the hoist Wade noticed that the flywheel had a white paint mark on it and seeing there wasn't a mark on the front pulley or a pointer either for that matter he used John's timing light to more scientifically set the timing......timing light works but no sign of the white marking on the flywheel. Advancing or retarding the distributor fails to find the white marking either. So has it been timed to another cylinder, #6 maybe?......timing light....again no sign of the elusive white marking on the flywheel. Didn't try further, surmised the white marking could be anything and, rather than pogo-sticking a '39 Packard on a hoist, Wade set the distributor timing with his finely tuned ear...... Quote: Peter Packard wrote:......I believe Noel's engine to be assembled with the valve timing one tooth retarded. You will have to time it by ear until the next time the engine front clip is removed and the valve timing corrected. It does not develop its full horsepower but it goes well under the circumstances. Best regards Peter Toet Peter,That explains it then, with Wade doing the right thing in the circumstances.
Posted on: 2009/12/4 20:32
|
|||
|
Mal
/o[]o\ ==== Bowral, Southern Highlands of NSW, Australia "Out of chaos comes order" - Nietzsche. 1938 Eight Touring Sedan - SOLD 1941 One-Twenty Club Coupe - SOLD 1948 Super Eight Limo, chassis RHD - SOLD 1950 Eight Touring Sedan - SOLD What's this? Put your Packard in the Packard Vehicle Registry! Here's how! Any questions - PM or email me at ozstatman@gmail.com |
||||
|
||||
|
Re: Wade's Workshop
|
||||
|---|---|---|---|---|
|
Forum Ambassador
|
Monday 7th December 2009
After donating blood in the morning it was off to the workshop. Should mention though that yesterday before I went to our clubs Christmas lunch I went to look at a Packard for sale. It is a '40 110 LHD and the dealer selling it only wants AU$39,900! Now Packards don't come up for sale here very often and especially through a car dealer. This dealer is located on Parramatta Road, which at one time was mile upon mile of car yards of various descriptions, so I thought Sunday would be a good viewing day. Not so, this dealer is only open Monday to Friday, my how times have changed. That said, when next I'm in the neighbourhood during business hours I'll drop in and look it over then. First up was completing the upholstery job on Big Red's front seat buttons. Wade had rummaged through Gina's button box and come up with some fine specimens for use on the seat back. So with me pushing in the buttons to a reasonable depth on the seat Wade was around the back tying the nylon cords threaded through the buttons. Next, with no work possible on Big Red, still waiting on parts, or work needed on either of the '39's, it was now the turn of the somewhat neglected '34. Some weeks back Harvey had picked up some lengths of bailey channel from Spectrum Rubber. Now the question was how do you bend it? The original channels, although complete, had the felt or whatever it is crumbling from it's 75 years of age and exposure to the elements. The replacement channel, although not the same as the original which is fully metal backed, when installed looks the part and as originals were not available this solution was adopted. I'm not going too far into it but the first attempt at bending the channel to follow the perimeter on the new rear window glass at first looked good but on closer examination there were kinks on the out of sight side. Much head scratching about how to bend the channel without kinking it but no obvious answer. So round to see the Mowads, a local panel shop, to tap into their expertise. Unfortunately it didn't extend back to 1934 so Wade was left to his own devices. Back to the workshop, this time cut the channel to a more user friendly length because it had been like wrestling with a snake previously when doing the second bend needed. Also measured and marked the centre of the first bend on the outside of the channel as a bending reference point. Next "Special Packard Bailey Channel Bending Tool" was brought down from the shelf and the first bend made, perfect! Then the second bend, after measuring and marking again, and a bit of tweaking there you had it, a good usable bailey channel. Then came removal of the rubber seal in the window frame channel, it's the metal channel sealed to the bottom of the window glass and is connected to the winding mechanism to raise and lower the window. Being old, perished and rusted in together with being less than 1/8" wide and about 1/4" deep presented it's own set of problems. Equipped with a Stanley Knife, more of that later, a small metal pick and a screwdriver Wade picked while I Stanleyed. Took some time but managed to clear all the rubber, or rather what was once rubber, from the left rear channel. Turned to the right rear then with Wade again picking and I Stanleying. This rubber bore some resemblance to it's name and proved harder to clean out of the channel although we were making progress, slow progress. Then Mal Stanleyed himself.  All work came to a standstill as I slashed about a 1" cut into the back of my right thumb below the knuckle. Bleed? Yes, it bled, but surprisingly no pain. Still no pain and it's now well over 4 hours since the gory event. Wade became nurse and doctor administering first aid by bandaiding it up and Rick proffered a blue rubber glove which is being used as a thumbstall with the fingers cut off. Purely for practical purposes mind you, I'm definitely not imitating Michael Jackson in any way! All work came to a standstill as I slashed about a 1" cut into the back of my right thumb below the knuckle. Bleed? Yes, it bled, but surprisingly no pain. Still no pain and it's now well over 4 hours since the gory event. Wade became nurse and doctor administering first aid by bandaiding it up and Rick proffered a blue rubber glove which is being used as a thumbstall with the fingers cut off. Purely for practical purposes mind you, I'm definitely not imitating Michael Jackson in any way!So ended my time at the workshop for today. Won't be there tomorrow as Wade is out and about, and while out will drop Noel's '41 160 front shocks into Tony "Shocks" for rebuilding. And I'll report back in on Wednesday together with a special guest! Attach file: (27.29 KB)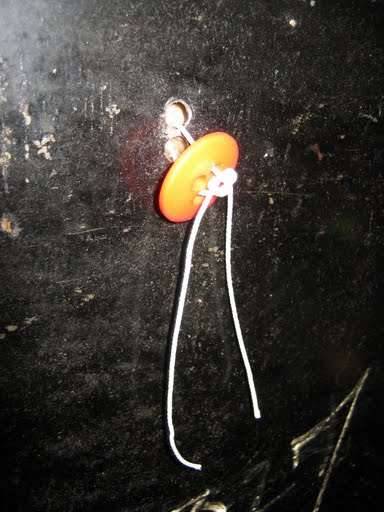 (24.82 KB) (24.82 KB)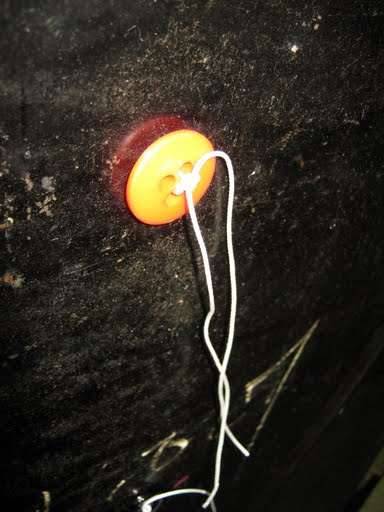 (34.21 KB) (34.21 KB)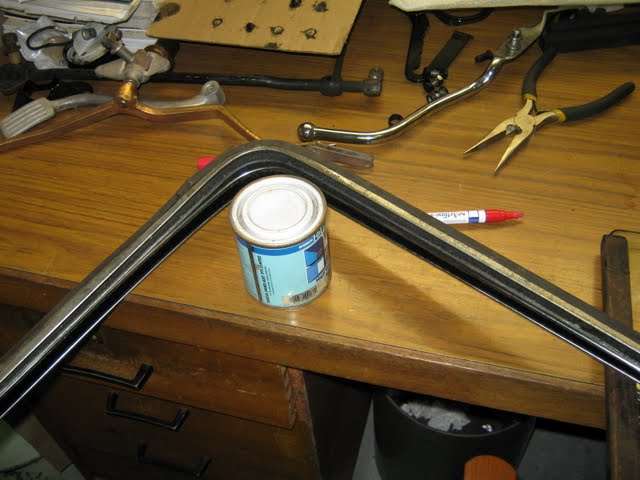 (30.20 KB) (30.20 KB)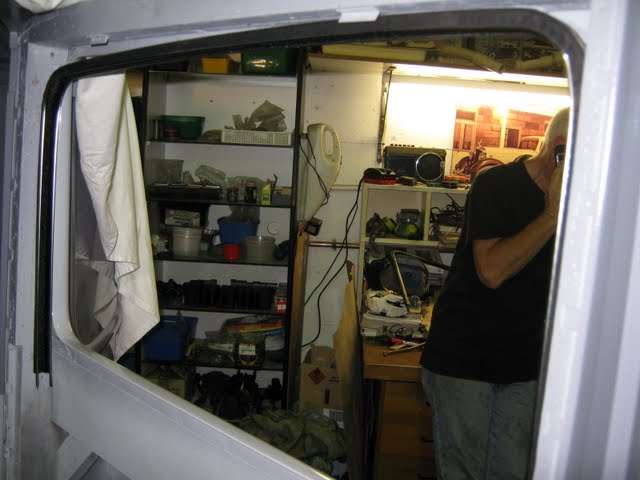 (18.12 KB) (18.12 KB)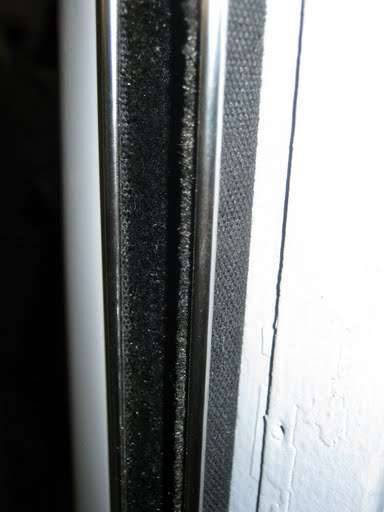 (22.38 KB) (22.38 KB) (22.57 KB) (22.57 KB)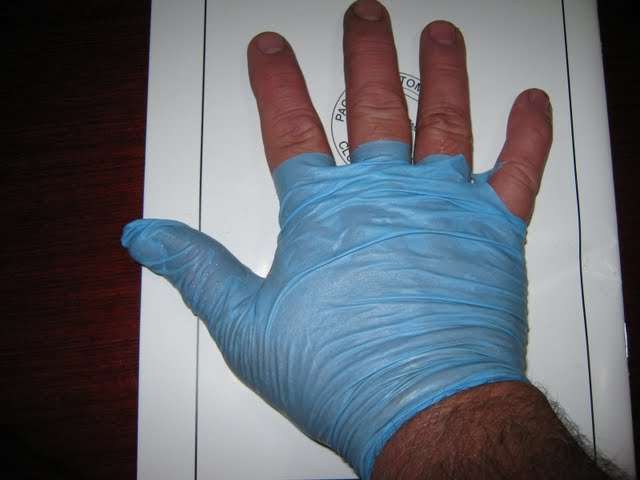 (30.25 KB) (30.25 KB) (28.89 KB) (28.89 KB)
Posted on: 2009/12/7 3:00
|
|||
|
Mal
/o[]o\ ==== Bowral, Southern Highlands of NSW, Australia "Out of chaos comes order" - Nietzsche. 1938 Eight Touring Sedan - SOLD 1941 One-Twenty Club Coupe - SOLD 1948 Super Eight Limo, chassis RHD - SOLD 1950 Eight Touring Sedan - SOLD What's this? Put your Packard in the Packard Vehicle Registry! Here's how! Any questions - PM or email me at ozstatman@gmail.com |
||||
|
||||
Register To PostTopic is Locked


