|
Re: Wade's Workshop
|
||||
|---|---|---|---|---|
|
Forum Ambassador

|
I retract my comment and apologize for stirring up the issue. I have witnessed too many "experts" doing the walk around judging at car displays and personally find it distasteful and rude, considering the effort we go to restoring these cars and making the effort to share them with others. Bill, your car is lovely and I wish you all the best in your efforts to finish it. If I can be of any assistance, please feel free to email me directly at flackmaster@sbcglobal.net
Posted on: 2010/4/5 6:58
|
|||
|
||||
|
Re: Wade's Workshop
|
||||
|---|---|---|---|---|
|
Forum Ambassador

|
Wednesday 7th April 2010
The Easter Break was spent celebrating wife Kath's birthday, completing the spreadsheet of PACA spare parts and seeing Carol King & James Taylor in concert. Then yesterday I joined Wade and Gina in Old Blue for the Morris Minor Picnic Club run to the Radio Museum at Kurrajong followed by lunch at the local pub. Not that it was all without incident. The spreadsheet, although completed, didn't support the links to the pic's I'd taken, something about knowing just enough about computers to get me into trouble? Then yesterday in Old Blue a whistling sound developed which couldn't be traced! But the Kurrajong Radio Museum was very interesting, entertaining and informative. And, seeing that the other hat that Wade wears is old radios, was eagerly awaited by him after last years run there only to find the museum closed! So today it was back to more mundane matters, like working on Big Red at the workshop! First task was installing new cowl beading to the left side of the grill shell. Straightforward, only complicated by the small screws and nuts necessary, which once again did their best to resist installation efforts but were finally bedded down. Then it was onto fixing the water leaks. These being the upper radiator hose, although it had been re-tightened a number of times, still not fixed. The valve on the cylinder head, although a new o-ring had been installed, there was still a minor leak. And a fresh leak from the lower two screws on the face of the shutter-stat, these became apparent to Wade this morning when he first arrived. So off with the radiator hose, clean out of the rust particles caught by the in line filter, a clean up of the surfaces on the radiator inlet and head outlet and back on together with new clamps. The valve on the head was taken off, cleaned and then re-installed with another o-ring. The two lower screws of the shutter-stat were removed, cleaned, equipped with copper washers and re-installed. Refilled the radiator and start it up again to test it all. However, being still tight and still with a not fully charged battery the booster was again brought in to play. Once fuel was up to the carb and the throttle man, me, got his act together it started reasonably easily. Checked for leaks and there were none, so far so good. But Wade wasn't happy with the way it was running so John's timing light was again co-opted. Funny, nothing had been touched since last start up but it was now off from Wade's mark. Manual adjustment of the distributor, under the guidance of the timing light, and back on the mark. Engine off, but what's that? A pool of water under the engine! Topside inspection revealed nothing so Wade was onto the creeper and under Big Red with shop light. Wade was able to determine it was only water from the overflow tube exiting into the channel of the front cross-member then running across and dropping through a hole on the other side. Pheeew! After that scare the head was re-torqued as the engine had run for some time, time enough for the shutters to be wide open, and was thoroughly warmed up. Again straightforward? Would be, except for obstructions like the coil holder and the distributor. Necessitated removal of the distributor to permit access to be gained with all headnuts nicely re-torqued. The other matter which will be attended to shortly was the generator not charging, the time honoured quick fix of giving the regulator a whack not doing the trick! All that done, it was time for the bonnet(hood) to go back on. This necessitated co-opting some extra muscle in the form of Grahame and Murray to each manage a corner, the front ones, while Wade and I handled the rears. Easy enough to lift it up off the stand, manoeuvre it around to the front of Big Red then lift it much higher up while taking it towards Big Red clearing the mudguards(fenders) and headlights and depositing it back from whence it came. Mission accomplished? Well, not really, it now remained to ensure the fit and gaps were right. Although it was close it was apparent the right front was too close while the left front was too open with the rear gaps being good. As part of the strategy for this, when bolting the grill shell to the fenders, all the bolts were left loose. Shouldn't be too hard to juggle things around? Wrong, the grill shell wouldn't budge. So once again Wade was under Big Red, this time armed with a crowbar to try and wedge the bottom bolts in the desired direction. Did move a bit but not sufficient to re-align as required. More pushing and shoving but no more movement. At this point it was decided to loosen the radiator from the frame it sits in but this necessitated removing the new beading only recently put into place on the sides and top of the grill shell. Why was it necessary to remove the beading? Because the heads of the retaining screws were under the beading! That done some more pulling, pushing and shoving and finally the grill shell had moved sufficiently, not much but enough to make a difference, and everything could now be tightened up. Same fight as before getting the nuts onto the screws for the beading ensured when it came to that part of it, but everything is now tightened and in place. While Wade was underneath he also tightened up the front bumper bar bracket nuts and bolts. This gave me the chance to do a strong man impression by lifting the bumper assembly and hold it in place while the nuts and bolts were tightened. What to do now? Why, re-install the left and right engine to frame splash shields. Only problem was there was a jack stand in the way on each side. Instead re-mounted the front wheels then Wade re-adjusted the front brakes, they were a little tight. Also tightened and pinned the front axles bearings, Wade had left this until Big Red was close to returning to earth. That done, a couple of shop jacks were employed to remove and re-position the jackstands so the splash shield installation could go ahead. Left side was easy, and I'm saying this as the guy passing the spanners(wrenches), while the right was more difficult. So difficult that even I got got to turn a spanner, but only because Wade ran out of hands and couldn't be both under the car and up top at the same time. See, I do come in useful occasionally! You might remember I mentioned earlier I was the throttle man? Why? Because both the floor and toe boards weren't yet back in Big Red and consequently the accelerator pedal wasn't connected. With all the other work done, now was the time to get the floor back in place. But first Wade was going to replace the old chipboard like insulation. First was the toeboard where the insulation is held to the steel floor by eight rivets. Wade attempted to drill them out but because of the effects of 70 years of degradation they spun in their holes. What to do? Why Mal, of all people, came up with an idea! Use a pair of pliers to crush the crimped end of the hollow rivets and drive them back through the board and sheet metal. I could tell Wade was at least a little sceptical but I was determined to give it a go. First one, failure! Second one, success! And Wade was involved too, while I was the pliers man he was the hammer and punch man, and as we went got better and better at the technique involved. Finally after seven were removed went back and had another go at number one and VOILA separation of the two pieces gained. Onto the bench where Wade was able to drill out the eight rivets holding the collar and perished gasket where the tower for the transmission shift lever passes through the floor board. Then I went to work doing what I do best, cleaning. So while Wade was tidying up my task prior to departing was scraping the metal portion of the toe board. One more thing - Wade found the whistling sound is a leak or leaks on Old Blues radiator. And a couple of videos. Note, the cameraman obviously is still learning so shots of ceilings, floors, etc are to be expected. Engine start, timing light, distributor adjustment Front wheels Attach file:  (45.78 KB) (45.78 KB)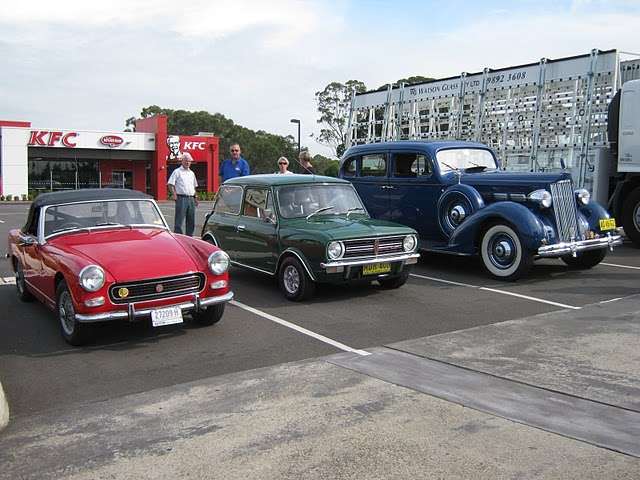 (49.64 KB) (49.64 KB)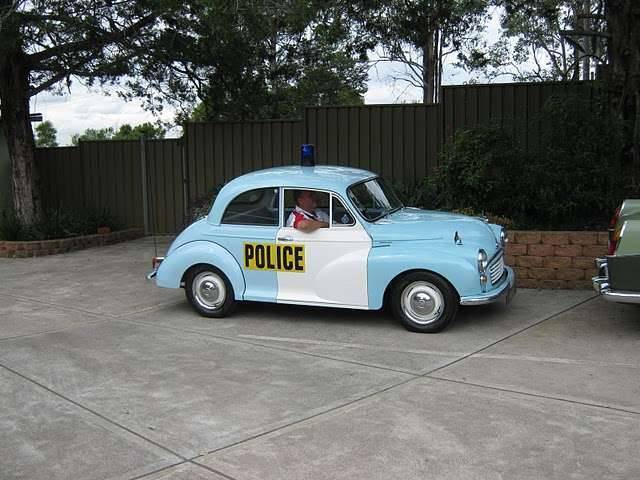 (25.09 KB) (25.09 KB)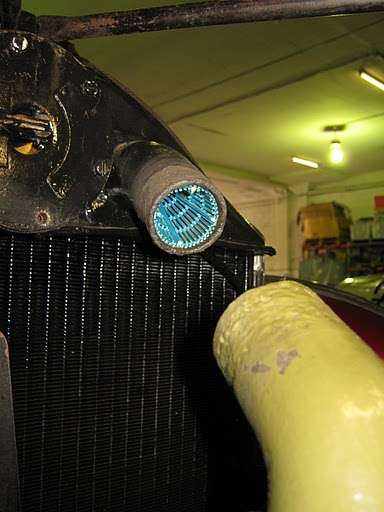 (40.44 KB) (40.44 KB)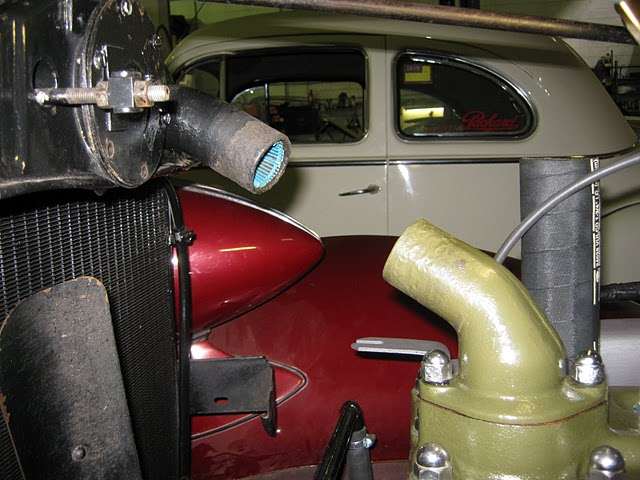 (25.17 KB) (25.17 KB)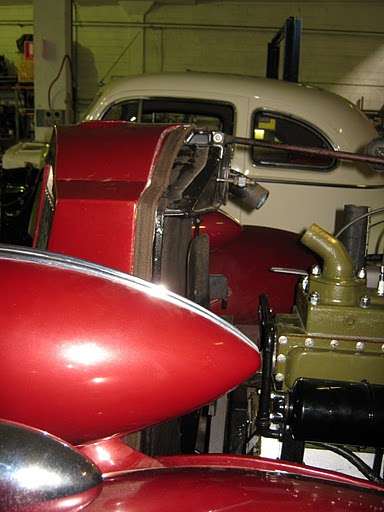 (35.29 KB) (35.29 KB)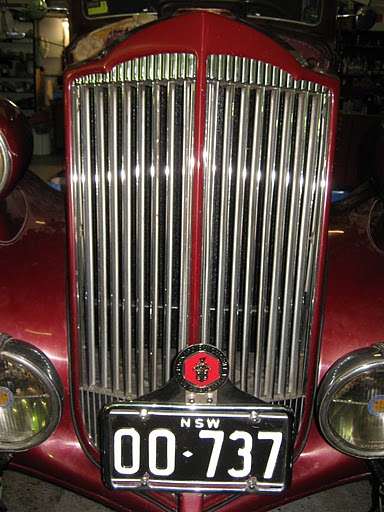 (25.24 KB) (25.24 KB) (37.23 KB) (37.23 KB)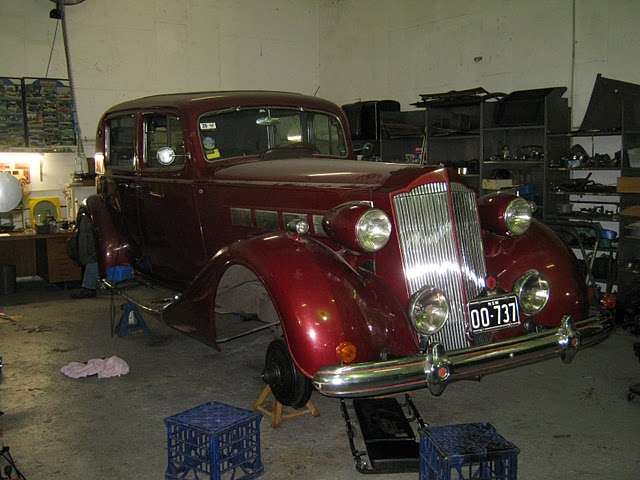 (35.21 KB) (35.21 KB)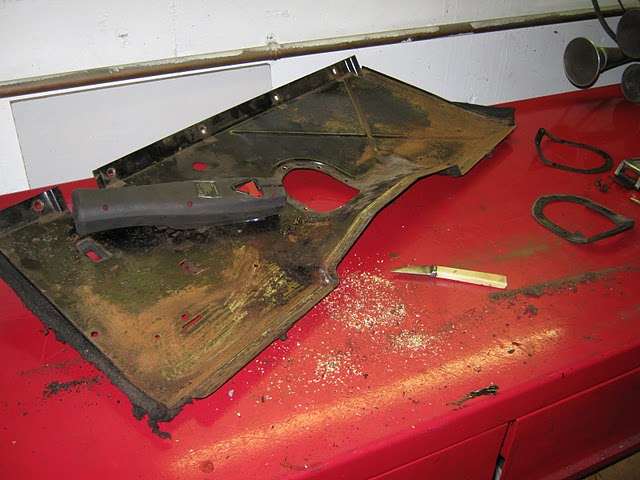 (25.48 KB) (25.48 KB)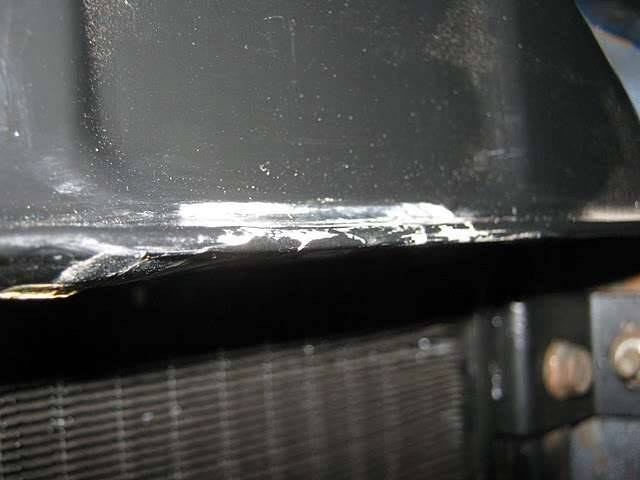
Posted on: 2010/4/7 6:40
|
|||
|
Mal
/o[]o\ ====  Bowral, Southern Highlands of NSW, Australia "Out of chaos comes order" - Nietzsche. 1938 Eight Touring Sedan - SOLD 1941 One-Twenty Club Coupe - SOLD 1948 Super Eight Limo, chassis RHD - SOLD 1950 Eight Touring Sedan - SOLD What's this?  Put your Packard in the Packard Vehicle Registry! Here's how! Any questions - PM or email me at ozstatman@gmail.com |
||||
|
||||
|
Re: Wade's Workshop
|
||||
|---|---|---|---|---|
|
Forum Ambassador
|
Thursday 8th April 2010
This morning was spent with our grand-daughters so I missed catching up with PackardInfo member DavidM when he visited the workshop prior to my arrival. David has 3 Packards, a '22 Sport Tourer and 2 '29's a 633 Roadster and a 633 7 Passenger Sedan. The Sedan is in the final throes of it's restoration and is currently at the upholstery shop. Reason David dropped in was to have a look at the limiting straps on the doors of Wade's '34. David's '29 needs these and he remembered a post of mine when Wade and I installed new ones in the '34. Turns out they are the same as the '29's and now that David has seen them in action, so to speak, will purchase them for the '29. At least I think that's the story, in a nutshell, but if I'm wrong David please advise me of the error of my ways. Wade had cut a new rubber gasket for the gear shift tower going through the toeboard, reassembled the toeboard and further cleaned and metal readied it in preparation for POR-15 painting. He'd also removed the wooden floor from the metal floorboard because it too needed replacing. And that's where I came in. Time to clean the metal floorboard up, so after lots of scraping and cleaning, followed by Marine Clean and Metal Ready it too was ready for POR-15 by day's end. While I was cleaning, Wade, after making a new battery hold down and installing a new Optima battery, the one it it was 7 years old and came from Old Blue, started up Big Red without any need for a boost, caught quickly and ran sweetly. Then Wade was under Big Red reconnecting clutch and brake pedal linkages even at one stage co-opting assistance from Graham to help him in this endeavour.  Graham. Graham.Then it was onto getting Big Red closer to being a running, driving Packard again. Yesterday the front wheels went on, today it was the rears turn. Wheels on and tightened reasonably the brakes were also backed off a little as they too were tight. After some miles on the road the brakes will again be re-adjusted once they are bedded in. Then with a jack under diff centre, the jack stands were removed and Big Red's rear was gently lowered to the concrete floor. Now under the weight of the car, the wheel nuts were tightened again using a long bar to ensure they were snugged up tight. Next were the rear axle nuts, these too required the long bar's persuasive touch to ensure they are on real, real tight with split pins completing the job. Then the front end was jacked up, axle stands removed and not quite so gently lowered to the concrete, lot more weight upfront helping gravity to take effect! Front wheel nuts then long bar tightened. There remained the rubber bump stops to be installed in the front end, right side wasn't a problem but left side didn't want to co-operate. Turned out to be excess rubber on the square shoulder of it's mounting bolt which a delicate Stanley knifing took care of. Then to complete all this, now that Big Red was back on Terra Australis, the hubcaps after their oven baking experience last year, were re-affixed to the wheels. A few other things were then re-attached, being an overflow tank, no more alarming puddles on the shop floor. And re-installing the aircleaner, which by the way has a paper element, it'll be even quieter now.  sorry Wade, looks like I've spilled the beans now. After all that Big Red was started again, and start it did but not without incident. First attempt Big Red was in gear, but that was quickly remedied and started easily second time round. Wade took the opportunity to check whether the generator charge was being returned to the battery, as you'll hear in the video about there being "Nothing, no volts on the field". Which term was explained to me later and Wade says he has a new regulator should that prove necessary. So very close now to getting back on the road now with the main things left to do being the painting of the toe and floorboards, the new floor insulation, remounting the pedal pads and re-installing the front seat squab. sorry Wade, looks like I've spilled the beans now. After all that Big Red was started again, and start it did but not without incident. First attempt Big Red was in gear, but that was quickly remedied and started easily second time round. Wade took the opportunity to check whether the generator charge was being returned to the battery, as you'll hear in the video about there being "Nothing, no volts on the field". Which term was explained to me later and Wade says he has a new regulator should that prove necessary. So very close now to getting back on the road now with the main things left to do being the painting of the toe and floorboards, the new floor insulation, remounting the pedal pads and re-installing the front seat squab. And finishing with a little piece of history, went back in this thread and found Big Red was taken off the road on the 2nd of April last year, so has spent just over a year being motionless. Todays Video Attach file: (35.06 KB)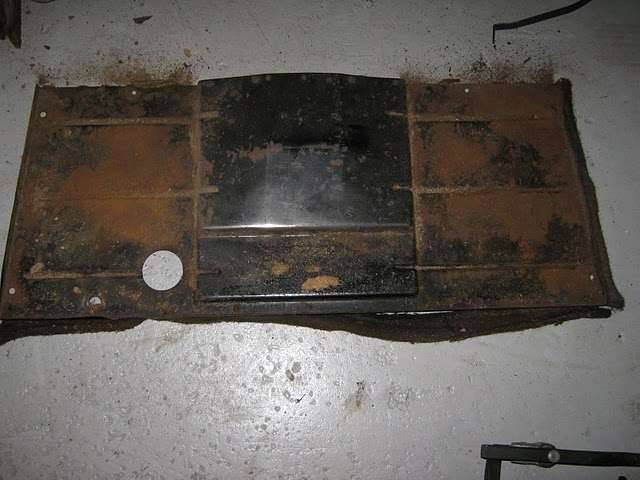 (33.78 KB) (33.78 KB)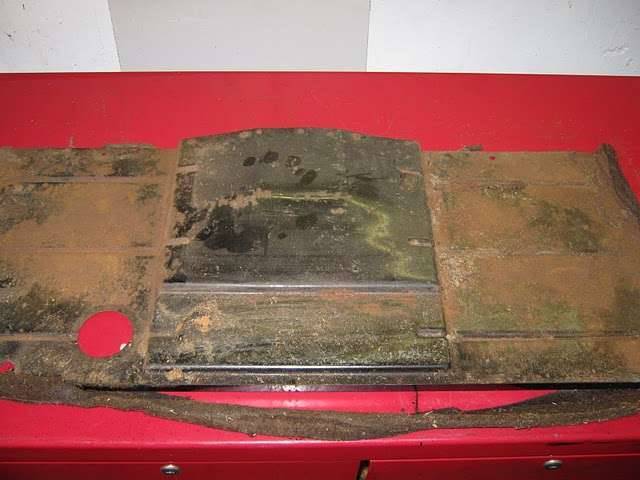 (47.14 KB) (47.14 KB)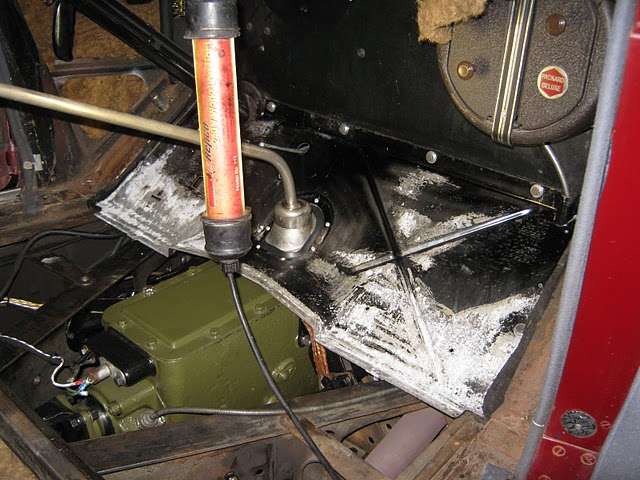 (37.92 KB) (37.92 KB)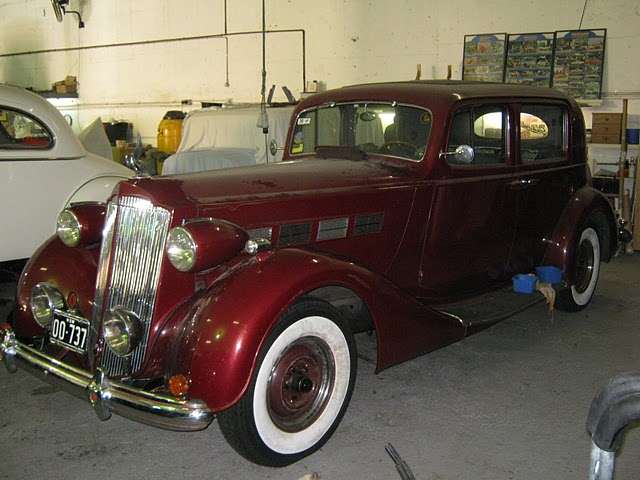 (40.49 KB) (40.49 KB)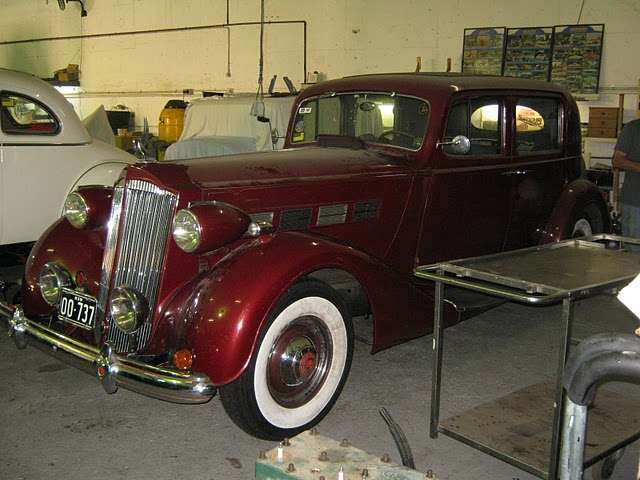 (22.79 KB) (22.79 KB)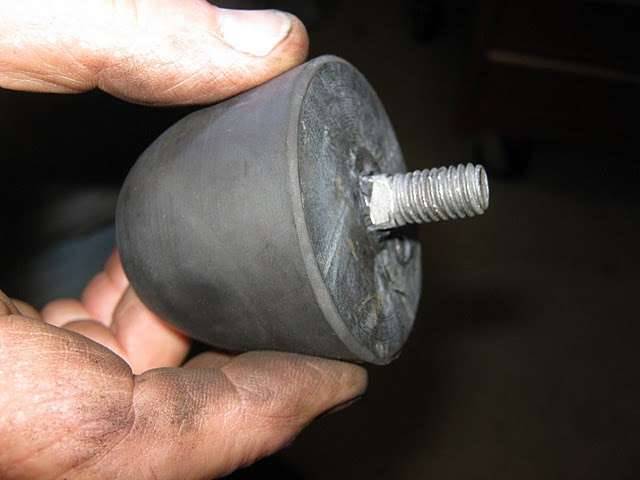
Posted on: 2010/4/8 5:48
|
|||
|
Mal
/o[]o\ ==== Bowral, Southern Highlands of NSW, Australia "Out of chaos comes order" - Nietzsche. 1938 Eight Touring Sedan - SOLD 1941 One-Twenty Club Coupe - SOLD 1948 Super Eight Limo, chassis RHD - SOLD 1950 Eight Touring Sedan - SOLD What's this? Put your Packard in the Packard Vehicle Registry! Here's how! Any questions - PM or email me at ozstatman@gmail.com |
||||
|
||||
|
Re: Wade's Workshop
|
||||
|---|---|---|---|---|
|
Forum Ambassador
|
Friday 9th April 2010
Arrived at the workshop to find Wade setting up parts for POR-15 painting. So donning my arm protectors(cut off socks covering wrist to upper arm!) and gloves opened the can, stirred, poured out sufficient for the job at hand and resealed the can. Parts being painted included the toe and front floor boards for Big Red, some nuts and bolts, the sheet metal piece from the '41 covering the space between the top of the grill to the radiator and some touch up of '41 parts previously POR-15'd. While I was painting Wade checked Big Red's voltage regulator again, then installed the NOS one he had in it's place. Then he went on to some front seat adjustment work. By this time I'd finished POR-15'ing and lent a hand where I could. Reason the front seat needed adjusting was because somewhere in reinstalling the runners, sliding mechanism and seat back and lower frame the adjusting cog mechanism was out by 1 cog on one side resulting in the seat binding up when trying to be slid backwards or forwards. To correct this fault the seat frame had to be detached from the mounts, the mounts loosened and the cogged shaft moved a cog forward on the right side as that side was further back than the left. A fair bit of work for something that's not seen but does contribute to driver comfort. An aside here, apparently Old Blue's front seat mechanism doesn't work and is fixed in place so there's no adjustment there, Wade will be spoiled once he's back driving Big Red. Last things done before leaving were re-mounting the '41's front wheels, taking out the jack stands and wiring up the gear shift rods. This will enable the '41 to be pushed out of the way next week when Big Red moves out of the workshop. There will also be a reshuffle of the cars in the workshop when that happens, with the '34 going from one side of Wade's workspace back to the other side. Attach file: (27.24 KB)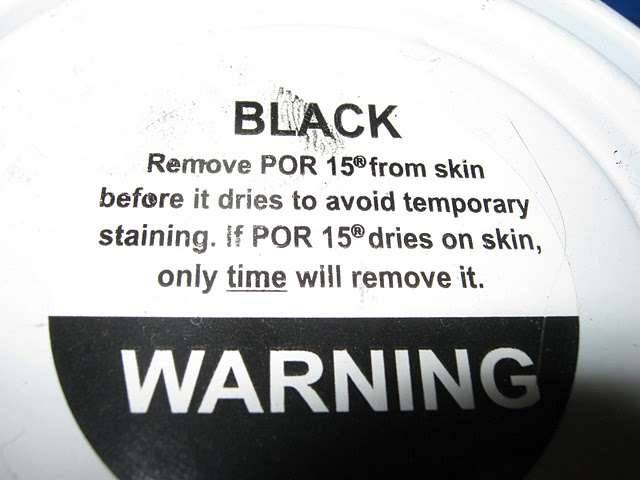 (37.66 KB) (37.66 KB)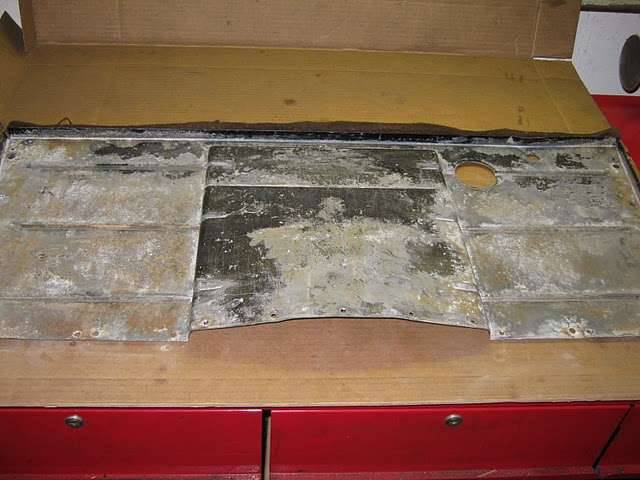 (27.41 KB) (27.41 KB)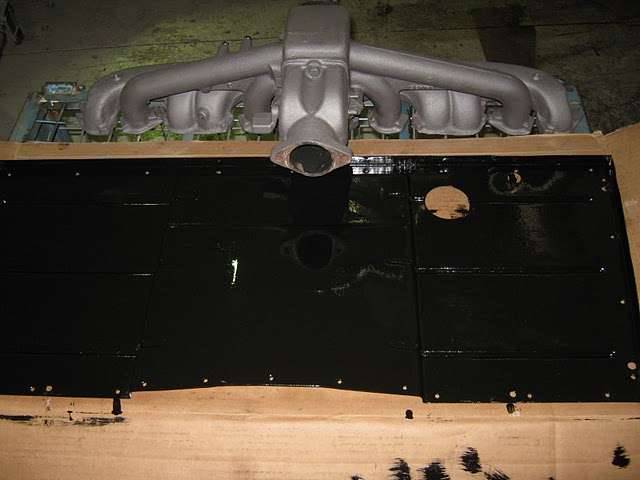 (48.85 KB) (48.85 KB)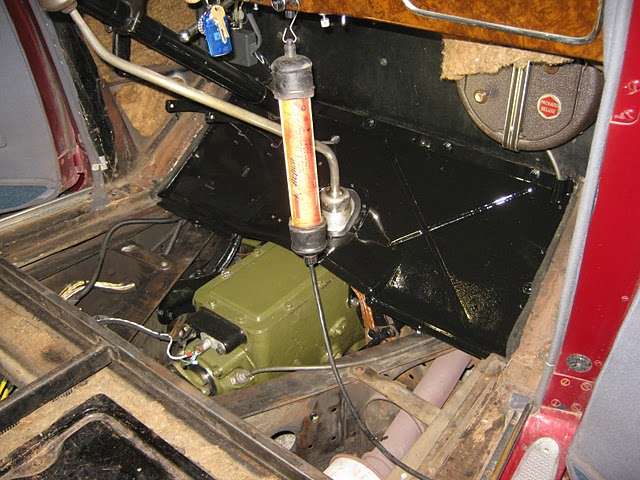 (27.93 KB) (27.93 KB)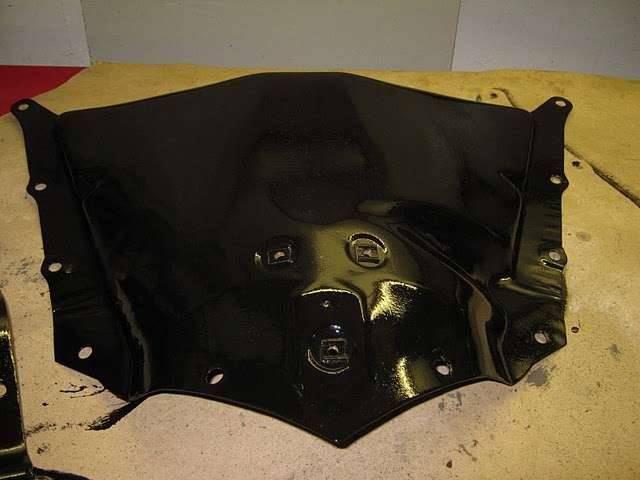 (39.01 KB) (39.01 KB) (41.02 KB) (41.02 KB)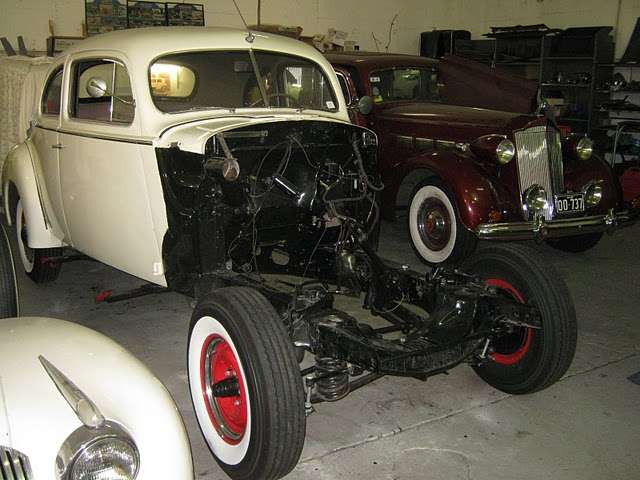
Posted on: 2010/4/8 23:15
|
|||
|
Mal
/o[]o\ ==== Bowral, Southern Highlands of NSW, Australia "Out of chaos comes order" - Nietzsche. 1938 Eight Touring Sedan - SOLD 1941 One-Twenty Club Coupe - SOLD 1948 Super Eight Limo, chassis RHD - SOLD 1950 Eight Touring Sedan - SOLD What's this? Put your Packard in the Packard Vehicle Registry! Here's how! Any questions - PM or email me at ozstatman@gmail.com |
||||
|
||||
|
Re: Wade's Workshop
|
||||
|---|---|---|---|---|
|
Forum Ambassador
|
Monday 12th April 2010
After yesterday's Packard run to the model railway and a fish and chips lunch spent some time at the workshop today helping Wade with some finishing touches for Big Red. When I first arrived PeterL was there with Wade and we spent some time talking before Peter bid us farewell. Next Noel called in, he'd been over to see his friend Tony who lives close by and had repaired some wheel covers for him for his Roller. And it looks like it wont be long before Noel's '39 is out of my garage and down at the workshop having it's new wiring harness installed by Wade. Also took a trip over to Grippy Rubber for Wade to obtain some rubber stripping for the '34 and rubber edging and tubing for Big Red. Also called Graham Wilkins, the crankshaft for the '41 is expected to be ready today so probably mid-week all will be ready to be picked up. Attach file: (26.49 KB) (28.17 KB) (28.17 KB)
Posted on: 2010/4/12 1:48
|
|||
|
Mal
/o[]o\ ==== Bowral, Southern Highlands of NSW, Australia "Out of chaos comes order" - Nietzsche. 1938 Eight Touring Sedan - SOLD 1941 One-Twenty Club Coupe - SOLD 1948 Super Eight Limo, chassis RHD - SOLD 1950 Eight Touring Sedan - SOLD What's this? Put your Packard in the Packard Vehicle Registry! Here's how! Any questions - PM or email me at ozstatman@gmail.com |
||||
|
||||
|
Re: Wade's Workshop
|
||||
|---|---|---|---|---|
|
Forum Ambassador
|
Tuesday 13th April 2010
Wade and Gina are away for a couple of days so didn't go down to the workshop and instead started rubbing back the '41's running boards. I'd had them re-Rhinoed a couple of weeks ago and they were very ripply, so much so I wasn't looking forward to tackling them. But it had to be done, and beginning with the right side, and 80 grit paper, started the job. Although I knew it would take time I wasn't prepared for the time it looked like taking.....weeks.....months.....even years with the progress or rather the lack of it I was making. What to do? Why employ a labour saving device, so it was off to the local hardware store, a national brand here, but I won't mention the name. There, among the array of powered sanding devices, I found just what I needed, or so I thought. A small palm held 40mm belt sander, branded Ozito, together with an assortment of belts in different grits. At home changed the belt it came with for a 60 grit one and started. Because I'd been warned off using powered equipment by Peter, the Rhino guy, I was fairly tentative at first. But as I went on, picking up some hands on experience and becoming more familiar with it, worked it somewhat harder. I did notice it was getting hot to use so took the opportunity to switch off and clean things up. Although it has a dust collector bag most of the Rhino dust was being spread over the job and close surrounds. Did this a number of times and also changed to a new belt at one stage. And progress was being made, progress that you could see as you went, not like the hand sanding which was equivalent to an erosion process over the course of millennia! However, getting hot again and also changing the belt again, the sander wouldn't restart. It was at this point in checking connections, switches, power availability that I found the tag on the power cord which said "NOT INTENDED FOR INDUSTRIAL OR HIGH FREQUENCY USE"! I didn't think mine was industrial use, although it probably could be argued that way, but it certainly was high frequency use. So a couple of hours after purchase it was back to the hardware store, where to my embarrassment it worked when plugged in!  Back home again, it started OK, ran for a while, then I noticed the smell of an electric motor burning, so switched it off, let it cool down, then it wouldn't restart! So back to the hardware store where I found out the guy I had dealt with initially and also on my first return visit had gone home for the day. Instead the store manager attended to me and he pointed out it only had 280 Watts of power, so was suitable only for VERY light work. What to do? The manager was prepared to exchange it for a new one but the prospect of him being agreeable to do just that when a couple more sanders wore out in completing the job didn't seem likely. Instead he agreed to refund the purchase price and I found a larger 75mm Ozito 730 Watt belt sander which wasn't too heavy to hold one handed and even better it was $10.00 cheaper! With MORE POWER, Tim the Toolman would have been proud! It also has a warning label, but it looks a step up from the other. Also bought some extra belts to suit. Back home again, changed to an 80 grit belt and fired it up. Although it isn't as easy to hold and use, it is almost as effective. Have now done a little more than half the running board and should finish it later this week. And I'm thinking of going back and buying another of the palm held Ozito belt sanders for some of the more intricate work but using it sparingly with greater care and plenty of cool down time when it starts to warm up. Back home again, it started OK, ran for a while, then I noticed the smell of an electric motor burning, so switched it off, let it cool down, then it wouldn't restart! So back to the hardware store where I found out the guy I had dealt with initially and also on my first return visit had gone home for the day. Instead the store manager attended to me and he pointed out it only had 280 Watts of power, so was suitable only for VERY light work. What to do? The manager was prepared to exchange it for a new one but the prospect of him being agreeable to do just that when a couple more sanders wore out in completing the job didn't seem likely. Instead he agreed to refund the purchase price and I found a larger 75mm Ozito 730 Watt belt sander which wasn't too heavy to hold one handed and even better it was $10.00 cheaper! With MORE POWER, Tim the Toolman would have been proud! It also has a warning label, but it looks a step up from the other. Also bought some extra belts to suit. Back home again, changed to an 80 grit belt and fired it up. Although it isn't as easy to hold and use, it is almost as effective. Have now done a little more than half the running board and should finish it later this week. And I'm thinking of going back and buying another of the palm held Ozito belt sanders for some of the more intricate work but using it sparingly with greater care and plenty of cool down time when it starts to warm up.Attach file: (35.05 KB)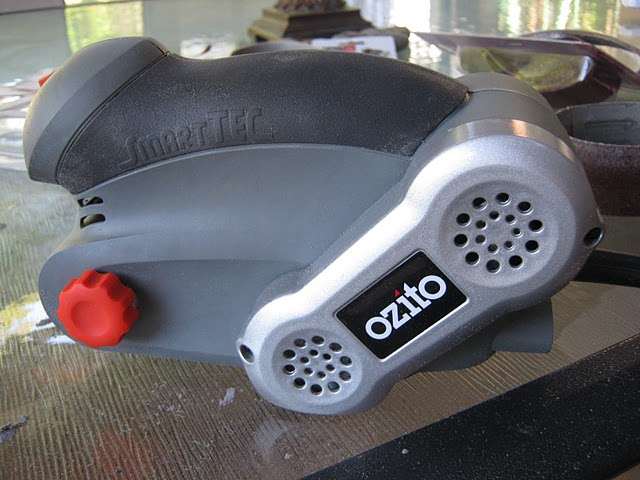 (42.41 KB) (42.41 KB)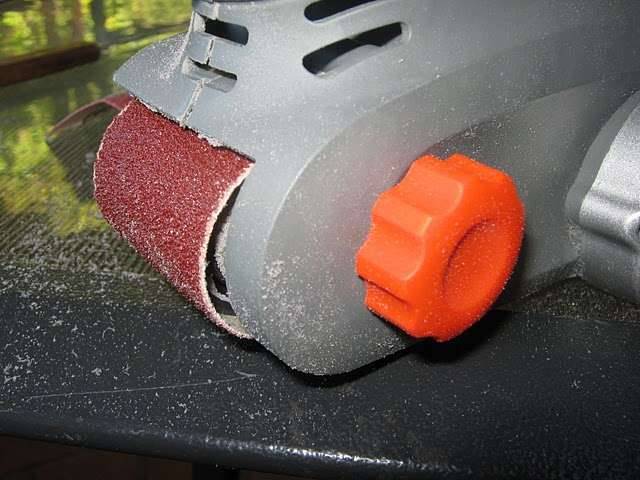 (41.02 KB) (41.02 KB)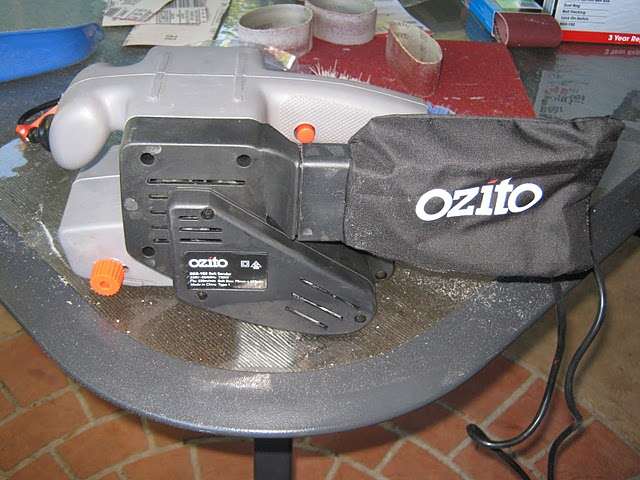 (29.35 KB) (29.35 KB)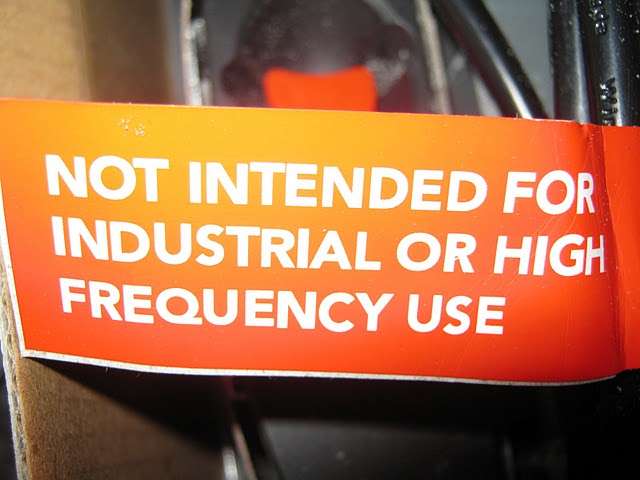 (40.41 KB) (40.41 KB)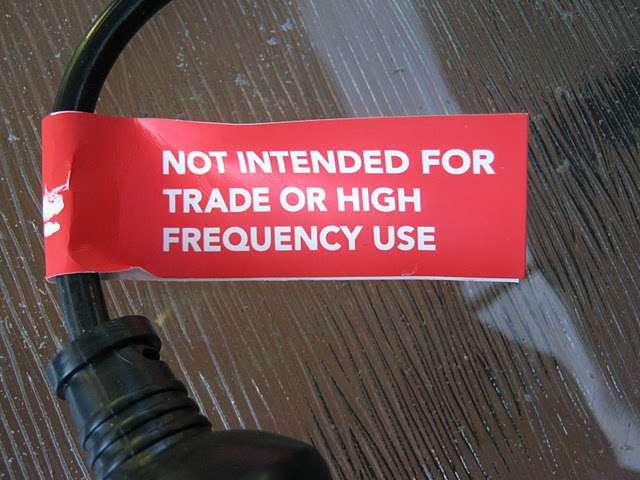 (36.58 KB) (36.58 KB)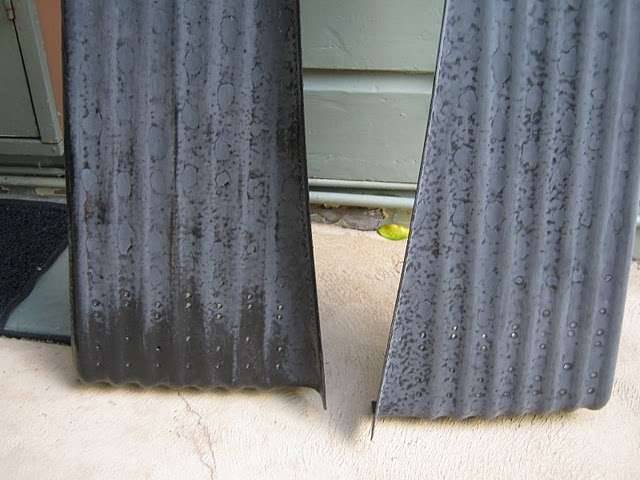 (39.30 KB) (39.30 KB)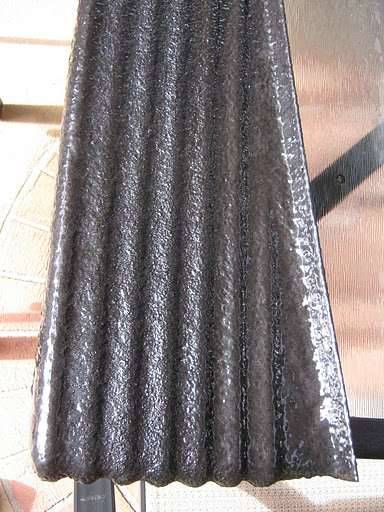 (42.37 KB) (42.37 KB)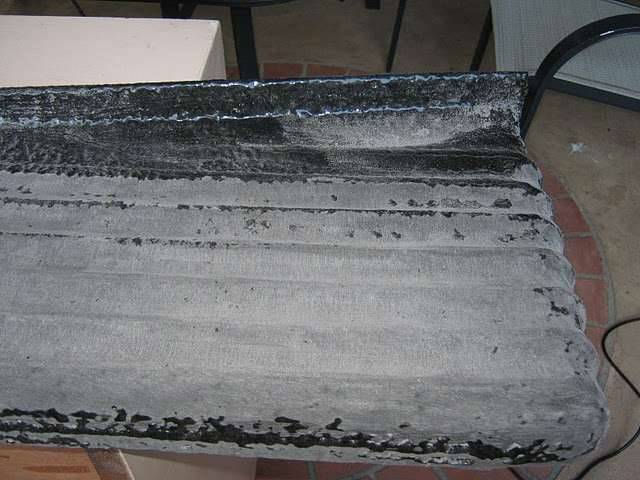 (36.17 KB) (36.17 KB)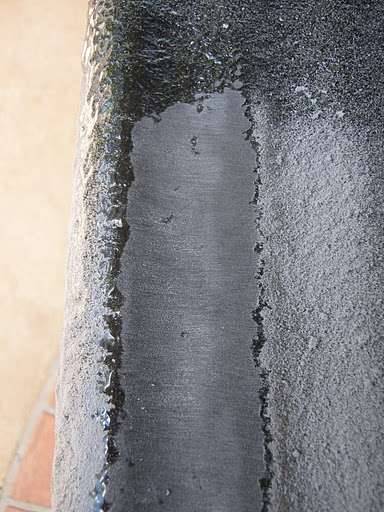 (50.52 KB) (50.52 KB)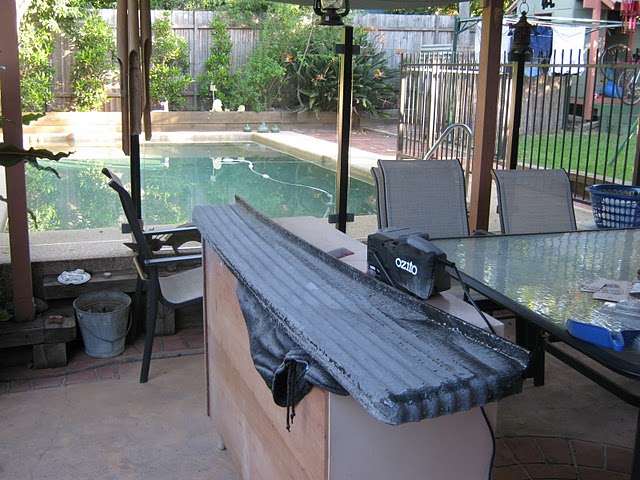
Posted on: 2010/4/13 4:19
|
|||
|
Mal
/o[]o\ ==== Bowral, Southern Highlands of NSW, Australia "Out of chaos comes order" - Nietzsche. 1938 Eight Touring Sedan - SOLD 1941 One-Twenty Club Coupe - SOLD 1948 Super Eight Limo, chassis RHD - SOLD 1950 Eight Touring Sedan - SOLD What's this? Put your Packard in the Packard Vehicle Registry! Here's how! Any questions - PM or email me at ozstatman@gmail.com |
||||
|
||||
|
Re: Wade's Workshop
|
||||
|---|---|---|---|---|
|
Forum Ambassador
|
Thursday 15th April 2010
Wade is still away, but I spent the day at the workshop working on the '41! Doing what, and am I qualified to do anything by myself? Well I have to have a go sometime and seeing what I was about to do wasn't mechanical in nature I decided to give it a go. It was installing heat and sound insulating rubber backed aluminium foil sheeting on the cabin floor. Although I'd bought some of this sheeting about 2 months ago, the other day when we went over to Grippy rubber I saw they had sheeting with thicker rubber but at a cheaper price and purchased 2.5 metres to use instead. And why is this being installed, it's not kosher you know? Because an authority higher than any Concourse judge deemed it must be so! What higher authority is there? My good wife, Kath, that's who! If she's getting hot on Packard runs most anything will be done, except install air-conditioning, to alleviate heat transfer from the engine and exhaust into the cabin. Started by removing the carpet, underlay and the rubber matting I'd made last year for the front cabin area. This necessitated unbolting the front seat from the floor, 2 bolts aside, and sliding the seat back and bottom assembly into the rear floor area. The insulating sheeting comes in rolls a little over 1 metre wide which is just about perfect for the underseat/underfloor coverage required. Using the rubber sheet I'd made for the front floor from the toe board to under the front seat as a template cut my first piece of insulation. And it's easy to cut, using just a pair of scissors. Measured, marked and cut out around the transmission inspection plate. Marked and using a hole punch cut holes for the trans plates mounting screws. Finally cleaned up the trans plate and coated it and the foil side of the insulation with contact adhesive let them "go off" and then put them together carefully. And it worked! Mounted the trans plate back in the car using just 2 screws. Then because the piece for the trans plate had been cut from the bigger floor piece placed the bigger piece in place, marked it because I was cutting it roughly down the middle to facilitate fitment a little later. With the front seat pushed back I couldn't just put it in place in one piece. Had previously punched a hole for the tension spring for the front seat in the insulation so used that as a point where the cut pieces intersected. That done a clean up of the right side of the floor and application of adhesive to both surfaces. Waiting for the adhesive to "go off" then started measuring and marking the left side piece to cut out the battery access plate. By this time was able to install the right side piece and managed to get it in without mishap. My biggest fear all throughout this process was having the adhesive adhere in the wrong place with consequent anguish and frustration. Finished cutting out the battery plate piece so cleaned up and applied adhesive to the left floor and floor piece. While that was "going off" started on the toe board piece by measuring and cutting it approximately to shape. Also measured and cut a small piece to cover the front of the trans plate which necessitated more holes being punched. Back to the left floor piece as it was now ready for installation, and Oh oooH! The cut out for the battery plate was about an inch too short on the inside edge. Not to fear though, just cut the offending piece out, fortunately it received very little adhesive so was easily fixed. Cleaned up battery plate, applied adhesive. Also applied adhesive to the small piece at the front of the trans cover and went back to measuring and fitting of the toe board piece. This piece provided the most challenges to accommodate the accelerator pedal and shaft, the top of the trans plate, the clutch/brake pedal plate and the present firewall insulation which "dips down" above the area of the pressure plate. A lot of trial fitting, trimming, cutting followed by a lot of trial fitting, trimming, then some more trial fitting, trimming, etc, etc. During the course of this also attended to the battery plate and front of trans plate adhesions, both without incident. Phew! For the toe board ended up cutting out a separate piece for the brake/clutch plate and working with that. Finally all was ready to apply adhesive to the toe board piece, the clutch/brake piece and one small filler piece for the left side. But first a trial fit to ensure I had a good chance of fitting it without a snafu. Looked promising so cleanup of surfaces, application of adhesive and a tidy up while waiting for it to "go off". Carefully handing the toe board piece the accelerator shaft was passed through it's requisite hole and then starting around the top of the trans plate it was pressed into place. The left side around the clutch/brake plate was then pressed to fit before moving around to the right side to finish it of. Again, all went well, so a big sigh of relief that it all went where it should. One thing I noted, and now that I think back the same thing happened when I was measuring cutting and fitting the rubber sheeting to the floor, was the amount of in and out, side to side, back to bench, bench to car movement required for all of this. Quote: Guscha wrote:......I use the tools of company Bosch since decades. They have an acceptable price-performance ratio and they are even available in your country. Yes, I have a Bosch Jigsaw and many years ago had a Bosch nibbler, fine tools. If they'd had a Bosch belt sander like the one in your illustration I would have been very interested because it looks perfect for the job I have in hand. As it is Bosch tools are in the premium price range here so I opted for the cheapie because this is a one-off project and unlikely to be used again. Attach file: (28.63 KB)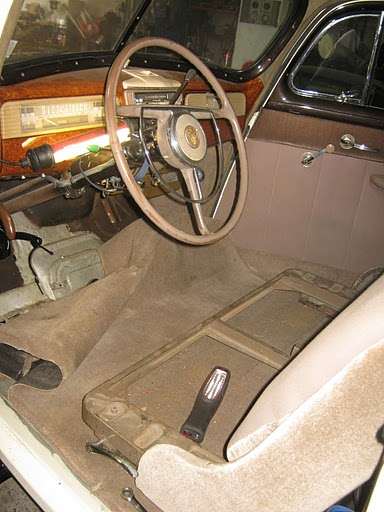 (42.02 KB) (42.02 KB)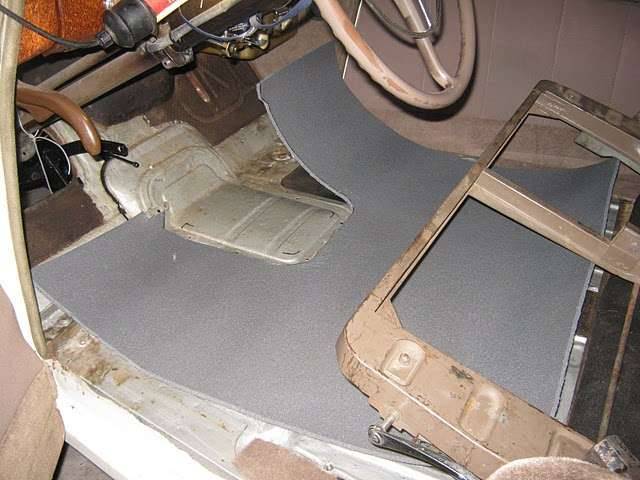 (36.25 KB) (36.25 KB)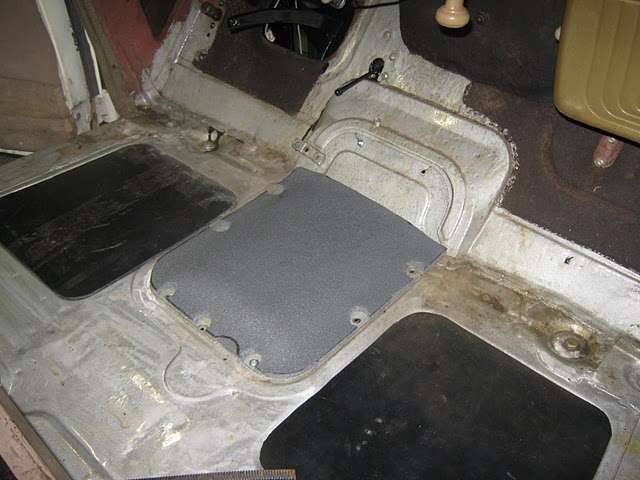 (36.01 KB) (36.01 KB)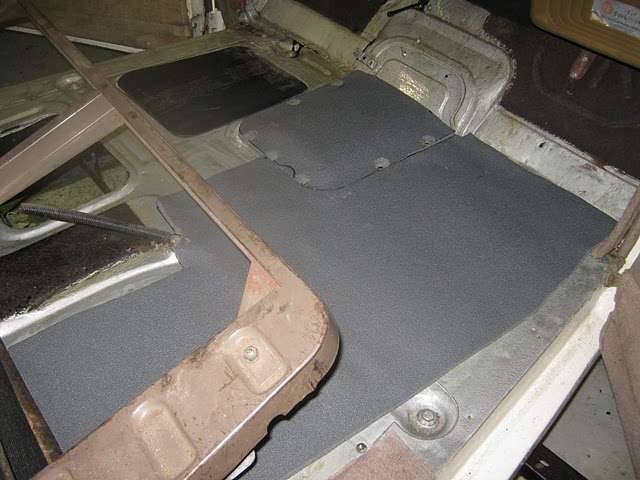 (41.36 KB) (41.36 KB)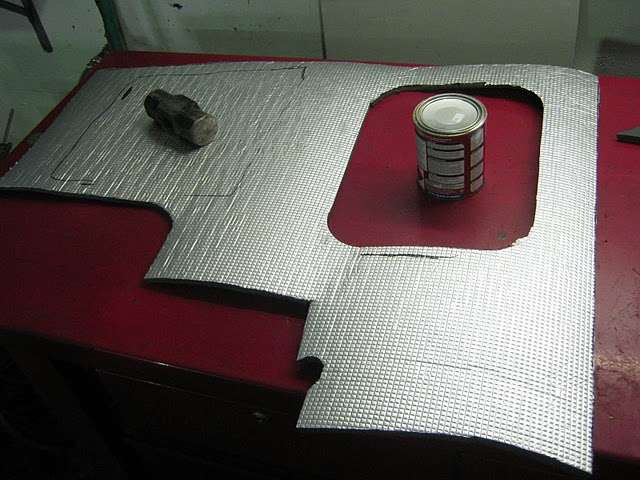 (35.46 KB) (35.46 KB)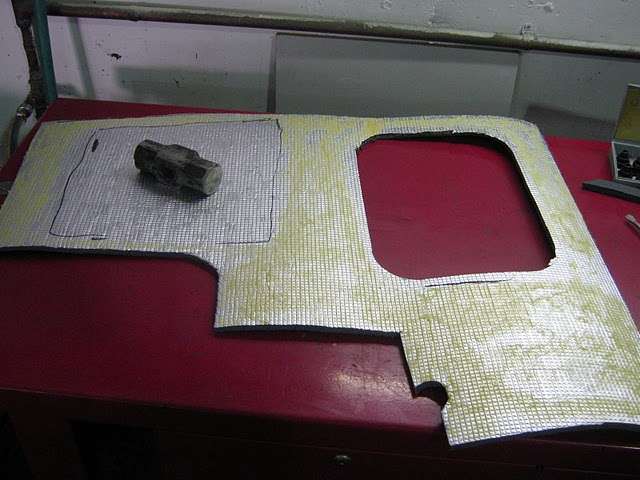 (38.04 KB) (38.04 KB)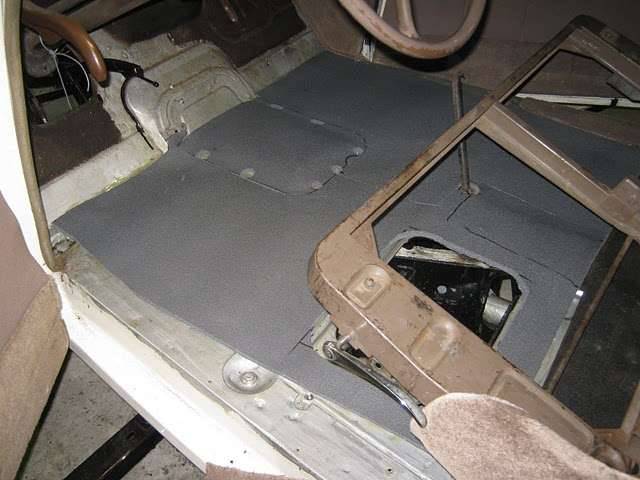 (32.83 KB) (32.83 KB)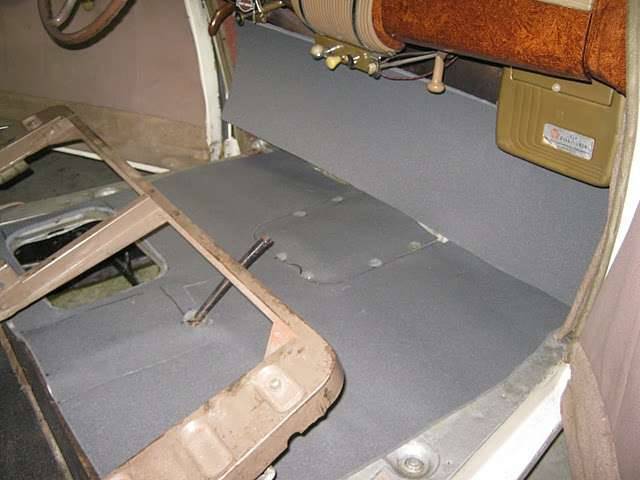 (26.37 KB) (26.37 KB)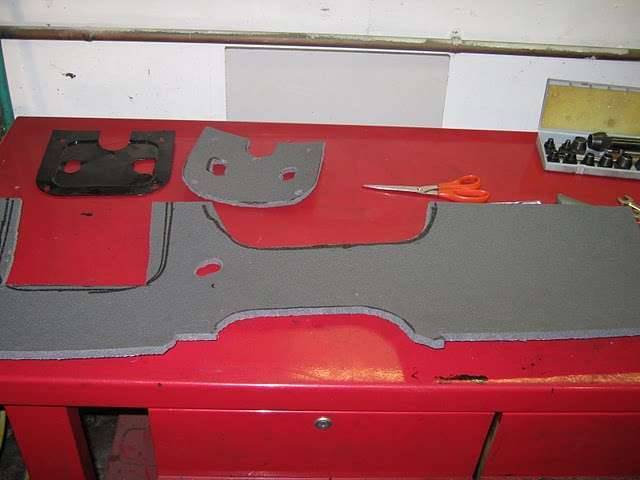 (38.40 KB) (38.40 KB)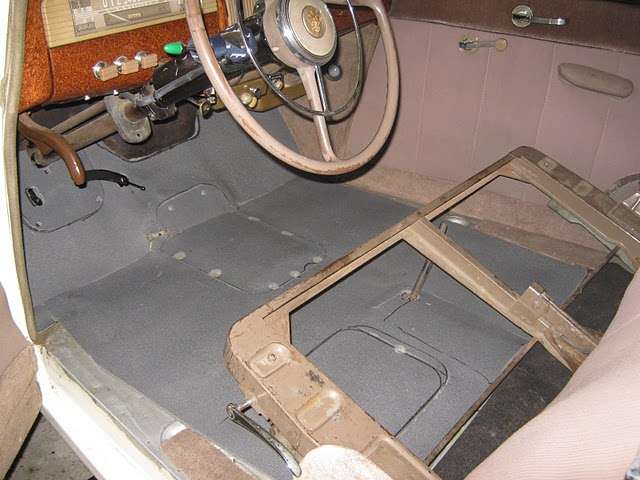 (10.61 KB) (10.61 KB)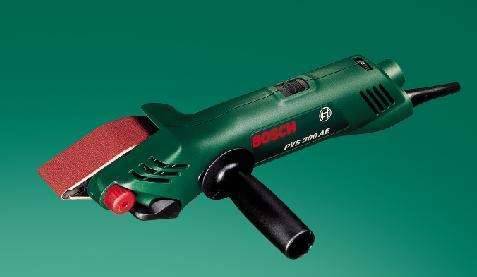
Posted on: 2010/4/15 5:33
|
|||
|
Mal
/o[]o\ ==== Bowral, Southern Highlands of NSW, Australia "Out of chaos comes order" - Nietzsche. 1938 Eight Touring Sedan - SOLD 1941 One-Twenty Club Coupe - SOLD 1948 Super Eight Limo, chassis RHD - SOLD 1950 Eight Touring Sedan - SOLD What's this? Put your Packard in the Packard Vehicle Registry! Here's how! Any questions - PM or email me at ozstatman@gmail.com |
||||
|
||||
|
Re: Wade's Workshop
|
||||
|---|---|---|---|---|
|
Home away from home
|
Mal
I hate to say this, but it is very obvious that the guy spraying your Rhino Lining doesn't know what he's doing. They should be no where near that rough when they're done spraying. He needs to have a talk with the Rhino Lining guy in Minneapolis, Minnesota, or with Dave Mitchell.
Posted on: 2010/4/15 11:42
|
|||
|
West Peterson
1930 Packard Speedster Eight Runabout (boattail) 1940 Packard 1808 w/Factory Air 1947 Chrysler Town and Country sedan 1970 Camaro RS https://packardinfo.com/xoops/html/modules/newbb/viewtopic.php?topic_id=4307&forum=10 http://aaca.org/ |
||||
|
||||
|
Re: Wade's Workshop
|
||||
|---|---|---|---|---|
|
Forum Ambassador
|
Quote:
West Peterson wrote:.....They should be no where near that rough when they're done spraying...... All I can say is, I know. The whole running board re-rubbering saga has been a learning one with advice along the way from yourself, Dave Mitchell and Keegan. Suffice to say the guy doing the Rhinoing has had no experience with using that process for this type of application. To start with I didn't realise when I gave him instructions for a couple of very light coats that the holes along the length of the board wouldn't fill in with Rhino. The holes are there for 160/180's and except for the ones at each end aren't used on 120's. The initial coats were a lot smoother with much less orange peel which I hand sanded back together with the filler used to plug the superfluous holes. With the latest application I instructed the guy to use heavier coats of Rhino because I would sand out any imperfections later. I didn't expect what he presented and he was very sheepish about what he'd done. Meanwhile with the situation I've created for myself I'll continue with my remedial work and eventually aim to end up with a pair of "reasonable" Rhinoed running boards for the '41 120 Club Coupe.And some good news - Friend Noel took his '41 160 Club Coupe boards with him on a US trip a few months back and Hunley Acuff re-rubbered them, he's doing '41's now! I'll be interested to see them when they arrive in Oz shortly.
Posted on: 2010/4/15 18:25
|
|||
|
Mal
/o[]o\ ==== Bowral, Southern Highlands of NSW, Australia "Out of chaos comes order" - Nietzsche. 1938 Eight Touring Sedan - SOLD 1941 One-Twenty Club Coupe - SOLD 1948 Super Eight Limo, chassis RHD - SOLD 1950 Eight Touring Sedan - SOLD What's this? Put your Packard in the Packard Vehicle Registry! Here's how! Any questions - PM or email me at ozstatman@gmail.com |
||||
|
||||
|
Re: Wade's Workshop
|
||||
|---|---|---|---|---|
|
Webmaster

|
Quote:
Do those count as checked or carry on luggage? 
Posted on: 2010/4/16 0:24
|
|||
|
-BigKev
1954 Packard Clipper Deluxe Touring Sedan -> Registry | Project Blog 1937 Packard 115-C Convertible Coupe -> Registry | Project Blog |
||||
|
||||
Register To PostTopic is Locked


