|
Re: Wade's Workshop
|
||||
|---|---|---|---|---|
|
Forum Ambassador

|
Monday 31st May 2010
Wade was working on Noel's '39 when I arrived, tidying up the grommet/gasket where the wiring harness and oil pressure, temp gauge and coil wire tubes pass through the firewall. Was able to lend a hand on the engine side while Wade worked from the cabin side. Wade also installed the carpeted interior to the firewall, right side kick panel and radio head. Battery clamped in and seat base installed and then started it up. So Noel you'll be pleased to know it runs, and in time for the Morris Minor Picnic Club run tomorrow. My side of things, after finishing holding screws and screwdrivers for Wade, consisted of this. Remounted the radiator/fender support rod/bracket to the radiator cradle of the '41. Gave the radiator a flush, no foreign matter evident just clear water, which is good and to be expected seeing it had been professionally cleaned before the '41 went back on the road, January '09. Remounted the radiator in it's cradle in the front clip. Took off the front wheels to enable the front clip to be re-mounted. Filled the steering box with Penrite Steering Box Fluid. This comes in a "tube" and has the consistency of tar, being very hard to pour. So first I heated the tube until the fluid would pour and poured it into an old Penrite Steering Fluid plastic bottle container. From there it was decanted into the steering box, as it was still runny, in five doses. Because it is so thick, it would plug the filler hole, necessitating turning the steering wheel lock to lock (very easy to do with the front end off the ground) until the air lock cleared or alternatively poking a little finger through it enabling it to run. That all done then it was time to start the '41 up again to reset the timing. But who left the key on flattening the battery? I have to confess t'was I! Last week when we tried to start it I was the one in the cabin so there was no hiding from it! Trouble is, being left like that, it's now as flat as a tack. Left it hooked up for re-charging overnight. Points were checked and don't appear be damaged. Might be able to give it a try before the Morris Minor Picnic Club run gets underway tomorrow morning from the workshop. Attach file:  (31.09 KB) (31.09 KB)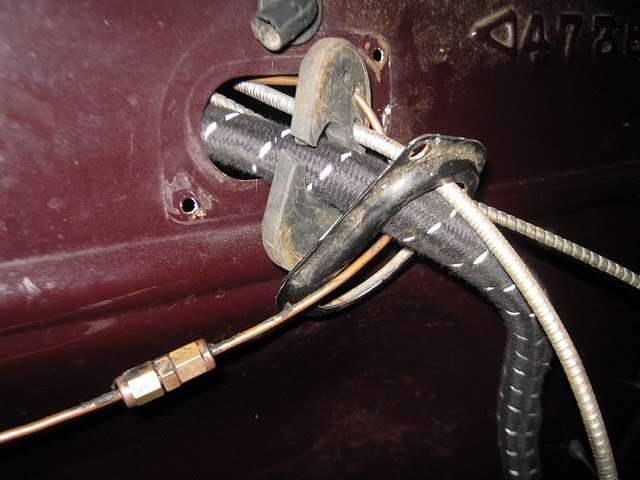 (34.36 KB) (34.36 KB)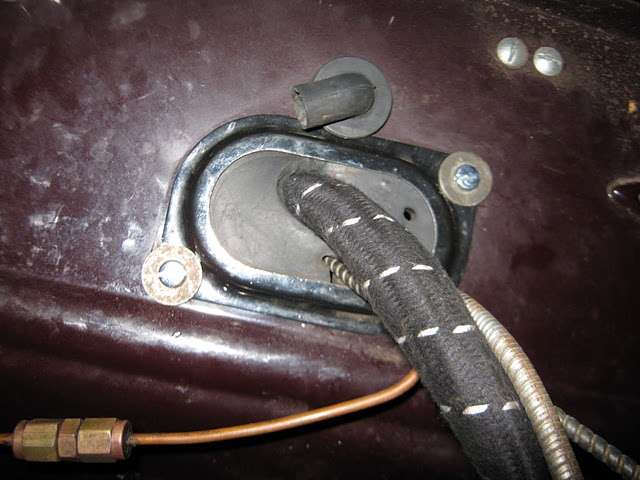 (27.98 KB) (27.98 KB) (38.95 KB) (38.95 KB)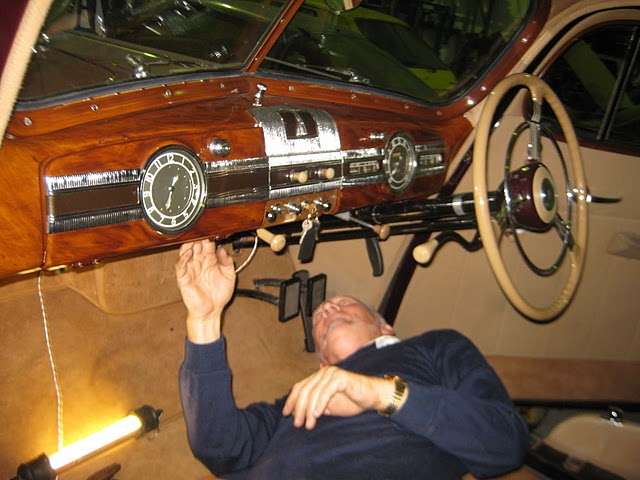 (40.00 KB) (40.00 KB)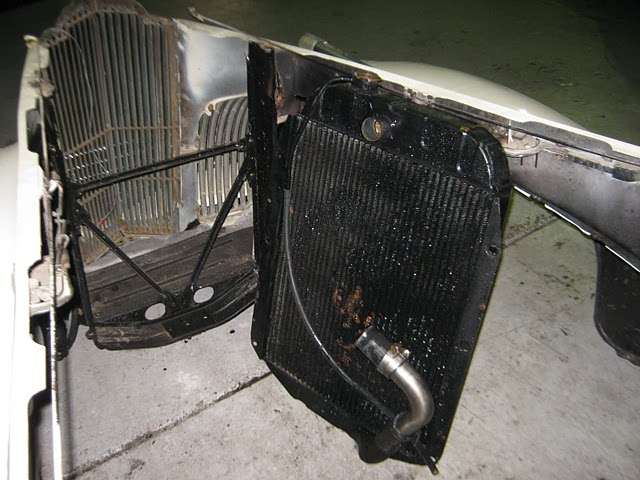 (30.67 KB) (30.67 KB)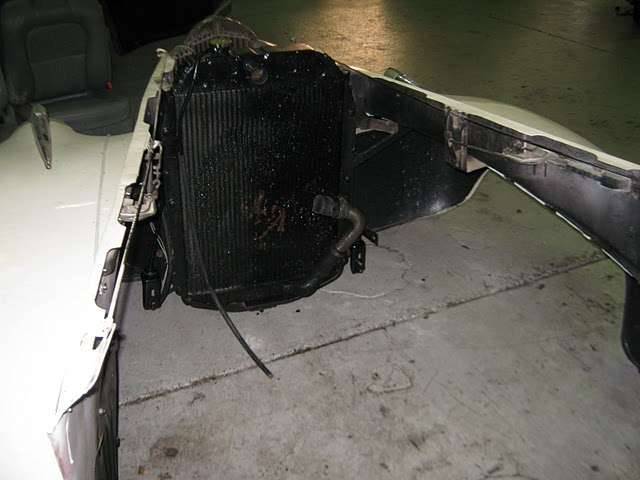 (49.37 KB) (49.37 KB)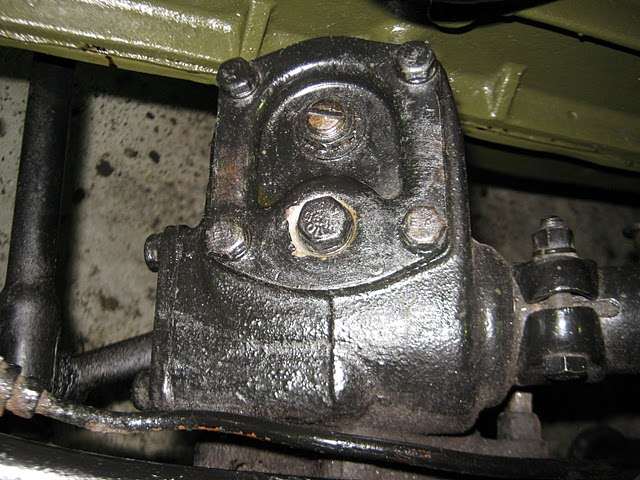 (32.93 KB) (32.93 KB)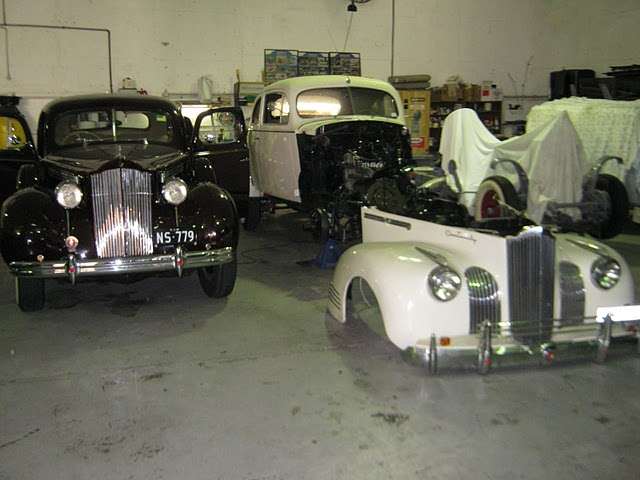
Posted on: 2010/5/30 23:52
|
|||
|
Mal
/o[]o\ ====  Bowral, Southern Highlands of NSW, Australia "Out of chaos comes order" - Nietzsche. 1938 Eight Touring Sedan - SOLD 1941 One-Twenty Club Coupe - SOLD 1948 Super Eight Limo, chassis RHD - SOLD 1950 Eight Touring Sedan - SOLD What's this?  Put your Packard in the Packard Vehicle Registry! Here's how! Any questions - PM or email me at ozstatman@gmail.com |
||||
|
||||
|
Re: Wade's Workshop
|
||||
|---|---|---|---|---|
|
Forum Ambassador
|
When Ted, the organiser of the Morris Minor Picnic Club, was looking for a rendezvous and start point for the June run Wade very kindly offered up his "shed" for the task. And like a couple of weeks ago when Tas, Phil, and wife Marjorie visited we were providing refreshments in the form of morning tea. Wade was already there and had set up the refreshments bar near the workshop entrance, when I arrived. The bar consists of a metal surface (looks like it could have been a very large drip tray in a former life) supported by a pair of 44 gallon drums(that's Imperial gallons, or about 200 litres), nothing but the best where catering is concerned in the workshop. Add to that the hot water urn, on loan from Ted, about a dozen mugs, some tea spoons and it's really starting to come together. Then it was my turn to add to the occassion with the provision of tea bags, instant coffee, sugar sticks, milk, a packet of chocolate biscuits, a packet of Anzac biscuits, a packet of rice cracker biscuits, two different cheeses and some thickly sliced ham, can't say we didn't spare any expense in doing this. While I was preparing the refreshments our first run participant, Reg, arrived. Refreshment preparation consisted of cutting up the cheeses and ham into savoury style cubes and displaying these together with the rice crackers in a plastic five compartment serving tray from the Two Dollar Shop, see NO expense. After some chit-chat, Reg made his own cup of tea, again NO expense, and taking some cheese and biscuits, we made our way into the workshop. After looking at the '41 Reg pointed back to the refreshments bar and said "Will you look at that". That turned out to be Misty, John's dog, helping herself to the refreshments! The sight of that prompted a startled response from this correspondent moving faster than he has for quite some time, in the direction of the pilfering pooch, accompanied by life-threatening threats. Arriving at the crime scene found Misty's discerning tastes had limited her to the ham, one of the two types of cheese and the chocolate biscuits. About half the ham cubes were gone, about a third of the cheese cubes and over half the chocolate biscuits. Not to fear, still had another thick slice of ham in reserve, enough cheese and two chocolate biscuits, making a total of five biscuits remaining out of eleven started with. By this time more of the run participants were arriving and were invited to make themselves tea or coffee and help themselves to the nibblies, again NO expense. People continued to arrive until it reached the stage we ran out of mugs for the tea and coffee, Fortunately, by this time, the earlier arrivals had finished their drinks, too bad if they wanted a re-fill, and their mugs were washed up by yours truely and pressed into service for the new arrivals. Think I did this washing up trick three times and was able to satisfy the demand for mugs, although I did see a few had requisitioned paper cups from the water dispenser and pressed those into service. Also did my hostly "thing" by circulating around the run participants with tray of nibblies in one hand, plate of biscuits in the other and Misty dogging every step I took. Needless to say she wasn't getting any more goodies, BAD DOG! Had a very busy time and wasn't able to take any pic's except for a few at the very death. But in circulating did catch up with a guy who worked for many years at the same company as I had, he now owns an MGB roadster. Must have totalled about 30 people who were doing the MMPC run, maybe a record, most I had seen on the occassions I've gone on these runs is no more than 20. The last sight I had, before I went off to do the washing up again followed by grandfatherly babysitting duties, was of Wade and Gina departing in Big Red and Noel following in his '39. Noel wants to keep the '39 ticking over and be sure it's ready for the 4 day Tamworth run at the end of June. We almost had another PackardInfo member there too, in the form of Russpackaus, AKA Russell, PACA's treasurer who had a business meeting in the vicinity and was going to try and get to the workshop if he could. At least he was closer this time because his previous excuse, for not catching up when Phil and Marjorie visited, was being in Singapore on business. Attach file: (42.35 KB)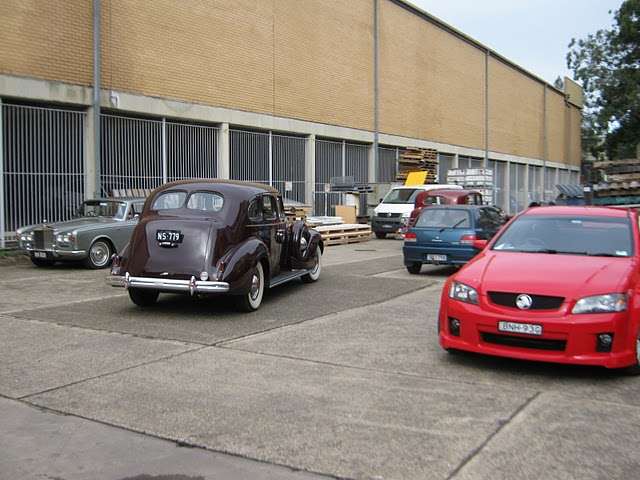
Posted on: 2010/5/31 22:59
|
|||
|
Mal
/o[]o\ ==== Bowral, Southern Highlands of NSW, Australia "Out of chaos comes order" - Nietzsche. 1938 Eight Touring Sedan - SOLD 1941 One-Twenty Club Coupe - SOLD 1948 Super Eight Limo, chassis RHD - SOLD 1950 Eight Touring Sedan - SOLD What's this? Put your Packard in the Packard Vehicle Registry! Here's how! Any questions - PM or email me at ozstatman@gmail.com |
||||
|
||||
|
Re: Wade's Workshop
|
||||
|---|---|---|---|---|
|
Forum Ambassador
|
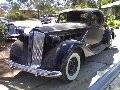
And here is a candid camera moment, courtesy of Gina, from today's workshop pitstop of the MMPC run.
Attach file: (101.20 KB)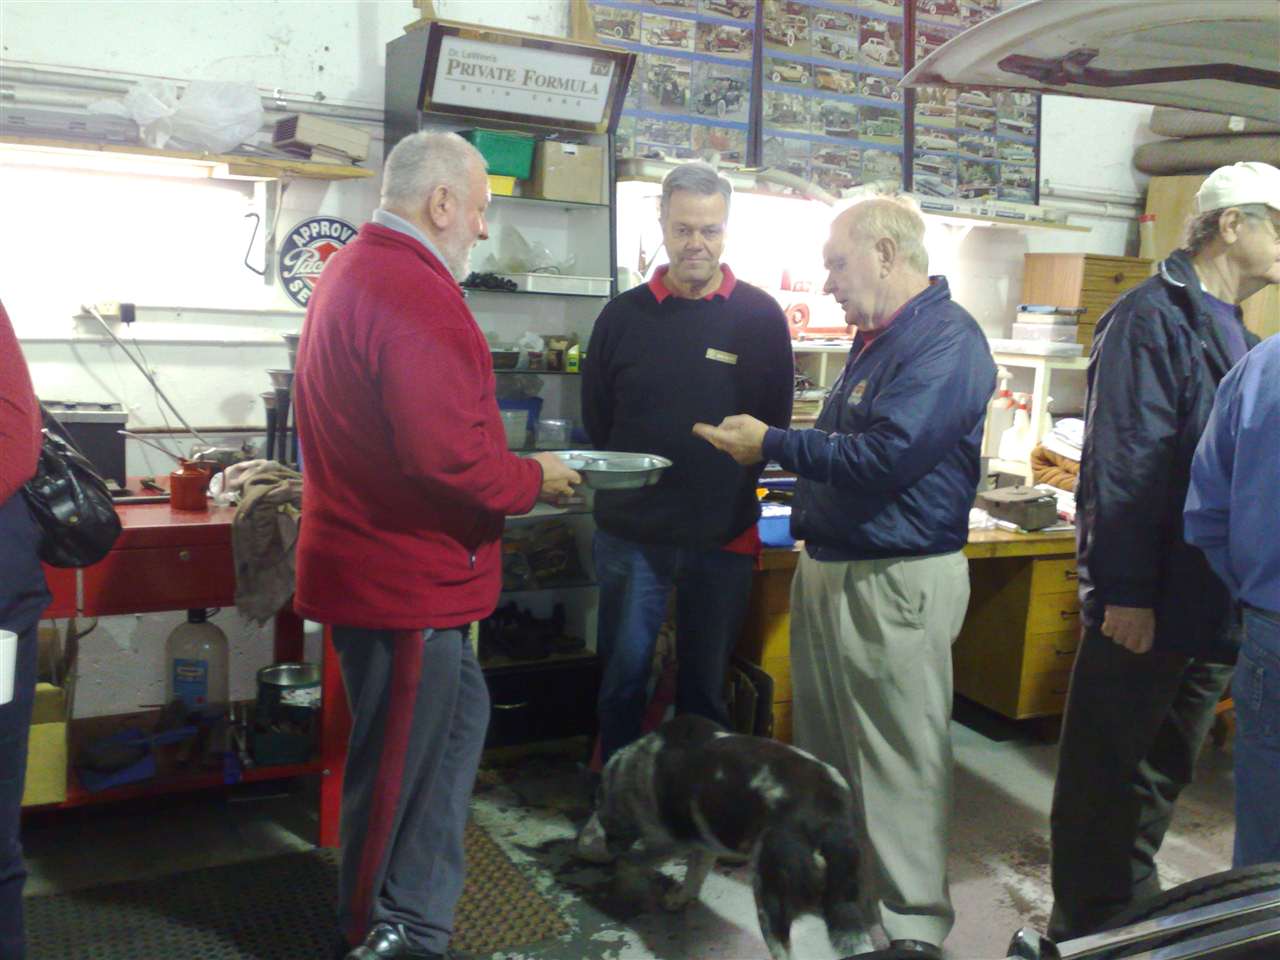
Posted on: 2010/6/1 6:08
|
|||
|
Mal
/o[]o\ ==== Bowral, Southern Highlands of NSW, Australia "Out of chaos comes order" - Nietzsche. 1938 Eight Touring Sedan - SOLD 1941 One-Twenty Club Coupe - SOLD 1948 Super Eight Limo, chassis RHD - SOLD 1950 Eight Touring Sedan - SOLD What's this? Put your Packard in the Packard Vehicle Registry! Here's how! Any questions - PM or email me at ozstatman@gmail.com |
||||
|
||||
|
Re: Wade's Workshop
|
||||
|---|---|---|---|---|
|
Forum Ambassador
|
Wednesday 2nd June 2010
Long day at the workshop with real progress made on the '41. All going well, probably driving it home on Friday! Wade had started up the '41's engine just prior to my arrival and was inspecting the leak at the fuel pump so that was the first task undertaken. The leak was coming from the "bulb" which threads in above the outlet port on the pump, it wasn't tight. Took the bulb off, fuel cleaned up, thread sealing tape applied and re-tightened. Wade then re-checked the timing because of all the freeplay adjusting which had gone on last week. Reset it, fired it up, timing light on and it was spot on. Also found an oil leak, traced to the oil filter top needing a little more tightening, and fixed. Next task was re-connecting the front clip with the rest of the '41. A little preparation first to ensure we had the bolts on hand to hold it in place while it was then aligned, bolted and tightened up. Then some extra muscle in the form of John and Rick and the front clip was lifted and walked back to the '41. A little bit of - right a bit, down a bit, up a bit, push a bit and down a bit and there we were with a couple of bolts holding it in place. Wade and I then set about the alignment process and this took much longer to do. Next was putting the bonnet(hood) back on. It had been sitting on top of Rick's wrecked Lexus Soarer Coupe for the past couple of months and was finally coming home. Easy enough to place it back on, but in doing so the centre strip came forward about 3/16" from where it should be leaving a gap where there previously wasn't one. Took a fair bit of tightening, then loosening, then pushing to finally correct it. Bonnet props were then re-mounted, the front end stays re-mounted to the front crossmember and radiator cradle and the radiator re-tightened (it had been loosened off to help the front clip re-alignment process). The front bumper was then re-mounted, with more up a bit down a bit from Wade underneath while I held and manouevered the bumper bar, bumper irons and stone guard assembly. That done I started on re-installing the front interior items still outstanding while Wade worked on the front end wiring. But...... I soon realised I couldn't do anything with the floor coverings until the accelerator pedal mount was rebolted to the floor. I'd taken the two nuts and bolts out early in the piece to paint, clean and re-install them but they got overlooked! Mea Culpa! Had to call on Wade's services to hold the nuts while I tightened the bolts. He's a glutton for punishment, that Wade, cramped under a mudguard(fender) while I cleaned up the bolts then manouevering the nuts and holding them in position in very tight quarters. Was then able to re-install the underlay, rubber matting and carpet and the accelerator pedal(NOS - from Flackmaster enterprises). Front seat squab was re-installed with Wade's help. Then I was onto re-installing the inner fender panels while Wade continued with the wiring. Lets just say this doesn't seem to be my forte and I struggled. Needed Wade's help to get the left side front panel into place and bolted in. Turned to the left side rear inner panel and struggled, and struggled and struggled some more. In the end that's where I left it and will pick up the running on Friday as it's highly unlikely I'll be there tomorrow. While working on the bonnet, Tony, Noel's mate arrived with some spare key barrels of Noel's for Wade to look over for Big Red's right front door lock. The spare NOS barrel that Wade has is not the same as that which was drilled out yesterday after the MMPC run and lunch. Wade took one from Tony that looked a closer match and will talk it over with the locksmith as to it's suitability. And while lying under the '41 installing the right side mudguard to body bolts I received a call from Daniel at General Auto Instruments that the new OD cable was ready! Pheeew, I'd been sweating on that call especially after his tales of doom and gloom last week. Will pick up the cable either tomorrow, other commitments permitting, or Friday before heading for the workshop. Things remaining to be done include: Interior - Left and Right Kick panels. Install new Overdrive cable bracket and knob. Engine - Install and connect thermostat housing to head. Cut radiator inlet hose and install in-line filter. Re-install battery and re-connect cables. Refill radiator. Body - Re-install Inner Fender Panels. Fix and re-mount firewall grommet after Overdrive cable is re-installed. Mechanical - Install new Overdrive cable to Overdrive unit. To answer this question from another threadQuote: Owen_Dyneto wrote:.......Also when convenient, would you be so kind as to send me the diameter (or circumference, I can divide by pi) of the muffler on Wade's 34 Eight, and it's shell length? Measured up Wade's SS muffler - It's exactly 4 foot in length and close enough to 5 inches in diameter. Wade had it made up here using the muffler on the '34 he imported from the US when his original '34 body was destroyed in a bushfire. The guy fabricating the muffler used the old one as a template duplicating the internal baffling and layout. Attach file: (35.02 KB)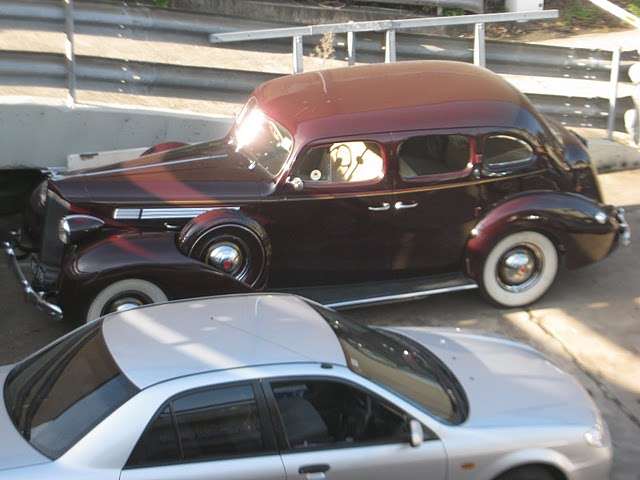 (24.45 KB) (24.45 KB)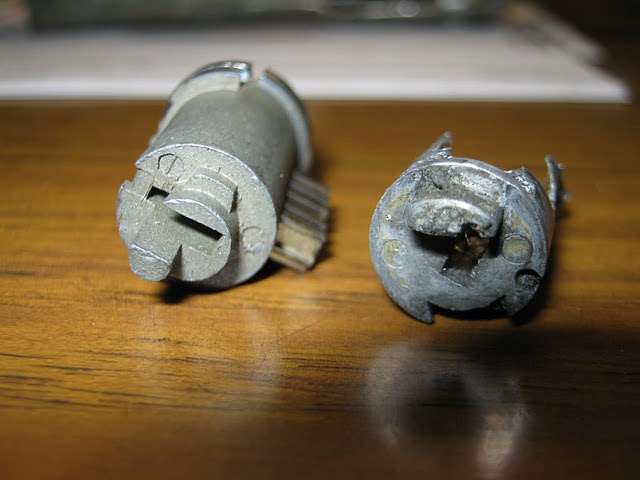 (29.36 KB) (29.36 KB) (37.88 KB) (37.88 KB)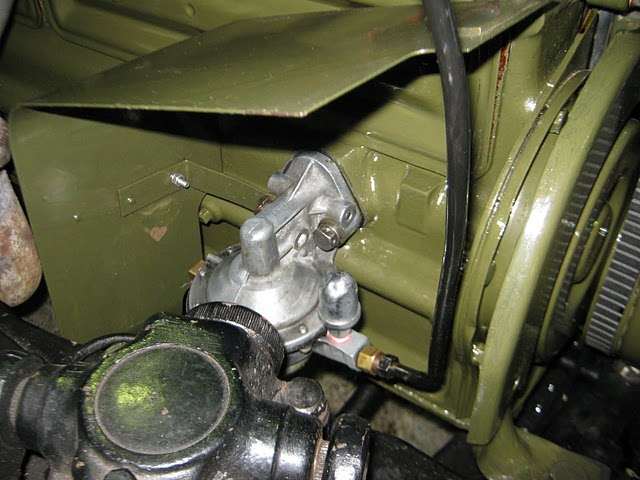 (34.87 KB) (34.87 KB)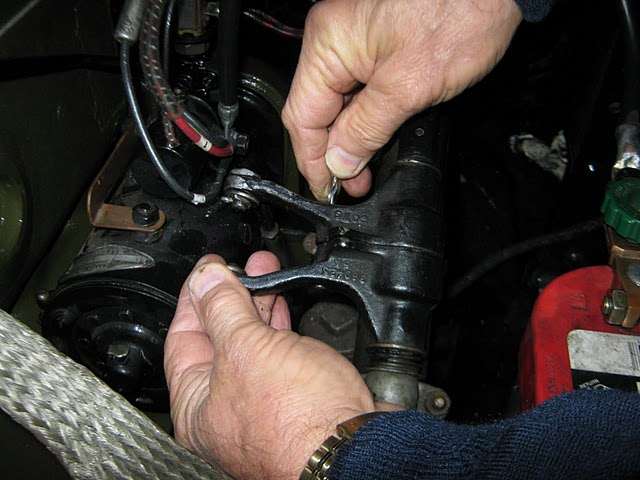 (32.17 KB) (32.17 KB)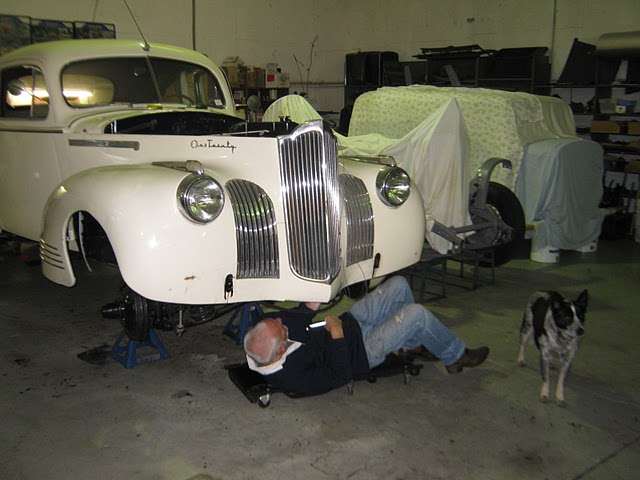 (35.00 KB) (35.00 KB) (25.13 KB) (25.13 KB)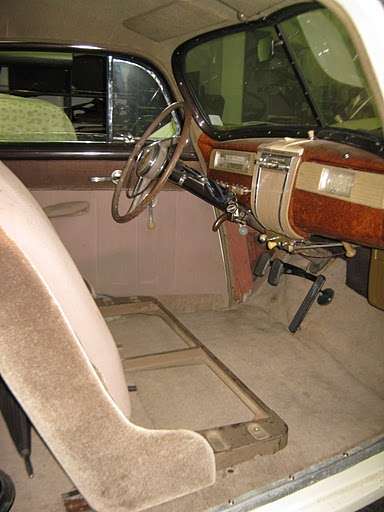 (31.68 KB) (31.68 KB)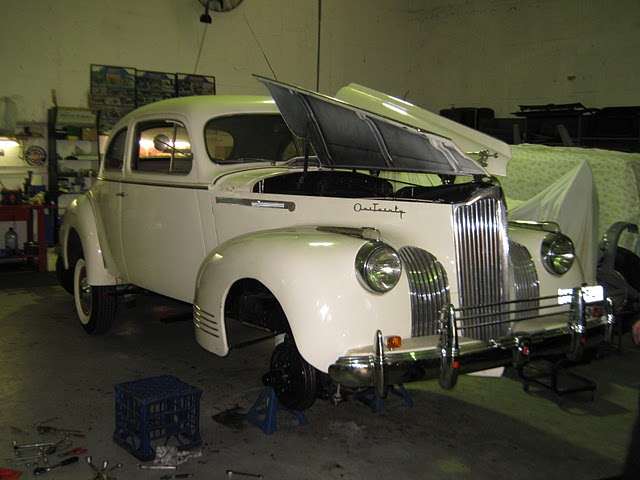 (32.27 KB) (32.27 KB)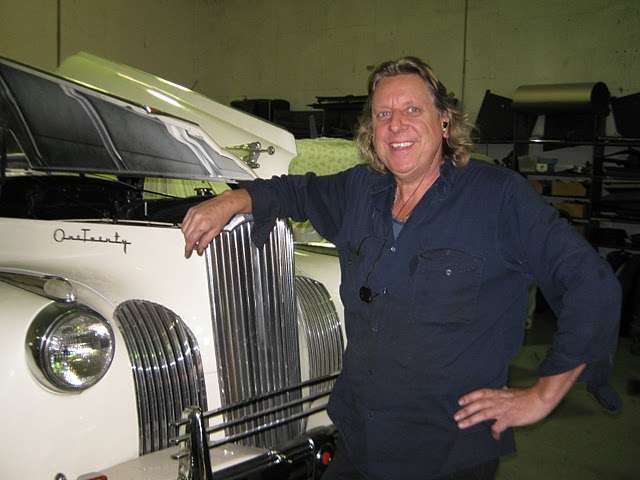
Posted on: 2010/6/2 6:32
|
|||
|
Mal
/o[]o\ ==== Bowral, Southern Highlands of NSW, Australia "Out of chaos comes order" - Nietzsche. 1938 Eight Touring Sedan - SOLD 1941 One-Twenty Club Coupe - SOLD 1948 Super Eight Limo, chassis RHD - SOLD 1950 Eight Touring Sedan - SOLD What's this? Put your Packard in the Packard Vehicle Registry! Here's how! Any questions - PM or email me at ozstatman@gmail.com |
||||
|
||||
|
Re: Wade's Workshop
|
||||
|---|---|---|---|---|
|
Forum Ambassador

|
Not to jump in on Mal, but it should be about 48 inches exclusive of the nipples at each end. I seem to recall but can't find the spec at the moment that the original muffler was 4-1/4 in diameter. At that dimension there is only about 1/8 clearance to the brake cross-chassis rod so I don't think a 5 inch diameter muffler would fit, but then again my exhaust header is not original and might mount a small fraction of an inch lower. Fairly close quarters at the rear for the tail pipe also where you just clear the gas tank lower edge without the pipe hitting or vibrating against the lower end of the spring shackle.
Posted on: 2010/6/2 9:44
|
|||
|
||||
|
Re: Wade's Workshop
|
||||
|---|---|---|---|---|
|
Forum Ambassador
|
Friday 4th June 2010
Drove Old Blue down to the workshop as part of the preparation for the '41's return to the road. Needed to take the in-line radiator hose filter off the '37 and transfer it to the '41, more of that later. And I arrived before Wade, just! Wade set about installing the newly made OD cable I picked up from General Auto Instruments yesterday. Ralph of GAI told and showed me that they made the new cable the same length, with the same size threads, etc. Also gave instructions that if it was too long to bring it back and they would fix it or if the thread wasn't long enough we could cut some more. The interesting part of his instructions was to use two old disc brake pads if we clamped it in a vice to prevent the shaft from getting damaged! Learned something new yesterday. First was getting the cable through the firewall opening which was accomplished by removing most of the cables presently going through the gasket/grommet there to make it somewhat easier. Wade bolted the OD handle body to the steering column tube then had to find a tiny screw, for the switch, which was lost somewhere in transit. That done threaded the cable to the OD only I had to do it a further two times until the optimal position and angle were attained because of the constraints in doing this. That done, while Wade worked under the '41 with the OD, I returned to the left side inner fender panel which so frustrated me on Wednesday. The bolt which caused me so much grief went into the captive nut comparatively easily after a little bit of jiggling and re-aligning. The next one, the rear bottom bolt and nut then presented it's own problem, requiring Inspector Gadget type extendable arms in order to reach the nut and the bolt at the same time. Instead, thanks to a fortunate break in the OD work, pressed Wade into service under the mudguard(fender) while I tackled the other side in the engine compartment, comparatively simple then. A bit more jiggling and aligning then tightened up all the inner fender panel nuts and bolts. Then "helped" Wade with the OD cable re-installation. "Helped" means I held a pair of brake pliers to grip the end of the OD cable while Wade cut about 1&1/4" of excess thread off the end with an angle grinder. The problem was that the thread was so long that when threaded through the body of the clevis it interfered with the OD lockout arm preventing it from operating, obviously not a good thing. That done re-installed and re-connected a now fully charged battery. That brings us to the top radiator hose coolant filter. First I dumped about half the coolant out of Old Blue, even had a problem doing that! After finding the drain cock, rear bottom of tank left side, opened the cock and drip, drip drip..... Not the spout of coolant expected, so consulted Wade who advised "take off the radiator cap"! What a difference! So learned something new today as well. Only drained enough coolant so that the level was below the filter needing to be removed. Took off the filter, hoses and clamps and rounded up the '41's thermostat housing and attached radiator hose for the transfer to take place. Consulted Wade as to how much hose to leave attached to the thermostat housing and proceeded to cut the '41's hose down Then, in fitting the filter housing to the radiator hose attached to the thermostat housing, almost had a heart attack!!!! Different sizes! But not to fear, Wade said the filter came with adapter pieces just for these types of circumstances. Managed to find one on the shelf full of rubber parts then another, not quite the same but it works. Next was cutting the remaining piece of the '41's upper radiator hose for the length between the top tank and the filter housing. Measured, a number of times, then cut. My two greatest fears here are: 1) Slashing myself with the Stanley Knife, and 2) Cutting off more than necessary and ending up with too short a piece. Fortunately neither happened but another side to the equation arose. Namely, not enough had been cut off so the hose was squeezed and consequently kinked when installed. Took the offending hose off and more measuring, mainly by eye, and about a further 3/8" needed to be trimmed off the engine end of the hose. Because I was now trying to cut without hardly any lateral support on one side of the hose fear #1, this time, was a real possibility. However to give the hose support I used the offcut piece of hose, pressed inside the hose I was cutting and although not an optimal situation it was a lot better than an unsupported hose. Saw a trick a little later which if I'd known then would have used instead. Third new thing learned in the past few days! Anyway on to the trick, it was Wade trimming down the second of the filter adapter collars with a Stanley knife and he used a large socket in it against which he was able to make an easy cut, didn't succumb to fear #1 or #2 either. BUT.......minutes later with an open Stanley knife in his right hand he slashed the outside of his left thumb. Wsde wasn't actually cutting anything but he brougth his left hand up sharply and caught the Stanley knife with it. It had just had a new blade installed, so at least it was a clean cut! Wanted to carry on but I had to insist he had medical treatment first. It was a deep gash wanting to bleed and I didn't want him bleeding over my Packard! So after a band-aid, almost ineffectual, found a wide "dressing" in the first aid kit which after being cut down the centre, the two pieces were then applied tightly, one on top of the other, to stop the blood loss. Usually I'm the one wandering around with an open Stanley knife in hand so for it to happen to Wade is out of character. And you'll be happy to know that even this snap happy Packardrazzi forewent taking pic's of this grisly scene. Bandage and dressing on, it was back to the fray with the coolant filter housing and top radiator hose installed then filled the '41 up with water. Then we fired the '41 up, see this video for a timing check which was spot on. The small white line is TDC #1 and the full white line is 7 degrees before TDC #1, oil pressure is good, temp is good but the ammeter was jumping around and will be looked at next week. The last part of the video shows the inside of one of the front wheels which had been propped up against the exhaust pipe a week ago and forgotten about. Needless to say it copped all the crap pushed through the exhaust system today. Other matters to attend to are a leak in the heater control valve and another leak from the oil filter, seems to be escaping past the central large nut on top. By this time we'd run out of time with the workshop vacated for Friday lunch at Eastwood Rugby Club's restaurant Wings. If you're ever in this neck of the woods you have to go there, the medium rare Filet Mignon with a choice of vegetables or salad is delicious and great value too. Quote: traumjaegercat wrote:......Is the muffler length of 4 foot just the tube itself or does that include the take off spigots where the clamps go?..... Owen_Dyneto wrote: Not to jump in on Mal, but it should be about 48 inches exclusive of the nipples at each end. I seem to recall but can't find the spec at the moment that the original muffler was 4-1/4 in diameter. At that dimension there is only about 1/8 clearance to the brake cross-chassis rod so I don't think a 5 inch diameter muffler would fit, but then again my exhaust header is not original and might mount a small fraction of an inch lower. Fairly close quarters at the rear for the tail pipe also where you just clear the gas tank lower edge without the pipe hitting or vibrating against the lower end of the spring shackle. And speaking of mufflers, the '41's has a hole in it! Not apparent with the old engine, but now with the rebuilt one it's noticeable. Will be attended to next week when we go and see Wade's muffler guy. Attach file: (35.50 KB)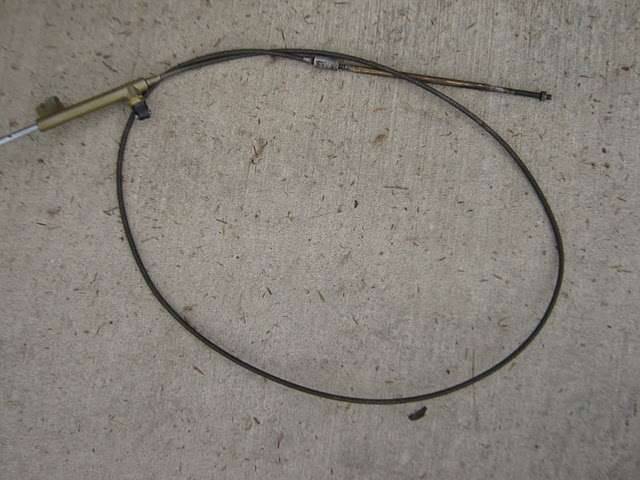 (38.78 KB) (38.78 KB)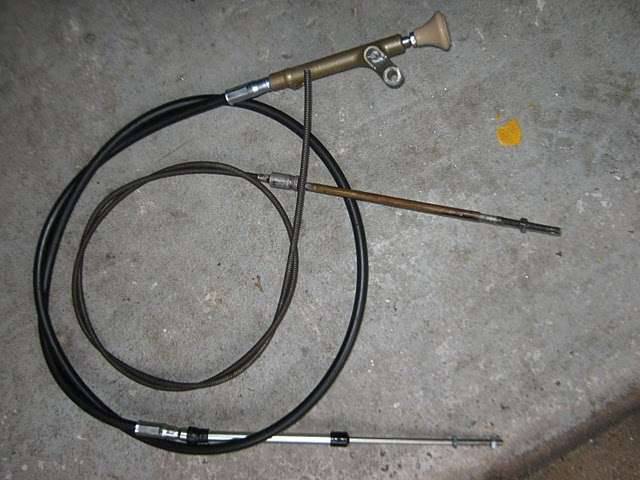 (40.08 KB) (40.08 KB)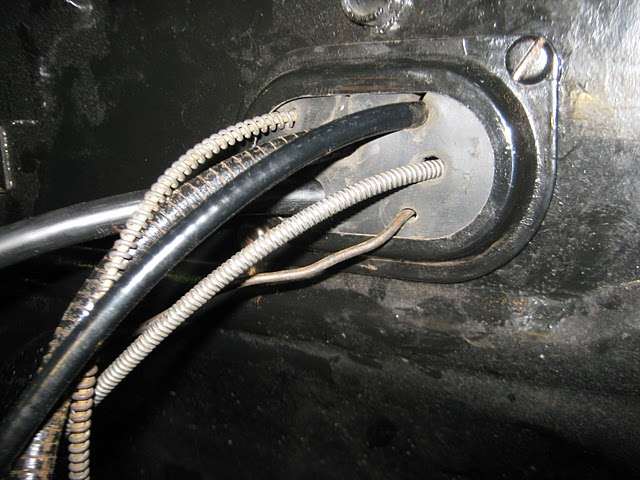 (31.20 KB) (31.20 KB)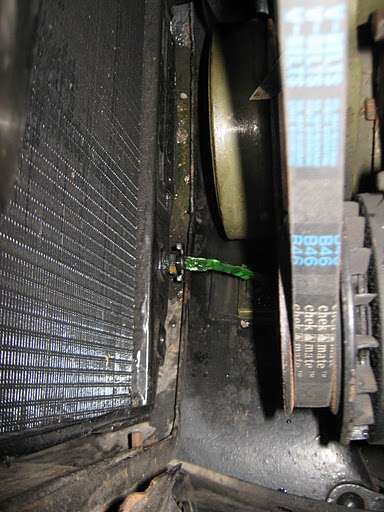 (39.02 KB) (39.02 KB)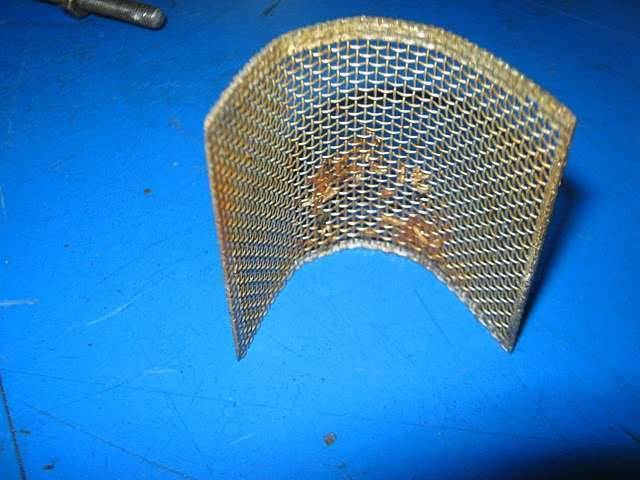 (0.00 KB) (0.00 KB) (36.42 KB) (36.42 KB) (24.23 KB) (24.23 KB)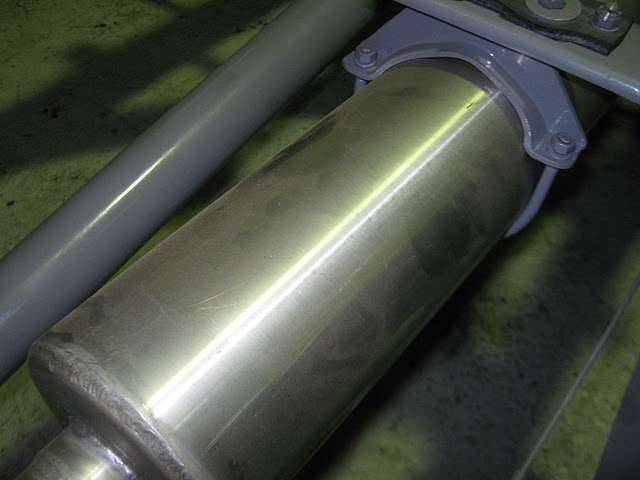 (23.73 KB) (23.73 KB)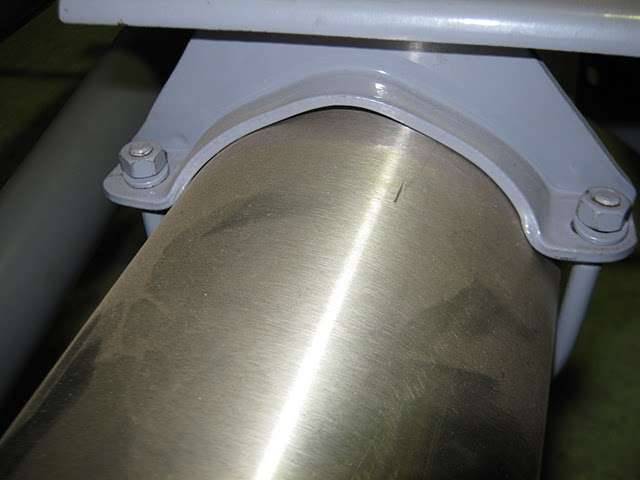 (21.71 KB) (21.71 KB)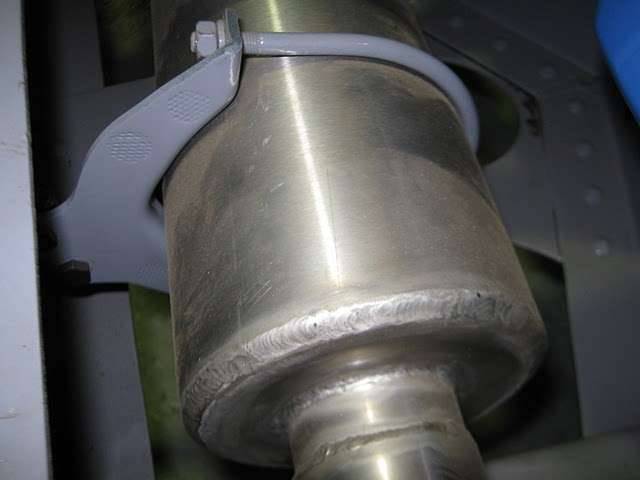
Posted on: 2010/6/4 4:24
|
|||
|
Mal
/o[]o\ ==== Bowral, Southern Highlands of NSW, Australia "Out of chaos comes order" - Nietzsche. 1938 Eight Touring Sedan - SOLD 1941 One-Twenty Club Coupe - SOLD 1948 Super Eight Limo, chassis RHD - SOLD 1950 Eight Touring Sedan - SOLD What's this? Put your Packard in the Packard Vehicle Registry! Here's how! Any questions - PM or email me at ozstatman@gmail.com |
||||
|
||||
|
Re: Wade's Workshop
|
||||
|---|---|---|---|---|
|
Forum Ambassador
|
Monday 7th June 2010
Wade had his thumb attended to at Hospital over the weekend and, to add to the pain, broke a tooth as well! I didn't get in until later in the morning, because of donating blood plasma, and Wade was able to have the tooth attended to by his dentist before getting to the workshop. These things don't seem to hold him back though, before I got there he'd removed the heater valve, and found a length of copper tubing to enable the heater to be bypassed for now. Fixed the leak from the oil filter where oil was escaping past the big 1" top cover retaining nut. Took the top off, but there didn't seem to be a way to take the nut off to replace the copper washer under it. Instead resorted to thread sealing tape between the washer and the cover, seems to work! Then wired up the fuel pump bolts, after tightening them up a bit first. Then replaced the fuel filter which is in-line between the fuel pump and the carb. Took the opportunity to reshape/rebend the fuel line too so that it was straighter than before. That done, fired the '41 up again to check for leaks - none, and to heat up the engine and retighten the head nuts - done. Next was re-installing the right front inner mudguard(fender) panels. Proved too difficult, with everything in place, to slide the front panel down past the mudguard, carb, fuel pump heat shield, etc. Then, Mal had an idea!  Doesn't happen often! So I want to crow about it when it does happen.......slid the panel across the engine from the left side, turned the corner and with the help of a little brute force there it was in place! But at this time Wade had to leave to have his thumb re-bandaged at the hospital, leaving yours truely to tackle re-installing the fasteners required. Managed to get most into place but there are a couple which require a second pair of hands so will catch up with them tomorrow with Wades help. Doesn't happen often! So I want to crow about it when it does happen.......slid the panel across the engine from the left side, turned the corner and with the help of a little brute force there it was in place! But at this time Wade had to leave to have his thumb re-bandaged at the hospital, leaving yours truely to tackle re-installing the fasteners required. Managed to get most into place but there are a couple which require a second pair of hands so will catch up with them tomorrow with Wades help.Attach file: (22.47 KB)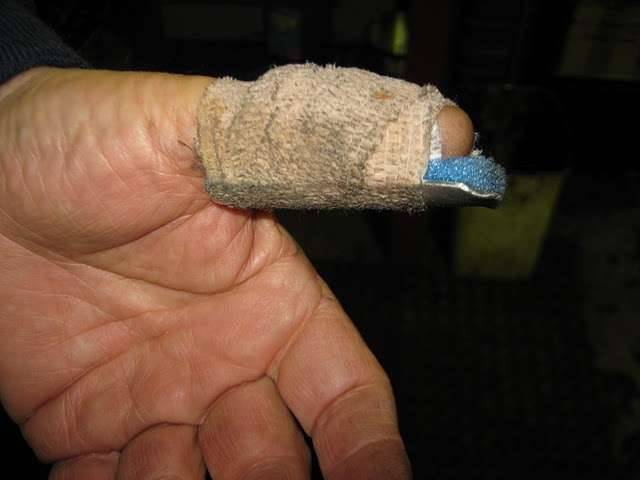 (31.98 KB) (31.98 KB)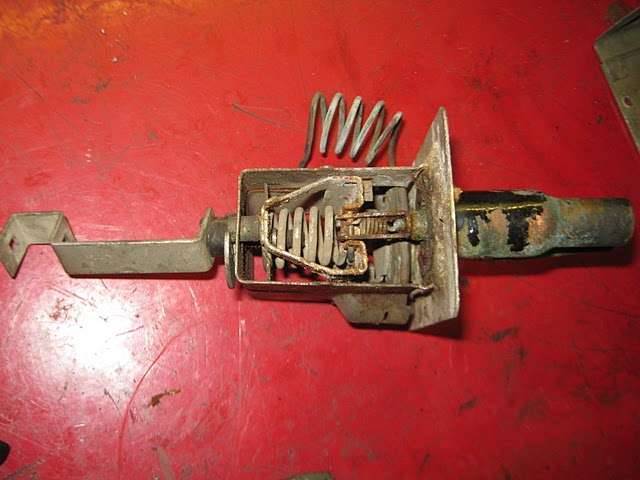 (45.08 KB) (45.08 KB)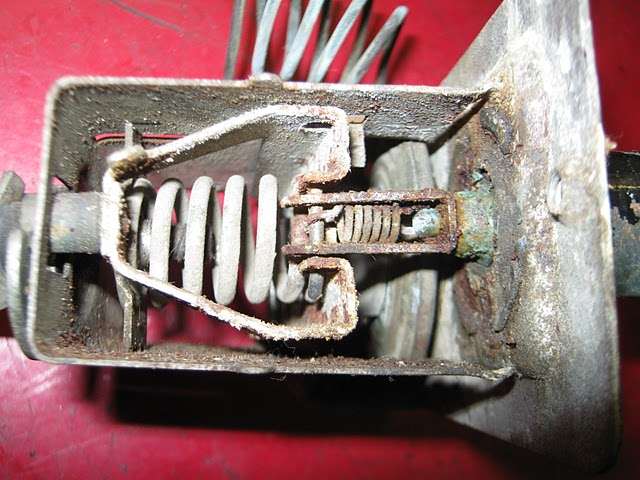 (43.38 KB) (43.38 KB)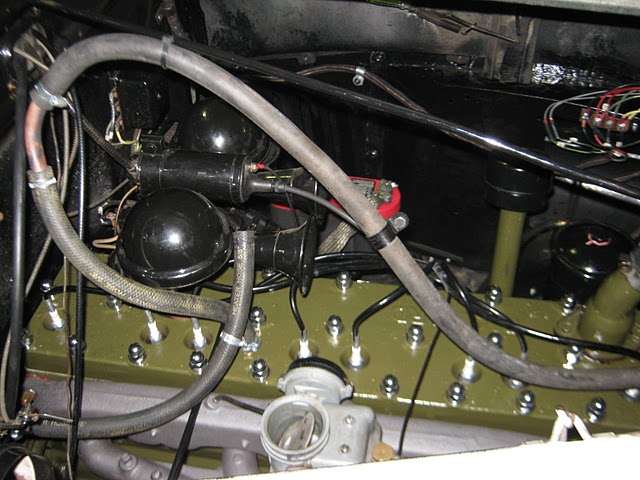 (35.52 KB) (35.52 KB)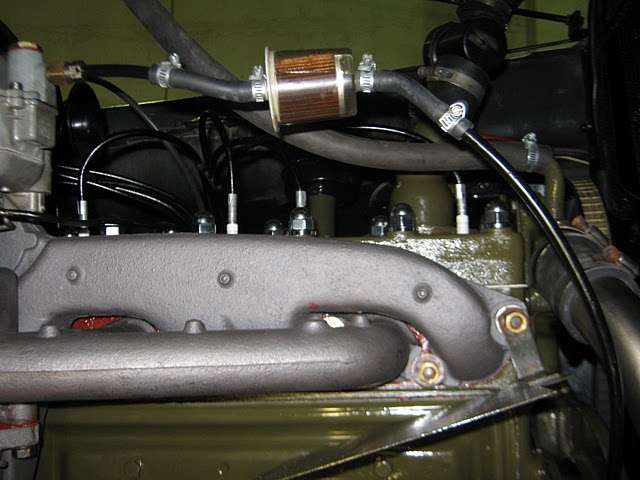 (37.24 KB) (37.24 KB)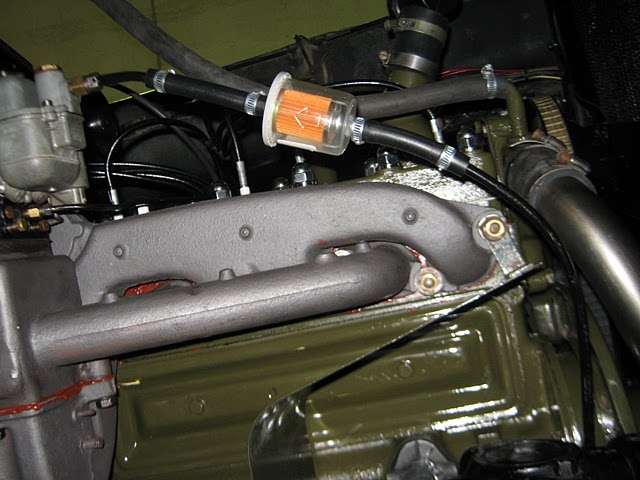 (34.00 KB) (34.00 KB)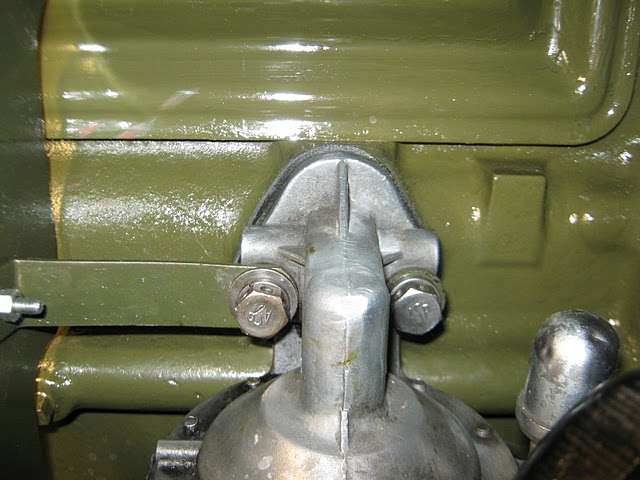 (34.62 KB) (34.62 KB)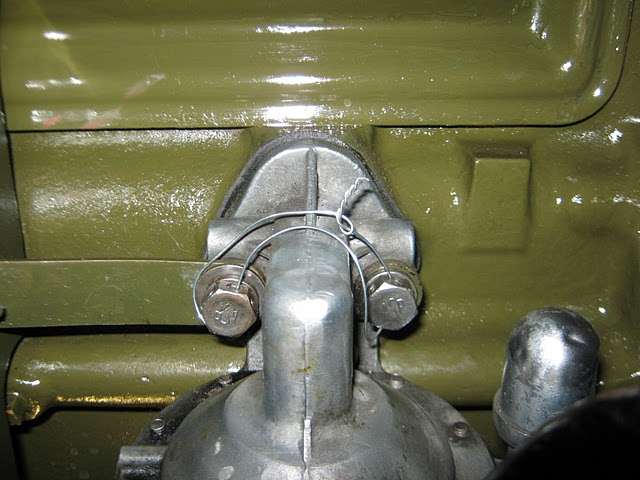 (33.07 KB) (33.07 KB) (31.21 KB) (31.21 KB) (18.37 KB) (18.37 KB)
Posted on: 2010/6/7 3:32
|
|||
|
Mal
/o[]o\ ==== Bowral, Southern Highlands of NSW, Australia "Out of chaos comes order" - Nietzsche. 1938 Eight Touring Sedan - SOLD 1941 One-Twenty Club Coupe - SOLD 1948 Super Eight Limo, chassis RHD - SOLD 1950 Eight Touring Sedan - SOLD What's this? Put your Packard in the Packard Vehicle Registry! Here's how! Any questions - PM or email me at ozstatman@gmail.com |
||||
|
||||
|
Re: Wade's Workshop
|
||||
|---|---|---|---|---|
|
Home away from home
|
Hi Mal ( and Wade) Sorry that I won't catch up with you guys next weekend in Tamworth, Ann and I have been "poached" by "Pepe" and his crew for a run to Victoria. The purpose of this message is to suggest that the hose filter which you have installed is a really practical item, but needs to be installed almost horizontally at the top outlet to capture crap trying to go from the block to the radiator. I find that if you instal it at the upper inlet of the radiator then you are able to loosen off the filter clamps and rotate the filter before you undo it. The crap is then trapped so it cannot fall back into the block. Just a small point and not a criticism at all. Best Regards and have a good weekend. PT.
Posted on: 2010/6/7 3:55
|
|||
|
I like people, Packards and old motorbikes
|
||||
|
||||
|
Re: Wade's Workshop
|
||||
|---|---|---|---|---|
|
Forum Ambassador
|
Tuesday 8th June 2010
On the road again. But before we got there had to attend to a number of things. First with Wade's help installed the last three fasteners for the right side inner fender panels, then re-installed the air cleaner and the right front wheel(Wade had installed the left front wheel yesterday). During the course of re-installing the air cleaner caught a hand on something and it was only when Wade said "what happened to you?" did I realise the back of my right hand had taken on a red hue! Jack under the front end and jack stands removed, same with the rear end and the '41 was back on Terra Firma, not for the first time since December 15th, but for the first time in going condition. Tightened up the front wheel lugs now it was on the ground and Wade put the hubcaps on. Then after some car shuffling to make a path the '41 could traverse in exiting the workshop fired it up and made the workshop roller door and stopped. Why? To drain some water from the radiator so the heater bypass set-up could be cleaned up a bit. Took the opportunity to take the in-line filter cap off when the water level dropped sufficiently and promptly dropped the cap!  Looked and looked but couldn't find it! My worst fear was that it had rolled into the drain just outside the workshop door and would never be seen again! Fortunately after jacking up the front end, Wade slid under on a creeper and found it hiding in the front crossmember. Pheeew! And Peter, there was some crap in the filter, not a lot but some and will be checked again after further running. Looked and looked but couldn't find it! My worst fear was that it had rolled into the drain just outside the workshop door and would never be seen again! Fortunately after jacking up the front end, Wade slid under on a creeper and found it hiding in the front crossmember. Pheeew! And Peter, there was some crap in the filter, not a lot but some and will be checked again after further running.Quote: Peter Packard wrote:.......The purpose of this message is to suggest that the hose filter which you have installed is a really practical item, but needs to be installed almost horizontally at the top outlet to capture crap trying to go from the block to the radiator.....The crap is then trapped so it cannot fall back into the block........ Watered up and fired up again, after Wade added 5 litres of fuel courtesy of the emergency supply he carries in Big Red and we were off to the nearest fuel station and to see how it behaved on the road again! And wonder of wonders, pulled into the local Shell station I regularly patronise and found they were offering pump service! No they weren't returning to days of old it was only a promotion for a couple of hours! And when the young guy started to fill the tank and the automatic stop cut in after about 3 litres were added to a virtually empty tank he said it was full. Took over from him and learned something from Wade in filling the Packard from modern bowsers. Have the nozzle just inside the filler neck so the unvented tank doesn't blow back triggering the auto stop as it did before. That done then had the inevitable Q & A answer session, and in this instance pic's, from the lookers a Packard attracts when sitting still for a time. Off then to complete Wade's little test route which fortunately is mostly back streets. The reason I say fortunately is that the '41's current registration sticker hadn't been affixed, in place of the expired one, so if pulled over it's very difficult to convince a "copper" you're not driving an un-registered vehicle. A technicality I know but could have been a source of grief. I did say to Wade yesterday I'd bring the new sticker down today but forgot to do so. Back at the workshop drove the '41 back in and parked it in front of where it had been. While I then media blasted the Ranco valve per BigKev's tutorial Wade was reading the 11 pages I'd downloaded last night of the proceedure. Then while I was re-installing the left and right kick panels Wade was de-constructing the Ranco valve. The kick panels required some of the rubber back aluminium insulation I'd installed on the front floor to be trimmed to allow the panels to fit properly. A strip about 10" long and about 1/2" wide was removed from each side and the panels could then be pushed down to line up with the clip holes along the rear edge. By that time Wade had most of the valve apart but required some help to separate the last few parts. While the valve is generally similar to the one in Kev's text it is different. I've had a look at NAPAonline.com as per Kev's text and found the valve kit he used which is for a Ranco H16. Today after blasting the '41's Ranco valve I see its a Ranco Type H.F. Anybody know if they are the similar enough that the H16 kit would work in a H.F.? Irrespective of whether it did or not I was going to order one anyway, but NAPA accepts US postal addresses only so that killed that! By this time I'd run out of time and had to return home for our regular grand-daughterly babysitting duties. Last thing I heard from Rick was "make sure you wash that before going anywhere" On returning home had a call from Wade saying he'd found a patch of oil where the '41 had been sitting and it looked to be in the area of the trans. Checked under the '41 and found a small patch in the vicinity described but couldn't get under to sight where it was actually coming from, will do that tomorrow at the workshop. Talked with Wade and agreed it wasn't a serious leak from the small size of the oil patch, so went ahead with the intention of the '41 carrying out its babysitter transportation services. Also found the current registration sticker and replaced the expired sticker with it. Washed the '41 of almost 6 months of dust, dirt and grease marks, and didn't it look better? Glistening in the afternoon sun and then turning heads on our way north, not too many babysitters arrive in a '41 Packard Coupe! Attach file: (35.59 KB)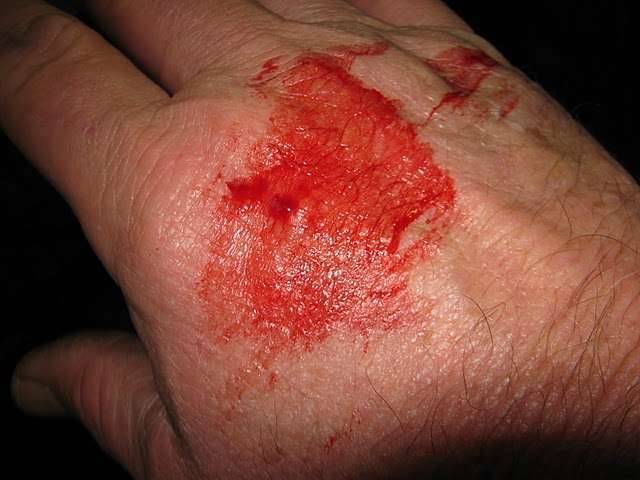 (32.55 KB) (32.55 KB) (42.62 KB) (42.62 KB)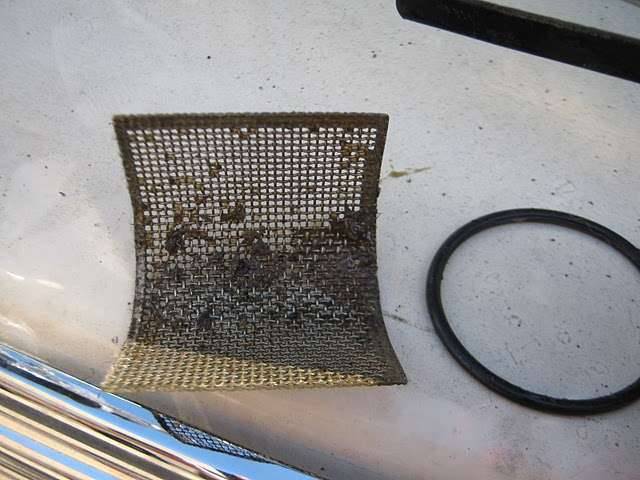 (30.23 KB) (30.23 KB)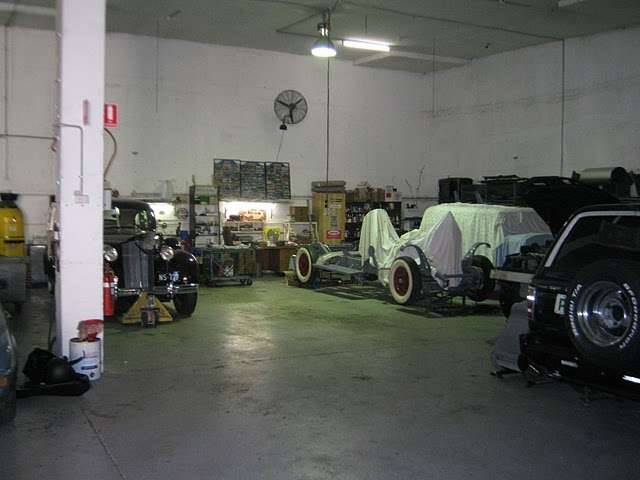 (21.83 KB) (21.83 KB)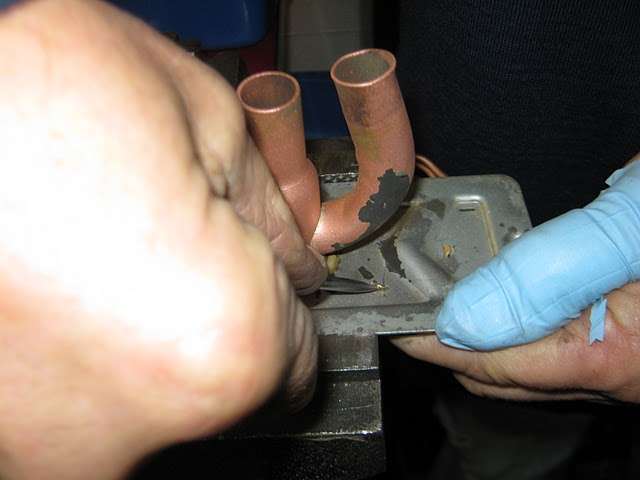 (29.59 KB) (29.59 KB)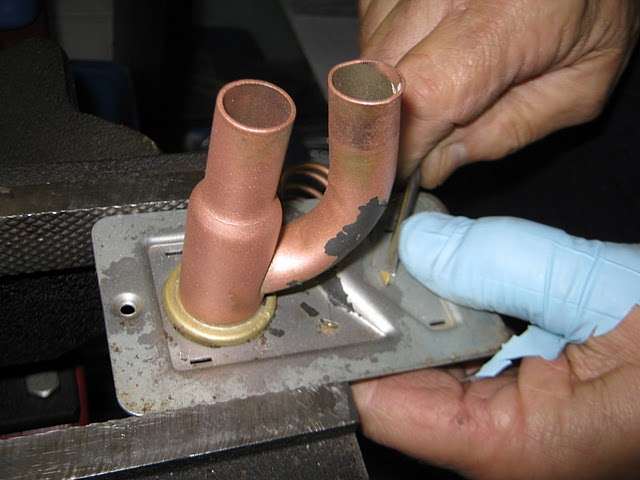 (24.00 KB) (24.00 KB) (34.18 KB) (34.18 KB)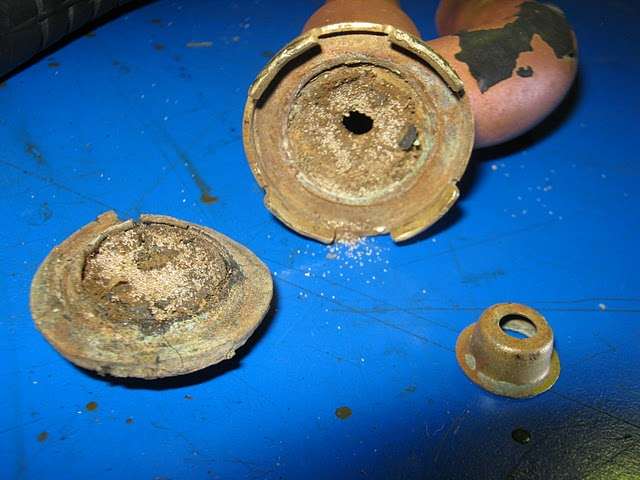 (31.30 KB) (31.30 KB)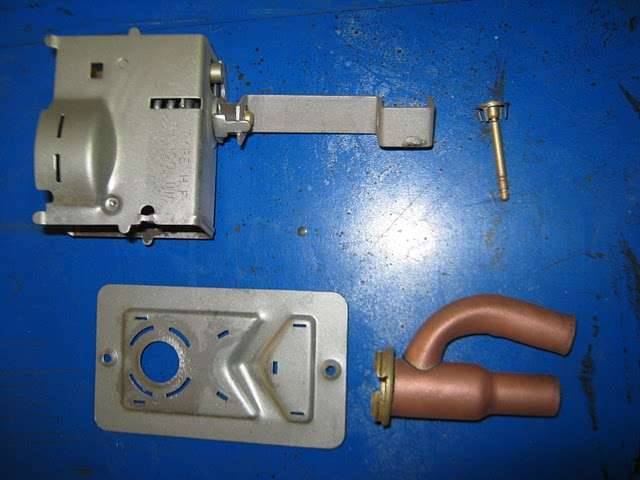 (37.62 KB) (37.62 KB)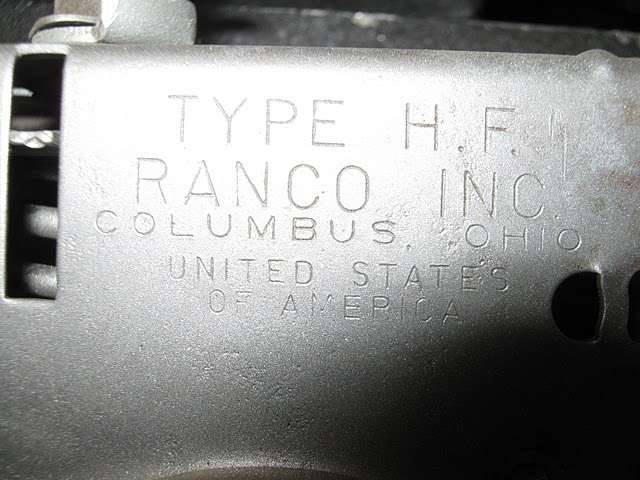 (44.81 KB) (44.81 KB) (41.07 KB) (41.07 KB)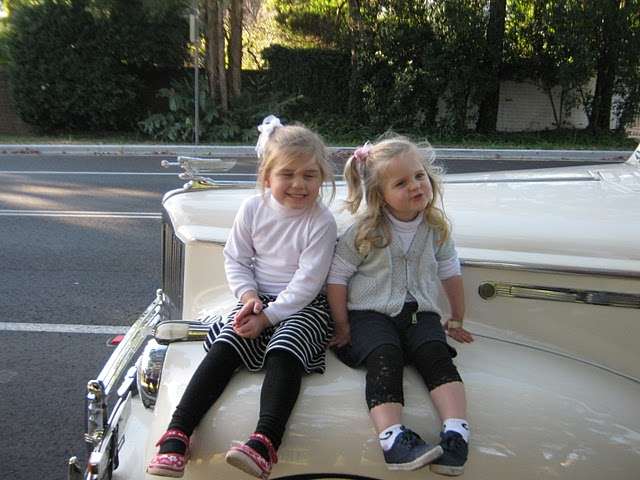
Posted on: 2010/6/8 6:35
|
|||
|
Mal
/o[]o\ ==== Bowral, Southern Highlands of NSW, Australia "Out of chaos comes order" - Nietzsche. 1938 Eight Touring Sedan - SOLD 1941 One-Twenty Club Coupe - SOLD 1948 Super Eight Limo, chassis RHD - SOLD 1950 Eight Touring Sedan - SOLD What's this? Put your Packard in the Packard Vehicle Registry! Here's how! Any questions - PM or email me at ozstatman@gmail.com |
||||
|
||||
Register To PostTopic is Locked


