|
Re: 51Packard's....51 Packard
|
||||
|---|---|---|---|---|
|
Home away from home

|
5-13-11
Weather has been wet lately and the times it has been dry, I've been doing yard work. Getting itchy about the car so I decided to bring something inside to work on. I'm running out of projects I can do inside so I picked the radio. My problems are: years ago, I would get static out of it, and now it does not work at all. I can not change stations with the knob or the buttons. A quick test shows that the fuse has blown and the power wire is pretty bad. That will need to be replaced. The inability to change the stations seems to come from a lack of lubrication. I don't think the button released fully and is acting like a clutch, keeping the knob from moving the station selector. I will have to take it apart and get some lube in there. Attach file:  (125.28 KB) (125.28 KB) (137.40 KB) (137.40 KB)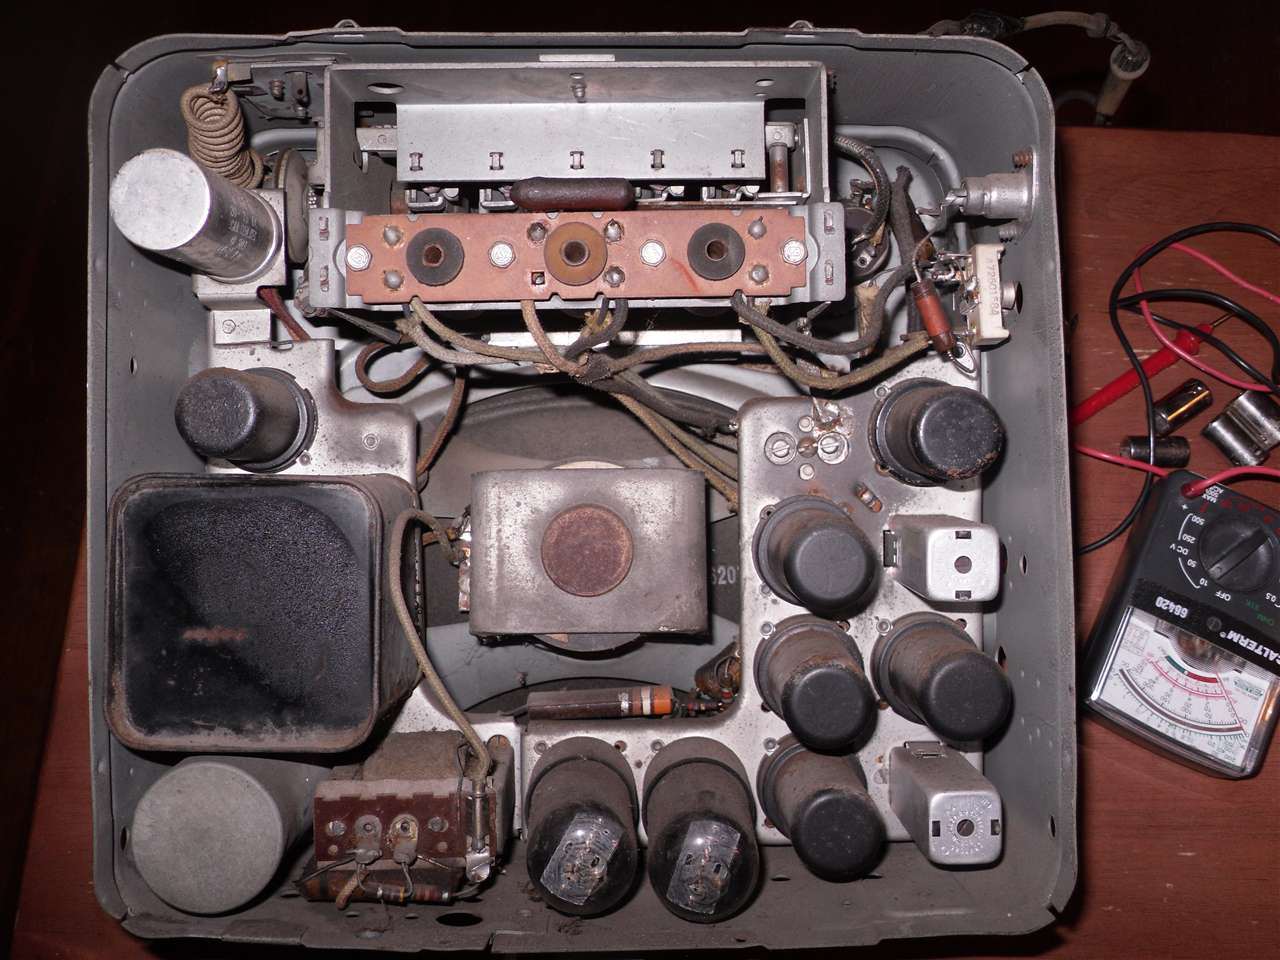 (54.44 KB) (54.44 KB) (89.42 KB) (89.42 KB)
Posted on: 2011/5/14 0:47
|
|||
|
[url=h
|
||||
|
||||
|
Re: 51Packard's....51 Packard
|
||||
|---|---|---|---|---|
|
Home away from home
|
I don't know if this is the correct way to get into the head of the radio, but this is how I did it.
First I removed the knobs by loosening the set screw. The fine tuner on the left side came off by gently prying it up. Under that is a thin flat nut that is removed to get the chrome dish shaped back piece off. This exposes a long nut on each side that is removed. Next I removed the bolts around the sides of the radio, closest to the front. I only removed the ones on the sides, not the ones in the front. The front panel holds the speaker. I propped it up against the frame of the radio by the back of the speaker so I would not pull any wires out. Attach file: (106.05 KB)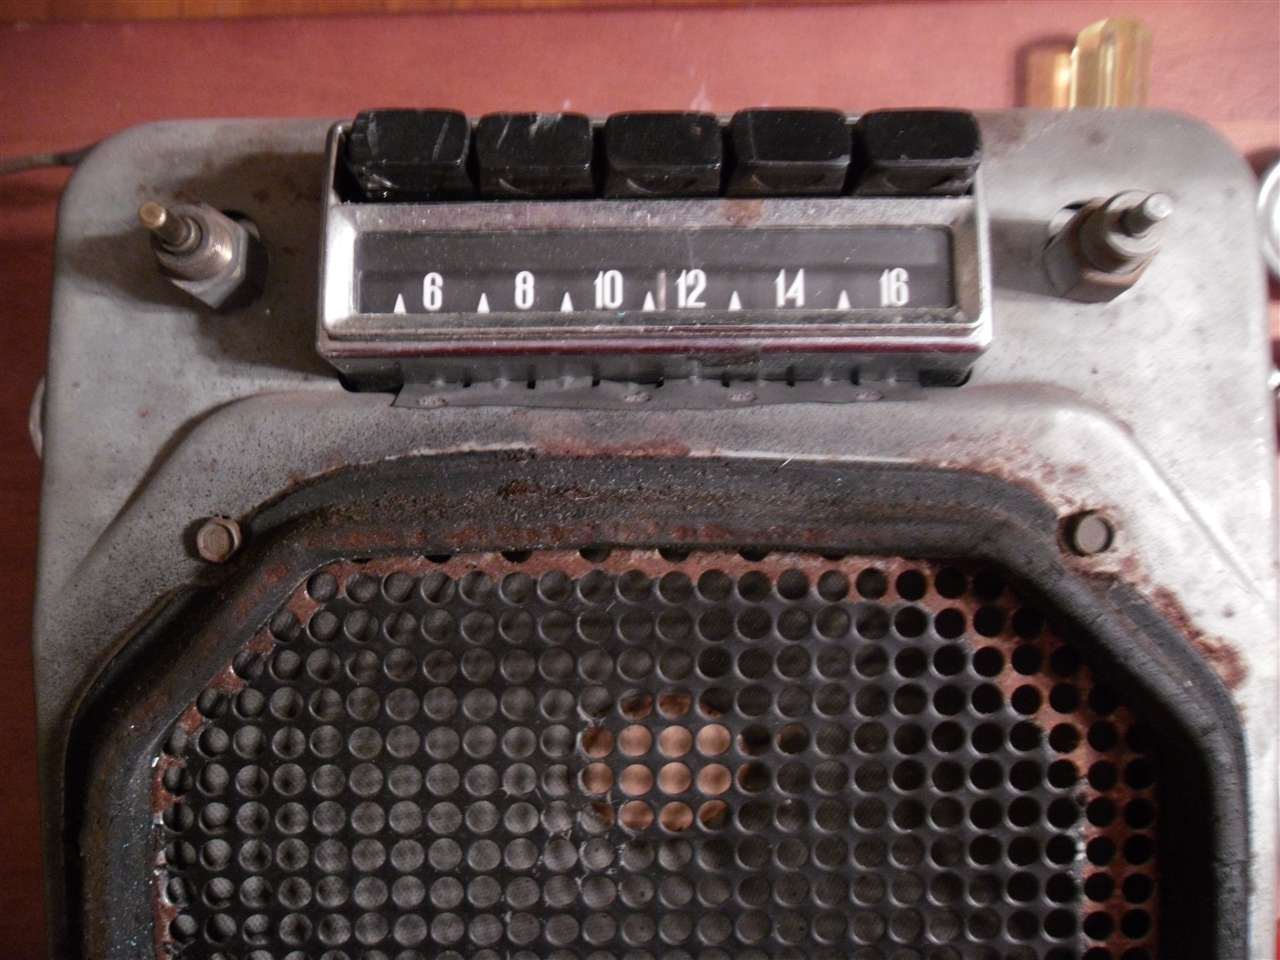 (122.49 KB) (122.49 KB)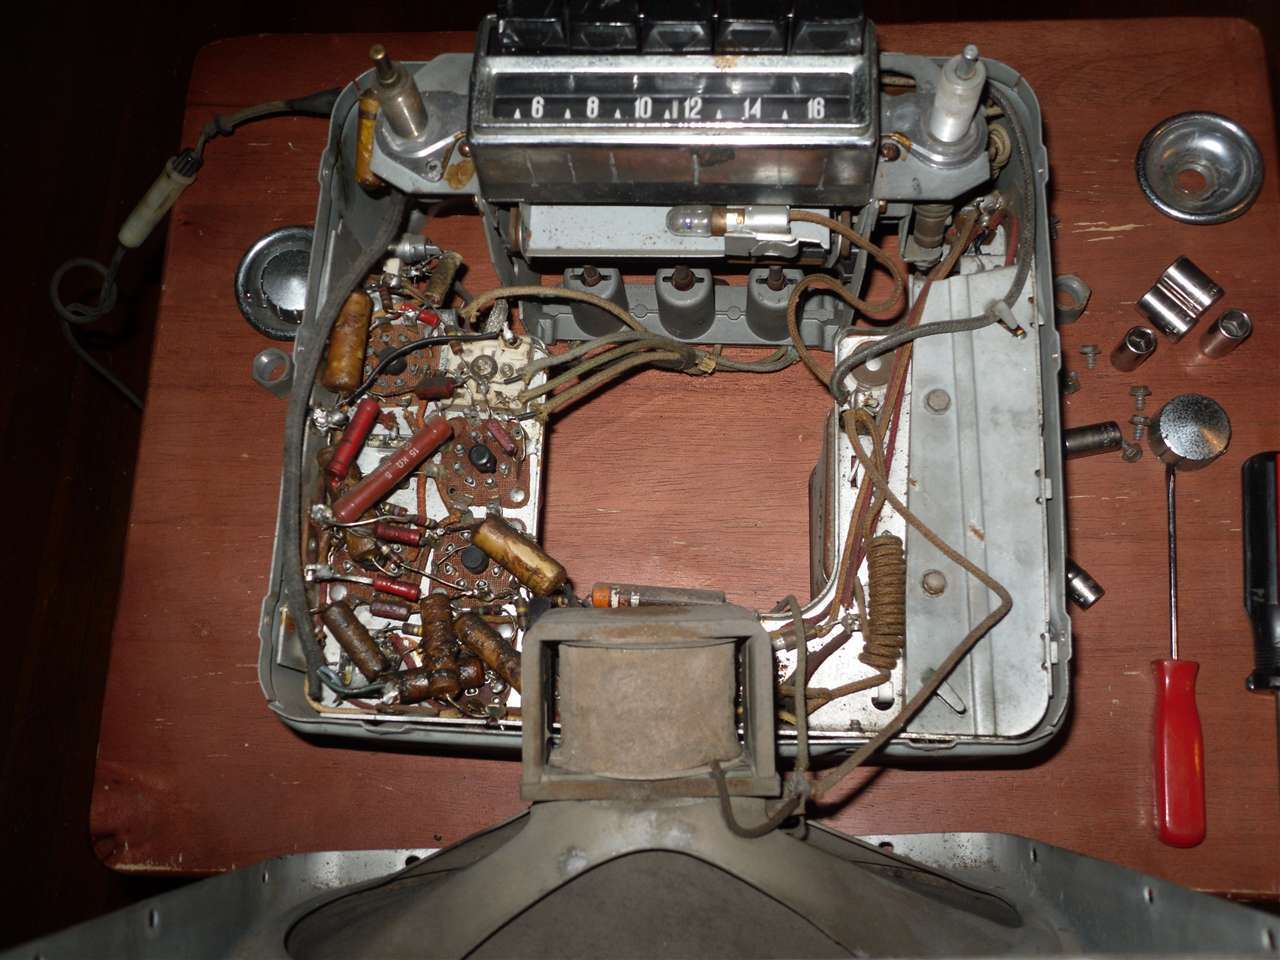
Posted on: 2011/5/14 0:55
|
|||
|
[url=h
|
||||
|
||||
|
Re: 51Packard's....51 Packard
|
||||
|---|---|---|---|---|
|
Forum Ambassador

|
This PackardInfo Radio Schematics and Diagrams references 416387, may help?
Posted on: 2011/5/14 1:01
|
|||
|
Mal
/o[]o\ ====  Bowral, Southern Highlands of NSW, Australia "Out of chaos comes order" - Nietzsche. 1938 Eight Touring Sedan - SOLD 1941 One-Twenty Club Coupe - SOLD 1948 Super Eight Limo, chassis RHD - SOLD 1950 Eight Touring Sedan - SOLD What's this?  Put your Packard in the Packard Vehicle Registry! Here's how! Any questions - PM or email me at ozstatman@gmail.com |
||||
|
||||
|
Re: 51Packard's....51 Packard
|
||||
|---|---|---|---|---|
|
Home away from home
|
Next I removed some more flat thin nuts on the volume and station selector stalks and removed the front panel that surrounds the buttons and houses the station selector glass.
After that, I removed two screws holding the black background piece for the station selector indicator and removed it, exposing a backing plate that the indicator uses as a pivot point. I removed a bolt on each side of this plate to loosen it. Then I found a spring type clip that attached to a pin the the scissor portion of the indicator mechanism. I removed this clip and freed up the mechanism enough so that it could be moved to the left and out of the way. This exposed the preset button mechanisms. Now I have to figure out how to clean these and lube them. I'm thinking of using electrical contact spray, but I am concerned over spray would effect the vacuum tubes. Not sure. For lube, maybe some light grease. I think oil would get dirty and gum up quickly. Attach file: (89.08 KB) (76.48 KB) (76.48 KB)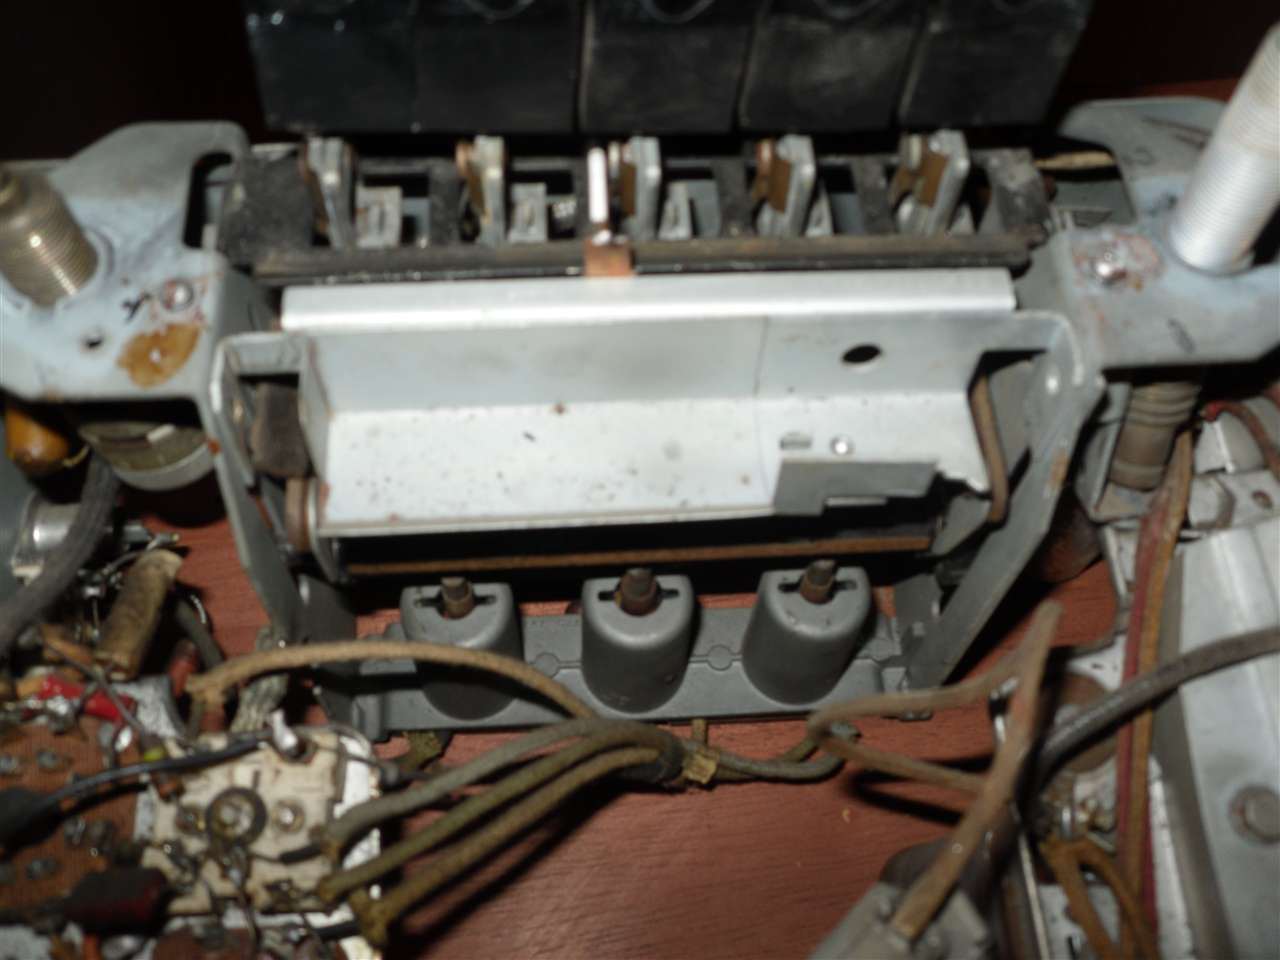 (64.99 KB) (64.99 KB)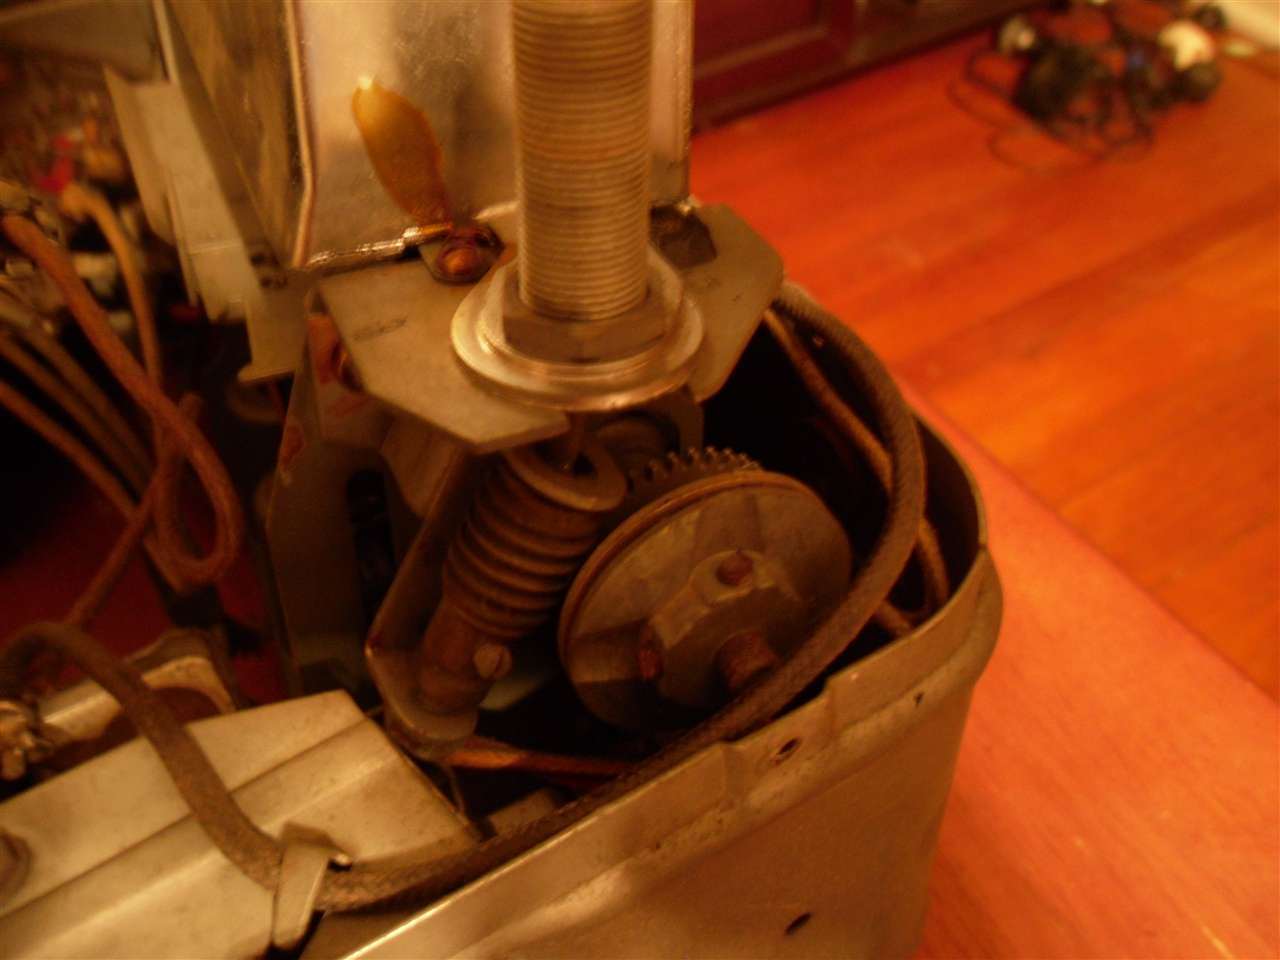 (68.09 KB) (68.09 KB)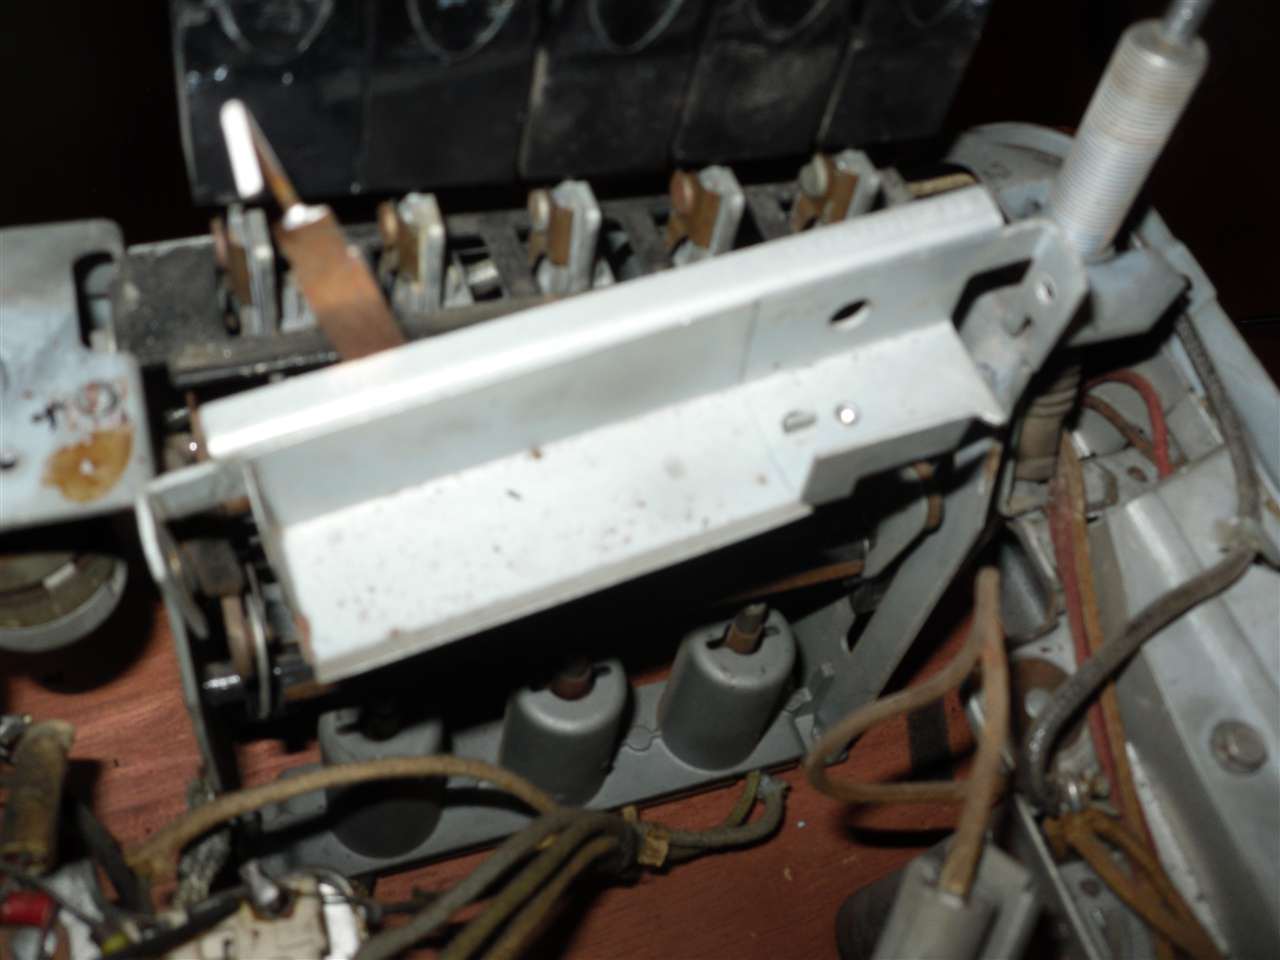 (62.15 KB) (62.15 KB) (54.53 KB) (54.53 KB)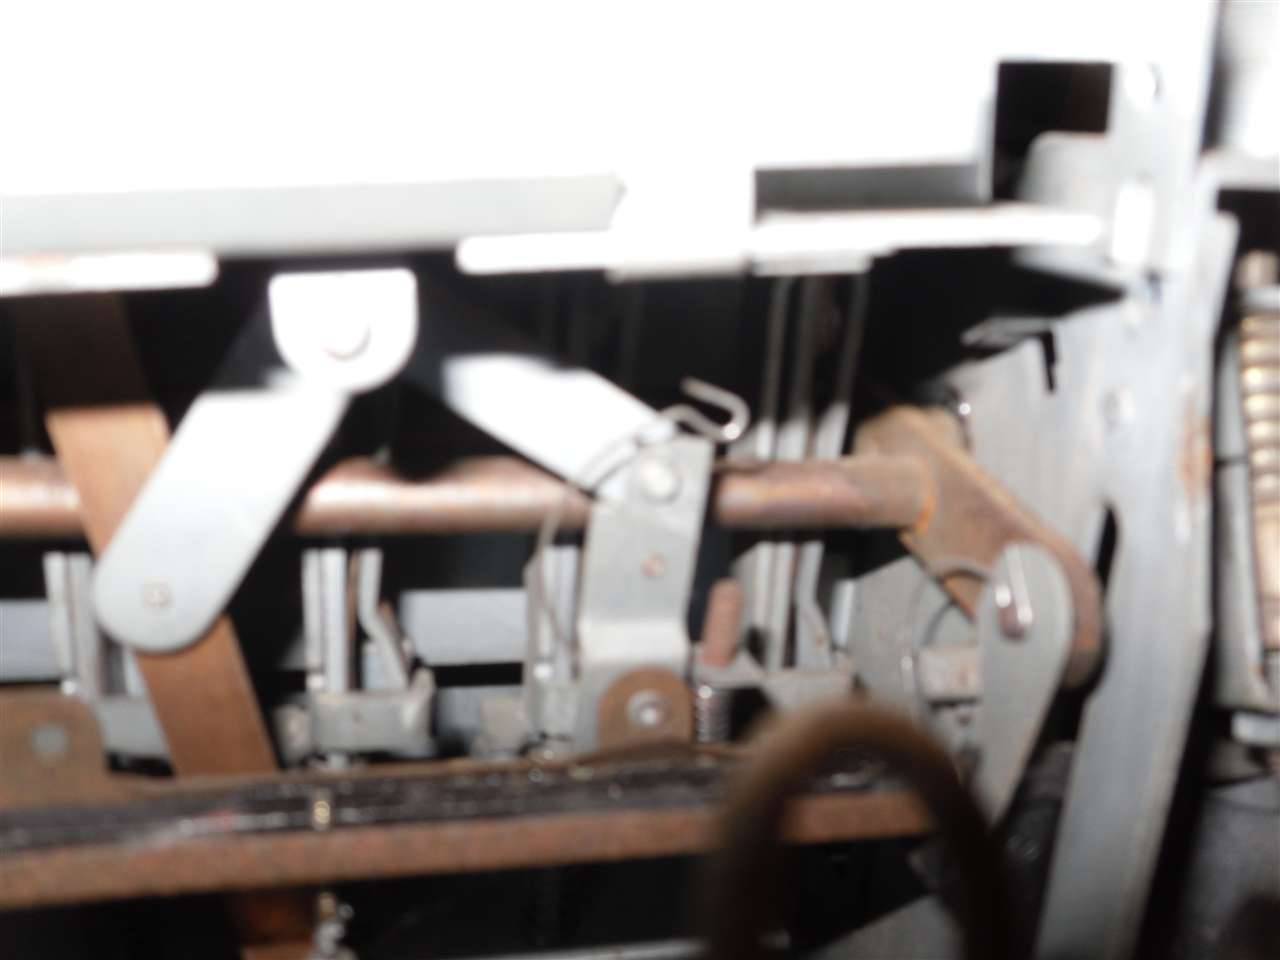 (102.59 KB) (102.59 KB)
Posted on: 2011/5/14 1:06
|
|||
|
[url=h
|
||||
|
||||
|
Re: 51Packard's....51 Packard
|
||||
|---|---|---|---|---|
|
Home away from home

|
I'm enjoying your blog '51.
Back to the welding - you mentioned the copper pipe heat sink. Good idea. Suggest using a bit of heavy gauge (14g?) copper sheet instead of the pipe, clamped tightly under the join, it will make better contact with the sheet and move surplus heat away better. I got some from a scrap metal merchant cheap. I have a lot of burn-throughs doing butt welds on floors etc. Gun angle seems to be almost as important as amps and volts so keep it well angled. I can't get a decent weld very easily without the gas either, which helps a lot with getting the puddle to flow and reducing spatter. Maybe instead of butt welding you could do an overlap or recessed overlap? Less chance of burn through and adds a bit of extra rigidity to the floor if you can't swage it. Less hassles with cutting exactly the right length also.
Posted on: 2011/5/14 7:48
|
|||
|
1951 Packard Club Sedan | [url=ht
|
||||
|
||||
|
Re: 51Packard's....51 Packard
|
||||
|---|---|---|---|---|
|
Home away from home
|
You were after a pic of the under-trunk area near the filler pipe . . . here's one from my '51.
Hope it's what you wanted, if not I'll go out and get under Packy and take a few shots for you. It's always fun getting under Packy and marveling at how much work I have yet to do. BTW, your first welds are better than my first welds were! 
Posted on: 2011/5/14 8:17
|
|||
|
1951 Packard Club Sedan | [url=ht
|
||||
|
||||
|
Re: 51Packard's....51 Packard
|
||||
|---|---|---|---|---|
|
Home away from home
|
Thanks for your suggestions Larry. I had thought about doing an overlap joint, but from what I have read, that will trap moisture and possibly cause rust problems later.
I'm going to try changing a bunch of things next time I can weld. The angle is a good suggestion. At least I haven't given up and filled it with fiberglass (yet) LOL! By the way, I'm enjoying your blog too. I love your dedication to the eradication of all traces of rust on your car! The pics I'm looking for are the piece of the floor between the spare wheel well and fender from inside the trunk. Pics of the inside of the trunk along the back filler panel (where the back up lights mount), and any pics under the car showing bracing. I know I'll never get it to look factory fresh again, but if it looks acceptable with the trunk open and I put similar to factory bracing between the fender and trunk floor so it is structurally sound, I will be happy.
Posted on: 2011/5/14 13:40
|
|||
|
[url=h
|
||||
|
||||
|
Re: 51Packard's....51 Packard
|
||||
|---|---|---|---|---|
|
Home away from home
|
OK, the radio station selector mechanism is cleaned and lubed. To clean it, I made some protective shields out of aluminum foil and sprayed it with contact cleaner. I couldn't think of a way to get the grease down in the mechanism so I used some lightweight oil instead. Everything is working much better. The buttons move the station selector when pressed and the station selector knob now tunes the stations.
Before I put it back together I was wondering if someone knows the answers to these questions. 1. The two left buttons rub against each other at the bottom. If I press one of the buttons, sometimes it moves the other one with it. Can these be adjusted or are they probably bent? 2. There are two pieces of rectangular felt that came out. They measure approximately 1/2" x 1". Any idea where they go?
Posted on: 2011/5/15 18:14
|
|||
|
[url=h
|
||||
|
||||
|
Re: 51Packard's....51 Packard
|
||||
|---|---|---|---|---|
|
Forum Ambassador

|
Probably bent--do the buttons pull out and push in with about equal feel or is one loose compared to other? Is the lock pin in the second button shaft assy fully engaged so it's support is not kicked out a bit. There is an illustration of the mechanism in SC 24-10https://www.packardinfo.com/xoops/html/downloads/SC/SC-VOL24NO10.pdf which gives an overall view of how things are laid out with an operational description. It might be of some use.
The felts are probably cushions. On the mechanism which rotates via the button cams, or possibly the ends of needle lever and position mechanism look carefully for a trace of glue or anything which comes extremely close and would hit if there was some inertia behind it.
Posted on: 2011/5/15 18:57
|
|||
|
Howard
|
||||
|
||||


