|
Re: burned up ammeter 1941 160 coupe
|
||||
|---|---|---|---|---|
|
Forum Ambassador
|
There were two 41 senior ammeters and difference is a bronze or a silver face. I believe the guts were the same for all even on the juniors except there were 5 different color faces used on those models.
Don't believe the shop manual is going to give you much guidance on dash removal but perhaps someone on the forum has done it and can help.
Posted on: 2019/7/4 20:17
|
|||
|
Howard
|
||||
|
||||
|
Re: burned up ammeter 1941 160 coupe
|
||||
|---|---|---|---|---|
|
Home away from home
|
Hi Jim,
Sorry to hear about your ammeter woes. I am only weighing in here because I have replaced the ammeter in my '39 Junior car recently and also, I have an extra ammeter that came out of a '41. Not sure if it would be any use to you as I believe it came from a 110/120, but if you're stuck, we could exchange a couple of pics and see if it would work. Also, removing your ammeter (again, if it's the same as the Junior cars) is quite simple and does not require removal of the dash, just the 2-gauge cluster that the ammeter is in (ammeter/gas gauge) I would submit that if your wiring burned up, it was from some kind of short or ulterior wiring issue, as the ammeters in those cars are made to withstand significant amperage. Someone more knowledgeable than I will likely weigh in here and clarify this point, but, in my opinion, if the ammeter is functioning properly, there should be no need to install a shunt to step down the load. PM me if you get stuck on a replacement and I can give you more detail on the gauge I have. Good luck. Chris
Posted on: 2019/7/4 21:44
|
|||
|
'If you think you can, or you think you can't - you're right!' Henry Ford.
1939 Packard Six, Model 1700 |
||||
|
||||
|
Re: burned up ammeter 1941 160 coupe
|
||||
|---|---|---|---|---|
|
Forum Ambassador
|
G'day JimRosenthal,
 to PackardInfo, and I invite you to include your '41 160 Coupe in the Packard Owner's Registry to PackardInfo, and I invite you to include your '41 160 Coupe in the Packard Owner's Registry
Posted on: 2019/7/4 22:47
|
|||
|
Mal
/o[]o\ ====  Bowral, Southern Highlands of NSW, Australia "Out of chaos comes order" - Nietzsche. 1938 Eight Touring Sedan - SOLD 1941 One-Twenty Club Coupe - SOLD 1948 Super Eight Limo, chassis RHD - SOLD 1950 Eight Touring Sedan - SOLD What's this?  Put your Packard in the Packard Vehicle Registry! Here's how! Any questions - PM or email me at ozstatman@gmail.com |
||||
|
||||
|
Re: burned up ammeter 1941 160 coupe
|
||||
|---|---|---|---|---|
|
Just popping in

|
Thanks to all who commented!! I figured we would have to take it all apart because the window is now opaque and I will have to determine how to clean it or replace the glass or plastic. We'll look at it again. I may indeed need your extra ammeter, Chris- I'll call Merritt's today and see if they have one, if not, perhaps I can buy yours. First I have to see what we have in there. Also we need to check the charging system; someone pointed out it may be overcharging and that's why it burnt up. As to the shunt, sounds like it's not needed, but it would be good to know why this happened in the first place.
Posted on: 2019/7/5 6:08
|
|||
|
||||
|
Re: burned up ammeter 1941 160 coupe
|
||||
|---|---|---|---|---|
|
Home away from home
|
I would almost think it would have to have a short in the wiring harness someplace after the amp meter. A resistance check should show if there is.
Posted on: 2019/7/5 8:41
|
|||
|
||||
|
Re: burned up ammeter 1941 160 coupe
|
||||
|---|---|---|---|---|
|
Just popping in

|
I agree. There would have to be a short, and all that current would have to go through the ammeter to burn it up. Still trying to figure out how to get it out of there to see what happened.
Posted on: 2019/7/5 8:47
|
|||
|
||||
|
Re: burned up ammeter 1941 160 coupe
|
||||
|---|---|---|---|---|
|
Forum Ambassador
|
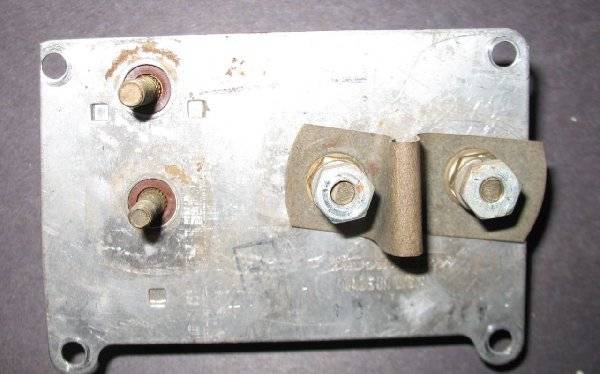
The gauges are mounted in pairs to a mounting plate which screws to the cluster. I don't know how much congestion there is behind he dash on a 41 but in other cars all was accessed from behind -- generally with a bit of contortion and flexing of reluctant to bend joints required.
Here is a photo of the Clipper mounting and I believe the conventional body was essentially the same but because of the gauges being stacked on each end of the speedo, a vertical layout for the mounting plates.
Posted on: 2019/7/5 8:58
|
|||
|
Howard
|
||||
|
||||
|
Re: burned up ammeter 1941 160 coupe
|
||||
|---|---|---|---|---|
|
Home away from home

|
This may not help very much because it's from a '40 160 . . . I know the '41 dash seems very different . . .
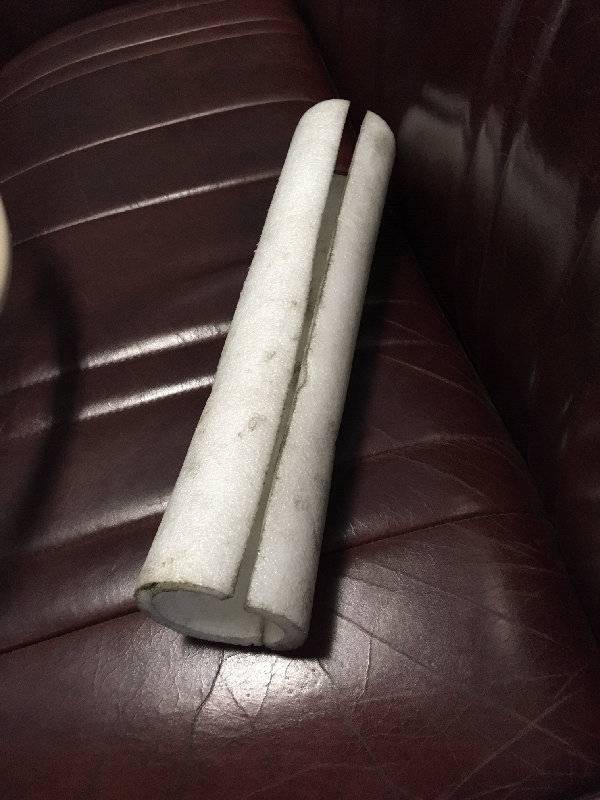
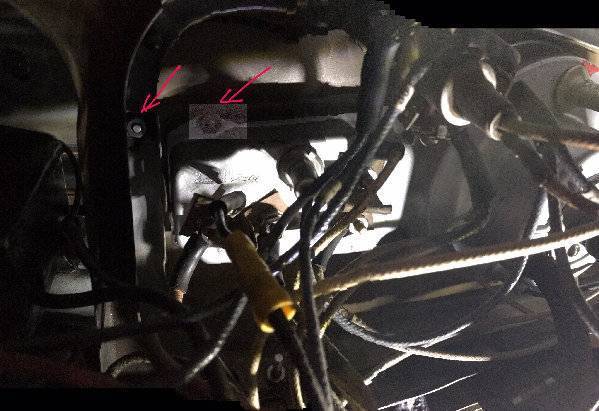
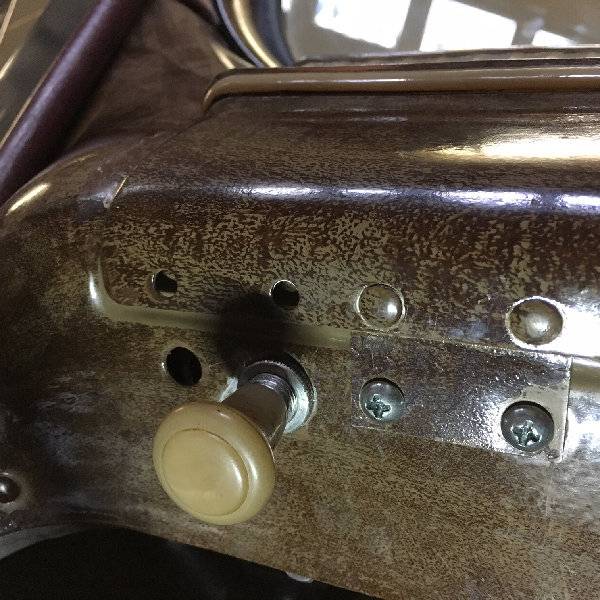
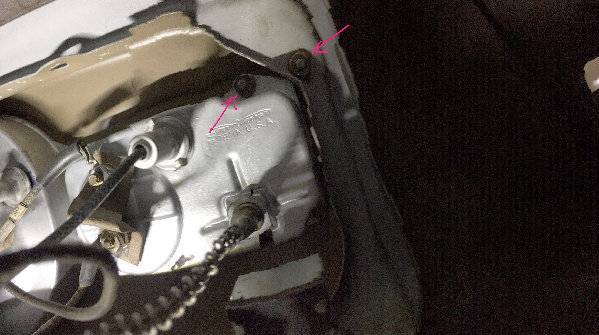
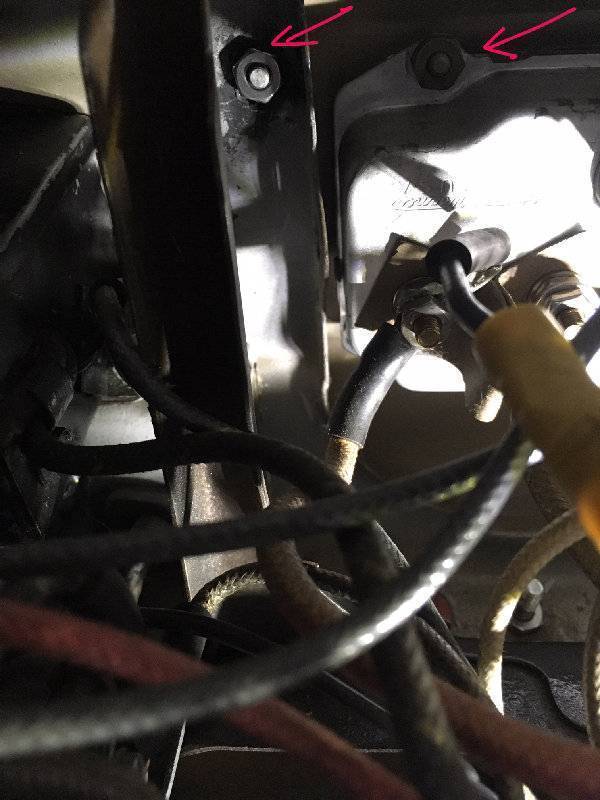
but when I work under the dash, for which I know I will spend a few extra days in purgatory for, I first remove the bottom seat cushion. I place a 2 ft section of pipe insulation over the forward section of the seat frame to cushion my back with a pillow on top. I stick 2 old pillows against the firewall to cushion my head and help keep it propped up. I lie across the floor looking up at the underside of the dash. My feet go out the passenger door, or sometimes up with my legs against the upper seat cushion. This works well dealing with the glove box area, wipers or center section items such as light switch. Other items like the starter switch, I remove the center/radio cover panel by pulling out the ashtray to access the nuts holding it on in its upper corners. I pull off the radio knobs and unscrew the radio retaining nuts. I push the radio toward the firewall and up. Then I can see the front row switches. Trying to access the backside of the instrument panel from underneath is more of a challenge because of the steering wheel, column, and support being in the road, not to mention the brake and clutch pedal behind your head. Coming home from my recent trip, the gas gauge needle was bouncing. Yesterday I inspected for a short, got my fingers on the gas gauge wire and wiggled them which made the needle flip and flop. Loose connection. I had to loosen the nuts retaining the instrument panel section of the dash. On my car there are 2 sets of 2 screws along the bottom edge of the dash. These can be easy to get out, but a bear for me to get back in. I replaced them with 1" screws I could push up and feel the ends of, so I could get the nuts on easily after. A little more twisting, but fewer days you know where. I only have two other retaining nuts ( I may have given up trying to replace others), one on left, which I can feel by putting a knee on the running board and reaching up above the handbrake handle, to the left of the upper left temp/oil gauge nut. The other I can reach by putting a 3/8" wrench on a diagonal down through the ash tray hole with my right hand, then sticking my fingers through the leftmost open segment where the radio and maplight go. The nut is just to the left of that at radio level and I use my fingers to hold the backside of the wrench against that nut. In the photos, one arrow points at one of the nuts retaining the actual instrument, which eventually have to come off to remove the instrument completely from the car. The other arrow points to a nut retaining the whole instrument panel...the ones I have to take off to access the instruments. I also disconnect the overdrive indicator/panel light control by pulling off the top, unscrewing the bezel, and pushing the switch towards the firewall. This may not be absolutely necessary, but it allows the instrument panel to come toward you farther and provides better access to the ammeter/gas gauge. Sorry I didn't take photos while everything was apart yesterday. You could PM flackmaster to see if he has one. If not he can recommend someone.
Posted on: 2019/7/5 13:04
|
|||
|
||||
|
Re: burned up ammeter 1941 160 coupe
|
||||
|---|---|---|---|---|
|
Just popping in

|
MUCH obliged to all who have posted to help. I will report back with diagnosis and progress.
Posted on: 2019/7/5 15:45
|
|||
|
||||

 (95.38 KB)