|
Carburetor WCFB 4-Barrel
|
||||
|---|---|---|---|---|
|
Home away from home

|
My next project, which I've been avoiding, is rebuilding my carb. I've been avoiding it because my car is running well and I don't want to mess it up. But I want to get seals, pump, etc in that are compatiable with modern fuels.
Any words of wisdom as I tackle this project? I'm thinking it should be pretty straight forward, and that as long as everything is set/adjusted correctly I should be good to go. I have this good step by step video from Mike's Carburetor. youtu.be/CoxRuNKCW_w?si=IDZsjVhFTlyrpXe_ 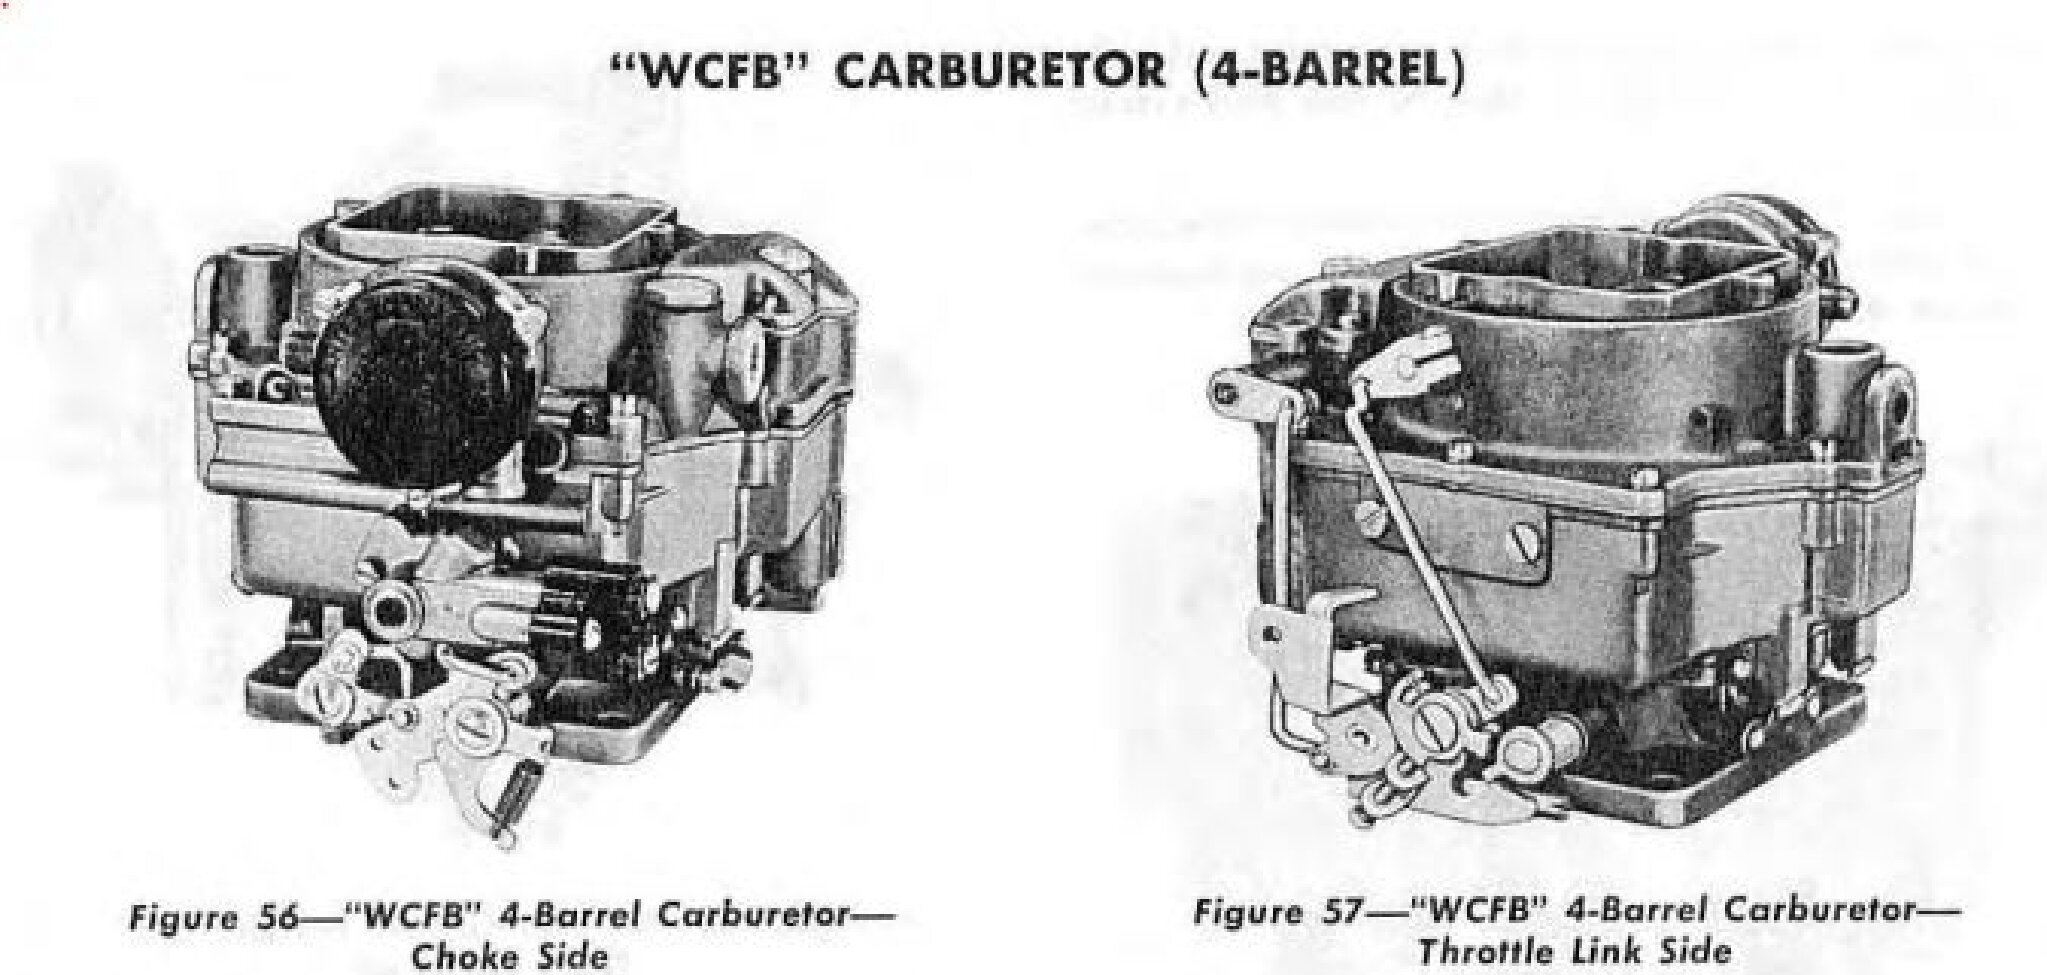
Posted on: 2024/9/7 9:28
|
|||
|
||||
|
Re: Carburetor WCFB 4-Barrel
|
||||
|---|---|---|---|---|
|
Home away from home

|
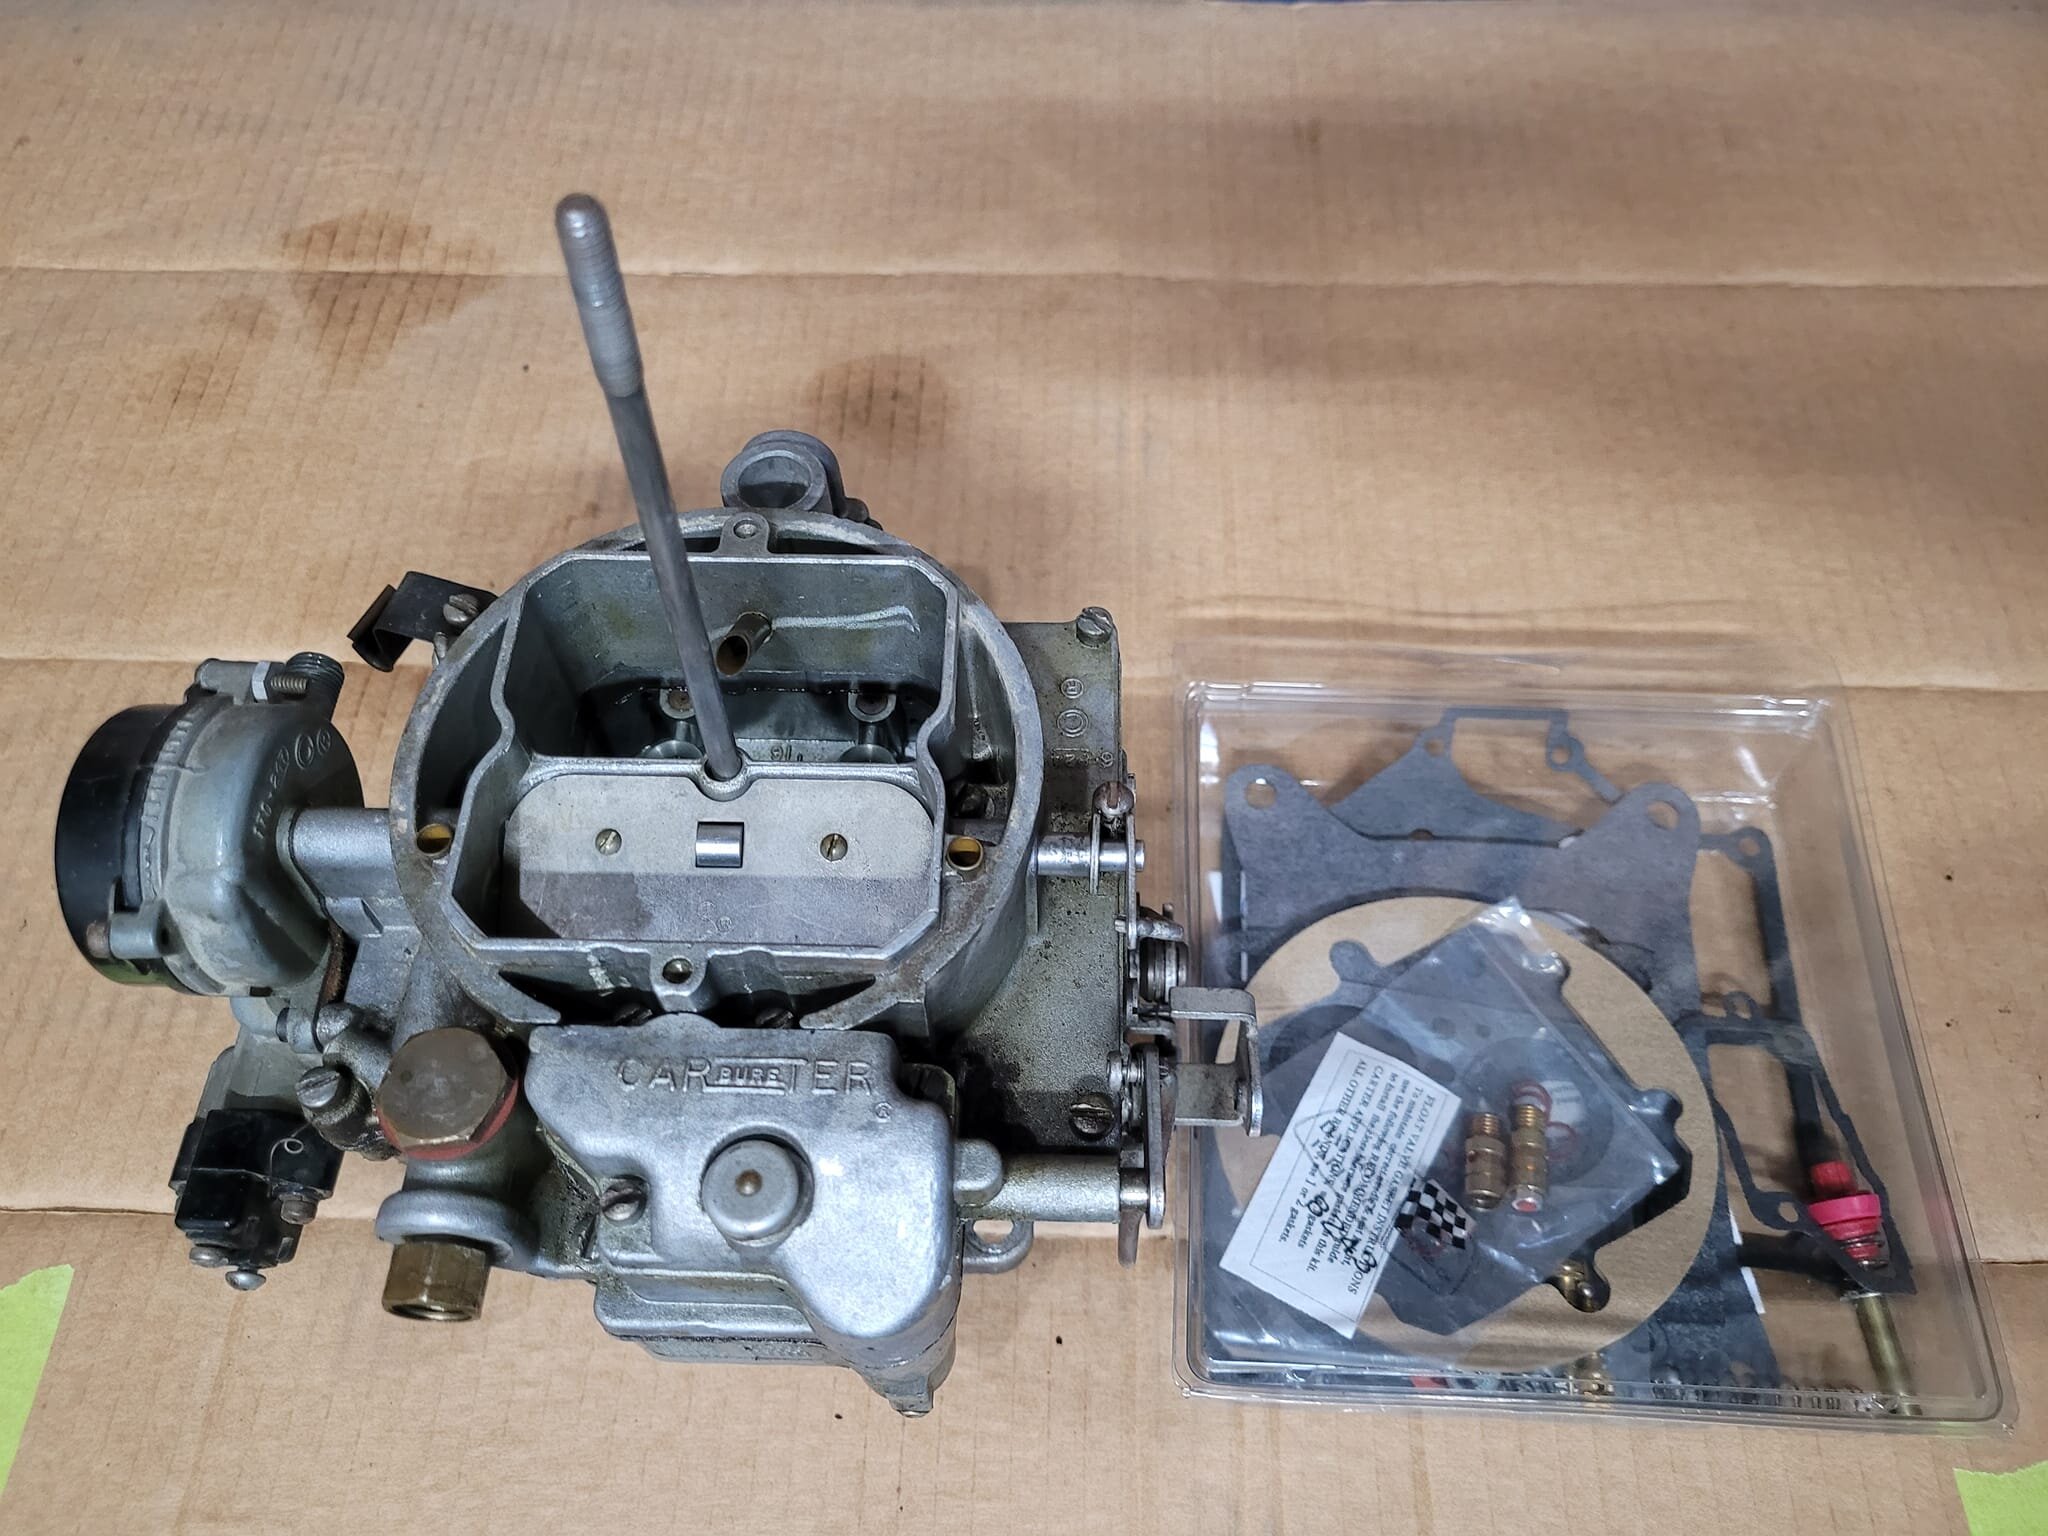
I rebuilt the carb for my 400. Started on a dime when I reinstalled it, with no leaks, but I still need to tune it up. It's not too hard if you have some basic aptitude. Lots of small parts though.
Don't bend the floats against the valves. Support them fully or remove them when making adjustments, then reinstall and check. Check for pin holes by dipping them in hot water for a few seconds. Obviously when reinstalling the air horn, you want to tighten over several passes. Most recommend center out to help relieve the gasket.
Posted on: 2024/9/7 9:35
|
|||
|
1955 400 | Registry | Project Blog
1955 Clipper Deluxe | Registry | Project Blog 1955 Clipper Super Panama | Registry Email (Parts/service inquiries only, please. Post all questions on the forum.) service@ultramatic.info |
||||
|
||||
|
Re: Carburetor WCFB 4-Barrel
|
||||
|---|---|---|---|---|
|
Webmaster

|
With anything I am taking apart for the first time, I always take an ungodly amount of pictures. Screw out, take a picture showing the screw size and the hole it went I to. Repeat.
This really helped when I had things apart and walked for days weeks, months...etc. Also everything goes into labeled ziplock bags if being stored for awhile. Then to reassemble, I can just look at the pictures in reverse order. Also if you have something like a cafeteria tray, or your wife's finest cookie sheet (any tray with a lip), it helps to contain the parts. Especially check balls that tend to roll away when you're not looking. If you haven't already, buy a one of those gallon cans of carb chem dip. The one that comes with the little basket inside. It works a jiffy to soak carb bodies and other parts to remove varnish from the inside of small internal passages. Sometimes the sheets that come with the rebuild kits are better than the general Packard Factory Service manuals as far as details. Also if you have access to a vintage Motor Manual or Glenn's Manual they tend to have better details as well. Finally, if you haven't downloaded the Packard Service Man's Training Manual for your type of Carb. They cover a lot of info, and theory so understand what does what.
Posted on: 2024/9/7 10:05
|
|||
|
-BigKev
1954 Packard Clipper Deluxe Touring Sedan -> Registry | Project Blog 1937 Packard 115-C Convertible Coupe -> Registry | Project Blog |
||||
|
||||
|
Re: Carburetor WCFB 4-Barrel
|
||||
|---|---|---|---|---|
|
Home away from home
|
I see you have already found Mike's Carburetor on youtube. He has an excellent video about correctly setting the metering rods. www.youtube.com/watch?v=4QgjJYjErZ8
It took me less than 15 minutes with a screwdriver to solve a couple issues with mine. I was running too rich.
Posted on: 2024/9/7 11:35
|
|||
|
||||
|
Re: Carburetor WCFB 4-Barrel
|
||||
|---|---|---|---|---|
|
Home away from home
|
Great feedback, thank you everyone!
Pictures and maybe even a video on this project! I'll keep you posted, I'm thinking of getting started on this after work this evening.
Posted on: 2024/9/7 14:51
|
|||
|
||||
|
Re: Carburetor WCFB 4-Barrel
|
||||
|---|---|---|---|---|
|
Home away from home
|
Let the games begin!
 Lots of little pieces! 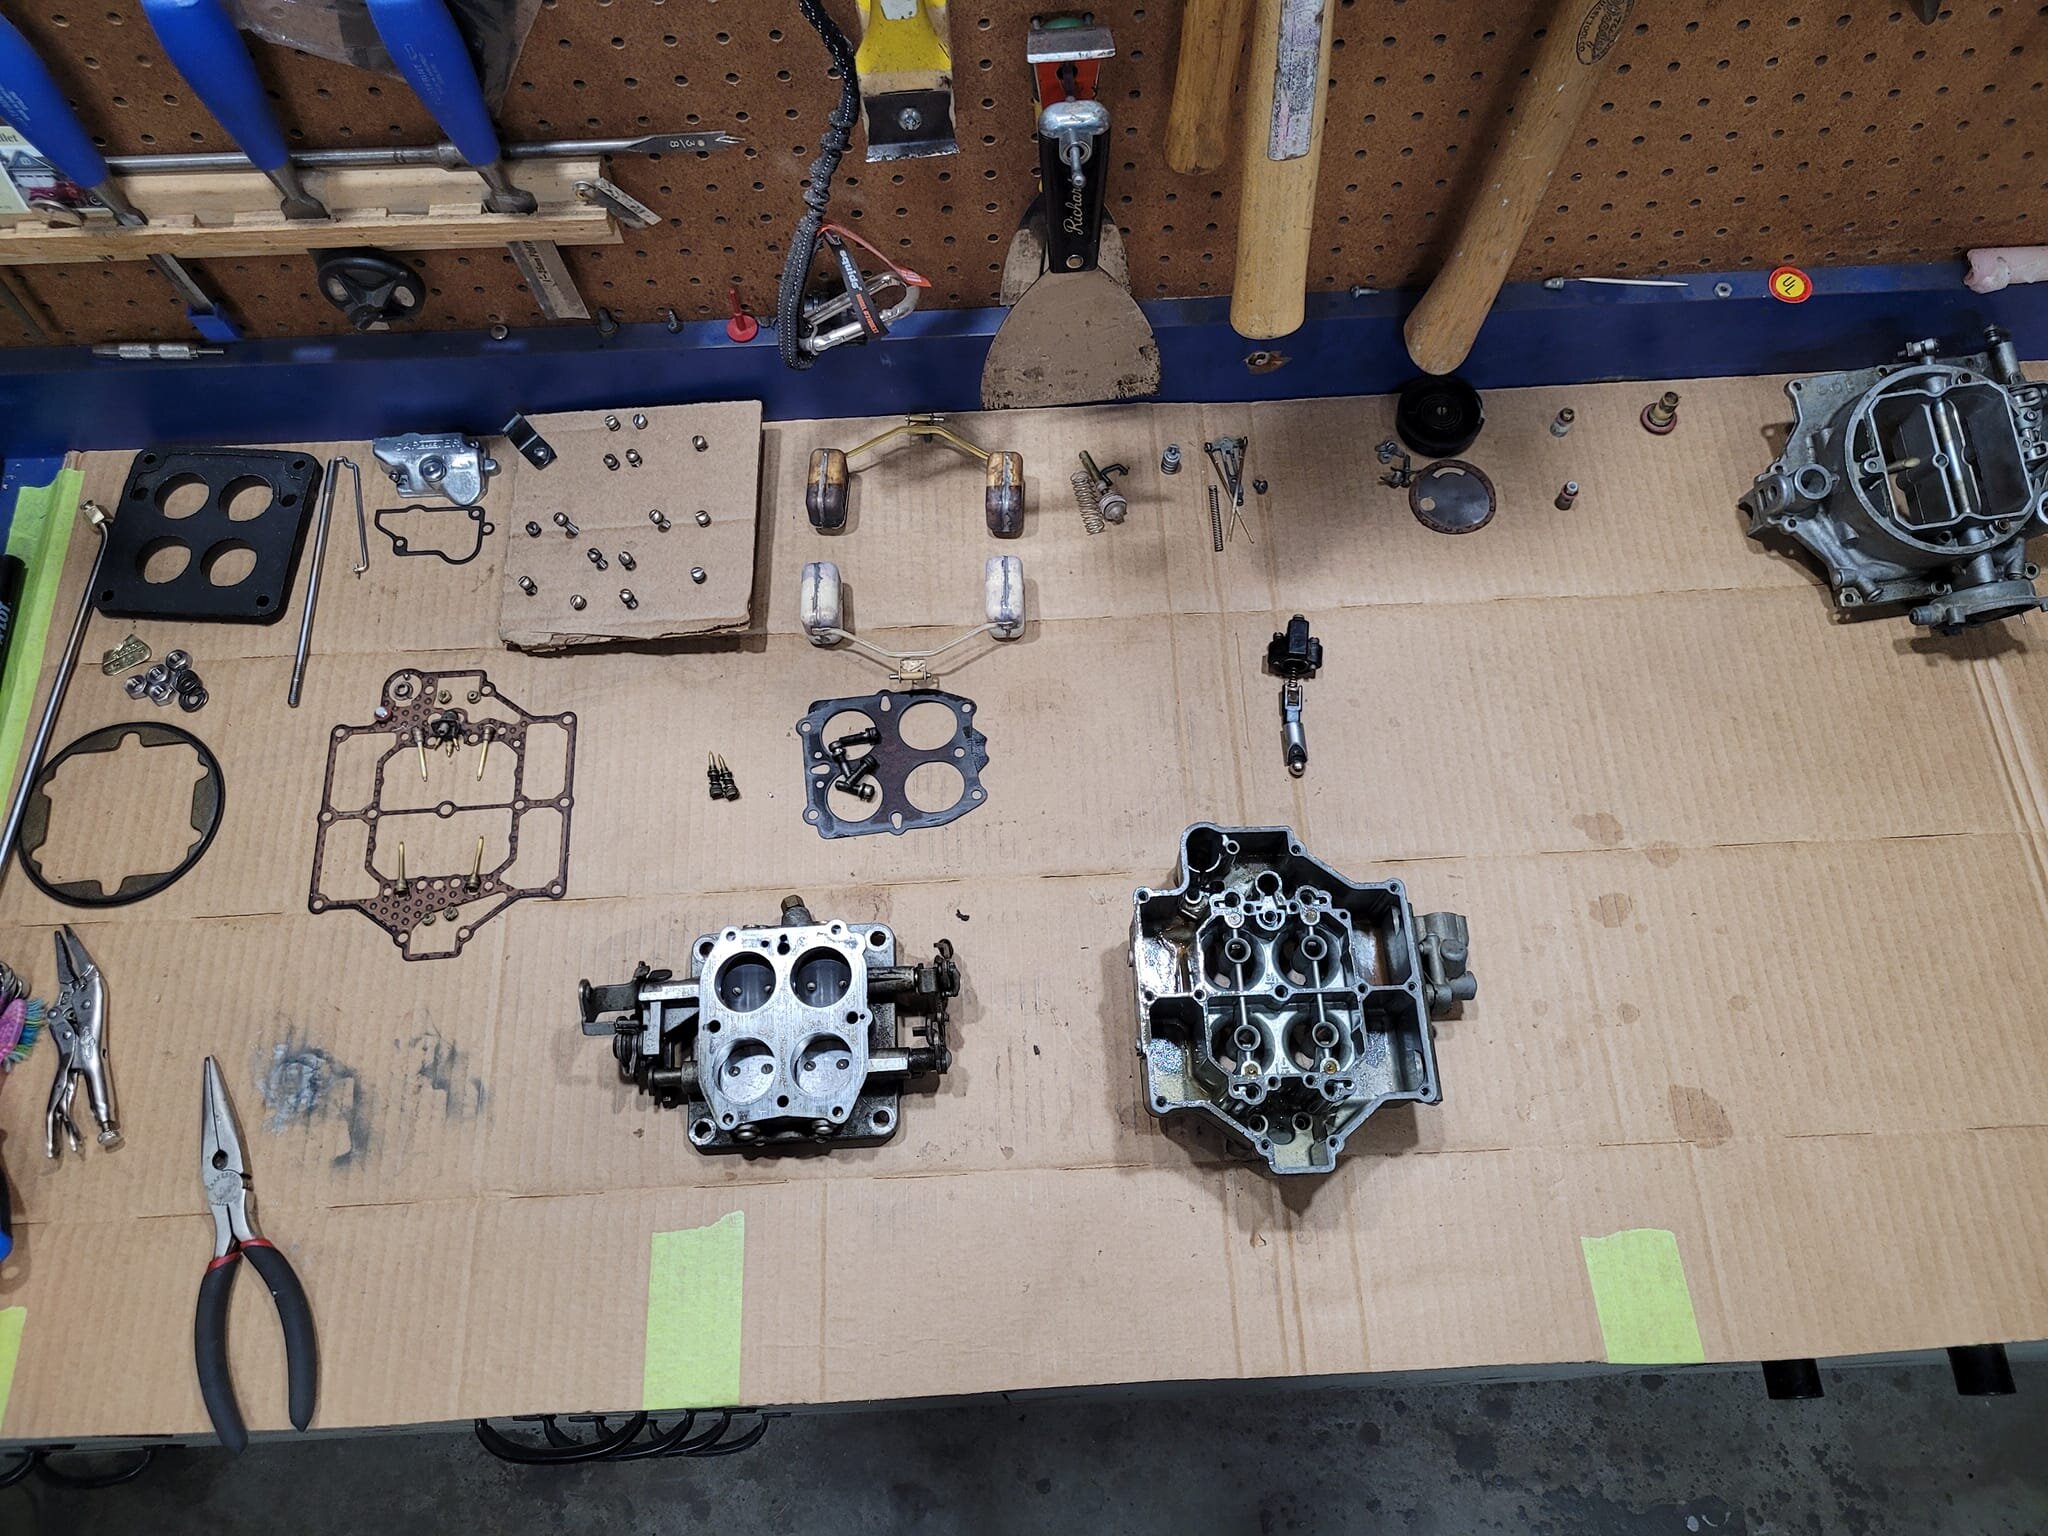 Accelertor pump is toast, which I suspected it might be. The new one has a spring on it, is this missing off the old one? 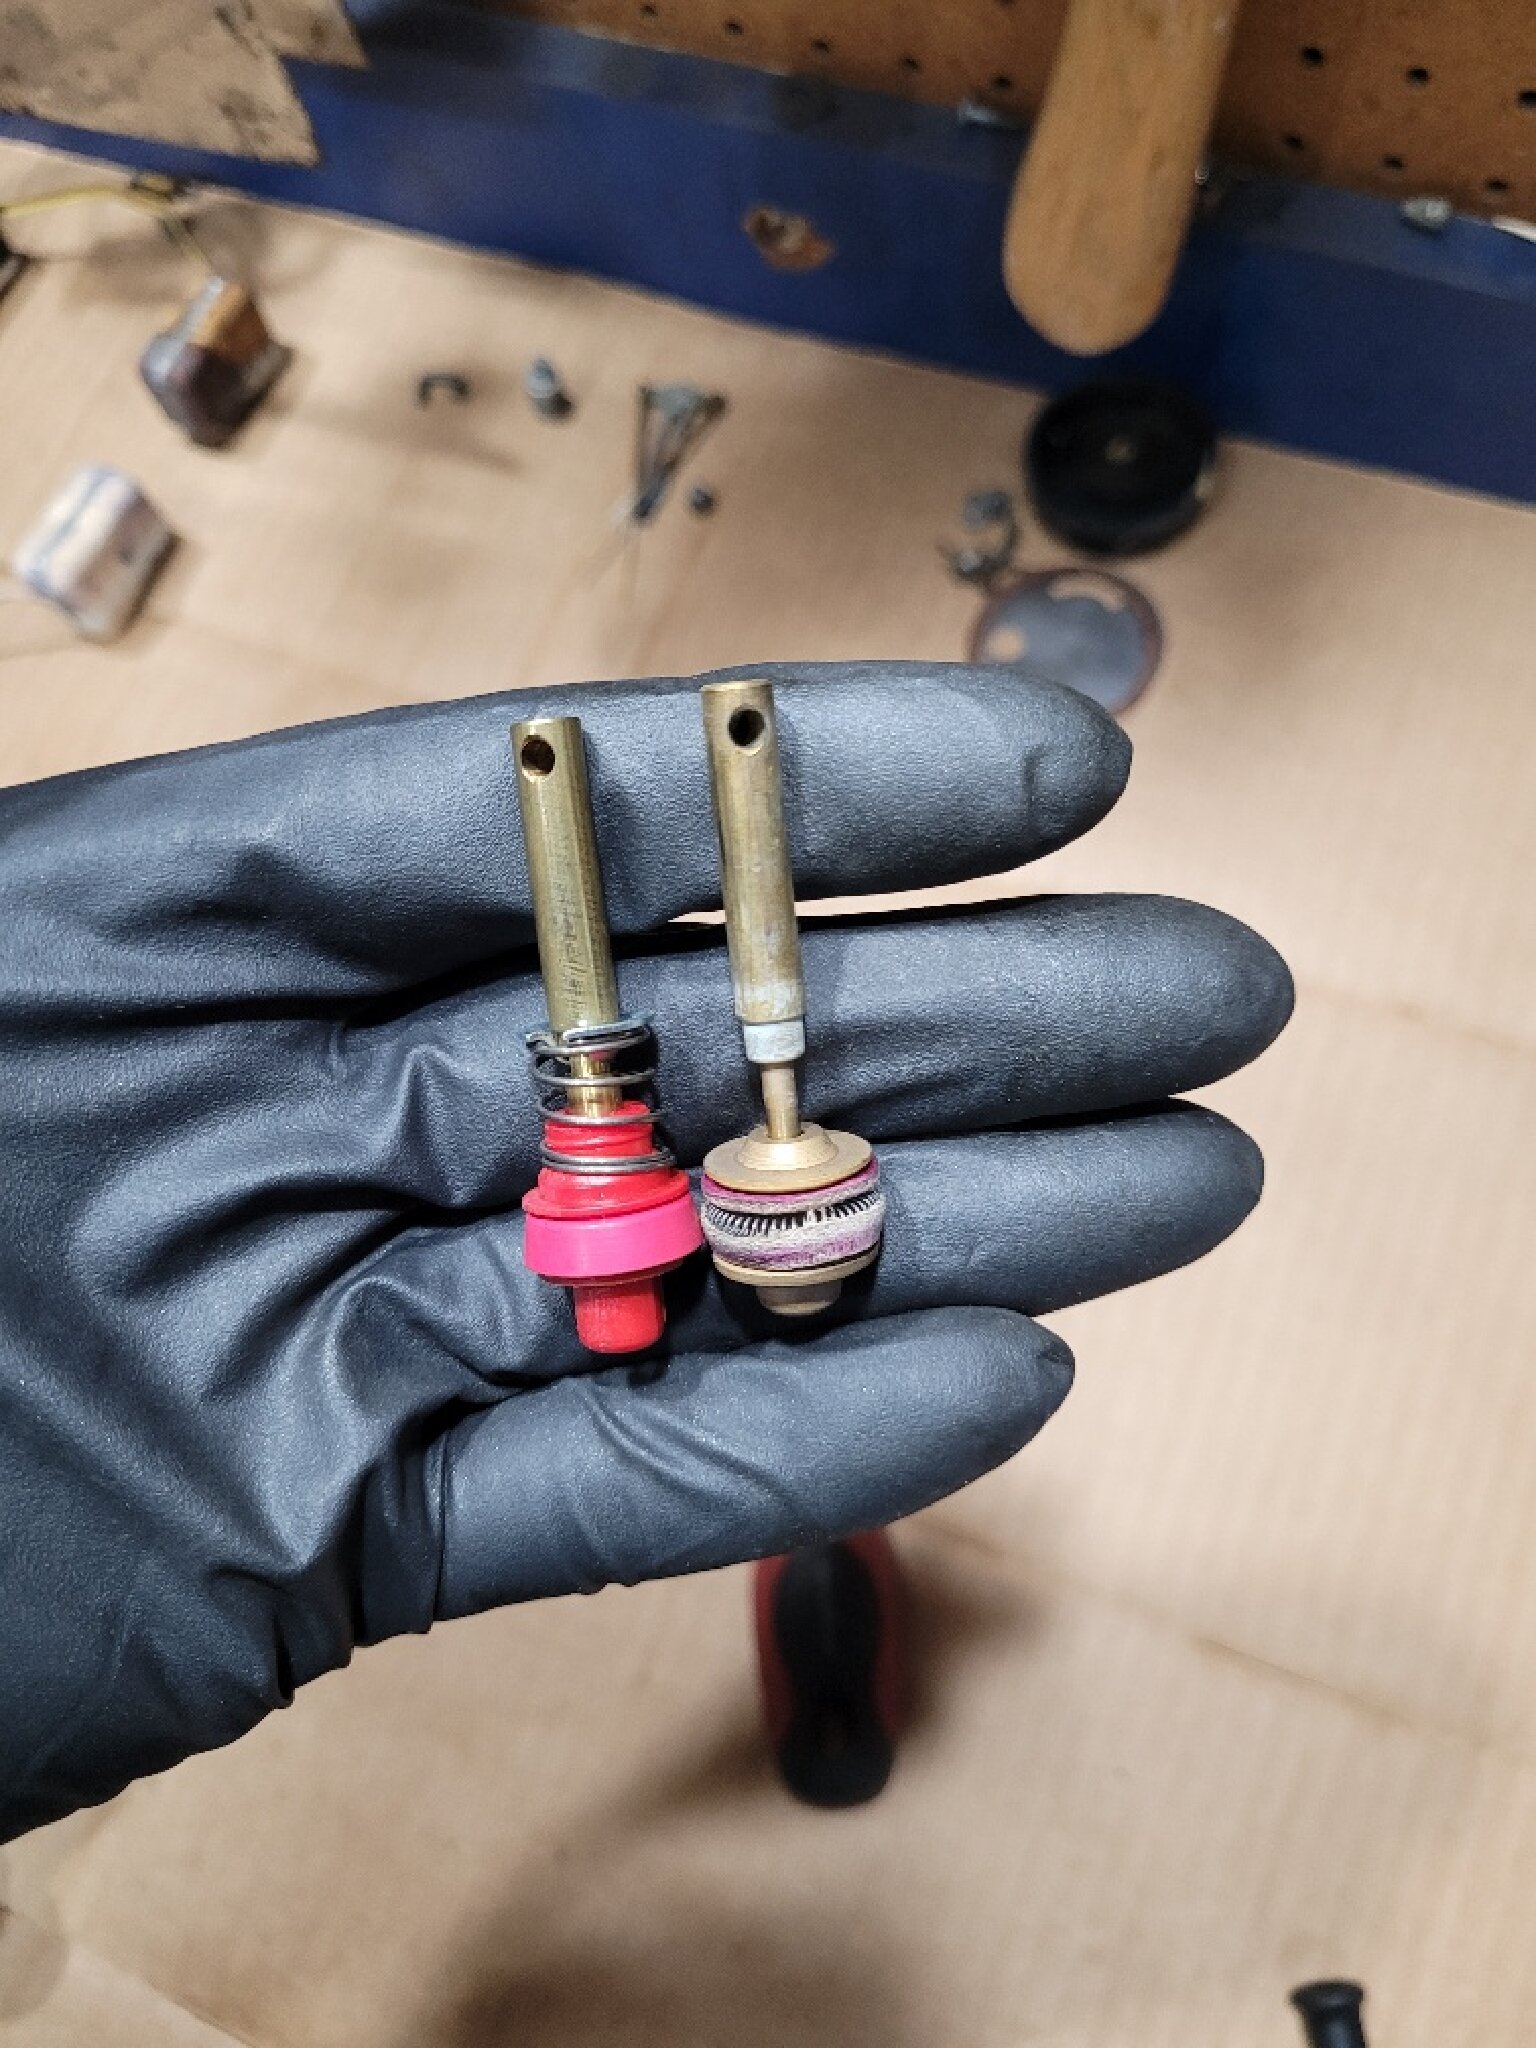 What purpose do these two holes in the insulator serve? The gasket sitting on top was 180 degrees to how it is sitting in the picture. When I put it in this position the cutout in the gasket lines up with these holes making me think this is the way it should go. 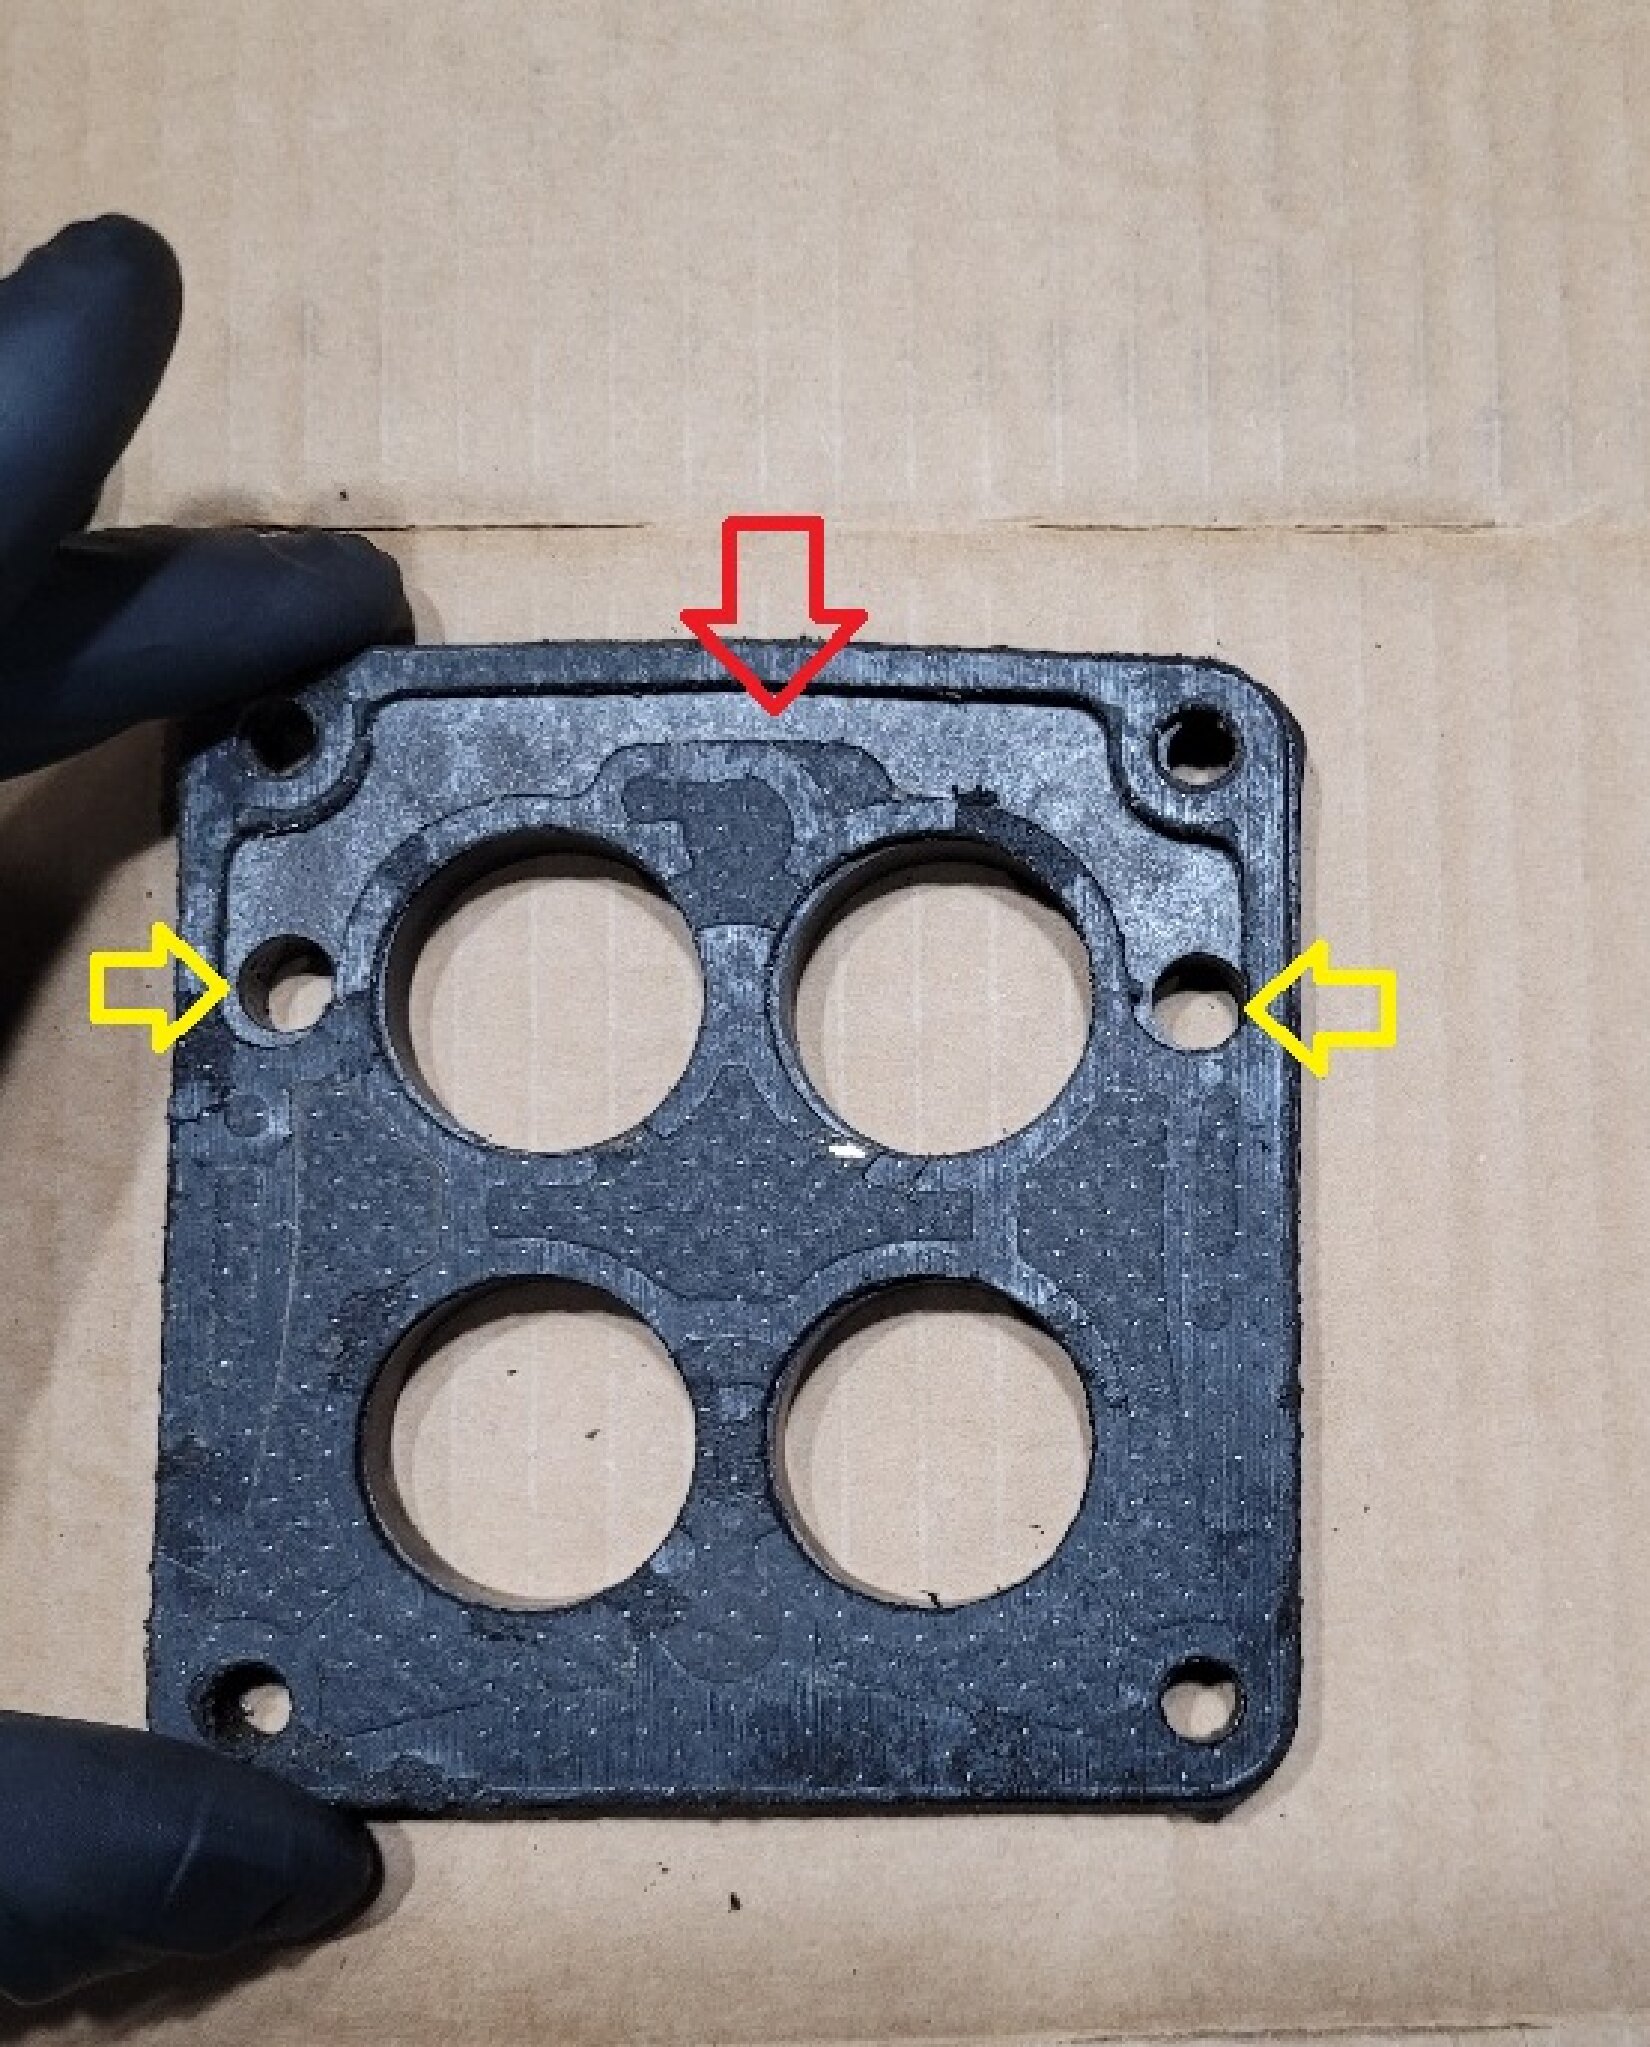 The gasket between the intake manifold and insulator has the cutout to the back, is this correct? 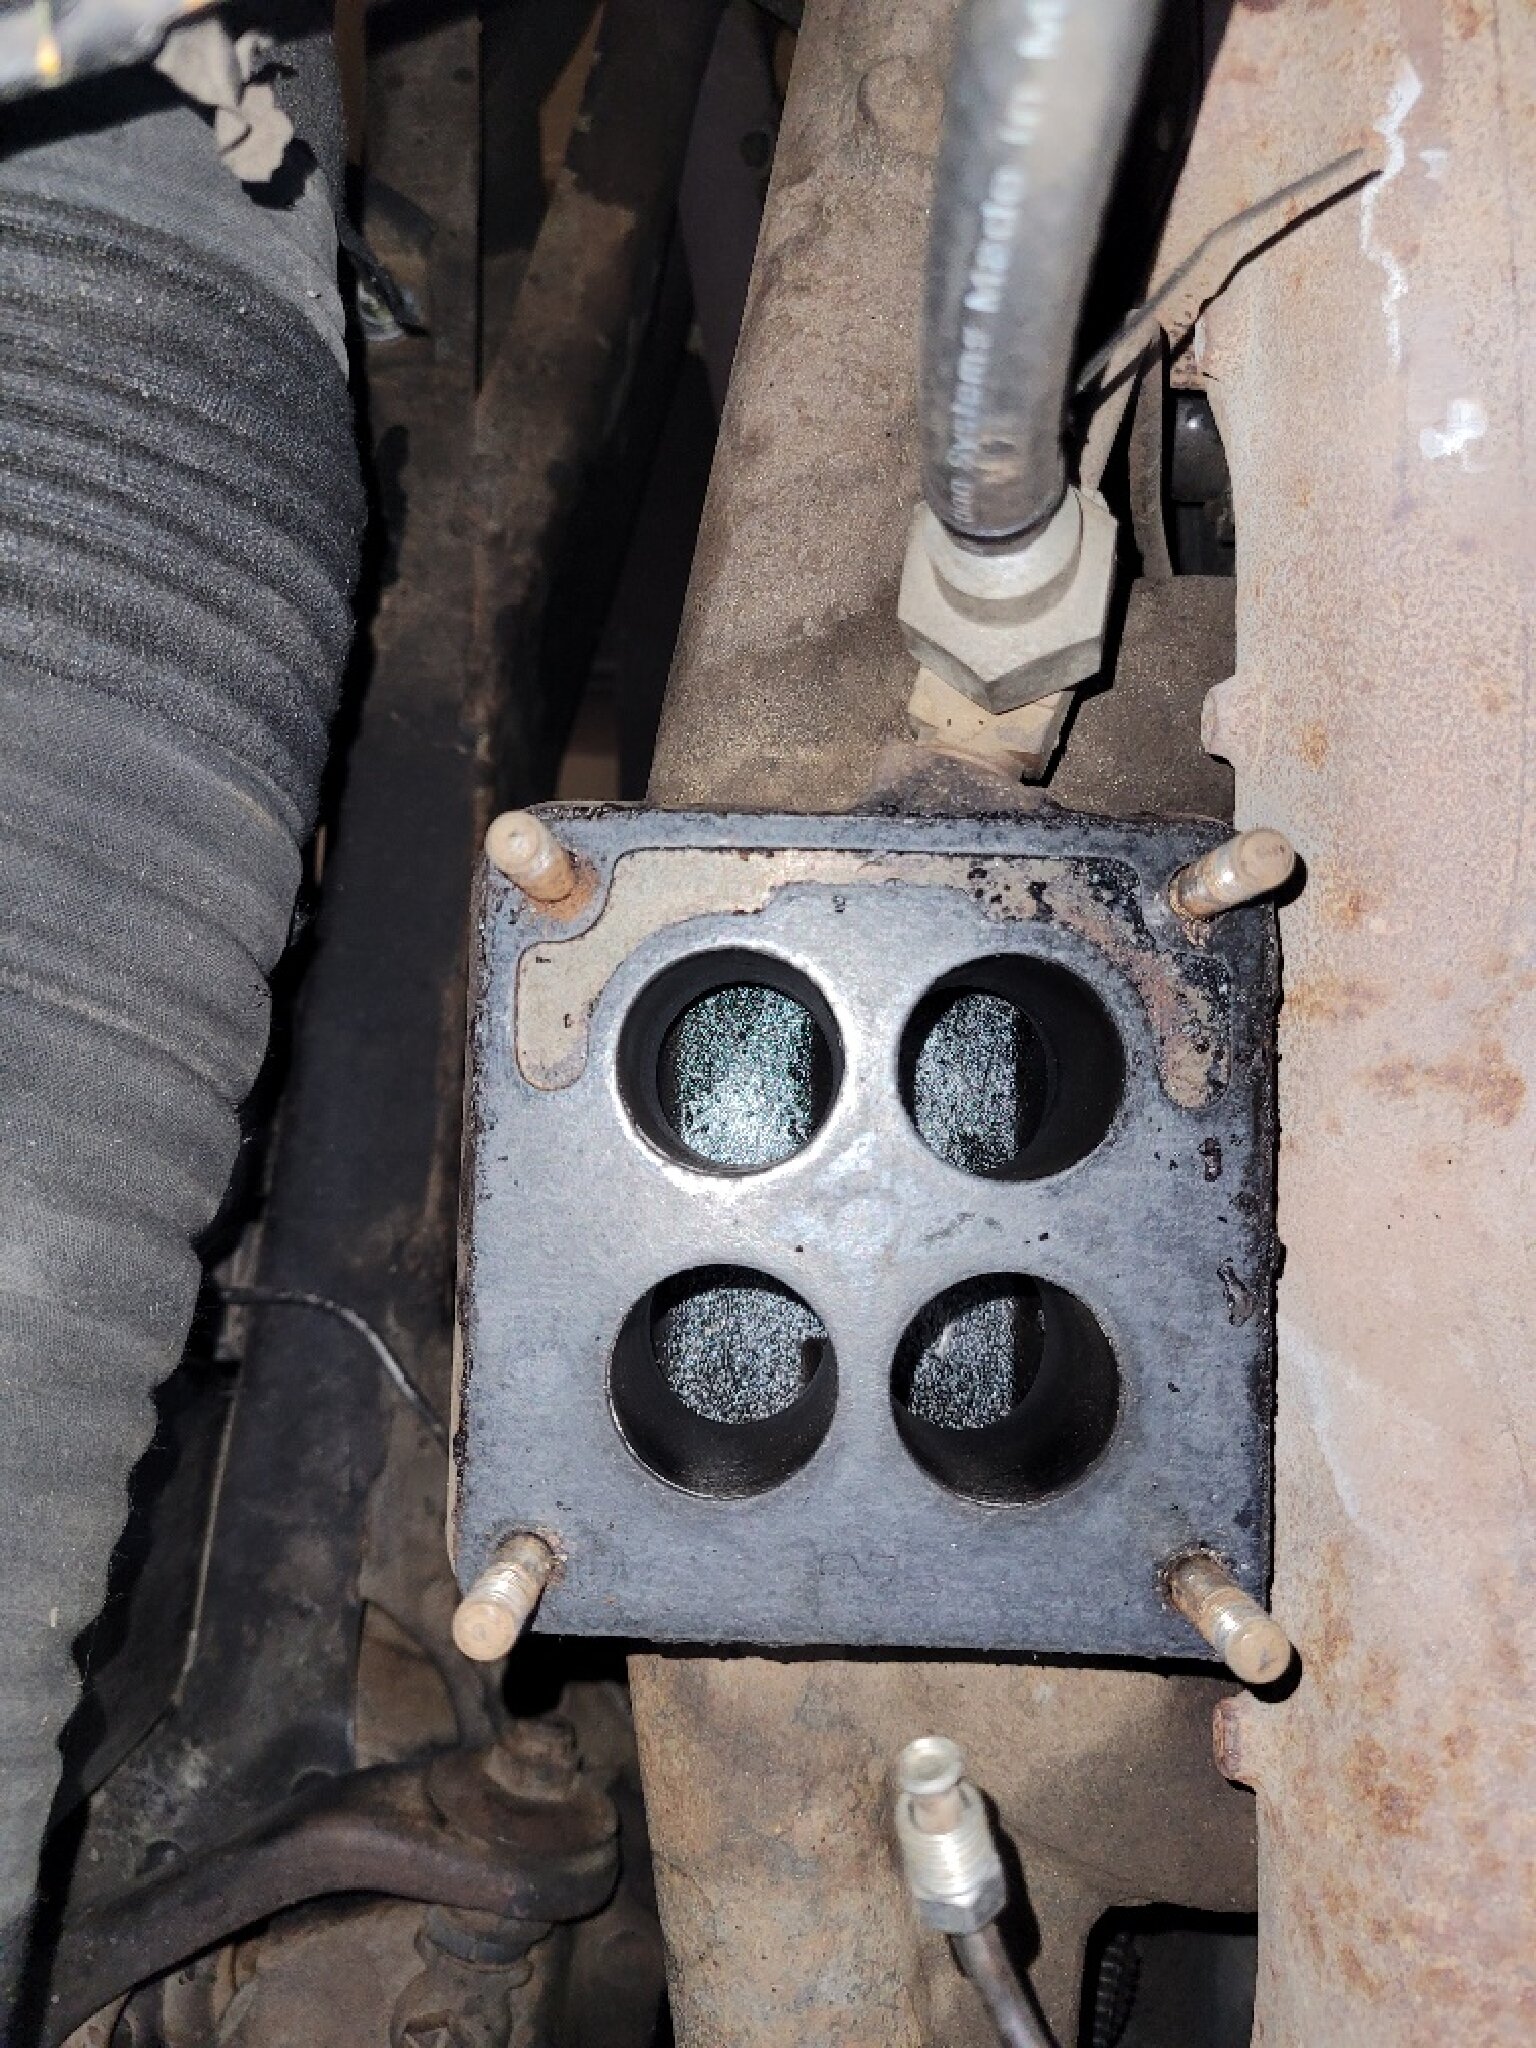 The new "gasket" (My kit only includes 1 not 2) does not have this cutout at all. Should it?? And I guess I'll have to make one more gasket.  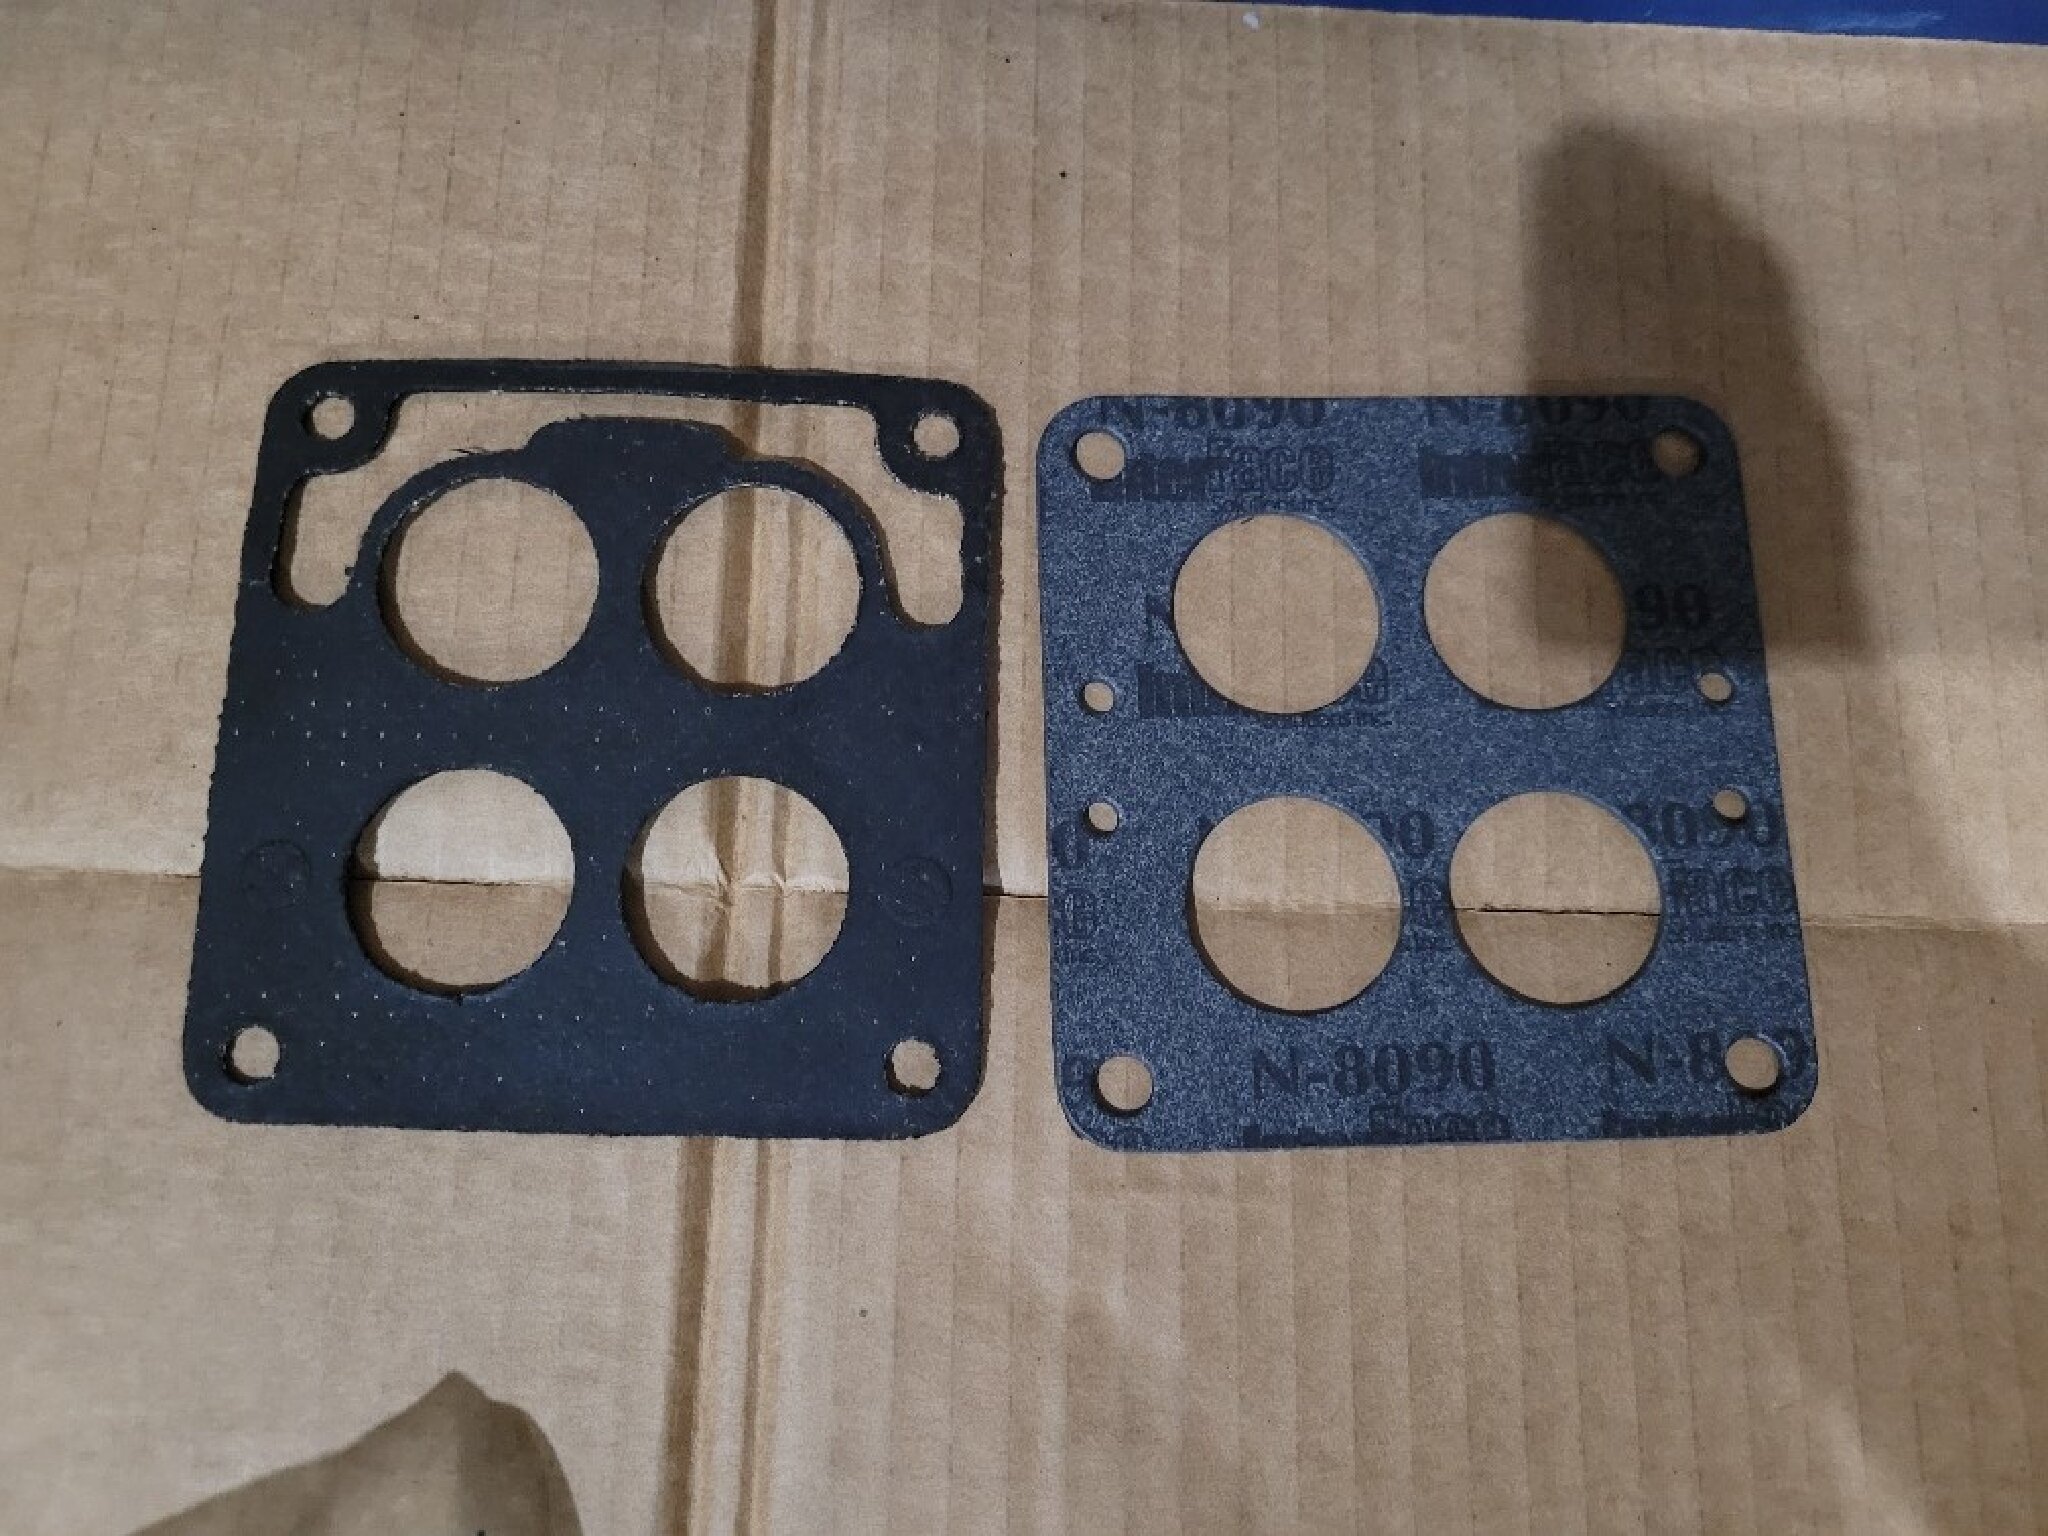
Posted on: 2024/9/7 23:55
|
|||
|
||||
|
Re: Carburetor WCFB 4-Barrel
|
||||
|---|---|---|---|---|
|
Home away from home

|
I've never seen a proper gasket without the cutout and yes, it should align with the holes. That said, I'm not sure what it does so once someone explains it we'll both know!
Incidentally, your workbench is FAR to neat and tidy. That's just not right!
Posted on: 2024/9/8 0:43
|
|||
|
||||
|
Re: Carburetor WCFB 4-Barrel
|
||||
|---|---|---|---|---|
|
Home away from home
|
Maybe while you're at it you can check the vacuum check valve for the power brakes as it's easily accessible without the carburetor in the way. You don't necessarily have to even remove it. Just remove its hose, put on a shorter clean one and try to blow and suck (carefully!) through it. You should be able to blow easily but not suck at all. If any air comes through while sucking, it's a problem so you'll have to take it apart for cleaning - if it comes apart. I don't recall if it does or not.
On this model of carburetor, I recall seeing a service note of some sort for adding a short tube in one of the holes. Something to do with gas sloshing in on certain turns and causing a stall. I couldn't readily locate the Service Counselor with the tidbit but I did find this section on carburetor servicing which might help. It's volume 27, starting on page 1.
Posted on: 2024/9/8 0:57
|
|||
|
||||
|
Re: Carburetor WCFB 4-Barrel
|
||||
|---|---|---|---|---|
|
Home away from home

|
Quote:
Accelertor pump is toast, which I suspected it might be. The new one has a spring on it, is this missing off the old one? To me the two look different. The old one is equipped with probably leather pump cup, the new one for sure with fluorelastomer pump cup. Quote: ...But I want to get seals, pump, etc in that are compatiable with modern fuels... Then you are probably on the right path. Fluorelastomer is alcohol/ethanol resistant. Please take a look at -> this overview. You will need a little patience as the linked page takes a few seconds to load. Quote: "...Any words of wisdom as I tackle this project?..." You should consider a rebuild kit.
Posted on: 2024/9/8 5:24
|
|||
|
The story of ZIS-110, ZIS-115, ZIL-111 & Chaika GAZ-13 on www.guscha.de
|
||||
|
||||


