
|
Re: Henry's 55 Constellation
|
||||
|---|---|---|---|---|
|
Forum Ambassador

|
the images are from the CD. i never did see anything on my ftp site. oh well. no worries. ;0)
Posted on: 2010/4/6 10:32
|
|||
|
1937 Packard 138-CD Deluxe Touring Limousine
Maroon/Black 1090-1021 [url=https://packardinfo.com/xoops/html/modules/registry/View.php?ID=232]1955 Packard |
||||
|
||||
|
Re: Henry's 55 Constellation
|
||||
|---|---|---|---|---|
|
Forum Ambassador
|
well, its been a month and no update, so i figured i would get to rebuilding the torque converter. took it apart only at this point. there is a HUGE difference between this new one and my old one. someone really did mess up that old one bad.
this new one has been rebuilt before, it looks practically brand new inside. you can see the other persons scratch marks, but i couldn't tell you how long ago it was rebuilt. the fluid was practically brand new, didnt' stink and the friction material was perfect. you can see where i punched the holes to make sure i can in now way line this thing up the wrong way. you can also see the person before me scratched it to mark it. any thoughts on how the heck i am going to get those two small bushings outa that hole. can't access it from the opposite side. (scratches head) in the pictures with the arrows drawn.....is that normal. the pictures are of TWO seperate ones that look like that. they are exactly across from each other. if you drew a straight line it would go through them, one on each side of the part they are inclosed in. i don't remember even seeing this part in my old one. i am going to rebuild it anyways though. enjoy the photos of a good torque converter. more to come when i am putting it back together, but this should wet your whistle for now. going to have to work on my f150 trans for awhile. it is acting up and i have a pressure solenoid that is going out. but, since i am in there i am going to do some improvments, such as shift kit and some upgrades to crappy factory parts that are accessible without dropping the trans. deeper pan, etc. etc. etc. basically i am using the solenoid problem as an excuse to make it nicer ;0) LOL! enjoy the pics. Hank Attach file:  (116.76 KB) (116.76 KB) (113.52 KB) (113.52 KB)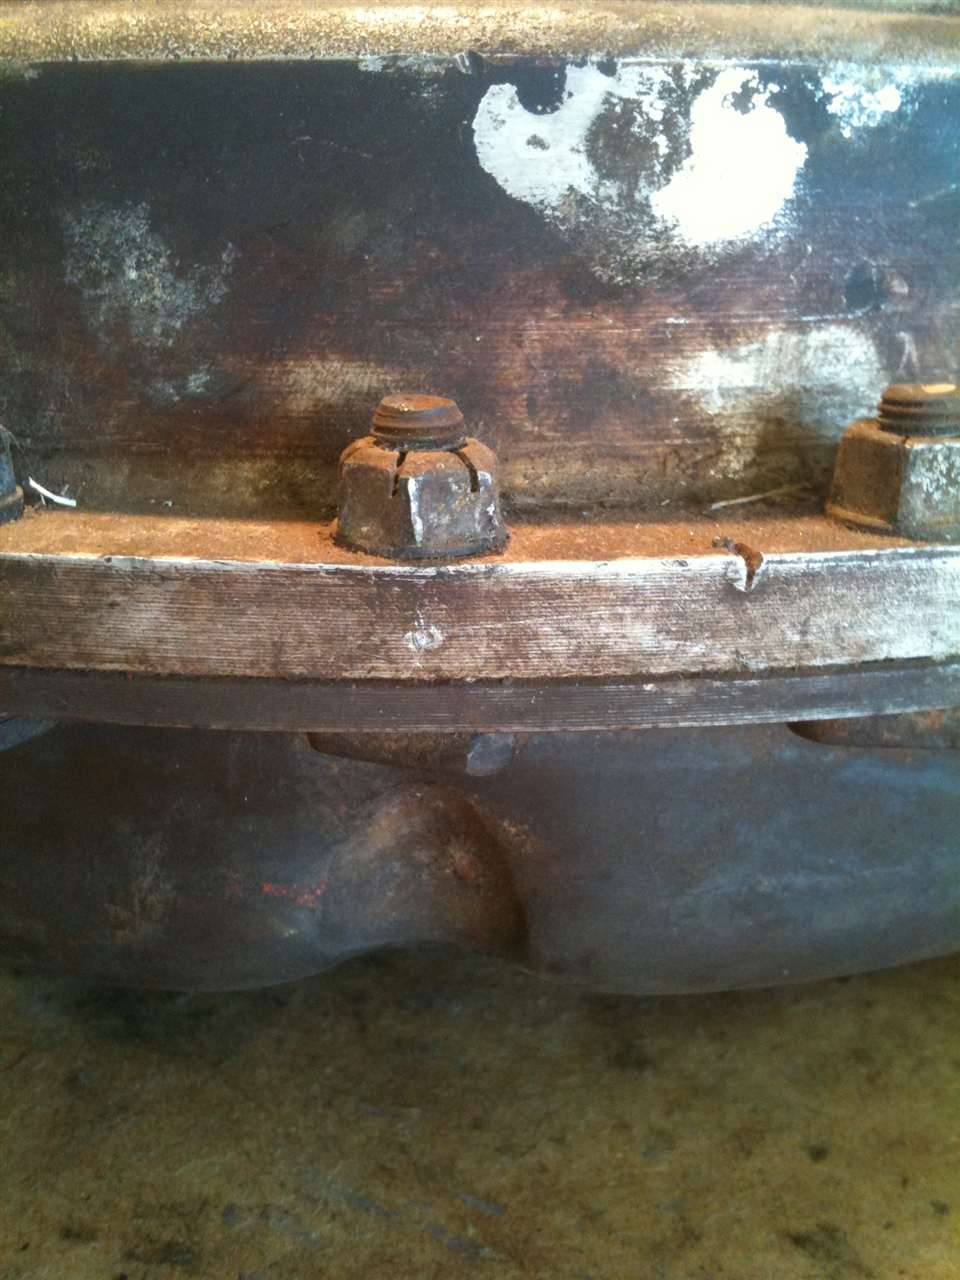 (104.51 KB) (104.51 KB)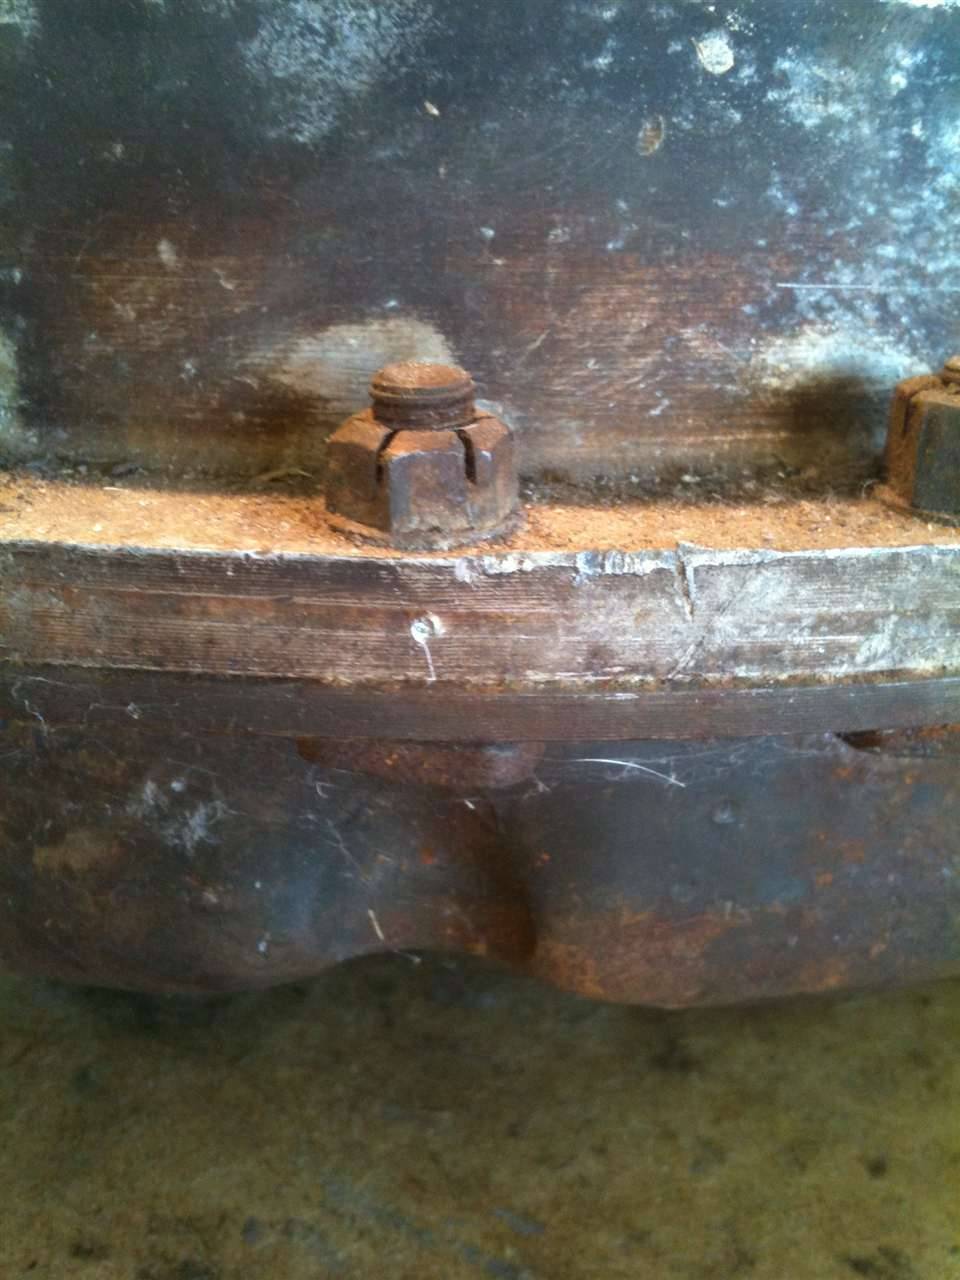 (114.16 KB) (114.16 KB)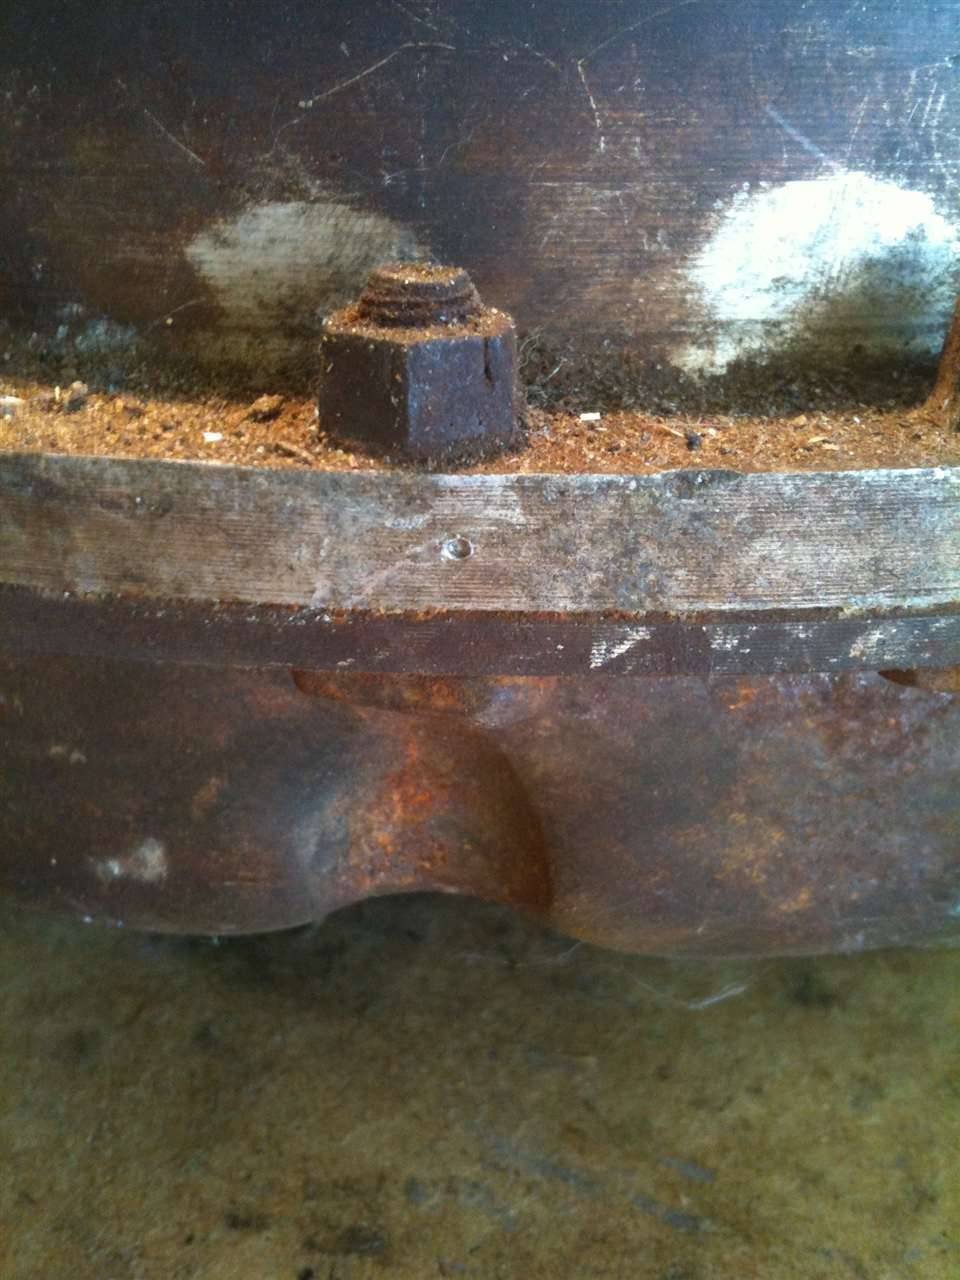 (81.12 KB) (81.12 KB)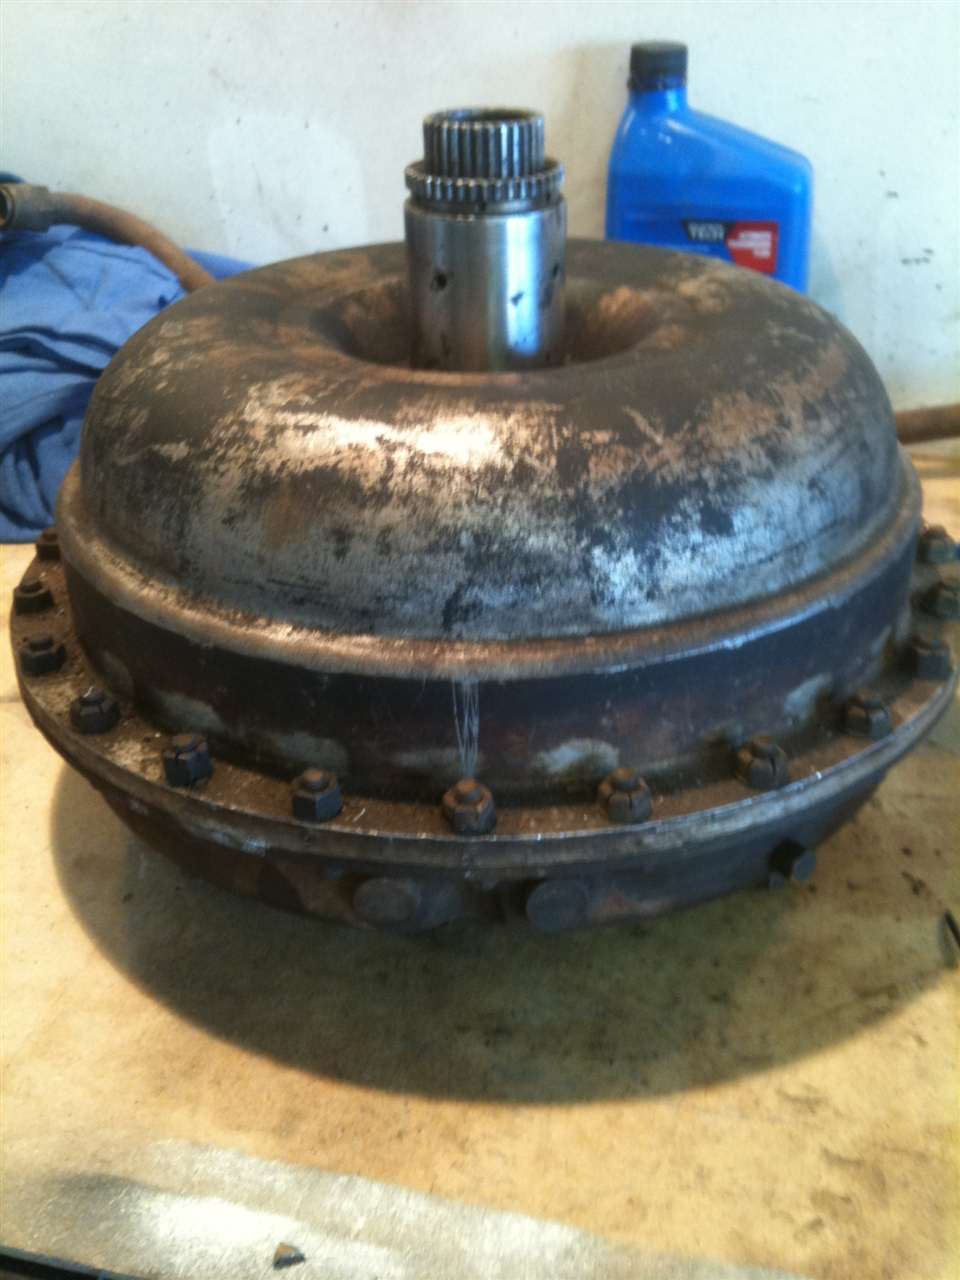 (115.45 KB) (115.45 KB)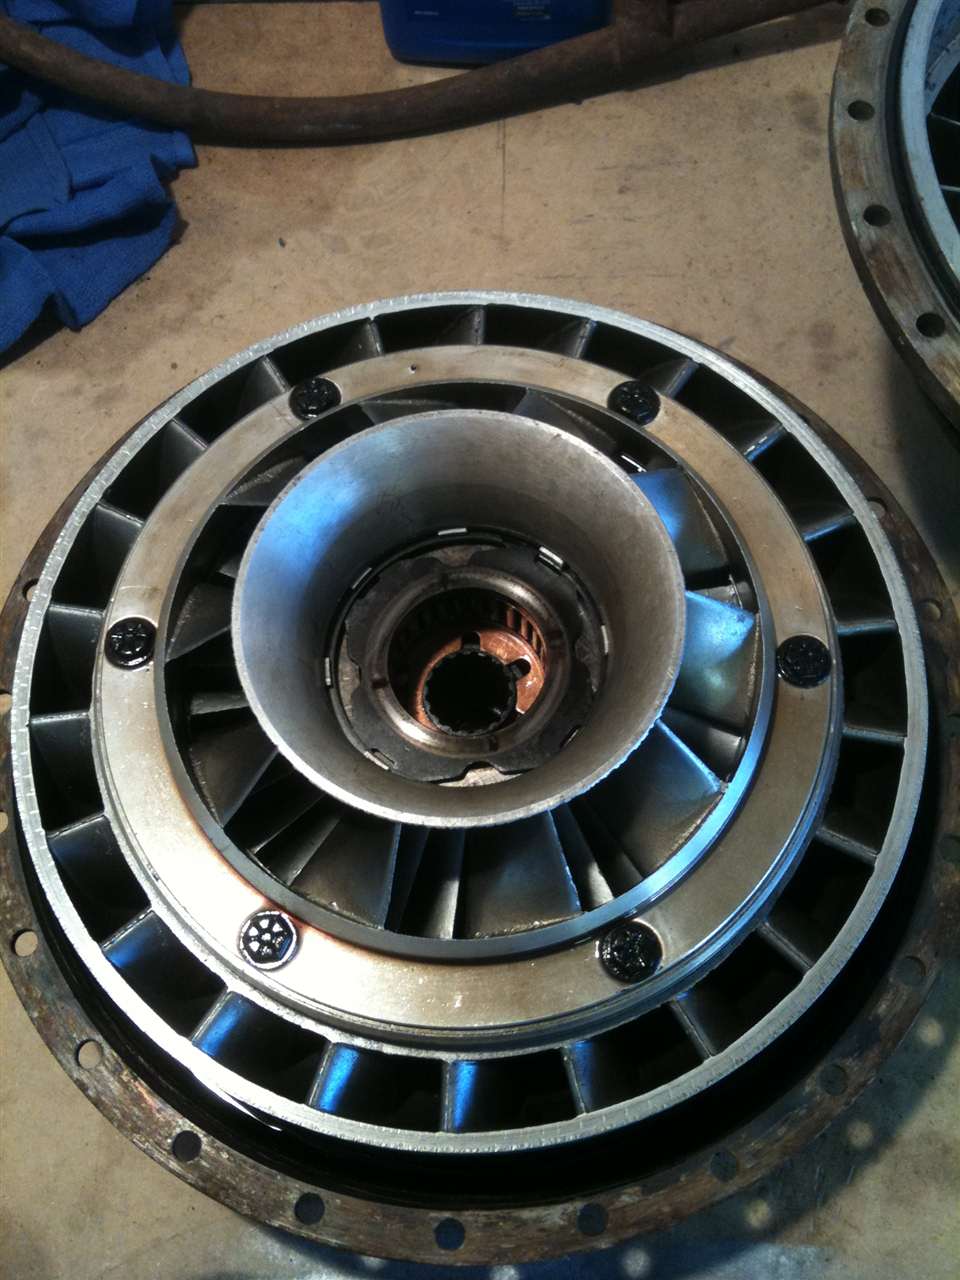 (120.15 KB) (120.15 KB)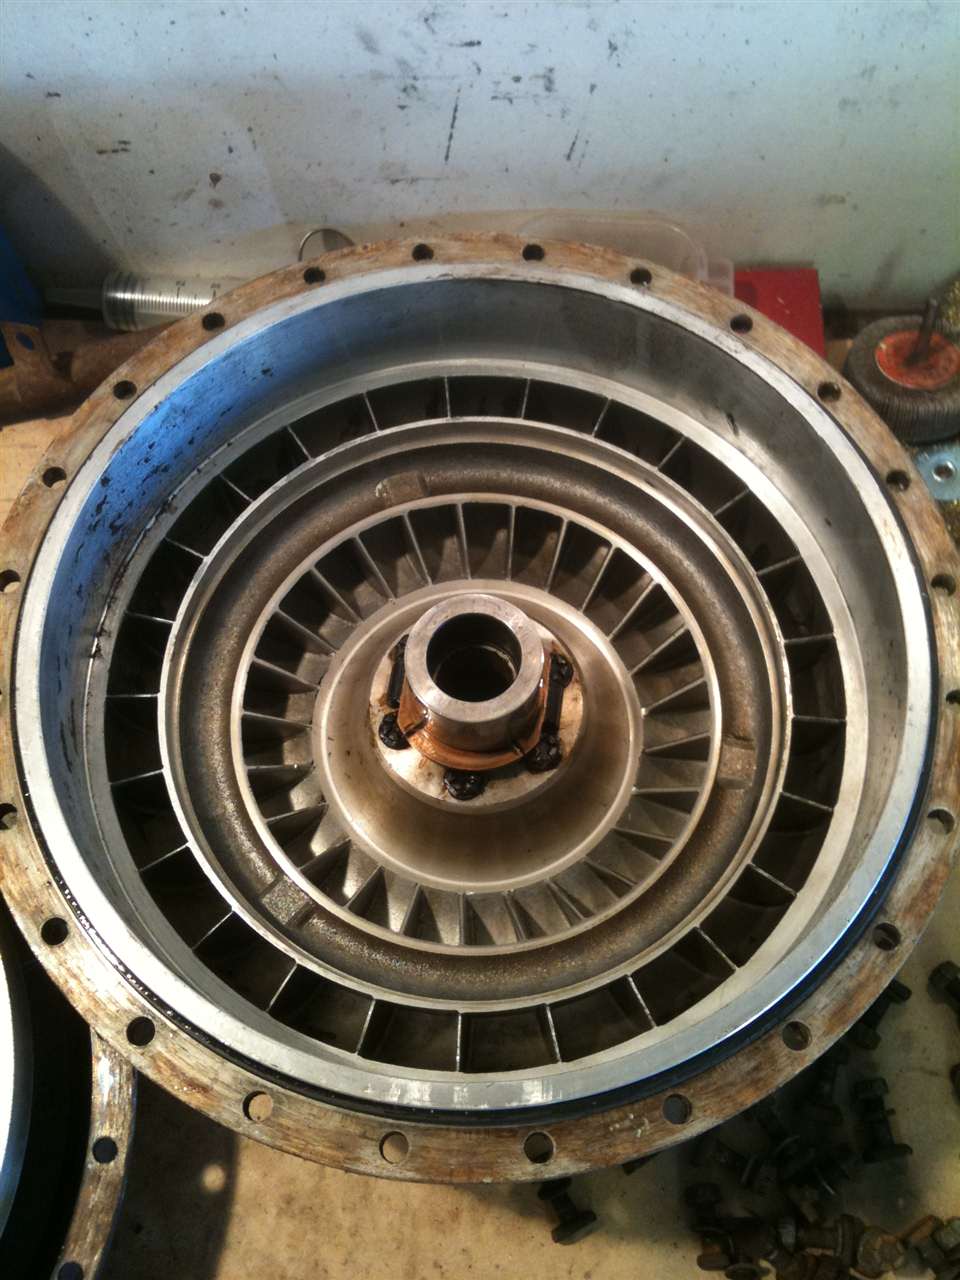 (87.25 KB) (87.25 KB)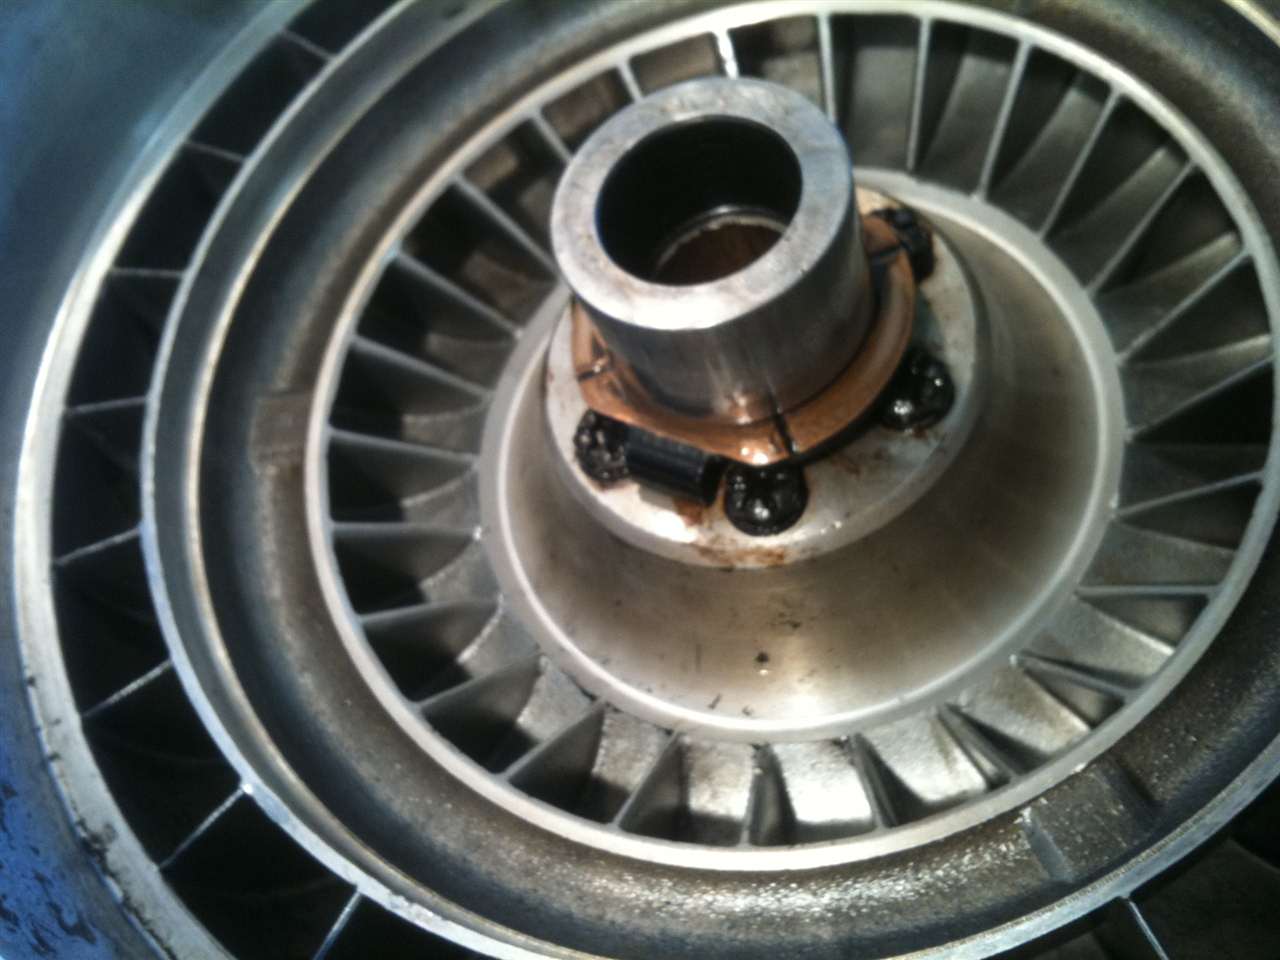 (108.79 KB) (108.79 KB) (96.46 KB) (96.46 KB)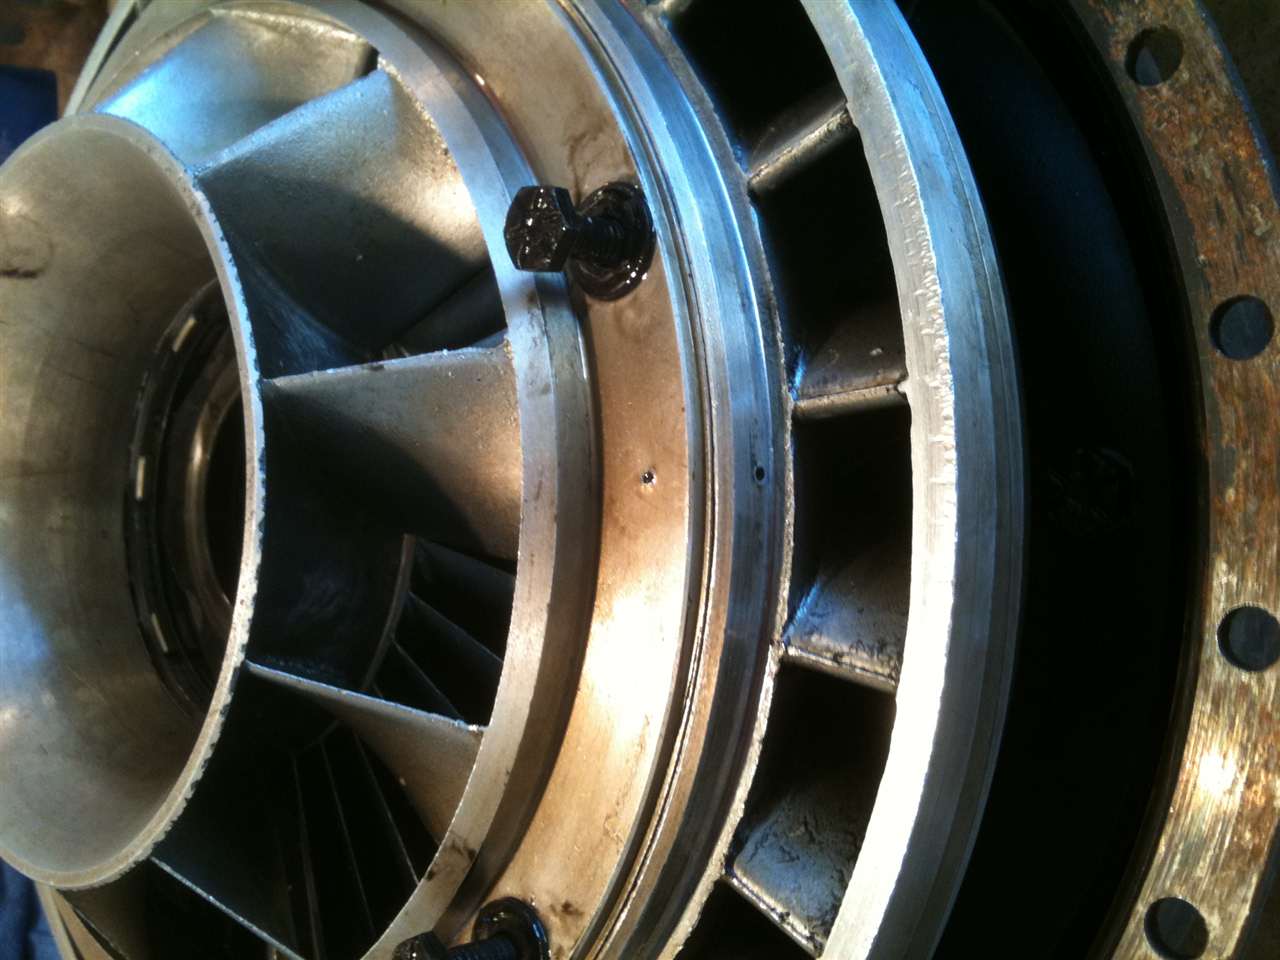 (105.41 KB) (105.41 KB) (105.26 KB) (105.26 KB) (133.43 KB) (133.43 KB) (137.42 KB) (137.42 KB)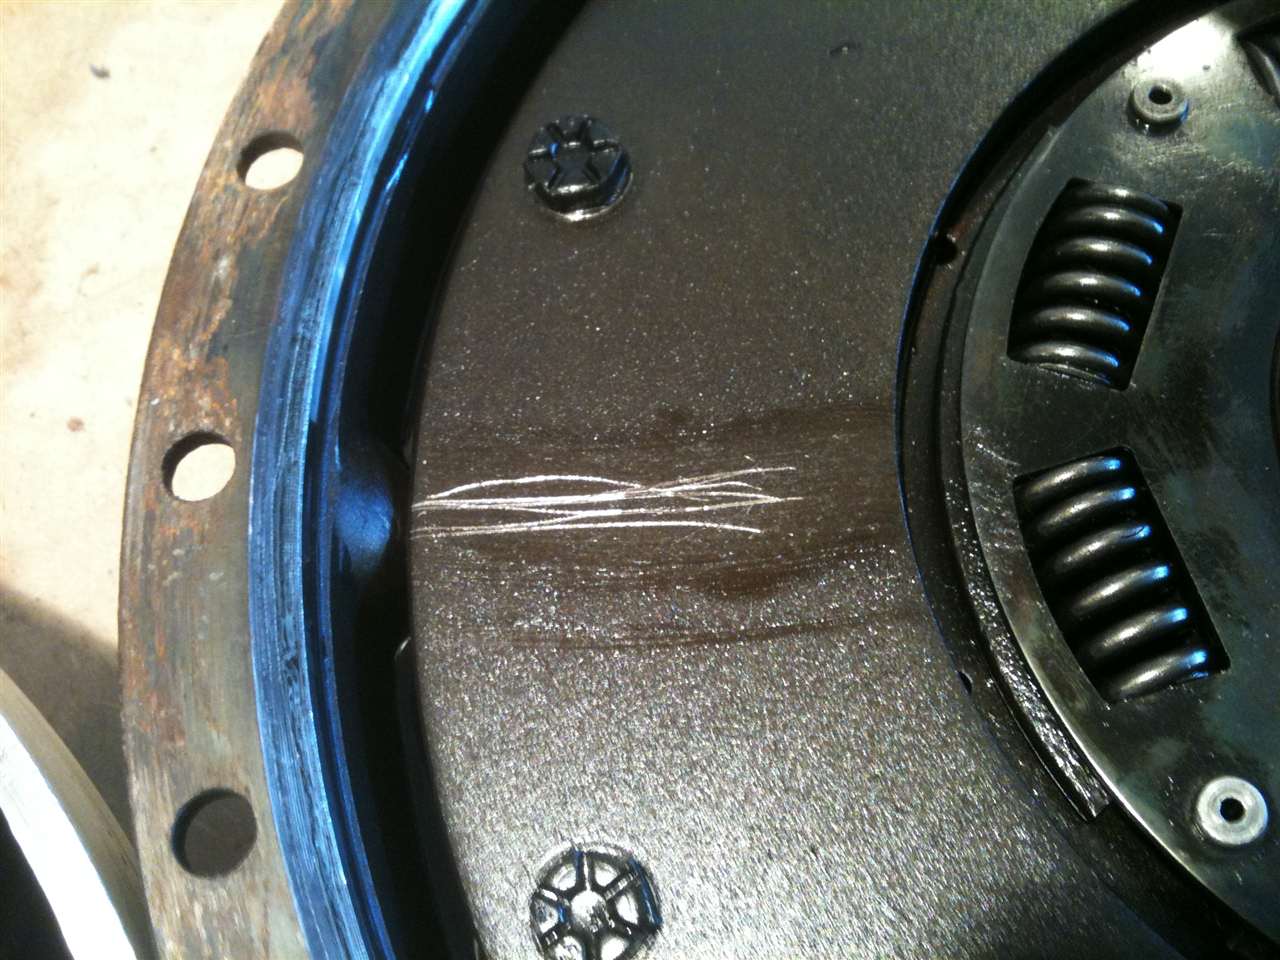 (129.18 KB) (129.18 KB)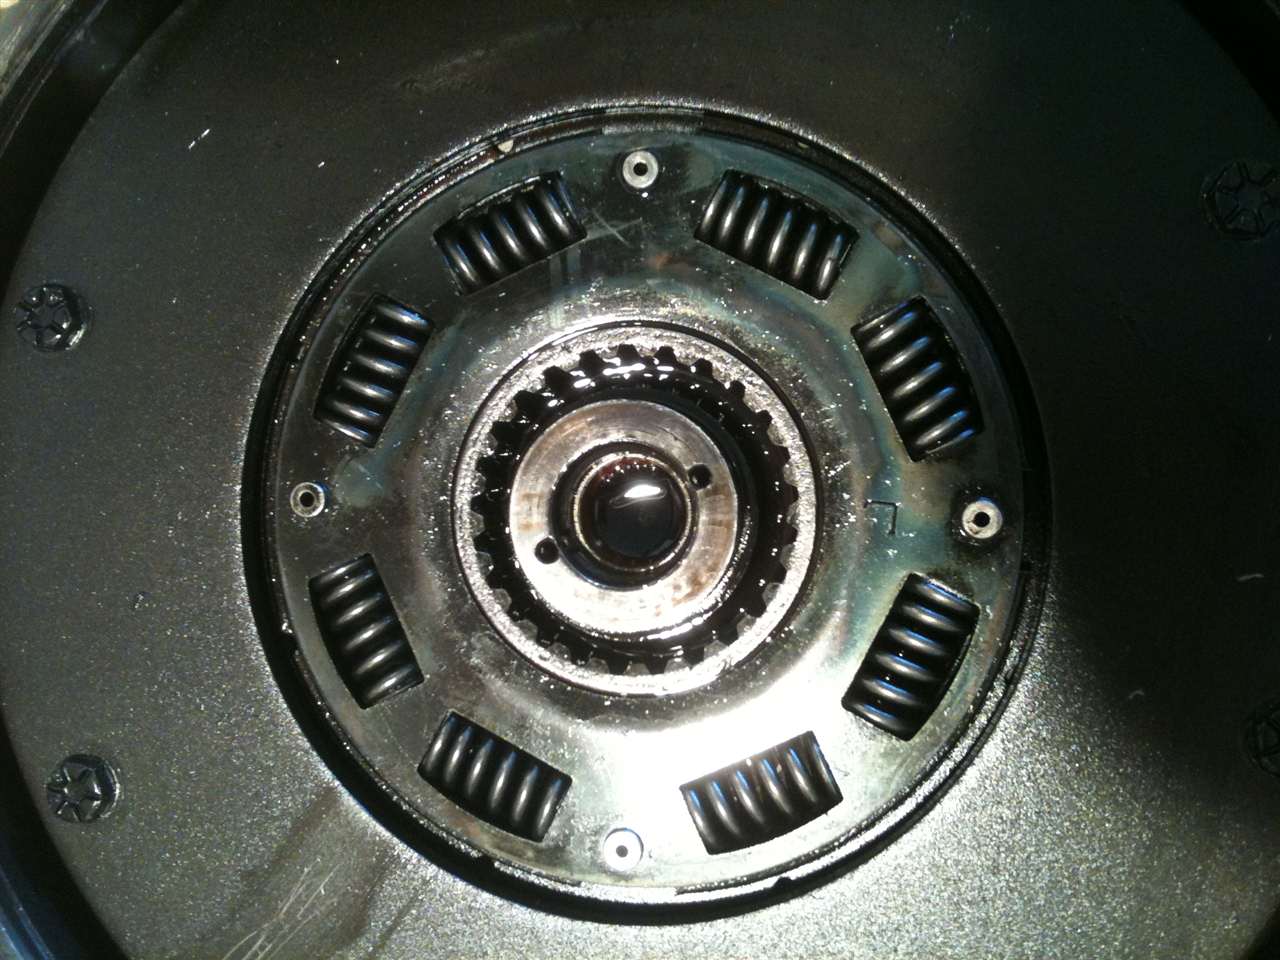 (108.81 KB) (108.81 KB)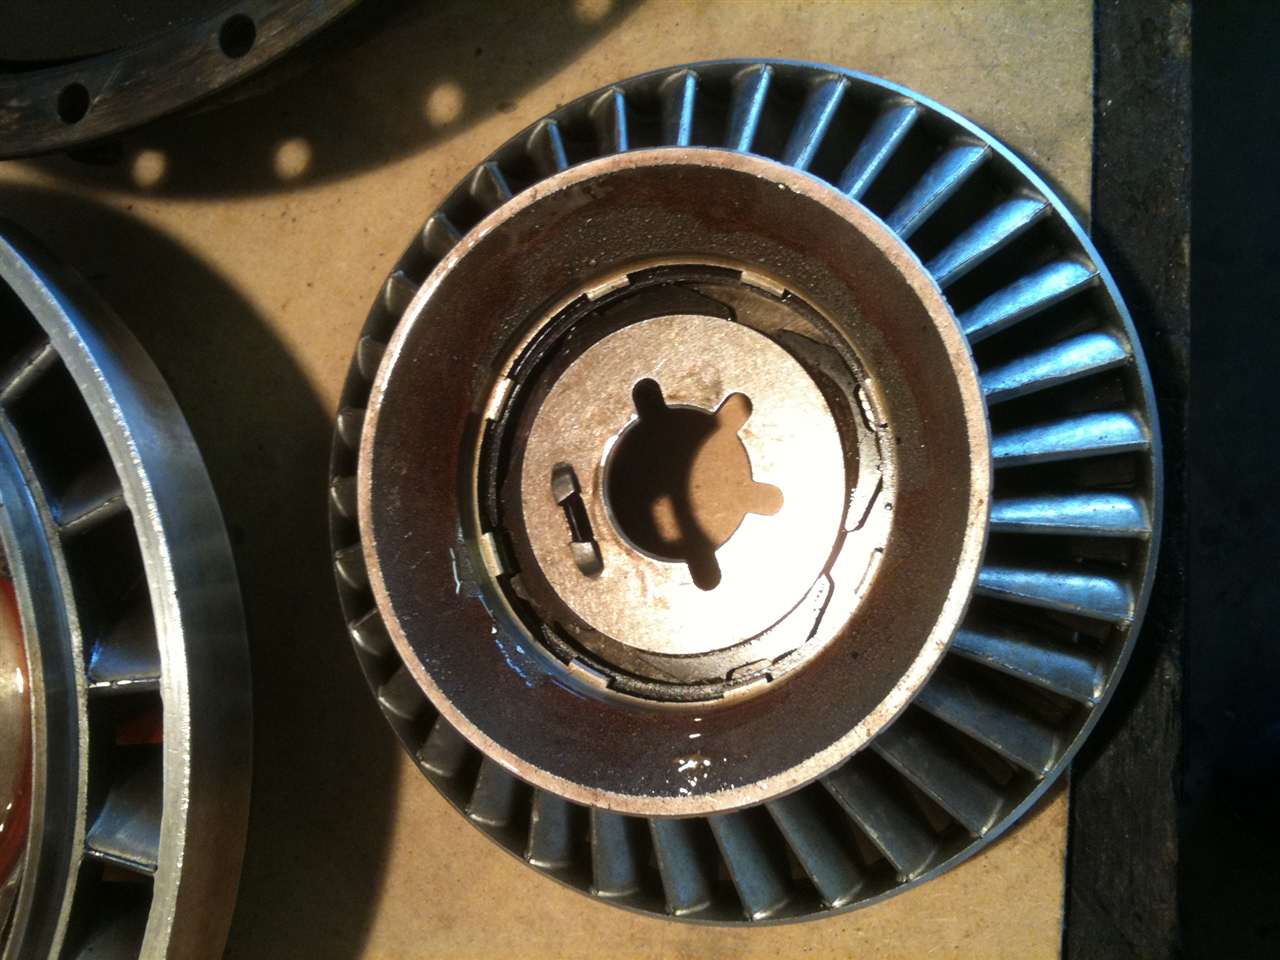 (111.28 KB) (111.28 KB) (102.33 KB) (102.33 KB)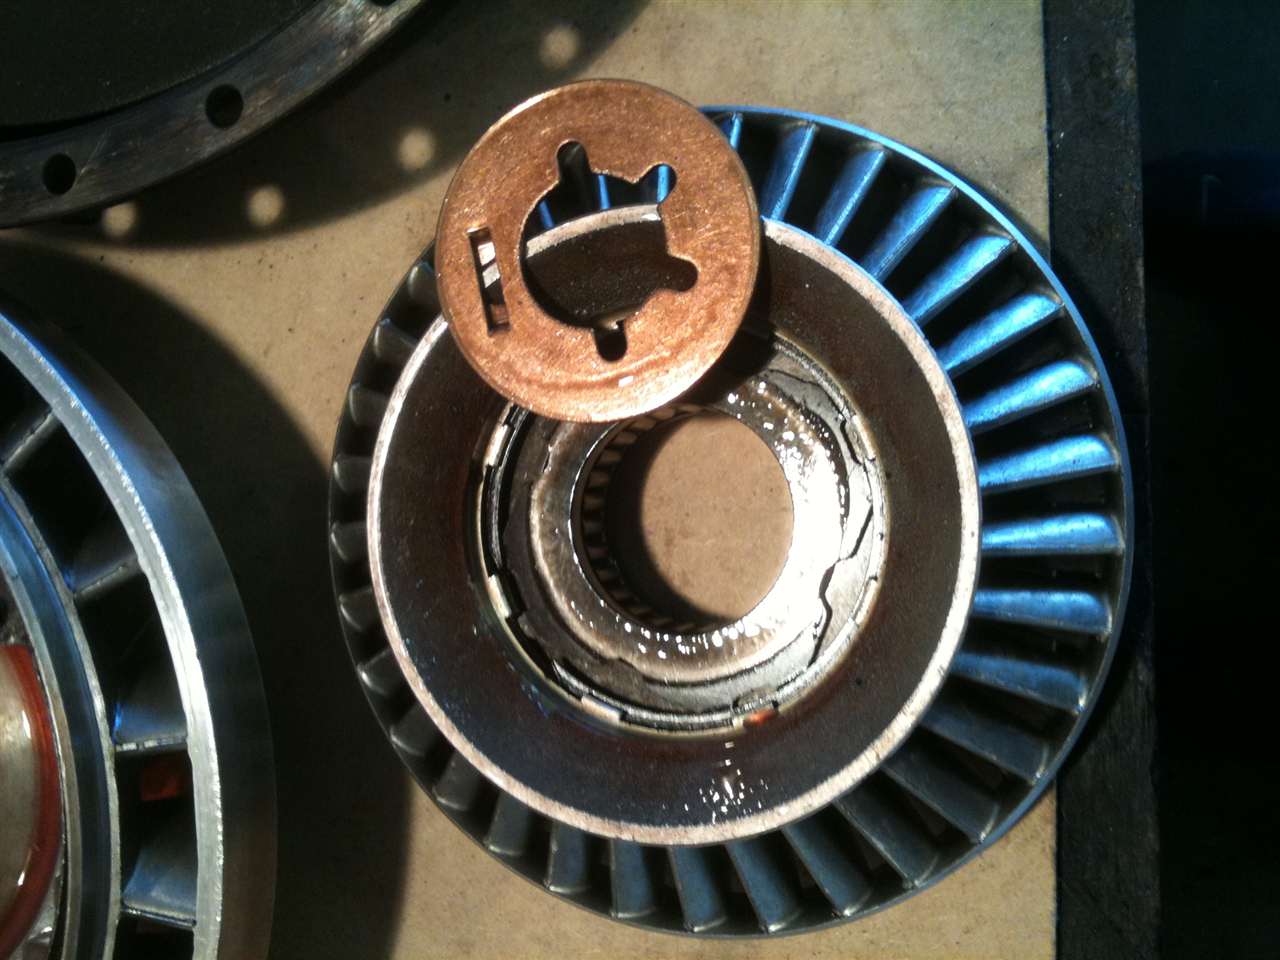 (117.16 KB) (117.16 KB)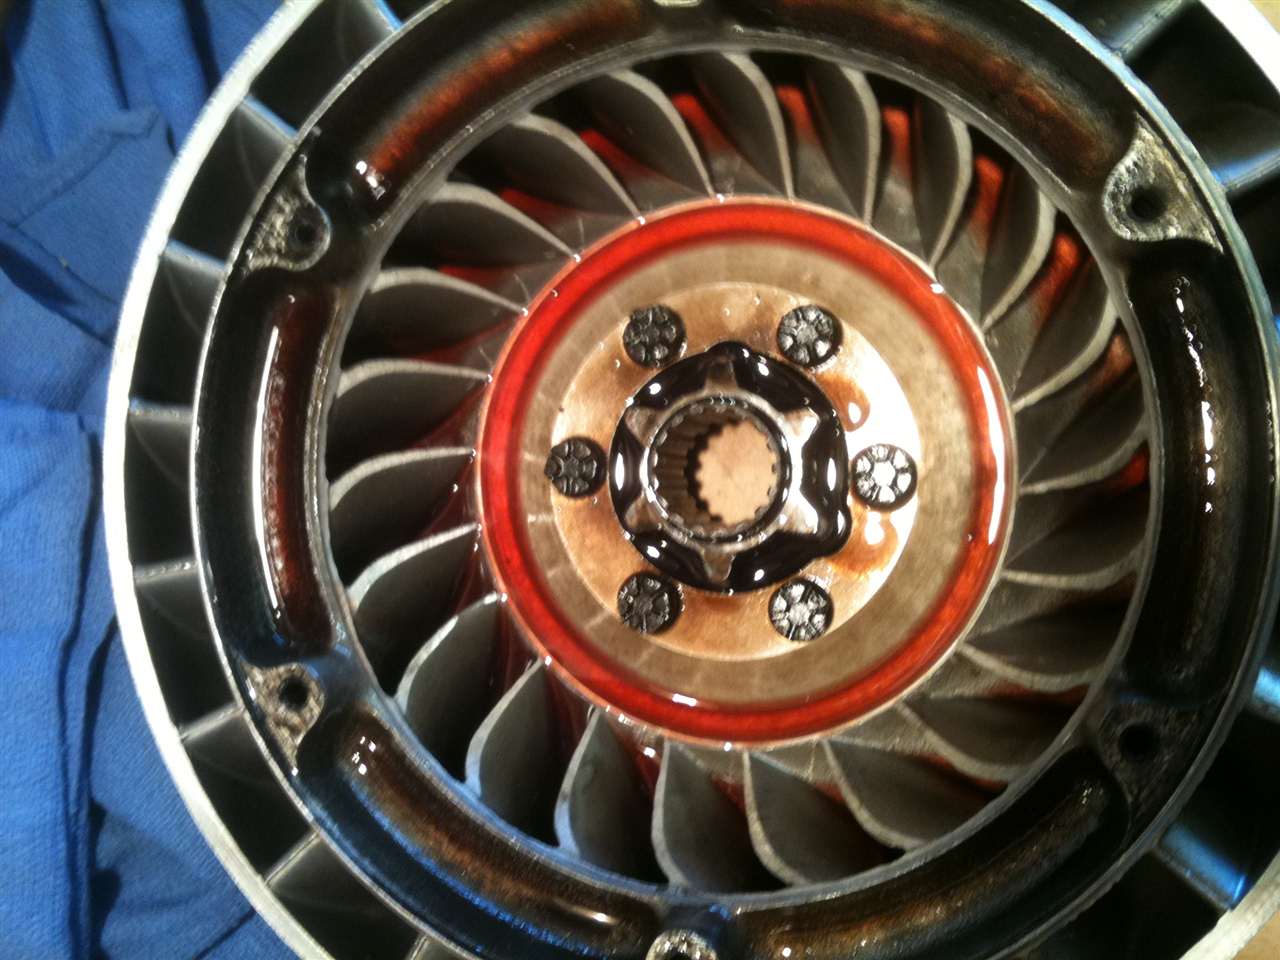 (122.58 KB) (122.58 KB) (158.17 KB) (158.17 KB) (100.42 KB) (100.42 KB)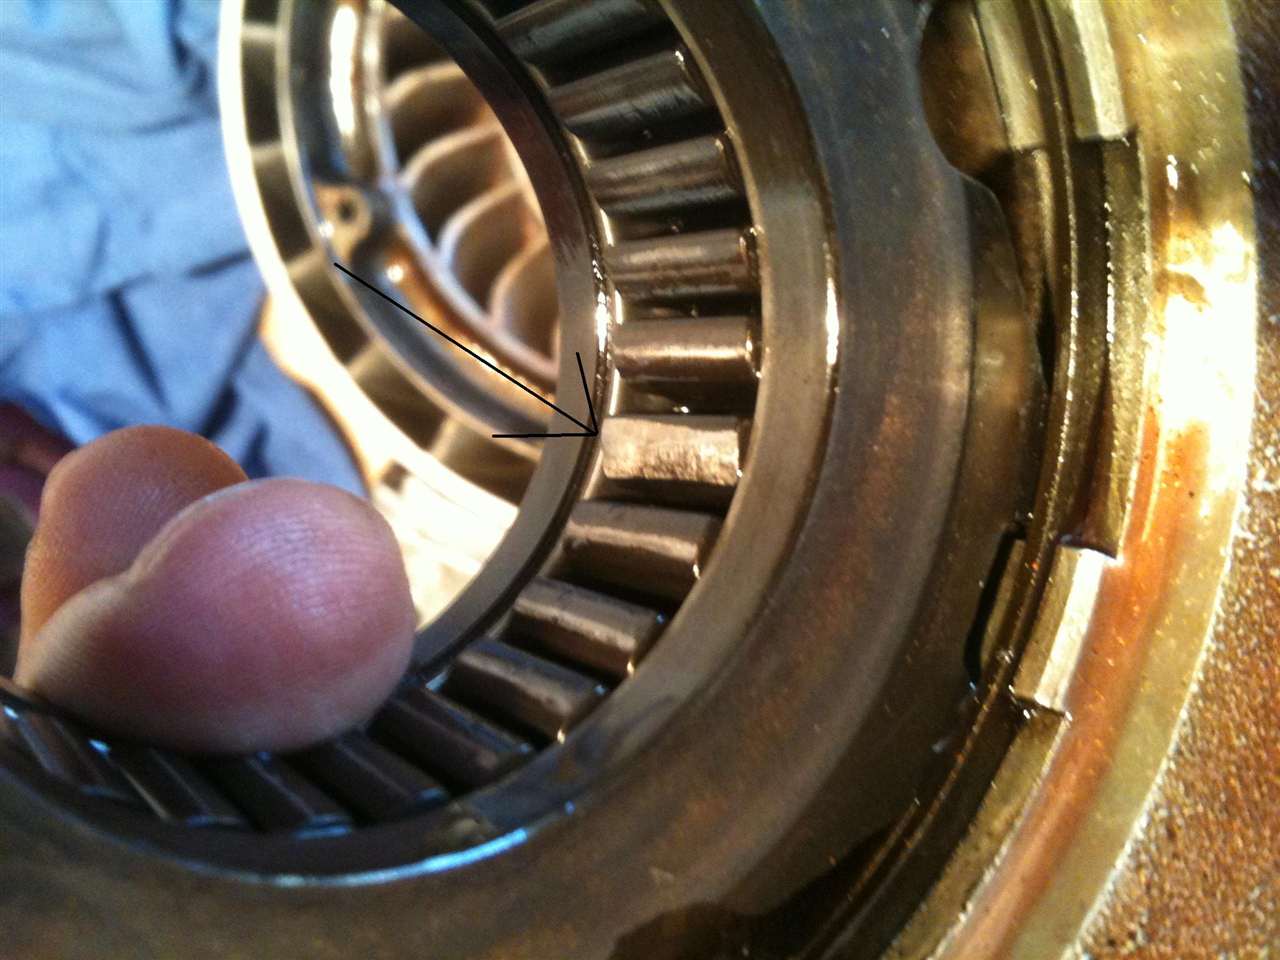 (100.07 KB) (100.07 KB) (123.37 KB) (123.37 KB)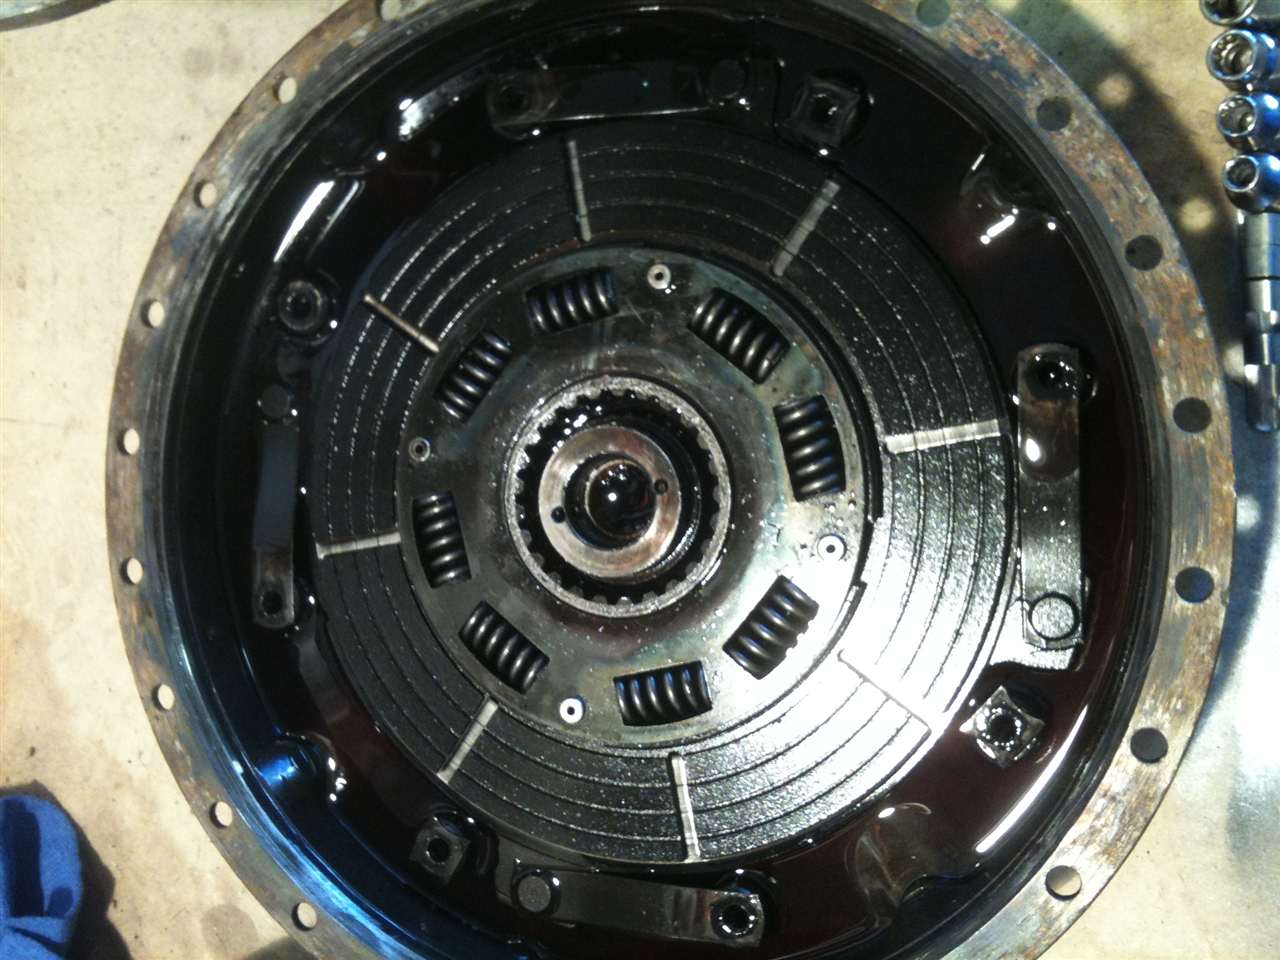 (138.72 KB) (138.72 KB) (119.36 KB) (119.36 KB)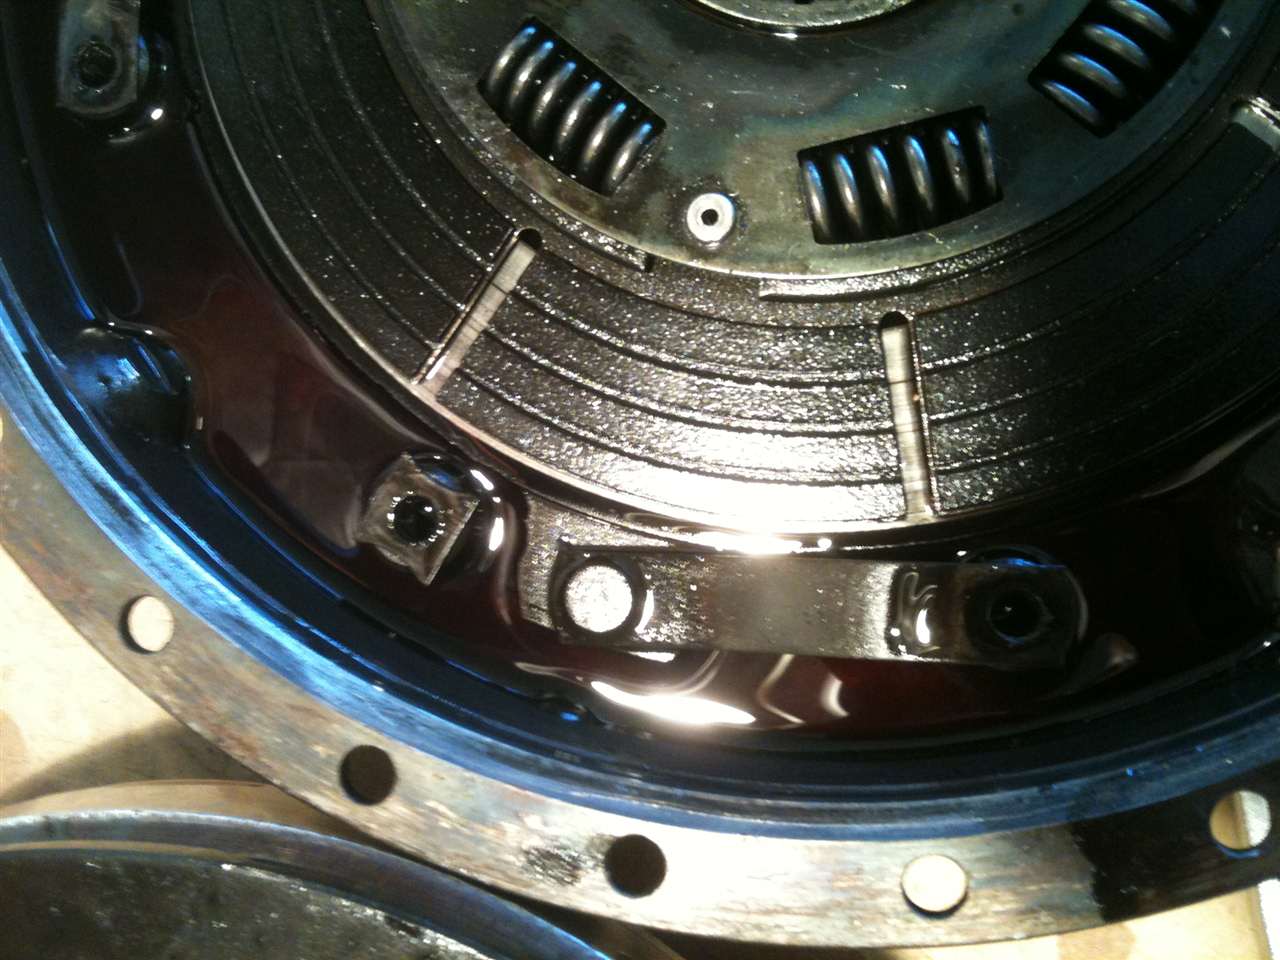 (94.76 KB) (94.76 KB) (85.89 KB) (85.89 KB)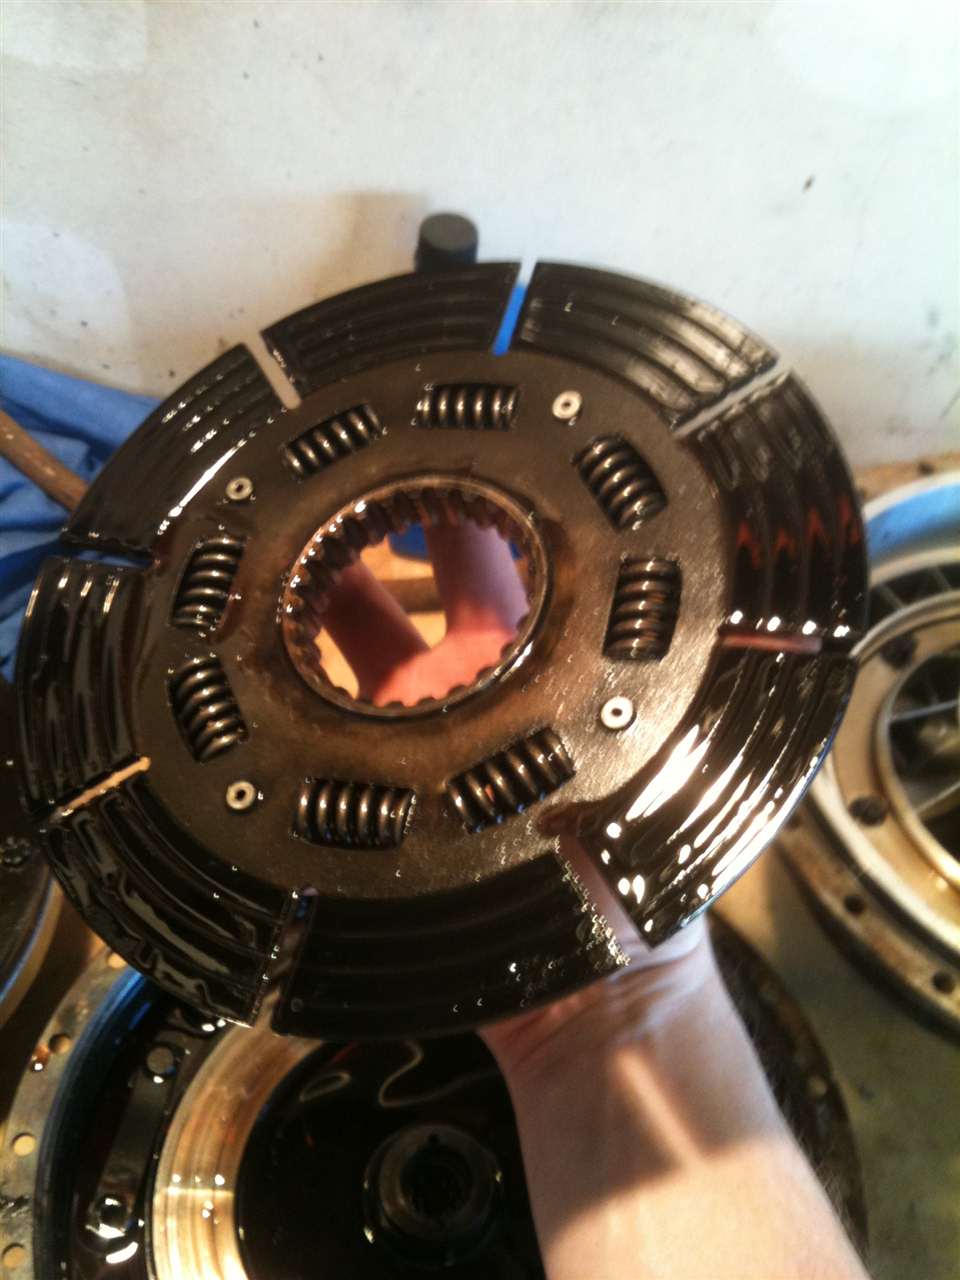 (95.85 KB) (95.85 KB)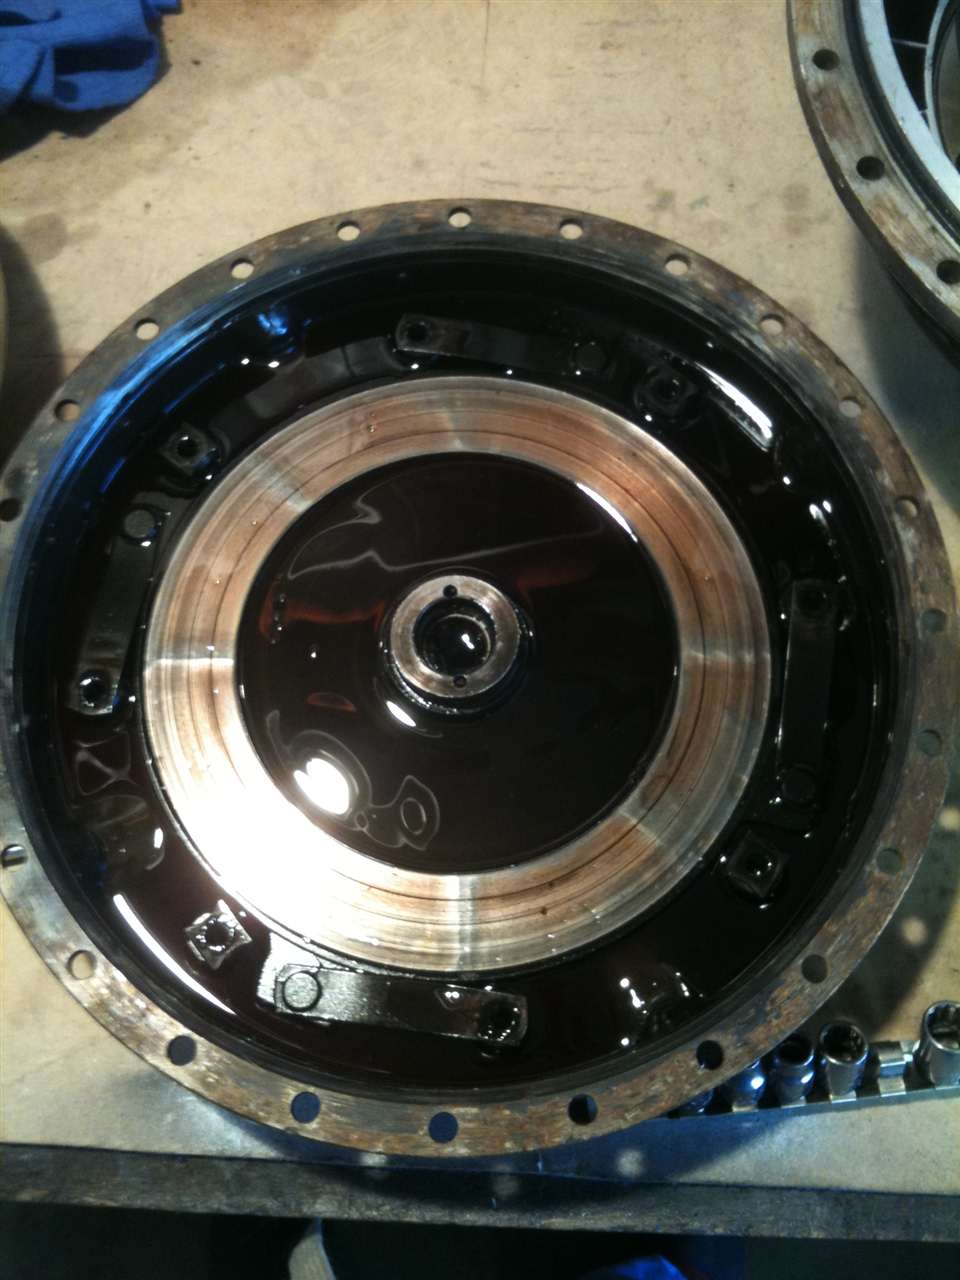 (96.10 KB) (96.10 KB) (102.83 KB) (102.83 KB)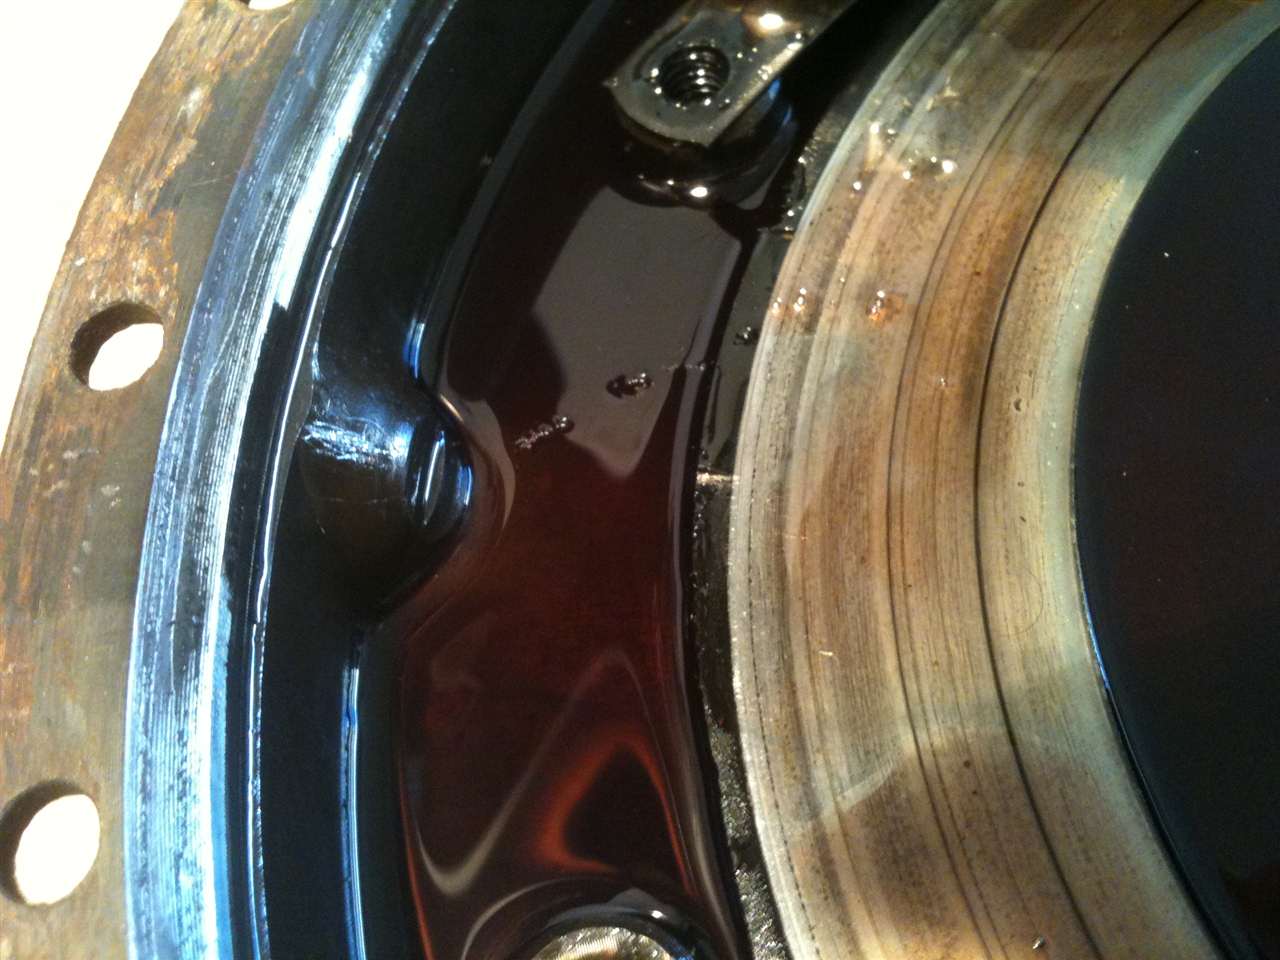 (99.51 KB) (99.51 KB)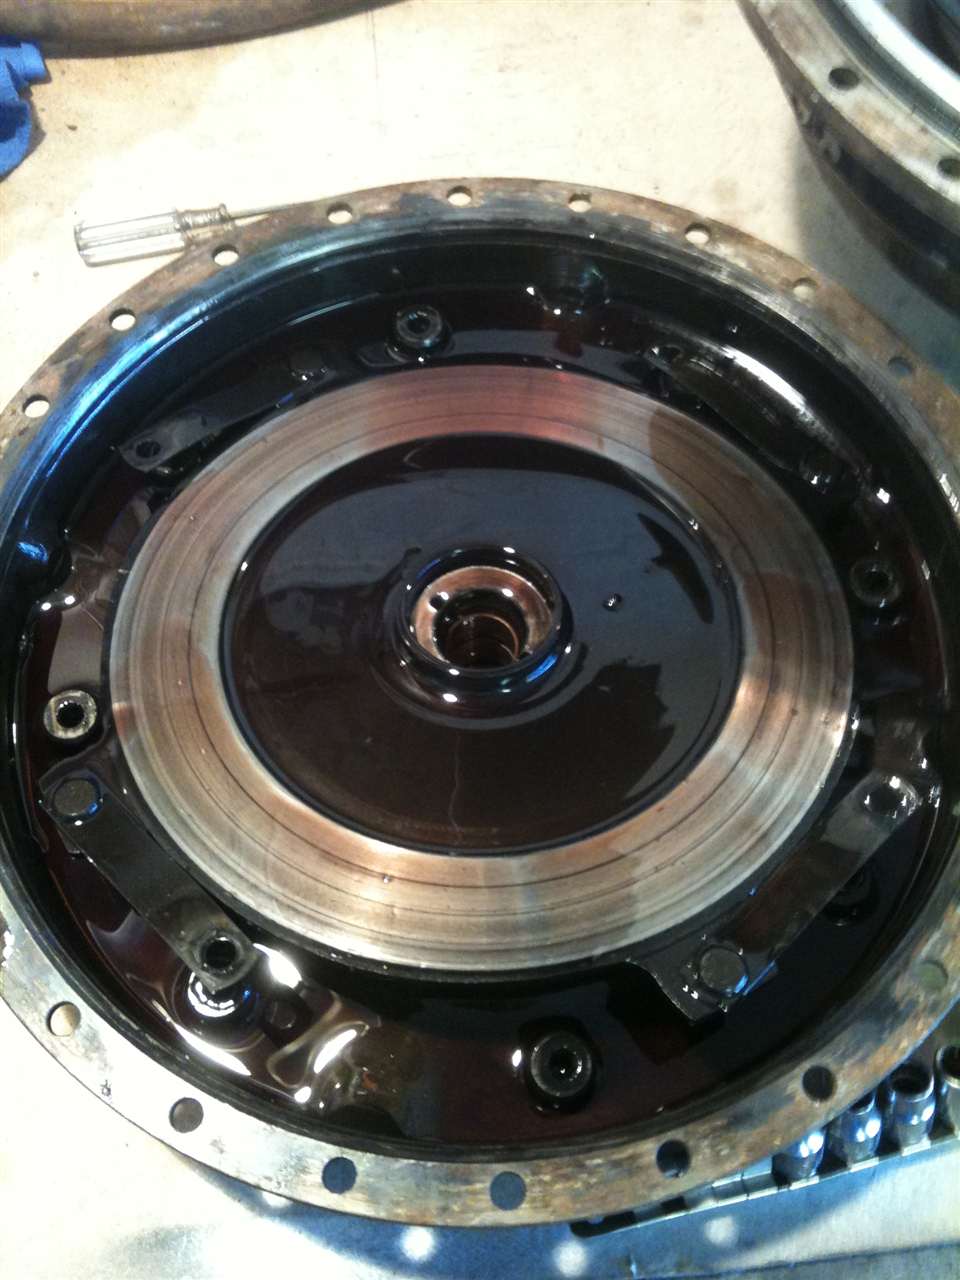 (98.24 KB) (98.24 KB) (102.94 KB) (102.94 KB) (89.42 KB) (89.42 KB)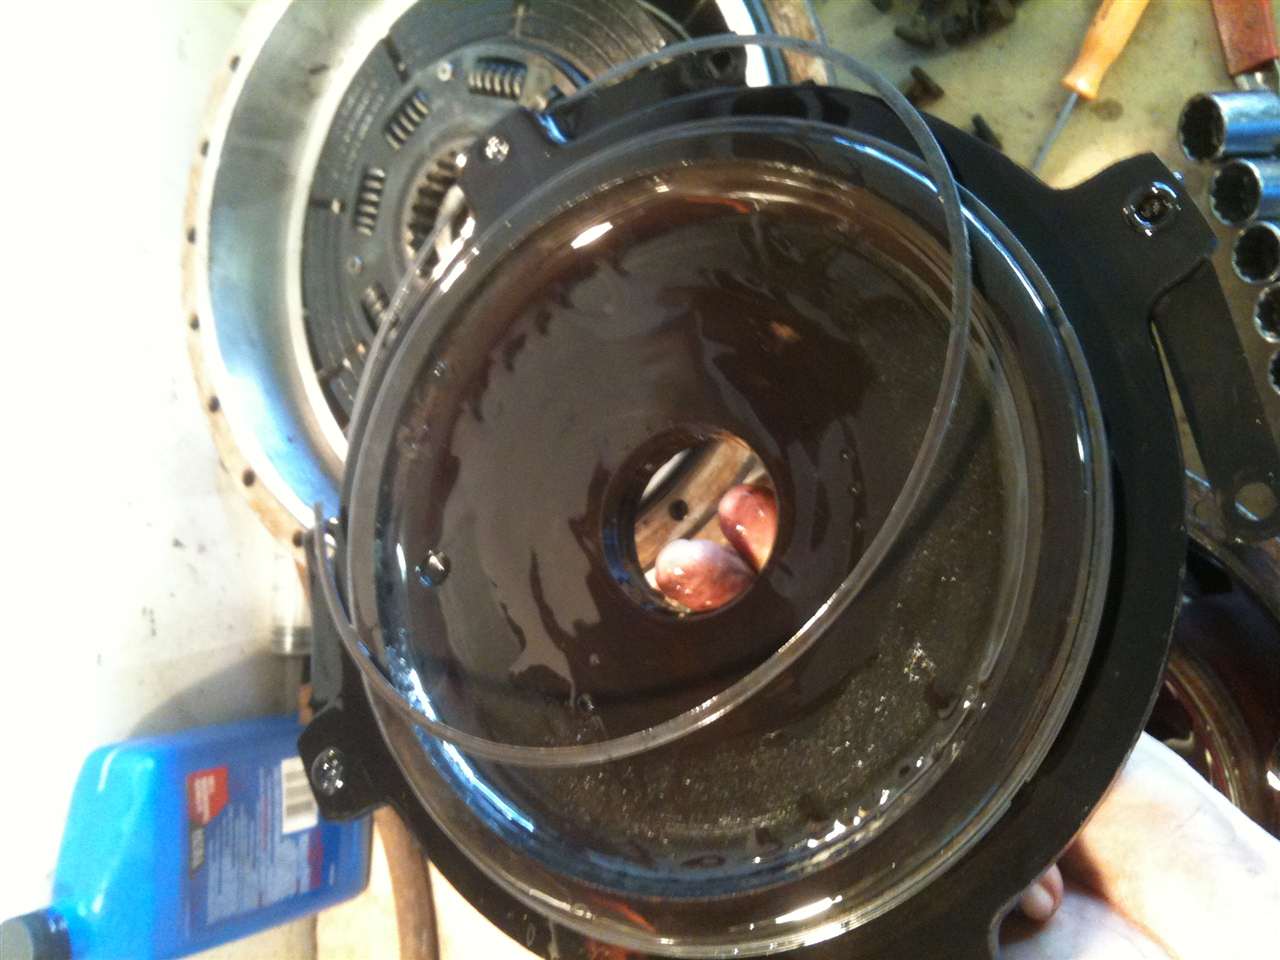 (98.93 KB) (98.93 KB)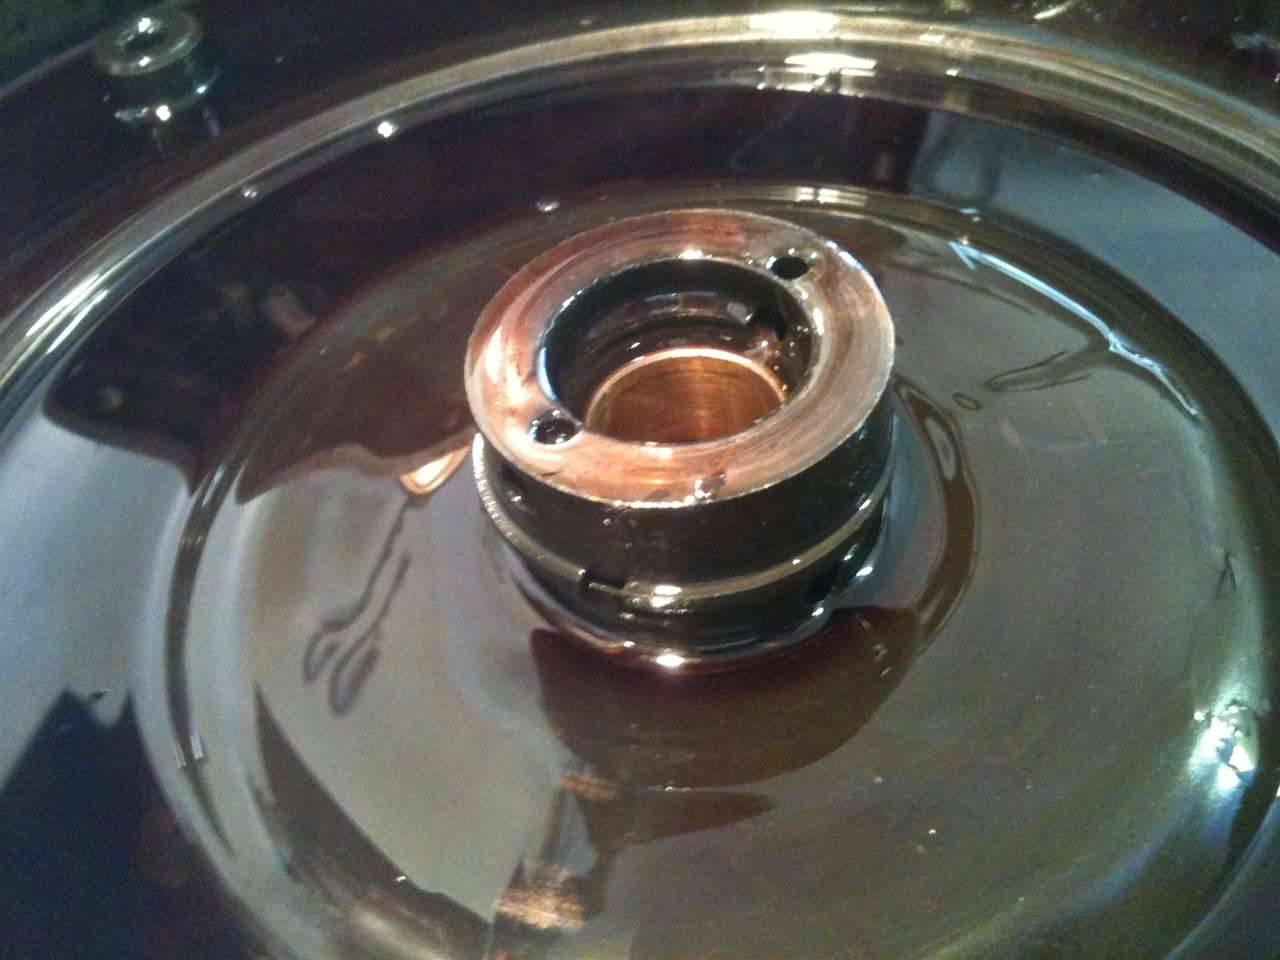 (97.83 KB) (97.83 KB)
Posted on: 2010/5/6 14:07
|
|||
|
1937 Packard 138-CD Deluxe Touring Limousine
Maroon/Black 1090-1021 [url=https://packardinfo.com/xoops/html/modules/registry/View.php?ID=232]1955 Packard |
||||
|
||||
|
Re: Henry's 55 Constellation
|
||||
|---|---|---|---|---|
|
Home away from home

|
The torque convertor is a fascinating piece. There are a number of things to look out for in there; in my experience many of the causes of Ultrauma are hatched there and them come to full flower elsewhere.
Be extra careful inspecting the sprag clutch. It is the weakest link, and if any of those sprags flip over and invert when it is under load, the clutch will lock and you will experience massive overheating. Those two damaged sprags have got to go. I'll be happy to send you a couple, but really recommend replacing the set. The clutch disc must be soft enough that you can mark it with your fingernail. If it is hard it will slip under load. The plate that covers the disk is supposed to be coned toward the disc. If you lay a straight edge across it you should be able to measure about a .010 gap at the edge. If the convertor was ever seriously overheated that cone will reverse to upwards--which means the harder the piston applies, the less surface area there will be for the clutch disk. These can be resprung in a big press--just did it for the 56 I'm building. All the bolts that hold aluminum pieces onto steel hubs should be coated with Loctite and retorqued. They love to come loose. Lastly double check all your bushing clearances; .003 maximum for good oil pressure control. You will probably have to borrow a special puller for those front bushings. I'll try and post a few picture later on.
Posted on: 2010/5/8 9:51
|
|||
|
||||
|
Re: Henry's 55 Constellation
|
||||
|---|---|---|---|---|
|
Home away from home
|
Here's a couple shots of the disk that covers the direct clutch to show how it is and isn't supposed to look. The straightedge is laying on the side that contacts the clutch disk.
Attach file: (68.31 KB) (67.10 KB) (67.10 KB)
Posted on: 2010/5/13 21:23
|
|||
|
||||
|
Re: Henry's 55 Constellation
|
||||
|---|---|---|---|---|
|
Forum Ambassador
|
about to start rebuilding the torque converter, but in the mean time i took one of the exhaust valves out because i have never done that before and it was there. they were pretty rusty looking. only the exhaust side though. you can see after cleaning it off....they wont be reused.
the rebuild kit from Kanter comes with new valves, but i am not sure if they are NOS or just some replacement. enjoy the pics of my pitted up valve. not really sure why it got that line in the middle of the lip seal. later, Hank Attach file: (132.07 KB)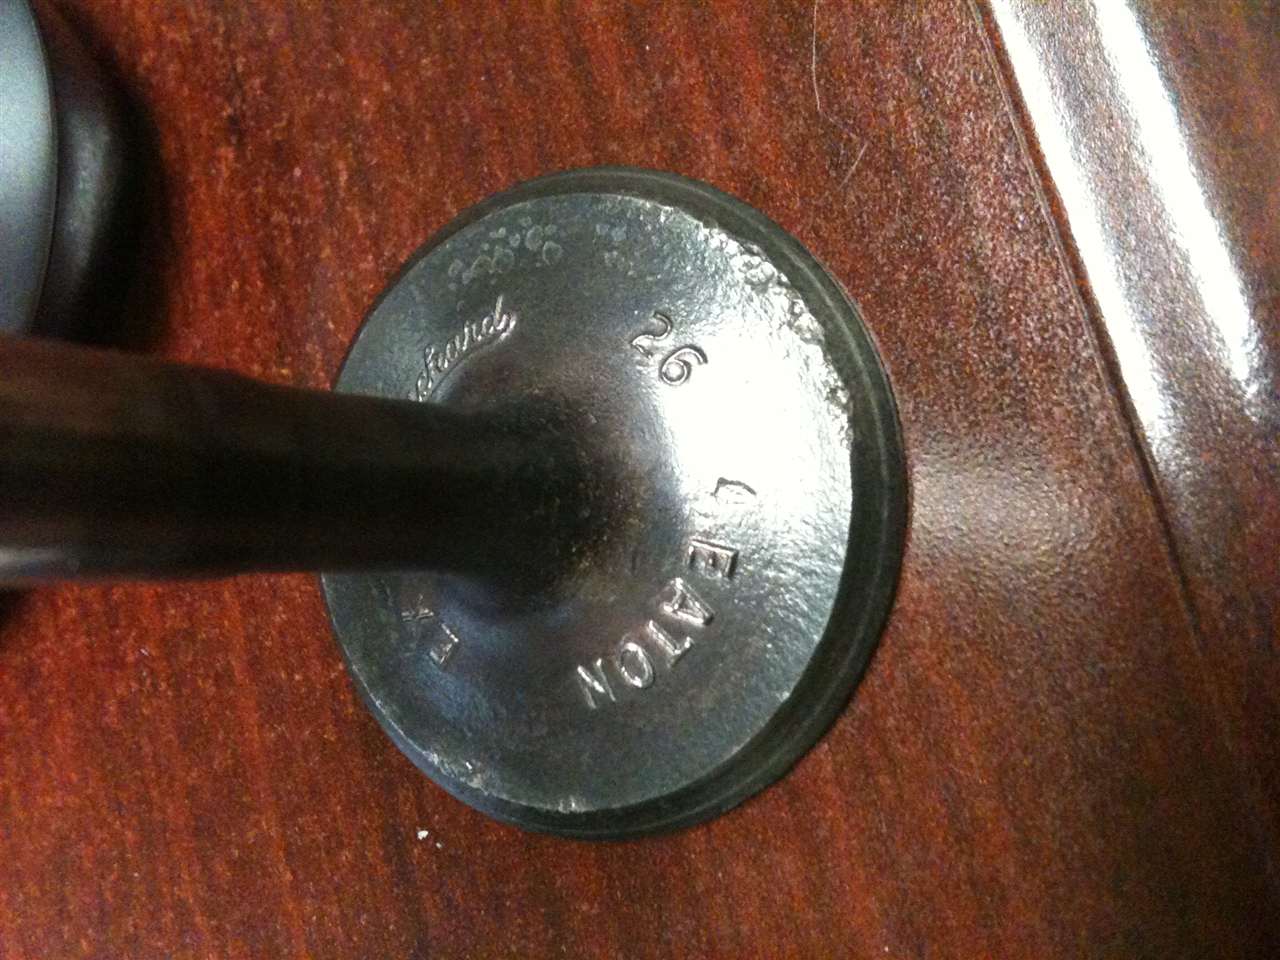 (134.42 KB) (134.42 KB)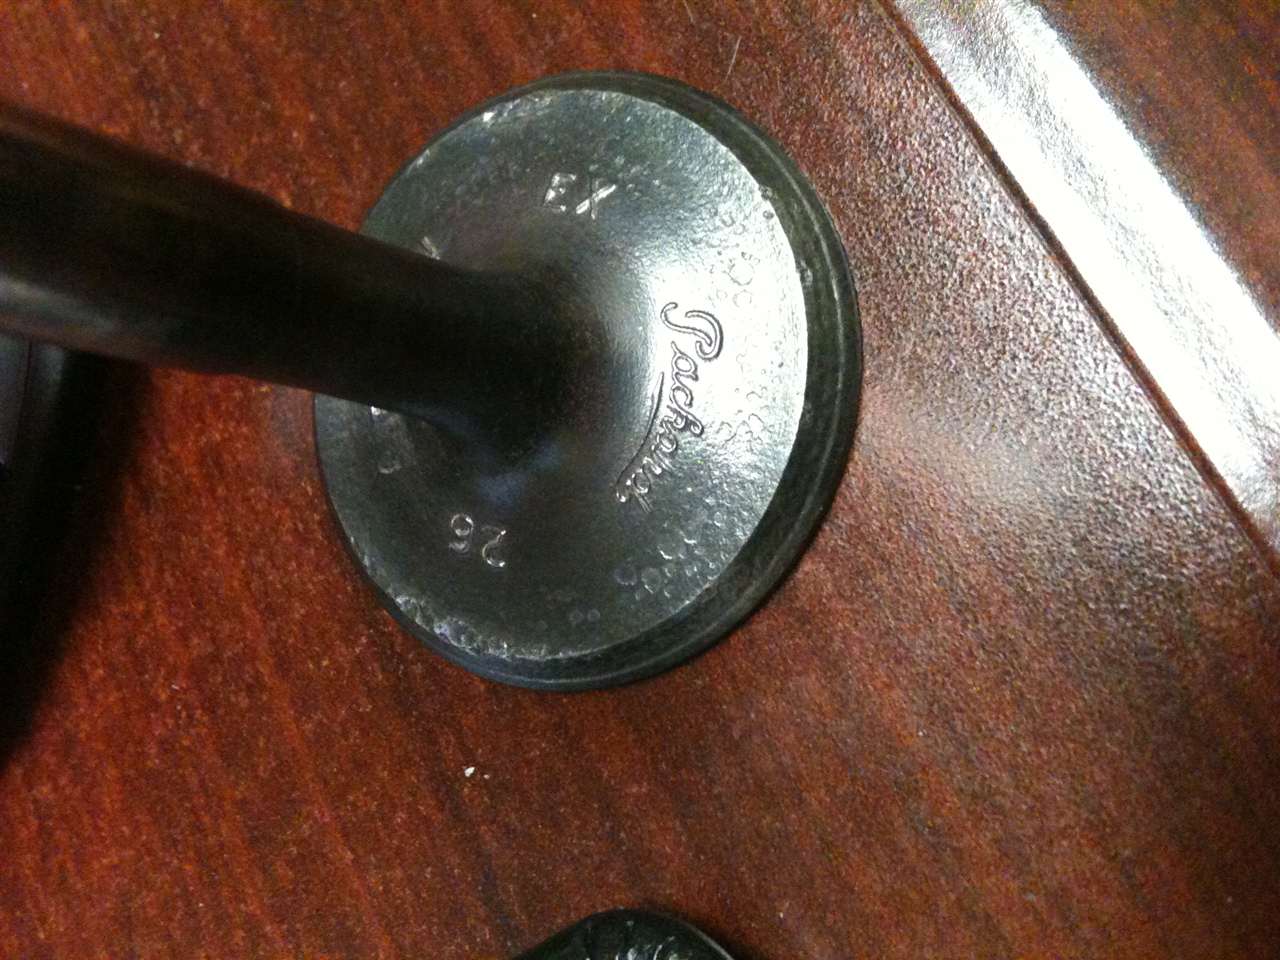 (132.83 KB) (132.83 KB)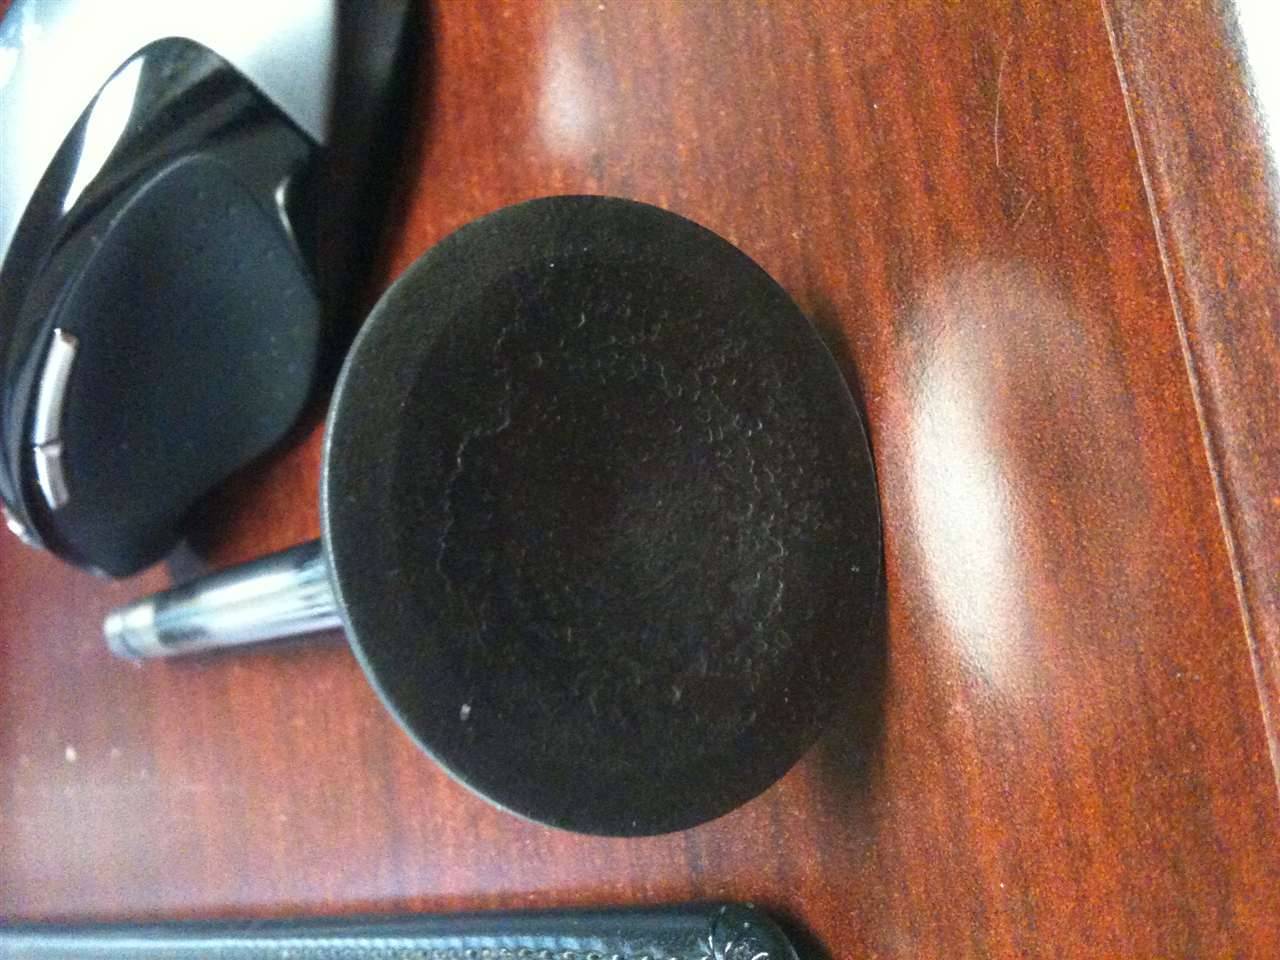
Posted on: 2010/6/21 13:56
|
|||
|
1937 Packard 138-CD Deluxe Touring Limousine
Maroon/Black 1090-1021 [url=https://packardinfo.com/xoops/html/modules/registry/View.php?ID=232]1955 Packard |
||||
|
||||
|
Re: Henry's 55 Constellation
|
||||
|---|---|---|---|---|
|
Forum Ambassador
|
Sorry guys a friend from work jumped on my computer while I was away and thought posting my car for sale would be funny. While I did laugh..... It wasn't funny. No it is not for sale! Sorry if u got ur hopes up LOL!!
I just saw this so Kev can u delete this from my blog? I b sure to log out next time LOL! And p.s. I forgave my friend 
Posted on: 2010/6/24 13:28
|
|||
|
1937 Packard 138-CD Deluxe Touring Limousine
Maroon/Black 1090-1021 [url=https://packardinfo.com/xoops/html/modules/registry/View.php?ID=232]1955 Packard |
||||
|
||||
|
Re: Henry's 55 Constellation
|
||||
|---|---|---|---|---|
|
Home away from home
|
Say it ain't so Hank

Posted on: 2010/6/24 14:39
|
|||
|
||||
|
Re: Henry's 55 Constellation
|
||||
|---|---|---|---|---|
|
Home away from home
|
Quote:
Henry, what the heck is wrong with that valve? Now a real shade-tree mehanick would file 'er off an put 'er back in, like we did with a stuck exhaust valve on a '48 Dodge flathead 6. Had to use a vice grips to get it out, which chewed it up a little, but some TLC and it went right back in, and is still in there, doing it's job. It's practically criminal to waste an only minimally busted valve. 
Posted on: 2010/6/27 16:26
|
|||
|
Guy
[b]Not an Expert[/ |
||||
|
||||
|
Re: Henry's 55 Constellation
|
||||
|---|---|---|---|---|
|
Forum Ambassador

|
Unless you locate OEM or NORS valves, all replacement valves available today are most likely made by Egge. Assuming you'd have enough margin left after refacing and the stem is true with head, it should be fine for reuse. Just have a good machine shop take a look. If you use old valves that have been refaced, you should also machine-face the seats.
Posted on: 2010/6/27 18:38
|
|||
|
||||


