
|
Re: Wade's Workshop
|
||||
|---|---|---|---|---|
|
Home away from home

|
I saw one recently at the Concorso de Santa Fe. It has a tiller steering as Kev said. The driver sits in the seat that is far back in the cab. Two passenger capacity, I believe, but with lots of leg room. Large glass area, good visability. Lead-Acid batteries in front and back compartments.
(o[]o)
Posted on: 2011/11/3 11:12
|
|||
|
We move toward
And make happen What occupies our mind... (W. Scherer) |
||||
|
||||
|
Re: Wade's Workshop
|
||||
|---|---|---|---|---|
|
Forum Ambassador

|
Monday 7th November 2011
While Mal was away Wade wasn't at play but working hard on Junior last Friday and Saturday. Arrived at the workshop to find Junior denuded, well at least as far as the front clip goes. Up on the hoist, engine at waist height with all accessories removed and linkages disconnected, front wheels off and Wade struggling to get the legs on the engine crane pinned in place. If you're lucky you might be able to do it alone but it's really a two man job even though all the second man does is just provide slight leverage so the pin's can be inserted when the legs are laid out flat. And this time around Wade had a nifty little pick up device which can be wound back and forth for the centre of balance in the lifting process. And it worked well too, with Mal operating the crane, up a bit, down a bit, pull back, slide in, etc, the engine and trans combo came out very easily. Next the trans/OD unit was removed from the bellhousing and laid on the floor. Good, except it tipped left spilling oil from the OD, filler plug or governor? To fix, tipped to the right but an even worse result, oil from solenoid or speedo drive this time. Fixed when the clutch throw out bearing was used as a wedge to maintain the trans/OD in an upright stance. Clutch fork, pressure and clutch plate then removed but first pressure plate and flywheel marked for future reference. With those off this allows access to the flywheel bolts but first more marking between crankshaft and flywheel followed by prising out the ears of the retaining tabs on the flywheel bolts. Then the bellhousing bolts became accessible and were removed. Turned then to the front of the engine and the front engine mount removed, rubber looks OK but will probably be replaced anyway. Harmonic balancer off then the timing case cover revealing a very slack timing chain. Unbolting the large nut on the cam gear required more tabs to be bent back and it then had to be gradually levered off the cam snout. The teeth on both timing gears are in sad shape with the cam gear worse than the crank gear. Additionally the back of the front crankshaft oil seal was "chewed up" where the crankshaft gear, the timing chain or a combination thereof had been having their way with it. Back and front done, next was the turn of the internal components. Valve spring compresser and a magnet were the tools used with the magnet picking out the little slide in retainers, then the valves followed by the valve springs. And it appears that almost all exhaust valves weren't seating. Down then to the bottom end, the big ends unbolted and piston and rod assemblies pushed out. Although last week #3 big end had shown signs of wear and scoring, #2 being first out today was down to the copper. As were #4, #1, #5 and #6 in order of removal. Additionally, the top ring on #6 was broken and from a cursory examination all the top rings seemed "looser" than the second rings. The camshaft was then slipped out after it's front retaining plate was removed. Tappets out and placed in numbered series for re-installation at a later date. Main bearing caps removed, first marking #2 and #3 which didn't have any visible marking although later a faint 3 was found on #3. All main bearing have pieces missing and/or other damage to them. Would have only been a matter of time before something dramatic happened. The ancillary fittings were next with the various oil pipe fitting first photographed by the Packardarazzi(moi!) and then removed. Aren't digital cameras wonderful? Next were the two screw topped oil gallery fittings. These required a shockhammer screwdriver to break them loose from the block but were relatively easy to remove. The last oil gallery items were the end plugs for the oil galleries. One at the rear of the main gallery, another at the front of it and a third below the front cam bearing. Each of these is a grub screw with a square female fitting and these are flush or below block surface level. These, together with some very stubborn welch plugs and a very embedded in block water distribution tube, were still in situ when I left, for some time with the grand-daughters. Once everything is removed, some measuring and assessment undertaken by Wilkins Engineering of block, crank, etc, and a frank and fearless discussion with John will take place. Depending on the outcomes things can then be set underway to order parts, dip blocks, do machining required leading to a new source of power for Junior. Attach file:  (37.02 KB) (37.02 KB)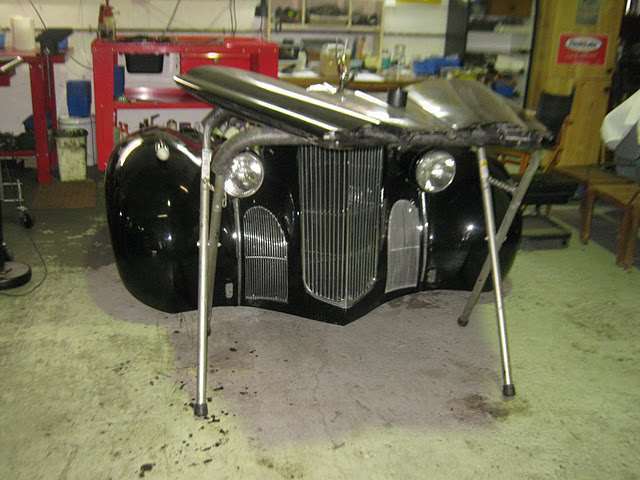 (20.85 KB) (20.85 KB)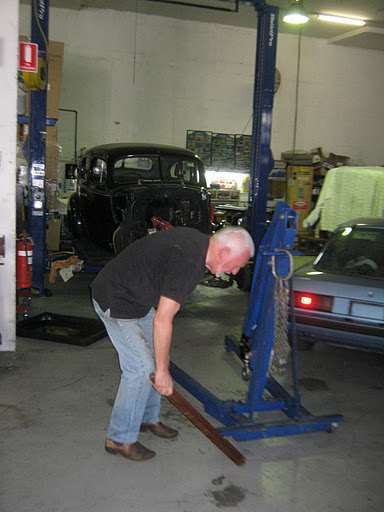 (20.54 KB) (20.54 KB)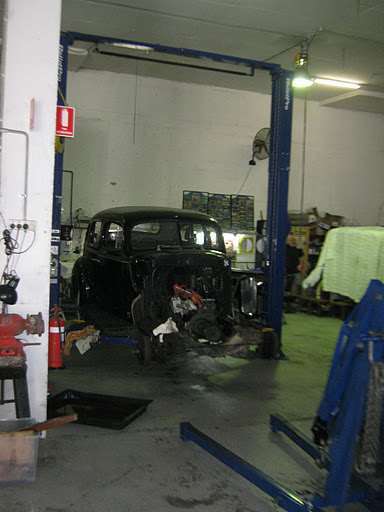 (40.28 KB) (40.28 KB) (43.77 KB) (43.77 KB)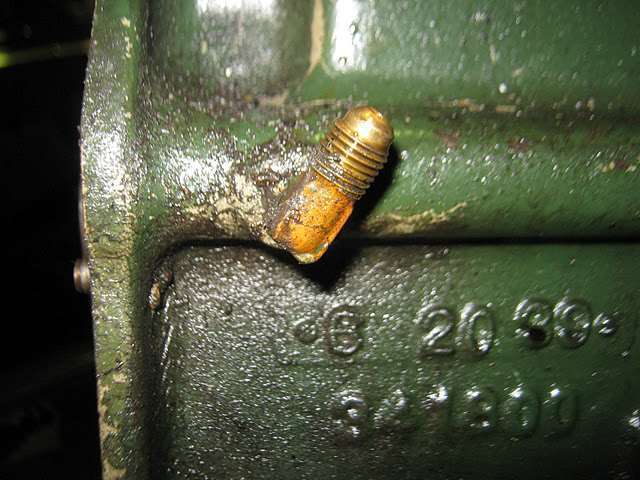 (46.05 KB) (46.05 KB)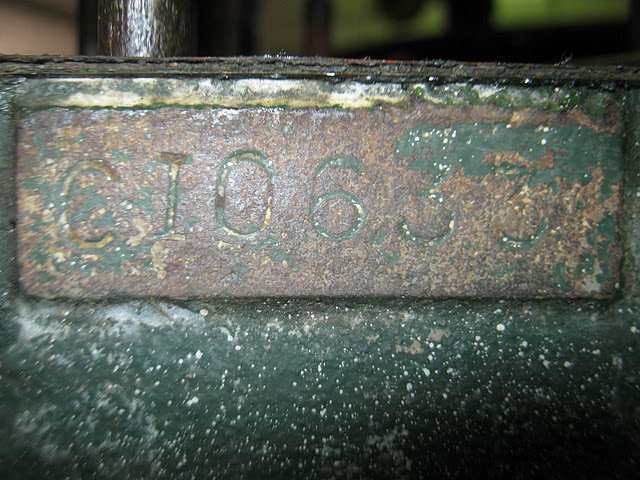 (30.79 KB) (30.79 KB) (37.79 KB) (37.79 KB)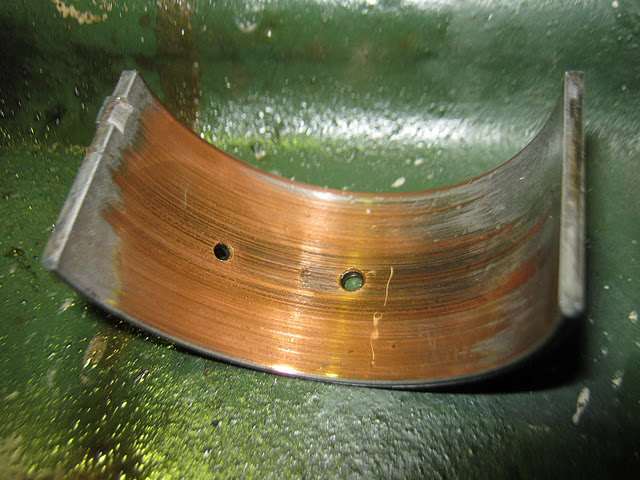 (31.76 KB) (31.76 KB)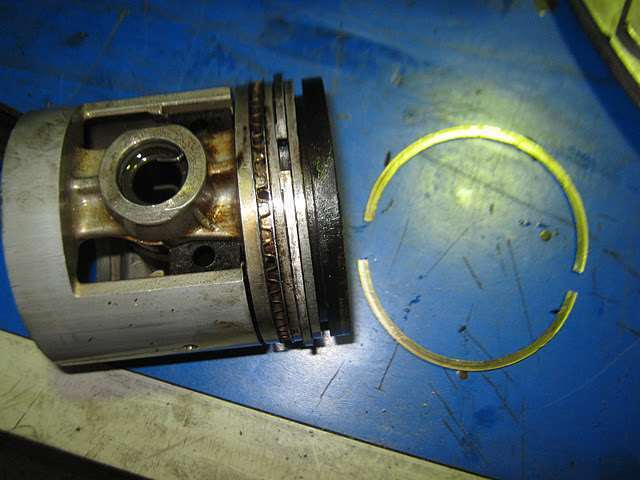 (26.65 KB) (26.65 KB)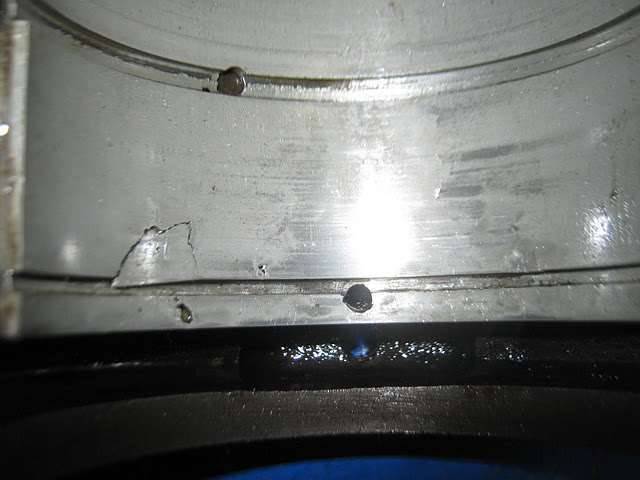 (27.21 KB) (27.21 KB) (30.24 KB) (30.24 KB)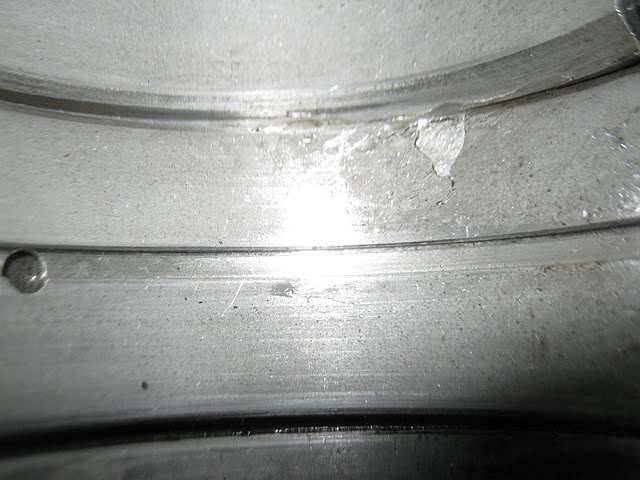 (27.55 KB) (27.55 KB)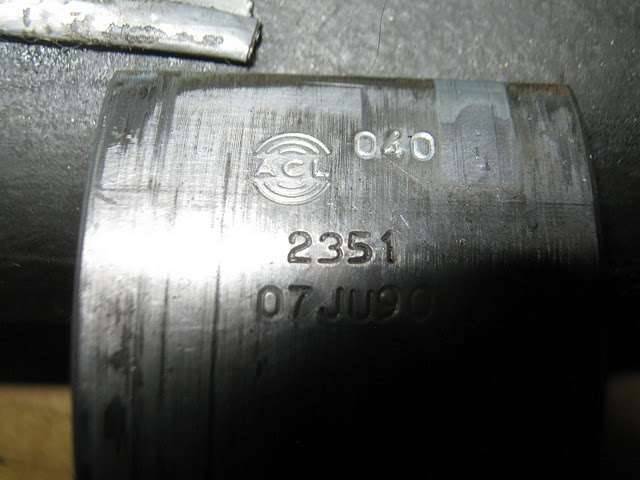 (27.12 KB) (27.12 KB)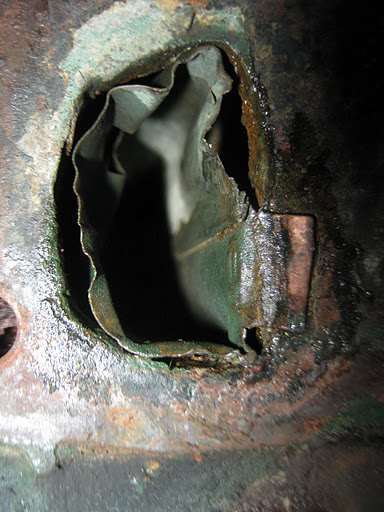 (44.28 KB) (44.28 KB)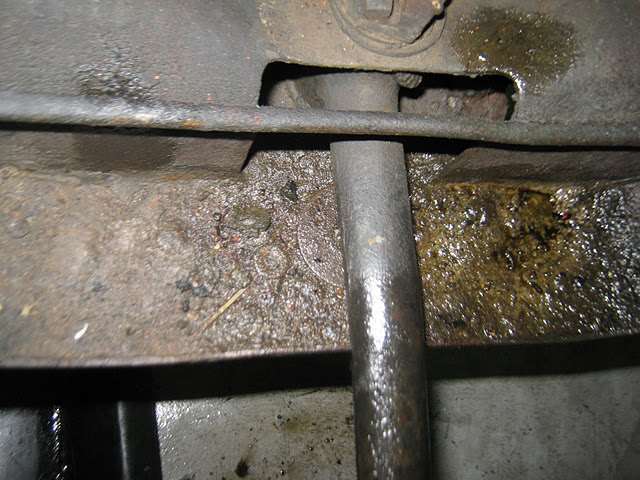
Posted on: 2011/11/7 6:58
|
|||
|
Mal
/o[]o\ ====  Bowral, Southern Highlands of NSW, Australia "Out of chaos comes order" - Nietzsche. 1938 Eight Touring Sedan - SOLD 1941 One-Twenty Club Coupe - SOLD 1948 Super Eight Limo, chassis RHD - SOLD 1950 Eight Touring Sedan - SOLD What's this?  Put your Packard in the Packard Vehicle Registry! Here's how! Any questions - PM or email me at ozstatman@gmail.com |
||||
|
||||
|
Re: Wade's Workshop
|
||||
|---|---|---|---|---|
|
Home away from home
|
After the visit today I tried to recall what I could of the conversation I had with the first guy that began restoring the car.
I am fairly sure he said I had to grind the crank to fit the bearings I could find.
Posted on: 2011/11/8 23:21
|
|||
|
Carpe Diem!!
 Registry Registry
|
||||
|
||||
|
Re: Wade's Workshop
|
||||
|---|---|---|---|---|
|
Home away from home
|
Hi Mal, You will probably find that the Copper and whitematal bearings are Bedford. many people make the mistake and put the Byrellium Copper bearings into a packard with a non-hardened crankshaft. The end result is that in marginal lubrication the copper bearings work harden and chew out the crank. The "tin/lead" bearings are also Bedford ( last set which I obtained was from Tasmania) but suitable for Packard cranks. I have used them in the past. I believe that you will find that the rods have been tunnelled to accept the Bedford ACL bearings. Let me know if you need some bits. Peter
Posted on: 2011/11/9 1:05
|
|||
|
I like people, Packards and old motorbikes
|
||||
|
||||
|
Re: Wade's Workshop
|
||||
|---|---|---|---|---|
|
Forum Ambassador
|
Wednesday 9th November 2011
No Packard work yesterday, we were on the Morris Minor Picnic Club run to the Careflight helicoptor base at Westmead hospital. Most interesting and informative, and Harvey and Carol joined us in their '40 Willys, see this album.. Today though it was back to Packards, with a road trip occupying the morning and early afternoon. Loaded Junior's block and crank together with #3 piston and rod into the back of Wade's ute and off. After running an errand for Gina which took us in the opposite direction we then set a course for Wilkins Performance Engines. There Graham measured up bores, taper, out of round on the block and the big end and main journals on the crank. Pistons are marked 0.040" but the bores are now in the vicinity of a further 0.008" over. The big ends are in the vicinity of 2.055" while the mains are "I can't remember", should have taken a pic of the numbers Graham noted down. The various numbers didn't look good which was confirmed later. While there we also saw the engine out of Chris, starliner's '53 Mayfair Hardtop which Graham is going to machine, etc, once the parts arrive from K's. Back on the road again and around the corner to Award Diffs who had called Wade yesterday to advise the pumpkin out of Barry's '38 Twelve was ready. They'd fitted a set of high speed gears which necessitated machining of both the back of the crown wheel and the face it bolts to. Speaking of bolting to, Terry there advised they used EH Holden diff bolts for this, they were exactly right. Additionally they also replaced the very large diff bearings, this was unexpected as there had been no noise detected from failing bearings. Next stop was for double insulted cable for the Crypton Engine Analyser then to Grippy rubber for rubber stripping for The Fossils radio speaker. Back at the workshop unloaded the diff, block and crank and were just in the midst of re-shuffling Packard Corner when Junior's Dad, John, arrived. Wade walked John through what had been discovered today and John advised he thought the guy who had the engine rebuilt said he'd used Bedford bearings.  for the confirmation Peter. Wade also advised John we were going to pull the crank out of the '39 Six engine which has been sitting in a corner since a new heart was transplanted into JohnM's TJ Richards bodied '39 Six Sedan in 2009. Once John departed took the tailshaft out of Junior, dropped Junior down and re-installed the front wheels, then finished the re-shuffling of parts and equipment. Reason for the shuffling is that Wade and PeterL are going to the Bendigo Swap Meet leaving on Friday and returning on Monday. While Wade's away Big Red needs a secure domicile so she's going into the hoist slot while Junior is moved one slot over. So if John or Rick, or even Peter(the guy who owns it) needs to use the hoist it will be accessible. for the confirmation Peter. Wade also advised John we were going to pull the crank out of the '39 Six engine which has been sitting in a corner since a new heart was transplanted into JohnM's TJ Richards bodied '39 Six Sedan in 2009. Once John departed took the tailshaft out of Junior, dropped Junior down and re-installed the front wheels, then finished the re-shuffling of parts and equipment. Reason for the shuffling is that Wade and PeterL are going to the Bendigo Swap Meet leaving on Friday and returning on Monday. While Wade's away Big Red needs a secure domicile so she's going into the hoist slot while Junior is moved one slot over. So if John or Rick, or even Peter(the guy who owns it) needs to use the hoist it will be accessible.After shuffling parts but before shuffling Junior and Big Red the '39 Six engine was brought out of the naughty corner. Up on the engine crane, drained what was left of the oil, removed the sump, oil pickup, oil pump, front cover plate and timing gear. Once all these parts were off the short block was laid on the mobile engine bench next to Juniors bare block. Removed all big end end caps and pistons and rods, main bearing caps and then removed the crankshaft. Although some wear on the journals measurements reveal it has a lot more meat left on it than the one from Junior. Accordingly it looks like JohnM's crank and rods will be used in the rebuild because it's journals haven't been modified like Juniors were. A quick comparison of the big end shells showed the Bedford's are wider. Attach file: (42.74 KB) (22.72 KB) (22.72 KB)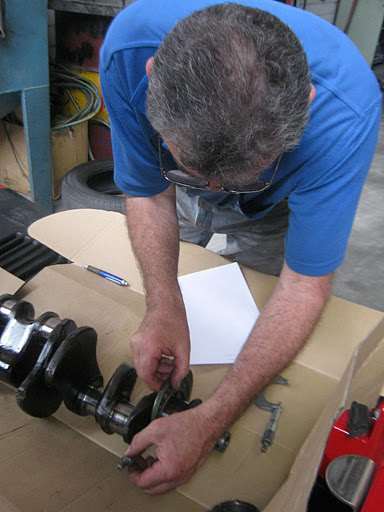 (28.13 KB) (28.13 KB)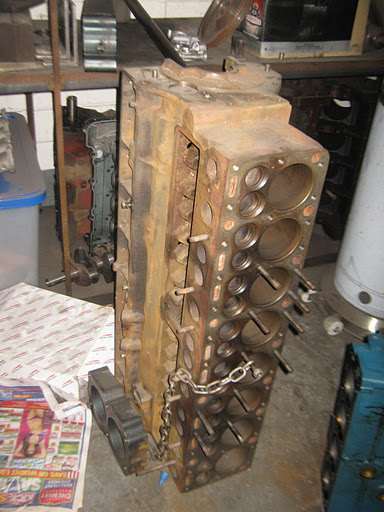 (39.13 KB) (39.13 KB)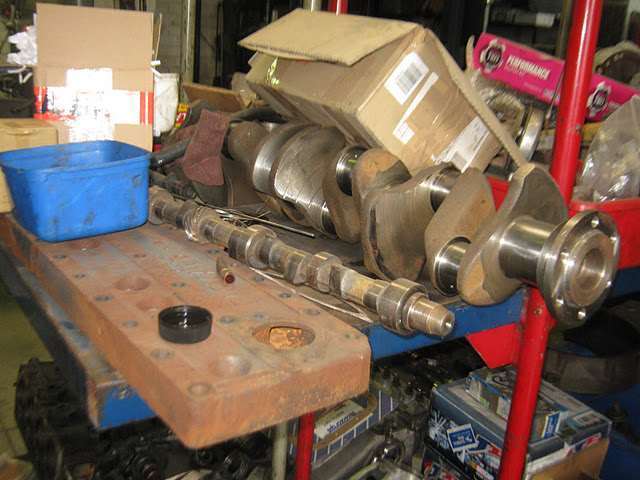 (35.90 KB) (35.90 KB)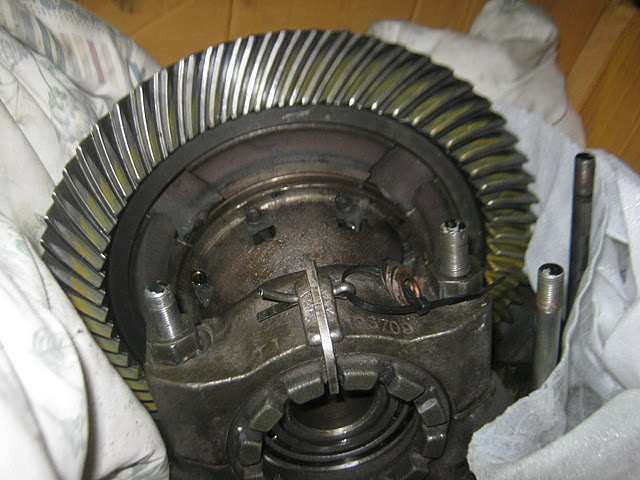 (30.79 KB) (30.79 KB)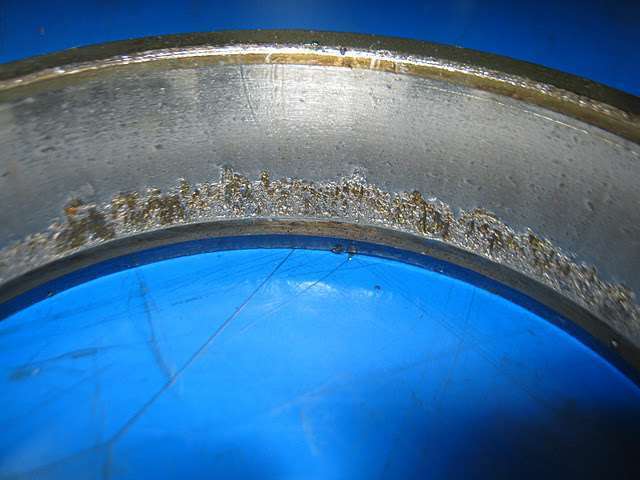 (30.48 KB) (30.48 KB) (43.12 KB) (43.12 KB)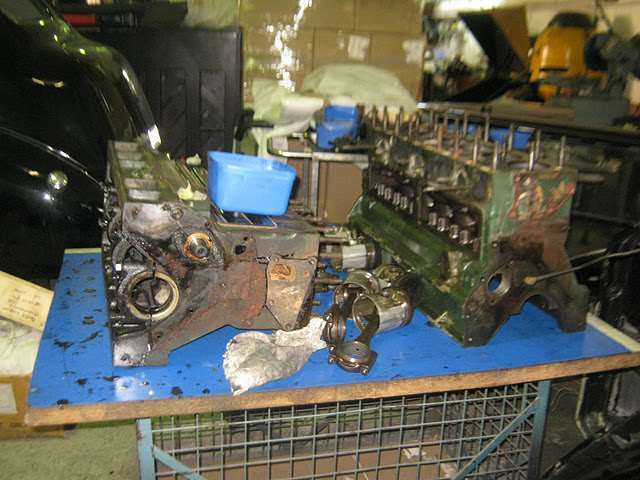 (31.34 KB) (31.34 KB)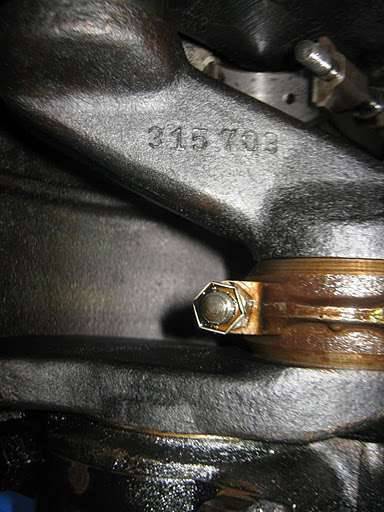 (36.19 KB) (36.19 KB)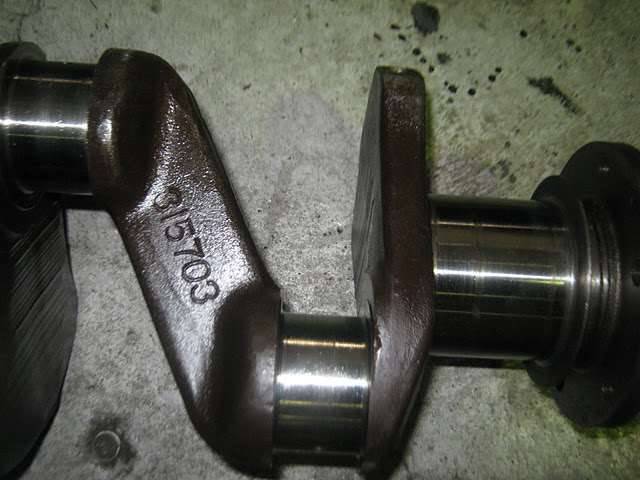 (38.08 KB) (38.08 KB) (34.61 KB) (34.61 KB)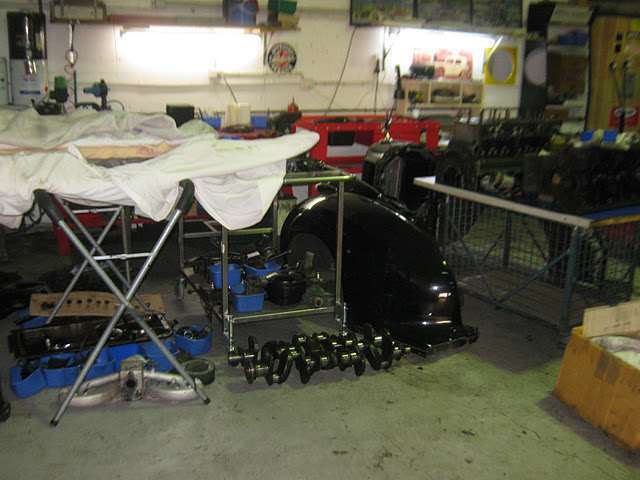 (27.22 KB) (27.22 KB)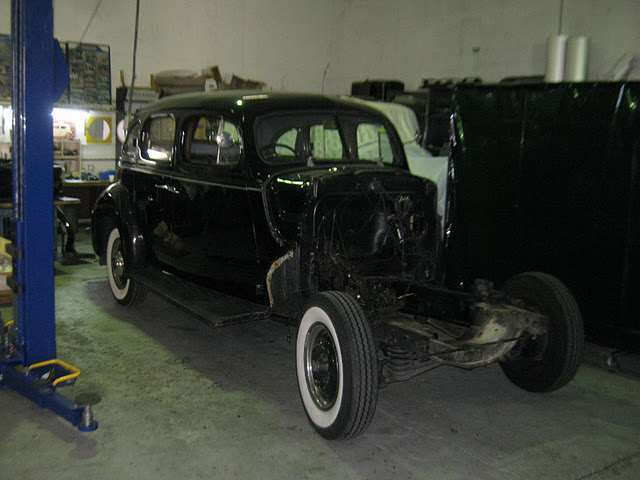 (33.66 KB) (33.66 KB)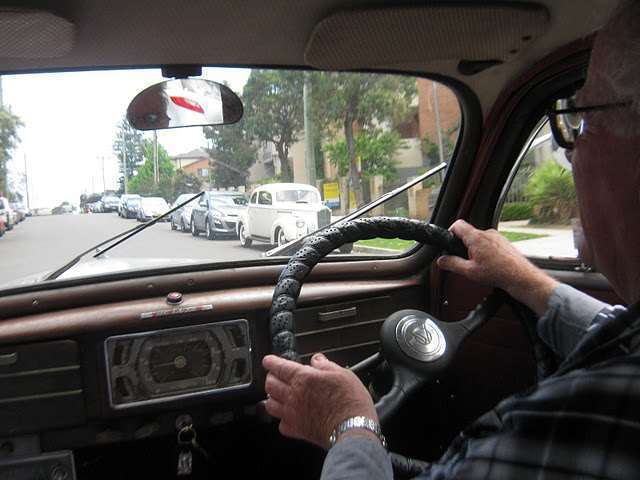
Posted on: 2011/11/9 3:34
|
|||
|
Mal
/o[]o\ ==== Bowral, Southern Highlands of NSW, Australia "Out of chaos comes order" - Nietzsche. 1938 Eight Touring Sedan - SOLD 1941 One-Twenty Club Coupe - SOLD 1948 Super Eight Limo, chassis RHD - SOLD 1950 Eight Touring Sedan - SOLD What's this? Put your Packard in the Packard Vehicle Registry! Here's how! Any questions - PM or email me at ozstatman@gmail.com |
||||
|
||||
|
Re: Wade's Workshop
|
||||
|---|---|---|---|---|
|
Just can't stay away
|
Hello,
I notice you are working on a 1934 Packard, is it a RHD? I need to find a right hand drive steering box for a 1934 Packard that is in good rebuildable condition so I can drive my car, maybe you have one there for sale. I have a RHD 1102 and any help would be great. Cheers Roberto cityvitnage@hotmail.com
Posted on: 2011/11/9 18:49
|
|||
|
cityvintage@hotmail.com
Purveyors of men's vintage clothing 1900-1960's |
||||
|
||||
|
Re: Wade's Workshop
|
||||
|---|---|---|---|---|
|
Forum Ambassador
|
Thursday 17th November 2011
Just a few hours at the workshop this afternoon. Wade had been in Tuesday morning and taken the spare Six crank over to Graham Wilkins. Graham miked it up and found both the big-ends and mains to be Standard, but all journals will be ground 0.010" under to clean them up. This morning Wade had removed the water distribution tube from Juniors block but not without a fight. Not to worry, on the magic shelf Wade had another one! This afternoon, while I started cleaning parts, Wade was tackling the front oil gallery grub screw which was proving quite recalcitrant. Still hadn't removed the remains of it when I left but it looks like it'll be drilled out and tapped to the next larger size together with a hex head grub screw instead of the square one at present. Also mounted The Fossil's speaker box on the firewall. Attach file: (19.54 KB) (33.11 KB) (33.11 KB) (21.75 KB) (21.75 KB) (28.54 KB) (28.54 KB) (22.13 KB) (22.13 KB) (31.62 KB) (31.62 KB)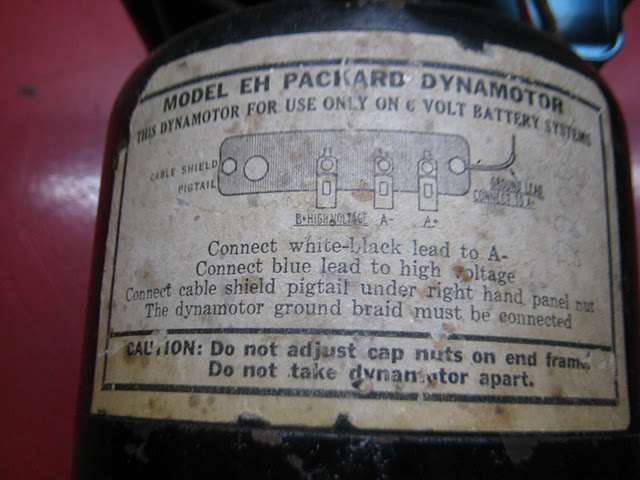 (41.64 KB) (41.64 KB)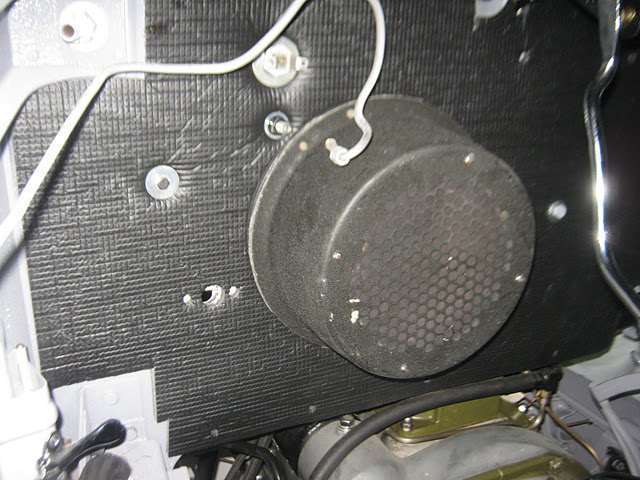
Posted on: 2011/11/17 2:09
|
|||
|
Mal
/o[]o\ ==== Bowral, Southern Highlands of NSW, Australia "Out of chaos comes order" - Nietzsche. 1938 Eight Touring Sedan - SOLD 1941 One-Twenty Club Coupe - SOLD 1948 Super Eight Limo, chassis RHD - SOLD 1950 Eight Touring Sedan - SOLD What's this? Put your Packard in the Packard Vehicle Registry! Here's how! Any questions - PM or email me at ozstatman@gmail.com |
||||
|
||||
|
Re: Wade's Workshop
|
||||
|---|---|---|---|---|
|
Forum Ambassador
|
Tuesday 22nd November 2011
On the weekend the Flackmaster requested some pic's "....of the routing of the overdrive cable to the overdrive lever, the precise location of the overdrive relay and frankly most other pictures of the real world install pictures as opposed to service manual diagrams...." Because ".... There is a guy local to me who is going to install an overdrive trans into a 41-120...." Took the in-car, firewall and topside routing shots on Sunday and teed it up with Wade to put the Coupe up on the hoist today to take the under-car pic's. So that was the first task, shuffling Big Red out and the Coupe in and putting it up on the hoist. Still pretty clean underneath. Although there is a minor rear main seal leak, a leak from the OD lock out lever and a leak from the vicinity of the fuel pump. More of leaks a little later. Took the under-car pic's and these will be emailed to the Flackmaster after I've finished this post, sorry David. With the Coupe up in the air also gave the undersides a good checkover and cleaned the grime, mostly from the old exhaust system before it was replaced by the stainless setup about 18 months ago, from the tailshaft, diff housing and fuel tank. After the fuel tank surfaces were cleaned a small puddle was noticed under it on the floor which was first thought to be from the cleaning. Closer examination showed it to be petrol and that it was likely coming from the area of the top of the tank. But, because I'd recently filled the fuel tank, it was decided to examine it further when the tank is closer to empty. I'd also had thoughts of replacing the flexible fuel line from the fuel pump to the rigid line on the front frame but the full fuel tank also precluded doing that. Discovered too that the rear springs are different side to side. Also tightened the U-bolt nuts, after Juniors experience, just wanted to be sure. In cleaning the tailshaft found the uni-joints have some play so will procure a pair to replace them. So the next time the Coupes on the hoist there'll be a bit of work done and not just the grease and oil change I was expecting While I was puttering around under the Coupe, Wade was removing sparkplugs and other plugs and fittings from Juniors cylinder head. Tomorrow the cylinder head together with the block will be taken to be tanked. Yesterday Wade had also rodded out the two block length oil galleries, this is a must before sending the block out to be cleaned. The lower gallery was relatively clean but the upper one was full of thick sludge, so Wade rodded this one out again today. Yesterday Wade had also drilled out the three gallery screw in plugs, retapped the holes and purchased new plugs from Lee Bros. Re-shuffled the Coupe out and Big Red back in then turned to The Fossil. First the mounting nuts for the radio speaker were replaced by dome nuts, being on the engine side of the firewall. Then a length of hose was going to be installed at the rear of the engine between the pipe running from the intake manifold to the pipe running to the regulator on the firewall. Only trouble was the clamps for the hose were too big, because the original vacuum hose was a larger outside diameter than the modern hose available. Not the magic shelf this time but the magic bucket full of old hose clips/clamps came to the rescue. Four were found, one of which turned out to be brass after blasting off dirt, rust and old paint. Because these needed to be painted Wade also took the opportunity to paint some other parts including part of the hand throttle linkage, some other clamps and the body and back cover of the STARTIX unit. Then, while I was painting Wade was fitting another hose to another part of the vacuum system and also re-routing an oil line which impeded the operation of the accelerator linkage. All the bits being put on lately have been in, around or near the firewall. They have to be sequenced, to prevent impeding other items which need to be installed. But there appears to be light at the end of this tunnel with Wade talking about it getting close to the time the foot plate and the dash panel can be installed. Attach file: (28.46 KB)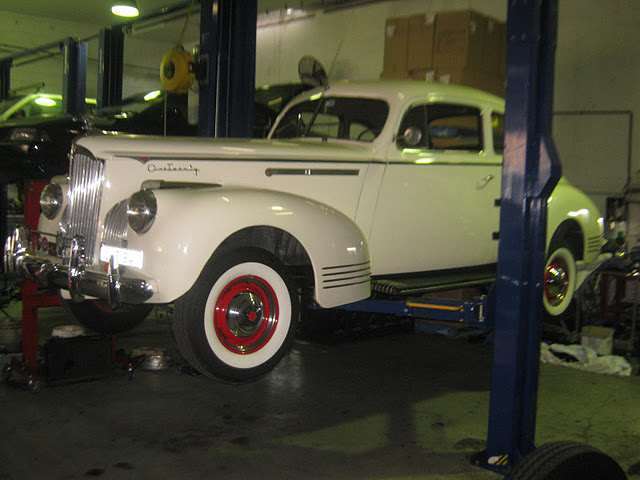 (33.36 KB) (33.36 KB)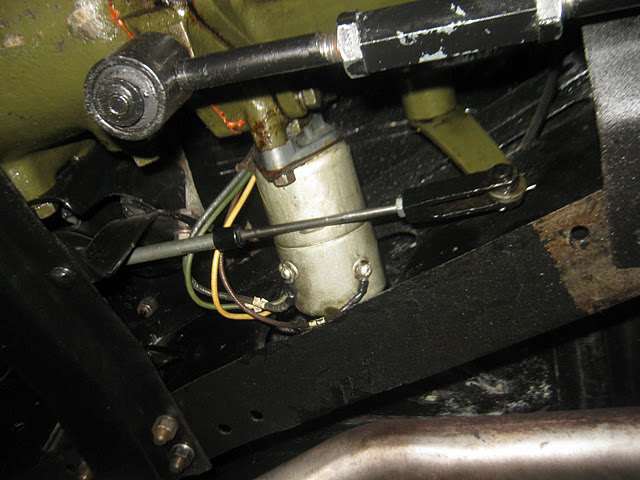 (30.57 KB) (30.57 KB)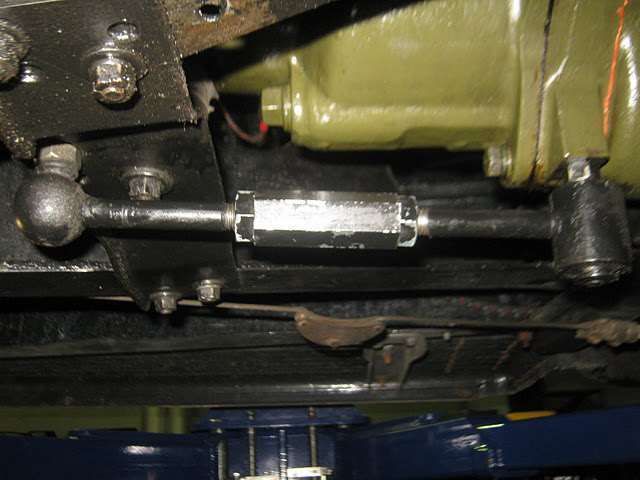 (34.60 KB) (34.60 KB)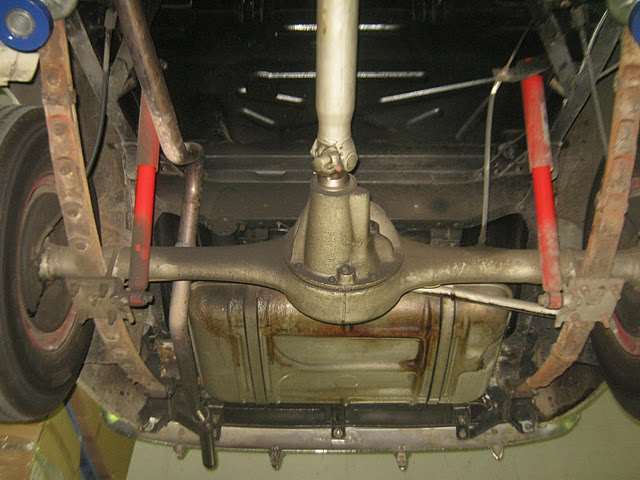 (37.77 KB) (37.77 KB) (23.33 KB) (23.33 KB)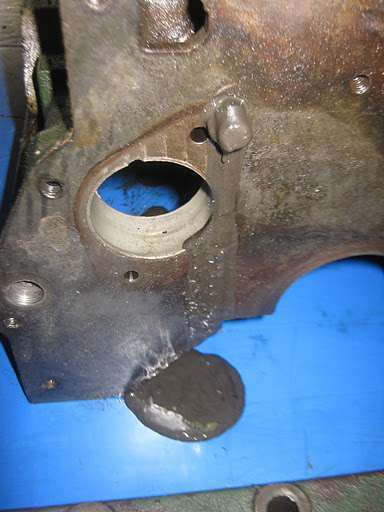 (20.75 KB) (20.75 KB)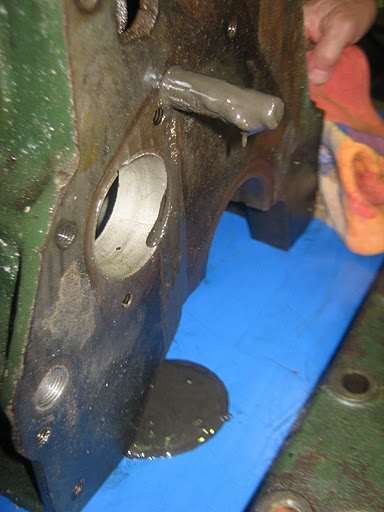 (20.94 KB) (20.94 KB)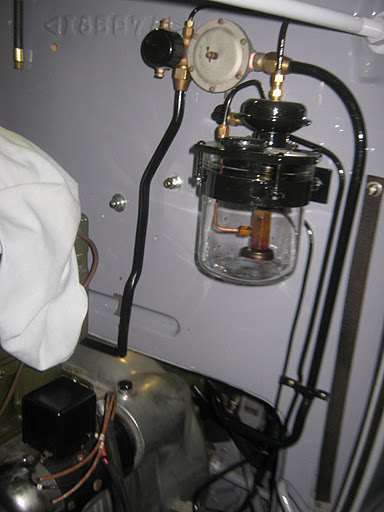 (25.65 KB) (25.65 KB)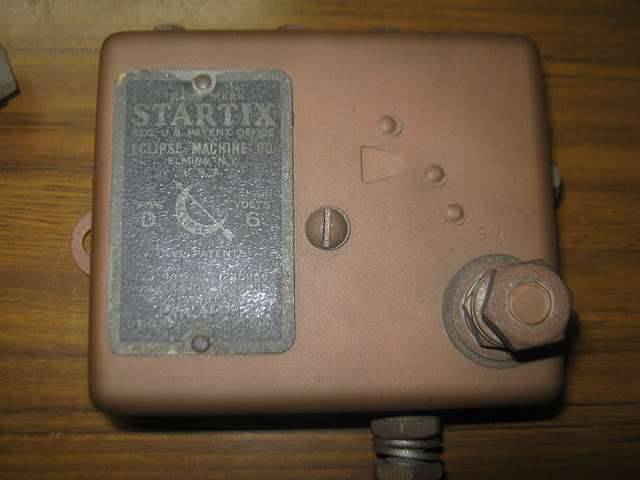 (27.74 KB) (27.74 KB)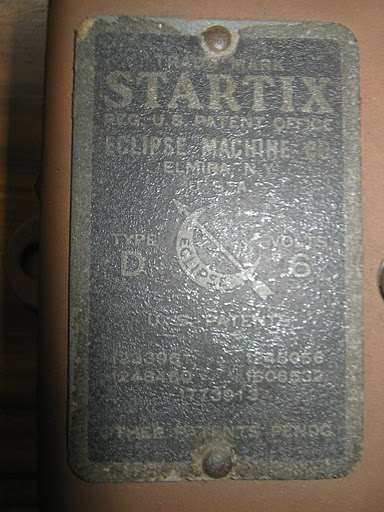 (22.70 KB) (22.70 KB)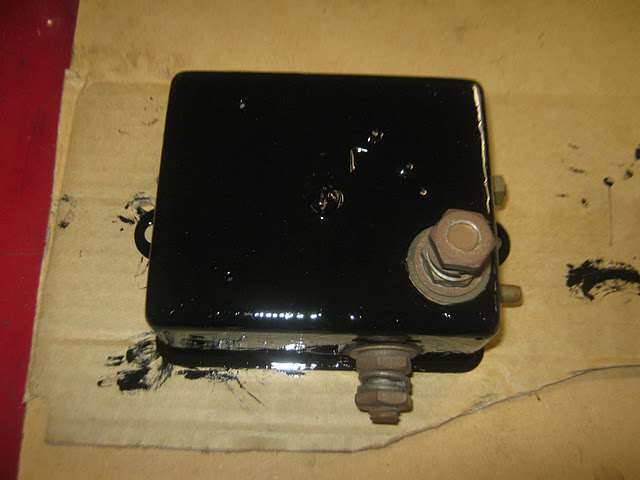
Posted on: 2011/11/22 5:10
|
|||
|
Mal
/o[]o\ ==== Bowral, Southern Highlands of NSW, Australia "Out of chaos comes order" - Nietzsche. 1938 Eight Touring Sedan - SOLD 1941 One-Twenty Club Coupe - SOLD 1948 Super Eight Limo, chassis RHD - SOLD 1950 Eight Touring Sedan - SOLD What's this? Put your Packard in the Packard Vehicle Registry! Here's how! Any questions - PM or email me at ozstatman@gmail.com |
||||
|
||||
|
Re: Wade's Workshop
|
||||
|---|---|---|---|---|
|
Forum Ambassador

|
Mal, I don't appear to have the thief-proof # from the 34 in my listing. Any chance you could forward that to me along with the vehicle number? The numbers above 185000 are beginning to be of special interest as it appears that the majority of them are RHD and at the high extreme of the #s for 1934.
Posted on: 2011/11/22 9:11
|
|||
|
||||
Register To PostTopic is Locked


