|
Re: KPack
|
||||
|---|---|---|---|---|
|
Webmaster

|
Best picture of the radiator fasteners I could find. But basically, its:
Core support| Rubber washer | Radiator Flange | Rubber washer | Metal washer | Bolt head. So the flange is sandwiched between two rubber washers. Attach file:  radiator1.jpg (36.19 KB) radiator1.jpg (36.19 KB)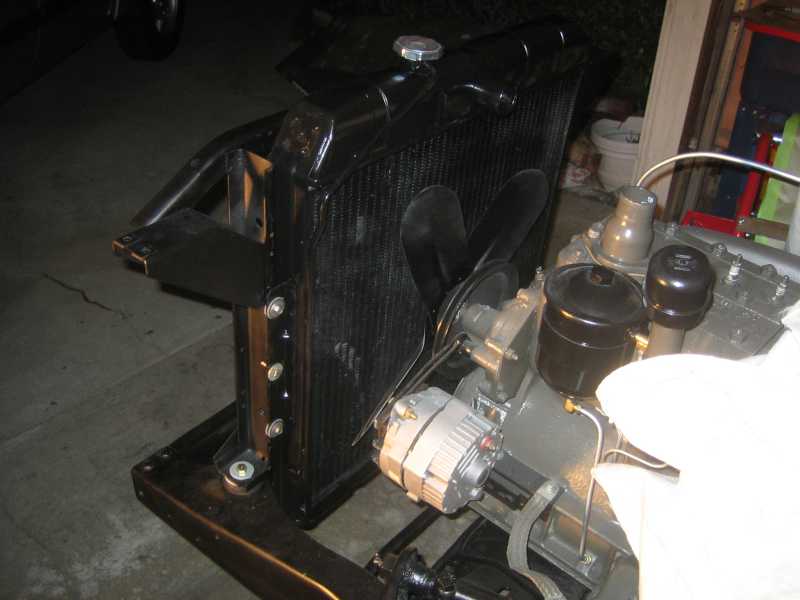
Posted on: 2022/1/26 15:09
|
|||
|
-BigKev
1954 Packard Clipper Deluxe Touring Sedan -> Registry | Project Blog 1937 Packard 115-C Convertible Coupe -> Registry | Project Blog |
||||
|
||||
|
Re: KPack
|
||||
|---|---|---|---|---|
|
Home away from home

|
Since I really haven't done any work on the car for the past 6 months, I might as well show you what's been commanding my attention instead.
For years my wife and I have talked about building a shop on our property because the house gets very small during the winter with 5 kids. And our attached garage gets small really fast with all my projects and hobbies. So we finally bit the bullet and signed with a company to build the building. We decided on a 36'x72' footprint, with the overall building split into two main rooms, each 36'x36'. The front half will be garage space with two bays, each with a 12'x 12' door. The back room will be for games, gathering, hobbies, etc, with a section taken out for a garden equipment room with a separate 8'x10' roll up door. I had a guy come out and do the excavation for the site....removing all the grass and organics, then laying down a gravel driveway and pad. It took a ton of gravel. He also dug a trench for power and water. All the materials for the building were brought in on a single truck and dropped in preparation for construction. The crew showed up and dug holes for the posts. The posts are three 2x8's glued and nailed together, with the bottom third treated. They were placed directly in the holes, squared up, then concrete poured all the way around them. After a few days the crew came back and started work on the walls and roof. They built the roof in 12' sections, then winched it up into place on the posts, and attached it. Each section was brought up that way and then tied into the others. It made for a quick and impressive build. The walls were framed out in 2x6 horizontal girts (non-load bearing) in preparation for drywall and insulation. Once all the wood framing was done they came back and added all the metal siding and roof. In November another crew came to do the concrete. I did 6" depth with #4 rebar on 24" centers throughout. Eventually the front half of the building will have at least one lift, so I wanted plenty of strength. I had run a bunch of conduit in the ground before the slab was poured, to make running electrical easier later on. Once the concrete was done, I spent the next several months doing all the electrical myself. I've never done it before and it always kind of freaked me out, so I figured I should learn how to do it so I wouldn't worry about it anymore. Being a total novice, it took me way longer than it should have and cost me more. But I learned. I did 1/2" EMT conduit in the walls so I can run more circuits later if I want. There are four outlets spaced every 12' along the walls, 4' off the ground. There are two 50 amp receptacles, one for each garage bay. A 30 amp receptacle is placed above one of the bays where a 2-post lift will likely be installed. Another 50 amp circuit will feed the compressor, which will likely be housed in a small room inside the garage space. Lights are not yet installed, but will eighteen 15K lumen high-bay LEDs....9 for the front of the building and 9 for the back. They are on wireless dimmers. Each main room of the shop will have an overhead fan to circulate air, and each room will be heated by an overhead propane heater. Currently insulation and drywall are going in over the next week. Then paint and hanging lights. With any luck I might able to actually use the shop before summer time. I have a TON of work I want to do on the Panama this year and I really need to get rolling on it. -Kevin Attach file:  40746.jpeg (70.49 KB) 40746.jpeg (70.49 KB)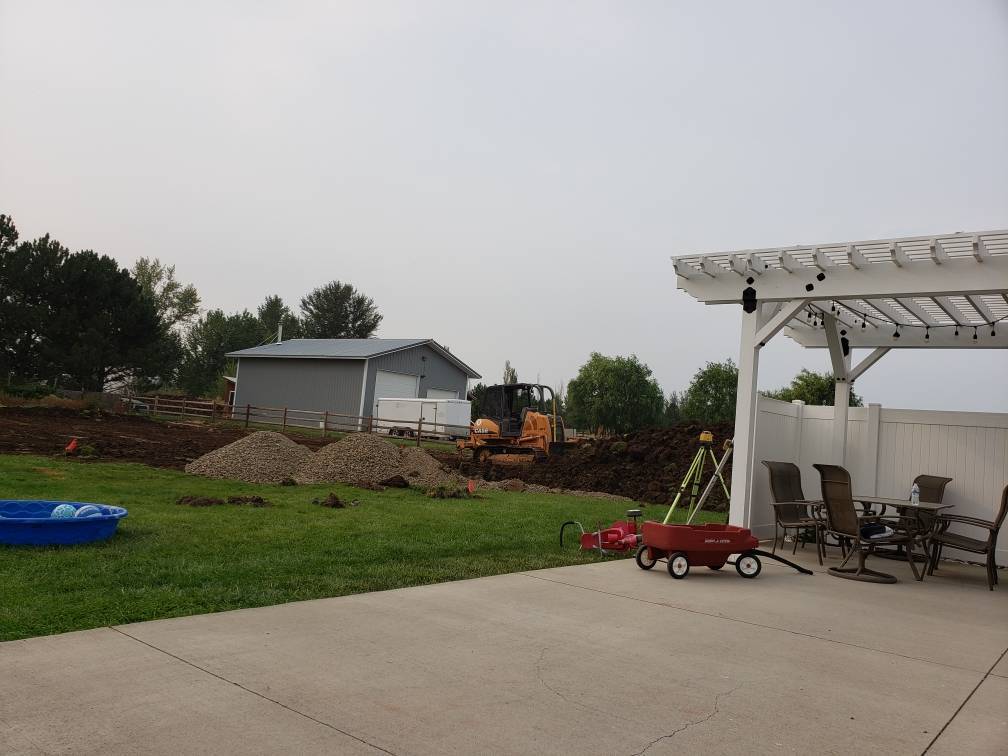 41378.jpeg (168.27 KB) 41378.jpeg (168.27 KB)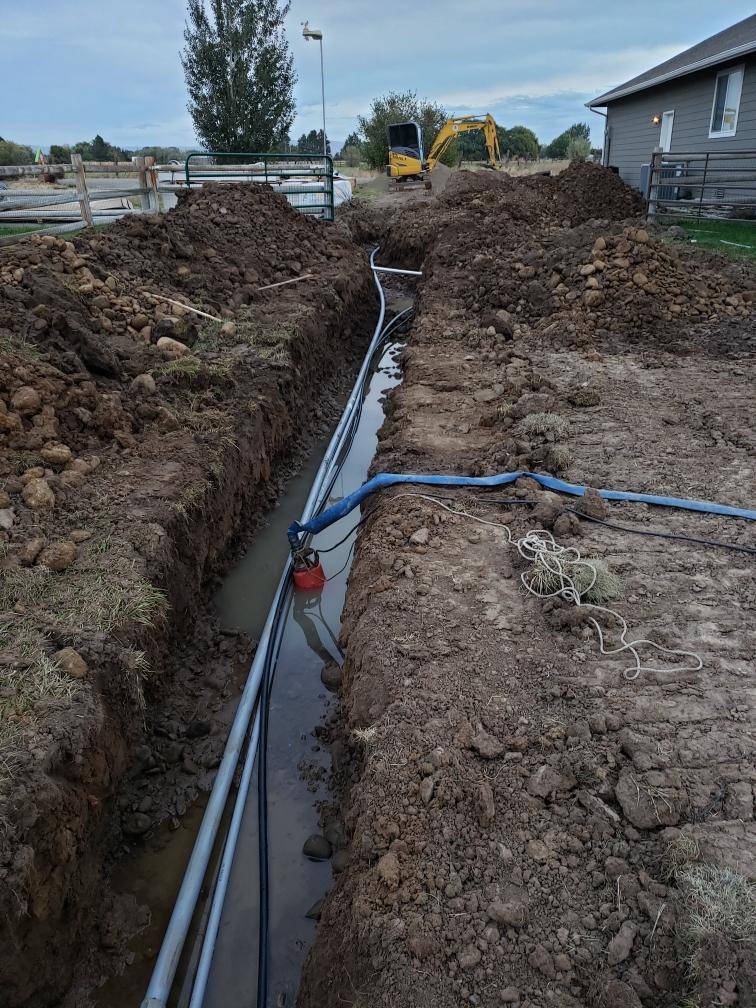 20210910_173257.jpg (462.99 KB) 20210910_173257.jpg (462.99 KB)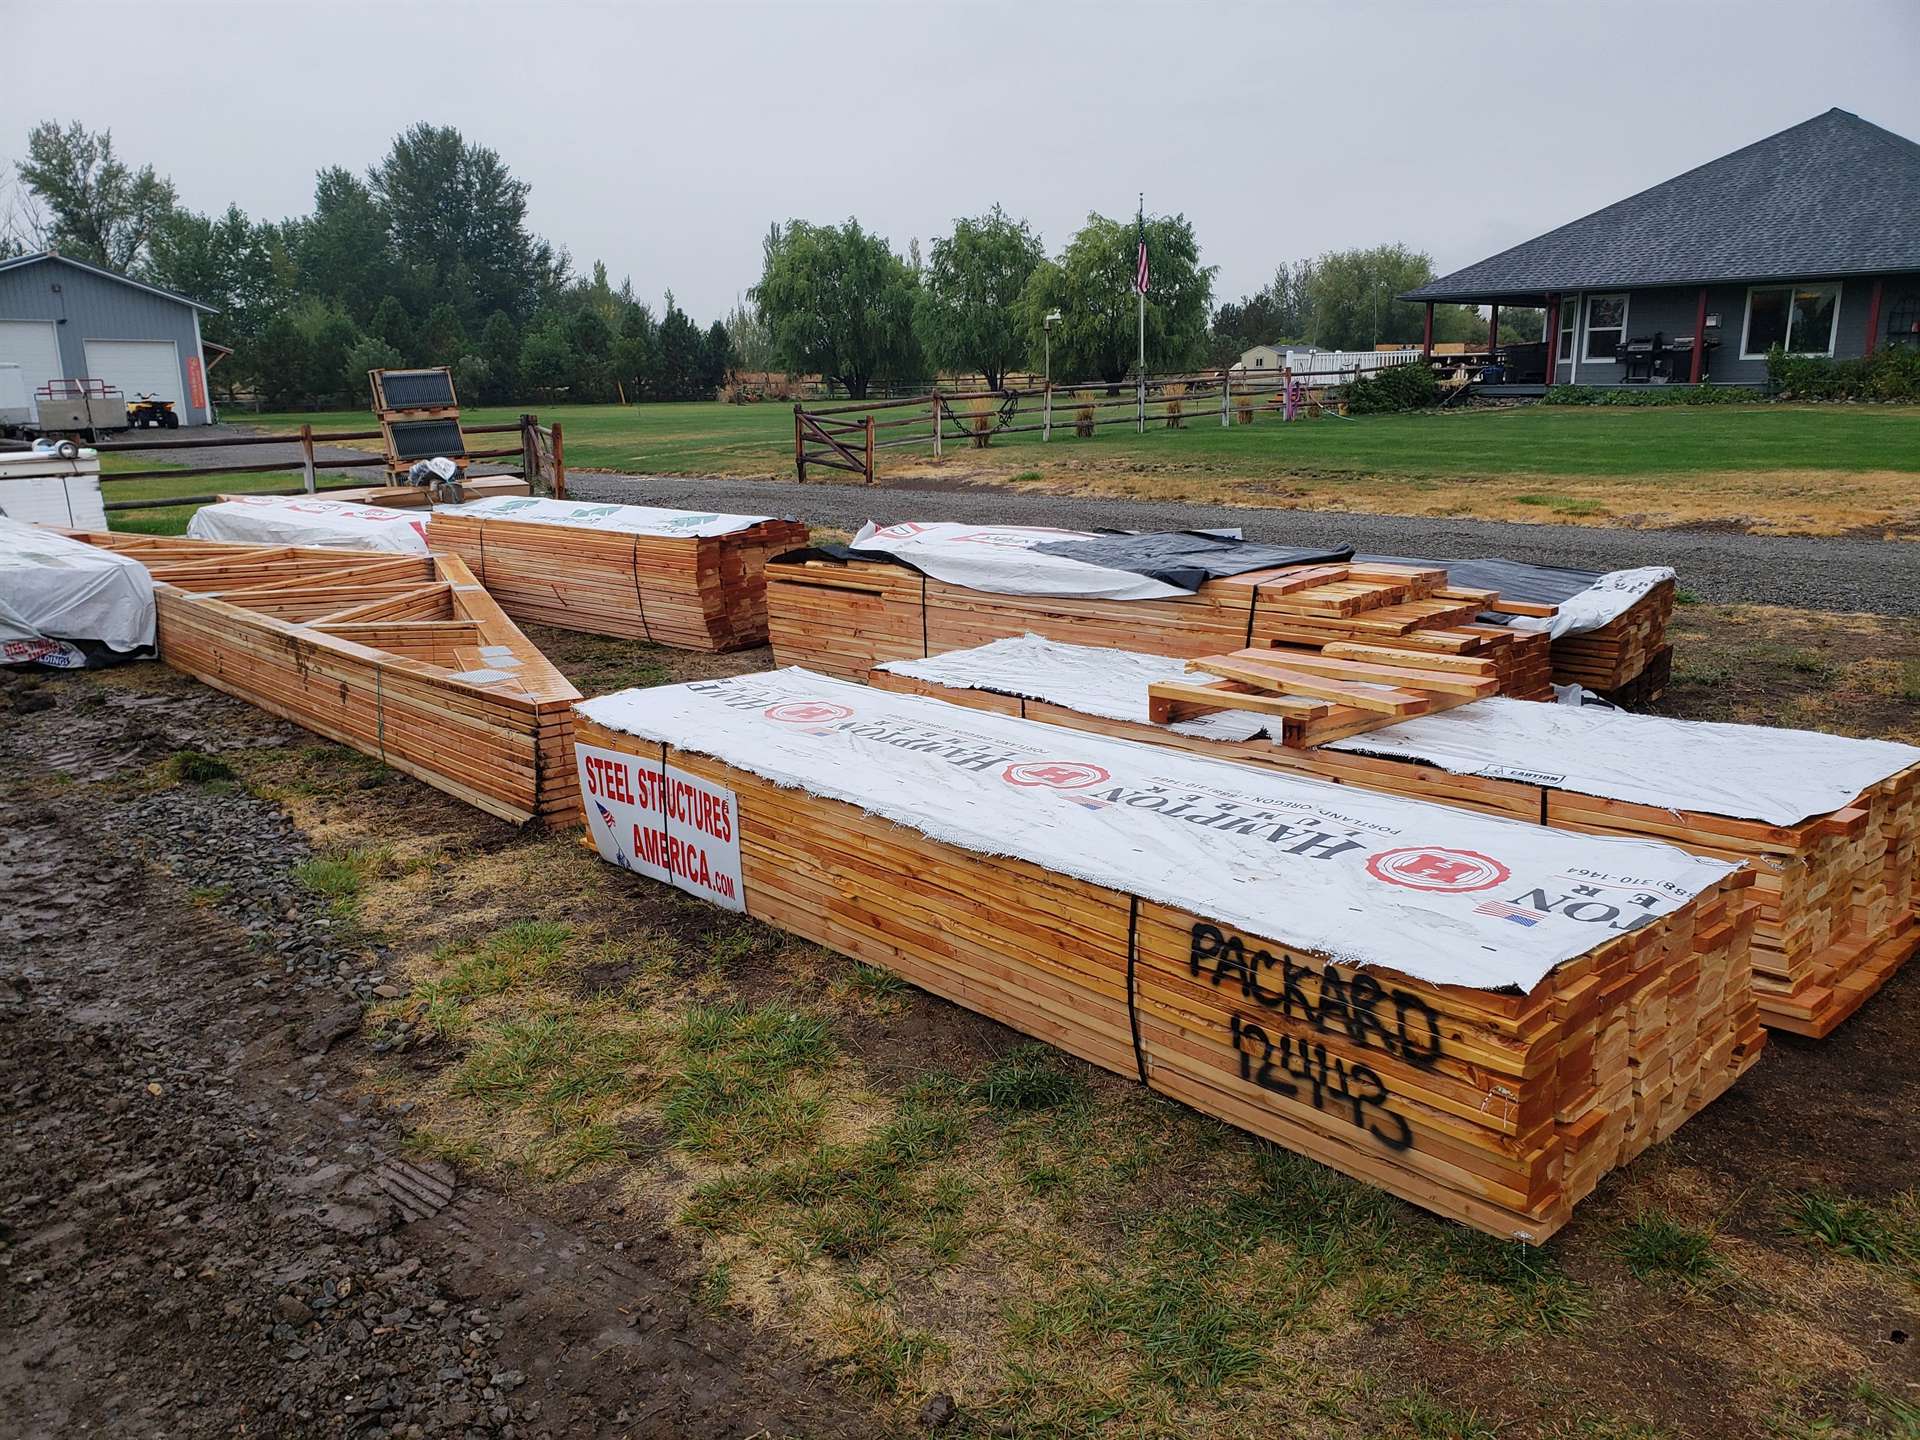 20211005_120646.jpg (700.56 KB) 20211005_120646.jpg (700.56 KB) 20211006_113721.jpg (192.09 KB) 20211006_113721.jpg (192.09 KB)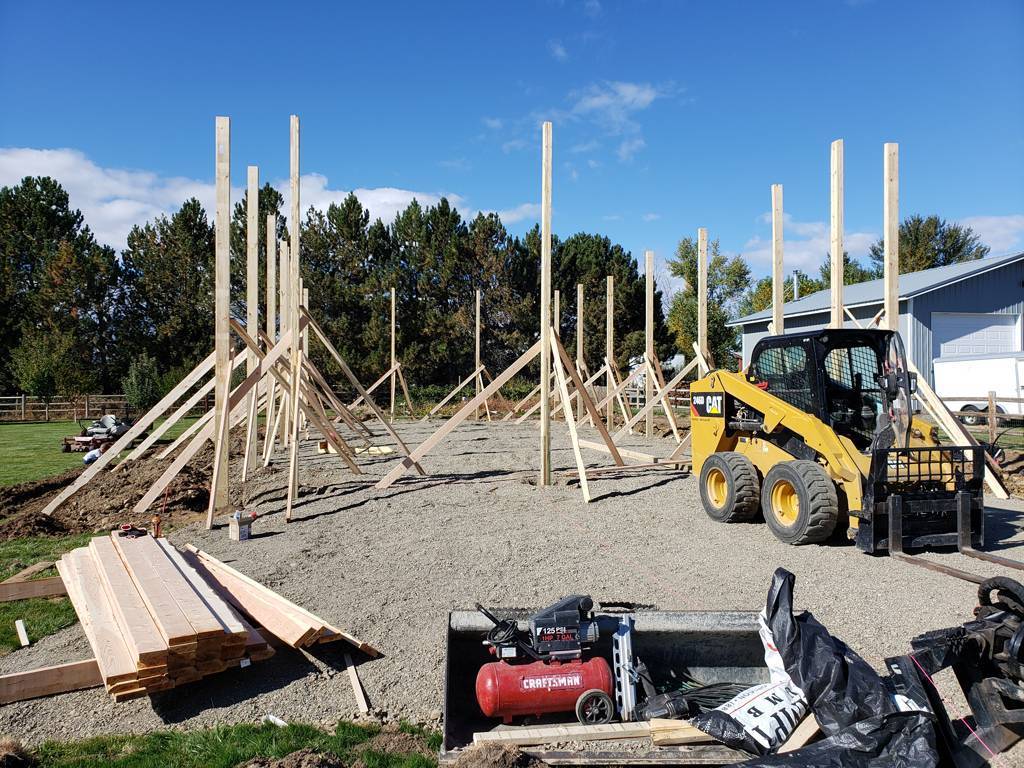 20211007_121953.jpg (163.78 KB) 20211007_121953.jpg (163.78 KB)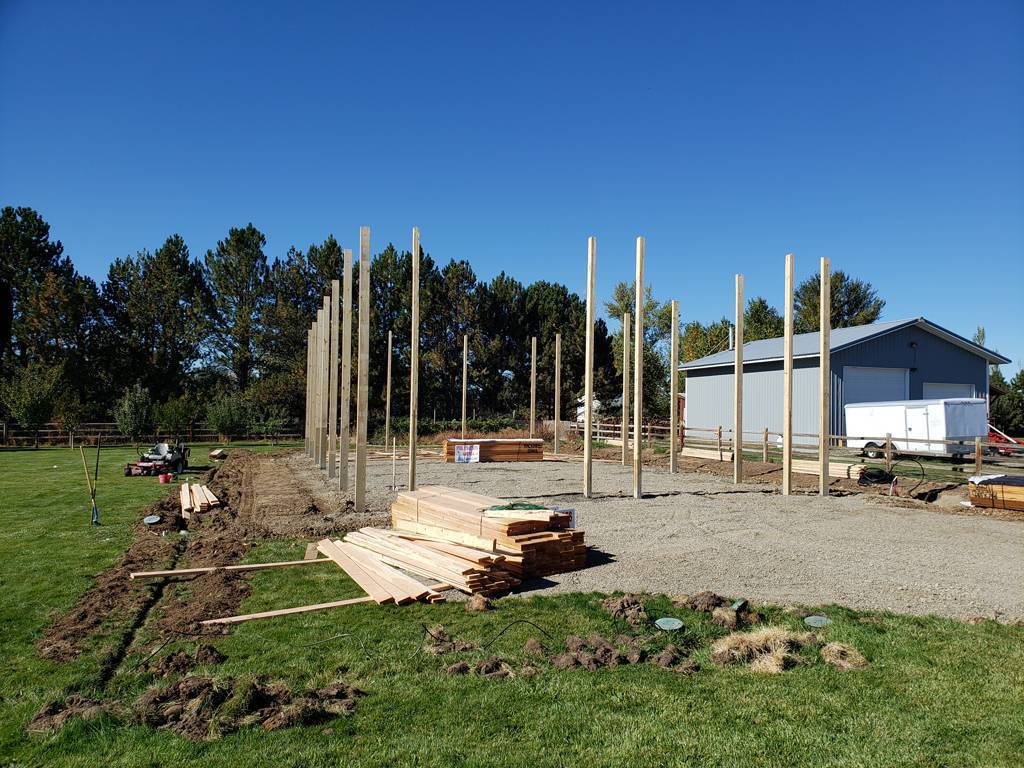 20211008_155236edit.jpg (187.55 KB) 20211008_155236edit.jpg (187.55 KB)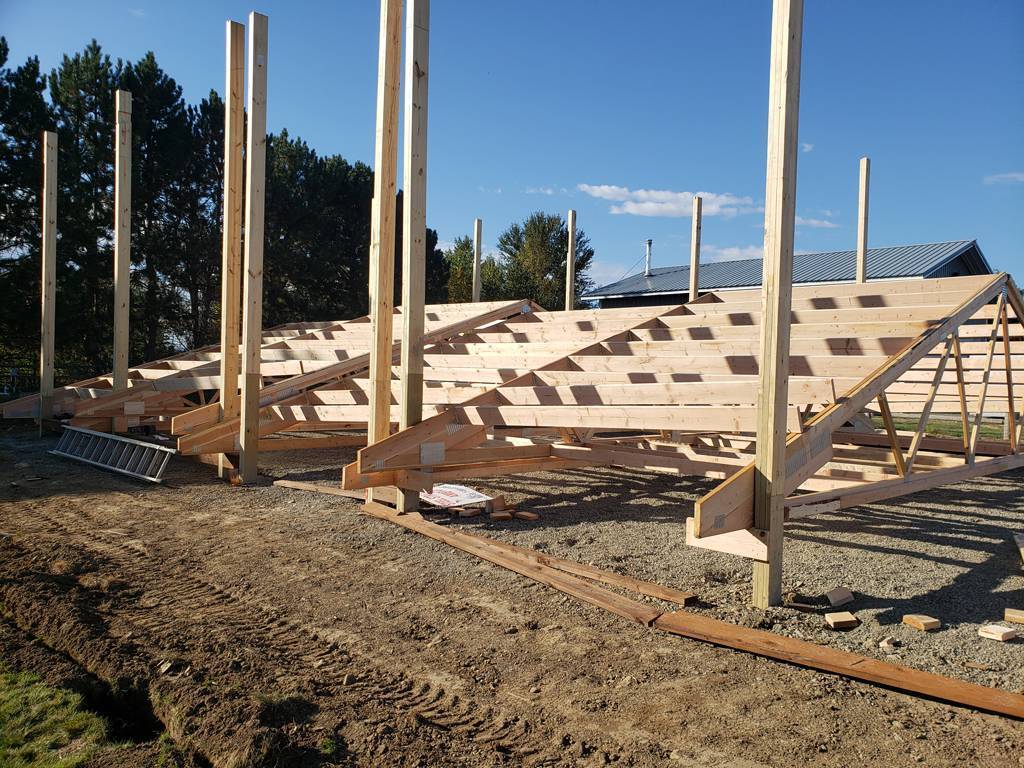 20211012_173936edit.jpg (135.53 KB) 20211012_173936edit.jpg (135.53 KB)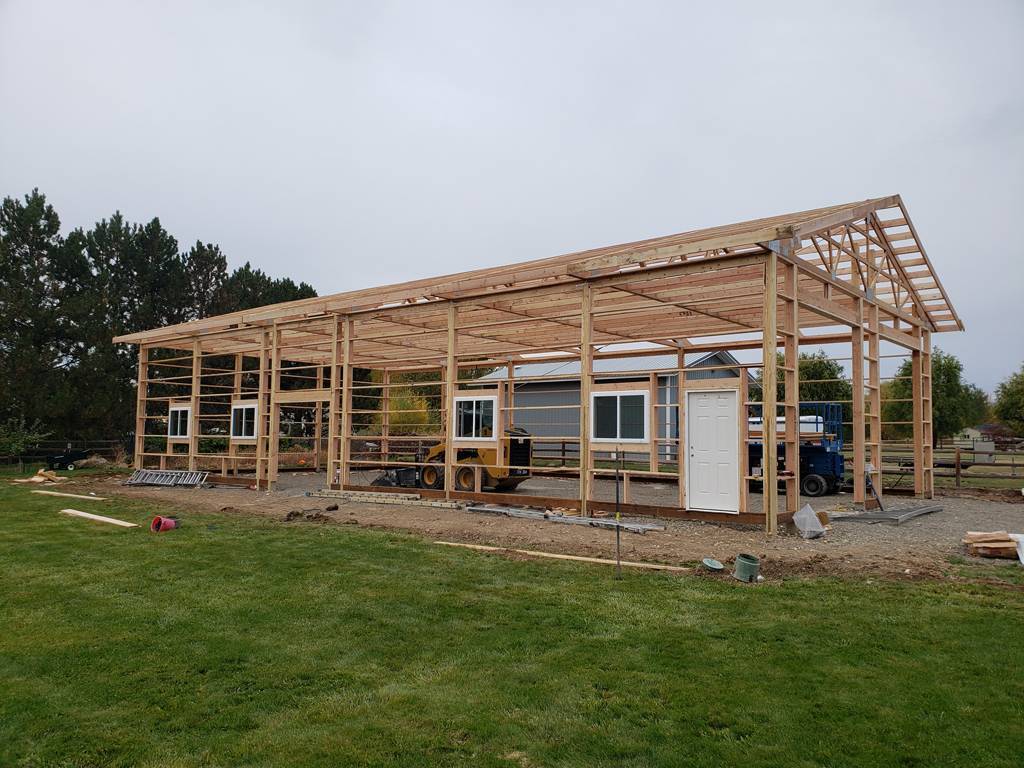 20211019_123624.jpg (129.96 KB) 20211019_123624.jpg (129.96 KB) 20211111_085418edit.jpg (158.95 KB) 20211111_085418edit.jpg (158.95 KB)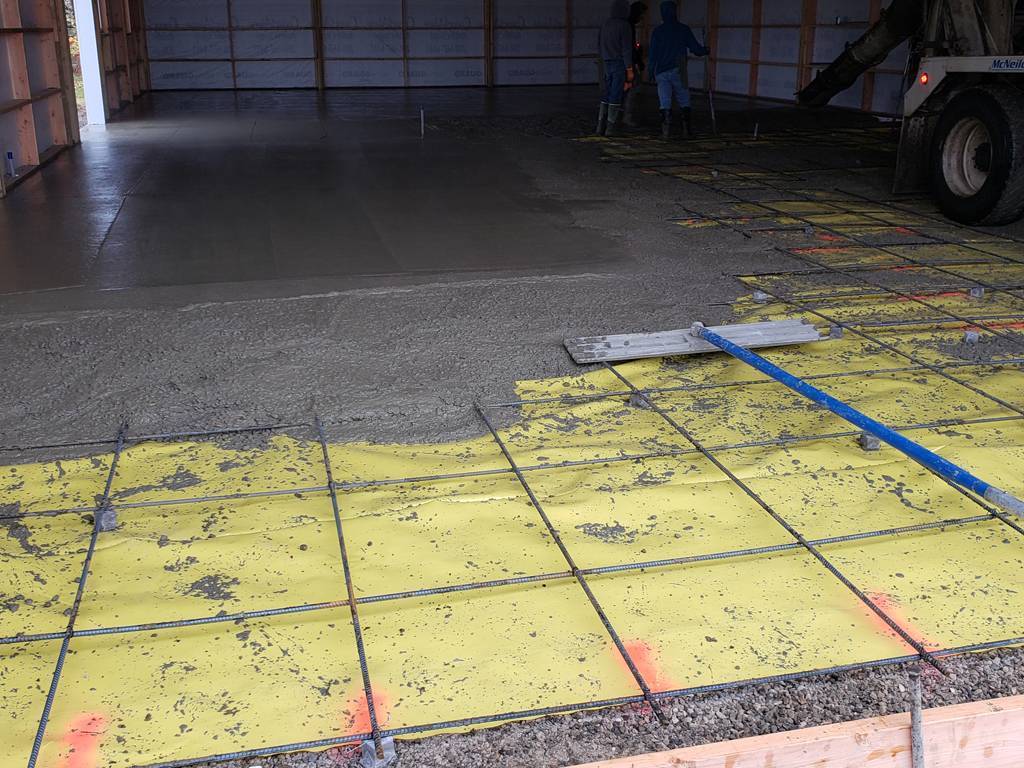 20220112_173802edit.jpg (121.86 KB) 20220112_173802edit.jpg (121.86 KB)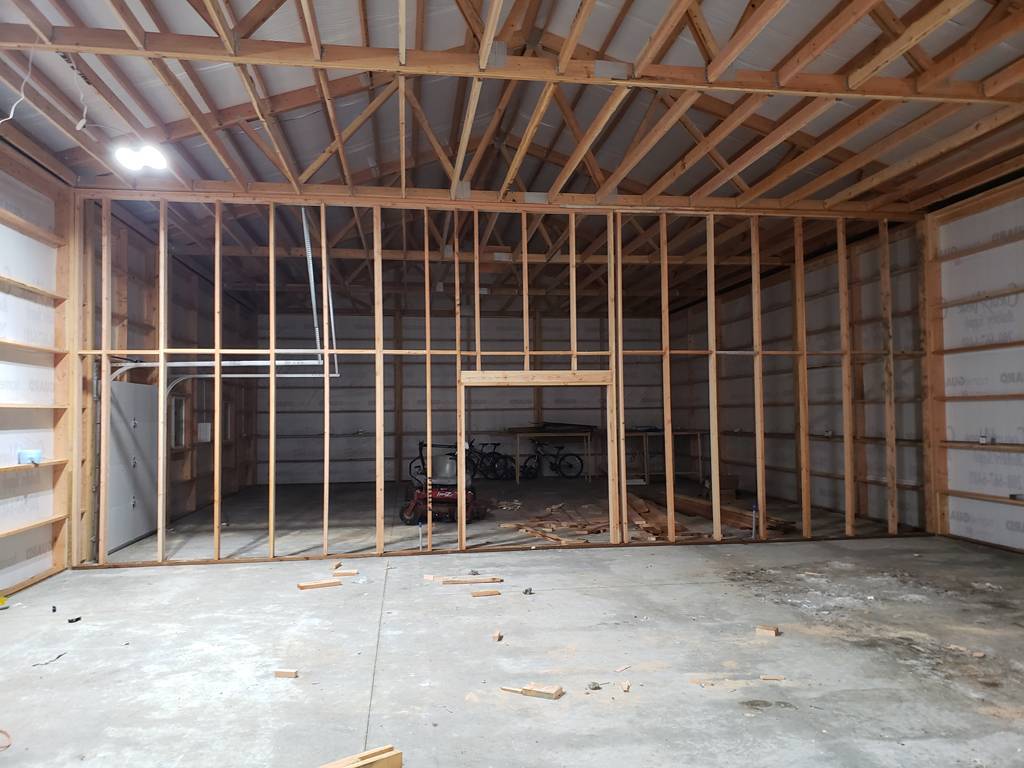 20211113_134059edit.jpg (161.72 KB) 20211113_134059edit.jpg (161.72 KB)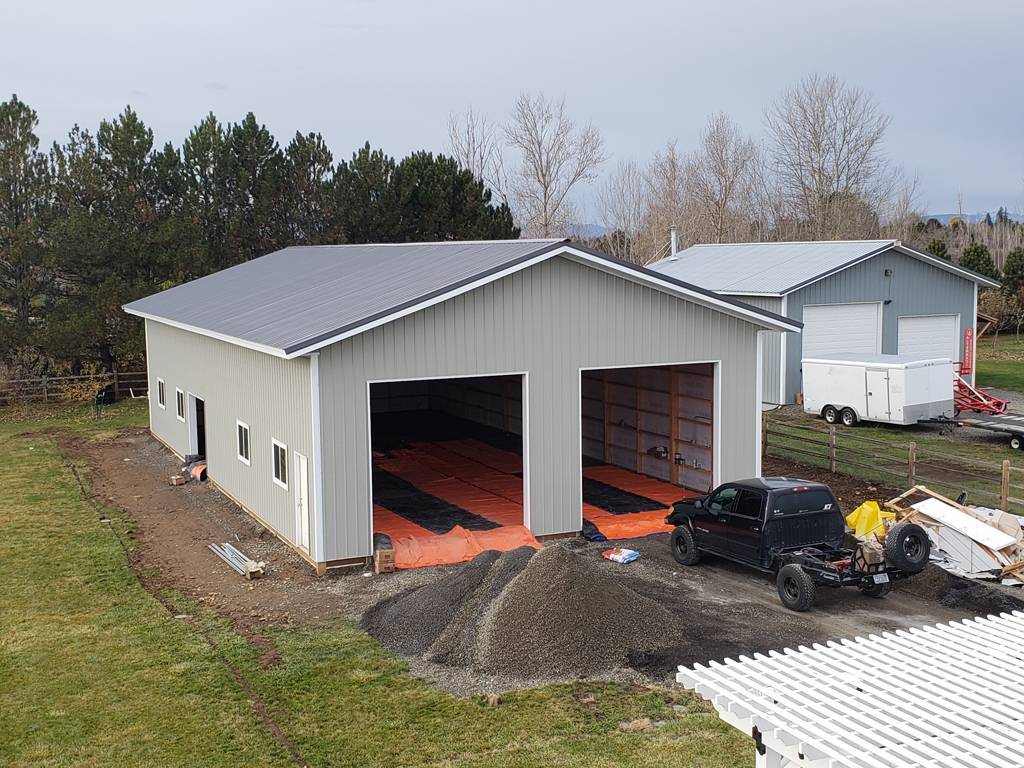 20220223_205027edit.jpg (137.97 KB) 20220223_205027edit.jpg (137.97 KB)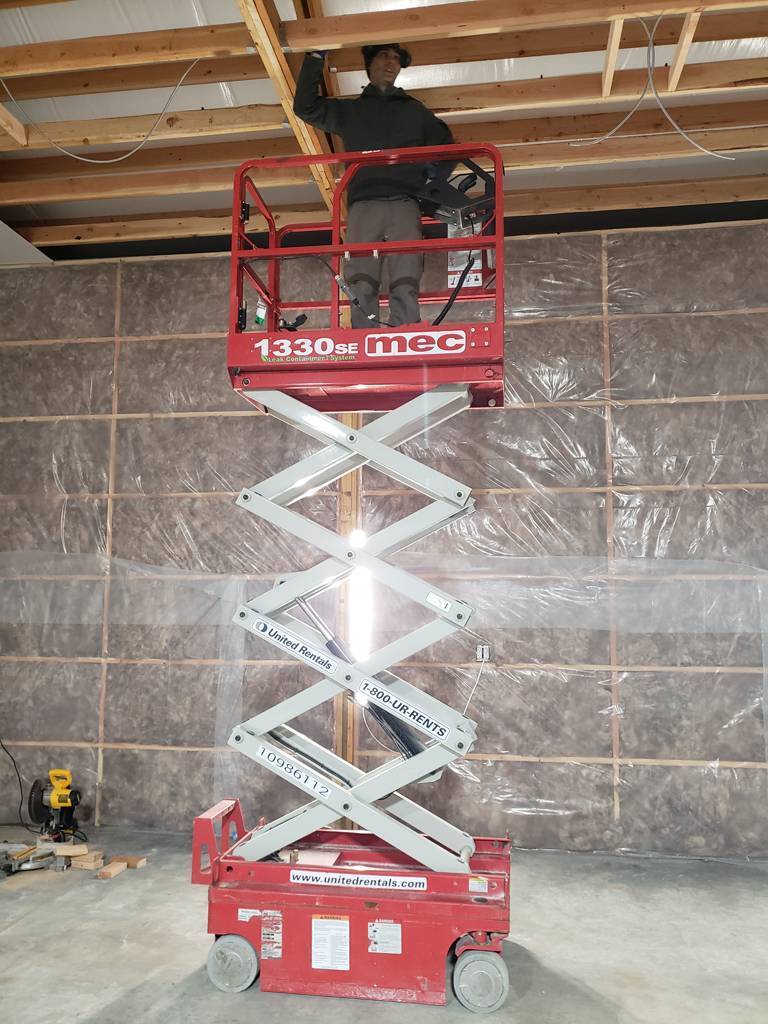 20220228_173839edit.jpg (91.52 KB) 20220228_173839edit.jpg (91.52 KB)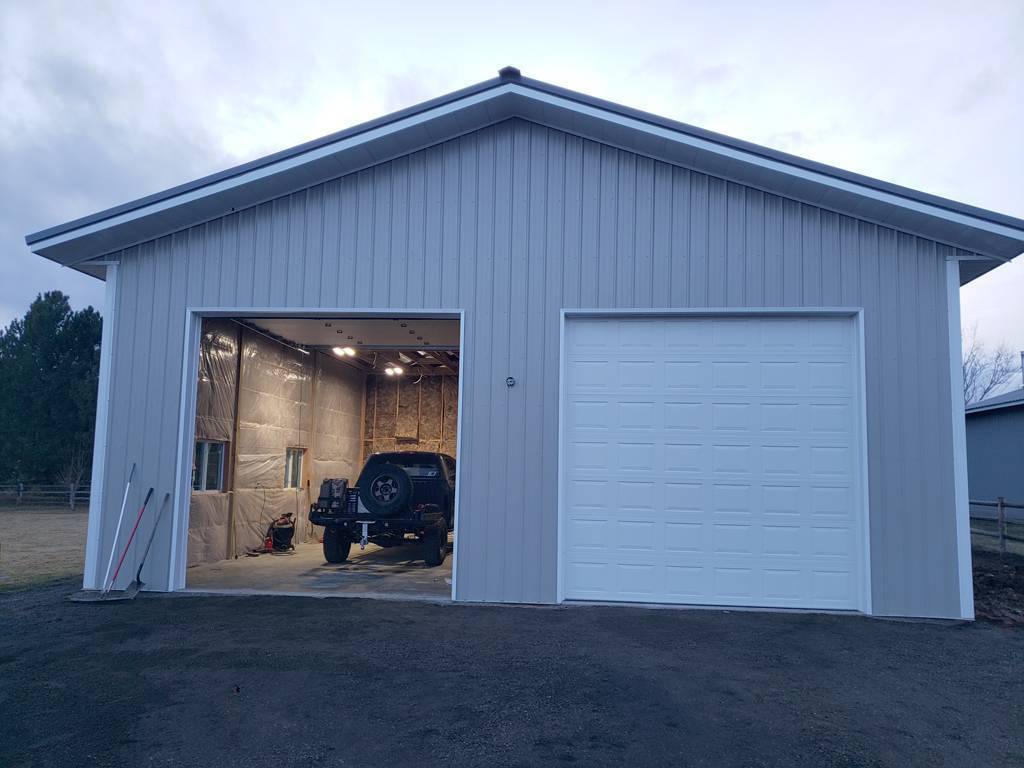
Posted on: 2022/3/10 13:15
|
|||
|
||||
|
Re: KPack's 1954 Panama
|
||||
|---|---|---|---|---|
|
Home away from home

|
Kevin:
Congratulations on the shop building, wow! That’s the first time I’ve seen the roof structure built near the ground and lifted it into place. I know about ‘lift slab’ construction in concrete structures but didn’t know that kind of construction is being used for wooden trussed roofs. How are the purlins held to the rafters? dp
Posted on: 2022/3/10 14:09
|
|||
|
||||
|
Re: KPack's 1954 Panama
|
||||
|---|---|---|---|---|
|
Home away from home

|
Very nice! I would have saved a bundle had I built a "stick" building as you did rather than ordering and having installed a steel truss system. The cost of the "kit" seemed reasonable but it was nearly trippled to get it put up. Had I built a stick building, it could have been erected and insulated for half what it ultimately cost uninsulated, not to mention all the recent costs to insulate! At least it's comfortable now (it got down to 11 degrees last night) and only low 30s now but it's quite cozy inside when I run the heater for a half hour.
Anyway, I was surprised at the need for 30A circuit for your future lift. My 4-post runs off a standard 15A circuit but maybe 2-post lifts take more for some reason. Currently (pun intended) the only power at my shop comes from a long extension cord coming from the nearby house and feeds into the receptacles but it will be on off-grid solar one of these days.
Posted on: 2022/3/10 14:52
|
|||
|
All generalities are false.
Once I thought I was wrong but I was mistaken. Don Pierson Packard / IMPERIAL page CA DMV Licensed Vehicle VIN Verification 1951 Henney-Packard 3-Door Long Wheelbase Air Force Ambulance The 1951 Henney-Packard is For Sale! 1954 Packard Patrician 1954 Packard Patrician Parts Car 1956 Clipper Custom Sedan |
||||
|
||||
|
Re: KPack
|
||||
|---|---|---|---|---|
|
Home away from home
|
David - The type of building is technically called "post-frame" construction, but most people around here just call them "pole barns". It's an easy way to build in the Northwest, and relatively inexpensive (before all this inflation....the building is ending up to be way more expensive than I had originally planned). I've attached some pictures to show the roof structure better. The rafters and purlins are all attached with joist hangers (2x6). If you look closely, you can see that the trusses are doubled up to each other. There are 2x4's running the length between the trusses top and bottom, effectively making the two trusses one large truss. At the ends, the outer boards on the posts were cut out and the trusses sandwich the center board of the post, with huge bolts going through the whole assembly. From what I've seen, this roof structure is much more robust than other pole buildings I've seen.
Don - The cost of wood is unfortunately very high, as is steel, drywall, and literally everything else in the shop. The build is more expensive than I wanted, but we knew that things were only going to get more expensive, so we decided to bite the bullet and get it done before it got worse. Right now I'm scrambling to try and get the drywall and insulation done before it gets even more expensive. The rest of it I can do on my own. Most two post lifts are 240V, and typically need 30amps. Some four post lifts can be run off of 120V using a normal outlet. I don't have plans for a lift yet, but I'd like to get one in by next year if possible. So much easier to work on vehicles when they are in the air. -Kevin Attach file: 20220310_123233edit.jpg (134.03 KB)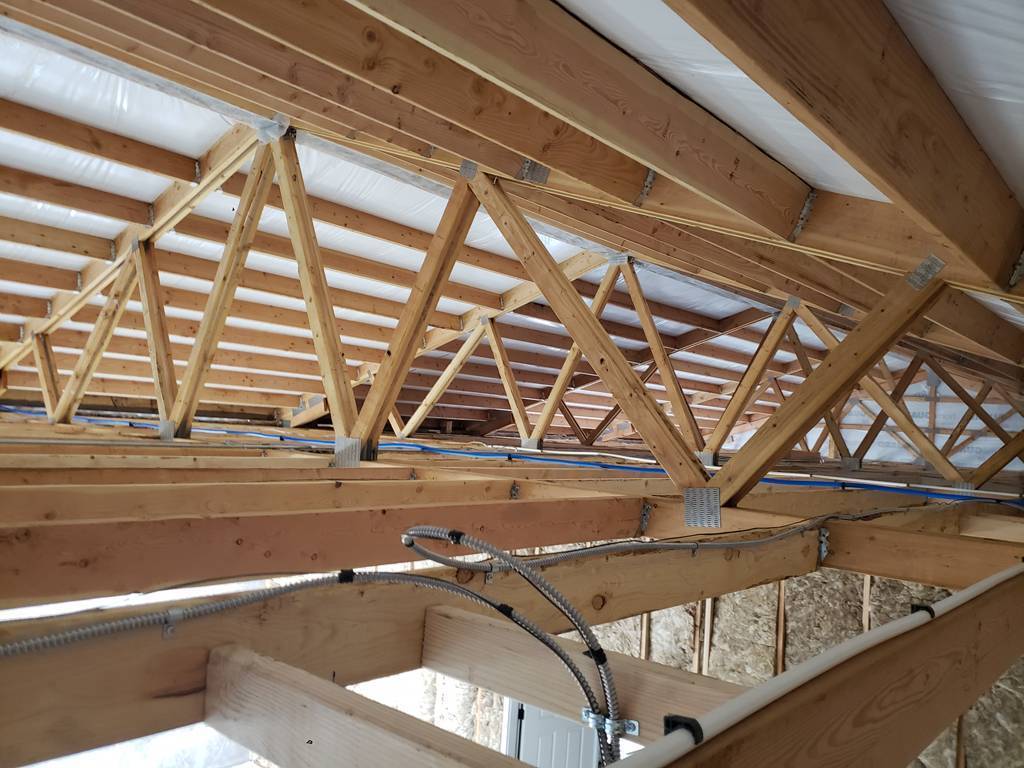 20220310_123444edit.jpg (95.21 KB) 20220310_123444edit.jpg (95.21 KB)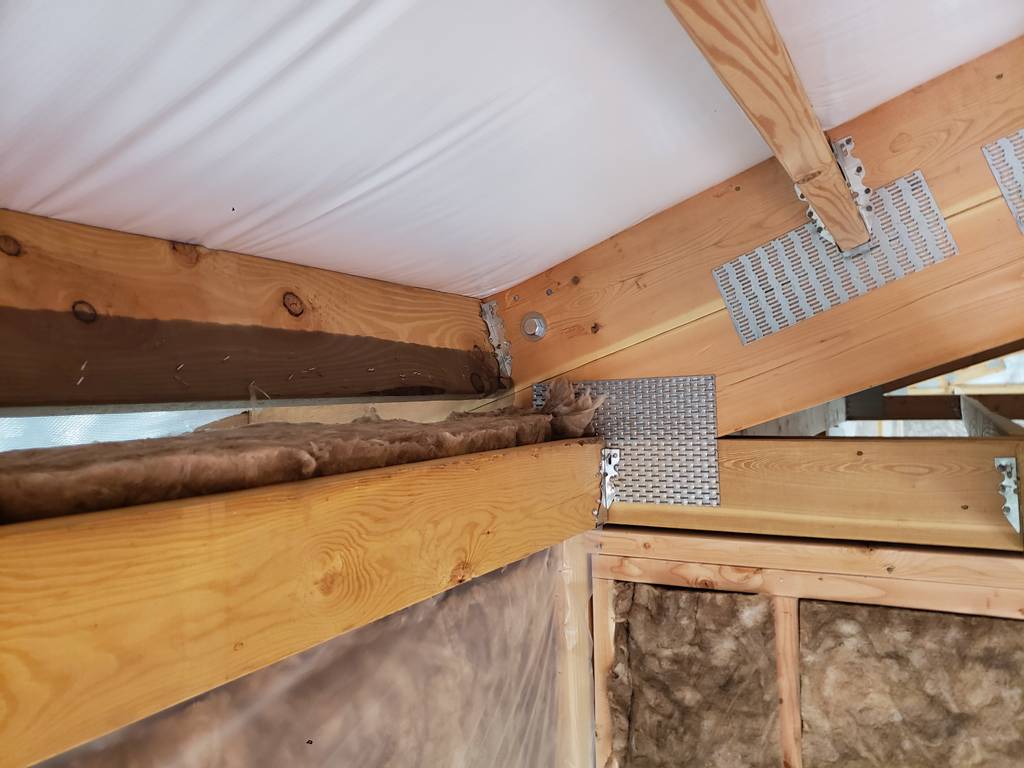
Posted on: 2022/3/10 20:08
|
|||
|
||||
|
Re: KPack
|
||||
|---|---|---|---|---|
|
Home away from home
|
Some progress. I got the radiator back from the shop today. They didn't need to do a recore thankfully. Just refurbished it. They dipped it in an acid tank and took all the old paint and rust off, found and repaired all leaks, then repainted the whole thing in special paint.
While the radiator has been out I've been trying to clean up a few parts while I have easy access to them. One of those is the generator. It seems to be working fine, but the whole thing was covered in a thick layer of grease, grime and dirt. I spent some time scraping everything off. I debated disassembling the whole thing, but if it's working fine I don't know that it's necessary. Now my question is how were these things painted originally? Was the whole thing black, or were parts of it silver (front and back??). Lastly, I pushed the car out of the garage for about an hour while I pressure washed all the crud off the floor from winter. I pushed it out and in while the car was in neutral, not running because of no radiator. The next day I found two massive puddles of transmission fluid under the car. One centered under the torque converter, one centered under the pan. I'm at a loss as to why the transmission would puke fluid everywhere after getting pushed 20 feet back and 20 feet forward. Thoughts? Attach file: Original radiator.jpg (328.14 KB)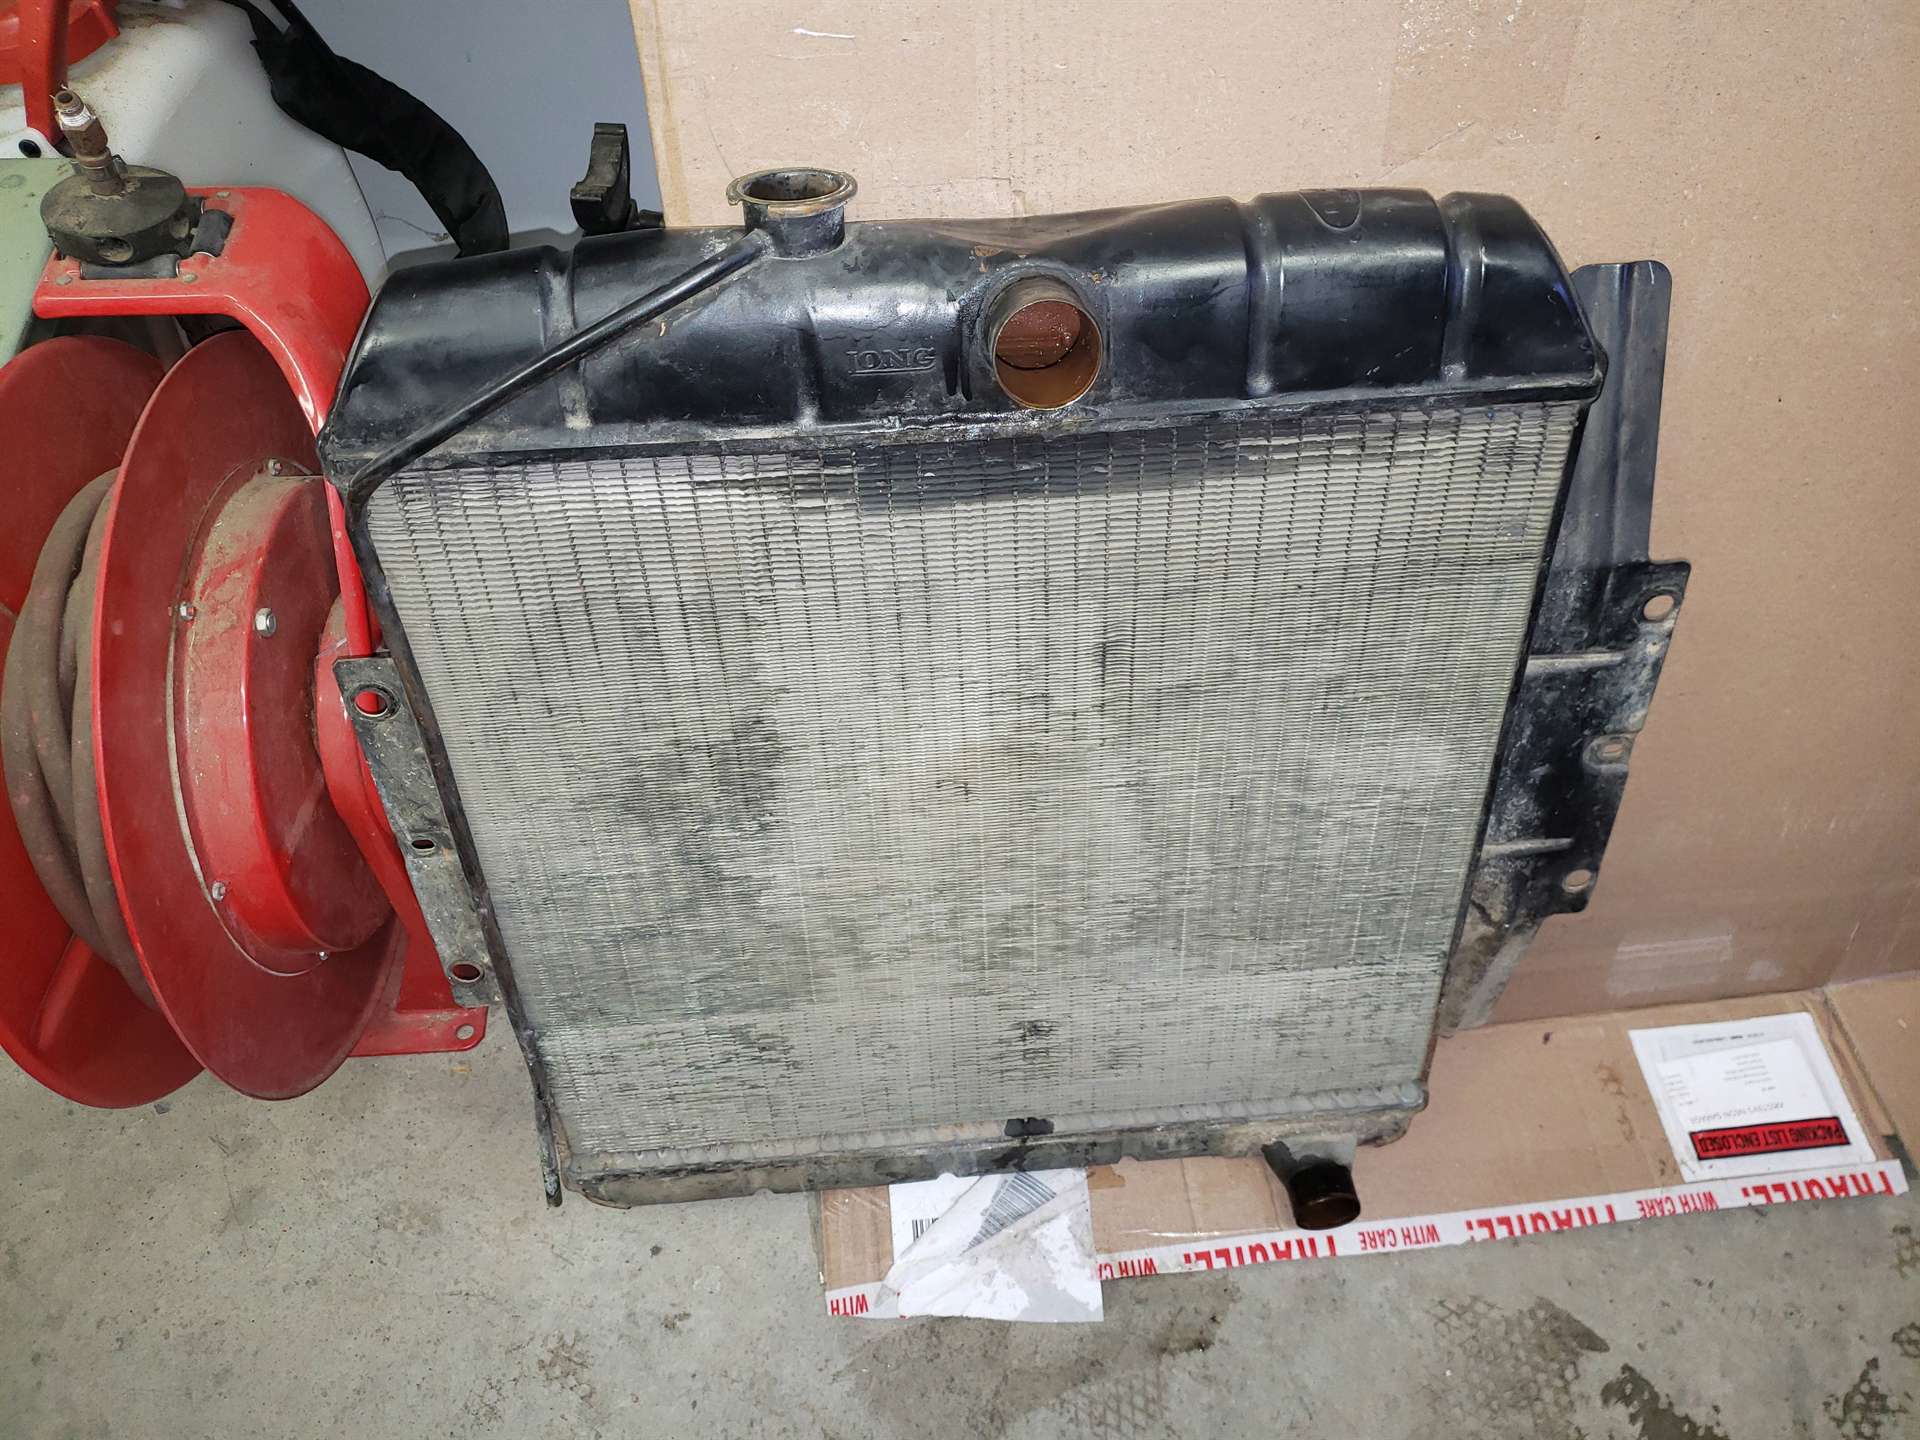 Refurbished radiator.jpg (297.05 KB) Refurbished radiator.jpg (297.05 KB) Rust inside before cleaning.jpg (129.71 KB) Rust inside before cleaning.jpg (129.71 KB)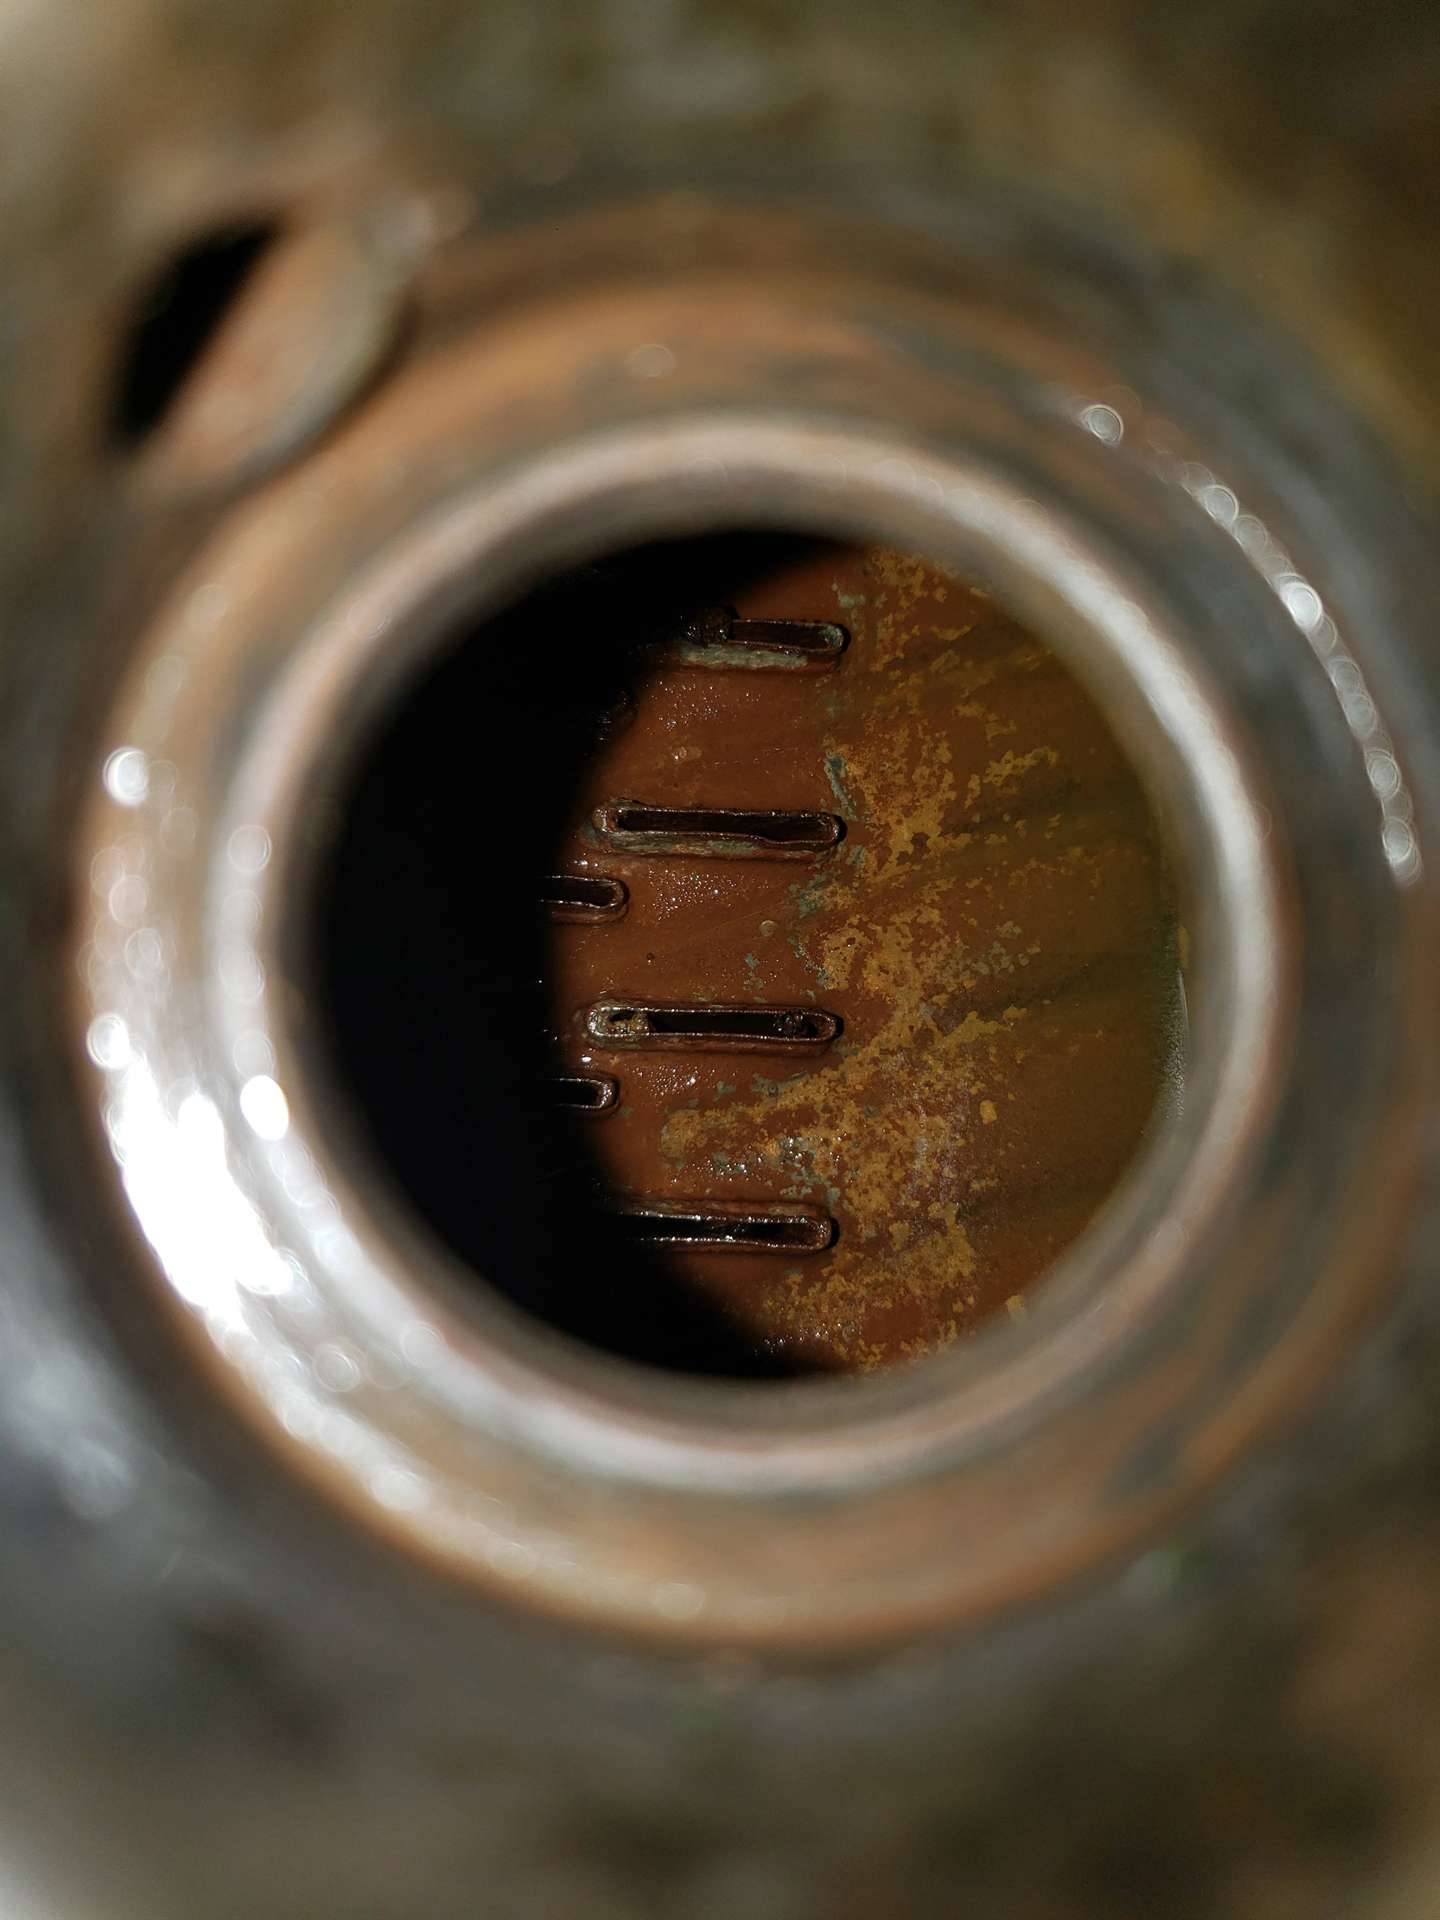 Clean inside.jpg (164.92 KB) Clean inside.jpg (164.92 KB) Generator after removal.jpg (271.73 KB) Generator after removal.jpg (271.73 KB) Generator after cleaning.jpg (336.69 KB) Generator after cleaning.jpg (336.69 KB)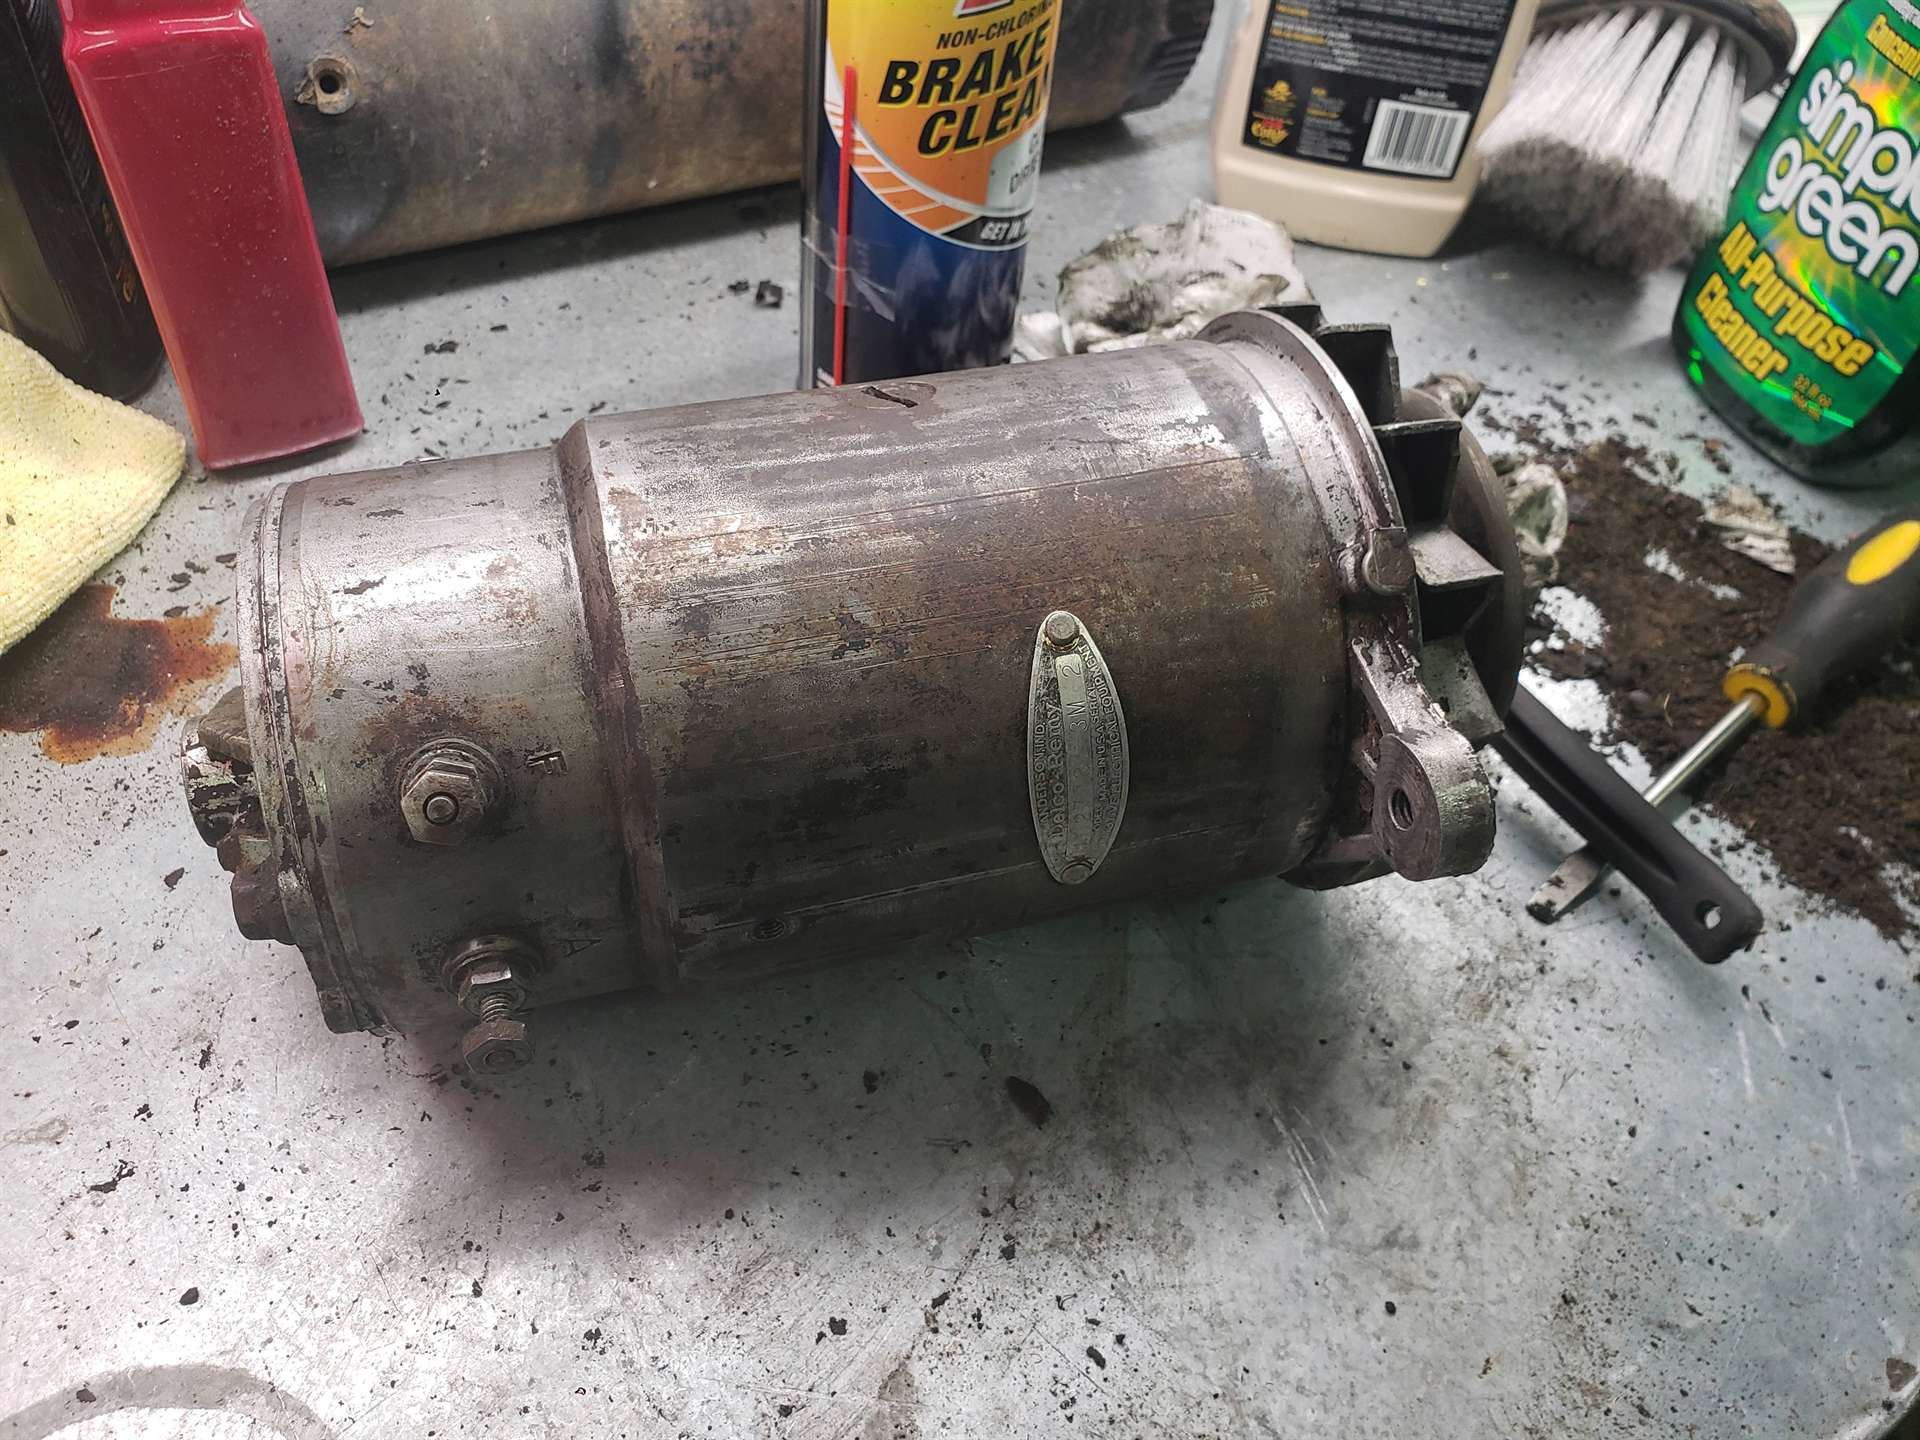 More leaks.jpg (137.41 KB) More leaks.jpg (137.41 KB)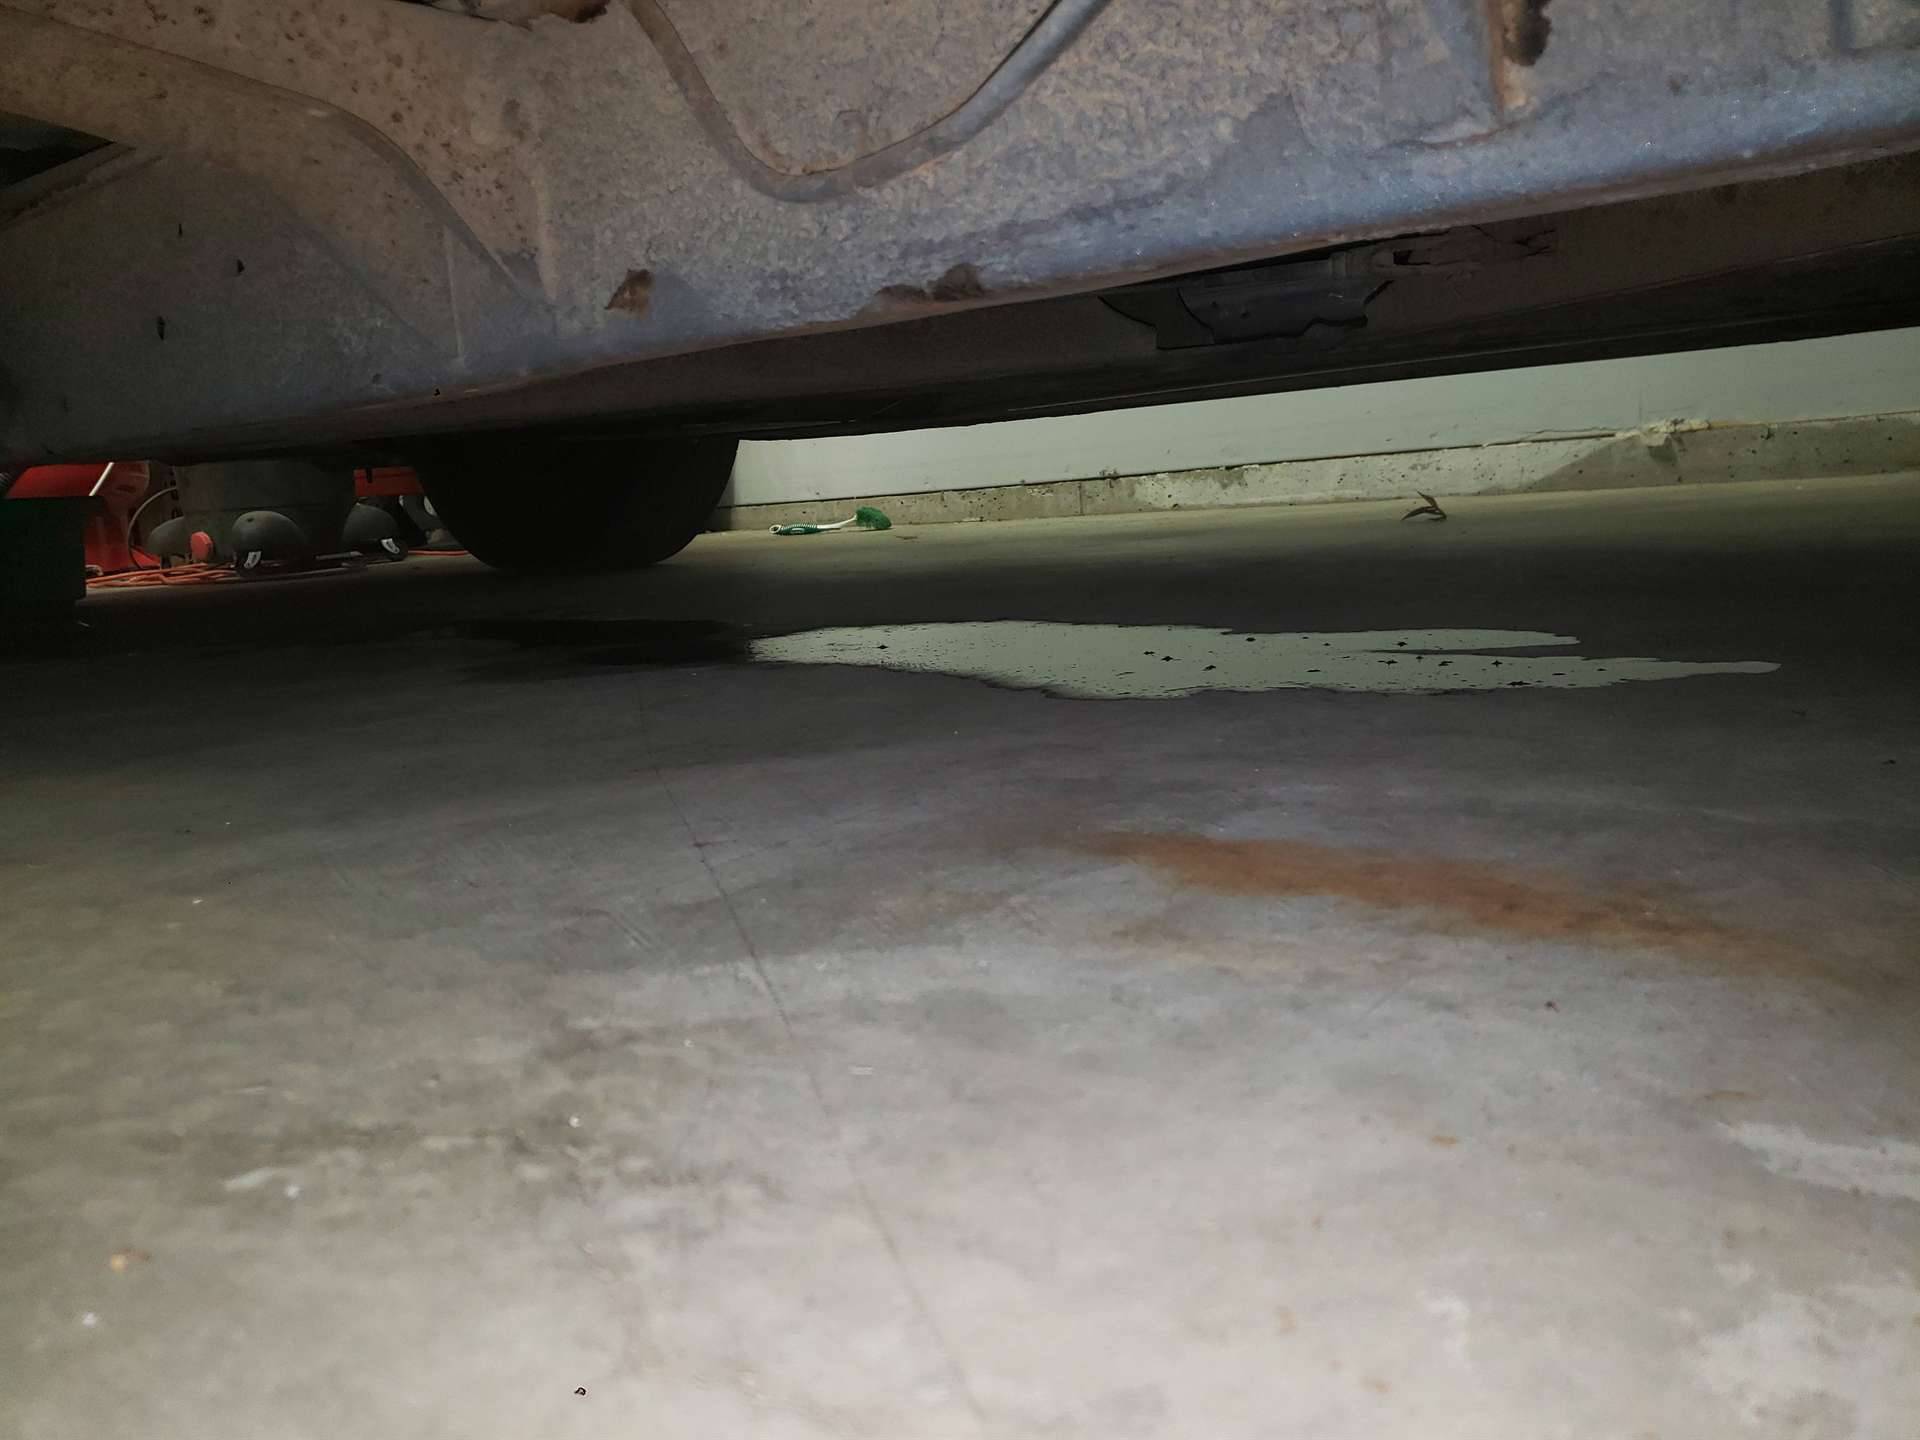
Posted on: 2022/3/29 15:01
|
|||
|
||||
|
Re: KPack's 1954 Panama
|
||||
|---|---|---|---|---|
|
Home away from home

|
Kevin, nice job on the radiator. You saved a bundle of cash by it not needing to be recored. Generators are easy to repair. If it was my car I would disassemble it, clean it up, clean the commutator end of the armature, replace the front bearing and rear bushing and install new brushes. I've done hundreds of them.
Posted on: 2022/3/30 13:02
|
|||
|
We move toward
And make happen What occupies our mind... (W. Scherer) |
||||
|
||||
|
Re: KPack's 1954 Panama
|
||||
|---|---|---|---|---|
|
Home away from home
|
Quote:
The radiator was only $350 out the door. Way cheaper than a recore which would've run $700-800. What's a good source for the generator rebuild parts? I'm not opposed to rebuilding. It's one more thing I get to learn. -Kevin
Posted on: 2022/3/30 13:59
|
|||
|
||||
|
Re: KPack's 1954 Panama
|
||||
|---|---|---|---|---|
|
Forum Ambassador

|
NAPA has most if not all the generator and starter parts required for routine service.
Posted on: 2022/3/30 14:40
|
|||
|
||||


