|
Re: Mal's '41 120 Coupe
|
||||
|---|---|---|---|---|
|
Forum Ambassador

|
Thursday 14th August 2008
Morning at the workshop then it was off to see our grand daughters in the afternoon. On the way to the workshop dropped into Bunnings, our biggest hardware store chain in Australia, and bought a bolt and nut for the middle of the rear bumper to the splash shield. The bolt has a round head with a square shoulder under it where it slips into a slotted bracket at the rear centre of the bumper. Cut it down by about 1" and of course had to undo all but one of the bumper bracket bolts to swing the bumper down to slide the bolt into the slot. All went well and the bumper was bolted back on to all the bumper brackets. Next was making up brackets to mount the rear turn indicators to the bumper brackets. So after some eyeballing and judicious measuring cut a bracket out of a piece of thin aluminium plate I've been carting around for 40 years. The plate, although now small in size, had originally contributed the bulk of its area to a firewall for a Y-Block Ford powered dragster back in the 60's. Using a Bosch Jigsaw cut out a rectangular piece 4&3/4" x 1&3/4" then drilled a 1/2" hole for the bumper bolt. Using a piece of paper measured from the bolt to up behind the bumper bar then bent the piece in the jaws of the bench vice at about a 90 degree angle. Whoops, too much! Needed about a 45 degree angle so cut another piece but this one was about 5" x 1&3/4". Some judicious bending at the approximate angle and it came up and back to clear the bumper. More eyeballing and marking and another 45 degree angle bent in the vice by hand. I discovered I didn't need to use a big shifter just lean on it carefully with a 230lb Aussie and "voila" instant angle! That was the left side mostly done so turned to the right side. All went well, cut another 5" x 1&3/4" piece, drilled the 1/2" hole and the first 45 degree bend. However on mounting it on the bracket discovered this side of the splash shield is higher than the left side. Wade suggested jacking up the bumper bracket on the right side so slacked off the bolts, jacked away, did up the bolts and maybe 1/4" was gained, it all helps. Thought I get a bit creative with this bracket and put 2 more 20 to 30 degree bends instead of the single 45 one I'd done of the first bracket. Looked OK but because it was dissimilar to the left one just didn't look right. So cut still another 5" x 1&3/4" piece, drilled the 1/2" hole and the first 45 degree bend. Then another 45 degree bend but a bit further up the piece because of the splash shield discrepancy. And it worked. Next was drilling 3/8" holes in the above bumper end. Then rounding off the corners, first with the jigsaw, than some smoothing on the grinder. Will probably require a little further tweaking but the basis is now in place. And of course had a couldn't find it moment. The rubber washer for one of the turn indicators couldn't be found until I turned over the steel washer and there it was "stuck" to the other side. Turned out well, but I'm having these senior moments all the time now with nuts, bolts, washers and parts big and small! While this was going on Wade had been under John's '39 and re-installed the flywheel himself. I did offer to lend a hand to lift or hold as required but Wade went under, came out a few times, and before you knew it emerged with the job done. He'd held the flywheel up to the crankshaft flange and found it fitted on snuggly so didn't need a second pair of hands. Then Kevin, the owner of the '35 Sedan that Wade's repairing the engine of, arrived for an update and chat. Kevin also caught up with John, who's going to get his Daimler up running and ready for registration. As mentioned above the aluminium plate was used as a firewall for a Y-Block Ford powered dragster. And my brother used similar pieces of thin plate rolled to shape, by a mate in the Gladiators Hot Rod club, as the rear fenders for his Y-Block Ford powered A Bucket. I've included a few pic's of the rail and of my brothers rod. Please forgive the pictures of a Ford powered hot rod and a dragster. They are there to illustrate the use of thin aluminium plate which is also being used in the '41 and as examples of my automotive history. Attach file:  (15.89 KB) (15.89 KB)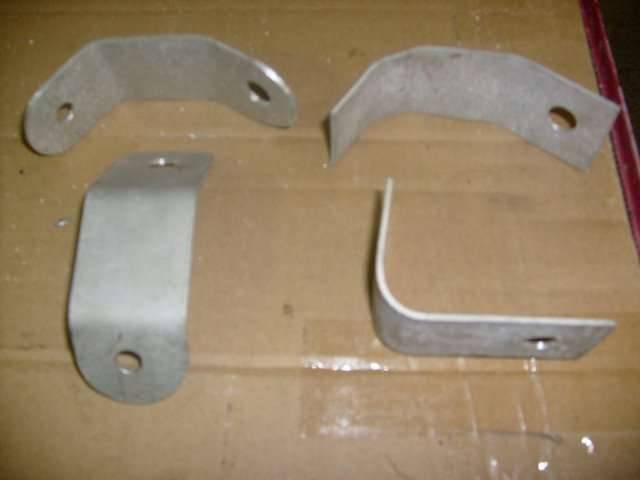 (24.29 KB) (24.29 KB)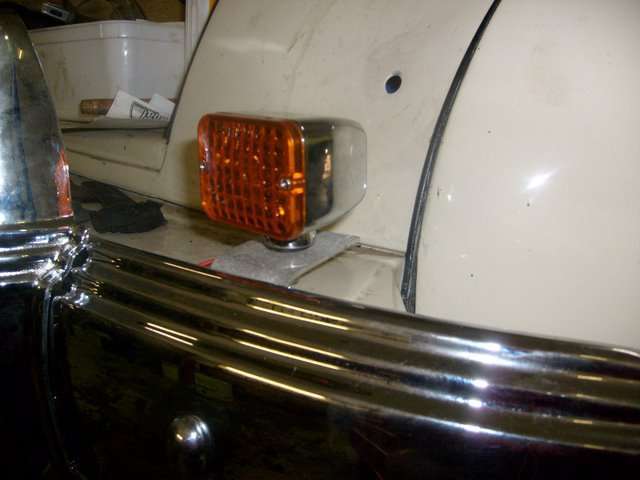 (18.41 KB) (18.41 KB)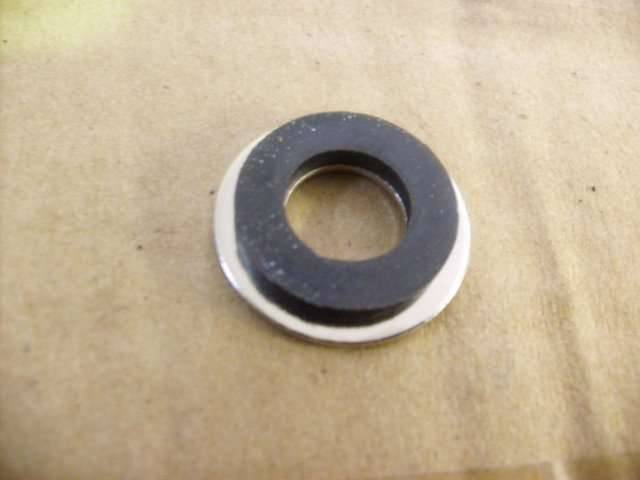 (31.52 KB) (31.52 KB) (22.80 KB) (22.80 KB)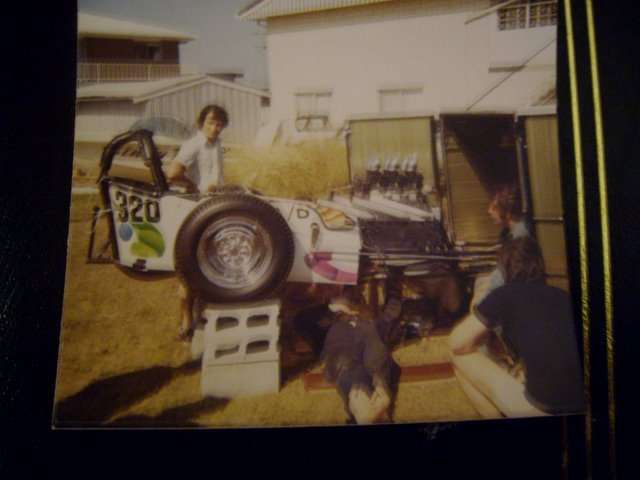 (22.00 KB) (22.00 KB)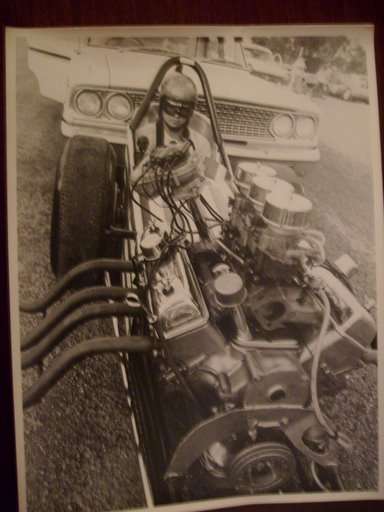 (25.71 KB) (25.71 KB)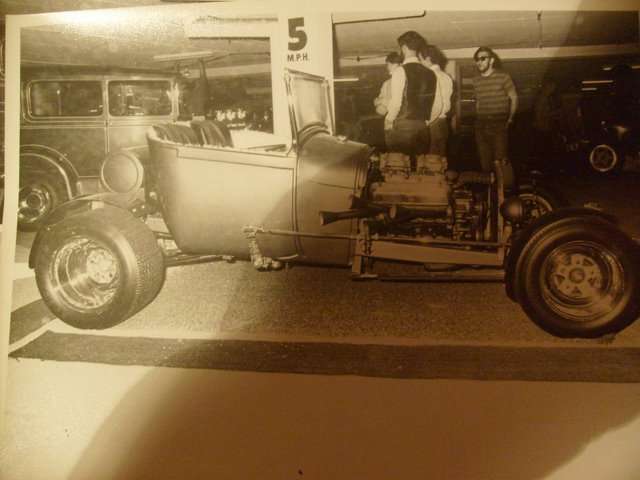 (34.16 KB) (34.16 KB)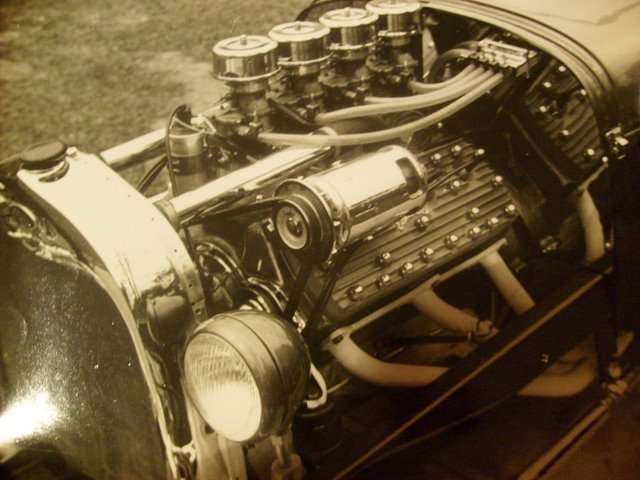 (22.42 KB) (22.42 KB)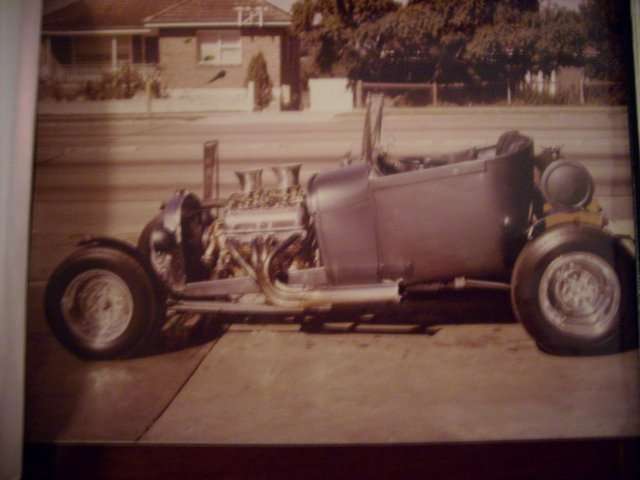
Posted on: 2008/8/14 4:39
|
|||
|
Mal
/o[]o\ ====  Bowral, Southern Highlands of NSW, Australia "Out of chaos comes order" - Nietzsche. 1938 Eight Touring Sedan - SOLD 1941 One-Twenty Club Coupe - SOLD 1948 Super Eight Limo, chassis RHD - SOLD 1950 Eight Touring Sedan - SOLD What's this?  Put your Packard in the Packard Vehicle Registry! Here's how! Any questions - PM or email me at ozstatman@gmail.com |
||||
|
||||
|
Re: Mal's '41 120 Coupe
|
||||
|---|---|---|---|---|
|
Forum Ambassador
|
Friday 15th August 2008
Quiet morning at the workshop mainly installing the rear bumper drop down centre over-riders and cross bars. Wade was in but had to leave early, but while there guided, helped, advised, measured, tested, fiddled and assisted. The pic's I'd taken back in April of the dis-assembly weren't helpful so it was a combination of observation, deduction and trial and error to get the mechanism to come together and operate smoothly. This included taking it almost all apart again to swap the over-riders from the sides we originally set them up on. And by the time Wade had to leave it was back on again but needed to be properly positioned and all nuts fully tightened. After doing that then tightened up the inside bumper bracket nuts and the centre bumper splash shield nut. Then onto the front sway bar which although in place hadn't been hooked up because the links didn't appear to reach and fit. Started by jacking the right side of the front suspension up because currently the '41 is sitting on jack stands and the front suspension is "hanging". By doing this the gap between the sway bar and the mount on the front suspension was shortened but not enough. So tried the same on the left side with of course the same result but while doing this thought I may have mounted the sway bar upside down. Started undoing the mountings for the sway bar but before I was through the right side had a phone call from my wife Kath. She was calling me home because our daughter needed some urgent baby sitting, and being a dutiful husband not to mention a doting grandfather I dropped the tools and returned as summoned. Actually tidied up and then returned home but what this meant was I didn't get to go to Grippy Rubber for some more rubber grommets, or to Mobile Instrument Service about my temp gauge/ capillary problem, or do a number of other minor chores relating to the '41. But there's always next week. Attach file: (28.42 KB) (22.98 KB) (22.98 KB)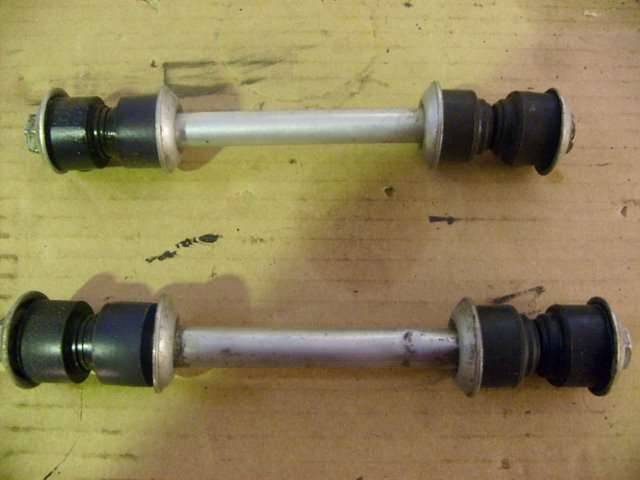 (17.75 KB) (17.75 KB)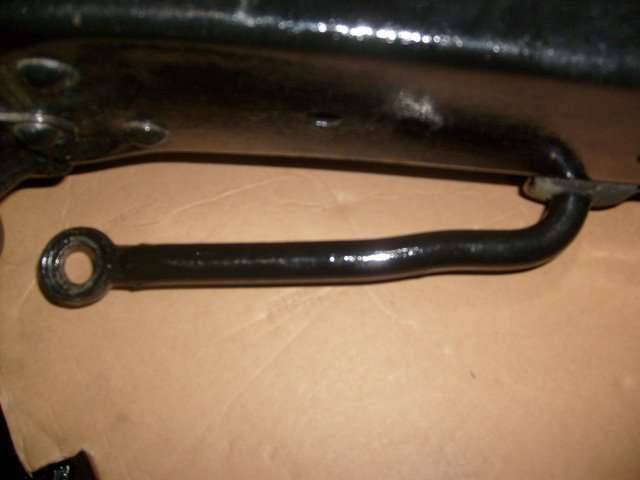
Posted on: 2008/8/15 4:06
|
|||
|
Mal
/o[]o\ ==== Bowral, Southern Highlands of NSW, Australia "Out of chaos comes order" - Nietzsche. 1938 Eight Touring Sedan - SOLD 1941 One-Twenty Club Coupe - SOLD 1948 Super Eight Limo, chassis RHD - SOLD 1950 Eight Touring Sedan - SOLD What's this? Put your Packard in the Packard Vehicle Registry! Here's how! Any questions - PM or email me at ozstatman@gmail.com |
||||
|
||||
|
Re: Mal's '41 120 Coupe
|
||||
|---|---|---|---|---|
|
Home away from home

|
Mal, you will probably want to take this with a grain of salt since the part numbers are different between the 120/180 but here's what my '41 sway bar looks like.
Attach file: (58.19 KB)
Posted on: 2008/8/15 9:28
|
|||
|
||||
|
Re: Mal's '41 120 Coupe
|
||||
|---|---|---|---|---|
|
Forum Ambassador

|
Yes, that sway bar link arrangement was used thru the 21st series cars, and some of the very early 22nd series Custom Eights. On my 48 Custom, I replaced the sway bar with one from a later 22nd/23rd series car so I could use the other style link, no problem with the interchange.
Posted on: 2008/8/15 9:48
|
|||
|
||||
|
Re: Mal's '41 120 Coupe
|
||||
|---|---|---|---|---|
|
Forum Ambassador
|
Barrie, JD & Dave,
Thanks guys, you've each given me something to think about. I did find an illustration in my Motors Manual here at home which shows that for 35-42 the links are the same as shown in JD's pic. So it looks like a later or another stabilizer bar has been swapped in at some stage of the '41's life. I'm going down to the workshop soon and will fiddle some more with remounting the bar and also look up the '41 manual which is down there. Don't have my camera here at the moment but later will take a pic of the page in Motors and add it to this post. EDIT - Pics below from '41 manual and Motors Manual added. Attach file: (20.16 KB) (29.42 KB) (29.42 KB)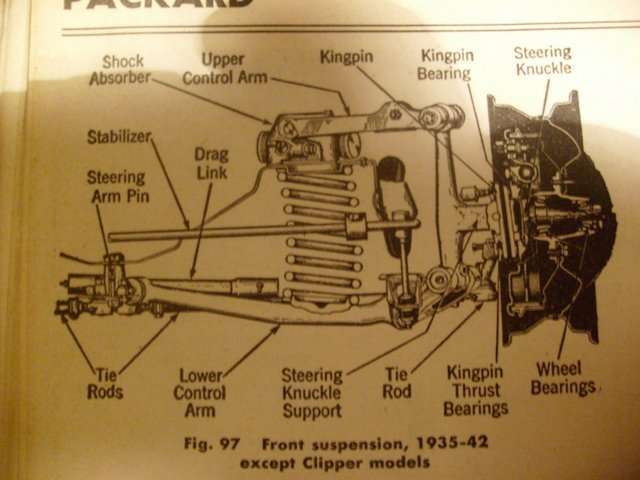
Posted on: 2008/8/15 16:31
|
|||
|
Mal
/o[]o\ ==== Bowral, Southern Highlands of NSW, Australia "Out of chaos comes order" - Nietzsche. 1938 Eight Touring Sedan - SOLD 1941 One-Twenty Club Coupe - SOLD 1948 Super Eight Limo, chassis RHD - SOLD 1950 Eight Touring Sedan - SOLD What's this? Put your Packard in the Packard Vehicle Registry! Here's how! Any questions - PM or email me at ozstatman@gmail.com |
||||
|
||||
|
Re: Mal's '41 120 Coupe
|
||||
|---|---|---|---|---|
|
Forum Ambassador
|
Saturday 16th August 2008
On the way to the workshop this morning went looking for 6V globes to replace the 12V ones that came with the turn indicators. First stopped at Tibbie Rose, an Auto Electrician at Ryde, they didn't have them. Then tried Repco, spare parts retailer at West Ryde, they didn't have them. And last tried Salmon Bros, an electrical wholesaler at Meadowbank, and they didn't have them. Continued to the workshop and went back to removing the front sway bar. Then re-fitted it, but reversed the attitude of the "arms", but loosely secured the nuts and bolts securing the rubber mounting blocks to the front frame horns. This allowed a little more reach for the links to meet with the lower bracket on the front of the torque arm. Then using the small trolley jack and a block of wood jacked up the front of the torque arm so the suspension was bearing some of the weight of the car. This helped but still wasn't sufficient as I couldn't compress the sway bar far enough to get the final rubber, collar and nut on. What to do? Needed something to compress the sway bar a little bit and hold it while I did the nut up. EUREKA!!! - The valve spring compressor sprang to mind as an implement suitable for the task at hand. So, and when you read this Wade you can be assured I was very very careful in using the compressor for a job it wasn't intended for, very gradually just hand tightened the compressor using the handle at the end of the long thread. Took up very easily, so I'm sure the valve spring compressor didn't suffer any undue harm. Repeated on the other side where it was slightly harder because there was now some tension on the sway bar but still required only hand tightening to bring the shaft of the bolt through the rubbers and collars. Then tightened up the sway bar mounting brackets on the frame horns. After this, seeing the uses I put his tools and equipment to when he's not around, I'm afraid that Wade won't let me work unsupervised in the workshop. Turned to the lower radiator tube and hoses because, after installing them earlier this week, I'd discovered that the upper hose of the two lower hoses had a kink in it. I'd discussed this with Wade and he suggested cut some more of the upper part of the s/s tube off so that the angle to the water pump inlet was reduced. Took the hoses, s/s tube and clamps off. And speaking of which, I've replaced the clamp on the lower radiator outlet because it was extremely difficult to reach, let alone tighten up. Rummaged through the bucket of hose clamps that Wade's accumulated and found one of the right size with a slotted hex head. This meant I could use a small socket coupled with a universal joint to tighten it instead of a screwdriver, much much easier. Wade had also come up with 2 lengths of new radiator hose, one about 6" in length and the other about 18". Determined to try and use the 6" length only, if possible, and save the longer length for Wade. Hacksawed off another 1" from the upper part of the s/s tube so that now a bit over 2" in total has been taken off. Then installed the longer of my 2 pieces of hose, the 6" length of hose from Wade, the s/s tube and the clamps. That did me for time at the workshop this the morning, but I'd been thinking all along about 6V globes, so went to Metropolitan Motorcycle Spares at Silverwater instead of going directly home. And this time, success! Bought out their entire stock of 7 globes, although I only need 4, now have some spares for the future. And on leaving Metroploitan there was a nice Chrysler New Yorker parked still LHD and very nice in it's powder blue. Attach file: (32.00 KB)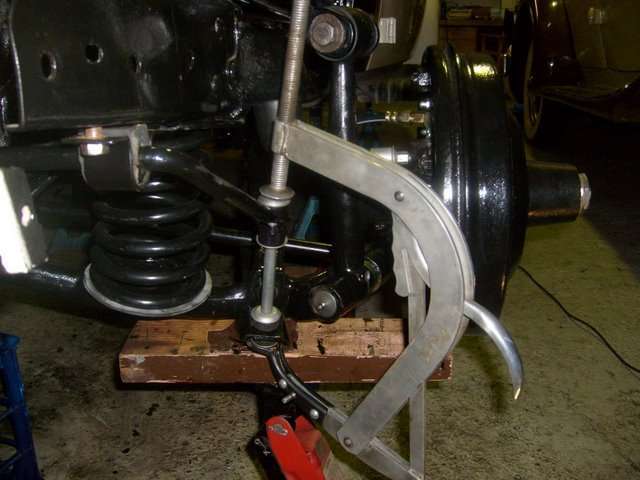 (20.40 KB) (20.40 KB)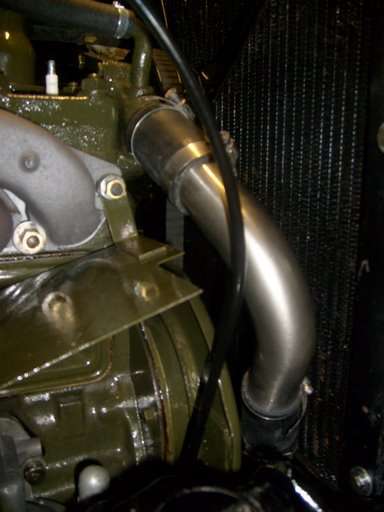 (21.12 KB) (21.12 KB)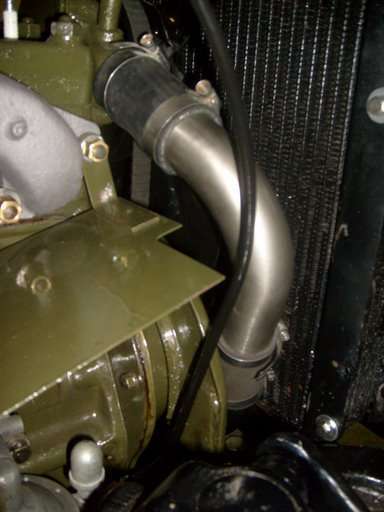 (21.78 KB) (21.78 KB)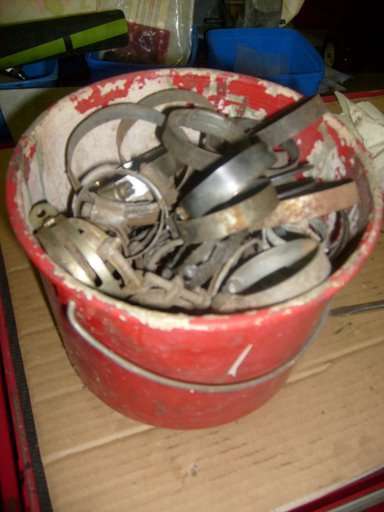 (17.21 KB) (17.21 KB)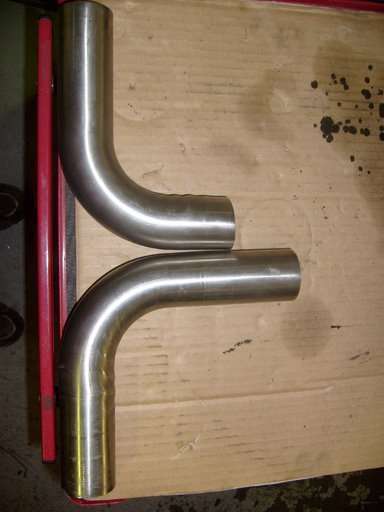 (26.79 KB) (26.79 KB)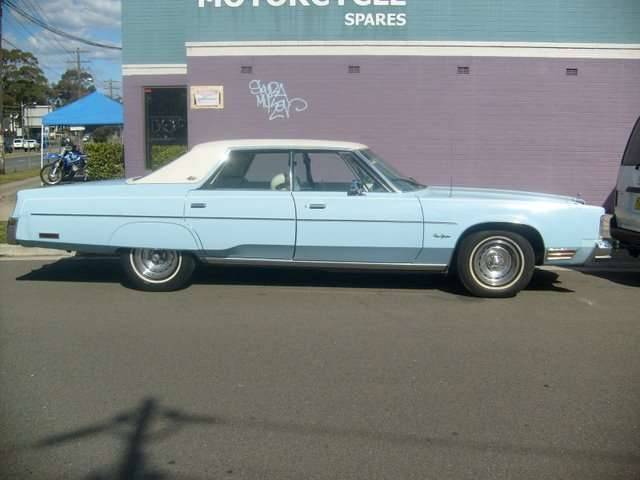
Posted on: 2008/8/15 23:17
|
|||
|
Mal
/o[]o\ ==== Bowral, Southern Highlands of NSW, Australia "Out of chaos comes order" - Nietzsche. 1938 Eight Touring Sedan - SOLD 1941 One-Twenty Club Coupe - SOLD 1948 Super Eight Limo, chassis RHD - SOLD 1950 Eight Touring Sedan - SOLD What's this? Put your Packard in the Packard Vehicle Registry! Here's how! Any questions - PM or email me at ozstatman@gmail.com |
||||
|
||||
|
Re: Mal's '41 120 Coupe
|
||||
|---|---|---|---|---|
|
Forum Ambassador
|
Monday 18th August 2008
Turns out that today developed into a parts chasing day. Started at the workshop by cleaning up and masking up the taillight housings so I could spray the inside surface of the housings to better reflect the light. Then cleaned up the taillight retaining plates that go inside the trunk. Because I needed to go out and get some paint for the housing part of the painting exercise also went to Grippy Rubber and picked up a wide selection of rubber grommets for the re-wiring task ahead. Back to the shop and with a spray can painted the housing surface with chrome paint and brushed POR-15 silver on the retaining plates. Interesting that each tailight housing has "coupe" cast into it while the retaining plates are marked RC and LC, I presume for "right coupe" and "left coupe". No doubt helped in the assembly line process. About this time Wade, who had been fitting the con rods to Kevin's '35 crankshaft, realised he didn't have one of the big-end nuts for #8 rod cap. One had been lost at the machine shop, but at the time Wade wasn't too worried because he thought he had some spares. Alas and alack, no spares were to be found. Because I was going over to Mobile Instrument Services at Kings Park to chase up repair of the '41's temp gauge sender head, I was pressed into dropping into Lee Bros, the fasteners supplier, on the way there. This suited me because the sooner Wade finishes Kevin's '35 the sooner he can assist with the '41. So, armed with #8 rod, cap, 2 bolts but only one nut, my quest began. Entered Lee Bros full of hope and left depressed. Couldn't find a nut to fit it, let alone a castellated high tensile nut. Went through measuring with calipers, electronic calipers, micrometers and various thread gauges but without a glimmer of hope. In the carpark phoned Wade told him of the news and asked him for the phone number of Graham McDonald Services where I'd bought the NPS Tap for the wheel cylinders then rang them to be told they don't carry any fasteners at all. Rang Wade again and asked him to contact Harvey, the guy wood-graining the '41 dash, as he was relatively close by and might be able to help. As I was continuing on to Mobile Instrument Services Wade called to say Harvey was expecting me when I finished there. At Mobile Instrument Services was pleasantly surprised to find they can replace the bulb and although about 1" of the wire encircled tube is lost it will work. And best of all it will be ready in a week and is half the price of getting it done elsewhere. I also had a little task to do here for Wade too. In his '37 120 sedan he is using an electronic temp gauge, because the original gauge is cactus. But the only way you can read it is to switch the engine off! This is because the electronic interference when the engine is running turns the digital display to electronic flashes instead of readable numbers. So he's replacing the electronic gauge with the same manual gauge I'm using in the '38 and I was able to pick up a gauge and an adaptor. Then arriving at Harvey's found him just about to dive under the house into the storage space to search for big-end nuts. Before he did that though he showed me what he'd done so far on the '41 dash. It's base coated and ready and he's been experimenting with different paints and colours because the stuff he used to use is no longer available. Showed me his test piece and a number of attempts thereon before he was satisfied with the result. Now, although it won't be original pattern or colour, it'll be a whole lot better than the chocolate brown the dash was painted in. So presuming the weather's right tomorrow, and the forecast is positive, he'll paint the dash. But then has to leave it for a week to harden, then he'll apply the clear coats and another week will pass. So in about a fortnight, all going well, I'll have the '41 dash back in all it's wood-grained glory. However back to the chase, while Harvey ferreted around under the crawl space I was looking through his nut and bolt collection in the garage out the back. Suffice to say we both struck out. Then it was into his under-house garage but again no luck. Harvey does have a spare Super 8 engine but naturally was loath to open it up for the sake of one big-end nut. Wade is now going to contact a number of other Packard Club members who he's reasonably certain should have a big-end nut. And Wade did admonish me first up at the workshop for misuse of tools, but fortunately it was in a light hearted way. Attach file: (24.38 KB)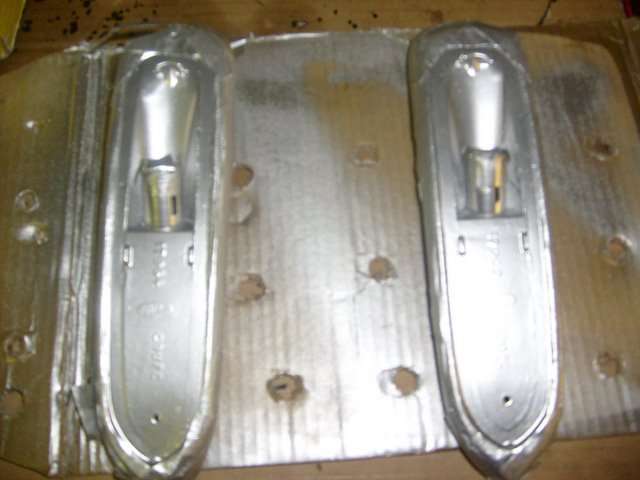 (23.47 KB) (23.47 KB)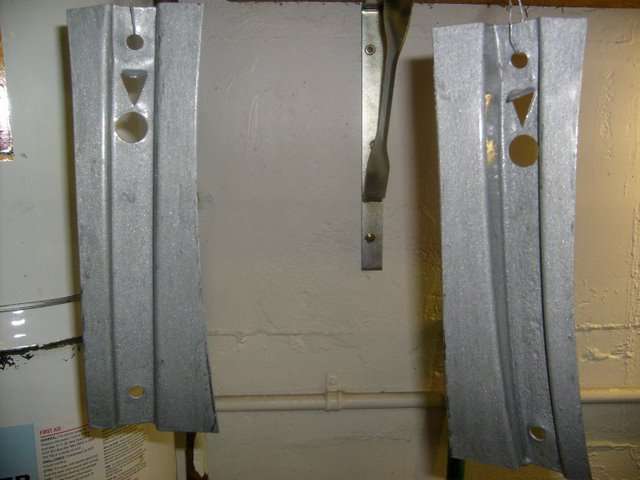 (17.58 KB) (17.58 KB)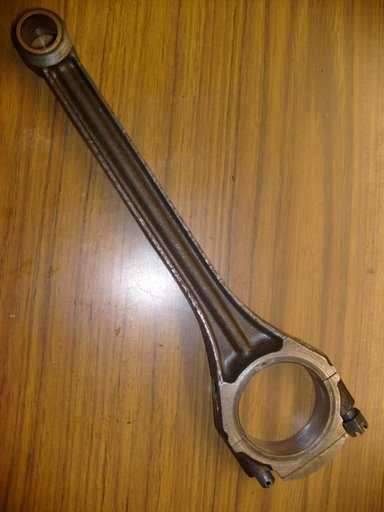
Posted on: 2008/8/18 7:09
|
|||
|
Mal
/o[]o\ ==== Bowral, Southern Highlands of NSW, Australia "Out of chaos comes order" - Nietzsche. 1938 Eight Touring Sedan - SOLD 1941 One-Twenty Club Coupe - SOLD 1948 Super Eight Limo, chassis RHD - SOLD 1950 Eight Touring Sedan - SOLD What's this? Put your Packard in the Packard Vehicle Registry! Here's how! Any questions - PM or email me at ozstatman@gmail.com |
||||
|
||||
|
Re: Mal's '41 120 Coupe
|
||||
|---|---|---|---|---|
|
Forum Ambassador
|
Mal,
I had a full set of rod bolts made by ARP for my rods when I converted them to accept the Plymouth rod bearings. This left me with the original 16 bolts and nuts. I would be happy to send a rod nut if you folks are unable to locate one at home. Jim Attach file: (50.32 KB)
Posted on: 2008/8/18 10:52
|
|||
|
||||
|
Re: Mal's '41 120 Coupe
|
||||
|---|---|---|---|---|
|
Webmaster

|
Super8,
The pics you are trying to attach are too large, and that is why they are not viewing. The above picture I manually resized to 800x600, and now it works. Pics should be 1024x1024 or smaller. Thanks!
Posted on: 2008/8/18 11:53
|
|||
|
-BigKev
1954 Packard Clipper Deluxe Touring Sedan -> Registry | Project Blog 1937 Packard 115-C Convertible Coupe -> Registry | Project Blog |
||||
|
||||
Register To PostTopic is Locked


