|
Re: Henry's 55 Constellation
|
||||
|---|---|---|---|---|
|
Forum Ambassador

|
it's weekend update with Hank Greene....
worked on putting the rear diff together again and painting the trailing arms. got the trailing arms painted in their final state and put the o-seal on the rear diff and mounted it in the carrier housing. put in the driver's side axle and put in the new outer seal in the outer seal plate. cleaned up the shims and the outer seal plate. i like using the sand blaster to clean them up quick (except the shims) and then used the bench grinder brush wheel to polish the metal and what i call "seal" it from then undesirables  mounted the new solenoids. must say they are a great replacement and cheap to boot. 15 bucks a piece, not bad  mounted everything together on the solenoids and painted them with Plast-id plasticized paint. i will have to say it actually looks better than what i had before LOL! i then noticed that the wiring harness seemed to be rubbing in places when i was working on the solenoid setup, so i put the wire loom protection on. i think it looks better and will actually protect the wiring better in the future....you never know what those freaking pests will get in there and eat up the wiring. we have a field near our house..so i have lots of bait out as they have already eaten part of the wiring harness on my z3...(repaired, luckily) used wire ties to hold it on and i must say it looks pretty sweet! mounted everything together on the solenoids and painted them with Plast-id plasticized paint. i will have to say it actually looks better than what i had before LOL! i then noticed that the wiring harness seemed to be rubbing in places when i was working on the solenoid setup, so i put the wire loom protection on. i think it looks better and will actually protect the wiring better in the future....you never know what those freaking pests will get in there and eat up the wiring. we have a field near our house..so i have lots of bait out as they have already eaten part of the wiring harness on my z3...(repaired, luckily) used wire ties to hold it on and i must say it looks pretty sweet!  i also tested the system and it works 100%....also HH you will get a good laugh out of the fact that i was testing the old system the wrong way, i reread the manual and i was not testing per the manual....i tried the way i was doing it with the old ones on the new ones and they sill only clicked....so i knew it was something i was doing. i looked in the manual and sure enough i was not doing it right...DANG! i feel stupid! i also tested the system and it works 100%....also HH you will get a good laugh out of the fact that i was testing the old system the wrong way, i reread the manual and i was not testing per the manual....i tried the way i was doing it with the old ones on the new ones and they sill only clicked....so i knew it was something i was doing. i looked in the manual and sure enough i was not doing it right...DANG! i feel stupid!  oh well..it works now. goes both ways and the limit switch works perfectly now. the solenoids do touch in the middle there, but it was not enough to impede operation and mounting. oh well..it works now. goes both ways and the limit switch works perfectly now. the solenoids do touch in the middle there, but it was not enough to impede operation and mounting.BigKev...what was the part number on the outside seals that came in your kit. mine were different from the ones that were originally in there (they were replacements and not O.E i think.) national seal old and new ones, but different part numbers. the new ones were a very tight fit over the axle end. the inside diameter was bigger on the older one that i took off. so i am worried that it will rub down and not work. just wondered what your part number was. well, until next time, this has been weekend update with Hank Greene. enjoy the pics and have a great tomorrow. Attach file:  (110.87 KB) (110.87 KB)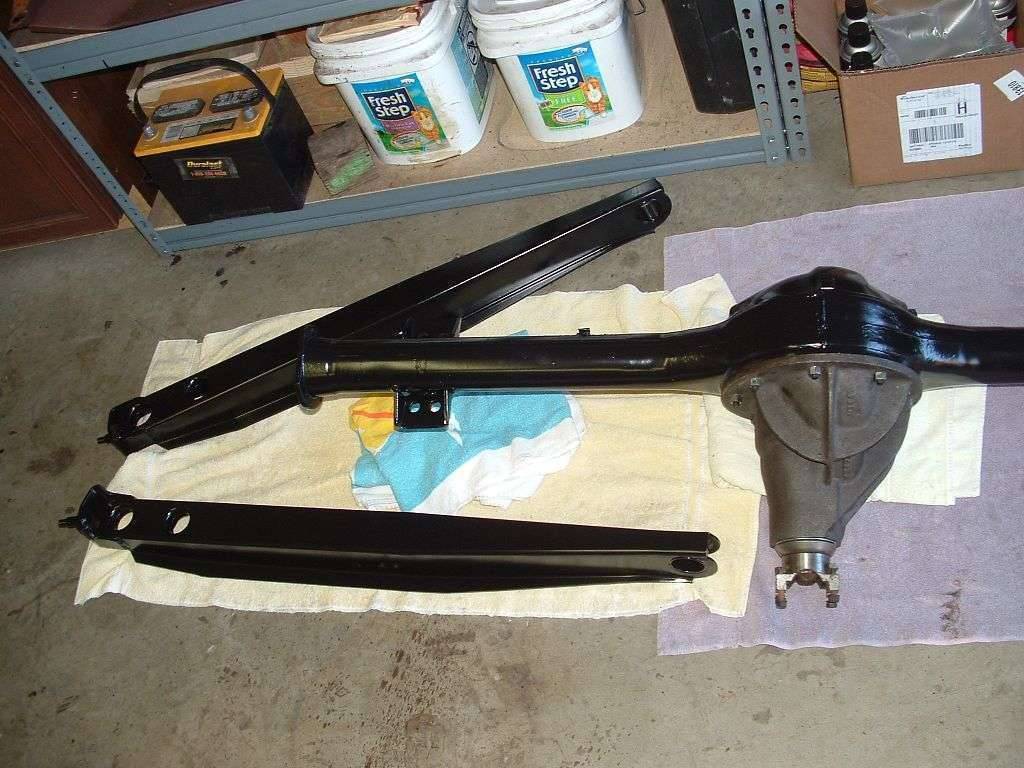 (110.68 KB) (110.68 KB)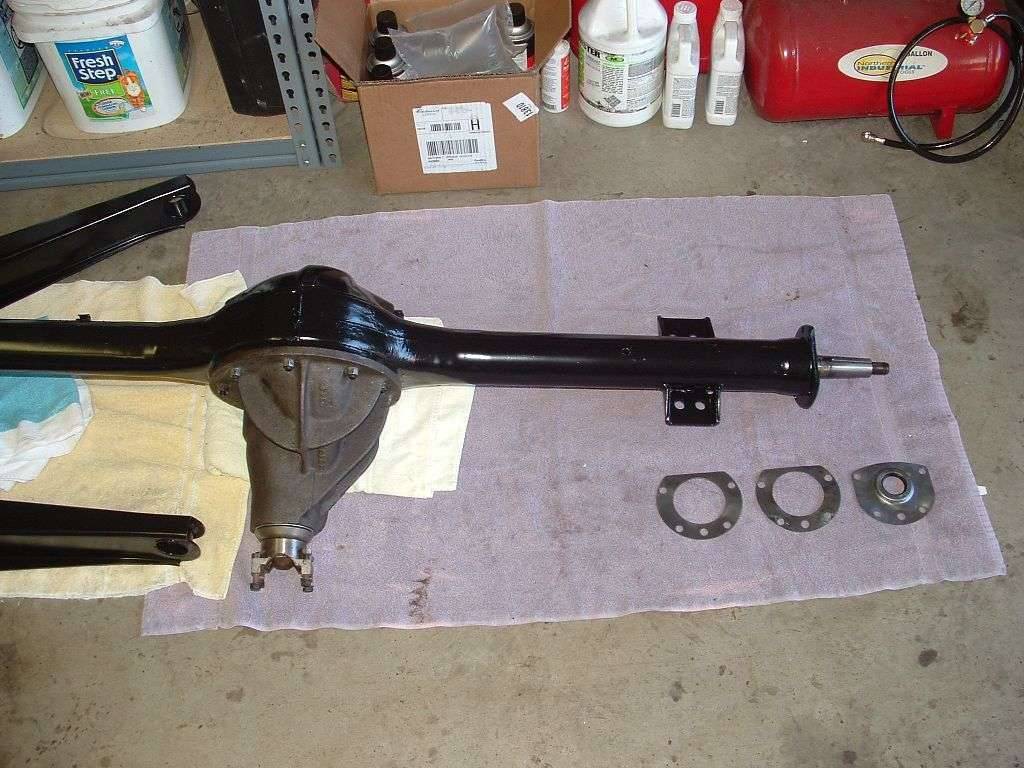 (44.26 KB) (44.26 KB)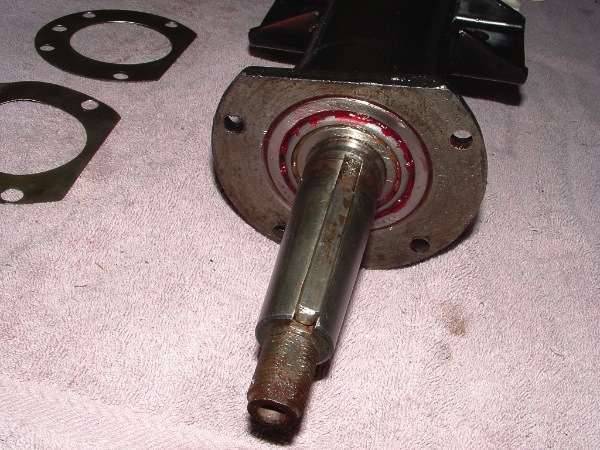 (103.30 KB) (103.30 KB)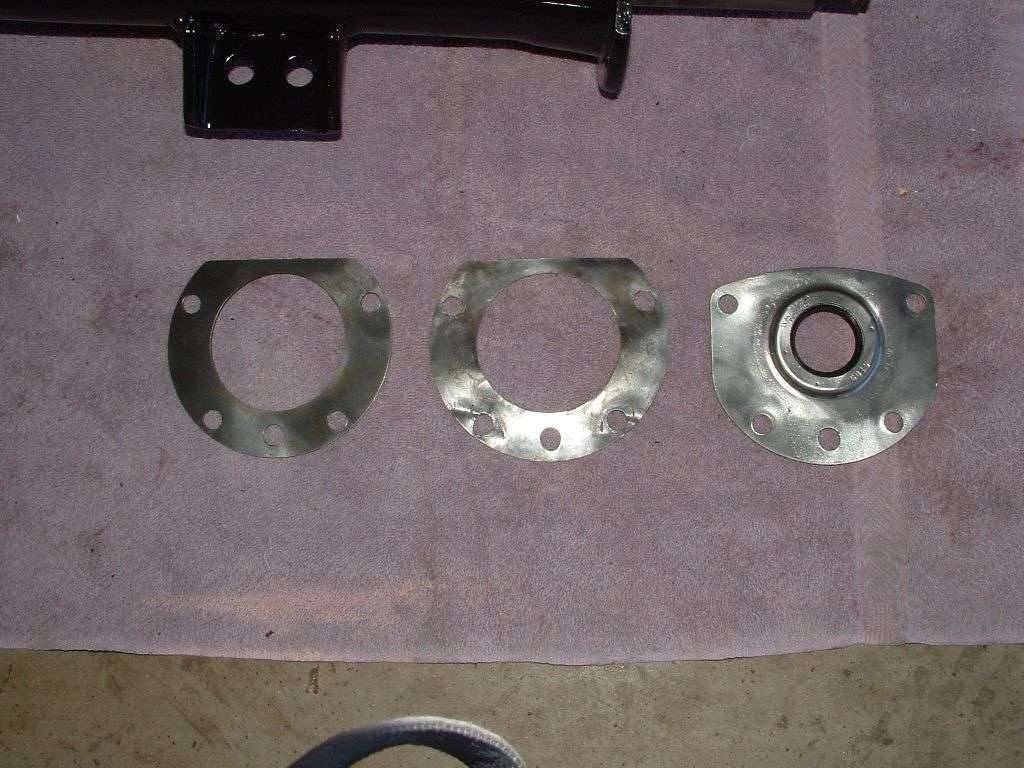 (139.78 KB) (139.78 KB)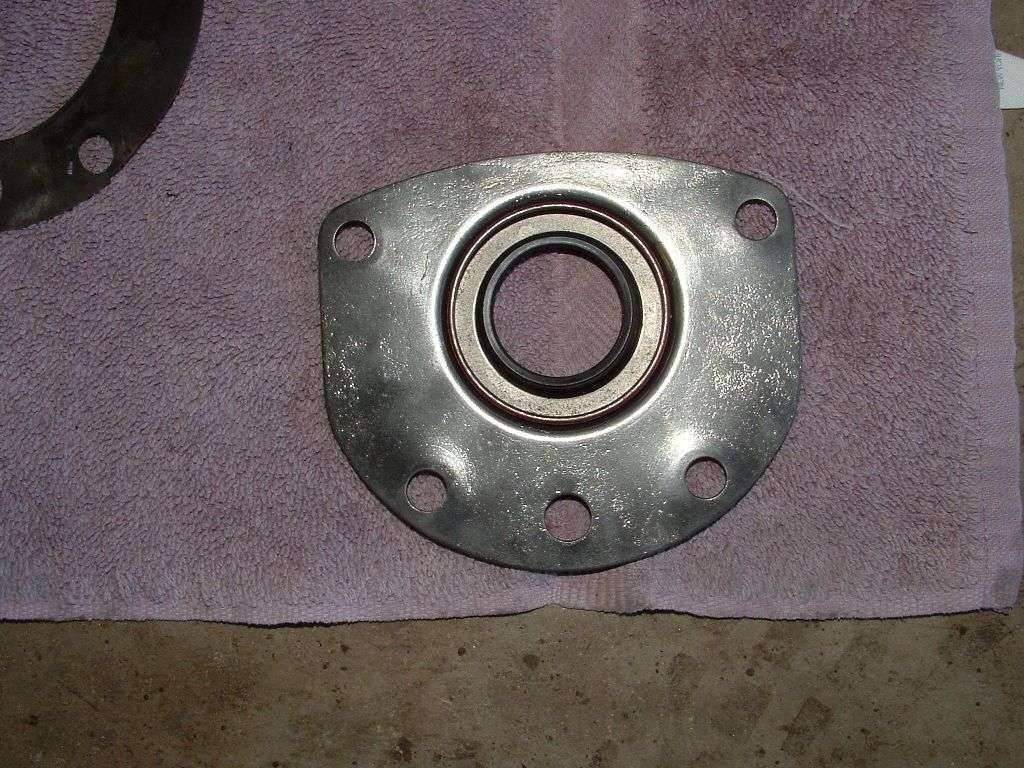 (119.97 KB) (119.97 KB)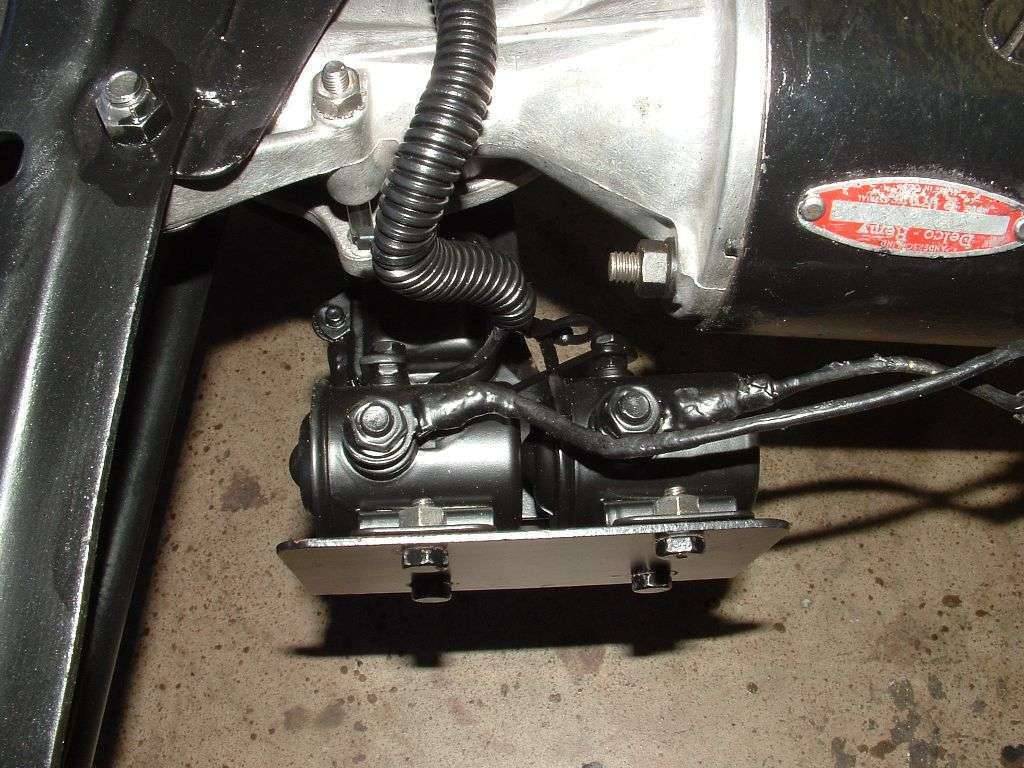 (130.60 KB) (130.60 KB)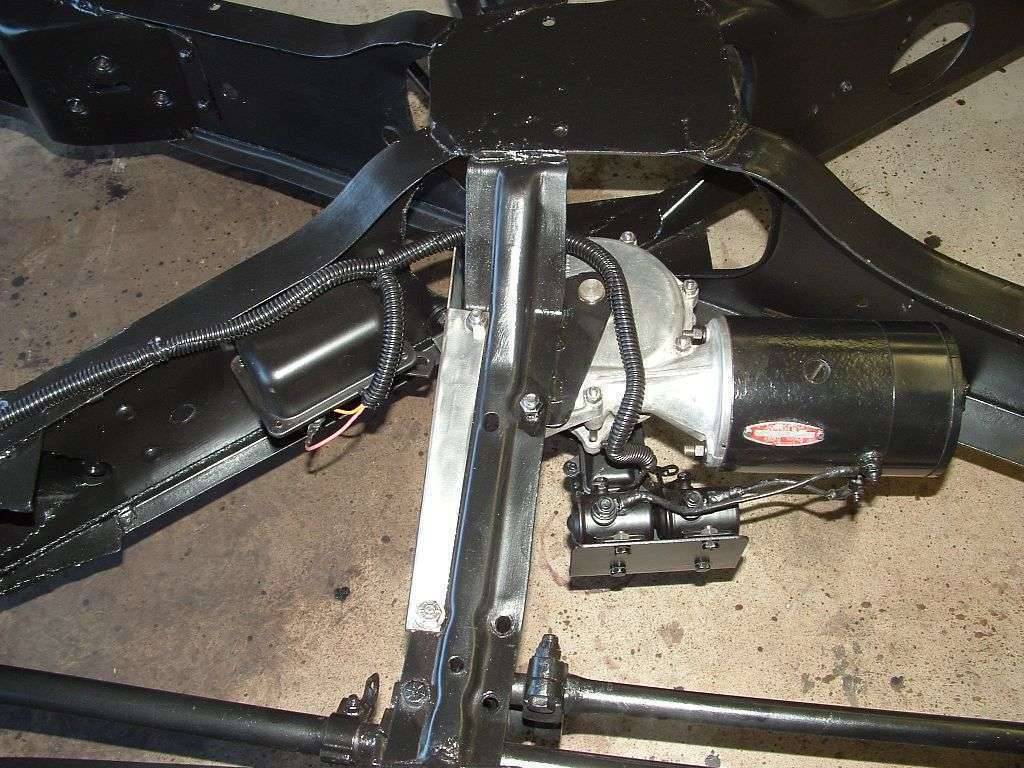 (123.83 KB) (123.83 KB)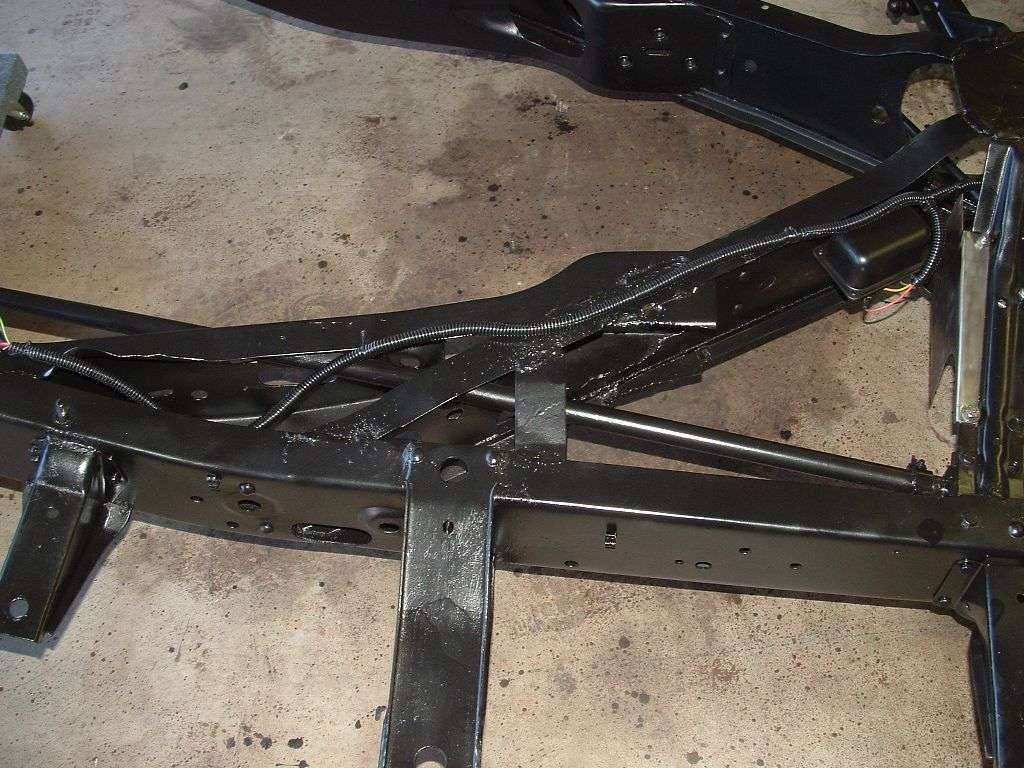
Posted on: 2009/2/2 0:37
|
|||
|
1937 Packard 138-CD Deluxe Touring Limousine
Maroon/Black 1090-1021 [url=https://packardinfo.com/xoops/html/modules/registry/View.php?ID=232]1955 Packard |
||||
|
||||
|
Re: Henry's 55 Constellation
|
||||
|---|---|---|---|---|
|
Webmaster

|
Hank,
The seals (inners and outers) actually had no part numbers on them what so ever. Just green in color.
Posted on: 2009/2/2 13:33
|
|||
|
-BigKev
1954 Packard Clipper Deluxe Touring Sedan -> Registry | Project Blog 1937 Packard 115-C Convertible Coupe -> Registry | Project Blog |
||||
|
||||

|
Re: Henry's 55 Constellation
|
||||
|---|---|---|---|---|
|
Forum Ambassador
|
just bought a set of 4 Coker Classic bias ply 3" WW tires new from ebay for 446 dollars shipped! that is 40 bucks less a tire. AWESOME!
more updates to come this weekend. later, Hank
Posted on: 2009/2/7 0:41
|
|||
|
1937 Packard 138-CD Deluxe Touring Limousine
Maroon/Black 1090-1021 [url=https://packardinfo.com/xoops/html/modules/registry/View.php?ID=232]1955 Packard |
||||
|
||||
|
Re: Henry's 55 Constellation
|
||||
|---|---|---|---|---|
|
Home away from home
|
Henry,
Good deal on those tires. I'm glad you're going with bias ply. I know some won't agree, but you've just been such a purist so far on this project, the correct tires are a nice touch. Besides, when these cars were new and for many years afterward, they had nothing on them but bias. That's the only tire I've ever had under the TL Packards I've driven, so I can't comment on any improvements with radials, but they sure handled nice with good 4-ply bias tires. I'm not trying to start a controversy here, just sayin' I'm pleased with your choice.
Posted on: 2009/2/7 23:21
|
|||
|
Guy
Not an Expert |
||||
|
||||
|
Re: Henry's 55 Constellation
|
||||
|---|---|---|---|---|
|
Forum Ambassador
|
i agree. i am bias to bias ply as well. LOL!
  this weekend i did nothing to the packard, instead i worked on my truck. installed my lift springs and new ball joints, etc... it sucked... today i moved on to the packard. i put the backing plate back on and put the seals on after. i painted the backing plate with 500 degree engine paint in satin. i figured with the heat from the brakes it couldn't hurt. see pictures, i was inspired by BigKev to take photos of each step. i also painted the sway bars and link in their final stage of paint. believe it or not, but the silver look pieces on the passenger's side that i was putting together are polished, i did not paint them with silver cad. i used the bench grinder wire wheel to polish them and seal the metal. i have put water on them and they don't rust...darnedest thing i have ever seen, but i wont argue as i like the polished look better and it keeps me from having to paint all the time. i also clean up the end of the e-brake cable, nice and shiny now ;0) soaked the brake cylinder in pb blaster as it was pretty cruddy. i was at a family members autoshop today getting the wheel alignment done and saw an old blast cabinet in the corner (this is an old shop) and asked about it. nice big one too, stand up version w/ door on the side and top opens too. offered to buy it, he said he would think about it and let me know. it will need new seals and window, etc...but i think i can get it pretty cheap since it is just sitting there doing nothing. wish me luck on that, cause as much as i like my homemade one...i sure would like to stand up and not hunch myself over mine, which sux. next is blasting the other backing plate and putting the driver's side together. once i put the axle in the passenger's side, it pushed the driver's side back out a bit, funny thing is that once i put the shims up to it, it took up the exact amount of slack that was needed.... so, yeah me! enjoy the pics....and for some reason my bias ply tires got delayed...but they are still in UPS hands, so they will be here although a bit later. i will post pics of those when they get here. i also made my own seals for the torsion bar bearings out of pipe wrap. it worked perfectly. bot the torsion bar bearings mounted, but still have not connected the motor to them. you can see were the nuts chipped off some of the paint, will have to do some touch up later. saw some rather rare cares on the way to get new exhaust on my truck...i gave a thumbs up to the lambo and he was not a jerk and he revved for me and took off like a bat outa hell! too bad i wasn't in my z3..(supercharged), i might have gave him a run for his money. later dudes, Hank Attach file: (126.98 KB)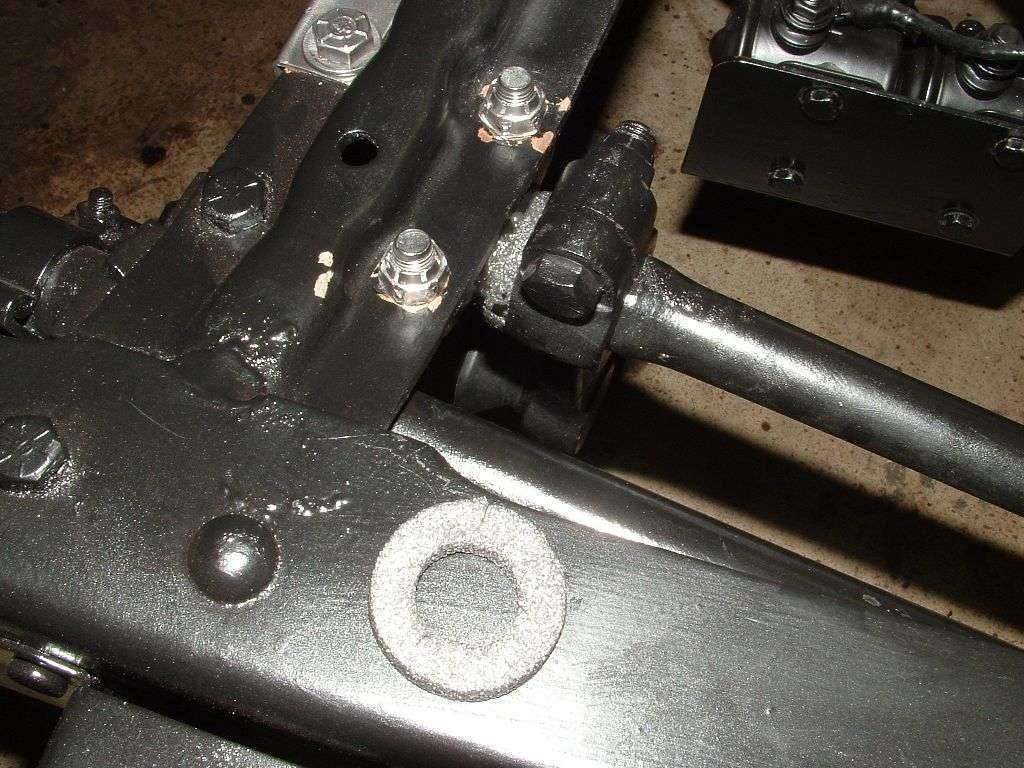 (59.29 KB) (59.29 KB)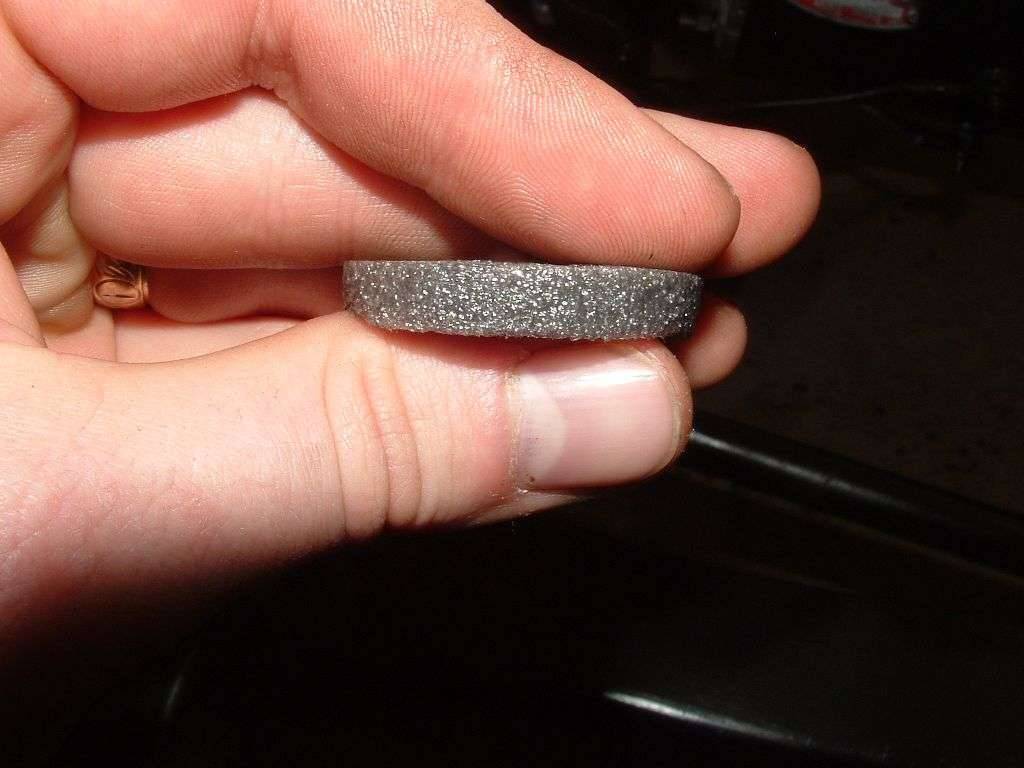 (69.73 KB) (69.73 KB) (72.70 KB) (72.70 KB)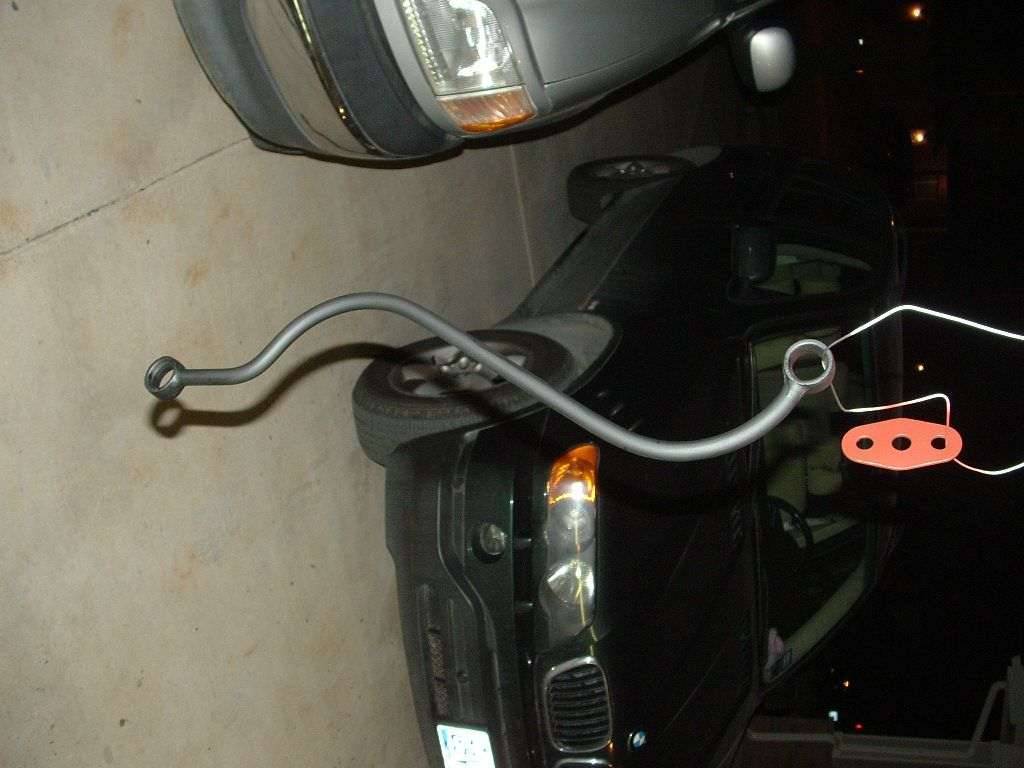 (96.07 KB) (96.07 KB)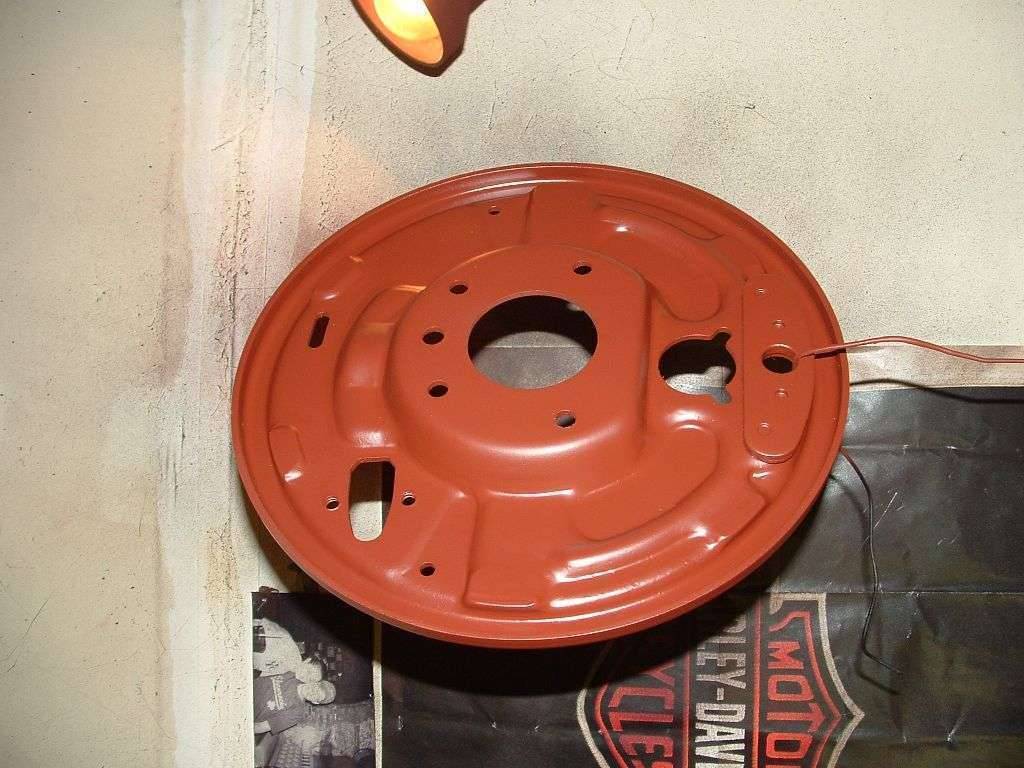 (124.31 KB) (124.31 KB)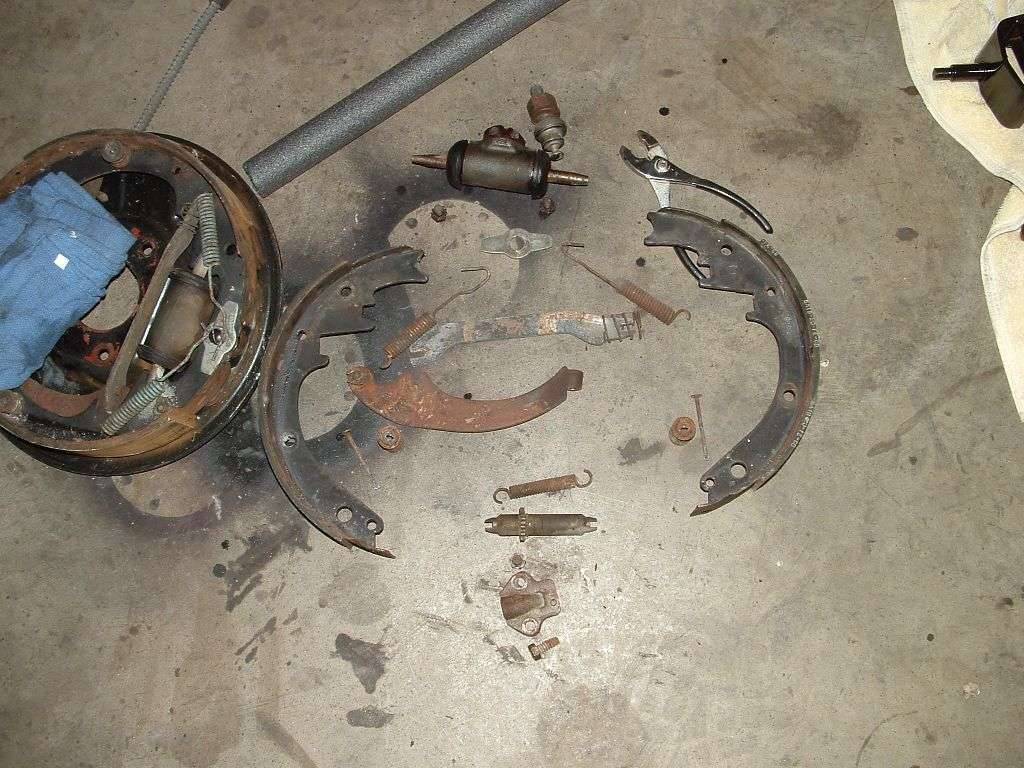 (81.44 KB) (81.44 KB)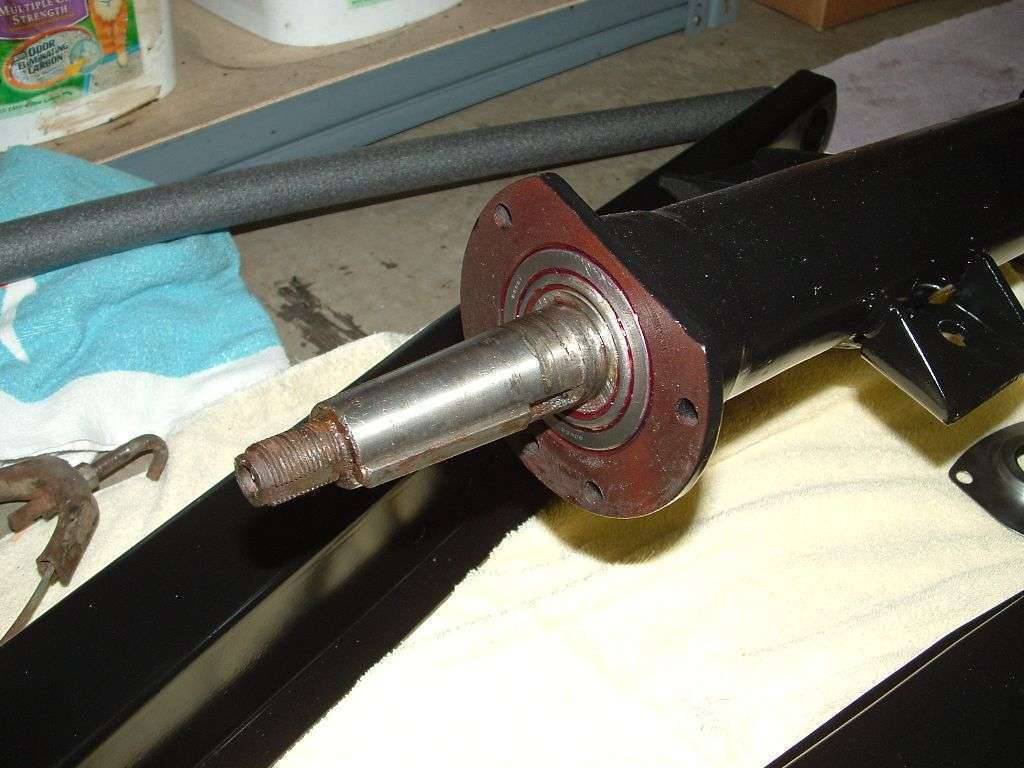 (40.63 KB) (40.63 KB)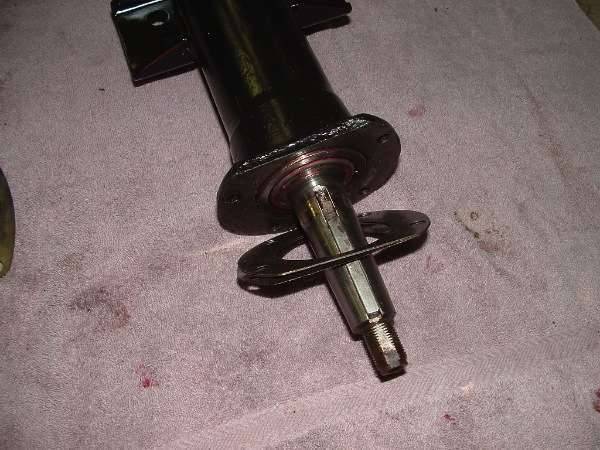 (135.98 KB) (135.98 KB) (62.55 KB) (62.55 KB)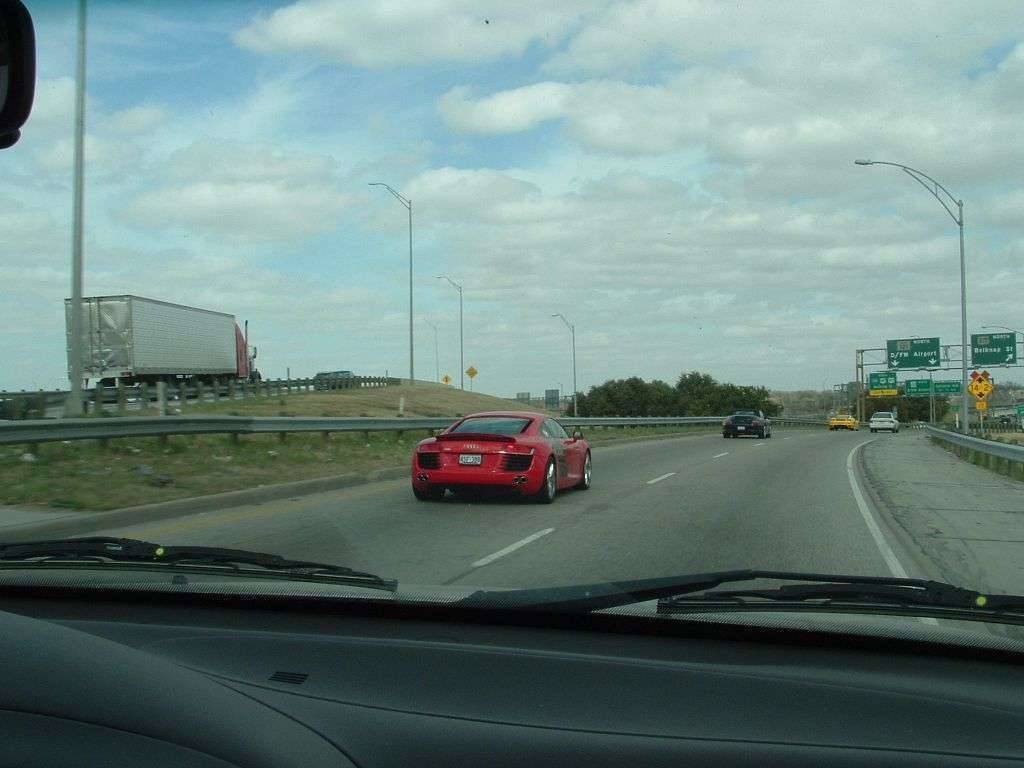 (89.72 KB) (89.72 KB)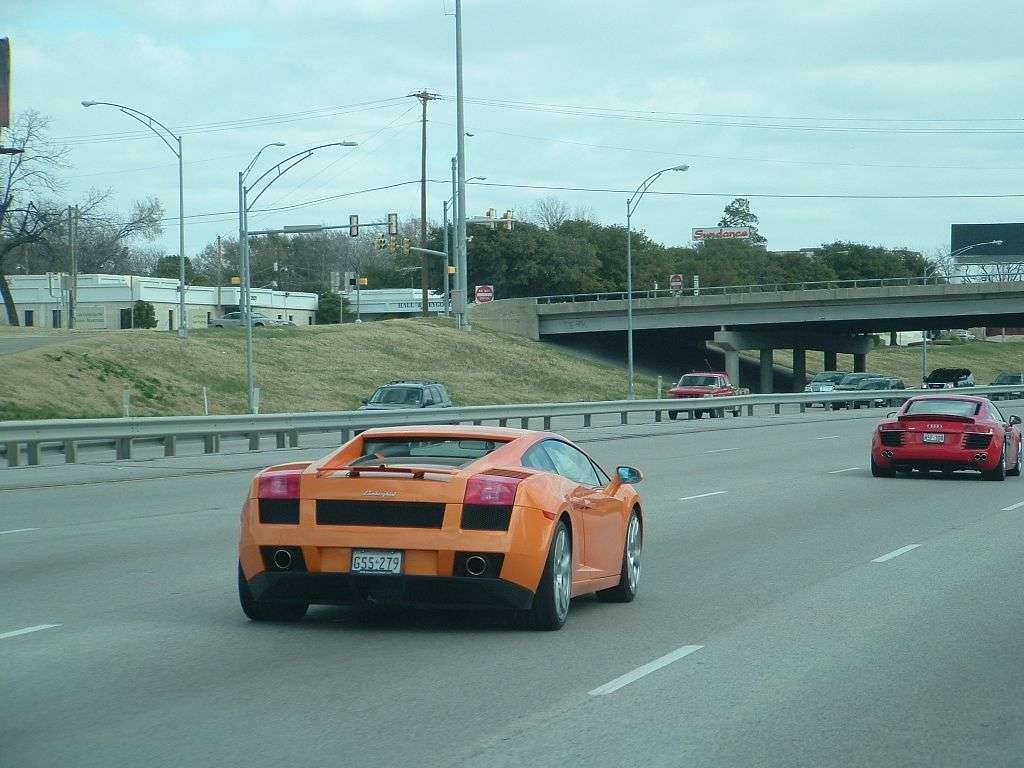 (65.25 KB) (65.25 KB)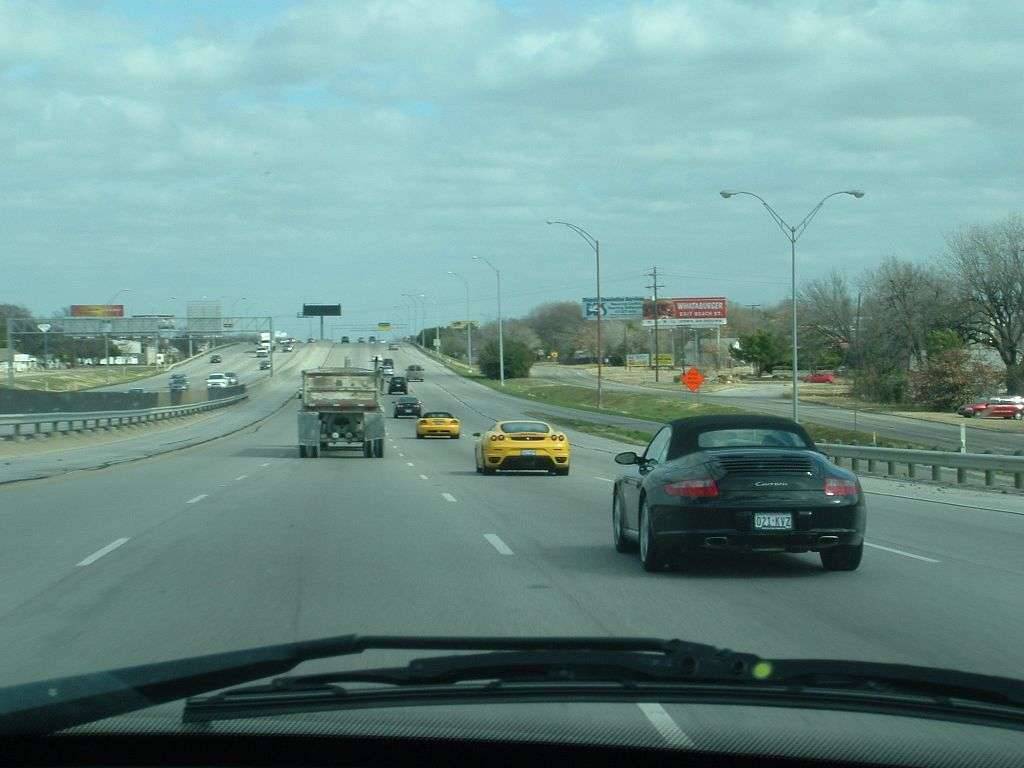 (81.03 KB) (81.03 KB) (69.31 KB) (69.31 KB) (72.71 KB) (72.71 KB) (94.11 KB) (94.11 KB)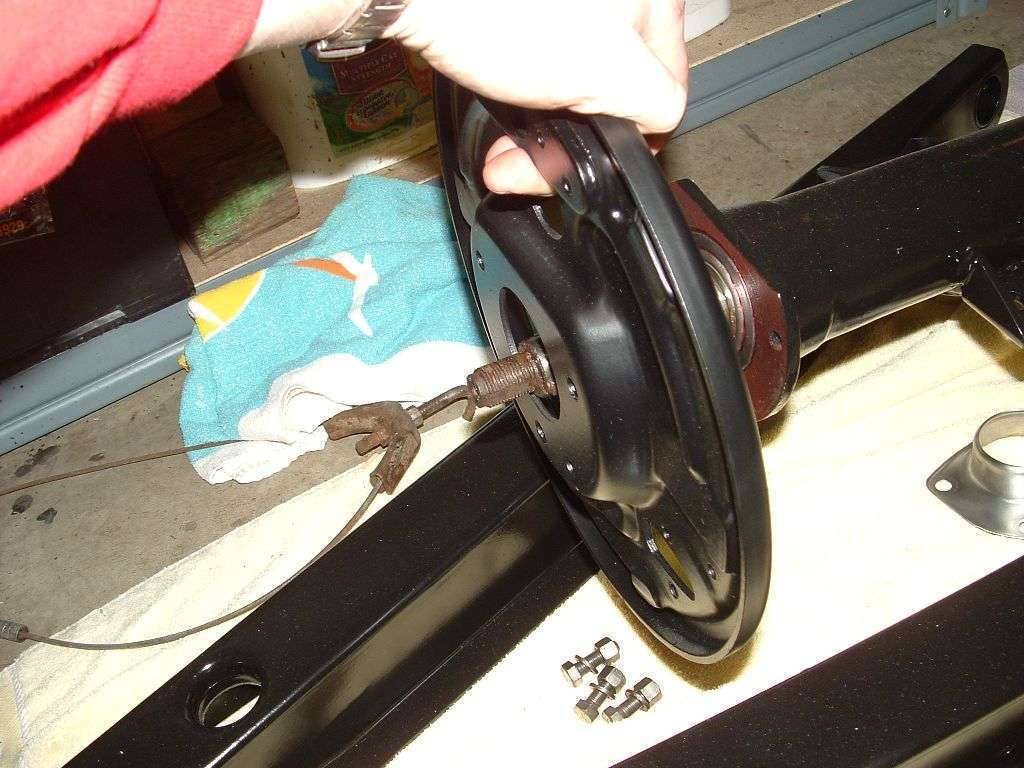 (87.27 KB) (87.27 KB)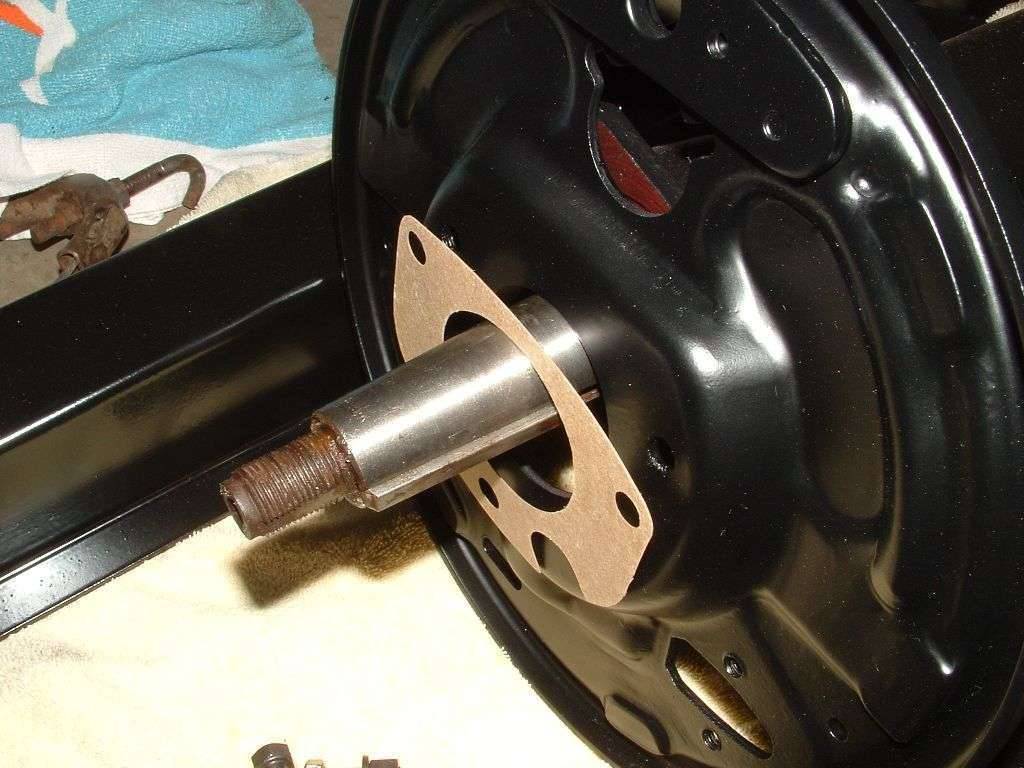 (86.31 KB) (86.31 KB)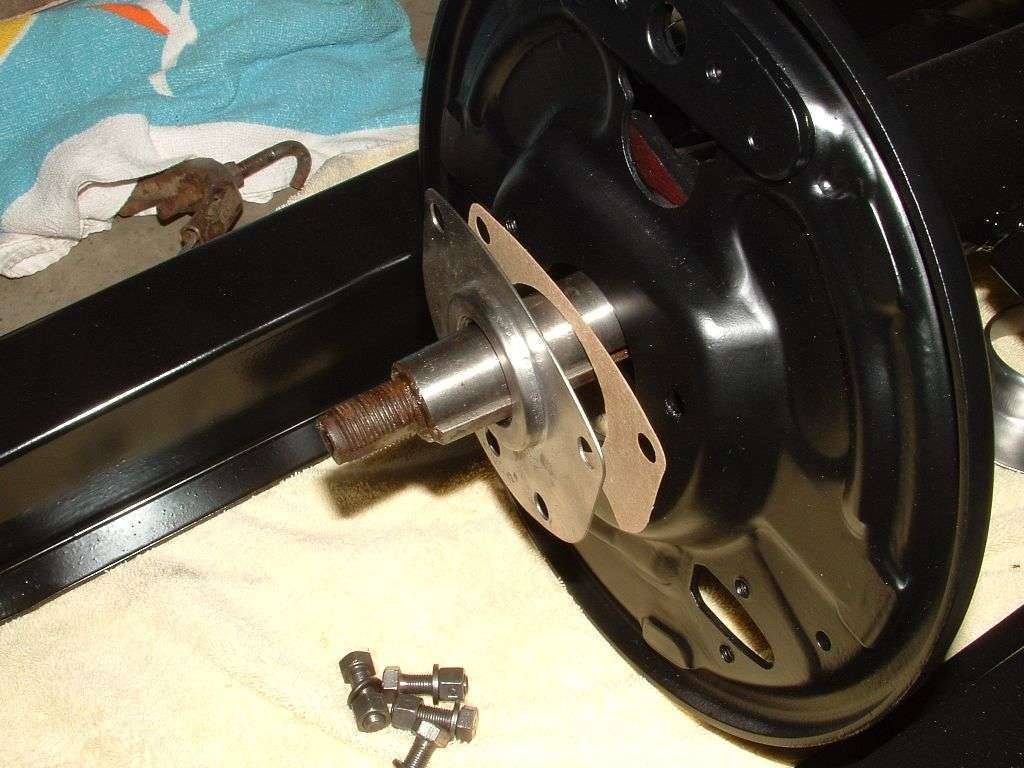 (94.36 KB) (94.36 KB)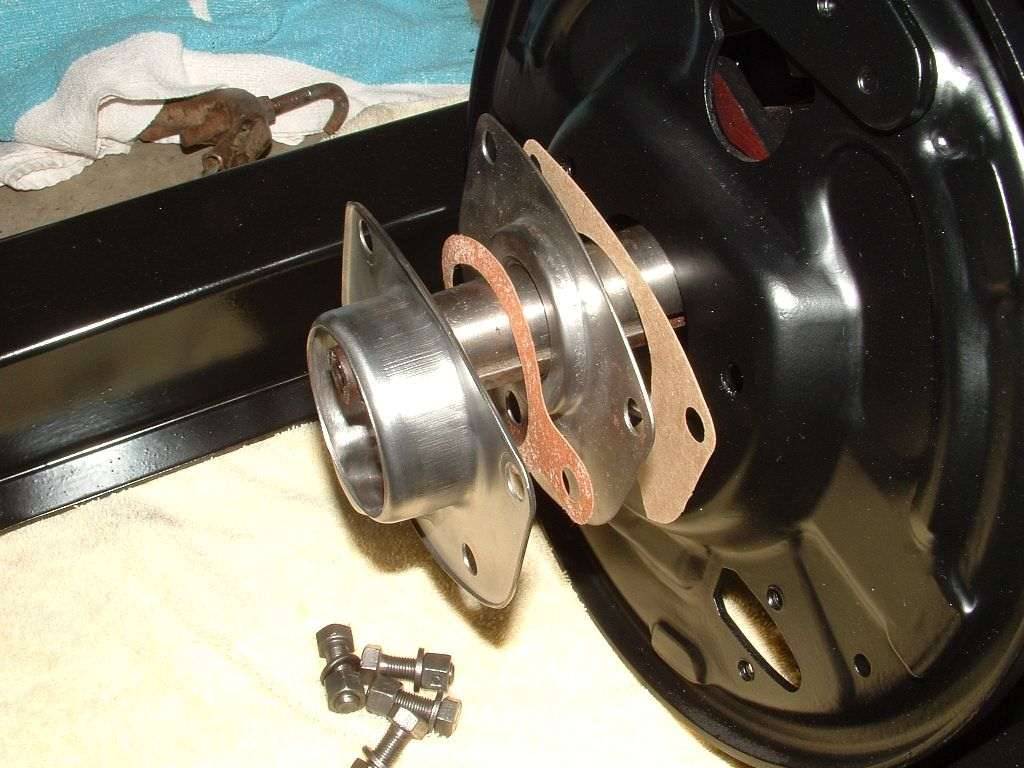 (88.74 KB) (88.74 KB)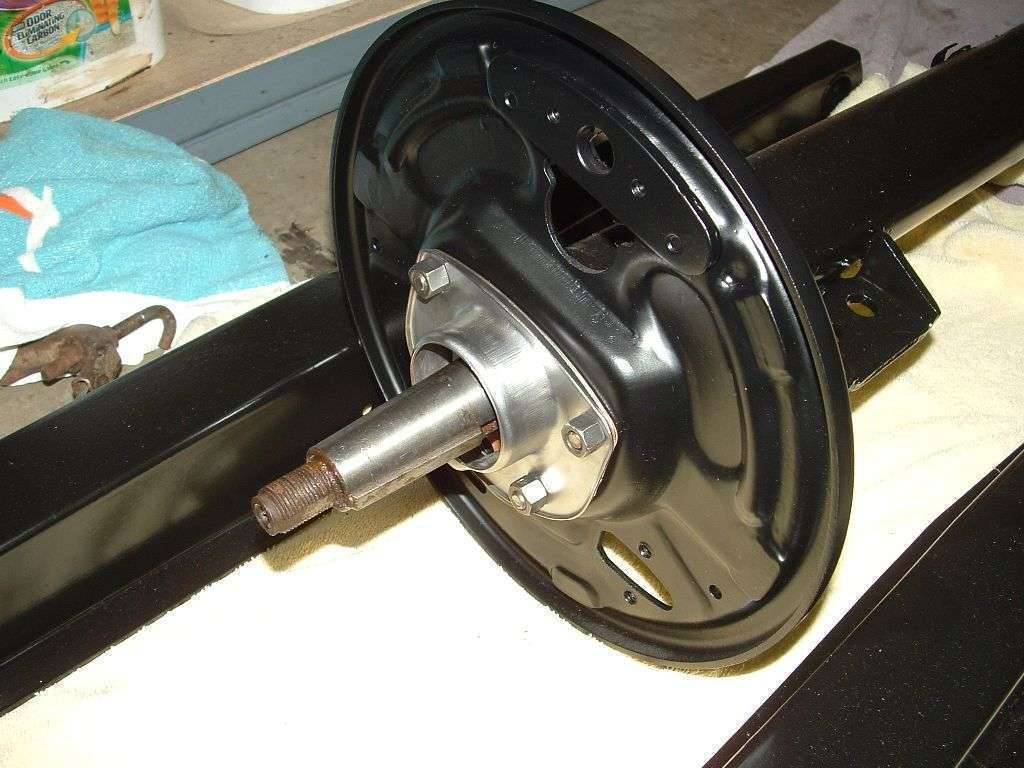 (44.94 KB) (44.94 KB)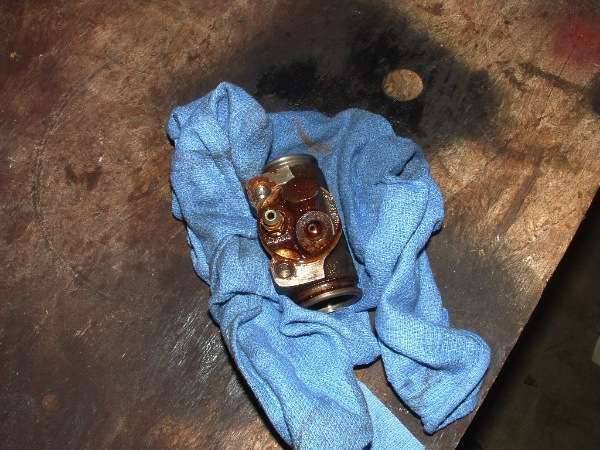 (110.37 KB) (110.37 KB)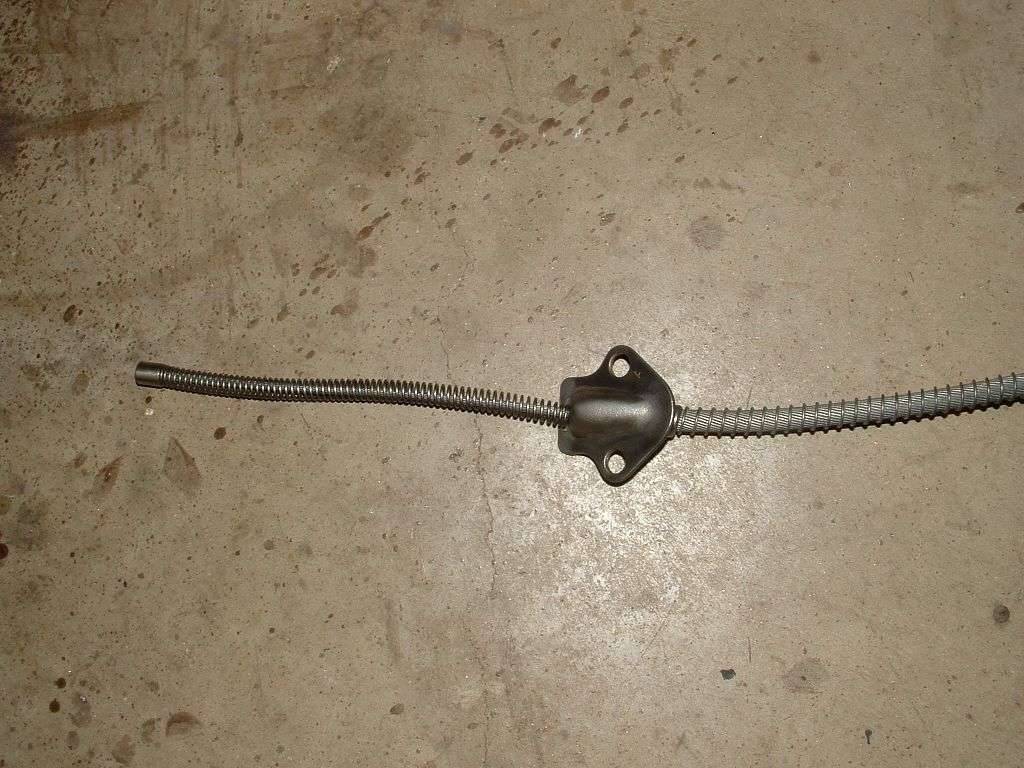 (74.14 KB) (74.14 KB)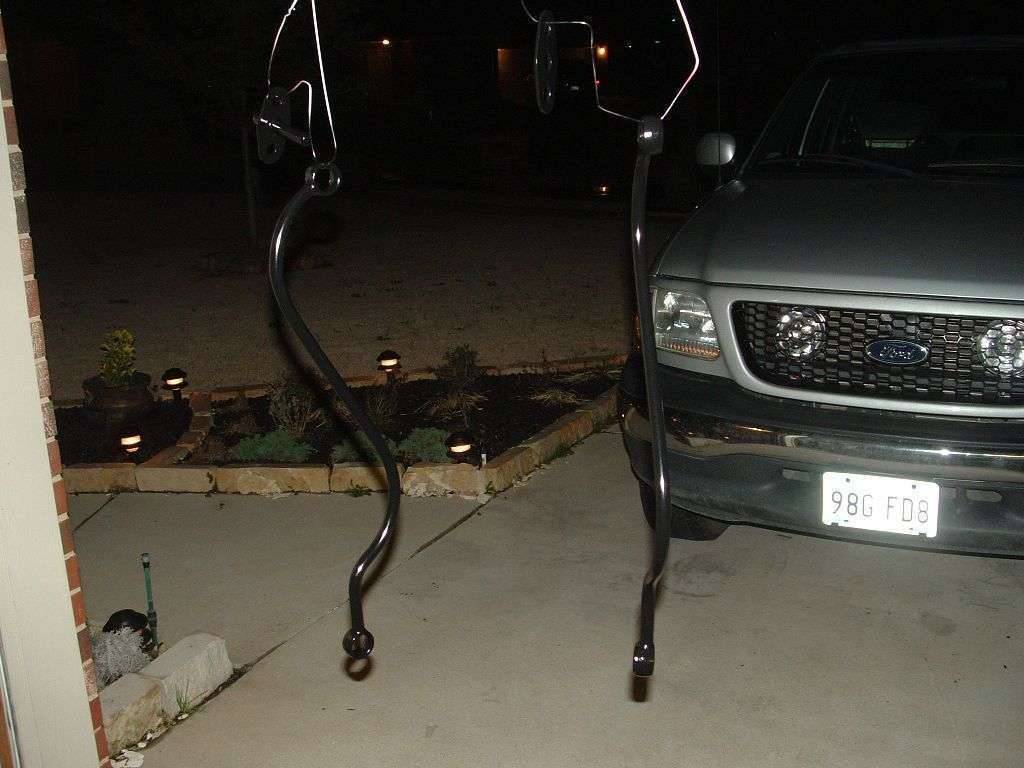
Posted on: 2009/2/10 0:42
|
|||
|
1937 Packard 138-CD Deluxe Touring Limousine
Maroon/Black 1090-1021 [url=https://packardinfo.com/xoops/html/modules/registry/View.php?ID=232]1955 Packard |
||||
|
||||
|
Re: Henry's 55 Constellation
|
||||
|---|---|---|---|---|
|
Forum Ambassador

|
Hank,
Great pic's and plenty of them, keep 'em coming. Noticed pic's 3 and 4, if married together, give a full view of the front of the Ford behind the bar being photographed. 
Posted on: 2009/2/10 1:54
|
|||
|
Mal
/o[]o\ ====  Bowral, Southern Highlands of NSW, Australia "Out of chaos comes order" - Nietzsche. 1938 Eight Touring Sedan - SOLD 1941 One-Twenty Club Coupe - SOLD 1948 Super Eight Limo, chassis RHD - SOLD 1950 Eight Touring Sedan - SOLD What's this?  Put your Packard in the Packard Vehicle Registry! Here's how! Any questions - PM or email me at ozstatman@gmail.com |
||||
|
||||
|
Re: Henry's 55 Constellation
|
||||
|---|---|---|---|---|
|
Forum Ambassador
|
weekend update:
decided my homemade blast cabinet was pissing me off and i was done with it. found one at tractor supply for 110 bucks!! that is CHEAP! had gloves, light(to be desired) screen covers, vent, vacuum hook up w/ filter, gun, etc....everything but the material. i just used my old material and added about another 25 pounds to it. it is a table top unit and is the perfect height for me and is WAY more comfortable than the old one. no more hunching over to use it. made some improvements to it...added the extra light and since the original light was a tube fluorescent i shoved some cardboard on top to keep the light out of my eyes (bad design there). i also add more weather stripping to the front of the unit as it was blow into my face and bothering me. then added another latch to the front to squeeze down on the front of the unit...stopped the leak and now the when i use the unit...it is so air tight that the gloves will suction to my arms and hands...awesome! i like it way better than my POS homemade one and it is bigger inside too, plus i don't have to stop to reclaim the material...it is constant now ;0) yeah! found out that the metal pieces that i thought were "sealed" were not...stupid me.....they started to flash/surface rust...so i took it apart and i am painting everything, guess i will be using that silver cad after all. i just don't want to have to mess with it later down the line. did alot of sandblasting and cleaning to get parts ready to reassemble. i am very close to putting the back of the car together. i also hooked up the torsion motor to the torsion bars.....and....it worked!!! moves perfectly smooth, noisy, but smooth and goes in both directions and limit switch works fine. got the rest of my tires from UPS....2 of the got lost for some reason...so some big wig at UPS delivered them in his personal car after work on friday....now that is service! i was just glad to see them...i was worried they weren't going to show up and the seller was getting worried too, but we got lucky. i still can't believe i got those things so cheap! perfect timing! Coker classic 3" WW 7.60x15 i need another for the spare though....but in good time. got my rear sway bar back together with the help of a very good friend of mine! this guy is a genius with cars, you should see his work! AWESOME! anyways, we took those 5/8 bolts, i drilled out the plates to fit them, then we bolted everything up and cut down the head of the bolt and the nut so it would fit in the handing bracket when i put it back on the car. then we welded the nut on...wasn't going to trust it to hold after that. and the painted everything. better than that rivot and easier to reverse if need be. so that is about it for the weekend. lots of cleaning and preparation for the rear to be installed. enjoy the pics. until next time, Hank Attach file: (128.94 KB)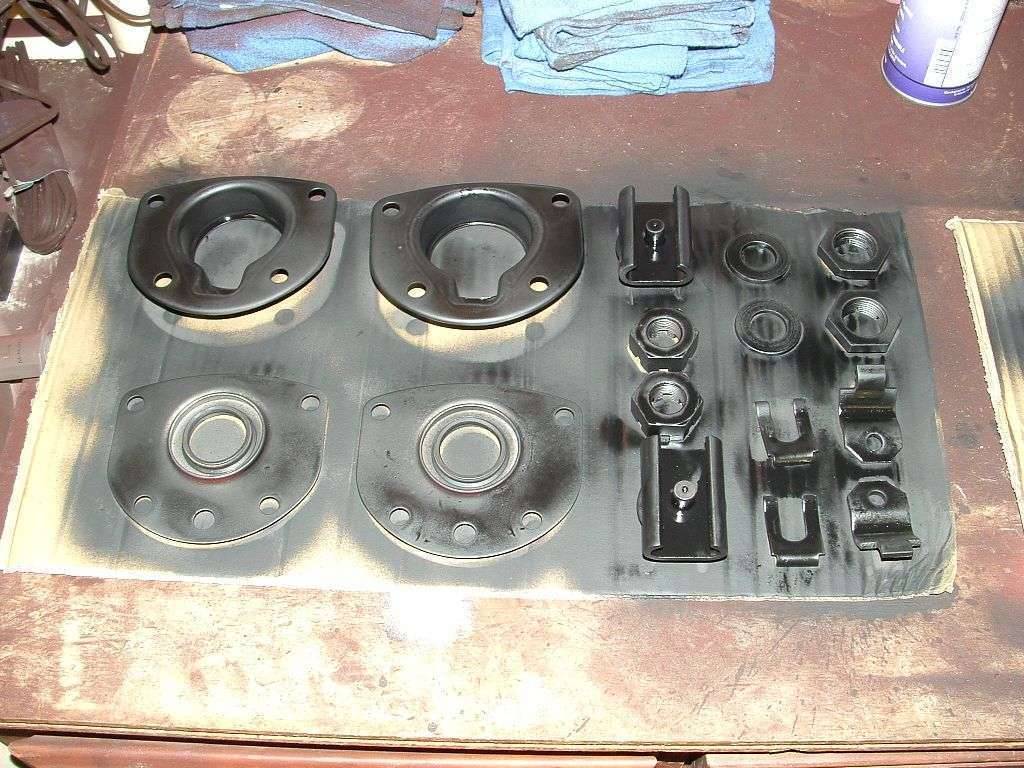 (71.63 KB) (71.63 KB)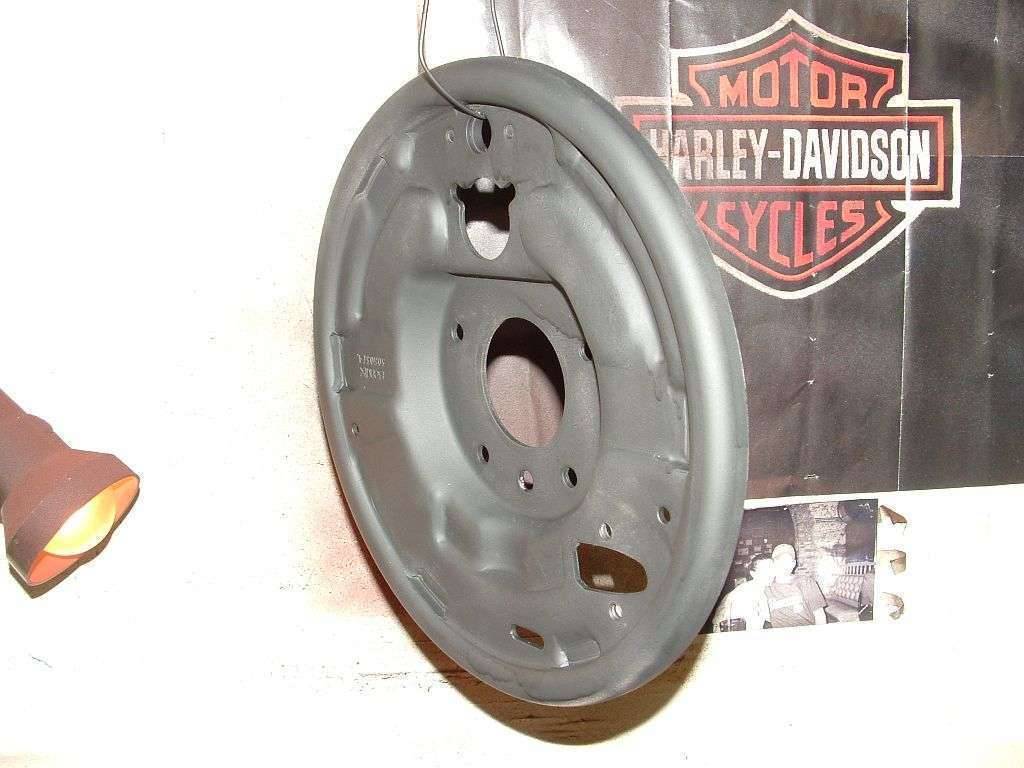 (111.06 KB) (111.06 KB)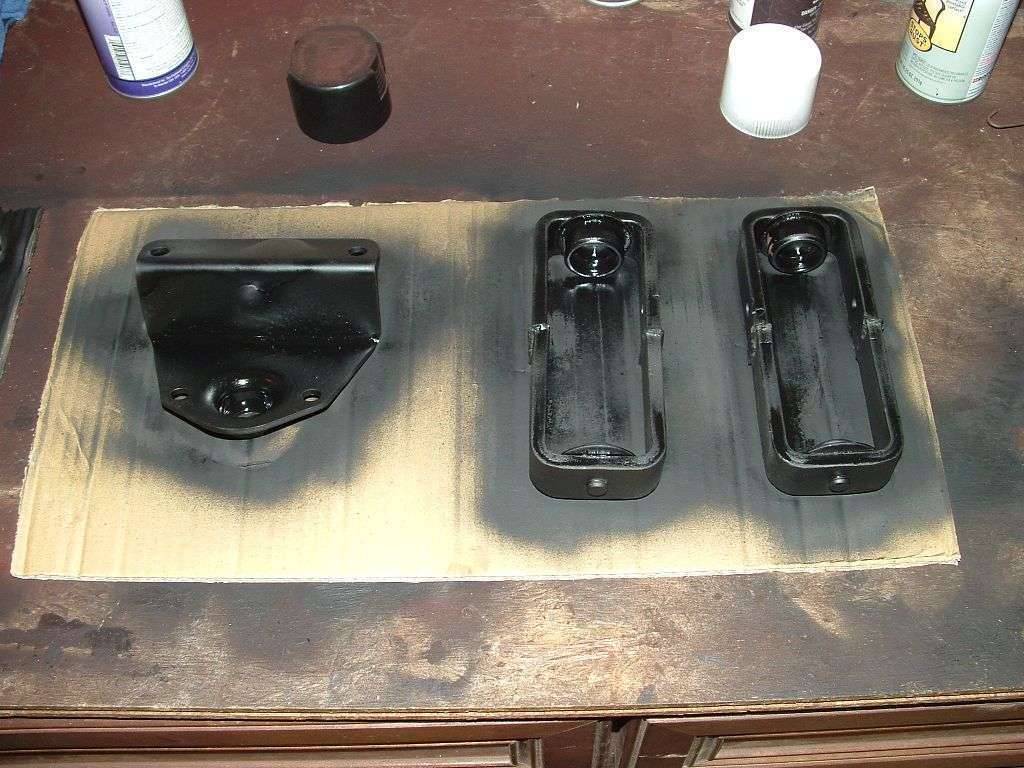 (114.28 KB) (114.28 KB)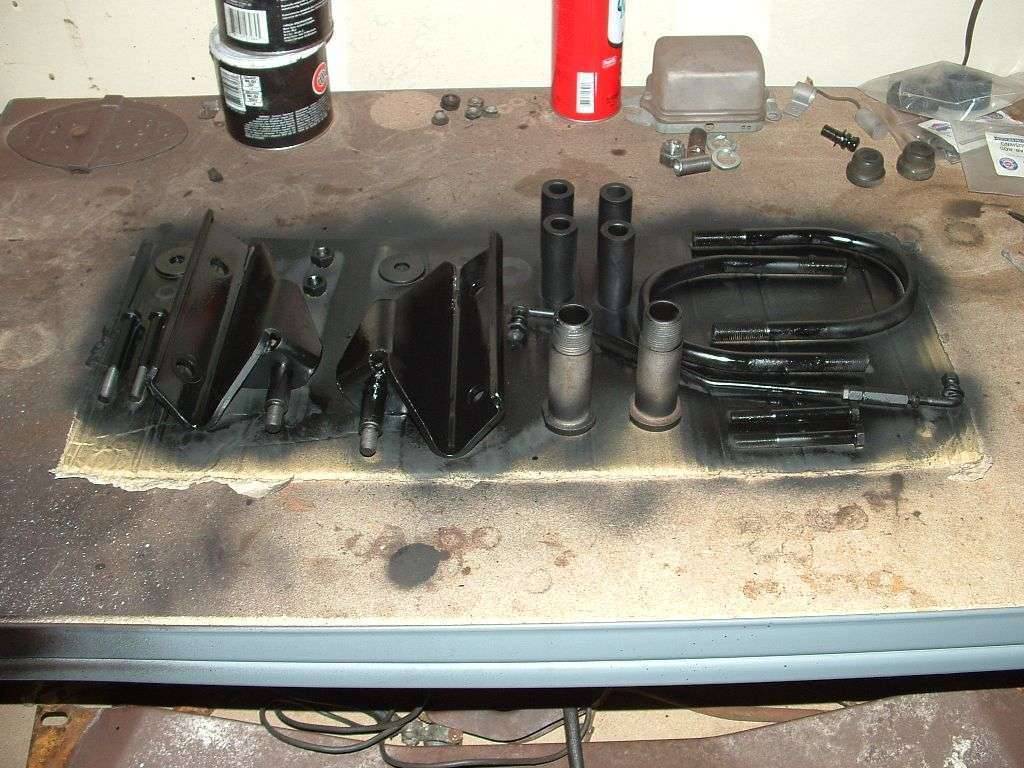 (94.94 KB) (94.94 KB)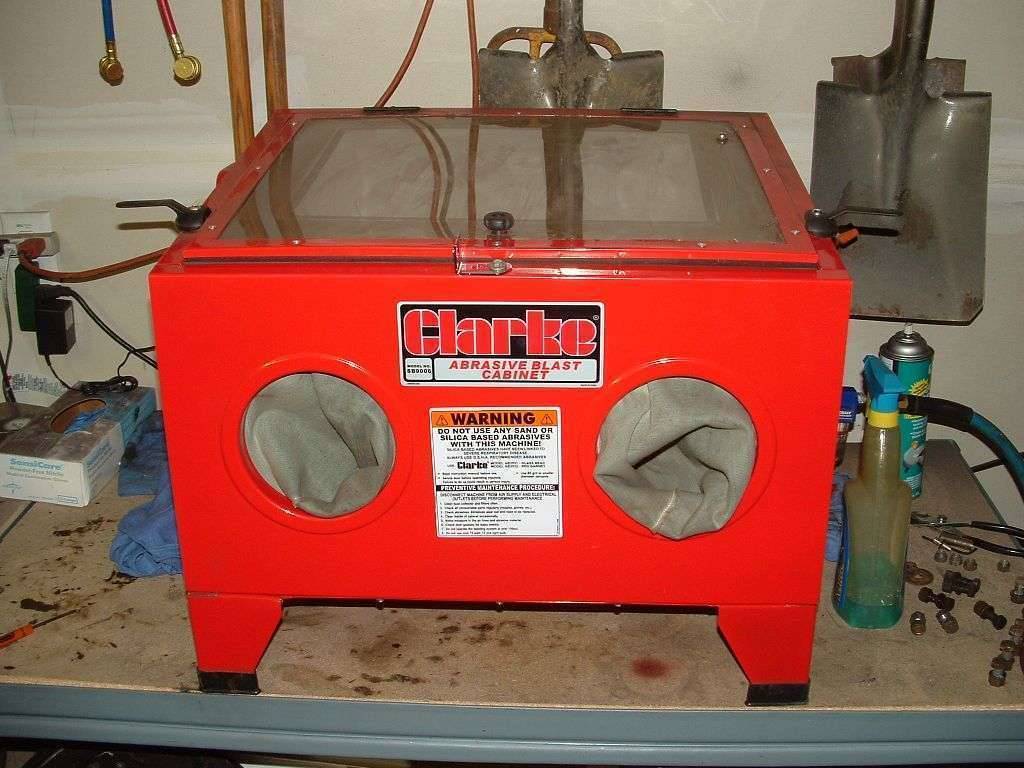 (83.67 KB) (83.67 KB)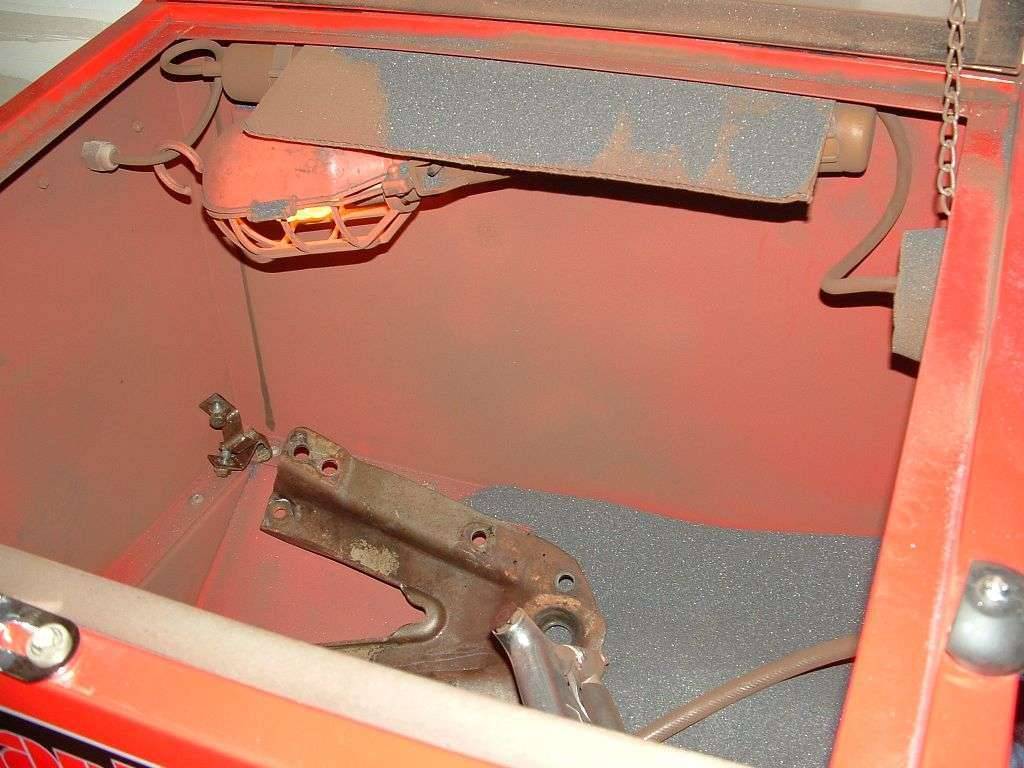 (120.04 KB) (120.04 KB)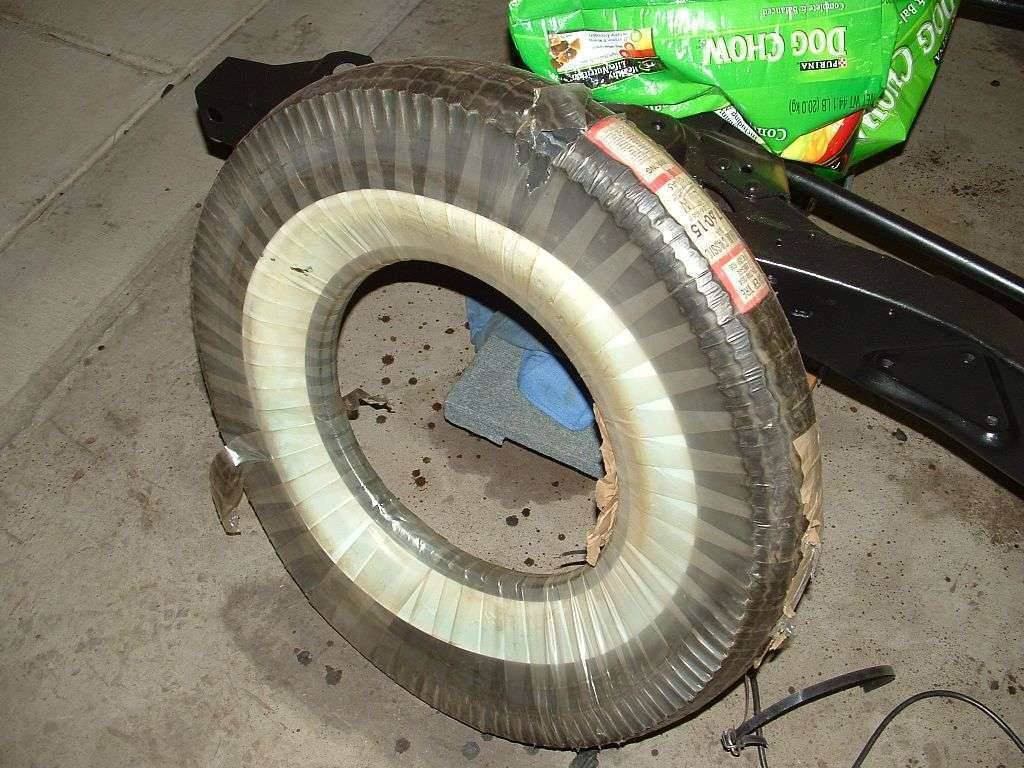 (96.42 KB) (96.42 KB)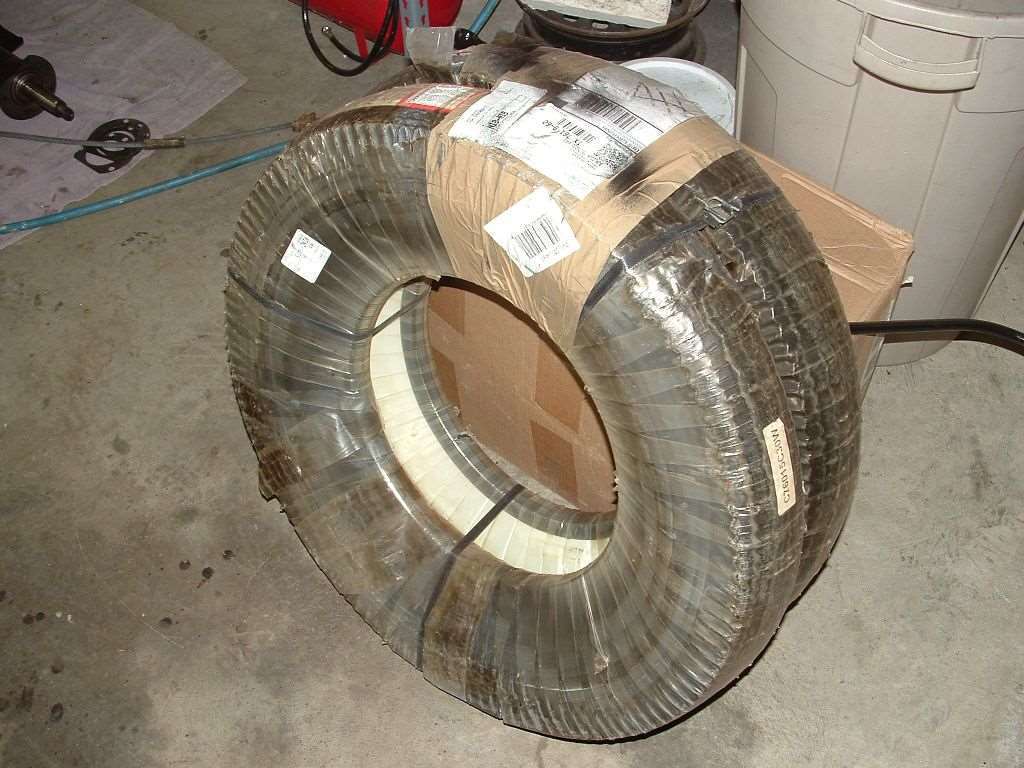 (43.70 KB) (43.70 KB)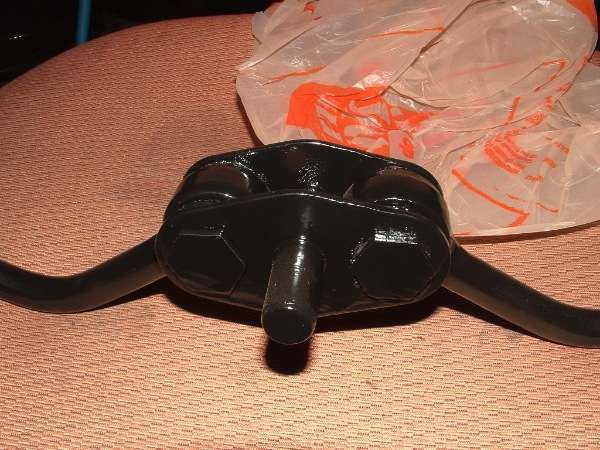 (43.73 KB) (43.73 KB)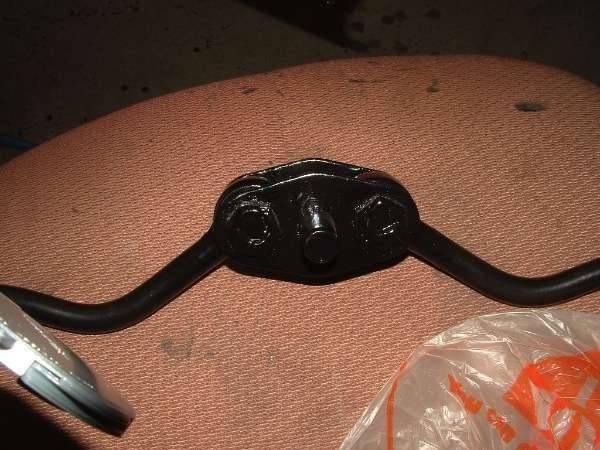 (117.38 KB) (117.38 KB)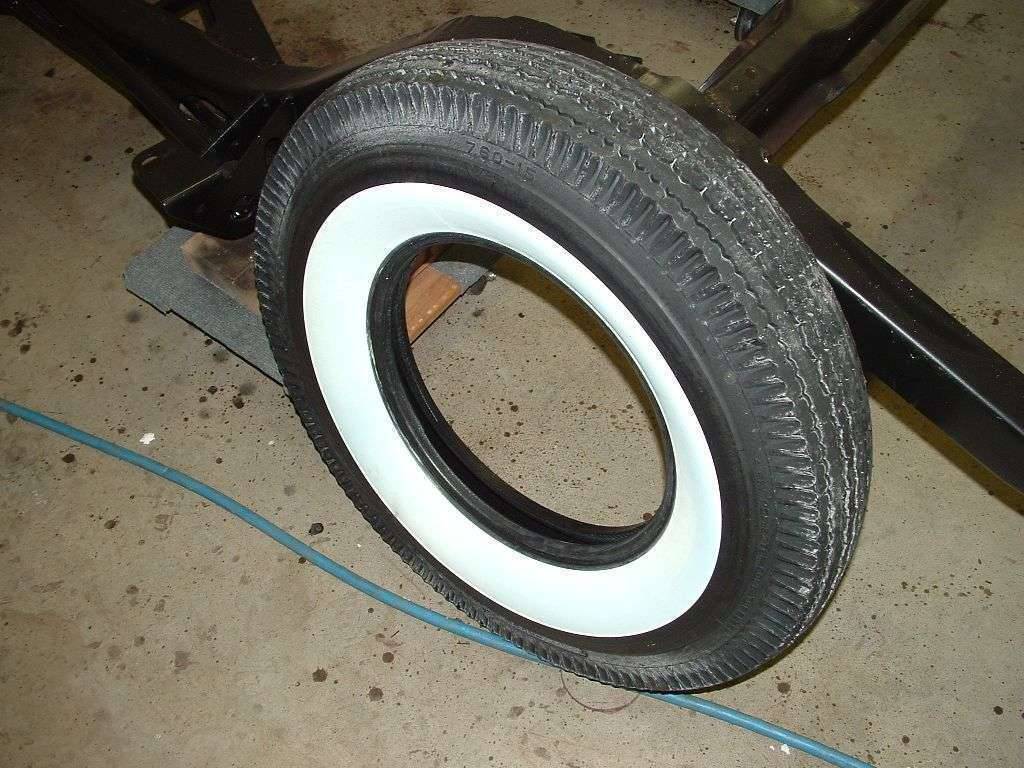
Posted on: 2009/2/16 12:35
|
|||
|
1937 Packard 138-CD Deluxe Touring Limousine
Maroon/Black 1090-1021 [url=https://packardinfo.com/xoops/html/modules/registry/View.php?ID=232]1955 Packard |
||||
|
||||
|
Re: Henry's 55 Constellation
|
||||
|---|---|---|---|---|
|
Forum Ambassador
|
one other question....you know those bushing at the front of the rear trailing arms....the ones towards the front of the car where the trailing arms attach to the frame.....well i noticed they are elliptical....so does the thinner part of the bushing go down or does the thicker part.
they look like my crude drawing attached. Attach file: (11.61 KB)
Posted on: 2009/2/16 12:42
|
|||
|
1937 Packard 138-CD Deluxe Touring Limousine
Maroon/Black 1090-1021 [url=https://packardinfo.com/xoops/html/modules/registry/View.php?ID=232]1955 Packard |
||||
|
||||
|
Re: Henry's 55 Constellation
|
||||
|---|---|---|---|---|
|
Forum Ambassador

|
A little confused about which you refer. Is this the area in question, and if so, the bushings are concentric. If another area, please post a picture as I don't recall anything elliptical or eccentric.
Attach file: (10.76 KB)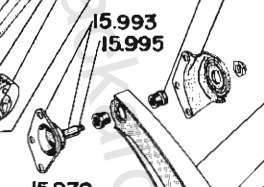 (20.24 KB) (20.24 KB)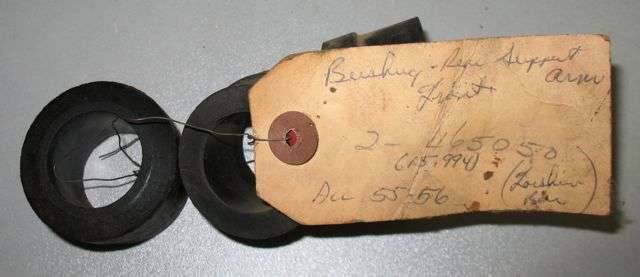
Posted on: 2009/2/16 15:58
|
|||
|
||||


