|
Re: Wade's Workshop
|
||||
|---|---|---|---|---|
|
Forum Ambassador

|
Monday 28th September 2009
Promises, promises....http://www.youtube.com/watch?v=52Gg1WfQWa4&feature=fvw....that's what it seemed Peter of Rhino Linings at Thornleigh kept telling me regarding the spraying of the running boards for the Coupe. I decided I'd better research this before completely disparaging his good name and through diary and blog entries came up with this timeline of the running board saga: Tuesday 21st July - Running boards removed from Coupe Thursday 23rd July - Rubber cleaned off running boards Thursday 6th August - Quote from Peter of Rhino Linings to coat running boards. Running boards garnet blasted Tuesday 18th August - Dings and imperfections knocked out, POR-15'd the undersides & Rang Peter at Rhino Linings who advised can't do them for a week or two. Thursday 20th August - Boards wrapped in protective plastic Friday 28th August - Rang Peter who advised he is setting up coating equipment today and if I can get the boards to him they should be ready early next week Tuesday 1st September - Not ready yet Saturday 5th September - Not ready yet Wednesday 10th September - Not ready yet Tuesday 22nd September - Should be ready tomorrow afternoon Friday 25th September - Rang Peter twice & left messages to call me Saturday 26th September - Rang Peter, could be ready in the afternoon Monday 28th September - Rang Peter, should be ready in the afternoon. Rang Peter in the afternoon - READY! So most of the delay was in my tiny mind, although Peter said at the start that the boards would be ready next week it really only stretched to one month! Just seemed to be much longer, but I now realise its because the whole running board saga stretched over an almost 10 week period whereas Peter's direct involvement was for just for the last month of it. That said - How did they turn out? Well good and bad is the answer. Although never having done a coating of this type for running boards Peter was confident he could do a good job. And from Peter's perspective IT IS a good job, while from mine expectations were not met. It's a learning process on both sides with a lot more being learned from my side than Peter's. Expectations? I thought it would turn out to be a smooth even finish. From Peter's side it is, but because the boards have corrugations running their length some of the coating tends to slightly "pool" in the corrugation valleys and leave a ripple or slightly lumpy effect. This is compounded by the finish being very shiny/glossy. Because of the way the finish is applied, the equipment uses a mechanical pump to separately force resin(also contains the colour desired) and  in 20 seconds or less. Because of the limited time available it is difficult to evenly coat uneven surfaces. I had hoped to get some pic's of the equipment but it had been packed up before I arrived. There are also myriad holes in the boards, some of which are used for the 120 trim pieces, but others are not, being for 160/180 trim pieces which run the length of the boards. Peter had ensured that all the holes remained while I would have been happy to see them all covered over. Observation, communication and understanding are all great qualities, I just wish I had some of each and were able to apply them in the running board saga. But we do learn by our mistakes don't we? I hope I do, although this particular set of circumstances will never present itself again. Did discuss my disappointments with Peter and no, he can't do anything about the holes so I'm stuck with them, so they are now obviously drain holes for wet driving conditions. The other matter of the shiny/gloss finish and the ripple effect in the corrugations might be mitigated though. Peter suggested coating the boards with modern plastic bumper primer which has a semi-gloss or matte finish, before they completely cure, so I'll give this a go. in 20 seconds or less. Because of the limited time available it is difficult to evenly coat uneven surfaces. I had hoped to get some pic's of the equipment but it had been packed up before I arrived. There are also myriad holes in the boards, some of which are used for the 120 trim pieces, but others are not, being for 160/180 trim pieces which run the length of the boards. Peter had ensured that all the holes remained while I would have been happy to see them all covered over. Observation, communication and understanding are all great qualities, I just wish I had some of each and were able to apply them in the running board saga. But we do learn by our mistakes don't we? I hope I do, although this particular set of circumstances will never present itself again. Did discuss my disappointments with Peter and no, he can't do anything about the holes so I'm stuck with them, so they are now obviously drain holes for wet driving conditions. The other matter of the shiny/gloss finish and the ripple effect in the corrugations might be mitigated though. Peter suggested coating the boards with modern plastic bumper primer which has a semi-gloss or matte finish, before they completely cure, so I'll give this a go.Would I recommend doing this procedure for your running boards? The short answer is - No. In my case, its been a learning and instructive experience, and because the alternative cost 10 times as much I couldn't afford it anyway, so I'm happy with what I've got. EDIT - Received an Email from DavidM and he should be at the workshop Thursday to pick up the Maxwell flywheel. Attach file:  (24.59 KB) (24.59 KB)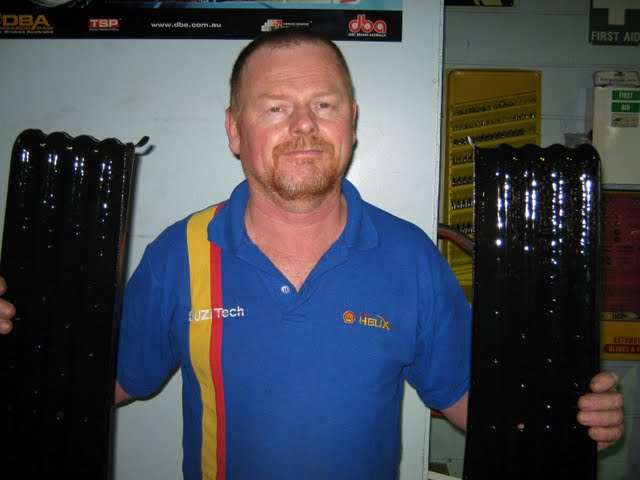 (30.15 KB) (30.15 KB)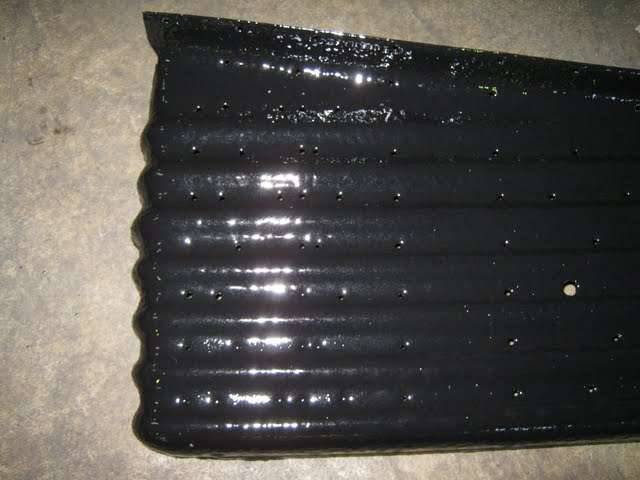
Posted on: 2009/9/28 9:00
|
|||
|
Mal
/o[]o\ ====  Bowral, Southern Highlands of NSW, Australia "Out of chaos comes order" - Nietzsche. 1938 Eight Touring Sedan - SOLD 1941 One-Twenty Club Coupe - SOLD 1948 Super Eight Limo, chassis RHD - SOLD 1950 Eight Touring Sedan - SOLD What's this?  Put your Packard in the Packard Vehicle Registry! Here's how! Any questions - PM or email me at ozstatman@gmail.com |
||||
|
||||

|
Re: Wade's Workshop
|
||||
|---|---|---|---|---|
|
Forum Ambassador

|
and iso cyanide
The retired chemist in me keeps cropping up. It's isocyanate. Not instantly lethal like cyanide, but remember the Union Carbide methyl isocyanate release in Bophal, India?
Posted on: 2009/9/28 10:05
|
|||
|
||||
|
Re: Wade's Workshop
|
||||
|---|---|---|---|---|
|
Forum Ambassador
|
Quote:
JD in KC wrote:.....I got a quote to do my '41 running boards from the Rhino folks about 2 years ago but I put the '41 project on the back burner to work on the newly acquired '50....... JD, I remember our discussions concerning re-covering '41 running boards and the options canvassed. I'm hopeful that the modern bumper primer will help to alleviate the stark and glossy finish now exhibited and Peter did suggest that they will dull a bit with ultra-violet exposure. Glad my trailblazing was "helpful" to you, and maybe others considering this option.
Posted on: 2009/9/28 16:26
|
|||
|
Mal
/o[]o\ ==== Bowral, Southern Highlands of NSW, Australia "Out of chaos comes order" - Nietzsche. 1938 Eight Touring Sedan - SOLD 1941 One-Twenty Club Coupe - SOLD 1948 Super Eight Limo, chassis RHD - SOLD 1950 Eight Touring Sedan - SOLD What's this? Put your Packard in the Packard Vehicle Registry! Here's how! Any questions - PM or email me at ozstatman@gmail.com |
||||
|
||||
|
Re: Wade's Workshop
|
||||
|---|---|---|---|---|
|
Forum Ambassador
|
Quote:
Dave, I've corrected my post to identify isocyanate in lieu of my misunderstood/misheard reference from talking to Peter about the process and ingredients. And yes, certainly do remember the Bophal disaster. 
Posted on: 2009/9/28 16:31
|
|||
|
Mal
/o[]o\ ==== Bowral, Southern Highlands of NSW, Australia "Out of chaos comes order" - Nietzsche. 1938 Eight Touring Sedan - SOLD 1941 One-Twenty Club Coupe - SOLD 1948 Super Eight Limo, chassis RHD - SOLD 1950 Eight Touring Sedan - SOLD What's this? Put your Packard in the Packard Vehicle Registry! Here's how! Any questions - PM or email me at ozstatman@gmail.com |
||||
|
||||
|
Re: Wade's Workshop
|
||||
|---|---|---|---|---|
|
Home away from home
|
Mal
My brother did the Rhino Linings on his '42 Formal. Yes, when Rhino is done, it will have a texture (orange peel?). You need to sand it smooth. This will also eliminate the high gloss. Start with a heavy grit, say 100 or so, and graduate to a much finer grit and stop when you're happy. For anyone wanting to use Rhino (and I highly recommend it), make sure the operator sprays with a much finer setting than what is used for pickup beds. Also, it should be done in several coats, not one thick heavy coat. For more detail in the exact process, contact David Mitchell (forum member). His turned out absolutely perfect. I've never seen better. We (my brother) skipped a few parts of the process and they didn't turn out quite as nice, but much nicer than the reproduction rubber that you lay on with glue and patches at the corners.
Posted on: 2009/9/29 15:04
|
|||
|
West Peterson
1930 Packard Speedster Eight Runabout (boattail) 1940 Packard 1808 w/Factory Air 1947 Chrysler Town and Country sedan 1970 Camaro RS https://packardinfo.com/xoops/html/modules/newbb/viewtopic.php?topic_id=4307&forum=10 http://aaca.org/ |
||||
|
||||
|
Rhino
|
||||
|---|---|---|---|---|
|
Home away from home
|
Mal - I actually own and run a Rhino Linings shop here in MN. I've sprayed dozens of running boards for local builders here. It doesn't surprise me that they didn't turn out as good as you would have liked. It sounds like Peter is new to Rhino? The process for rhino is unlike any other coating. You really have to know what your doing, and you need to literally spray thousands of gallons of material before you're good at it. There's two types of machines that can spray the chemicals, and each one can do a good job. I've got both types of machines, and you have to spray completely different with one vs. the other. From the sounds of it Peter is using the low pressure machine. It doesn't produce anywhere near 15000psi. It's more like 5psi with about 80psi of air pressure for atomizing the liquid. The pooling effect you have is because he applied too thick a coating and not enough air pressure with each pass, and didn't allow enough time between coats. I also own the high pressure machine. It's more like a pressure washer in that it pumps the two components at about 2000psi and the pressure atomizes the liquid out of the tip of the gun. With this machine you couldn't get the effects you have, unless you set the machine up incorrectly which is a possibility.
You do have the option of stripping the rhino off. If you choose that route, let me know and I can talk you through it. As far as the holes, he should have filled them prior to spraying. Your not stuck with them that way however. Get some black windshield urethane. I like 3M Superfast Urethane. Use that to fill the holes. Just spread some into the holes, then clean the surrounding area with acetone to wipe any extra off from around the holes. When cured, it's quite similar to rhino. I use it to fill holes and imperfections prior to spraying because you can spread it and smooth it. Then when you spray, they just disappear. Regarding your timeline, he should have had them back to you in one day. I can spray 3 full size trucks and have the owners drive them home the same day, every day of the week. My guess is that he screwed them up at least once, had to strip off the coating and try again. Which is why he's telling you he can't do anything more for you. He doesn't know how. Believe it or not, smaller parts are actually harder to spray and have them come out looking good. You have to remember that this equipment is really designed around doing pickup boxes. Large flat areas that need a lot of material laid down very quickly. Even if a person is a world class painter, it doesn't mean they can spray Rhino. Most of the time if the person has been a painter for a long time, it's very hard for them to spray rhino well. Rhino isn't paint, and doesn't act like paint. It goes from a liquid to a solid in less than 30 seconds. Each new coat hardens quicker and quicker because rhino is exothermic. It builds more heat with each coat, cooking the newest coat. Rhino has a lot to offer the car restoration people, and you can bet that my Clipper will be wearing some. I'm even making all new body mount bushings out of it. I encourage anyone to use it in there projects (especially if they live near my shop :) ) just make sure the person spraying your job has the experience to do it correctly. Mal, I'm very sorry that you had to go through this. Nothings worse than having to put a part on your car that you're not happy with. Let me know if you've got any questons regarding rhino or how to salvage your boards. Keegan
Posted on: 2009/9/29 22:23
|
|||
|
||||
|
Re: Rhino
|
||||
|---|---|---|---|---|
|
Forum Ambassador
|
Wednesday 30th September 2009
Just a photo session at the workshop this morning because there wasn't anything there I could do with my limited skills. Wade's been working away on some little things on the '34 and Big Red since I saw him last week. On the '34 he's installed the bracket/hinge for the top cowl vent but it isn't bolted to the vent yet. He has to get some rubber to seal the vent and that will be done then as part of the process of holding the vent in place to secure the rubber when it's glued in. Also installed the rubber weather strips along the top of each door. And here's one of the reasons why it takes so long restoring an old car, each strip took an hour to an hour and a half to secure in place. Wade wasn't able to slide them in, as the ravages of time conspired against this being that easy to do. Instead he had to "knead" the strip into it's channel inch by inch along the top of each door. While for Big Red Wade's part way through installing some NOS courtesy or foot lights for the rear seat passengers. These are being installed in the bottoms of the rear fenders just above the running boards and will light up when the door is opened. Wade tells me he got these in a trade from Mat(Packard34) who originally intended to use them on his '34. Wade is waiting on some engine parts for Big Red and once those arrive progress there should pick up. He also said he's going to do the engine swap for John's '39 110 soon and is planning a re-shuffle in the workshop to accommodate that. I've put my hand up to drive the '39 to the workshop so I can add it to the list of Packards I've driven or ridden in, currently a very small list. Quote: West Peterson wrote: Mal My brother did the Rhino Linings on his '42 Formal. Yes, when Rhino is done, it will have a texture (orange peel?). You need to sand it smooth. This will also eliminate the high gloss. Start with a heavy grit, say 100 or so, and graduate to a much finer grit and stop when you're happy. West, The texture on mine is smooth, but there are some runs/ripples in it even though it sets very quickly(hard to escape the laws of gravity!). Peter in applying it used a very fine spray and did not deliberately stipple(texture) it on the final passes. I have spoken previously with Dave Mitchell, a very nice guy, and will do so again soon. Besides the advice yesterday from Harvey, in speaking with Wade today a few other thoughts have been raised. In the meantime I'm letting the boards cure in the backyard in the direct sunlight. The running board saga continues...... Keegan, Just saw your post(because I'm having a lot of trouble today with PackardInfo dropping out intermittently but luckily I've been saving what I've been typing along the way, cumbersome but necessary at times) and will take on board what you've said. In Peter's defence there are some extenuating circumstances as to why the Rhino'ing process apparently dragged on for a month. Peter actually runs an automotive repair business specialising in Mini Minors and Suzuki's, the Rhino spraying part was set up in a shed at his home in a semi-rural area of northern Sydney. But with his wife dying about 6 months ago and a young daughter to care for he's relocated his home and also the Rhino spraying equipment but hasn't set it up permanently. The Rhino equipment was installed in a large 10 x 9 metre shed, but in the workshop he's cramped for space and has it fitted up in a box at present. I had hoped to take a pic of the equipment but all I got was the box otherwise you could tell he which type he had. So Rhino is a sideline to his main business and I believe that where the delays came from as he set his priorities. NOTE - loading text first then adding pic's later because of the problems I'm having keeping PackardInfo on-line! Attach file: (28.09 KB)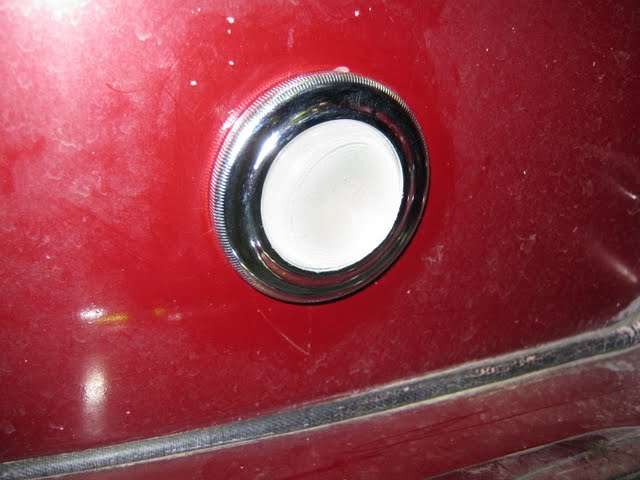 (31.34 KB) (31.34 KB)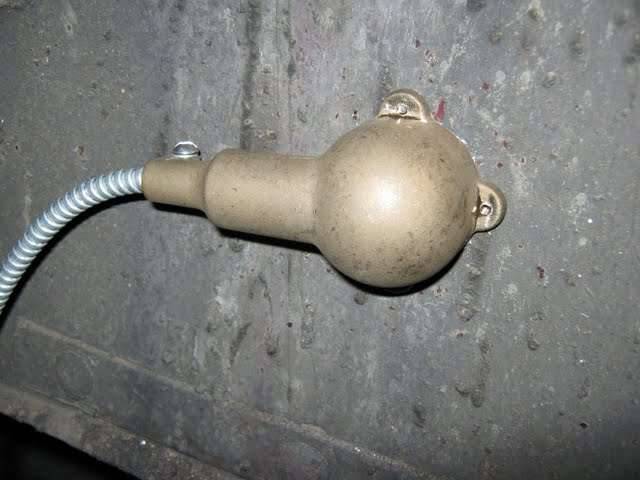 (26.47 KB) (26.47 KB)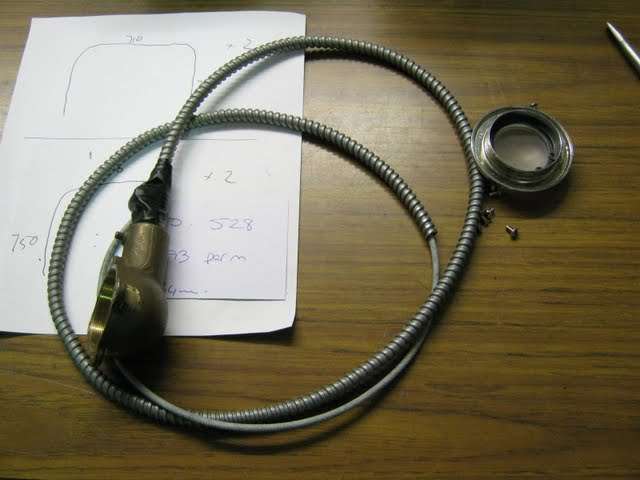 (27.51 KB) (27.51 KB)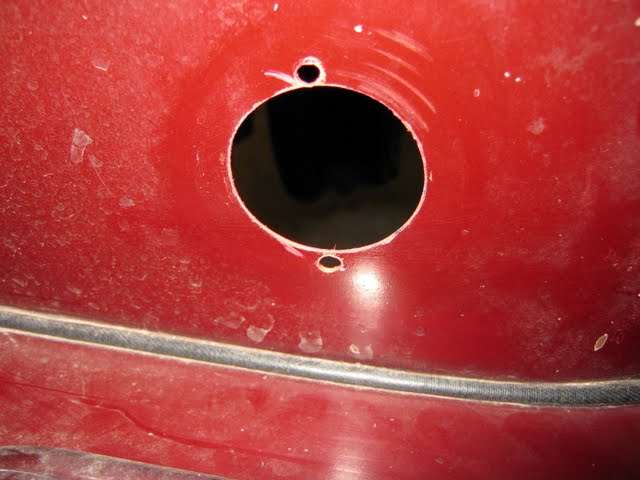 (25.40 KB) (25.40 KB) (26.86 KB) (26.86 KB)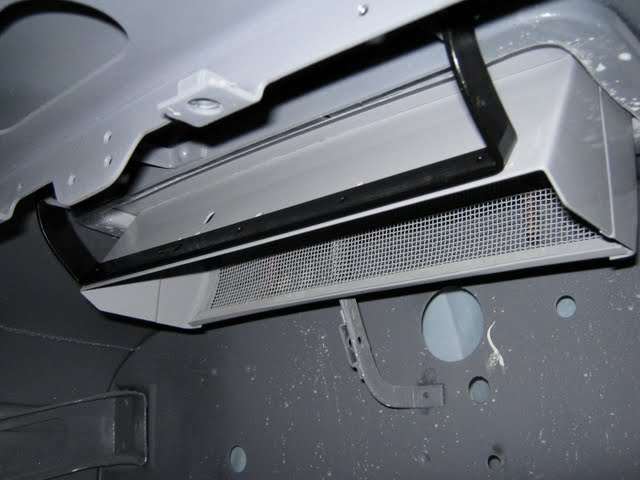 (20.27 KB) (20.27 KB) (33.14 KB) (33.14 KB)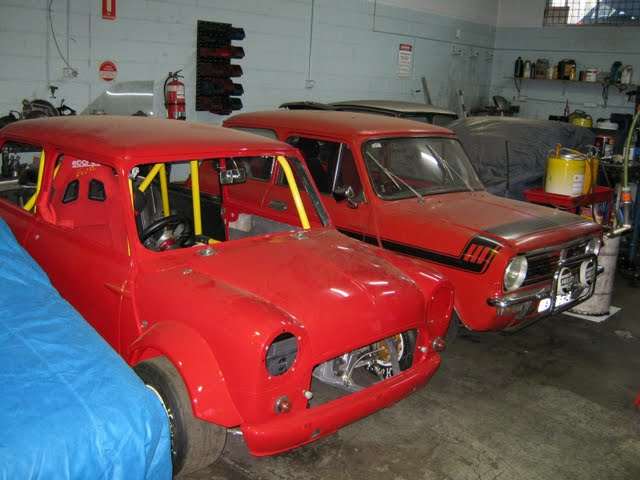 (38.81 KB) (38.81 KB) (21.19 KB) (21.19 KB)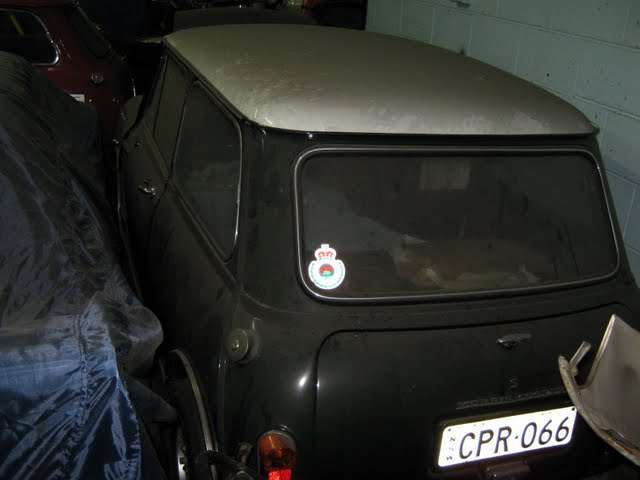 (25.29 KB) (25.29 KB)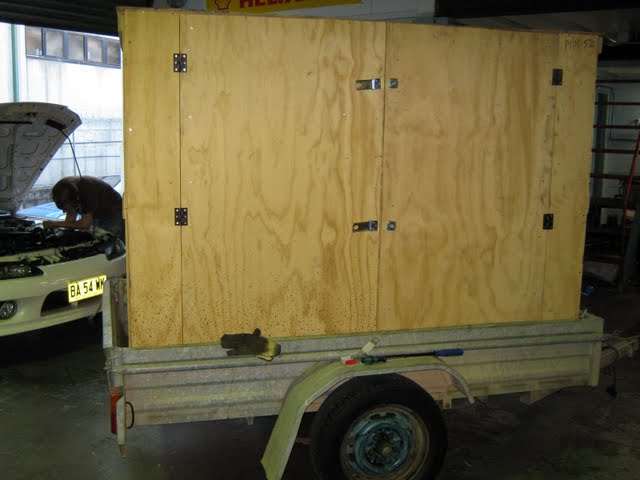
Posted on: 2009/9/29 23:02
|
|||
|
Mal
/o[]o\ ==== Bowral, Southern Highlands of NSW, Australia "Out of chaos comes order" - Nietzsche. 1938 Eight Touring Sedan - SOLD 1941 One-Twenty Club Coupe - SOLD 1948 Super Eight Limo, chassis RHD - SOLD 1950 Eight Touring Sedan - SOLD What's this? Put your Packard in the Packard Vehicle Registry! Here's how! Any questions - PM or email me at ozstatman@gmail.com |
||||
|
||||
|
Re: Rhino
|
||||
|---|---|---|---|---|
|
Forum Ambassador
|
Thursday 1st October 2009
Took the '41 Coupe down to the workshop today so a few things could be attended to before our Packard club run on Sunday to Tuggerah about 50 miles north. However on arriving I found Wade engaged with fixing the armoured ignition cable on the '34. The tabs/tangs behind the ignition switch were broken or deformed and Wade came up with a solution to fix it using a plastic(shock...horror) collar from a small fan he had in his junk box at home. Although not correct, because it won't be seen and as it serves a purpose, it was necessary to come up with a practical solution which this is. But anyway, back to the Coupe, and it's wants and needs. 1) Remove and clean sparkplugs, 2) Fix non-working horn, 3) Fix part working headlights(high beam only) and 4) Install new accelerator pedal. I know the Flackmaster for one, will be looking forward to seeing that's done because its a fair few months since I bought the NOS pedal from him! I'd removed and was just finishing cleaning the plugs when DavidM arrived to pick up his Maxwell flywheel. Suffice to say that was reason aplenty to down tools and engage in some Packard and Maxwell talk. And fairly wide ranging it was too, covering things like the new big end bearings Wade's received from Merritt's for Big Red, the balancing plates on Big Red's pressure plate, the '34 body and the seals and rubbers fitted to date compared to what David did for his '29 Sedan, Barry Smith's '38 V12(Both Wade and David have seen, ridden in and driven it - I'm jealous) and Barry's '51 Convertible not to mention the Maxwell. The reason I mention the Maxwell is that David recently had the engine rebuilt by the guy I picked up the flywheel from. Part of the rebuild was using aluminium pistons and Model A Ford conrods in lieu of the Cast Iron pistons and stock conrods. This for a number of reasons, first the weight saving is considerable with the Alloy piston/Model A conrod combination being about 1/3 the weight of the Cast Iron piston/Maxwell conrod setup and Maxwell pistons have rings which are 3/8" deep. Model A conrods have the same dimensions as the Maxwell ones and are conventional in the sense that the big end cap is held in place by 2 bolts. The Maxwell conrods have a "hinge" system where one side of the big end cap rotates on a pin with a bolt on the other side and suffer from the pin becoming loose from the forces it is under. If you read this David could you send me a pic or post it here of the Maxwell big end "hinge" system, I for one am interested to see it. As well as those changes for reliability the compression ratio is now about 4.5 : 1 up from the stock 3.8 : 1. Now I don't know if Dave Moor, the engine rebuilder, had the cam re-ground like he does with the other old engines he does but it looks to me that David has a hot rod Maxwell in the making. Would be interesting to see David up against another Maxwell in a stop light drag race. Unfortunately it's highly unlikely to happen as there wouldn't be many Maxwells in Australia and for two of them to be at the same lights at the same time would be a miracle! Just looked at the pic of the balanced flywheel and David and now I'm wondering if it's been lightened too, seems to be a considerable amount removed just for balancing David! But back to reality, after David left, returned to working on the Coupe and re-installed the cleaned plugs. Next tackled the non working horn. It had stopped working when we left Port Macquarie last month and it had also failed before about 2 months after the Coupe was registered for the road in January. Turns out the wire used for the horn down the centre of the steering column is not flexible enough, for the lock-to-lock wheel turning exercises of manouvering the coupe, causing it to break where it's soldered to the horn contact. Easy enough fix, some new wire with a better ability to turn with column, and solder it to the contact. Yes but also had to jack up the front end to pass the old horn wire back up through the column so the new wire could be connected to it to be pulled through. It wouldn't go through from the top because it was now too flexible! Apart from that slight hiccup all went well with Wade doing the electrical work while I passed wire strippers and crimpers and such, and it works......PAAAARRRP! Now the headlights, and again Wade was involved, tests in car showed only high beam working so the apparently obvious culprit was the dimmer/dipper switch. Before going any further Wade produced a used switch from his shelves full of parts. Probably a '37 switch, in that the mounting hole spacing was different, but testing on the bench showed that is was working. So out with the old switch, a test fit of the new switch which showed the upper mounting hole was in the right place and re-drilling of the lower mounting hole and fitment of the new "old" switch, and it works! Lastly was the NOS Flackmaster accelerator pedal. Straight forward, with some advice from Wade about clamping the rod that goes through the firewall so the new pedal could be pushed on without loosing the rod in the process. A little help too with the pivot pin putting it back in the car and with the aid of some rubber grease on the accelerator rod pivot hole and VOILA in it went. With that my time at the workshop was done so I left Wade to continue with his '34 armoured ignition cable fix. Attach file: (23.71 KB)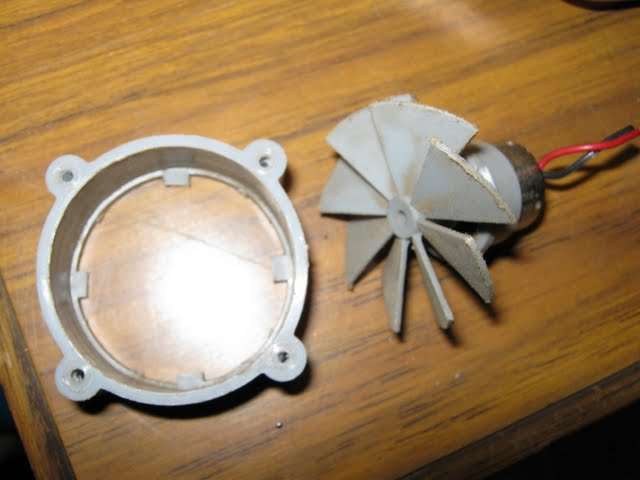 (17.47 KB) (17.47 KB)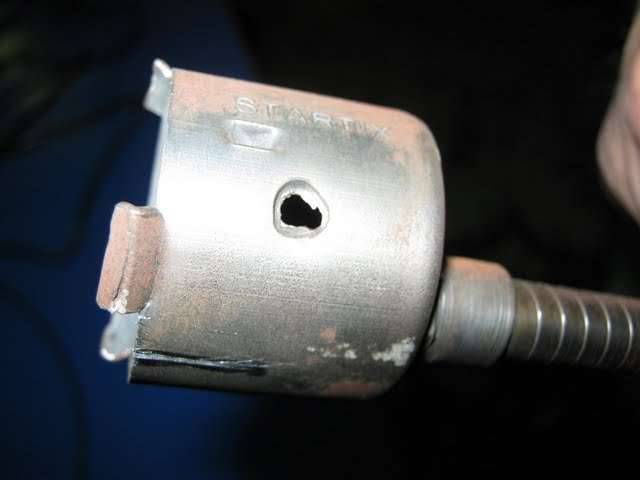 (25.52 KB) (25.52 KB) (25.82 KB) (25.82 KB) (23.53 KB) (23.53 KB)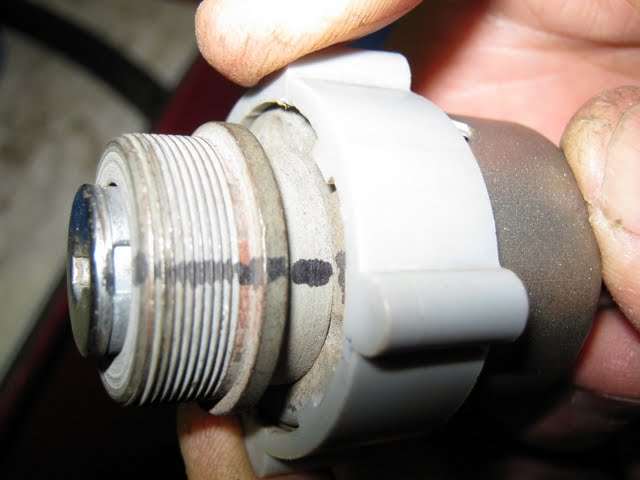 (19.44 KB) (19.44 KB)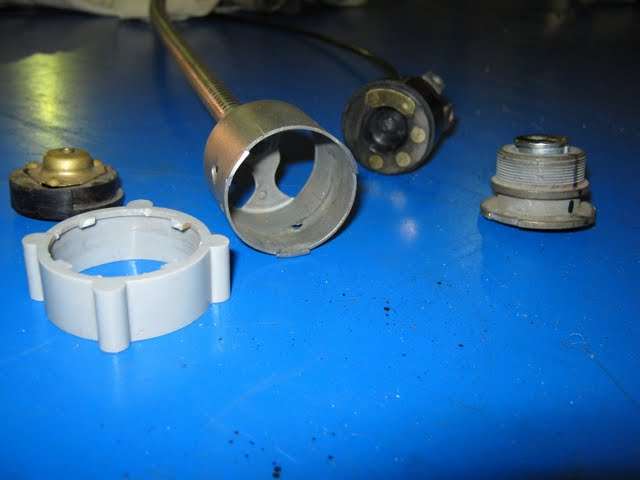 (17.46 KB) (17.46 KB) (25.57 KB) (25.57 KB)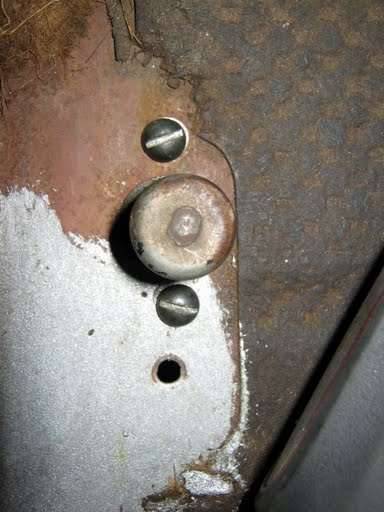 (32.76 KB) (32.76 KB)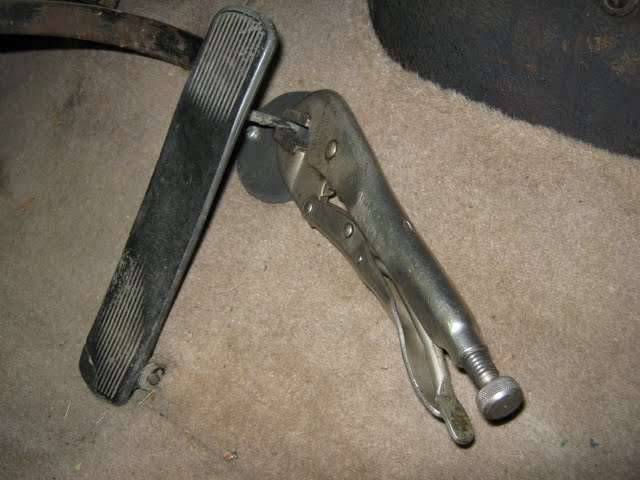 (24.20 KB) (24.20 KB)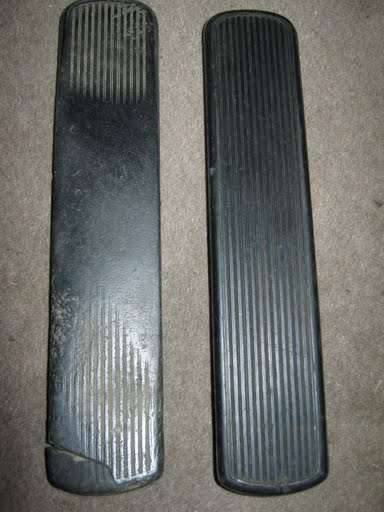 (26.08 KB) (26.08 KB)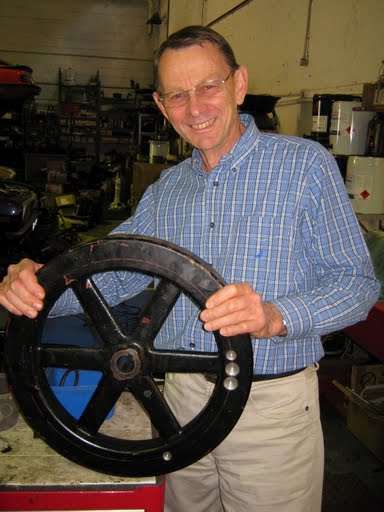
Posted on: 2009/10/1 0:51
|
|||
|
Mal
/o[]o\ ==== Bowral, Southern Highlands of NSW, Australia "Out of chaos comes order" - Nietzsche. 1938 Eight Touring Sedan - SOLD 1941 One-Twenty Club Coupe - SOLD 1948 Super Eight Limo, chassis RHD - SOLD 1950 Eight Touring Sedan - SOLD What's this? Put your Packard in the Packard Vehicle Registry! Here's how! Any questions - PM or email me at ozstatman@gmail.com |
||||
|
||||
|
Re: Wade's Workshop
|
||||
|---|---|---|---|---|
|
Home away from home
|
Mal,
I am not sure what interest a 1912 2 cylinder Maxwell has to the Packard owning forum readers however there is a tenuous connection in that the flywheel found its way to "Wades shed" and you started it so I guess that allows for a response. Your description of the hinged con. rod is perfect and I would like to post a picture to show this primitive design but VB has gone to the UK for 3 weeks and taken the camera with her. I bought this car from US "fully restored" and have just completed a total rebuild on the "fully restored" engine (sounds familiar I am sure). The cylinders were so corroded they had to be sleeved and the new babbit metalled con rods had only about 50% contact, the rest was undersize. As for hot rodding (or is it rat rodding, whatever that means?) I had to buy new pistons and aluminum is the only way to go, there are no balance weights on the crank shaft so the lighter the better and incidentally after trying in vain to get a price from Egge, friends in US suggested I try Arias who responded immediately with a price that proved to be cheaper than Egge when they eventually responded, they are beautifully made and I highly recommend them. During discussion on a Maxwell chat line it was suggested that the antiquated conrods be replaced with ones from an A model Ford which are dimensionally identical. The result is that the old (4 1/2" dia) pistons and conrods weigh 3.7 kgs each (that's about 8 lbs for our US friends who are still to get their act together), the news ones weigh almost exactly half that. As for the compression ratio I just re-checked the figures and the information I gave you was incorrect, the original CR is 3.1 : 1 and with the new domed pistons this increases to 4.0 : 1 which might reduce the time for 0 to 30 mph from 10 minutes to maybe 8 minutes. Seriously it is all in the interest of smoother running and reduced engine load. I do have Packards (1920's)and unlike other more sensible owners who have advanced to the later, easier to drive models, I like the older ones and as I couldn't afford an early Packard model 48 or twin six I opted for the brass era 2 cyl. Maxwell. That,I am sure the readers will agree, is more than enough on Maxwells so back to things Packard.
Posted on: 2009/10/2 5:23
|
|||
|
||||
Register To PostTopic is Locked


